Flutter 插件开发实战:桥接原生 SDK
Flutter 的强大之处在于其跨平台能力,而 Flutter 插件(Plugin) 则是实现与平台特定功能(如您的广告 SDK)通信的桥梁。
本文将一步步通过了解原理,配置环境,创建项目,指导您完成一个基础 Flutter 插件的创建、原生代码的集成,最终实现 Flutter 层对底层原生 SDK 的调用。
一、Flutter 插件开发核心原理
Flutter 插件是 Dart 代码和平台特定原生代码的结合体。它们之间通过 Platform Channel (平台通道) 进行通信,主要涉及三个关键概念:
| 概念 | 作用 |
|---|---|
MethodChannel |
负责 Dart 层与原生层之间的 方法调用 和 数据传输。 |
| Dart 层 | 插件的公共接口,供 Flutter 应用调用。它通过 MethodChannel 将方法调用发送给原生层。 |
| 原生层 (Android/iOS/HarmonyOS) | 接收 Dart 发来的调用,执行原生 SDK 的功能(如初始化、加载广告),并将结果通过 MethodChannel 返回给 Dart 层。 |
二、开发环境准备
涉及到的平台有Android、IOS、Harmony,会涉及到Flutter 环境的切换,所以安装FVM进行项目Flutter环境版本管理。下面是对版本管理工具 FVM 的安装、常用命令,以及项目启动、依赖构建和在各平台 IDE 中打开的全部流程。
1. FVM (Flutter 版本管理) 环境安装
FVM (Flutter Version Management) 是一款强大的工具,用于管理和切换不同 Flutter 项目所需的 SDK 版本。安装如下,可以下载一个flutter_sdk 并在系统环境变量Path中配置dart的bin路径,通过dart pub global activate fvm 进行下载安装fvm,或者选择Chocolatey。
windows: 在系统环境变量中配置dart_sdk环境。
mac: 在.bash_profile中配置dart_sdk环境。
| 步骤 | 操作 | 说明 |
|---|---|---|
| 1. 基础 Flutter SDK | 首先需 下载并安装 基础的 Flutter SDK。 | 这是 FVM 依赖运行的环境基础。 |
| 2. 配置 Dart 环境变量 | 确保 Dart SDK 的路径已添加到您的系统 Path 环境变量 中。 | Dart SDK 随 Flutter SDK 一起提供,完成 Flutter 环境变量配置即可。 |
| 3. 安装 FVM | 在命令行(CMD 或 PowerShell)中执行 Dart 包全局激活命令: | dart pub global activate fvm |
安装完FVM之后,会在用户名下生成fvm目录,这里可以通过 fvm config --cache-path D:\...\fvm <换成自己的路径> 设置。并将其路径配置到环境变量中。
用于不同flutter_sdk版本缓存。如下:
执行完
fvm install 3.35.3等之后就会在fvm/versions/下载对应flutter版本。而当前我们系统环境配置的是Google Flutter环境,而鸿蒙版的flutter_sdk是无法通过fvm install 来下载的。我们只需要进入到fvm/versions下面打开命令行,通过git克隆即可。鸿蒙官方文档
js
git clone -b 3.22.0-ohos https://gitcode.com/openharmony-tpc/flutter_flutter.git custom_3.22.0mac: 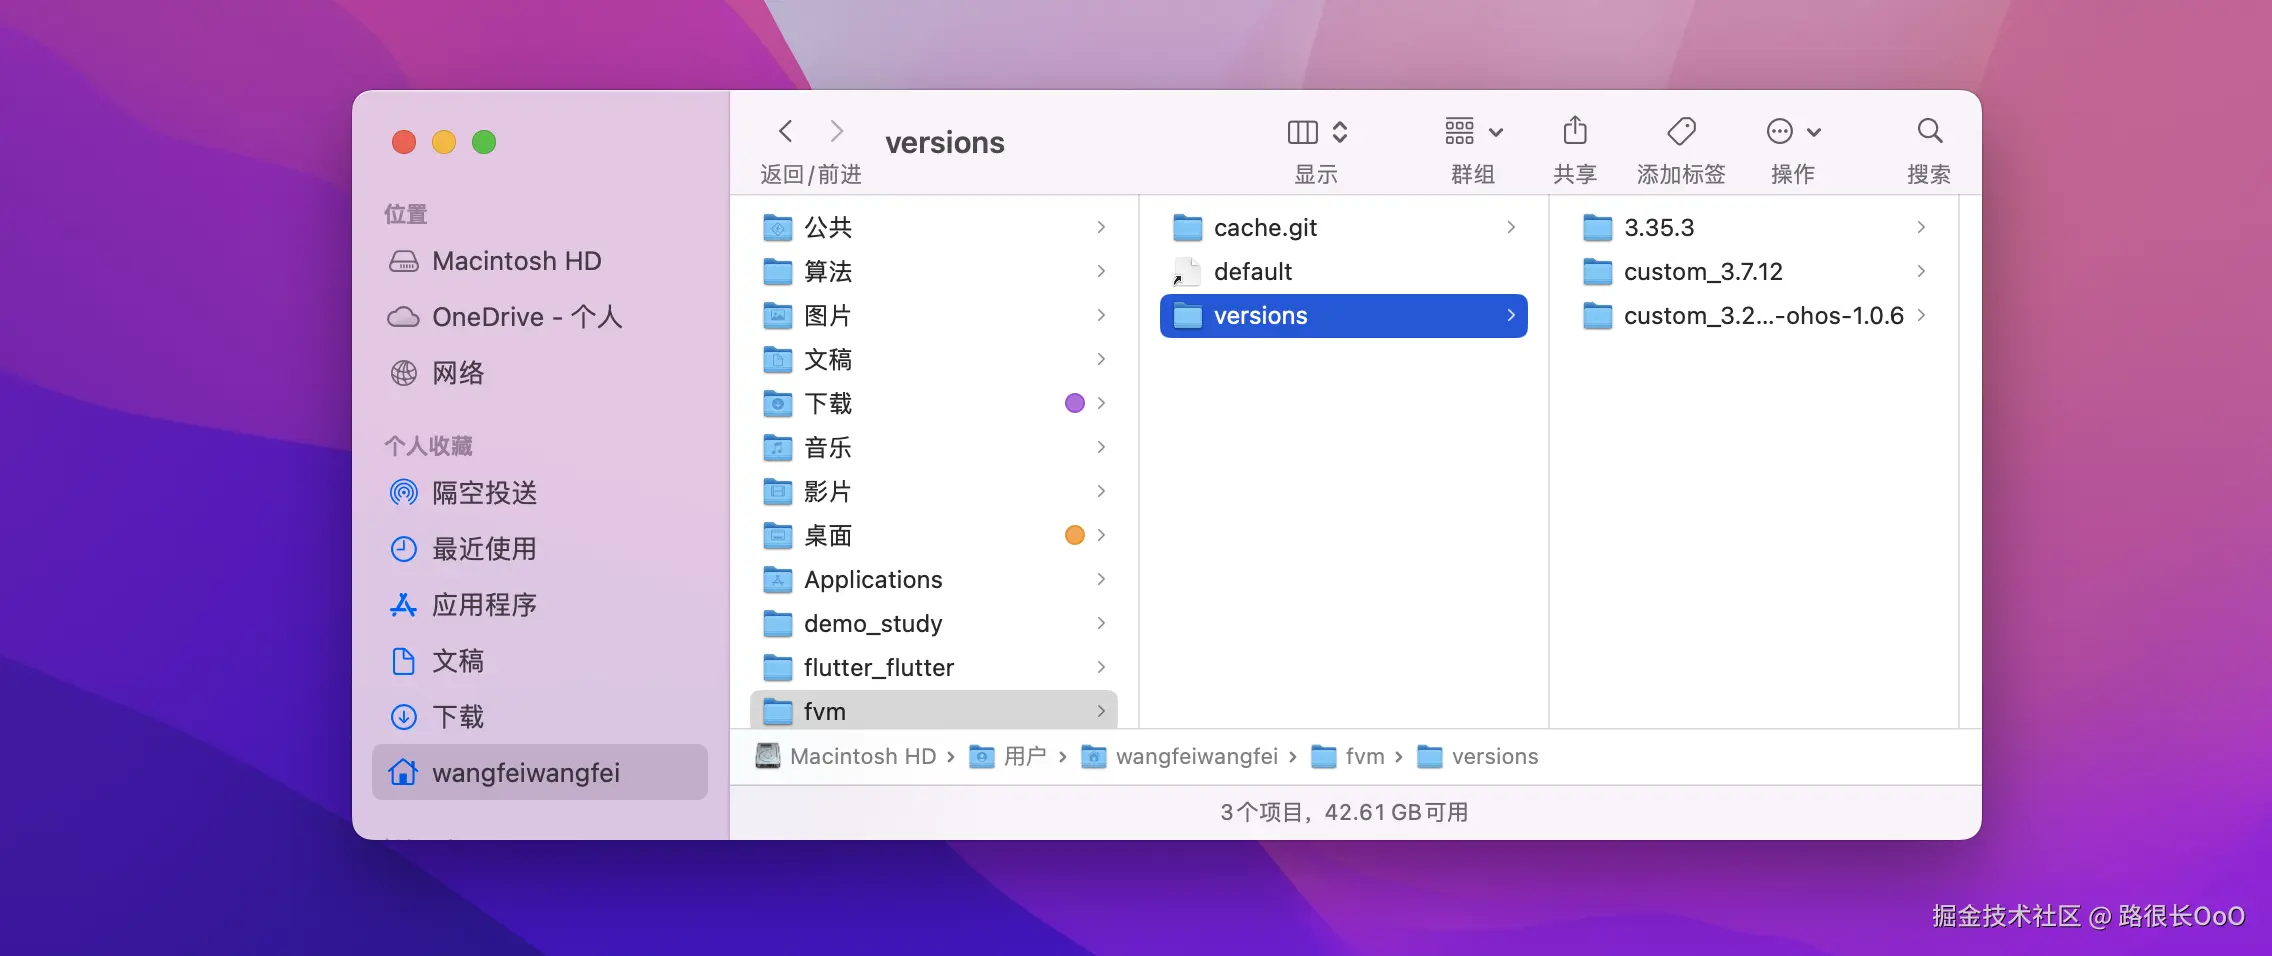
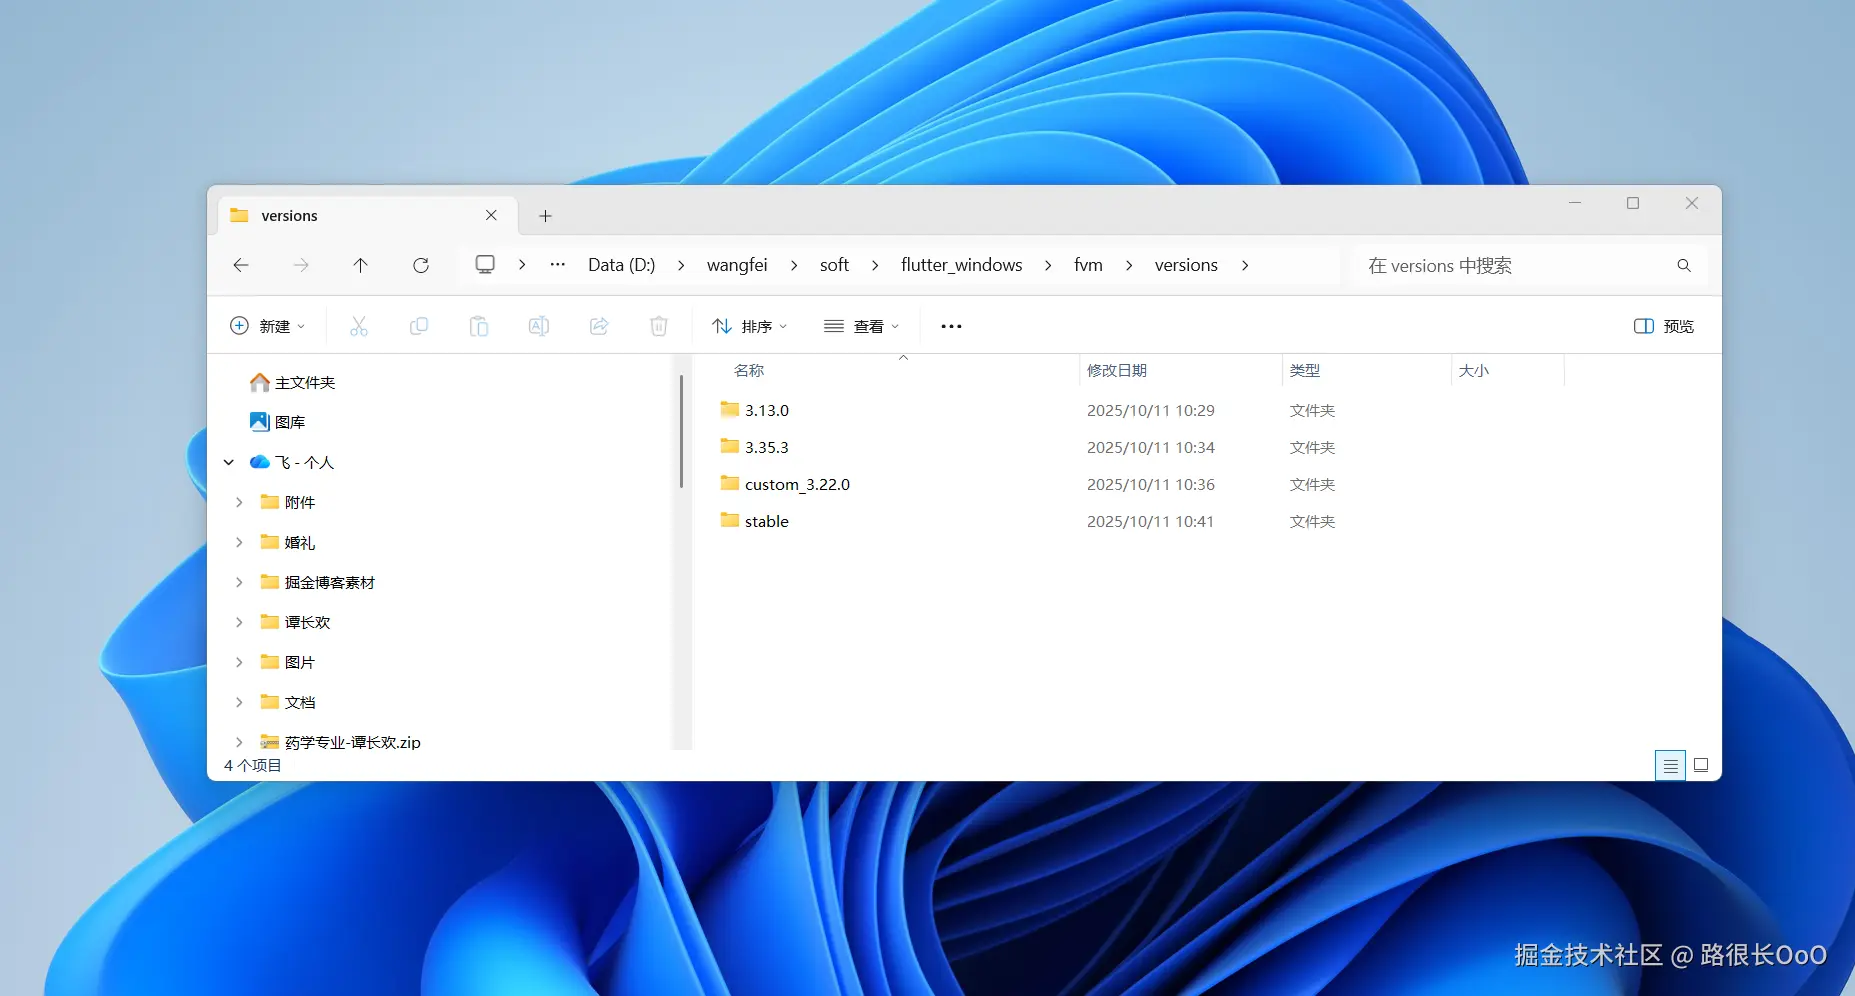
windows:
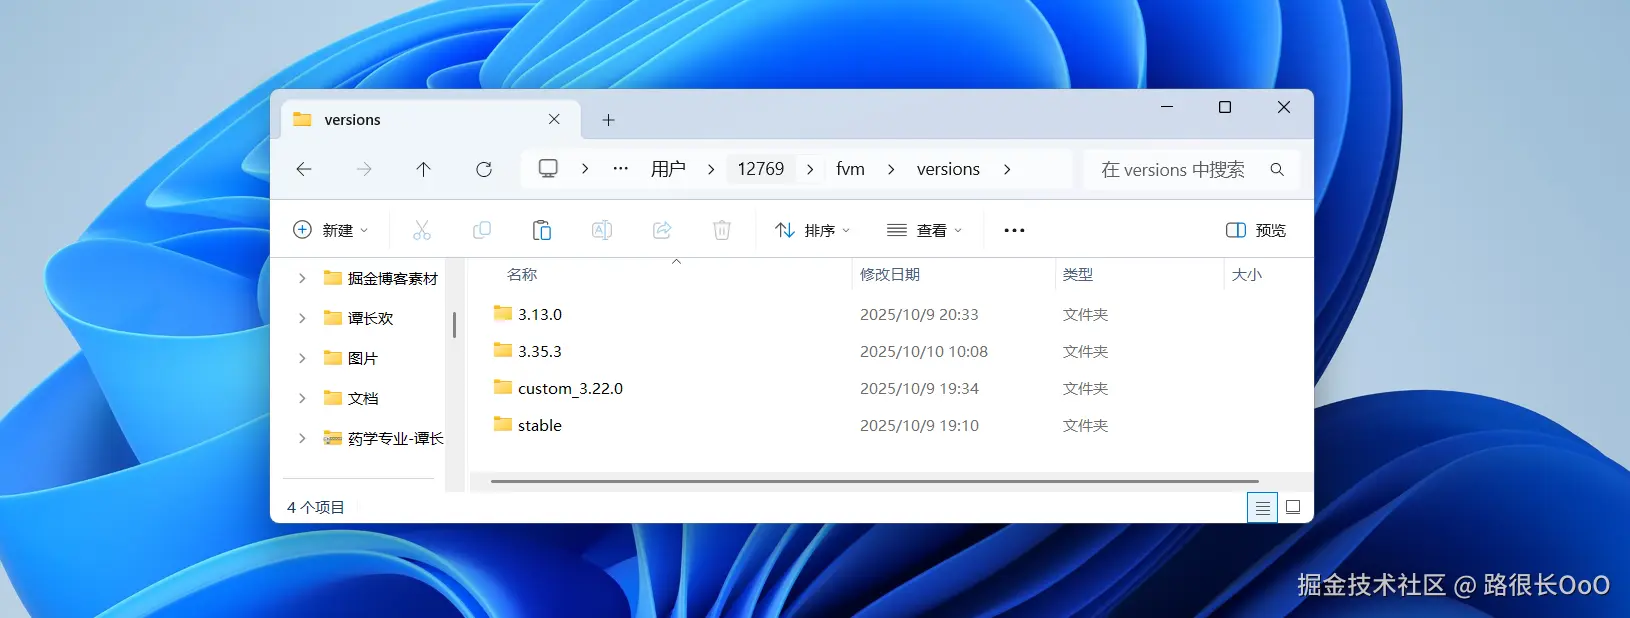
fvm config --cache-path D:\wangfei\soft\flutter_windows\fvm 操作之后,会将Flutter_SDK每一个版本缓存到此路径下versions里面。作为fvm缓存仓库。这里建议将fvm缓存仓库和项目放在同一磁盘里面例如都在D盘。
2. FVM 常用操作命令
安装 FVM 后,您可以使用以下命令来管理和设置项目所需的 Flutter SDK 版本。
| 命令 | 作用 | 默认路径(示例) |
|---|---|---|
fvm install <version> |
下载指定版本的 Flutter SDK 到 FVM 的本地缓存中。 | Windows: C:\Users\用户名\fvm\versions mac:/Users/用户名/fvm/versions |
fvm list |
在项目根目录下执行,查看 FVM 缓存中已安装的所有 SDK 版本。 | - |
fvm use <version> |
在项目根目录下执行,使当前项目配置并使用指定的 Flutter SDK 版本。 | 在项目根目录创建 .fvm 文件夹。 |
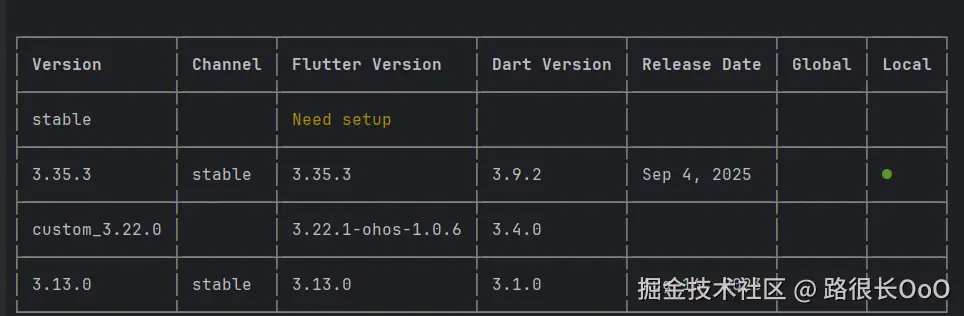
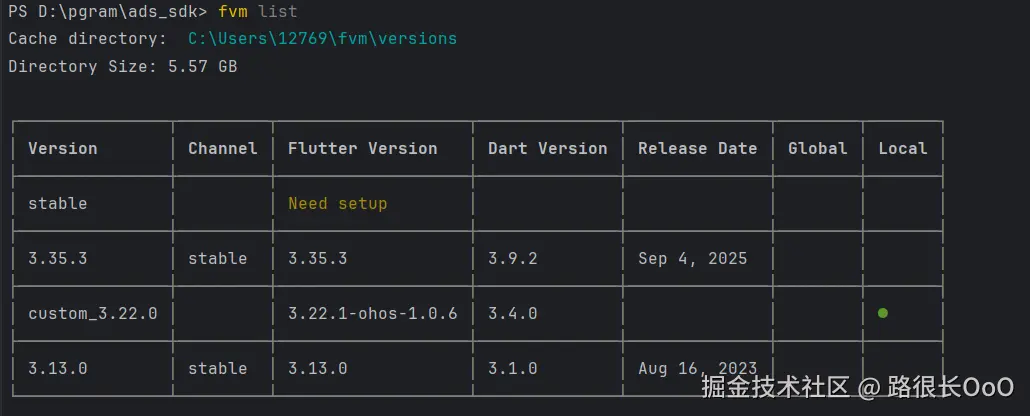
fvm list可以查看当前导入fvm的所有flutter_sdk版本。下面都是通过fvm install version 下载配置的。
3. 创建 Flutter 插件项目
使用 flutter create 命令并指定类型为 plugin,即可创建一个包含所有平台代码模板的插件项目。 假设您的插件名为 ads_sdk。
如果要
支持鸿蒙,需要在创建项目的文件夹下面,执行fvm flutter use custom_3.22.0, 让其后续支持鸿蒙环境下执行命令。避免创建失败。
css
# --template=plugin 表示创建插件项目
fvm flutter create --template=plugin --platforms=android,ios,ohos ads_sdk
选择编译器打开,我使用的是AndroidStudio
4. 首次运行与构建依赖
在项目环境中,执行以下步骤以准备编译所需的依赖和平台工具。
A. 下载平台编译工具
这是首次切换 Flutter 版本或首次运行项目时,Flutter SDK 为项目下载 运行所需的"平台工具"和"Web SDK" 的正常准备步骤。
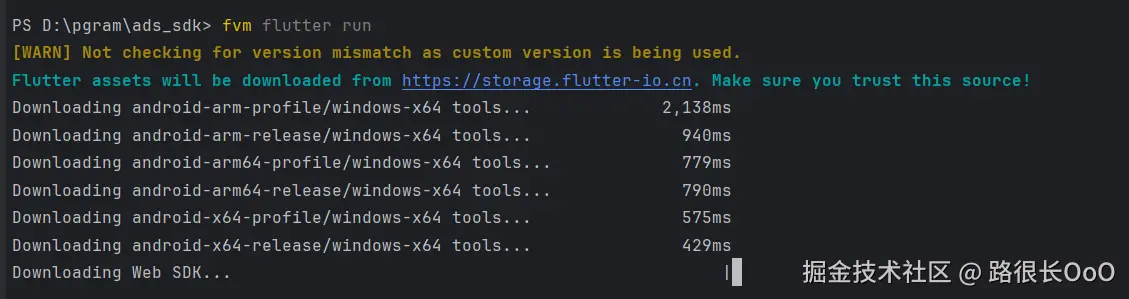
在项目根目录下,执行任务 Flutter 命令触发:
arduino
fvm flutter runcustom_3.22.0 是鸿蒙端环境
B. 构建平台依赖
在进入原生 IDE 之前,建议先构建一次 Flutter 插件,为各平台生成所需的配置文件和代码。
进入项目 example 目录 下对应的平台文件夹(例如:ads_sdk/example/android),然后执行相应的构建命令:
| 平台 | 目标目录 | 构建命令 |
|---|---|---|
| Android | ads_sdk/example/android |
fvm flutter build apk --debug 或 --release |
| iOS | ads_sdk/example/ios |
fvm flutter build ipa --release (通常用于发布) |
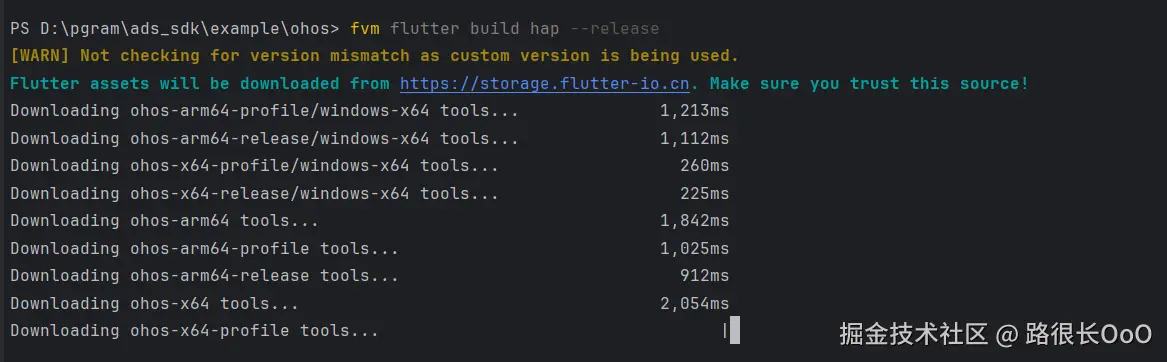
| HarmonyOS (Ohos) | ads_sdk/example/ohos |
fvm flutter build hap --release |
5. 打开与配置各平台项目
在完成上述构建步骤后,即可使用各平台的原生 IDE 打开项目,并进行后续的库依赖配置和开发工作。
| 平台 | IDE | 打开路径 | 关键操作 |
|---|---|---|---|
| Android | Android Studio | ads_sdk/example/android |
打开项目后,等待 Gradle 同步完成,然后进行原生库依赖配置。 |
| HarmonyOS | DevEco Studio | ads_sdk/example/ohos |
打开项目,配置原生 SDK 依赖。 |
| iOS | Xcode | ads_sdk/example/ios/Runner.xcworkspace |
务必打开 .xcworkspace 文件,配置原生库依赖。 |
完成在原生 IDE 中项目的打开和库依赖的配置后,您就可以开始进行 Flutter 插件的原生层开发工作。
因为我们创建的是flutter插件项目,所以各端编译器打开构建依赖完成之后。互相之间的依赖都已完成。直接可以进行开发了。
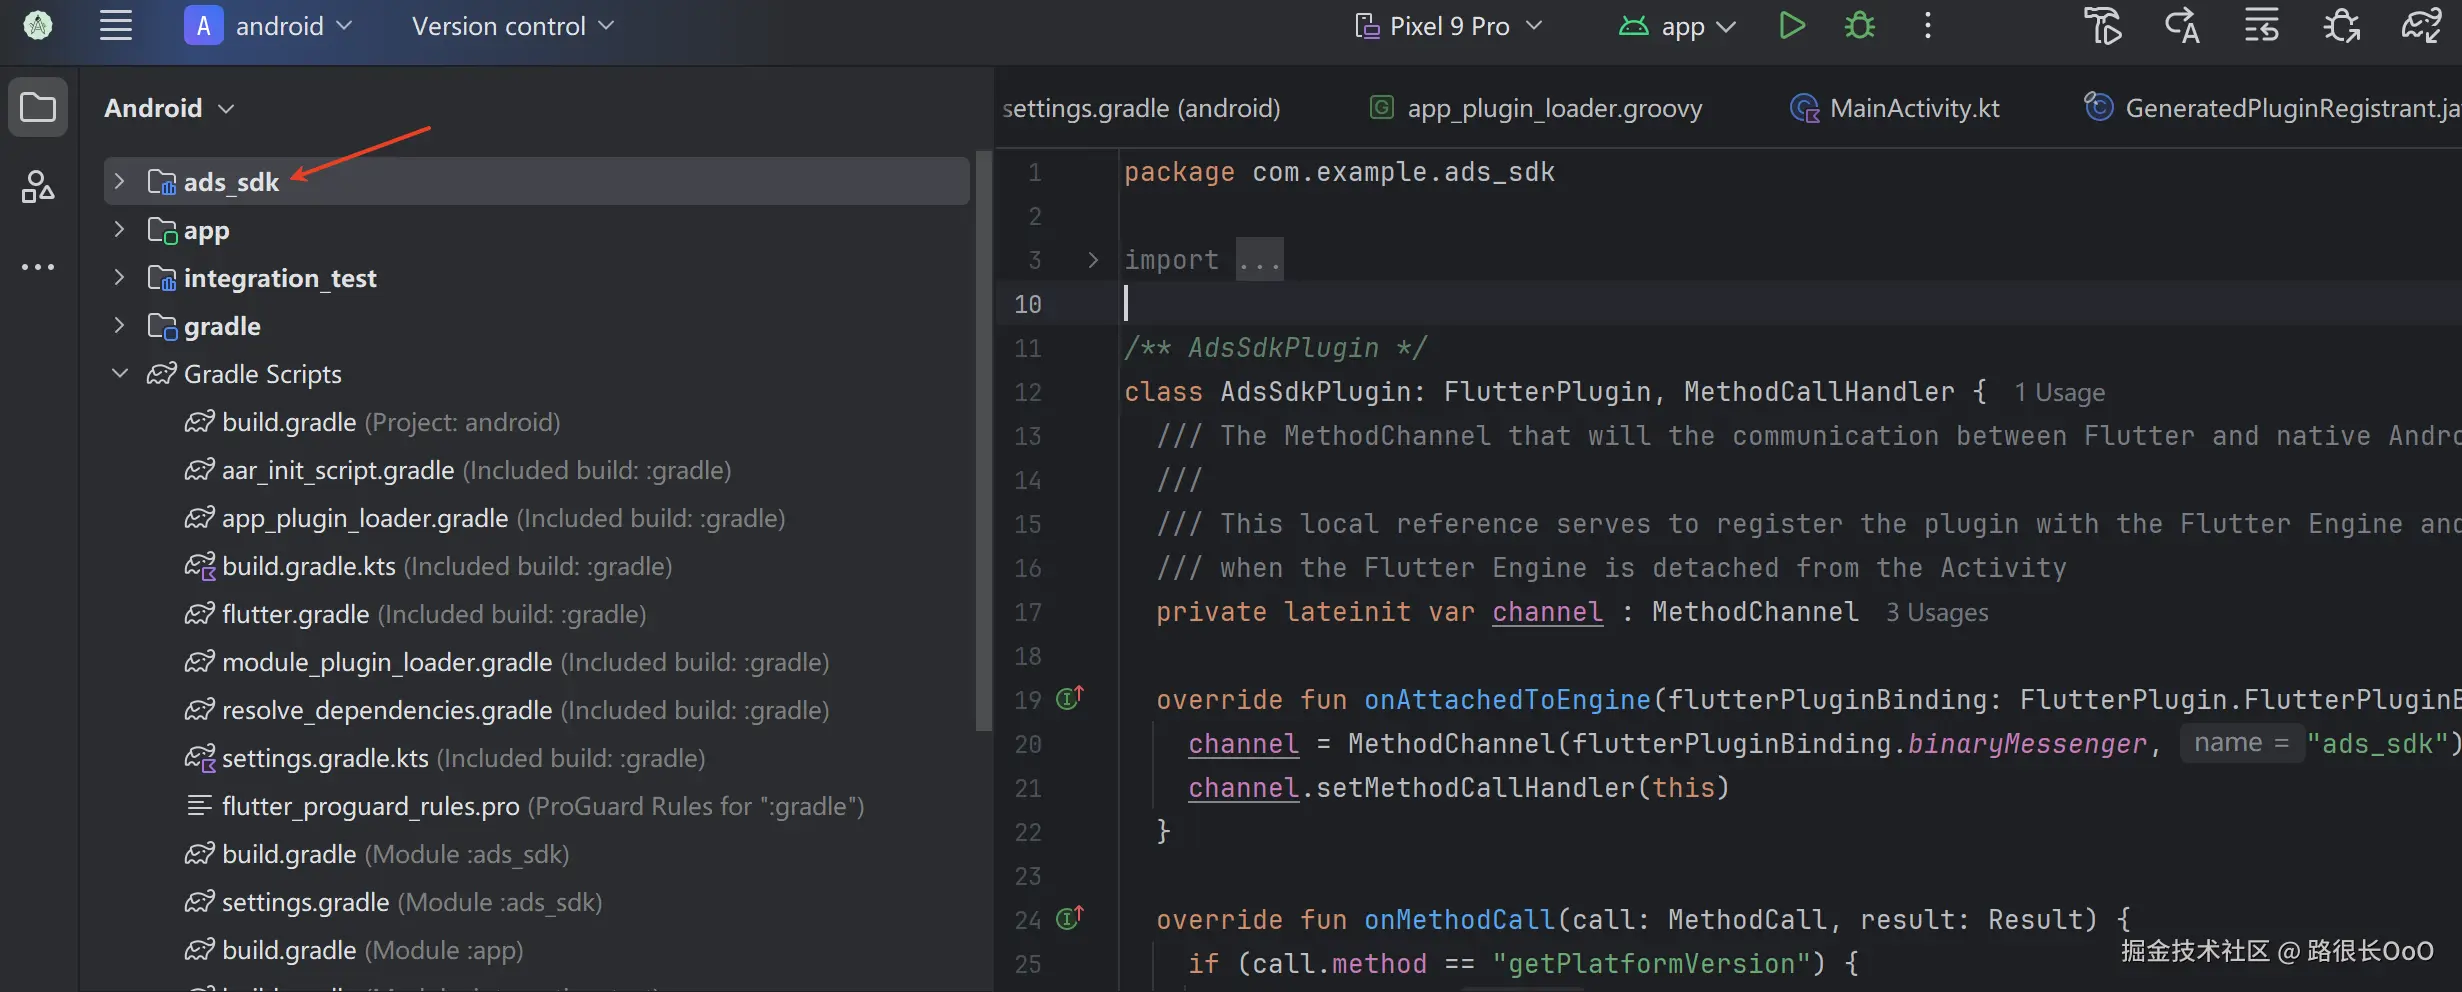
下图是AndroidStudio打开项目/example/android,依赖同步完成之后的目录。我们主要的开发工作也在ads_sdk这个module中进行。
下图是DevEco Studio打开项目/example/ohos,依赖同步完成之后的目录。我们主要的开发工作也在ohos.ads_sdk这个module中进行。

四、Flutter 层 (Dart) API 设计与实现
这次文章基于我们原生各端【Android、IOS、Harmony】广告SDK进行开发一款Flutter插件,其目的是让Flutter项目开发者可以快速的接入我们的广告SDK【广告,聚合】。
明确开发流程:
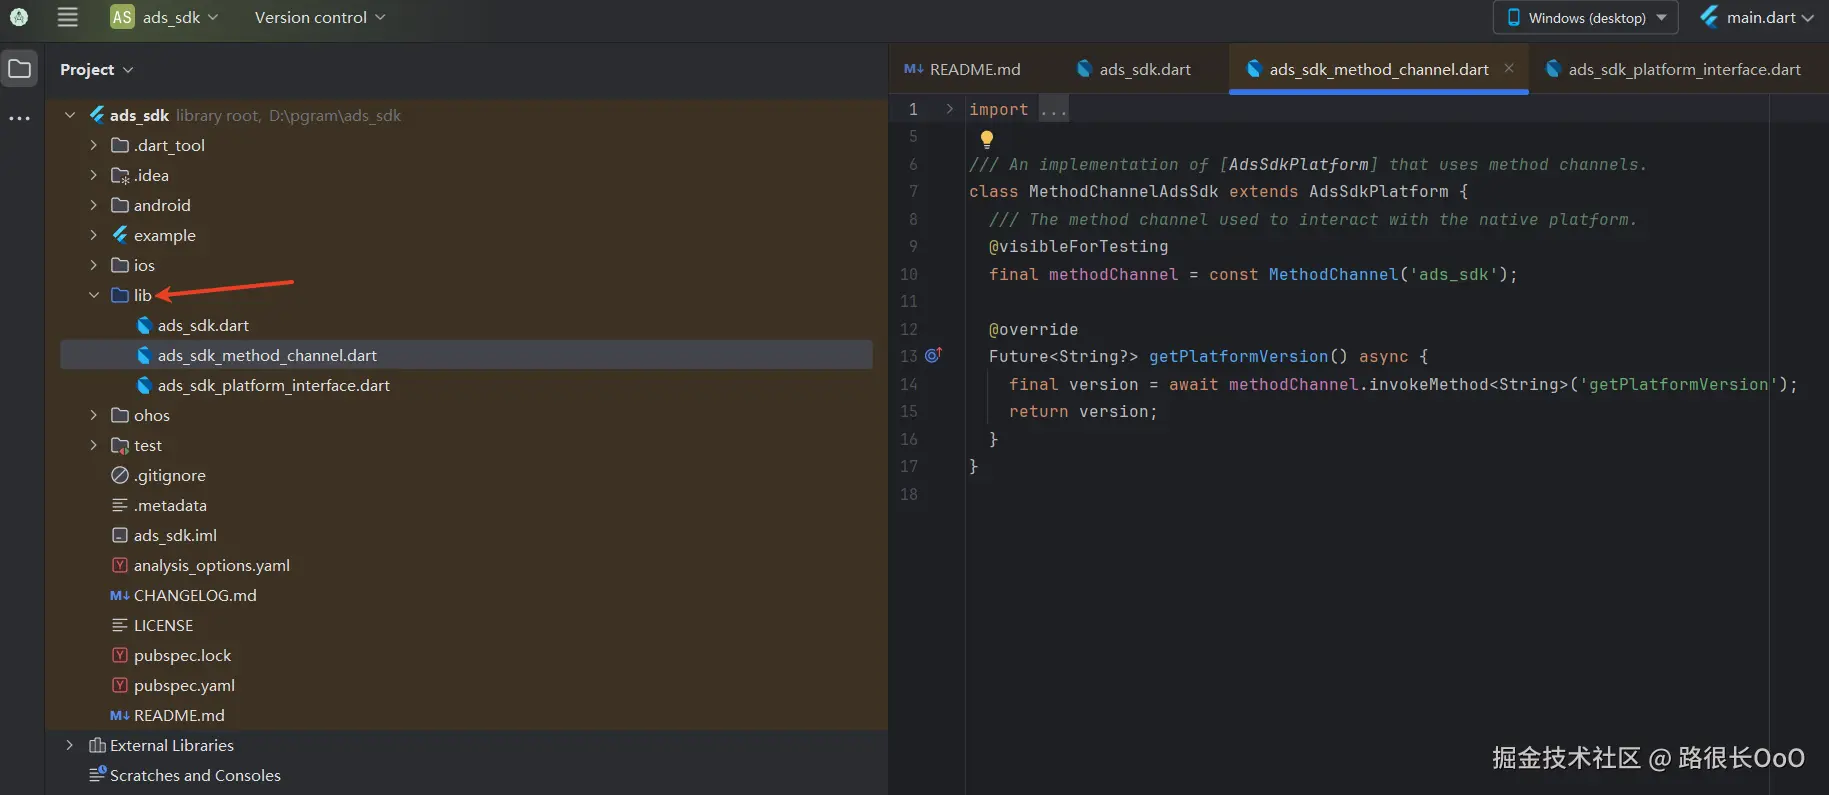
我们创建的Flutter插件项目,其项目下/lib 是flutter统一调用公共层,而amps/android|ios|ohos 是各个对应平台需要实现调用各端广告SDK的模块。
js
[Flutter项目]  //example【相当于媒体项目,这个不用管,一般作为demo运行验证】
   ↓
[Flutter插件 SDK层] //amps_sdk/lib
   ↓
[各端 SDK(aar、framwork、har)] //amps_sdk/android|ios|harmony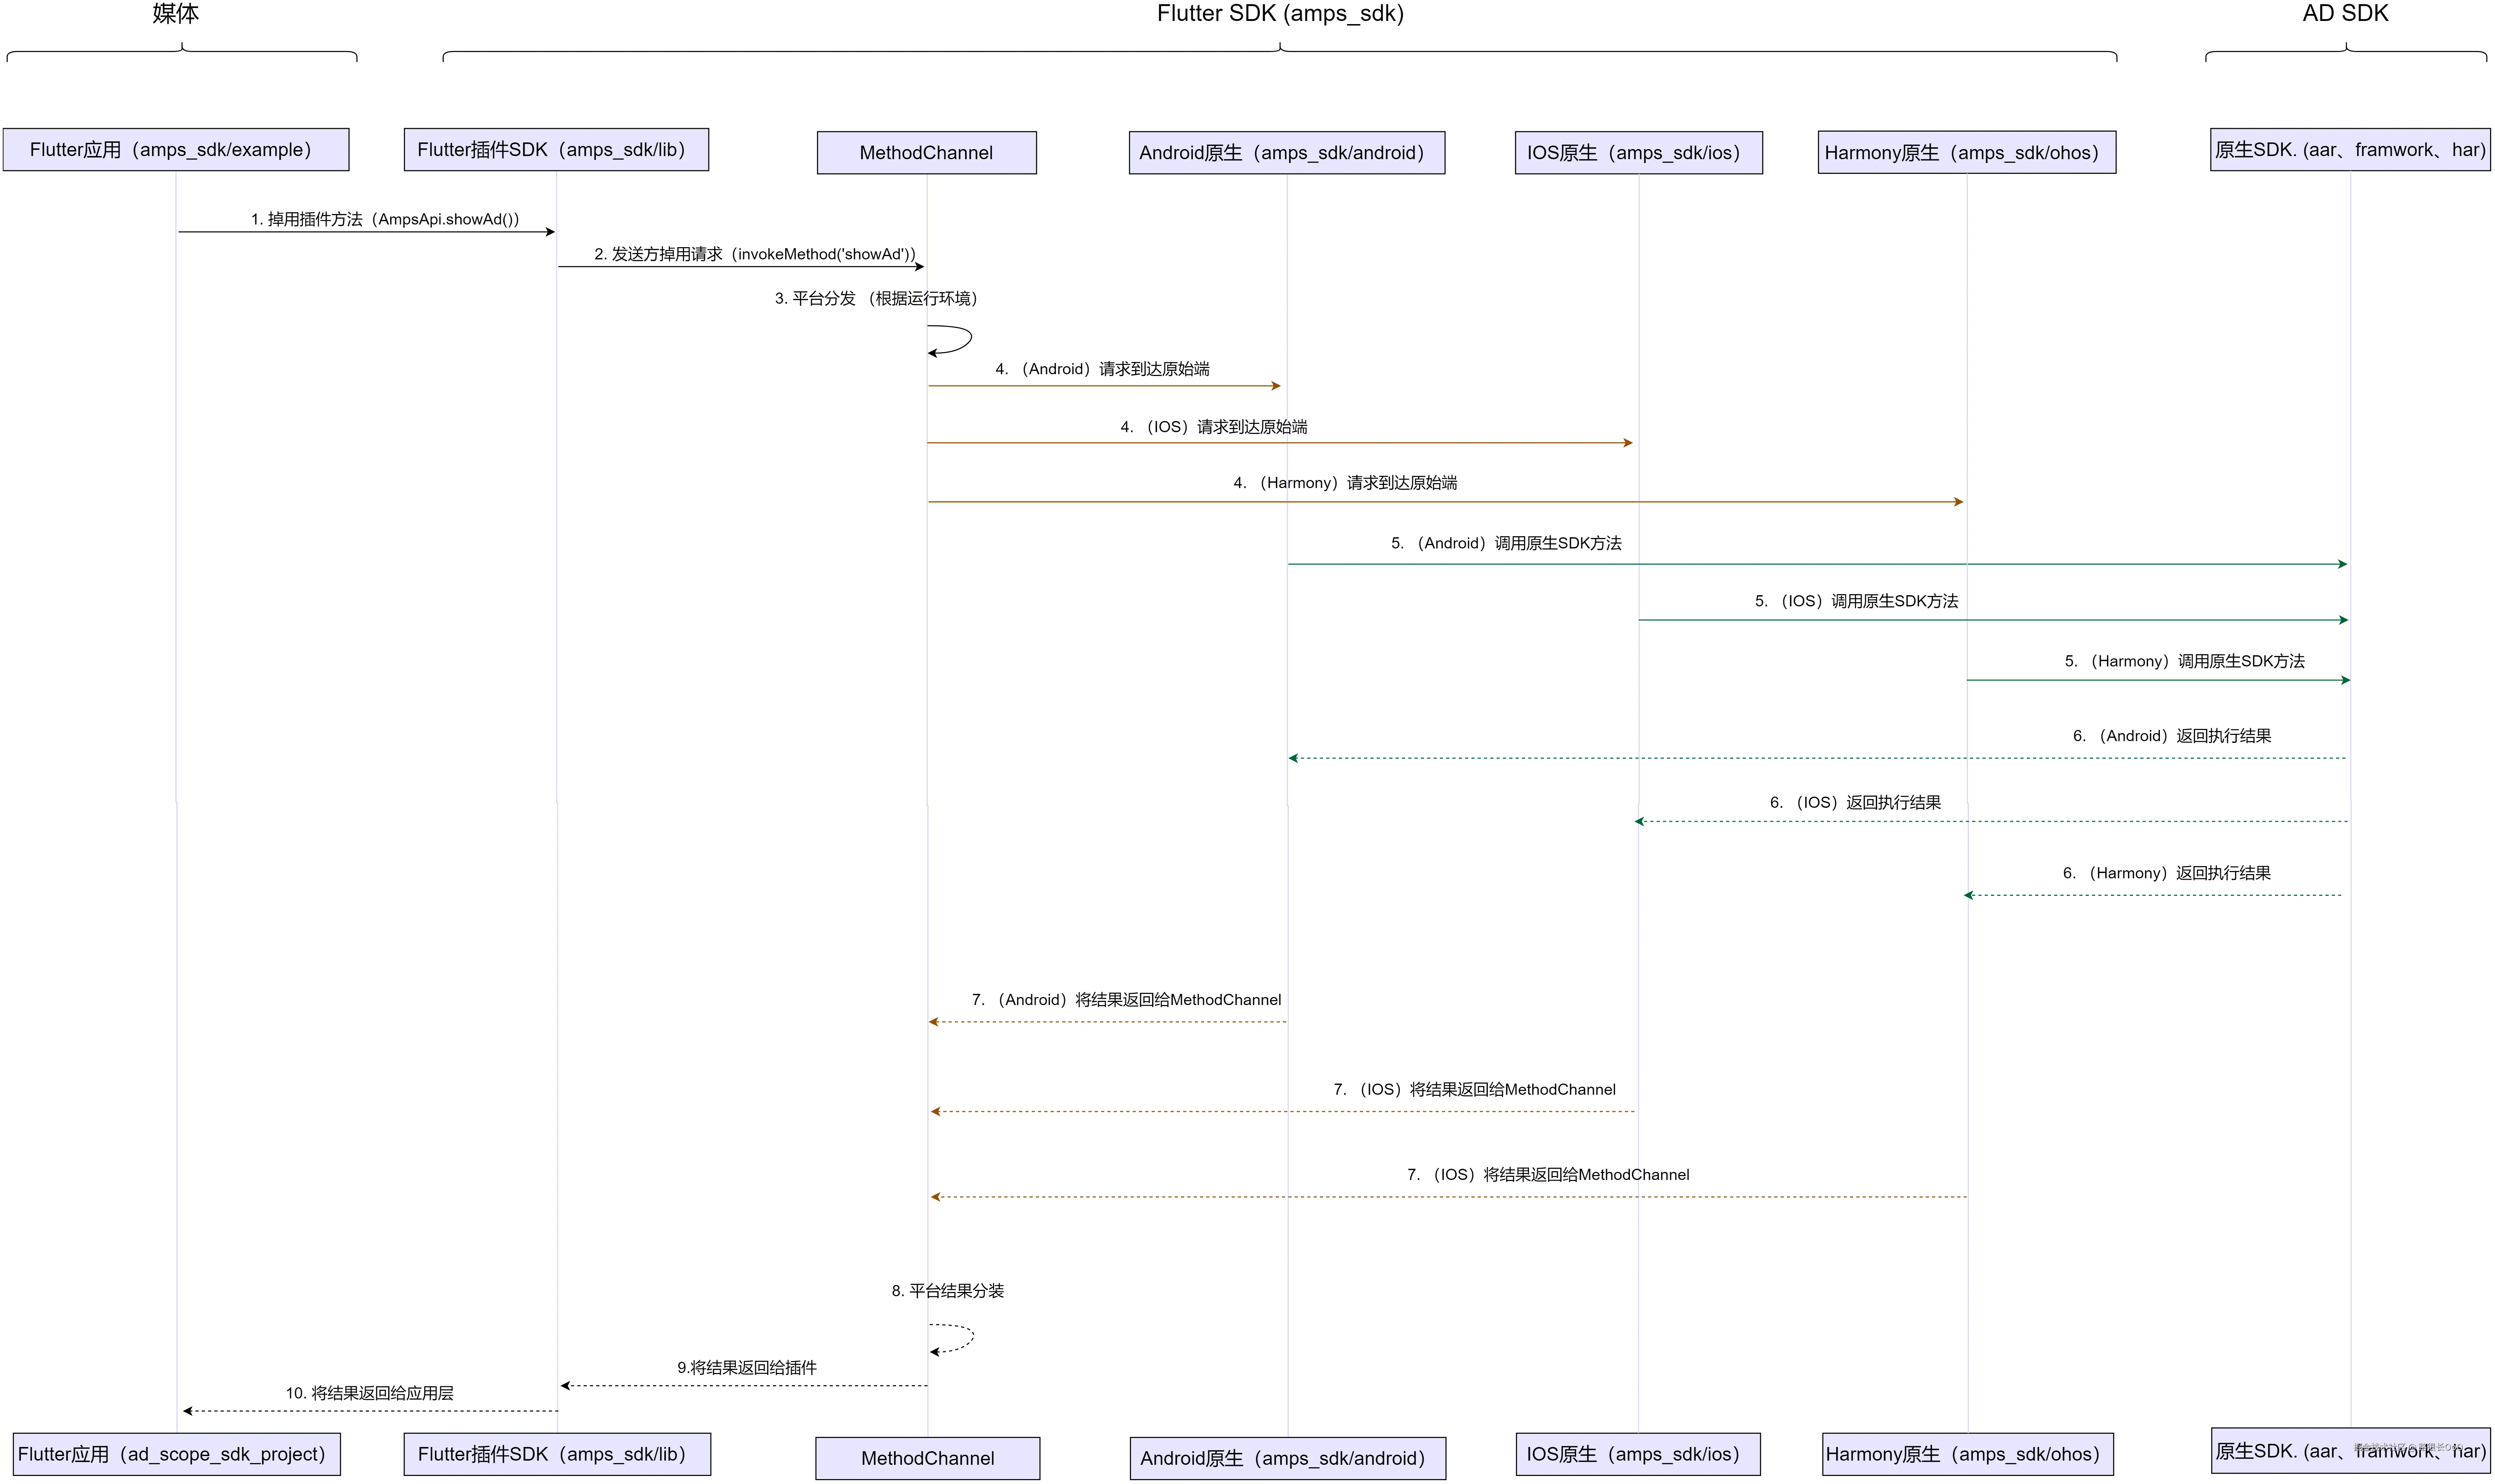
1. 定义 MethodChannel
在 Dart 代码中,首先初始化 MethodChannel,通道名称需要保持 Android/iOS/Windows 原生代码中的通道名称一致(通常默认是 ads_sdk)。
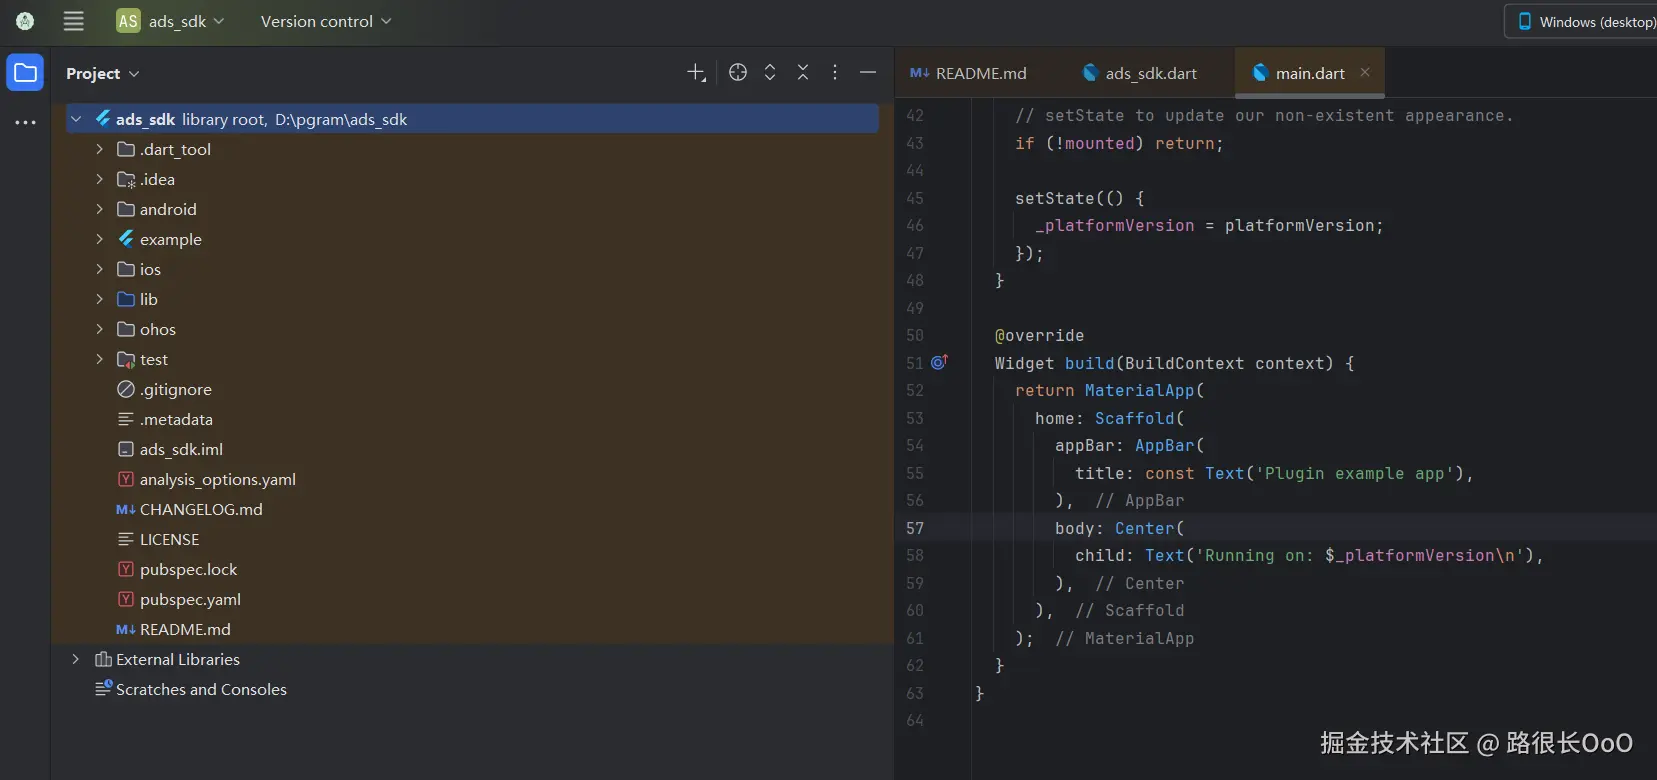
默认会在lib下面创建三个文件,ads_sdk.dart、ads_sdk_method_channel.dart、ads_sdk_platform_interface.dart 。提供了一个获取平台版本的案例,我全部删除,在ads_sdk创建一个全局唯一的MethodChannel ,当然MethodChannel 可以创建多个。我这里默认所有的Flutter端调用都通过此通道进行。
dart
// lib/ads_sdk.dart
import 'package:flutter/services.dart';

class AmpsSdk {
  static const MethodChannel channel = MethodChannel('amps_sdk');
}
2. Flutte层设计实现
广告SDK,简单的几个模块,SDK初始化、开屏、插屏、原生、自渲染。所以我们在Flutter端也分为五个模块。
为了和Android以及Harmony各端原生广告SDK调用一致,我们尽可能Flutter调用也统一。如下是Flutter调用样式 AMPSAdSdk().init(sdkConfig, _callBack);。初始化SDK,入参为sdkConfig(sdk)所需要的各种参数,_callBack 初始化成功失败相关回调。
flutter 没有接口,所以通过方法类型参数代替实现回调。其他入参过多,通过构造者模式设计接口。可以查看相关数据文件。
dart
import 'dart:async';
import 'ads_sdk.dart';
import 'data/amps_init_config.dart';
import 'data/common.dart';
class AMPSAdSdk {
  AMPSIInitCallBack?  _callBack;

  static bool testModel = false;
  AMPSAdSdk() {
    AdsSdk.channel.setMethodCallHandler(
          (call) async {
        switch (call.method) {
          case AMPSInitChannelMethod.initSuccess:
            _callBack?.initSuccess?.call();
            break;
          case AMPSInitChannelMethod.initializing:
            _callBack?.initializing?.call();
            break;
          case AMPSInitChannelMethod.alreadyInit:
            _callBack?.alreadyInit?.call();
            break;
          case AMPSInitChannelMethod.initFailed:
            var map = call.arguments as Map<dynamic, dynamic>;
            _callBack?.initFailed?.call(map[AMPSSdkCallBackErrorKey.code],
                map[AMPSSdkCallBackErrorKey.message]);
            break;
        }
      },
    );
  }

  // 发送数据给native
  Future<void> init(AMPSInitConfig sdkConfig,AMPSIInitCallBack callBack) async {
    _callBack = callBack;
    // 使用时
    await AdsSdk.channel.invokeMethod(
      AMPSAdSdkMethodNames.init,
      sdkConfig.toMap(AMPSAdSdk.testModel),
    );
  }
}

typedef InitSuccessCallBack = void Function();
typedef InitializingCallBack = void Function();
typedef AlreadyInitCallBack = void Function();
typedef InitFailedCallBack = void Function(int? code, String? msg);
// 1. 定义回调接口(抽象类)
class AMPSIInitCallBack {
  // 初始化成功的回调
  late final InitSuccessCallBack? initSuccess;

  // 正在初始化的回调
  late final InitializingCallBack? initializing;

  // 已经初始化的回调
  late final  AlreadyInitCallBack? alreadyInit;

  // 初始化失败的回调
  late final  InitFailedCallBack? initFailed;

  AMPSIInitCallBack({this.initSuccess, this.initializing, this.alreadyInit, this.initFailed});
}
入参AMPSInitConfig如下,通过构造者模式构建API,为了大量的数据传递和解析方便我这里采用了Map传递。只需要Flutte端key和各端一一对应即可。
dart
import 'amps_sdk_api_keys.dart';
//UI模式【自动、黑色、浅色】
enum UiModel { uiModelAuto, uiModelDark, uiModelLight }

//坐标系类型
enum CoordinateType {
  wgs84('WGS84'),
  gcj02('GCJ02'),
  baidu('BAIDU');

  final String value;

  const CoordinateType(this.value);

  @override
  String toString() => value;
}

//适龄标记
enum UnderageTag {
  unknown(-1),
  maturity(0),
  underage(1);

  final int value;

  const UnderageTag(this.value);
}

//初始化设置, 国家类型选项
class CountryType {
  static const COUNTRY_TYPE_CHINA_MAINLAND = 1;
  static const COUNTRY_TYPE_OTHER = 0;
}

//支持的货币类型
class CurrencyType {
  static const CURRENCY_TYPE_CNY = "CNY"; //人民币
  static const CURRENCY_TYPE_USD = "USD"; //美元
  static const CURRENCY_TYPE_JPY = "JPY"; //日元
  static const CURRENCY_TYPE_EUR = "EUR"; //欧元
  static const CURRENCY_TYPE_GBP = "GBP"; //英镑
  static const CURRENCY_TYPE_IDR = "IDR"; //印尼盾
  static const CURRENCY_TYPE_MYR = "MYR"; //马来西亚林吉特
  static const CURRENCY_TYPE_PHP = "PHP"; //菲律宾比索
  static const CURRENCY_TYPE_KRW = "THB"; //泰铢
}

/// 记录三方传入的位置信息,用于上报
class AMPSLocation {
  /// 经度
  double? longitude;

  /// 纬度
  double? latitude;

  /// 坐标系类型,对应原代码中的AMPSConstants.CoordinateType
  /// (默认 0:GCJ02   1:WGS84   2:BAIDU,仅支持QM渠道)
  CoordinateType? coordinate;

  /// 时间戳
  int? timeStamp = 0;

  /// 构造函数,支持初始化时设置属性
  AMPSLocation({
    this.longitude,
    this.latitude,
    this.coordinate,
    int? timeStamp,
  }) {
    this.timeStamp = timeStamp ?? 0; // 确保默认值为0
  }

// 转为 Map
  Map<String, dynamic> toJson() {
    return {
      AMPSLocationKey.latitude: latitude,
      AMPSLocationKey.longitude: longitude,
      AMPSLocationKey.timeStamp: timeStamp,
      AMPSLocationKey.coordinate: coordinate?.value
    };
  }
}

// 假设的工具类
class StrUtil {
  static bool isEmpty(String? str) => str == null || str.isEmpty;

  static String replace(String str, String pattern, String replacement) {
    return str.replaceAll(RegExp(pattern), replacement);
  }
}

/// 用户控制类. 重写相关方法设置SDK可用内容
class AMPSCustomController {
  /// 是否可以使用PhoneState权限
  bool isCanUsePhoneState;

  /// 透传OAID
  String OAID;

  /// 是否允许使用个性化推荐
  /// true: 允许 false: 不允许
  bool isSupportPersonalized;

  /// 适龄标记
  /// 取值参考 [UnderageTag]
  UnderageTag getUnderageTag;

  /// userAgent
  String? userAgent;

  /// 是否可以使用传感器
  bool isCanUseSensor;

  /// 是否允许SDK自身获取定位
  bool isLocationEnabled;

  /// 用于记录,三方设置的位置信息
  AMPSLocation? location;

  AMPSCustomController({
    required AMPSCustomControllerParam? param,
  })  : isCanUsePhoneState = param?.isCanUsePhoneState ?? false,
        OAID = param?.OAID ?? "",
        isSupportPersonalized = param?.isSupportPersonalized ?? true,
        getUnderageTag = param?.getUnderageTag ?? UnderageTag.unknown,
        userAgent = param?.userAgent,
        isCanUseSensor = param?.isCanUseSensor ?? true,
        isLocationEnabled = param?.isLocationEnabled ?? true,
        location = param?.location;

// 转为 Map
  Map<String, dynamic> toJson() {
    return {
      AMPSControllerKey.isCanUsePhoneState: isCanUsePhoneState,
      AMPSControllerKey.oaid: OAID,
      AMPSControllerKey.isSupportPersonalized: isSupportPersonalized,
      AMPSControllerKey.getUnderageTag: getUnderageTag.value, // 枚举用名称传递
      AMPSControllerKey.userAgent: userAgent,
      AMPSControllerKey.isCanUseSensor: isCanUseSensor,
      AMPSControllerKey.isLocationEnabled: isLocationEnabled,
      AMPSControllerKey.location: location?.toJson(), // 嵌套对象序列化
    };
  }
}

/// AMPSCustomController 的参数类
class AMPSCustomControllerParam {
  /// 是否可以使用PhoneState权限
  final bool? isCanUsePhoneState;

  /// 透传OAID
  final String? OAID;

  /// 是否允许使用个性化推荐
  final bool? isSupportPersonalized;

  /// 适龄标记
  final UnderageTag? getUnderageTag;

  /// userAgent
  final String? userAgent;

  /// 是否可以使用传感器
  final bool? isCanUseSensor;

  /// 是否允许SDK自身获取定位
  final bool? isLocationEnabled;

  /// 三方设置的位置信息
  final AMPSLocation? location;

  AMPSCustomControllerParam({
    this.isCanUsePhoneState,
    this.OAID,
    this.isSupportPersonalized,
    this.getUnderageTag,
    this.userAgent,
    this.isCanUseSensor,
    this.isLocationEnabled,
    this.location,
  });
}


// AMPSInitConfig类,用于表示初始化配置
class AMPSInitConfig {
  // 媒体的账户ID
  String appId;

  // 日志模式
  final bool _isDebugSetting;
  final bool _isUseHttps;

  // 是否测试广告位(是否计价)
  final bool isTestAd;

  // 添加支持的现金类型
  final String currency;

  // 国家
  final int countryCN;

  final String appName;
  final UiModel uiModel;
  final bool adapterStatusBarHeight;
  final String userId;
  final String? province;
  final String? city;
  final String? region;

  // 聚合模式下,提前初始化的第三方广告渠道平台
  final List<String>? adapterNames;

  // 聚合模式下,传递第三方广告渠道平台初始化参数
  final Map<String, Map<String, dynamic>> extensionParam;

  final Map<String, dynamic> optionFields;

  final AMPSCustomController adController;
  final bool isMediation;
  static bool isMediationStatic = false;

  void a7bc8pp9i7d(String a5) {
    appId = a5;
  }

  // 构造函数,接收Builder对象并进行初始化
  AMPSInitConfig(AMPSBuilder builder)
      : appId = builder.appId,
        appName = builder.appName,
        _isDebugSetting = builder.isDebugSetting,
        _isUseHttps = builder.isUseHttps,
        userId = builder.userId,
        optionFields = builder.optionFields,
        currency = builder.currency,
        countryCN = builder.countryCN,
        isTestAd = builder.isTestAd,
        adController = builder.adController,
        uiModel = builder.uiModel,
        adapterStatusBarHeight = builder.adapter,
        province = builder.province,
        city = builder.city,
        region = builder.region,
        adapterNames = builder.adapterNames,
        extensionParam = builder.extensionParam,
        isMediation = builder.isMediation;

  // 转为 Map(用于JSON序列化)
  Map<String, dynamic> toMap(bool testModel) {
    return {
      // 基础类型直接传递
      AMPSInitConfigKey.testModel: testModel,
      AMPSInitConfigKey.appId: appId,
      AMPSInitConfigKey.isDebugSetting: _isDebugSetting,
      AMPSInitConfigKey.isUseHttps: _isUseHttps,
      AMPSInitConfigKey.isTestAd: isTestAd,
      AMPSInitConfigKey.currency: currency,
      AMPSInitConfigKey.countryCN: countryCN,
      AMPSInitConfigKey.appName: appName,
      AMPSInitConfigKey.userId: userId,
      AMPSInitConfigKey.province: province,
      AMPSInitConfigKey.adapterStatusBarHeight: adapterStatusBarHeight,
      AMPSInitConfigKey.city: city,
      AMPSInitConfigKey.region: region,
      AMPSInitConfigKey.isMediation: isMediation,
      // 枚举类型:用名称或值传递
      AMPSInitConfigKey.uiModel: uiModel.name, // 假设 UiModel 是枚举
      // 列表类型
      AMPSInitConfigKey.adapterNames: adapterNames,
      // Map 转为 Map(Flutter 中 Map 可直接序列化)
      AMPSInitConfigKey.extensionParam: extensionParam,
      AMPSInitConfigKey.optionFields: optionFields,
      // 嵌套对象:通过 toJson 转换
      AMPSInitConfigKey.adController: adController.toJson(),
    };
  }

// 获取uiModel的方法
  UiModel getUiModel() {
    return uiModel;
  }

// 获取appId的方法
  String getAppId() {
    return appId;
  }

// 获取设置的省份
  String? getProvince() {
    return province;
  }

// 获取设置的城市
  String? getCity() {
    return city;
  }

// 获取设置的地区
  String? getRegion() {
    return region;
  }

// 获取设置的第三方平台参数
  Map<String, Map<String, dynamic>> getExtensionParams() {
    return extensionParam;
  }

  List<String>? getAdapterNames() {
    return adapterNames;
  }

// 获取设置的某个第三方平台参数
  Map<String, dynamic> getExtensionParamItems(String key) {
    if (extensionParam.containsKey(key)) {
      return extensionParam[key] ?? <String,dynamic>{};
    }
    return <String,dynamic>{};
  }

// 获取appName的方法
  String getAppName() {
    return appName;
  }

// 获取isDebugSetting的方法
  bool isDebugSetting() {
    return _isDebugSetting;
  }

// 获取isUseHttps的方法
  bool isUseHttps() {
    return _isUseHttps;
  }

// 获取userId的方法
  String getUserId() {
    return userId;
  }

// 获取用户设置的userAgent
  String? getUserAgent() {
    return adController.userAgent;
  }

// 禁用奔溃日志收集,默认否【默认收集日志】
  bool disableCrashCollect() {
    if (optionFields.containsKey(OptionFieldKey.crashCollectSwitch)) {
      final disableCrashCollect =
      optionFields[OptionFieldKey.crashCollectSwitch];
      if (disableCrashCollect is bool) {
        return disableCrashCollect;
      }
    }
    return false;
  }

  String getLightColor() {
    if (optionFields.containsKey(OptionFieldKey.colorLight)) {
      final lightColor = optionFields[OptionFieldKey.colorLight];
      if (lightColor is String) {
        return lightColor;
      }
    }
    return "";
  }

  String getDarkColor() {
    if (optionFields.containsKey(OptionFieldKey.colorDark)) {
      final darkColor = optionFields[OptionFieldKey.colorDark];
      if (darkColor is String) {
        return darkColor;
      }
    }
    return "";
  }

//用于提供获取用户是否统一SDK自身定位。
  bool isLocationEnabled() {
    return adController.isLocationEnabled;
  }

//用于提供获取用户是否统一SDK自身定位。
  AMPSLocation? getUserLocation() {
    return adController.location;
  }

// 获取optionFields的方法
  Map<String, dynamic> getOptionFields() {
    return optionFields;
  }

// 获取currency的方法
  String getCurrency() {
    return currency;
  }

// 获取countryCN的方法
  int getCountryCN() {
    return countryCN;
  }

// 获取isTestAd的方法
  bool getIsTestAd() {
    return isTestAd;
  }

// 获取自定义OAID的方法
  String getCustomOAID() {
    return adController.OAID;
  }

// 获取是否可以使用电话状态的方法
  bool isCanUsePhoneState() {
    return adController.isCanUsePhoneState;
  }

// 获取是否可以使用传感器
  bool isCanUseSensor() {
    return adController.isCanUseSensor;
  }
}

class AMPSBuilder {
  String appId;
  String appName = "";
  bool isDebugSetting = true;
  bool isUseHttps = false;
  String userId = "";
  Map<String, dynamic> optionFields = {};
  String currency = "";
  int countryCN = CountryType.COUNTRY_TYPE_CHINA_MAINLAND;
  bool isTestAd = false;
  bool adapter = true;
  UiModel uiModel = UiModel.uiModelAuto;
  AMPSCustomController adController = AMPSCustomController(param: null);
  String? province;
  String? city;
  String? region;
  List<String>? adapterNames = [];
  late Map<String, Map<String, dynamic>> extensionParam;
  bool isMediation = false;

  // 构造函数,接收appId和context并进行初始化
  AMPSBuilder(this.appId) {
    extensionParam = <String, Map<String, dynamic>>{};
  }

  // 设置是否启用聚合功能
  AMPSBuilder setIsMediation(bool isMediation) {
    this.isMediation = isMediation;
    return this;
  }

  // 设置省份
  AMPSBuilder setProvince(String pro) {
    province = pro;
    return this;
  }

  // 设置城市
  AMPSBuilder setCity(String city) {
    this.city = city;
    return this;
  }

  // 设置地区
  AMPSBuilder setRegion(String region) {
    this.region = region;
    return this;
  }

  // 设置初始化第三方广告平台
  AMPSBuilder setAdapterNames(List<String> adapters) {
    adapterNames = adapters;
    return this;
  }

  /*
   * 设置某个渠道平台特有配置参数
   * key:渠道参数key,在AMPSConstants.ExtensionParamKey选择
   * param:具体参数集合
   */
  AMPSBuilder setExtensionParamItems(String key, Map<String, dynamic> param) {
    extensionParam[key] = param;
    return this;
  }

  // 设置广告控制器
  AMPSBuilder setAdCustomController(AMPSCustomController controller) {
    adController = controller;
    return this;
  }

  // 设置appName
  AMPSBuilder setAppName(String appName) {
    this.appName = appName;
    return this;
  }

  // 设置调试模式
  AMPSBuilder setDebugSetting(bool debugSetting) {
    isDebugSetting = debugSetting;
    return this;
  }

  // 设置是否使用HTTPS
  AMPSBuilder setUseHttps(bool isUseHttps) {
    this.isUseHttps = isUseHttps;
    return this;
  }

  // 设置用户ID
  AMPSBuilder setUserId(String userId) {
    this.userId = userId;
    return this;
  }

  // 设置选项字段
  AMPSBuilder setOptionFields(Map<String, dynamic> optionFields) {
    this.optionFields = optionFields;
    return this;
  }

  // 设置货币类型
  AMPSBuilder setCurrency(String currency) {
    this.currency = currency;
    return this;
  }

  // 设置国家代码
  AMPSBuilder setCountryCN(int countryCN) {
    this.countryCN = countryCN;
    return this;
  }

  // 设置UI模型
  AMPSBuilder setUiModel(UiModel uiModel) {
    this.uiModel = uiModel;
    return this;
  }

  // 设置是否为测试广告
  AMPSBuilder setIsTestAd(bool isTestAd) {
    this.isTestAd = isTestAd;
    return this;
  }

  // 设置落地页是否适配状态栏高度
  AMPSBuilder setLandStatusBarHeight([bool adapter = true]) {
    this.adapter = adapter;
    return this;
  }

  // 构建AMPSInitConfig对象的方法
  AMPSInitConfig build() {
    return AMPSInitConfig(this);
  }
}
记得导出flutter相关的文件到amps_sdk_export.dart,方便外部调用。我们可以在example中main中尝试调用初始化SDK。
dart
import 'dart:collection';
import 'package:ads_sdk/amps_ad_sdk.dart';
import 'package:flutter/material.dart';
import 'package:ads_sdk/amps_sdk_export.dart';
import 'widgets/blurred_background.dart';
import 'widgets/button_widget.dart';
enum  InitStatus {
  normal,
  initialing,
  alreadyInit,
  success,
  failed
}


void main() {
  runApp(const MyApp());
}

class MyApp extends StatelessWidget {
  const MyApp({super.key});

  @override
  Widget build(BuildContext context) {
    return MaterialApp(
      initialRoute: 'SplashPage',
      routes: {
        'SplashPage':(context)=>const SplashPage(title: '开屏页面')
      },
    );
  }
}

class SplashPage extends StatefulWidget {
  const SplashPage({super.key, required this.title});

  final String title;

  @override
  State<SplashPage> createState() => _SplashPageState();
}

class _SplashPageState extends State<SplashPage> {
  late AMPSIInitCallBack _callBack;
  InitStatus initStatus = InitStatus.normal;
  late AMPSInitConfig sdkConfig;
  @override
  void initState() {
    //SystemChrome.setEnabledSystemUIMode(SystemUiMode.manual, overlays: []);
    super.initState();
    _callBack = AMPSIInitCallBack(
        initSuccess: () {
          debugPrint("adk is initSuccess");
          setState(() {
            initStatus = InitStatus.success;
          });
        },
        initializing: () {
          debugPrint("adk is initializing");
        },
        alreadyInit: () {
          debugPrint("adk is alreadyInit");
          setState(() {
            initStatus = InitStatus.alreadyInit;
          });
        },
        initFailed: (code, msg) {
          initStatus = InitStatus.failed;
          debugPrint("adk is initFailed");
          debugPrint("result callBack=code$code;message=$msg");
        });
    HashMap<String, dynamic> optionFields = HashMap();
    optionFields["crashCollectSwitch"] = true;
    optionFields["lightColor"] = "#FFFF0000";
    optionFields["darkColor"] = "#0000FF00";
    HashMap<String, dynamic> ksSdkEx = HashMap();
    ksSdkEx["crashLog"] = true;
    ksSdkEx["ks_sdk_roller"] = "roller_click";
    ksSdkEx["ks_sdk_location"] = "baidu";
    sdkConfig = AMPSBuilder("33545")
        .setCity("北京")
        .setRegion("朝阳区双井")
        .setCurrency(CurrencyType.CURRENCY_TYPE_USD)
        .setCountryCN(CountryType.COUNTRY_TYPE_CHINA_MAINLAND)
        .setDebugSetting(true)
        .setIsMediation(false)
        .setIsTestAd(false)
        .setLandStatusBarHeight(true)
        .setOptionFields(optionFields)
        .setProvince("北京市")
        .setUiModel(UiModel.uiModelDark)
        .setUseHttps(true)
        .setUserId("12345656")
        .setExtensionParamItems("KuaiShouSDK", ksSdkEx)
        .setAppName("Flutter测试APP")
        .setAdapterNames(["ampskuaishouAdapter", "ampsJdSplashAdapter"])
        .setAdCustomController(AMPSCustomController(
        param: AMPSCustomControllerParam(
            isCanUsePhoneState: true,
            isCanUseSensor: true,
            isSupportPersonalized: true,
            isLocationEnabled: true,
            getUnderageTag: UnderageTag.underage,
            userAgent:
            "Mozilla/5.0 (Phone; OpenHarmony 5.0) AppleWebKit/537.36 (KHTML, like Gecko) Chrome/114.0.0.0 Safari/537.36  ArkWeb/4.1.6.1 Mobile",
            location: AMPSLocation(
                latitude: 39.959836,
                longitude: 116.31985,
                timeStamp: 1113939393,
                coordinate: CoordinateType.baidu)))) //个性化,传感器等外部设置
        .setIsMediation(false)
        .setUiModel(UiModel.uiModelAuto)
        .build();
    AMPSAdSdk.testModel = true;
  }

  @override
  Widget build(BuildContext context) {
    return Scaffold(body: Stack(
      alignment: AlignmentDirectional.center,
      children: [
        const BlurredBackground(),
        Column(children: [
          const SizedBox(height: 100,width: 0),
          ButtonWidget(
              buttonText: getInitResult(initStatus),
              backgroundColor: getInitColor(initStatus),
              callBack: () {
                AMPSAdSdk().init(sdkConfig, _callBack);
              }
          ),
          const SizedBox(height: 20,width: 0),
          ButtonWidget(
              buttonText: '开屏show案例页面',
              callBack: () {
                // 使用命名路由跳转
                Navigator.pushNamed(context, 'SplashShowPage');
              }
          ),
          const SizedBox(height: 20,width: 0),
          ButtonWidget(
              buttonText: '开屏组件案例页面',
              callBack: () {
                // 使用命名路由跳转
                Navigator.pushNamed(context, 'SplashWidgetPage');
              }
          )
        ],),
      ],
    ));
  }

  String getInitResult(InitStatus status) {
    switch (status) {
      case InitStatus.normal:
        return '点击初始化SDK';
      case InitStatus.initialing:
        return '初始化中';
      case InitStatus.alreadyInit:
        return '已初始化';
      case InitStatus.success:
        return '初始化成功';
      case InitStatus.failed:
        return '初始化失败';
    }
  }

  Color? getInitColor(InitStatus initStatus) {
    switch (initStatus) {
      case InitStatus.normal:
        return Colors.blue;
      case InitStatus.initialing:
        return Colors.grey;
      case InitStatus.alreadyInit:
        return Colors.green;
      case InitStatus.success:
        return Colors.green;
      case InitStatus.failed:
        return Colors.red;
    }
  }
}
五、原生层 (Android) 的实现与桥接
以 Android 为例,我们需要修改 android/src/main/.../AdsSdkPlugin.kt 文件来接收 Dart 层的调用,并调用底层的 Android 原生广告 SDK。 这样我们可以在外部example/lib/main 里面进行调用SDK接口了。
1. 接收 Dart 调用
通过AndroidStudio打开项目/example/android依赖完成之后,ads_sdk module中找到 AdsSdkPlugin 类(不同名称插件项目不一样,我这里是AdsSdkPlugin),这是接收 Dart 调用并进行处理的入口。代码如下,这里可以发现MethodChannel都在AdsSdkPlugin这个类里面,而外部模块调用很多【初始化、开屏、插屏、原生、自渲染】可能几十个上百个,我们是要所有的接收和处理都放到AdsSdkPlugin这一个类里面么?当然可以,但最好不要,代码要求的是分层,高内聚低耦合。所以接下来我们需要设计原生端代码结构。
Kotlin
package com.example.ads_sdk
import io.flutter.embedding.engine.plugins.FlutterPlugin
import io.flutter.plugin.common.MethodCall
import io.flutter.plugin.common.MethodChannel
import io.flutter.plugin.common.MethodChannel.MethodCallHandler
import io.flutter.plugin.common.MethodChannel.Result
/** AdsSdkPlugin */
class AdsSdkPlugin: FlutterPlugin, MethodCallHandler {
private lateinit var channel : MethodChannel
override fun onAttachedToEngine(flutterPluginBinding: FlutterPlugin.FlutterPluginBinding) {
channel = MethodChannel(flutterPluginBinding.binaryMessenger, "ads_sdk")
channel.setMethodCallHandler(this)
}
override fun onMethodCall(call: MethodCall, result: Result) {
//全部这里接收各个模块【初始化、开屏、插屏、原生、自渲染】的方法,耦合度过高。
case ....初始化:
初始化一堆操作
break;
case ...开屏load
break;
case ...开屏getEcpm
break;
case ...开屏notifyLoss
break;
....
....
}
override fun onDetachedFromEngine(binding: FlutterPlugin.FlutterPluginBinding) {
channel.setMethodCallHandler(null)
}
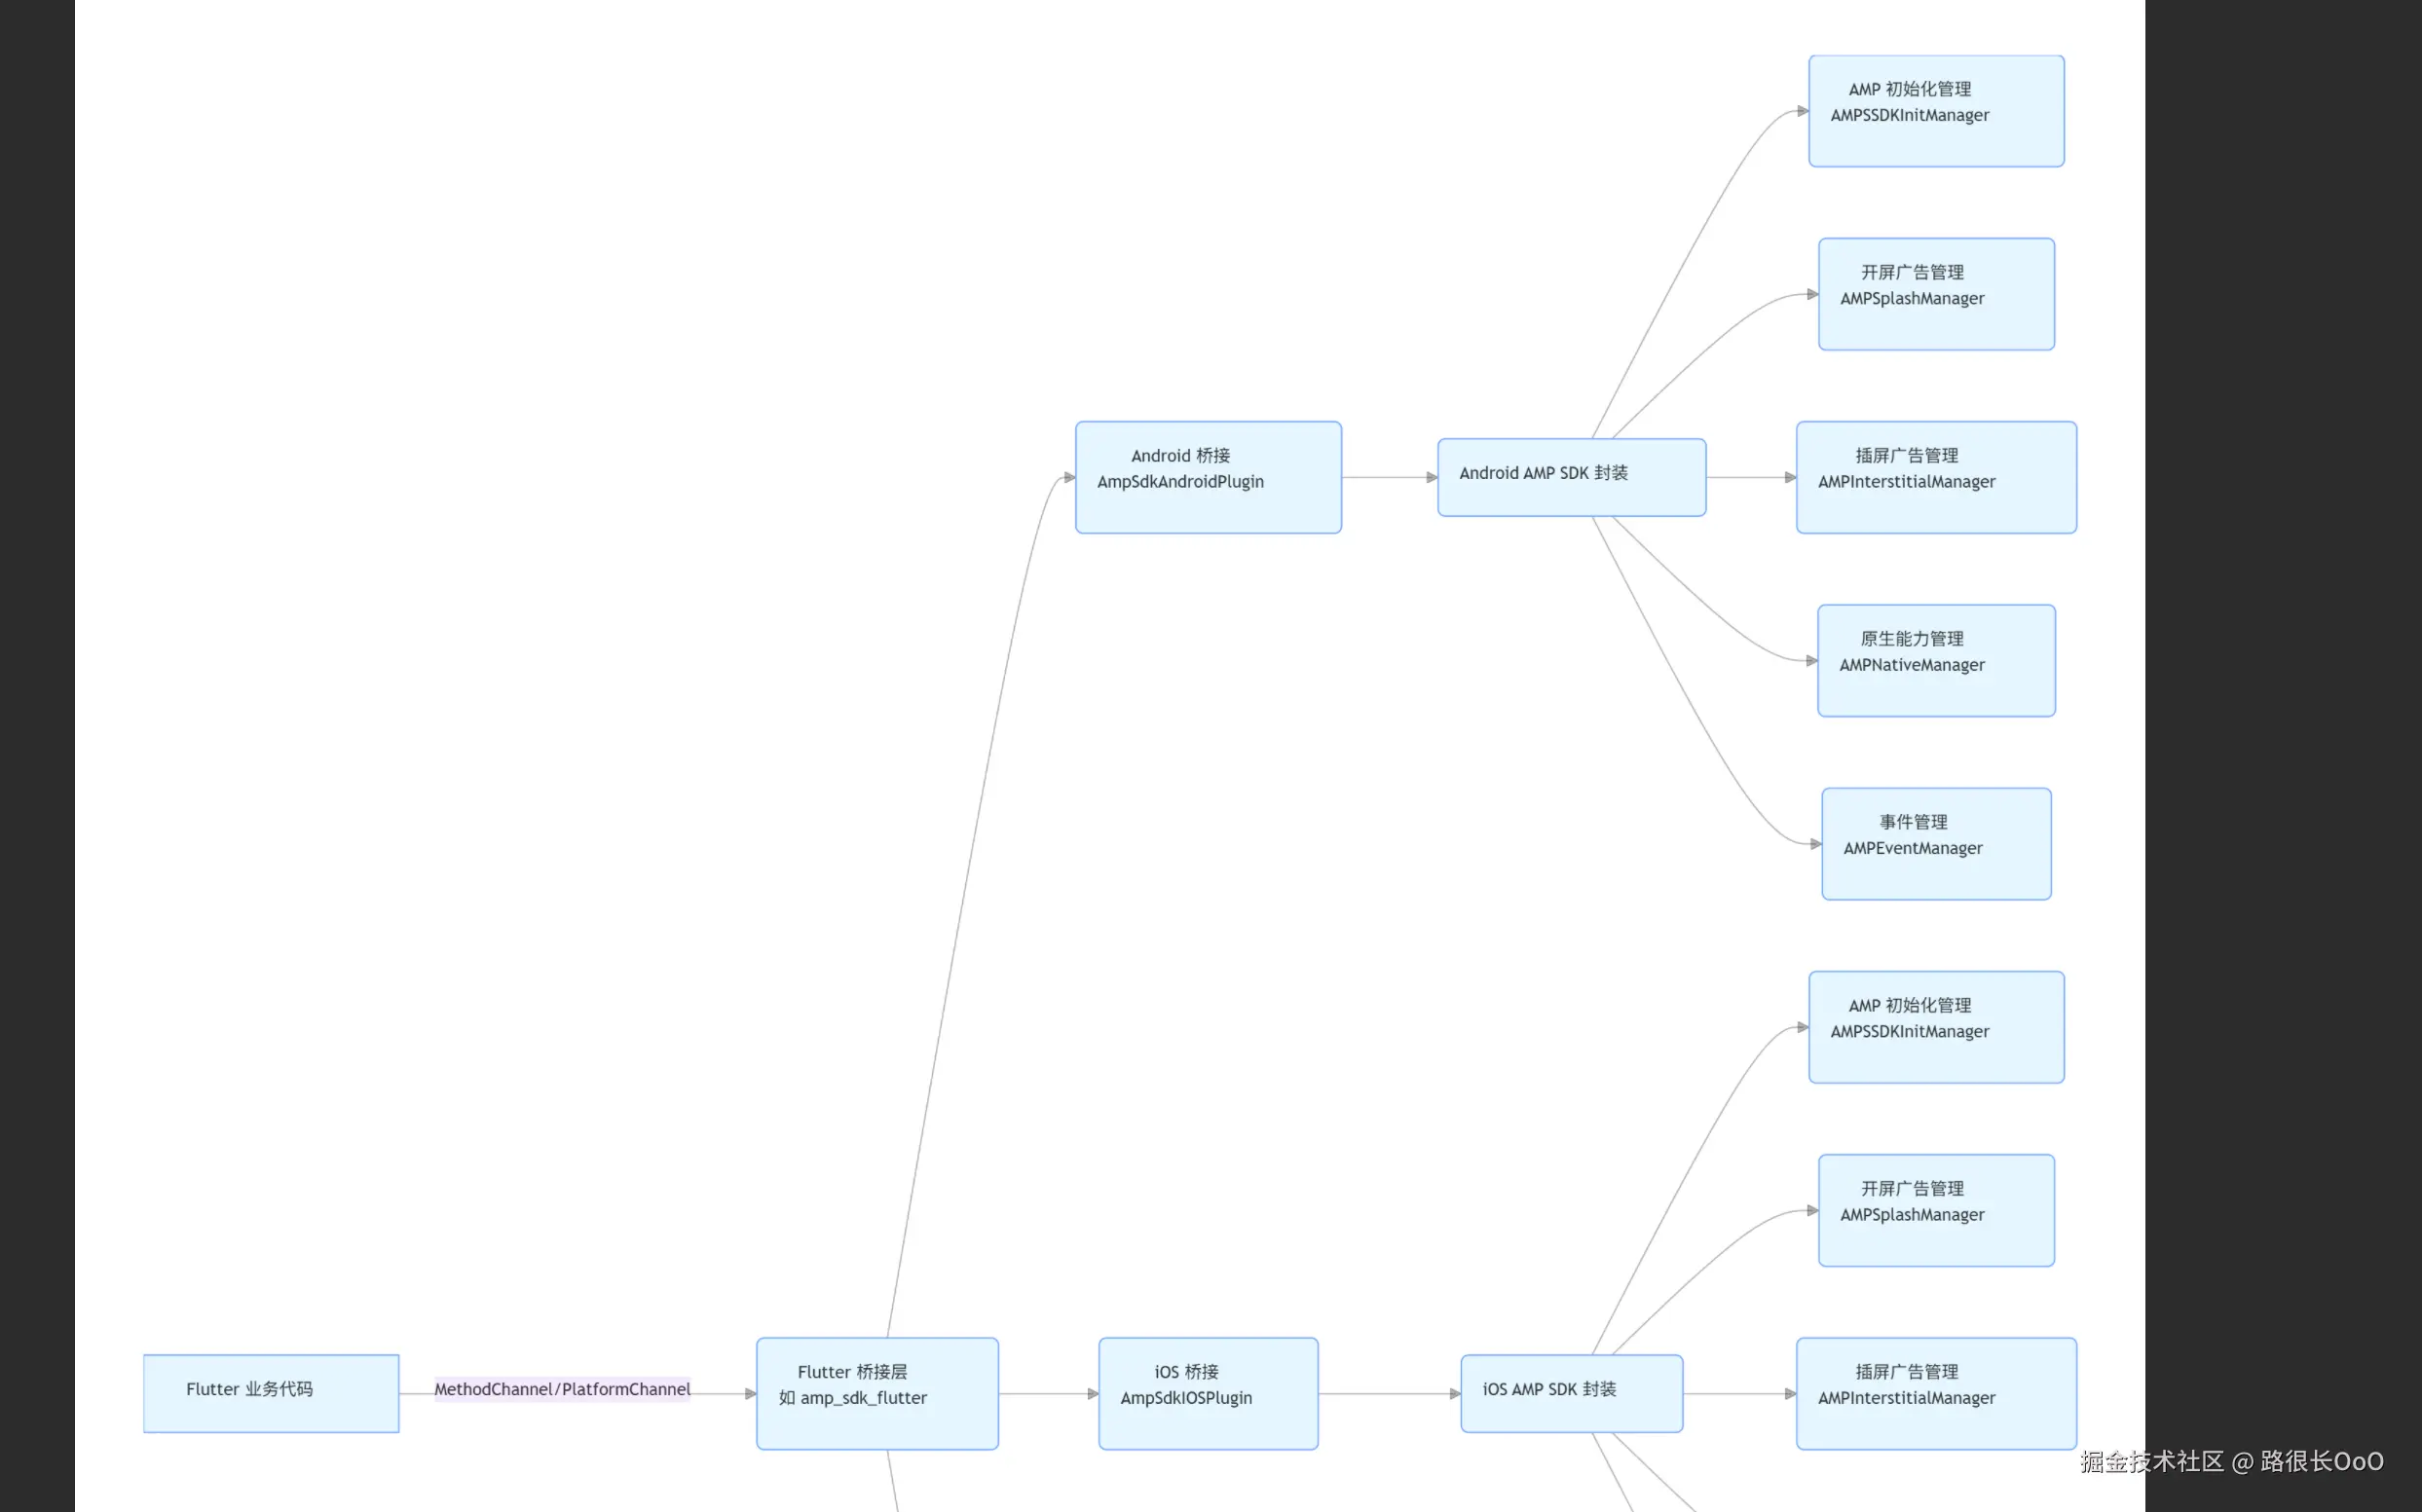
}2. 代码架构设计
整个插件开发过程,我们使用一个MethodChannel进行Flutter和各端的通信和调用,而整个SDK功能划分为【初始化、开屏、插屏、原生、自渲染】五个模块,而每个模块可能有十多个方法都会调用,整个调用加起来可能几十个方法调用,每一个调用涉及到一个庞大的功能,可能导致此页面各个模块业务逻辑耦合在一起。最简单的我这里将这五个模块单独管理类进行管理,相互解耦。
可能有开发者使用五个Plugin AdsSdkPlugin,AdsSplashPlugin,AdsNativePlugin....,每个Plugin对应一个MethodChannel进行模块划分,当然也可以,但是我发现插件项目自动生成的AdsSdkPlugin会被依赖到依赖了插件的项目中的GeneratedPluginRegistrant中,而这里统一默认注册了插件项目默认生成的AdsSdkPlugin。如果你创建了五个Plugin,每次项目依赖都会导致其他Pluging丢失,只有默认的AdsSdkPlugin存在。所以推荐使用默认生成的AdsSdkPlugin,而不是创建多个Plugin进行代码模块划分。
首先创建 AMPSEventManager 单例进行管理MethodChannel分发。在onMethodCall中根据Flutter端invoke的方法名称进行判断属于那个模块,再次分发到对应的管理对象中【AMPSSDKInitManager、AMPSSplashManager、AMPSInterstitialManager...】。
kotlin
package com.example.amps_sdk.manager
class AMPSEventManager private constructor() : MethodCallHandler {

    private var channel: MethodChannel? = null
    private var mContext: WeakReference<Activity>? = null // 在 Android 中通常使用 Context

    companion object {
        private var sInstance: AMPSEventManager? = null
        fun getInstance(): AMPSEventManager {
            return sInstance ?: synchronized(this) {
                sInstance ?: AMPSEventManager().also { sInstance = it }
            }
        }
    }

    fun setContext(context: Activity) {
        this.mContext = WeakReference(context) // 存储 application context 避免内存泄漏
    }

    fun getContext(): Activity? {
        return this.mContext?.get()
    }

    /**
     * 初始化 MethodChannel 并设置回调处理器
     * @param binaryMessenger Flutter引擎的BinaryMessenger
     */
    fun init(binaryMessenger: BinaryMessenger) {
        if (channel == null) {
            channel = MethodChannel(binaryMessenger, "amps_sdk") // "amps_sdk" 是通道名称
            channel?.setMethodCallHandler(this) // 将当前类设置为回调处理器
        }
    }

    /**
     * 处理来自 Flutter 的方法调用
     */
    override fun onMethodCall(call: MethodCall, result: Result) {
        when {
            InitMethodNames.contains(call.method) -> {//InitMethodNames 初始化相关的所有方法名称
                AMPSSDKInitManager.getInstance().handleMethodCall(call, result)
            }
            SplashMethodNames.contains(call.method) -> {
                AMPSSplashManager.getInstance().handleMethodCall(call, result)
            }
            InterstitialMethodNames.contains(call.method) -> {
                //AMPSInterstitialManager.getInstance().handleMethodCall(call, result)
            }
            NativeMethodNames.contains(call.method) -> {
                //AMPSNativeManager.getInstance().handleMethodCall(call, result)
            }
            else -> {
                result.notImplemented() // 如果方法名未被识别
            }
        }
    }

    /**
     * 从原生端向 Flutter 发送消息
     * @param method 方法名
     * @param args 参数,可以是 null 或任何 Flutter 支持的类型
     */
    fun sendMessageToFlutter(method: String, args: Any?) { // args 类型改为 Any? 更灵活
        channel?.invokeMethod(method, args)
    }

    /**
     * 释放资源,清除 MethodChannel 的回调处理器和 Context
     */
    fun release() {
        channel?.setMethodCallHandler(null)
        channel = null // 可选,如果不再需要这个channel实例
        mContext = null
    }
}
3. 集成原生 SDK 依赖
要真正调用您的原生广告 SDK,需要在 Android 插件的配置文件中添加依赖。
打开 android/build.gradle (插件根目录下的 android 文件夹内),在 dependencies 块中添加您的原生 SDK 依赖。
这种方式在开发过程中可用,但是广告SDK的具体字节码是不会打包到最终包体的,还需要三方在对应项目Android模块重新依赖广告SDK。比较麻烦,最好是将其发布到maven仓库,避免复杂的依赖,当然可以使用本地maven仓库形式进行依赖,三方只需要在对应部分增加maven依赖配置即可。
ini
allprojects {
    repositories {
        google()
        mavenCentral()
        maven {
            name = "myrepo"
            url = uri("file://${rootProject.projectDir.parentFile.parentFile}/android/m2repository")
        }
    }
}
对于本地maven构建,查看项目中build.gradle.kts
dart
group = "com.example.ads_sdk"
version = "1.0-SNAPSHOT"

// At the top of your build.gradle
String mavenLocalRepoPath = "${rootProject.projectDir.toURI()}/m2repository"
// Ensure the directory exists
new File(mavenLocalRepoPath).mkdirs()
buildscript {
    ext.kotlin_version = "2.1.0"
    repositories {
        google()
        mavenCentral()
        maven {
            url "file:///D:/pgram/ads_sdk/android/m2repository"
        }
    }

    dependencies {
        classpath("com.android.tools.build:gradle:8.10.1")
        classpath("org.jetbrains.kotlin:kotlin-gradle-plugin:$kotlin_version")
    }
}

allprojects {
    repositories {
        google()
        mavenCentral()
        maven {
            name = "myrepo"
            url = uri("file:///${mavenLocalRepoPath}")
        }
    }
}

apply plugin: "com.android.library"
apply plugin: "kotlin-android"
apply plugin: "maven-publish"
publishing {
    publications {
        // 第一个 AAR 的 Publication
        libraryOne(MavenPublication) {
            groupId = 'com.example'
            artifactId = 'amps-sdk'
            version = '1.0'
            //示例:假设你的模块名为 'amps_sdk' (与项目名一致)
            //并且你要发布 release AAR
            // 这个路径是相对于当前 build.gradle 所在模块的
            artifact "libs/beiziSDK_v5.3.0.3.aar"//在同一目录层级。所以可以写成libs/amps.aar
        }
        release(MavenPublication) {
            groupId = 'com.example'
            artifactId = 'common'
            version = '1.0'
            //示例:假设你的模块名为 'amps_sdk' (与项目名一致)
            //并且你要发布 release AAR
            // 这个路径是相对于当前 build.gradle 所在模块的
            artifact "libs/common_5.1.1.1.aar"
        }
    }
    repositories {
        maven {
            name = 'myrepo'
            url = mavenLocalRepoPath
        }
    }
}
//通过调试tasks调试路径:不需要调试之后删除即可
tasks.register("anotherTask") {
    doLast {
        //def mavenLocalRepo = file("m2repository")
        def a = uri("file://${rootProject.projectDir.parentFile.parentFile}/android/m2repository")
        logger.lifecycle(">>>>> [EXECUTION] 路径0=${a}")
        logger.lifecycle(">>>>> [EXECUTION] 路径1=${rootProject.projectDir.toURI()}") // 使用 lifecycle 确保默认可见
        logger.lifecycle(">>>>> [EXECUTION] 路径1=${rootProject.projectDir.toURI()}") // 使用 lifecycle 确保默认可见
        logger.lifecycle(">>>>> [EXECUTION] 路径2=${rootProject.projectDir.parentFile.parentFile}") // 使用 lifecycle 确保默认可见
    }
}

android {
    namespace = "com.example.amps_sdk"

    compileSdk = 36

    compileOptions {
        sourceCompatibility = JavaVersion.VERSION_11
        targetCompatibility = JavaVersion.VERSION_11
    }

    kotlinOptions {
        jvmTarget = JavaVersion.VERSION_11.toString()
    }

    sourceSets {
        main.java.srcDirs += "src/main/kotlin"
        test.java.srcDirs += "src/test/kotlin"
    }

    defaultConfig {
        minSdk = 24
    }

    dependencies {
        //compileOnly fileTree(dir: 'libs', include: '*.aar')
        // 依赖第一个 AAR (amps-sdk)
        api ('com.example:amps-sdk:1.0')
        // 依赖第二个 AAR (common)
        api ('com.example:common:1.0')
        implementation ('androidx.annotation:annotation:1.8.0')
        implementation ('androidx.appcompat:appcompat:1.7.1')
        implementation ('com.google.android.material:material:1.13.0')
        testImplementation ('junit:junit:4.13.2')
        androidTestImplementation ('androidx.test.ext:junit:1.3.0')
        androidTestImplementation ('androidx.test.espresso:espresso-core:3.7.0')
        testImplementation("org.jetbrains.kotlin:kotlin-test")
        testImplementation("org.mockito:mockito-core:5.19.0")
    }

    testOptions {
        unitTests.all {
            useJUnitPlatform()

            testLogging {
                events "passed", "skipped", "failed", "standardOut", "standardError"
                outputs.upToDateWhen {false}
                showStandardStreams = true
            }
        }
    }
}
六、事件回调处理 (EventChannel)
原生 SDK 通常会通过**回调(Callback)**来通知应用广告加载成功、展示或点击等事件。Flutter 使用 EventChannel 来处理这种原生到 Dart 的持续数据流。
1. Dart 层 (EventChannel)
在example/lib/main中调用AMPSAdSdk().init(),其本质是MethodChannel通过invoke调用原生端对于MethodChannel对应方法名称。
dart
Future<void> init(AMPSInitConfig sdkConfig,AMPSIInitCallBack callBack) async {
  _callBack = callBack;
  // 使用时
  await AdsSdk.channel.invokeMethod(
    AMPSAdSdkMethodNames.init,
    sdkConfig.toMap(AMPSAdSdk.testModel),
  );
}
原生端Android监听位置匹配到AMPSAdSdkMethodNames.INIT,进行真正广告SDK调用。
kotlin
class AMPSSDKInitManager private constructor() {

    companion object {
        @Volatile
        private var instance: AMPSSDKInitManager? = null

        fun getInstance(): AMPSSDKInitManager {
            return instance ?: synchronized(this) {
                instance ?: AMPSSDKInitManager().also { instance = it }
            }
        }
    }


    fun handleMethodCall(call: MethodCall, result: Result) {
        val method: String = call.method
        val flutterParams: Map<String, Any>? = call.arguments as? Map<String, Any>

        when (method) {
            AMPSAdSdkMethodNames.INIT -> {
                val context = AMPSEventManager.getInstance().getContext()
                if (context != null && flutterParams != null) {
                    val ampsConfig = AMPSInitConfigConverter().convert(flutterParams)
                    initAMPSSDK(ampsConfig, context)
                    result.success(true)
                } else {
                    if (context == null) {
                        result.error("CONTEXT_UNAVAILABLE", "Android context is not available.", null)
                    } else {
                        result.error("INVALID_ARGUMENTS", "Initialization arguments are missing or invalid.", null)
                    }
                }
            }
            else -> result.notImplemented()
        }
    }

    fun initAMPSSDK(ampsInitConfig: AMPSInitConfig?, context: Context) {
        val callback = object : IAMPSInitCallback {
            override fun successCallback() {
                sendMessage(AMPSInitChannelMethod.INIT_SUCCESS)
            }

            override fun failCallback(p0: AMPSError?) {
                sendMessage(AMPSInitChannelMethod.INIT_FAILED, mapOf("code" to p0?.code, "message" to p0?.message))
            }
        }

        if (ampsInitConfig != null) {
            SDKLog.setLogLevel(SDKLog.LOG_LEVEL.LOG_LEVEL_ALL);
            AMPSSDK.init(context, ampsInitConfig,callback)
        }
    }

    fun sendMessage(method: String, args: Any? = null) {
        AMPSEventManager.getInstance().sendMessageToFlutter(method, args)
    }
}
原生端SDK收到初始化SDK结果之后,通过AMPSEventManager.getInstance().sendMessageToFlutter(method, args)也就是MethodChannel最终通知Flutter端结果。Flutter端收到结果,通过callBack回调给用户。
总结
文章基本对 Flutter 插件开发实战、桥接原生 SDK 讲解了一遍------从Platform Channel 通信原理的底层逻辑,到FVM 多版本管理的环境搭建,再到Dart 层统一接口设计,原生层解耦架构实现的全流程开发,最后覆盖双向事件流转的联调关键,完整覆盖了多平台(Android、iOS、HarmonyOS)广告 SDK 桥接的核心环节,原生回调转发,模块解耦等实战痛点提供了具体方案(如构造者模式封装参数、AMPSEventManager 统一分发事件),可直接作为插件开发的落地参考。 当然,实际开发中可能还会遇到更多细节问题:比如 iOS 端的 Pod 依赖配置、HarmonyOS 端的 HAP 包构建适配、原生 SDK 异步回调的线程安全处理,或是插件发布到 Pub 仓库的规范配置等。如果大家在实操中遇到这类疑问,或是对现有流程有优化建议,都可以在评论区讨论交流。后续也会针对这些延伸场景补充更细致的教程,比如多 Channel 通信优化、插件版本迭代的兼容性处理等内容,帮助大家更顺畅地完成 Flutter 与原生能力的桥接工作。