文章目录
-
- 概述
- 准备工作
- [macOS 图标配置](#macOS 图标配置)
-
- 图标文件结构
- [生成 .icns 图标](#生成 .icns 图标)
-
- [Windows 环境](#Windows 环境)
- [macOS 环境](#macOS 环境)
- [Linux 图标配置](#Linux 图标配置)
-
- 图标文件结构
- [生成 .xpm 图标](#生成 .xpm 图标)
- [Windows 图标配置](#Windows 图标配置)
-
- 图标文件结构
- [生成 Windows 图标](#生成 Windows 图标)
-
- 应用图标 (.ico)
- [Inno Setup 小图生成](#Inno Setup 小图生成)
- [Inno Setup 大图生成](#Inno Setup 大图生成)
- [Server (HTML) 图标配置](#Server (HTML) 图标配置)
-
- 图标文件结构
- [生成 Web 图标](#生成 Web 图标)
- [Windows 图标规范详解](#Windows 图标规范详解)
-
- [Windows 应用图标要求](#Windows 应用图标要求)
- [Inno Setup 图标规范](#Inno Setup 图标规范)
- 最佳实践
- 总结
- 参考资源
概述
对于基于 VS Code OSS 进行二次开发的团队来说,图标自定义是品牌定制和用户体验优化的关键环节。本文详细介绍了如何为不同平台准备和生成图标资源,确保应用在各种环境下都能完美显示。
准备工作
基础图标要求
VS Code 对图标资源有严格的技术要求,确保在不同显示环境下都能保持清晰的视觉效果:
基础要求:
- 源图标分辨率:1024×1024 像素
- 格式:PNG 带透明通道
- 色彩空间:sRGB
- 文件优化:无损压缩
设计原则:
- 保持与 VS Code 设计语言的一致性
- 确保在小尺寸下的可识别性
- 支持深色/浅色主题适配
- 符合各平台的图标设计规范
图像文件:
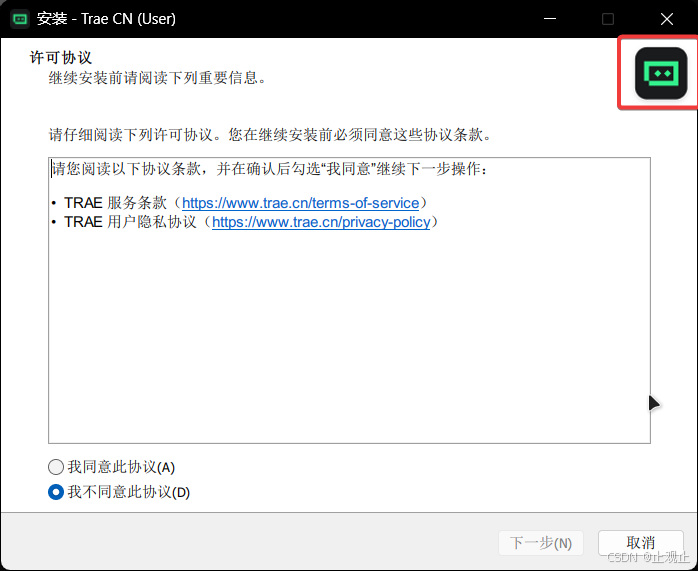
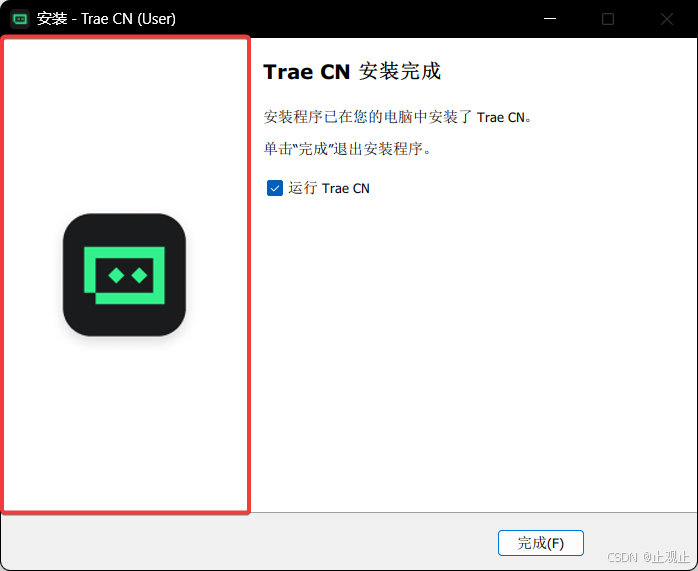
code.png(1024x1024):应用主图标inno-small.png(147x147): Windows Inno 安装程序的小图(需要带 Padding)inno-big.png():Windows Inno 安装程序的大图(避免透明背景)code-70.png:Windows 10 磁贴小图code-150.png:Windows 10 磁贴大图(注意底部预留磁贴应用名称的空间)
使用工具
ImageMagick:跨平台的图像处理工具(支持.ico和.xpm转换)icnsify:跨平台的 Apple.icns图标生成工具
macOS 图标配置
图标文件结构
shell
# 应用图标
resources/darwin/code.icns

# 文件关联图标(示例)
resources/darwin/bat.icns
resources/darwin/c.icns
resources/darwin/cpp.icns
resources/darwin/python.icns
resources/darwin/javascript.icns
# ... 更多文件类型图标
生成 .icns 图标
Windows 环境
powershell
# 安装 icnsify 工具
winget add -e --id JackMordaunt.icnsify

# 生成 .icns 文件
icnsify -i code.png -o code.icns
macOS 环境
macOS 使用 ICNS 格式,需要专门的工具进行处理:
bash
# 安装 icnsify 工具
brew install icnsify

# 生成 .icns 文件
icnsify -i code.png -o code.icns
也可以使用系统自带的 iconutil,避免安装额外的工具。
bash
# 使用系统自带的 iconutil 工具
mkdir icons.iconset

# 创建不同尺寸的图标
sips -z 16 16 code.png --out icons.iconset/icon_16x16.png
sips -z 32 32 code.png --out icons.iconset/icon_16x16@2x.png
sips -z 32 32 code.png --out icons.iconset/icon_32x32.png
sips -z 64 64 code.png --out icons.iconset/icon_32x32@2x.png
sips -z 128 128 code.png --out icons.iconset/icon_128x128.png
sips -z 256 256 code.png --out icons.iconset/icon_128x128@2x.png
sips -z 256 256 code.png --out icons.iconset/icon_256x256.png
sips -z 512 512 code.png --out icons.iconset/icon_256x256@2x.png
sips -z 512 512 code.png --out icons.iconset/icon_512x512.png
sips -z 1024 1024 code.png --out icons.iconset/icon_512x512@2x.png

# 生成 .icns 文件
iconutil -c icns icons.iconset -o code.icns
ICNS 格式特点:
ICNS 文件结构 图标类型 16x16@1x,2x 32x32@1x,2x 128x128@1x,2x 256x256@1x,2x 512x512@1x,2x 特殊用途图标 模板图标 Retina优化
Linux 图标配置
图标文件结构
shell
# 应用图标
resources/linux/code.png

# RPM 包图标(历史遗留)
resources/linux/rpm/code.xpm
生成 .xpm 图标
powershell
# 使用 ImageMagick 转换
magick code.png code.xpm
Windows 图标配置
图标文件结构
shell
# 应用图标
resources/win32/code.ico

# 磁贴图标
resources/win32/code_70x70.png
resources/win32/code_150x150.png

# 磁贴配置
resources/win32/VisualElementsManifest.xml

# Inno Setup 图标资源
resources/win32/inno-big-100.bmp
resources/win32/inno-big-125.bmp
resources/win32/inno-big-150.bmp
resources/win32/inno-big-175.bmp
resources/win32/inno-big-200.bmp
resources/win32/inno-big-225.bmp
resources/win32/inno-big-250.bmp
resources/win32/inno-small-100.bmp
resources/win32/inno-small-125.bmp
resources/win32/inno-small-150.bmp
resources/win32/inno-small-175.bmp
resources/win32/inno-small-200.bmp
resources/win32/inno-small-225.bmp
resources/win32/inno-small-250.bmp

# 文件关联图标
resources/win32/bower.ico
resources/win32/c.ico
resources/win32/cpp.ico
# ... 更多文件类型图标
生成 Windows 图标
应用图标 (.ico)
powershell
magick code.png -define icon:auto-resize="256,48,32,24,16" code.icoInno Setup 小图生成

方案一:已有带 padding 的图
powershell
# 批量生成所有尺寸
magick inno-small.png ^
    ( +clone -resize 58x58 -write inno-small-100.bmp ) ^
    ( +clone -resize 71x71 -write inno-small-125.bmp ) ^
    ( +clone -resize 85x85 -write inno-small-150.bmp ) ^
    ( +clone -resize 103x103 -write inno-small-175.bmp ) ^
    ( +clone -resize 112x112 -write inno-small-200.bmp ) ^
    ( +clone -resize 129x129 -write inno-small-225.bmp ) ^
    ( +clone -resize 147x147 -write inno-small-250.bmp ) ^
    null:
方案二:无 padding 图(自动添加)
powershell
# 单个尺寸生成示例
magick inno-small.png -resize 50x50 -gravity center -background white -extent 58x58 inno-small-100.bmp
Inno Setup 大图生成

使用百分比缩放
cmd
magick inno-big.png ^
    ( +clone -resize 40%! -write inno-big-100.bmp +delete ) ^
    ( +clone -resize 50%! -write inno-big-125.bmp +delete ) ^
    ( +clone -resize 60%! -write inno-big-150.bmp +delete ) ^
    ( +clone -resize 70%! -write inno-big-175.bmp +delete ) ^
    ( +clone -resize 80%! -write inno-big-200.bmp +delete ) ^
    ( +clone -resize 90%! -write inno-big-225.bmp +delete ) ^
    ( +clone -resize 100%! -write inno-big-250.bmp +delete ) ^
    null:
精确控制分辨率
cmd
magick inno-big.png ^
    ( +clone -resize 164x314! -write inno-big-100.bmp +delete ) ^
    ( +clone -resize 202x386! -write inno-big-125.bmp +delete ) ^
    ( +clone -resize 240x459! -write inno-big-150.bmp +delete ) ^
    ( +clone -resize 290x556! -write inno-big-175.bmp +delete ) ^
    ( +clone -resize 315x604! -write inno-big-200.bmp +delete ) ^
    ( +clone -resize 366x700! -write inno-big-225.bmp +delete ) ^
    ( +clone -resize 410x797! -write inno-big-250.bmp +delete ) ^
    null:
Server (HTML) 图标配置
图标文件结构
shell
# 网站图标
resources/server/favicon.ico

# PWA 应用图标
resources/server/code-192.png
resources/server/code-512.png

# PWA 清单文件
resources/server/manifest.json
生成 Web 图标
powershell
# 生成 favicon.ico
magick code.png -define icon:auto-resize="16,24,32,48,64,128,256" favicon.ico

# 生成 PWA 图标
magick code.png -resize 192x192 code-192.png
magick code.png -resize 512x512 code-512.png
Windows 图标规范详解
Windows 应用图标要求
根据 Microsoft 官方文档,Windows 应用图标需要满足以下要求:
最小图标尺寸要求
| 用途 | 最小尺寸 | 推荐尺寸 |
|---|---|---|
| 关联菜单、标题栏、系统托盘 | 16×16 | 16×16, 24×24, 32×32 |
| 任务栏、搜索结果、开始菜单 | 24×24 | 24×24, 32×32, 48×48 |
| 启动大头针 | 32×32 | 32×32, 48×48, 64×64 |
必备图标尺寸
- 16×16 像素
- 24×24 像素
- 32×32 像素
- 48×48 像素
- 256×256 像素
Inno Setup 图标规范
setup_wizardimagefile(安装向导大图)
| DPI 比例 | 分辨率 | 文件名称 |
|---|---|---|
| 100% | 164×314 | inno-big-100.bmp |
| 125% | 202×386 | inno-big-125.bmp |
| 150% | 240×459 | inno-big-150.bmp |
| 175% | 290×556 | inno-big-175.bmp |
| 200% | 315×604 | inno-big-200.bmp |
| 225% | 366×700 | inno-big-225.bmp |
| 250% | 410×797 | inno-big-250.bmp |
setup_wizardsmallimagefile(安装向导小图)
| DPI 比例 | 分辨率 | 文件名称 |
|---|---|---|
| 100% | 58×58 | inno-small-100.bmp |
| 125% | 71×71 | inno-small-125.bmp |
| 150% | 85×85 | inno-small-150.bmp |
| 175% | 103×103 | inno-small-175.bmp |
| 200% | 112×112 | inno-small-200.bmp |
| 225% | 129×129 | inno-small-225.bmp |
| 250% | 147×147 | inno-small-250.bmp |
最佳实践
图标设计建议
- 透明背景: 建议使用透明图标背景
- 主题适配: 为浅色和深色主题提供不同版本
- 尺寸完整: 提供完整的尺寸系列,避免系统缩放
- 格式优化: 根据不同平台选择最优格式
工具推荐
- ImageMagick: 跨平台的图像处理工具
- icnsify: macOS .icns 文件生成工具
- Inkscape: 矢量图标设计工具
生成脚本
为了方便图标生成,笔者也写了一套 PS1 脚本,有兴趣的可以参考脚本实现自己的自动化生成。
总结
VSCode 二次开发中的图标自定义涉及多个平台和多种格式,需要仔细准备。通过本文提供的指南,您可以系统地生成所有必需的图标资源,确保应用在各个平台上都有良好的视觉表现。