这个是在部署elk过程中操作的,这里作为工作留档,比较粗糙只是为了测试下各个模块的使用。具体测试环境在前面已经发布,另外这里需要给Docker-compose中logstash开放7777和8888端口
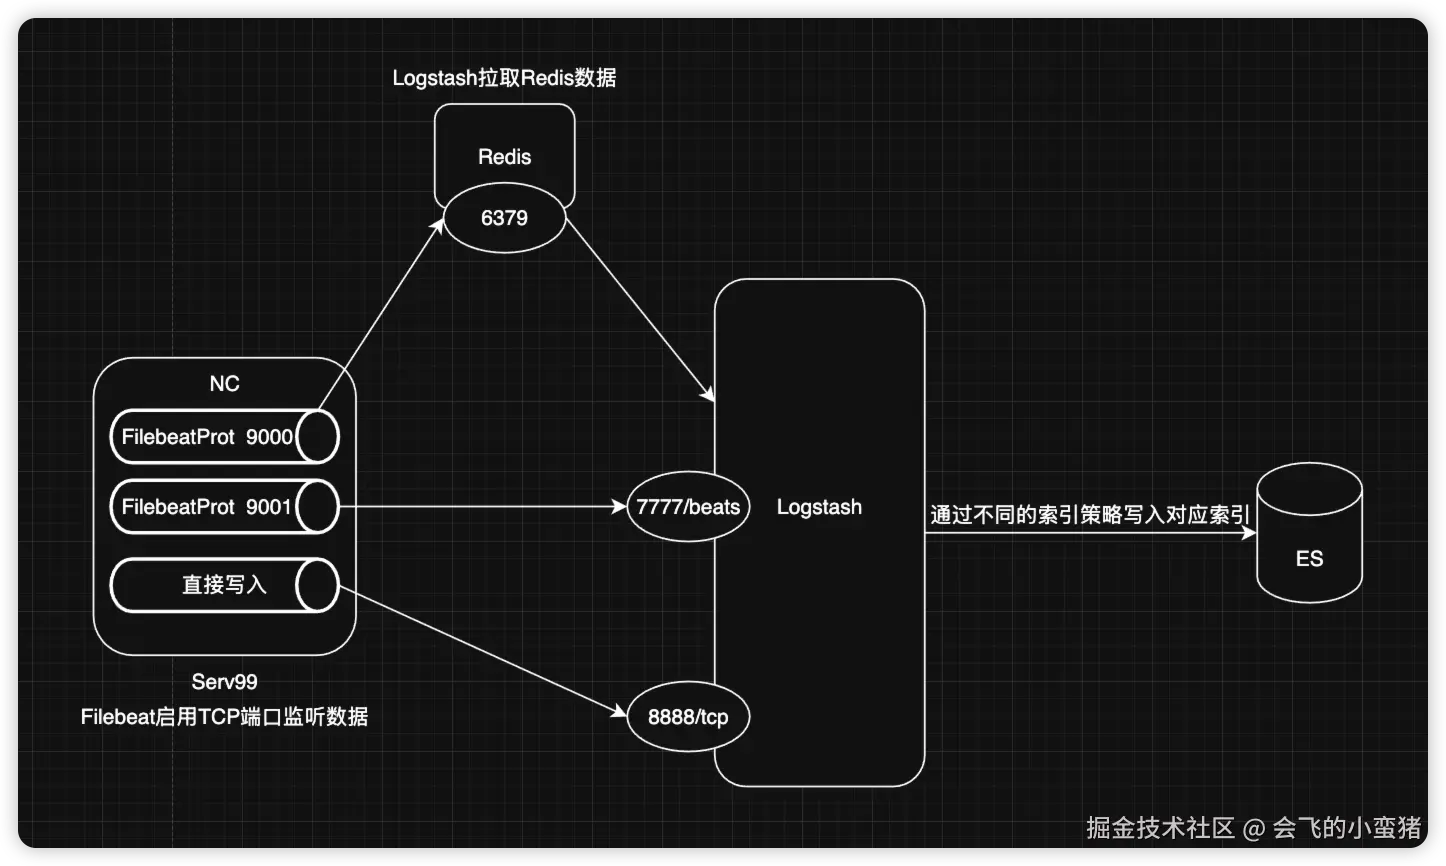
1.综合案例图
2.Logstash配置
ini
root@ubuntu2204test99:~/elkf/logstash/pipeline# pwd
/root/elkf/logstash/pipeline
root@ubuntu2204test99:~/elkf/logstash/pipeline# cat logstash.conf
input {
  beats {
    # 自定义一个类型,使Logstash可以进行判断处理
    type => "soure-bates"
    port => 7777
  }
  tcp {
    type => "soure-tcp"
    port => 8888
  }
  redis {
    type => "soure-redis"
    data_type => "list"
    db => 5
    host => "192.168.1.47"
    port => "6379"
    password => "123456"
    key => "filebeat-log"
  }
}
output {
  stdout {}
  if [type] == "soure-bates"{
    elasticsearch {
        hosts => ["192.168.1.99:9201","192.168.1.99:9202","192.168.1.99:9203"]
        user => "elastic"
        password => "123456"
        index => "soure-bates-%{+yyyy.MM.dd}"
    }
  } else if [type] == "soure-tcp" {
    elasticsearch {
        hosts => ["192.168.1.99:9201","192.168.1.99:9202","192.168.1.99:9203"]
        user => "elastic"
        password => "123456"
        index => "soure-tcp-%{+yyyy.MM.dd}"
    }
  } else if [type] == "soure-redis"{
      elasticsearch {
        hosts => ["192.168.1.99:9201","192.168.1.99:9202","192.168.1.99:9203"]
        user => "elastic"
        password => "123456"
        index => "soure-redis-%{+yyyy.MM.dd}"
    }
  } else {
      elasticsearch {
        hosts => ["192.168.1.99:9201","192.168.1.99:9202","192.168.1.99:9203"]
        user => "elastic"
        password => "123456"
        index => "soure-other-%{+yyyy.MM.dd}"
    }
  }
}
3.Filebeat配置(TCP)
ruby
root@ubuntu2204test99:/usr/local/filebeat-7.17.24# pwd
/usr/local/filebeat-7.17.24
root@ubuntu2204test99:/usr/local/filebeat-7.17.24# cat filebeat-tcp-logstatsh-es.yml

# Filebeat tcp配置,监听tcp9000断后来的信息并写入到logstash
filebeat.inputs:
- type: tcp
  host: "0.0.0.0:9001"

output.logstash:
  hosts: ["192.168.1.99:7777"]


# Filebeat启动命令
root@ubuntu2204test99:/usr/local/filebeat-7.17.24# ./filebeat -e -c filebeat-tcp-logstatsh-es.yml --path.data /tmp/filebeat01/

# 测试命令
root@ubuntu2204test99:~/elkf/logstash/pipeline# echo "this is filebeat 9001" |nc 192.168.1.99 9001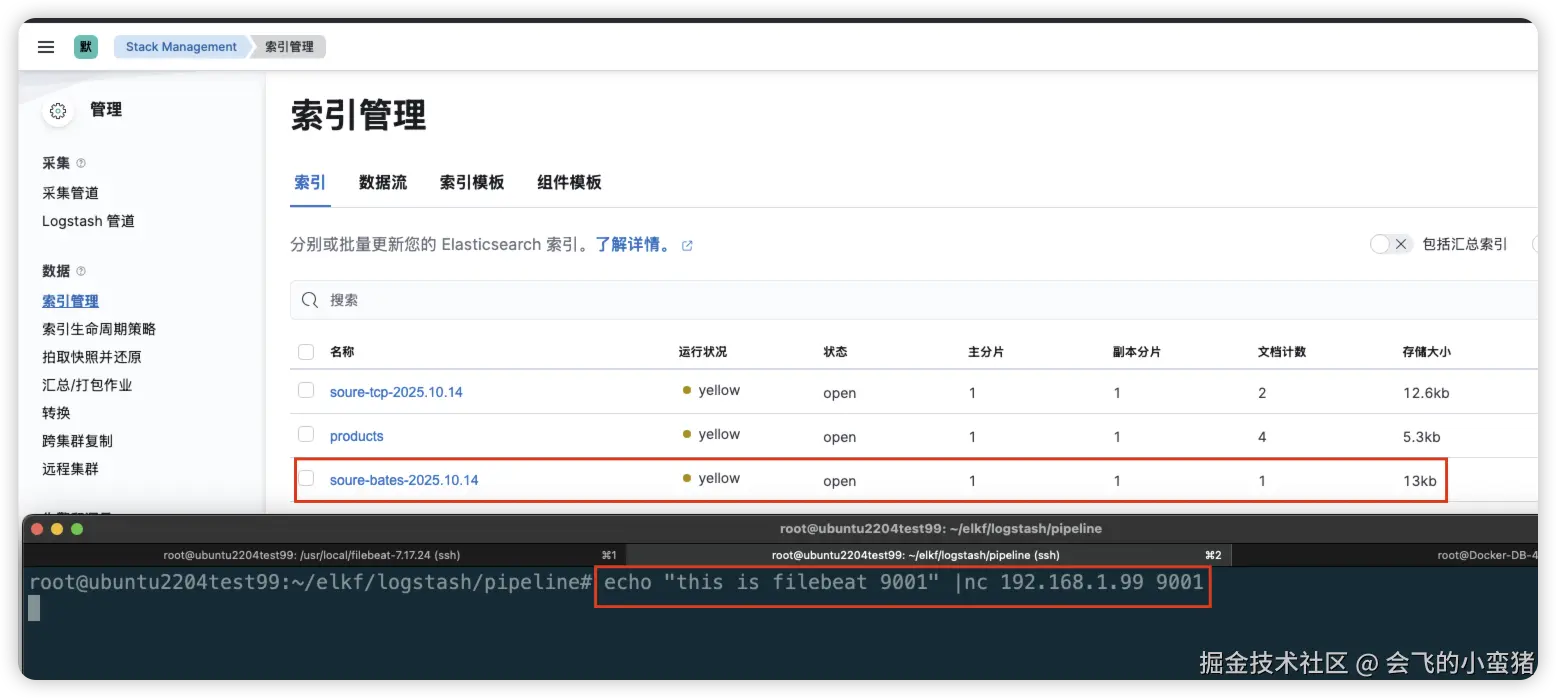
4.Filebeat配置(Redis)
ruby
root@ubuntu2204test99:/usr/local/filebeat-7.17.24# pwd
/usr/local/filebeat-7.17.24
root@ubuntu2204test99:/usr/local/filebeat-7.17.24# cat filebeat-redis-logstatsh-es.yml
filebeat.inputs:
- type: tcp
  host: "0.0.0.0:9000"

output.redis:
  hosts: ["192.168.1.47:6379"]
  password: "123456"
  key: "filebeat-log"
  db: 5 # 数据库编号
  timeout: 5

# Filebeat启动命令
root@ubuntu2204test99:/usr/local/filebeat-7.17.24# ./filebeat -e -c filebeat-redis-logstatsh-es.yml --path.data /tmp/filebeat02/

# 测试命令
root@ubuntu2204test99:~/elkf/logstash/pipeline# echo "this is redis 9000" |nc 192.168.1.99 9000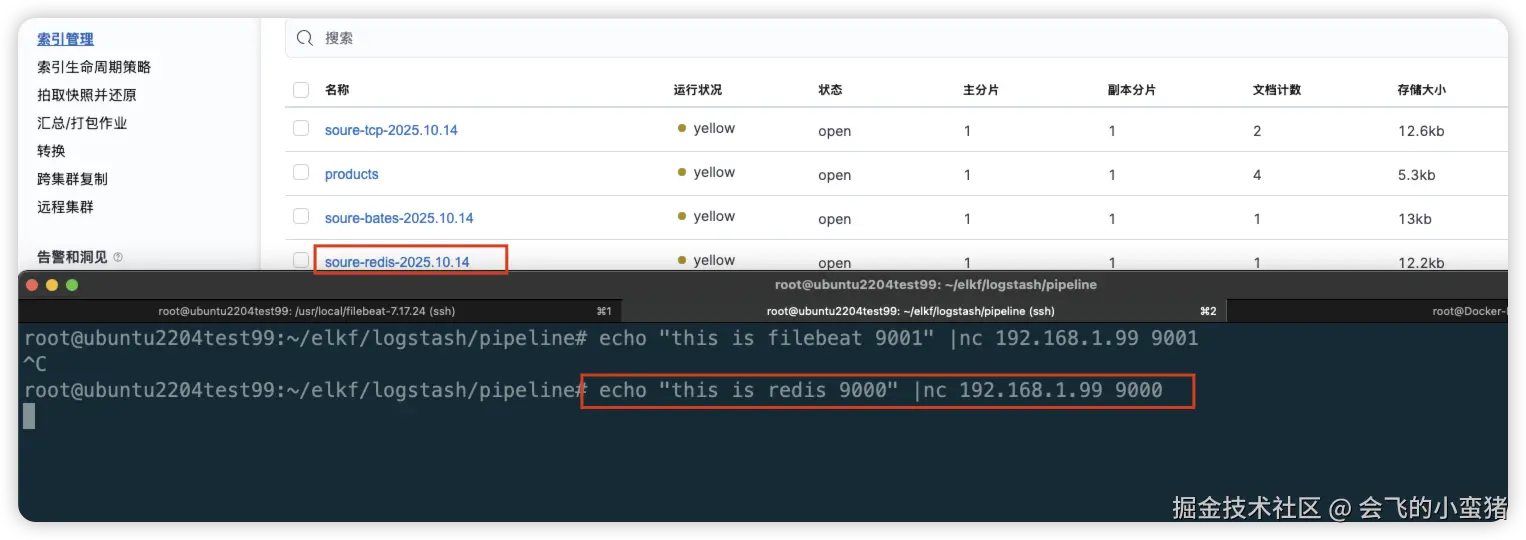
5.nc直接向Logstash写入
ruby
root@ubuntu2204test99:/usr/local/filebeat-7.17.24# echo 'hello this is nc to logstash 8888' |nc 192.168.1.99 8888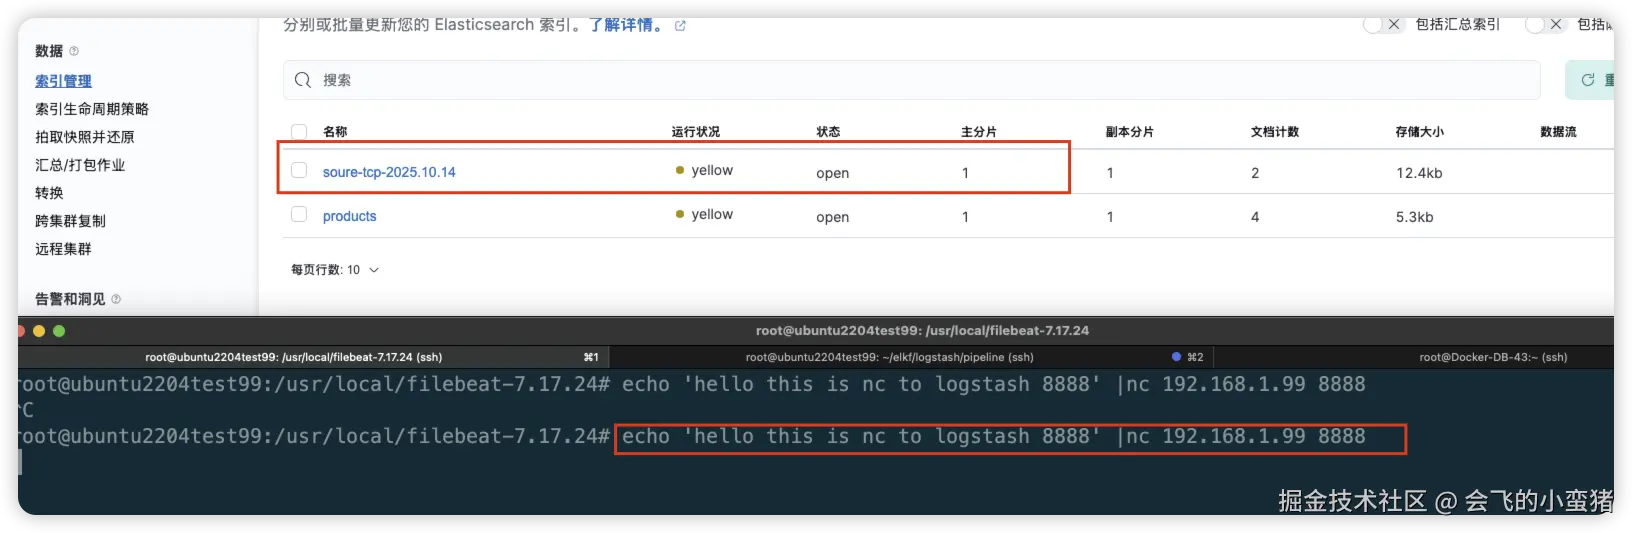
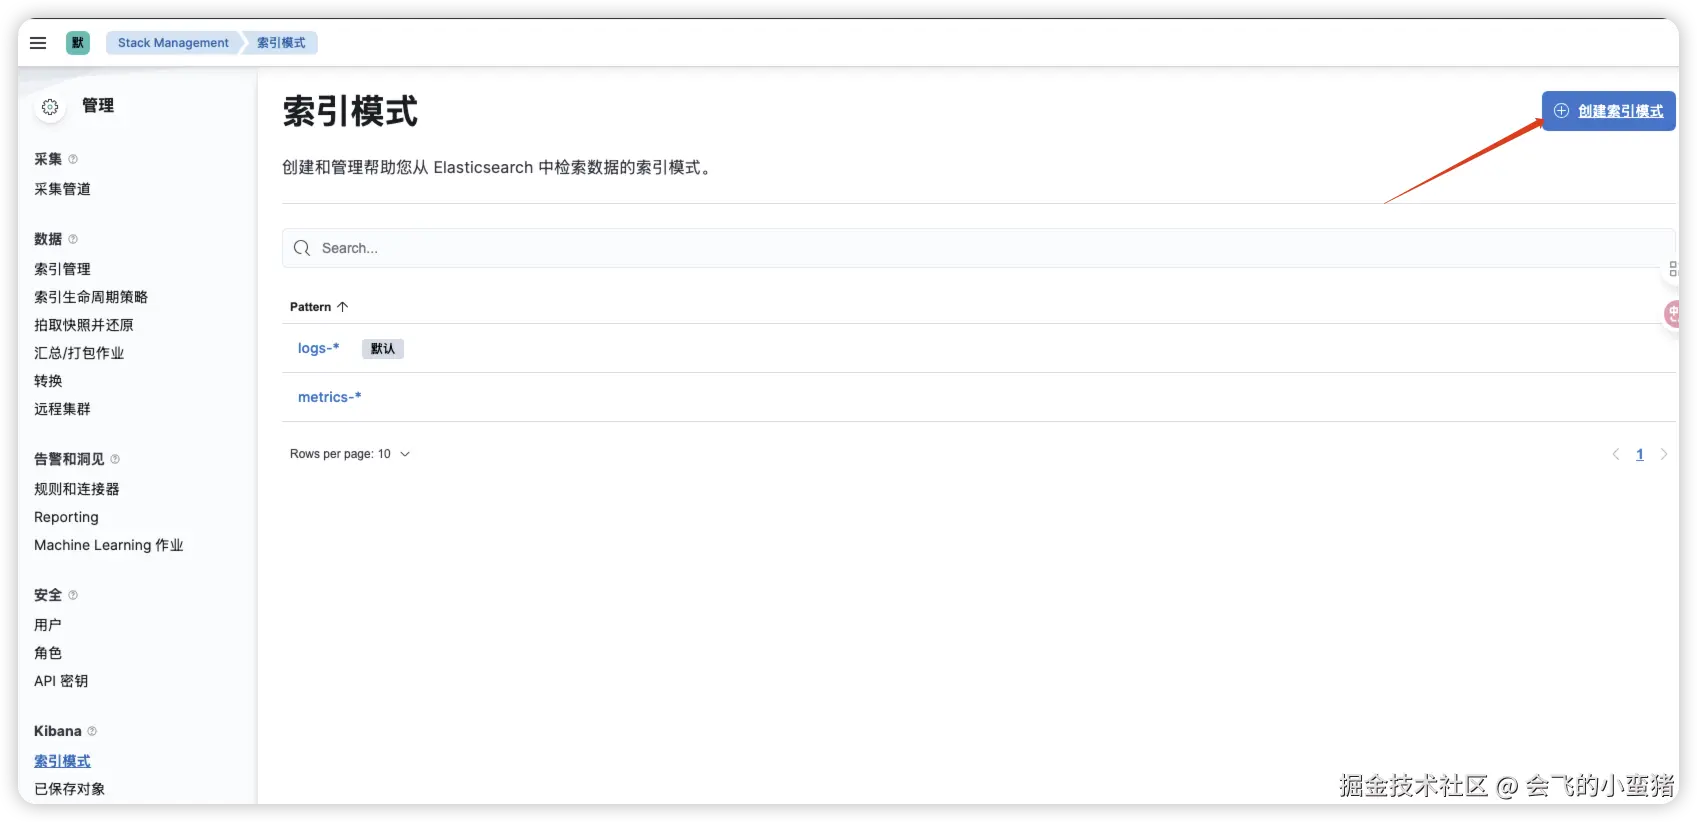
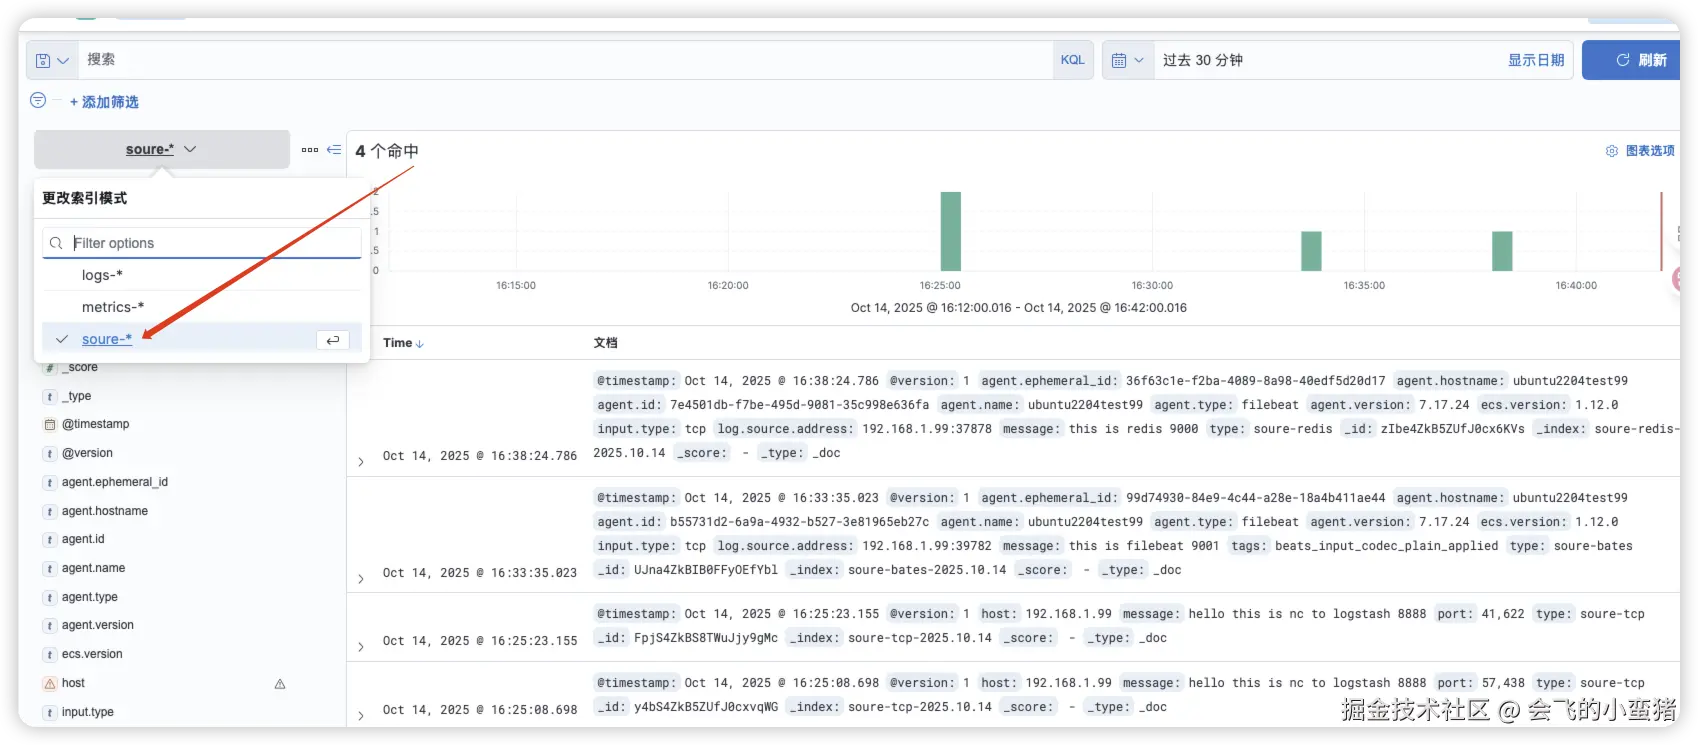
6.建立索引模式查看数据