文章目录
前言
如果你还没有学习OpenFeign可以看之前的博客微服务之OpenFeign 服务调用,本篇博客是接着上一篇写的。
熔断降级概念和使用
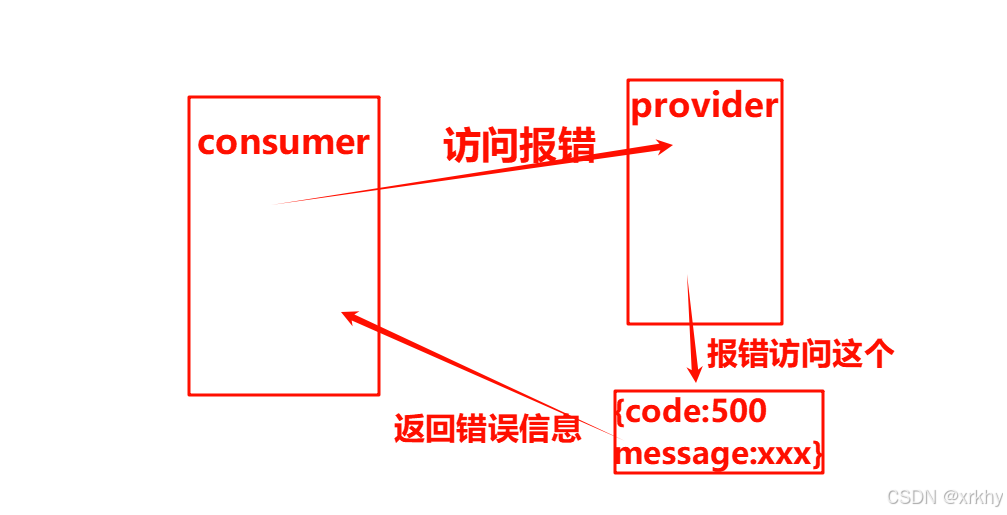
熔断降级就是起到保护的作用
比如consumer模块访问provider模块,但是provider模块出错误,我就会访问另一个服务,将code,message错误信息封装返回给provider模块。
修改bill-consumer模块
代码编写的整体思路如下

修改配置文件
在配置文件中添加
yml
feign: #开启熔断降级处理
  circuitbreaker:
    enabled: true
修改pom文件
这个在dependencies节点下添加。
注意不是dependencyManagement下的dependencies。
xml
<!-- 添加熔断降级依赖 -->
<dependency>
    <groupId>org.springframework.cloud</groupId>
    <artifactId>spring-cloud-starter-netflix-hystrix</artifactId>
    <version>2.2.9.RELEASE</version>
</dependency>
创建文件BillServiceImpl
在文件com/hsh/billconsumer7790/service/api文件下新建impl文件夹
java
package com.hsh.billconsumer7790.service.api.impl;
import com.hsh.billconsumer7790.service.api.BillService;
import com.hsh.utils.ResultJSON;
import org.springframework.stereotype.Component;
@Component
public class BillServiceImpl implements BillService {
@Override
public ResultJSON findBillListById(Integer id) {
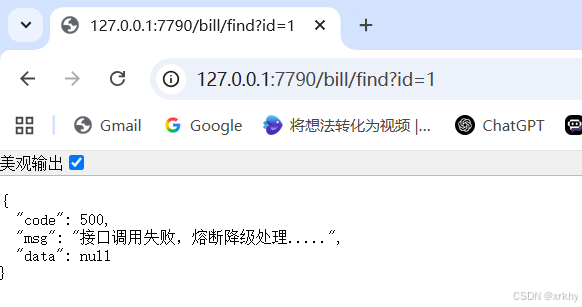
return ResultJSON.error("接口调用失败,熔断降级处理.....");
}
}修改BillService文件
给@FeignClient注解添加fallback属性用于熔断降级
java
package com.hsh.billconsumer7790.service.api;

import com.hsh.billconsumer7790.service.api.impl.BillServiceImpl;
import com.hsh.utils.ResultJSON;
import org.springframework.cloud.openfeign.FeignClient;
import org.springframework.web.bind.annotation.GetMapping;
import org.springframework.web.bind.annotation.RequestParam;

// @FeignClient()是调用的服务名称,即调用哪个模块哪个类
// 这里添加fallback = BillServiceImpl.class,表示如果调用失败,则调用BillServiceImpl中的方法
@FeignClient(name = "bill-provider-7780",path = "bill",fallback = BillServiceImpl.class)
public interface BillService {
    @GetMapping("/findBillListById")
    ResultJSON findBillListById(@RequestParam("id") Integer id);
}
修改bill-provider模块
修改BillServiceApi文件
路径如下com/hsh/billprovider7780/api添加除零错误,测试熔断降级
java
package com.hsh.billprovider7780.api;

import com.hsh.billprovider7780.service.BillService;
import com.hsh.utils.ResultJSON;
import org.springframework.beans.factory.annotation.Autowired;
import org.springframework.web.bind.annotation.GetMapping;
import org.springframework.web.bind.annotation.RequestMapping;
import org.springframework.web.bind.annotation.RequestParam;
import org.springframework.web.bind.annotation.RestController;

@RestController
@RequestMapping("/bill")
public class BillServiceApi {
    @Autowired
    private BillService billService;
    @GetMapping("/findBillListById")
    public ResultJSON findBillListById(@RequestParam("id")Integer  id){
        // 添加除零错误
        int i = 1/0;
        return billService.findBillListById(id);
    }
}
熔断降级测试
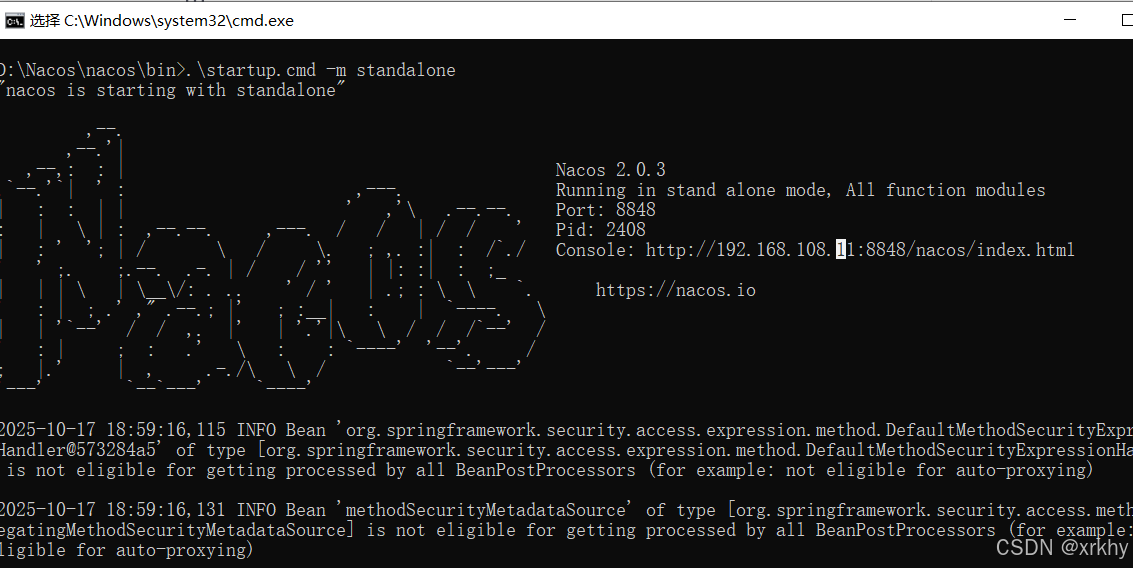
先去启动nacos
再去开启你的两个模块
输入路劲http://127.0.0.1:7790/bill/find?id=1
结果如下
loadBalancer负载均衡
SpringCloud 从 2020.0.1 版本开始,移除了 Ribbon 组件,使⽤Spring Cloud LoadBalancer 组件来代替 Ribbon 实现客户端负载均衡
下面开始讲解负载均衡
关闭idea
我们先把项目停下来,然后关闭idea
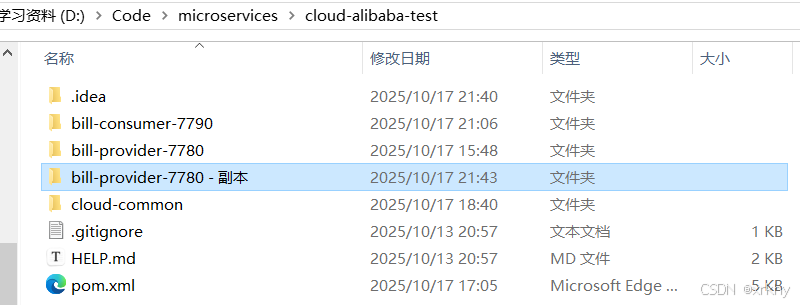
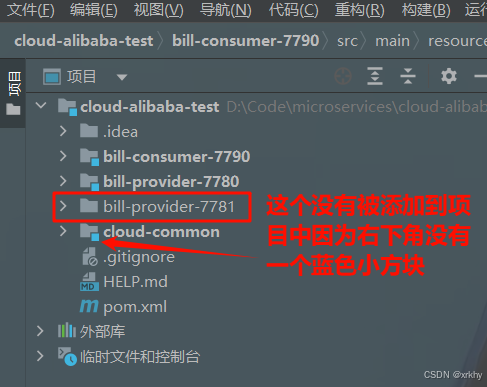
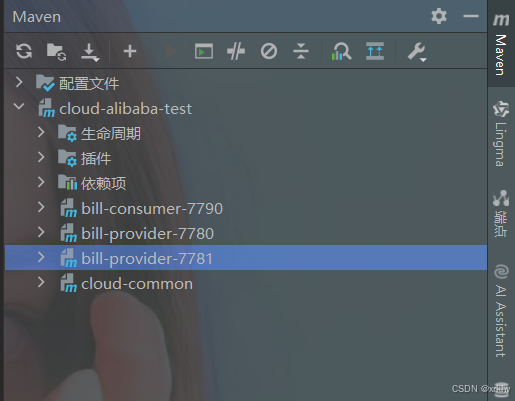
复制一个bill-provider项目
我们打开刚刚的项目所在文件夹,复制一下bill-provider-7780项目。
 将
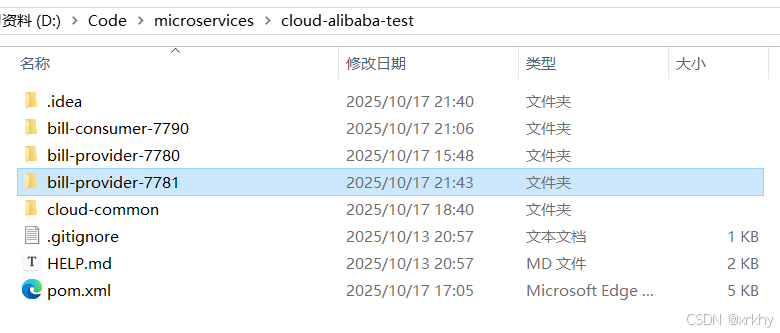
将bill-provider-7780 - 副本重命名为bill-provider-7781
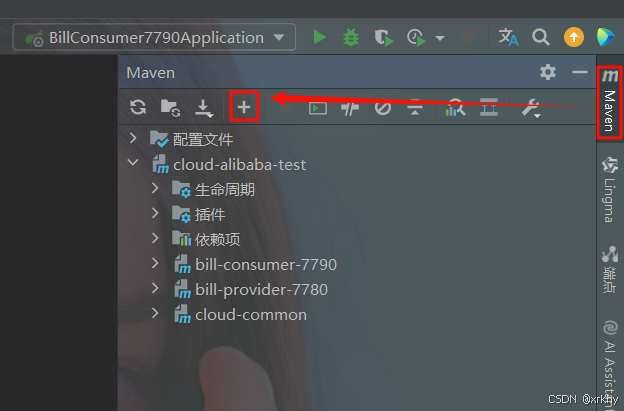
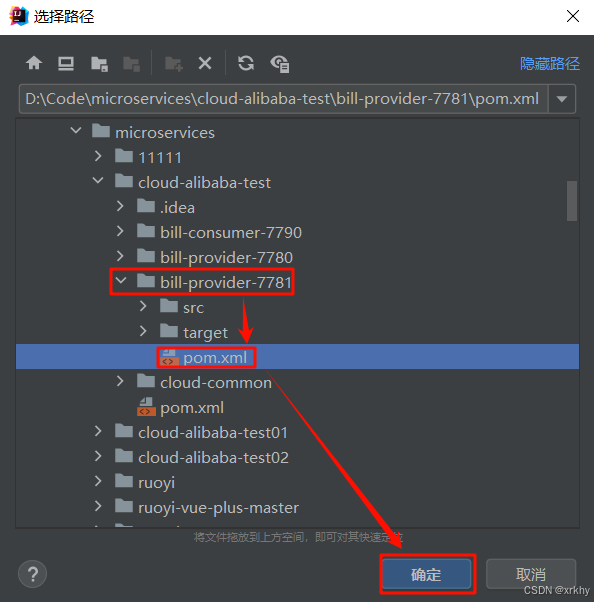
使用idea打开刚刚的项目加入项目
打开maven点击加号
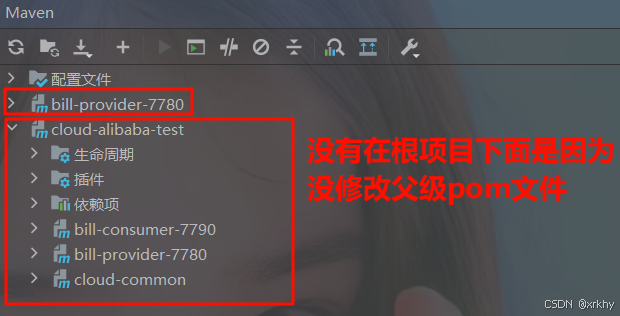
解决办法就是修改父级文件
修改父级pom文件
xml
<modules>
    <!-- ......-->
    <!-- 引入bill-provider-7781  -->
    <module>bill-provider-7781</module>
</modules>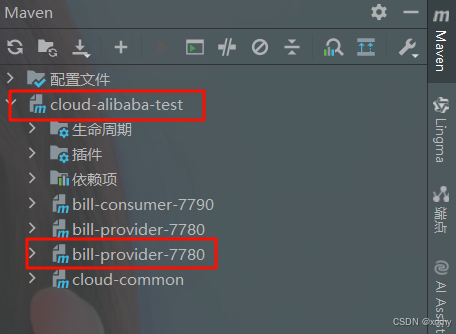
出现两个7780是因为还没有修改bill-provider-7781模块配置文件
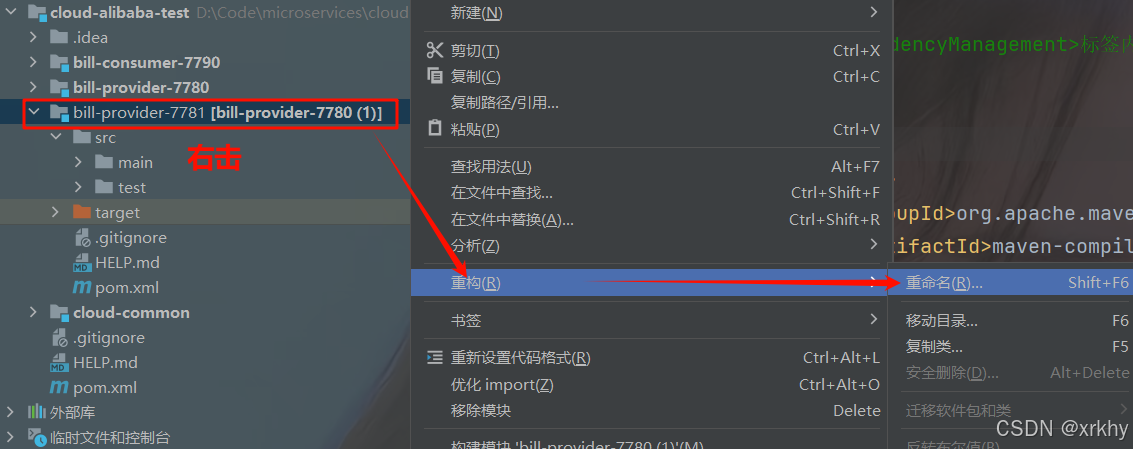
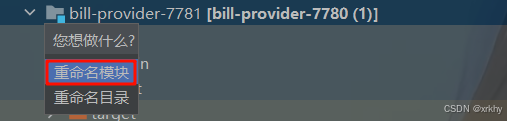
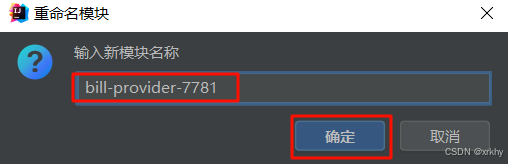
修改bill-provider-7781模块
修改模块名
修改pom文件
将pom文件中的所有7780改为7781,可通过ctrl+F搜索替换
然后重启idea并刷新maven
此时打开maven两个7780就改回来了。
修改文件或者文件夹为7781
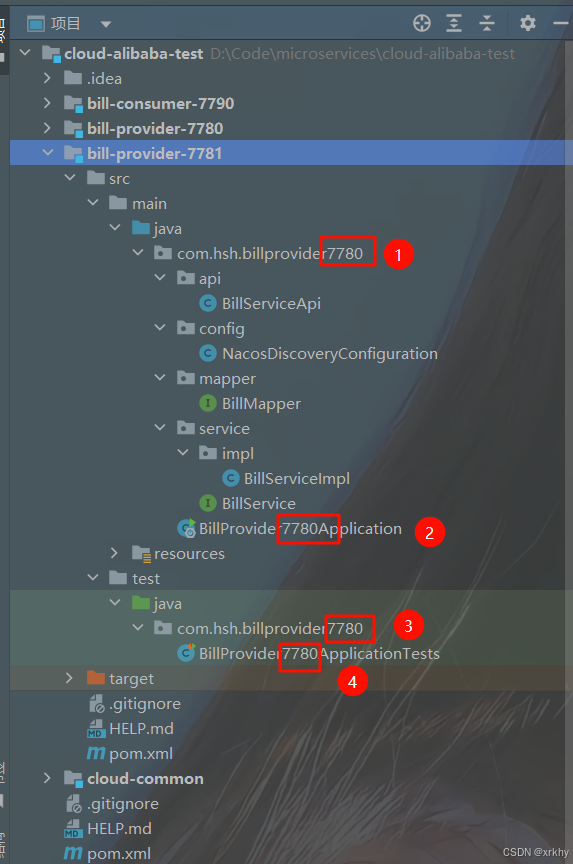
注意重构的时候只选择当前文件
修改启动类
java
package com.hsh.billprovider7781;

import org.mybatis.spring.annotation.MapperScan;
import org.springframework.boot.SpringApplication;
import org.springframework.boot.autoconfigure.SpringBootApplication;

@SpringBootApplication
// 将扫包的7780改为7781
@MapperScan("com.hsh.billprovider7781.mapper")
public class BillProvider7781Application {

    public static void main(String[] args) {
        SpringApplication.run(BillProvider7781Application.class, args);
    }
}
修改配置文件
只修改端口号即可,服务名不需要修改,因为负载均衡本身就是针对两个相同的项目
yml
server:
  port: 7781  # 端口号修改
spring:
  application:
    name: bill-provider-7780 # 服务名不修改
# .....
测试
启动nacos
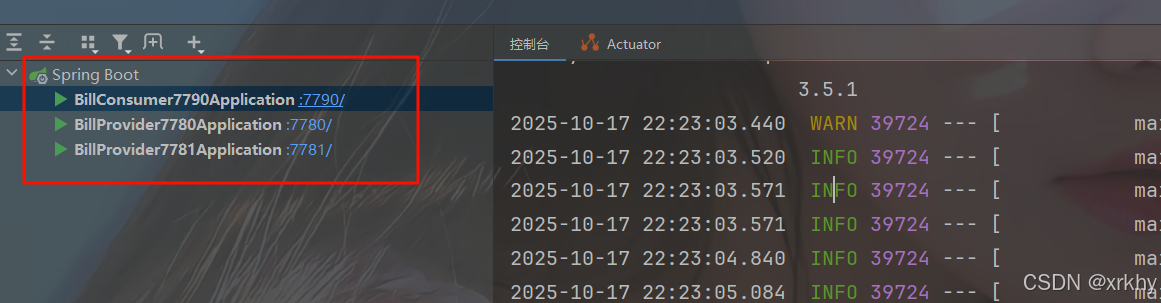
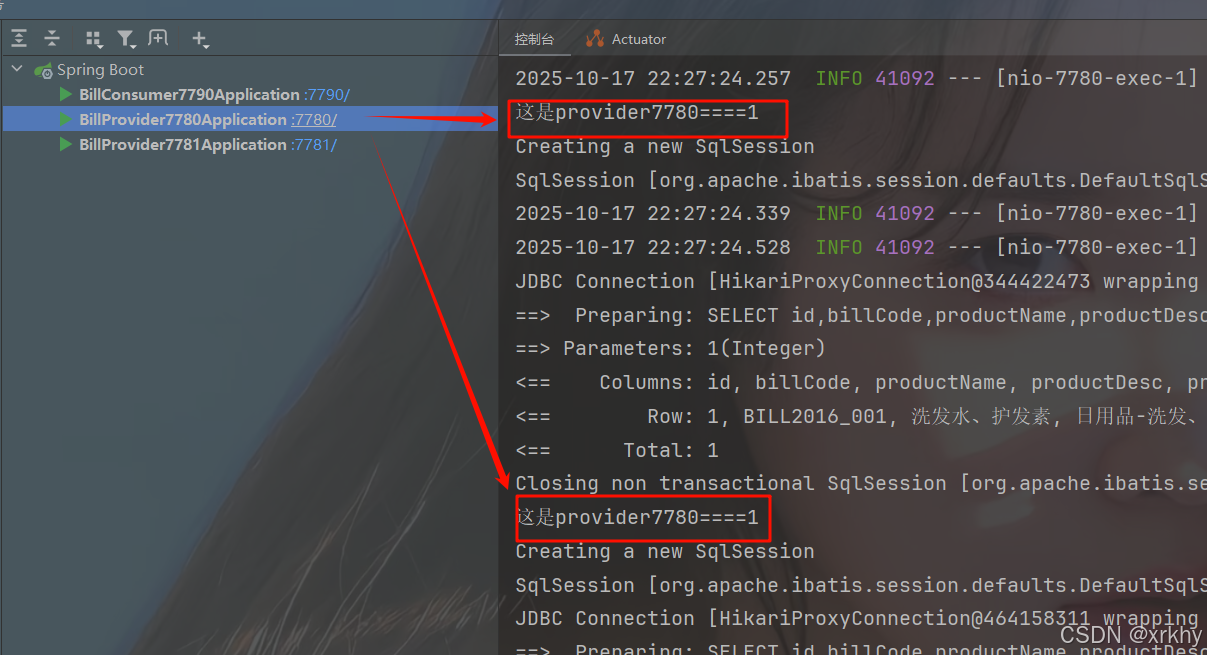
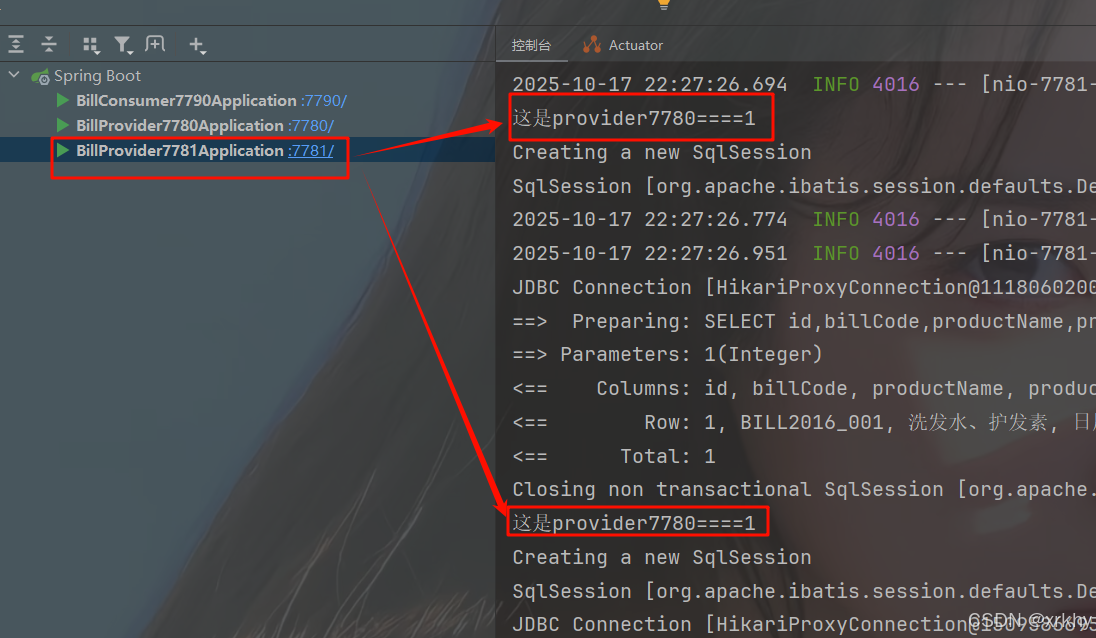
启动三个启动类
记得将
int i = 1/0错误那行代码注释掉
打开nacos可视化界面
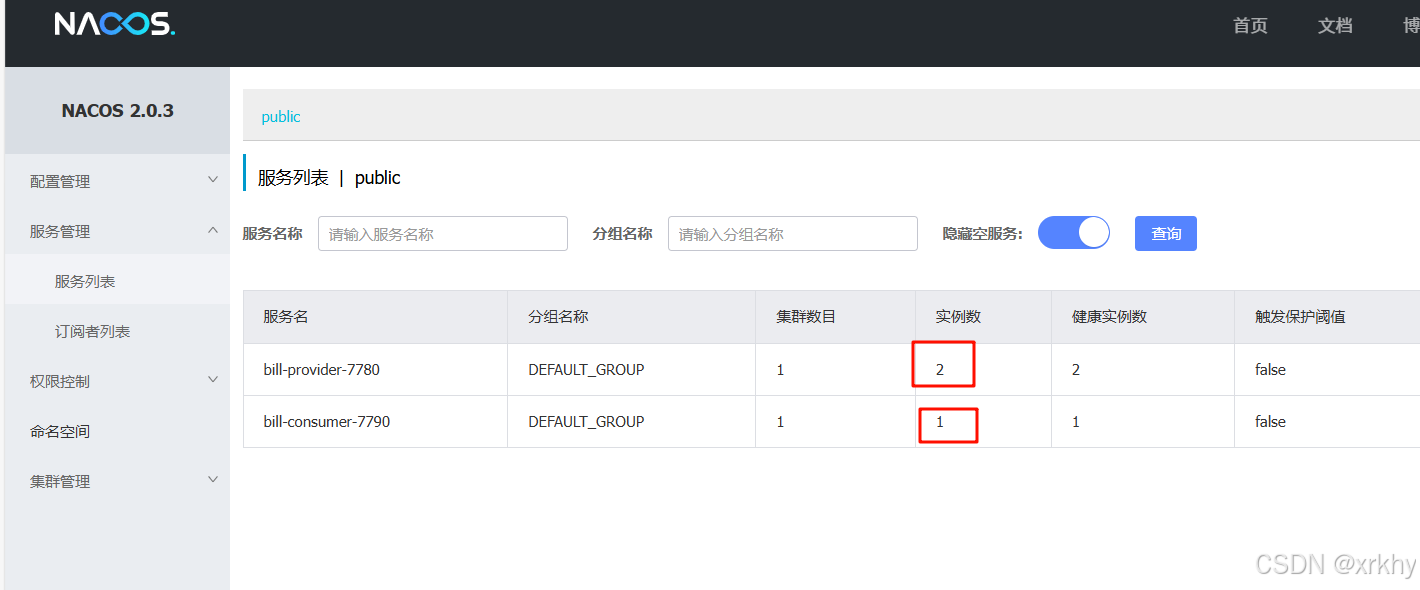
多次访问http://127.0.0.1:7790/bill/find?id=1
我们访问http://127.0.0.1:7790/bill/find?id=1发现 两个都有输出这就是负载均衡。
loadBalancer负载均衡的随机策略
修改bill-consumer-7790
在consumer中引入jar文件
这个jar包引过就不需要再去引用了。
xml
<!--客户端负载均衡loadbalancer-->
<dependency>
	<groupId>org.springframework.cloud</groupId>
	<artifactId>spring-cloud-starter-loadbalancer</artifactId>
</dependency>
注意:将两个provider服务名改为一致,端口号不一致,consumer中调用服务(一个provider两个实例)
新建RandomLoadBalancerConfig
在config包中添加配置类RandomLoadBalancerConfig,实现随机策略
java
package com.hsh.billconsumer7790.config;

import org.springframework.cloud.client.ServiceInstance;
import org.springframework.cloud.loadbalancer.core.RandomLoadBalancer;
import org.springframework.cloud.loadbalancer.core.ReactorLoadBalancer;
import org.springframework.cloud.loadbalancer.core.ServiceInstanceListSupplier;
import org.springframework.cloud.loadbalancer.support.LoadBalancerClientFactory;
import org.springframework.context.annotation.Bean;
import org.springframework.core.env.Environment;

public class RandomLoadBalancerConfig {
    @Bean
    ReactorLoadBalancer<ServiceInstance> randomLoadBalancer(
            Environment environment, LoadBalancerClientFactory
            loadBalancerClientFactory) {
        String name =
                environment.getProperty(LoadBalancerClientFactory.PROPERTY_NAME);
        return new RandomLoadBalancer(loadBalancerClientFactory
                .getLazyProvider(name, ServiceInstanceListSupplier.class),
                name);
    }
}
修改BillServive文件
java
package com.hsh.billconsumer7790.service.api;

import com.hsh.billconsumer7790.config.RandomLoadBalancerConfig;
import com.hsh.billconsumer7790.service.api.impl.BillServiceImpl;
import com.hsh.utils.ResultJSON;
import org.springframework.cloud.loadbalancer.annotation.LoadBalancerClient;
import org.springframework.cloud.openfeign.FeignClient;
import org.springframework.web.bind.annotation.GetMapping;
import org.springframework.web.bind.annotation.RequestParam;

// @FeignClient()是调用的服务名称,即调用哪个模块哪个类
// 这里添加fallback = BillServiceImpl.class,表示如果调用失败,则调用BillServiceImpl中的方法
@FeignClient(name = "bill-provider-7780",path = "bill",fallback = BillServiceImpl.class)
// 引用负载均衡  name表示对那个模块进行负载均衡 configuration 表示使用什么负载均衡算法
@LoadBalancerClient(name = "bill-provider",configuration = RandomLoadBalancerConfig.class)
public interface BillService {
    @GetMapping("/findBillListById")
    ResultJSON findBillListById(@RequestParam("id") Integer id);
}
未完待续...
请看下一篇博客微服务之配置中心Nacos