layuiadmin更新到2.7.0了(https://dev.layuion.com/themes/layuiadmin)。
作为老用户,很高兴又有更新了。
Herd的Nginx模式一直没搞懂,弄了一下没通。换成PHPstudy了。
先下载PHPstudy8.1,安装。然后从php官网下载php8.3,或者最新的php8.5或者php8.4等等。因为phpcas目前最高只支持php8.3,所以我下载的是php8.3。
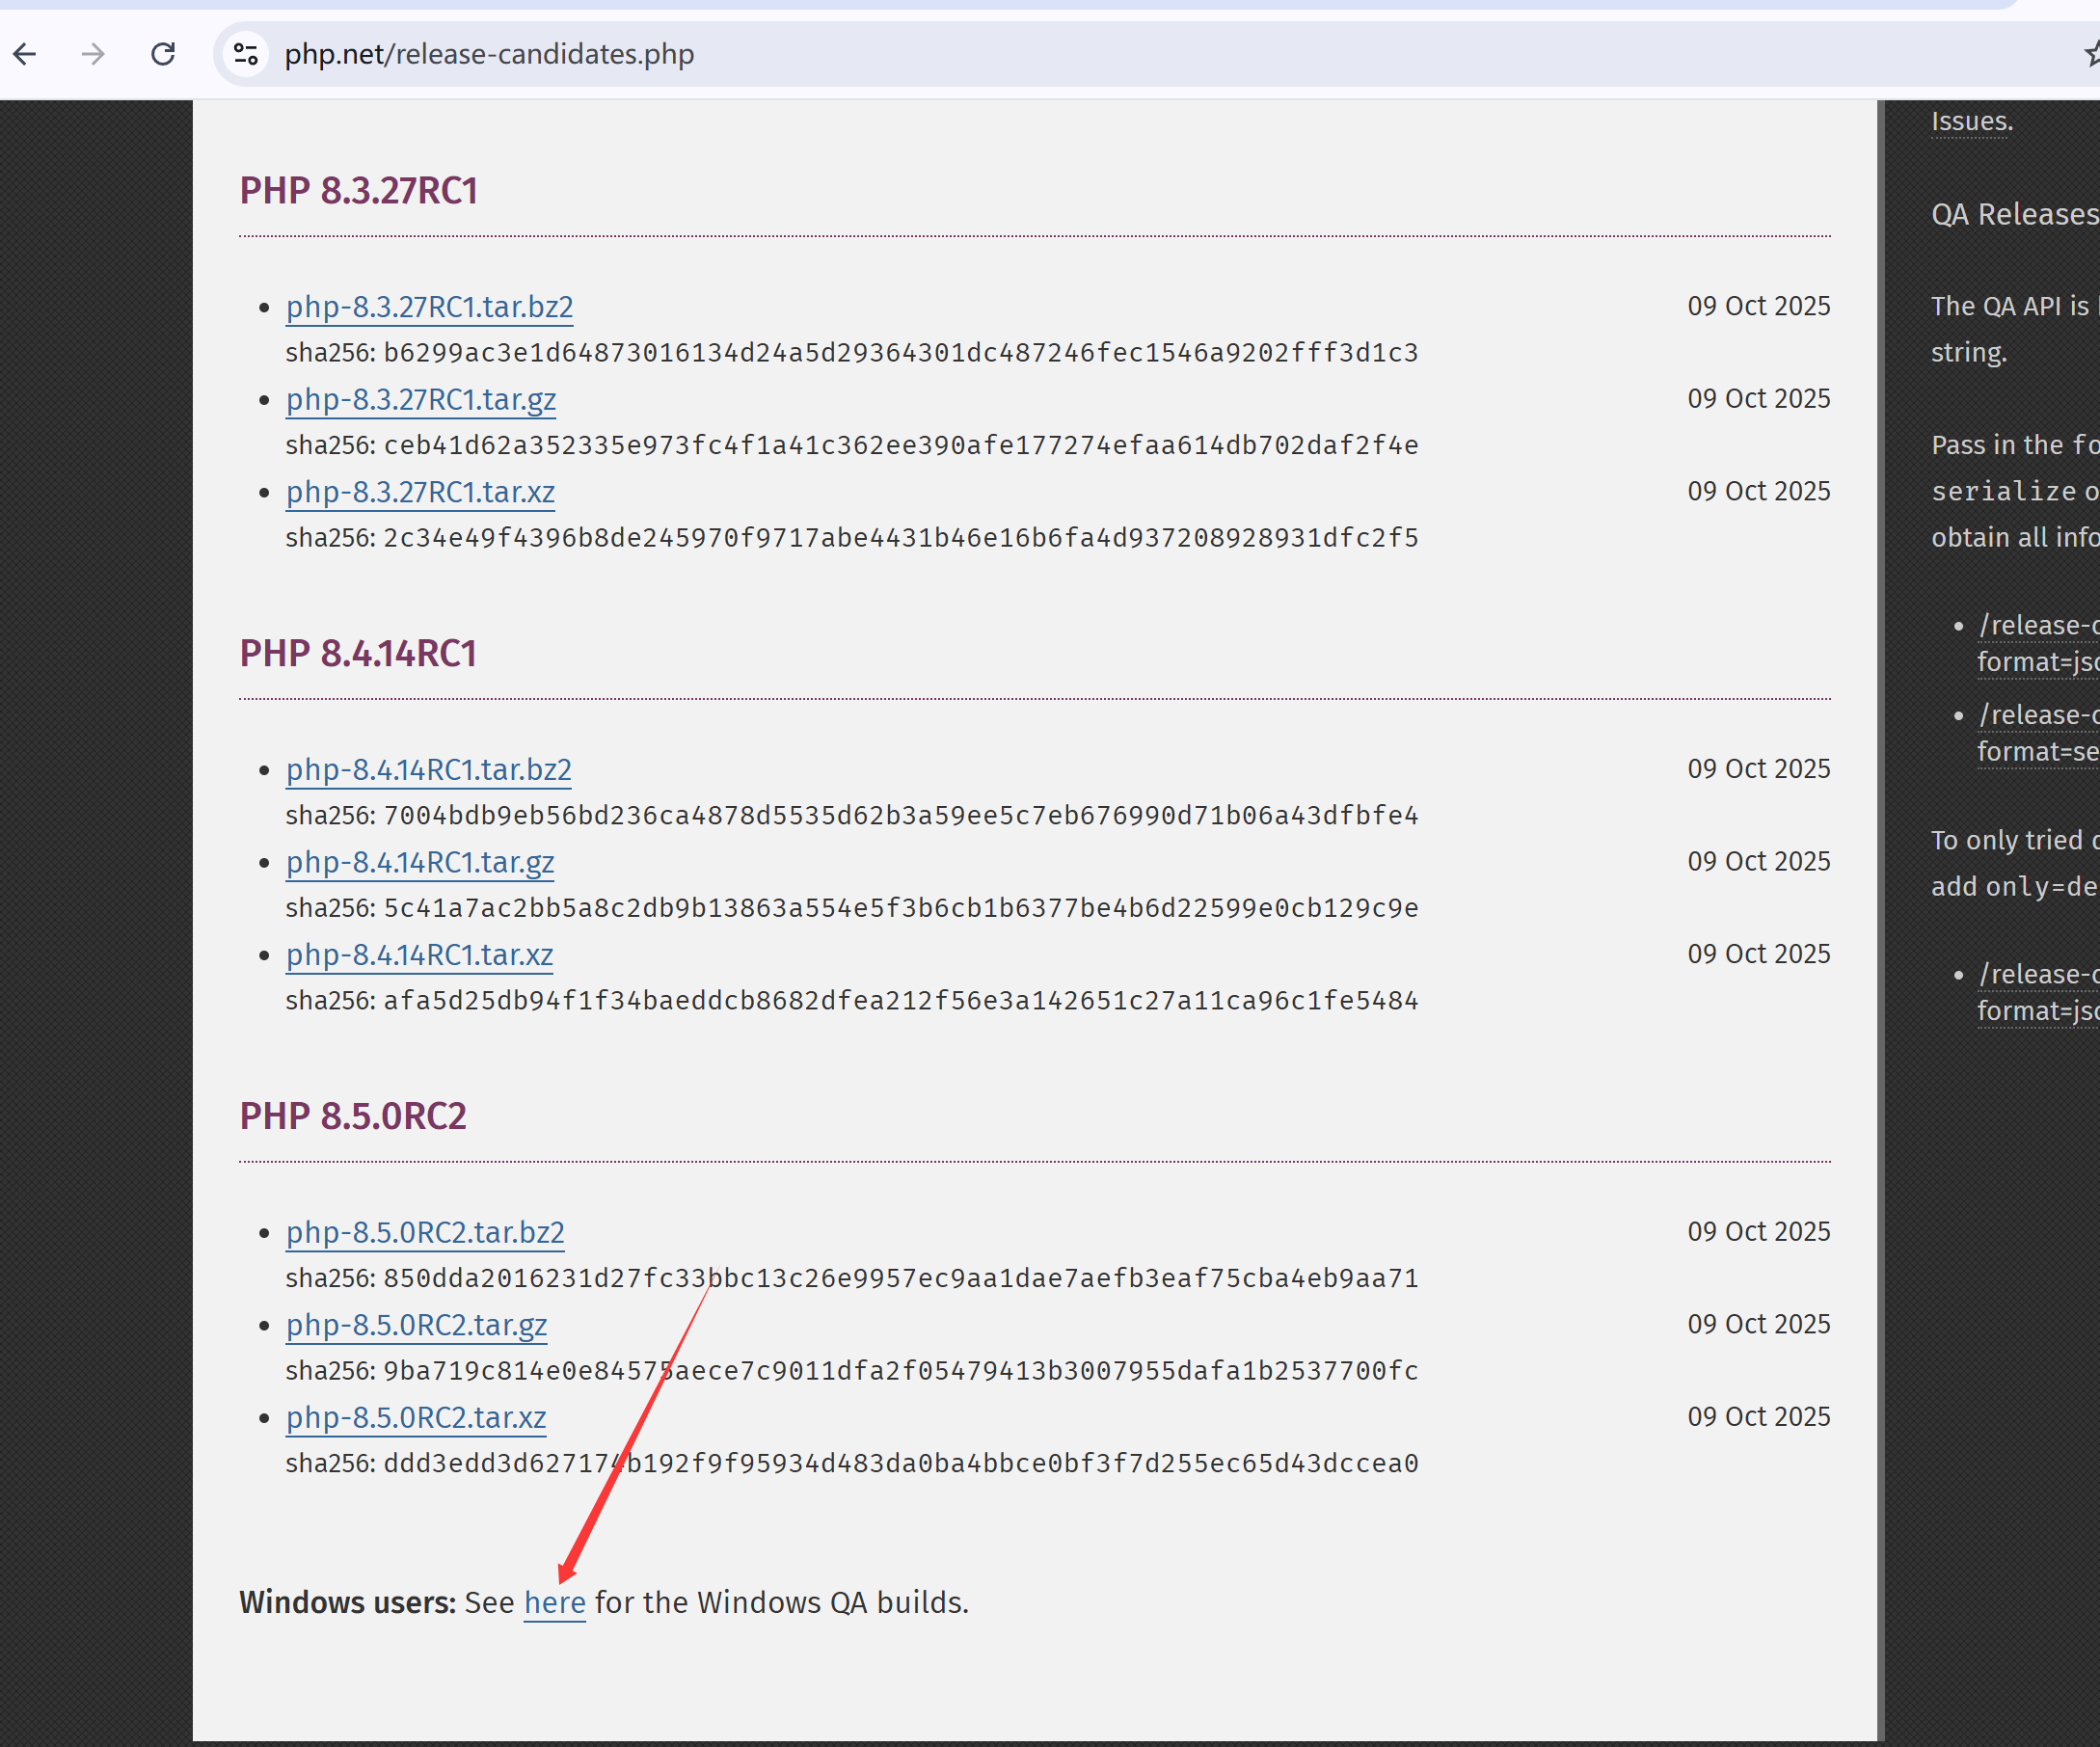
点击下面这里,换成Windows环境的php8.3包,
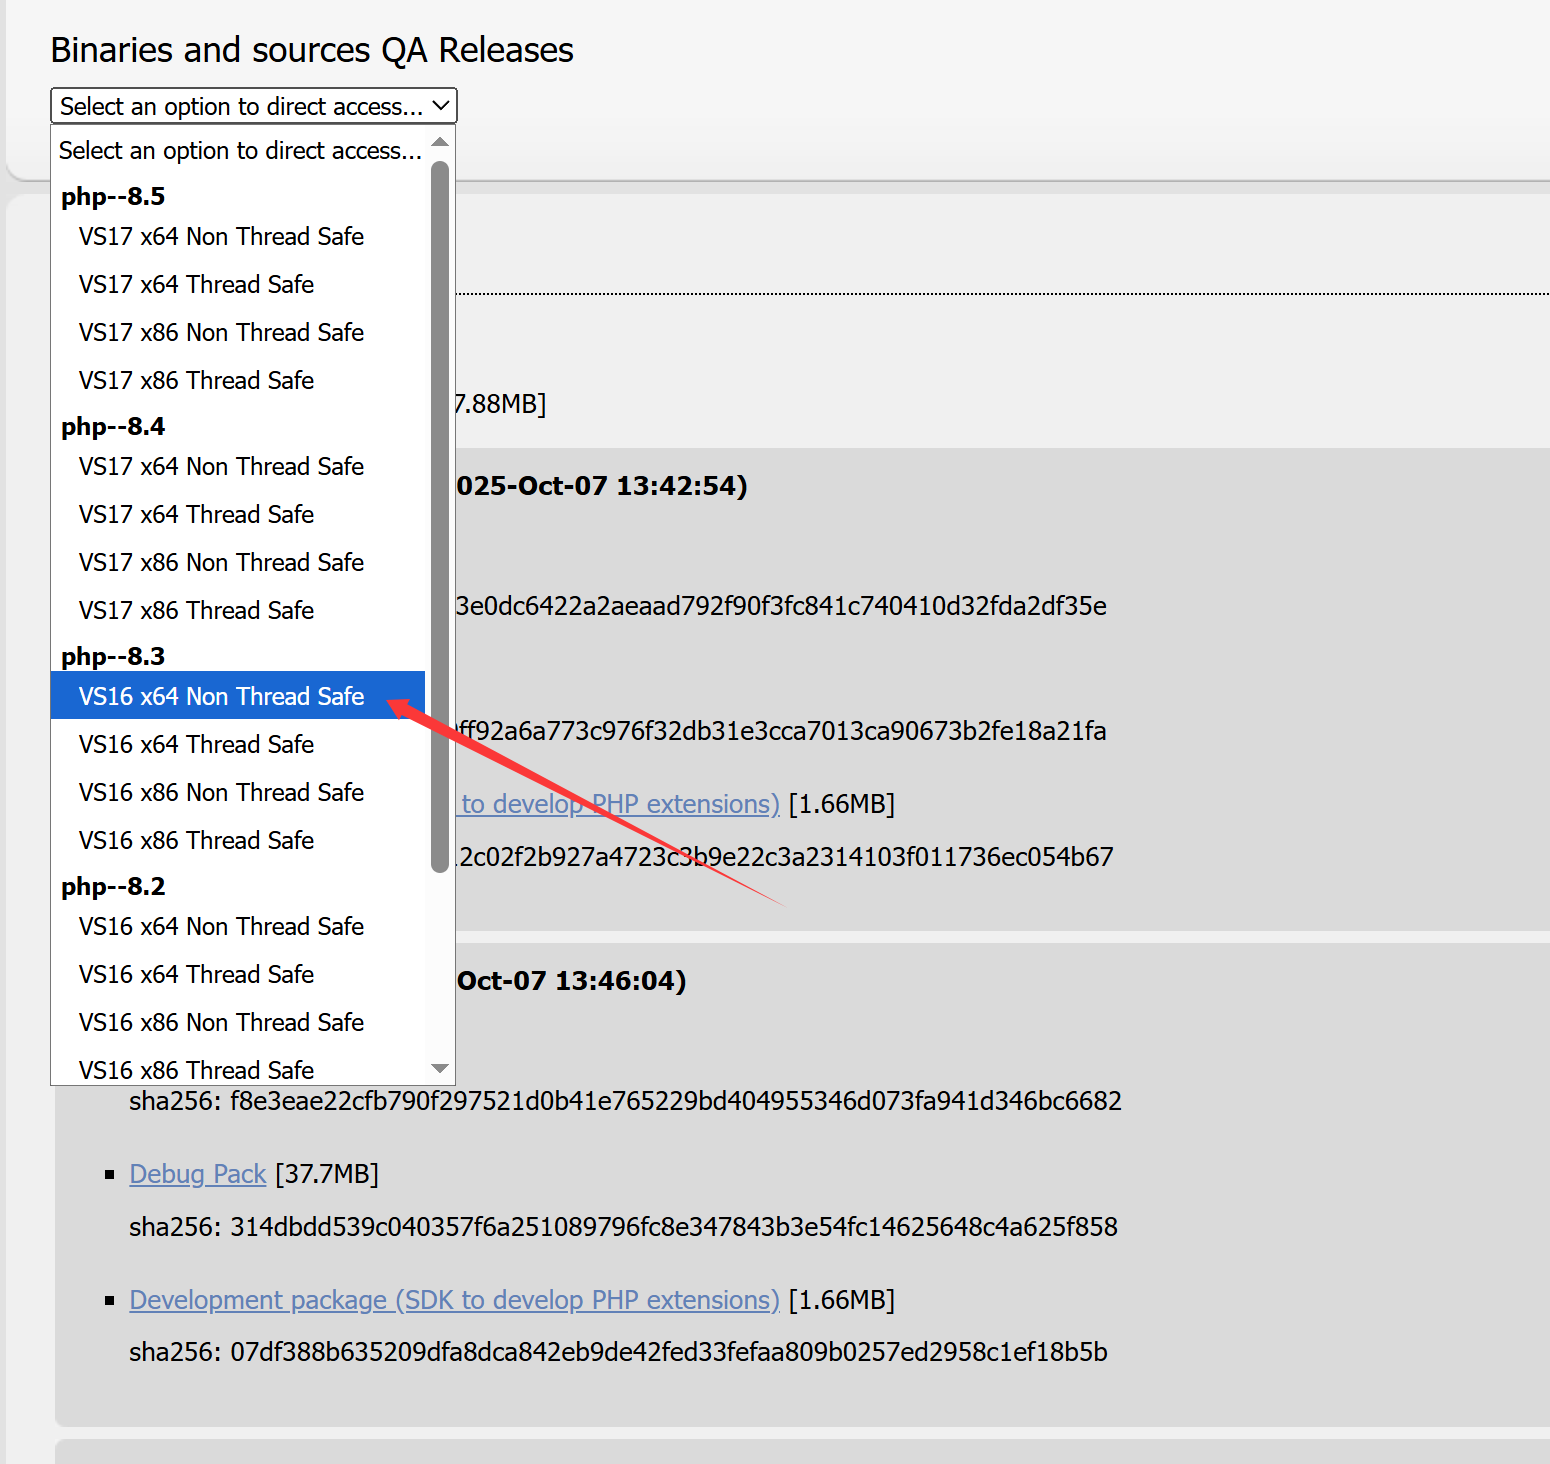
选择对应的php版本。下载zip压缩包,解压到
C:\phpstudy_pro\Extensions\php文件夹里,模仿php7.3.4nts这个命名方式,把8.3命名为php8.3.27nts。
在PHPstudy里需要添加3个网站。第一个域名站,就是实际的真实域名站80端口的,在cas认证服务器里进入白名单的那个域名。这个站就是一个空站。但是它的Nginx配置是最主要的。
在PHPstudy的设置-》配置文件,可以看到新建的域名站的配置文件,xxx.com_80,点击打开,编辑为:
server {
        listen        80;
        server_name  xxx.com;

        # 前端 layuiadmin 站点
        location / {
        proxy_pass http://localhost:5500;
        proxy_set_header Host $host;
        proxy_set_header X-Real-IP $remote_addr;
        }

    # 后端api
    location /api {
        proxy_pass http://localhost:8000;
        proxy_set_header Host $host;
        proxy_set_header X-Real-IP $remote_addr;
    }

}
主站就建好了。
然后就是前端的layuiadmin站点了。建立一个包含5500的端口的站点。为什么用5500呢?没有特定含义,我有时候习惯使用live server,直接在vscode上右键就打开了,属于个人习惯,可以随意换成其他端口。
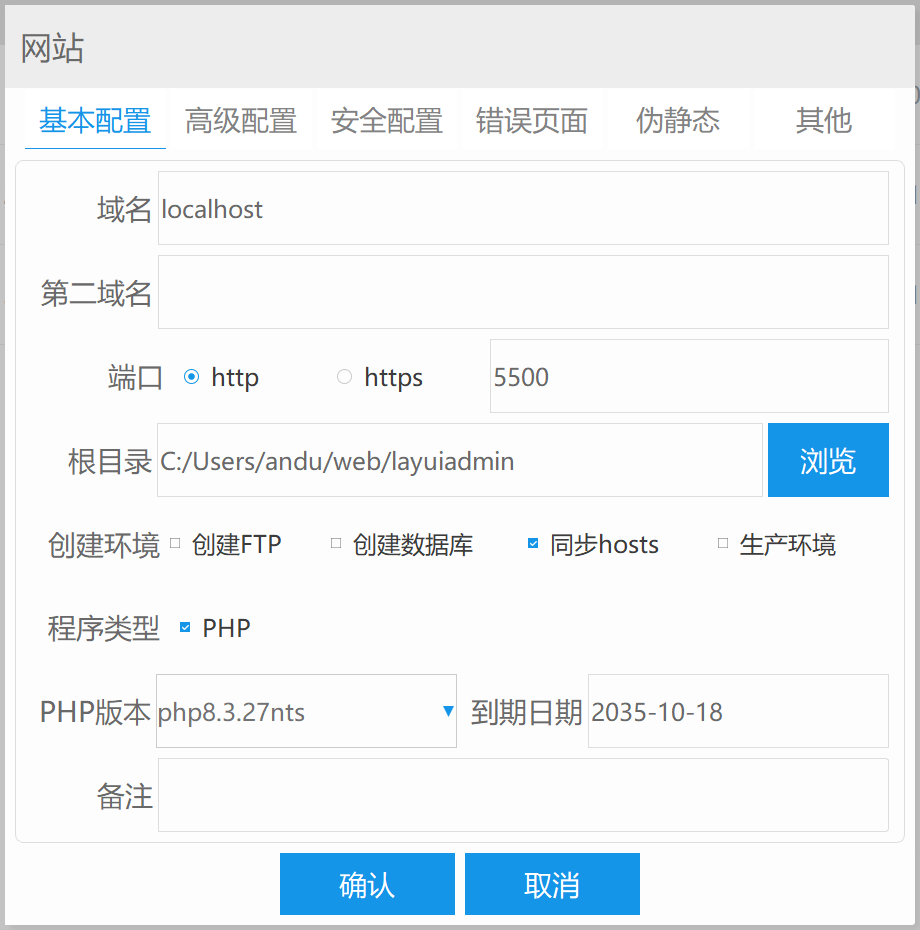
建好后,把layuiadmin的singe文件夹里的内容都丢到这个文件夹里即可。layuiadmin自带路由,放到web环境里,就可以自成一个站点。
然后就是添加后端的laravel12了。
先把PHPstudy目录下的php8.3文件夹放到系统的环境变量里。
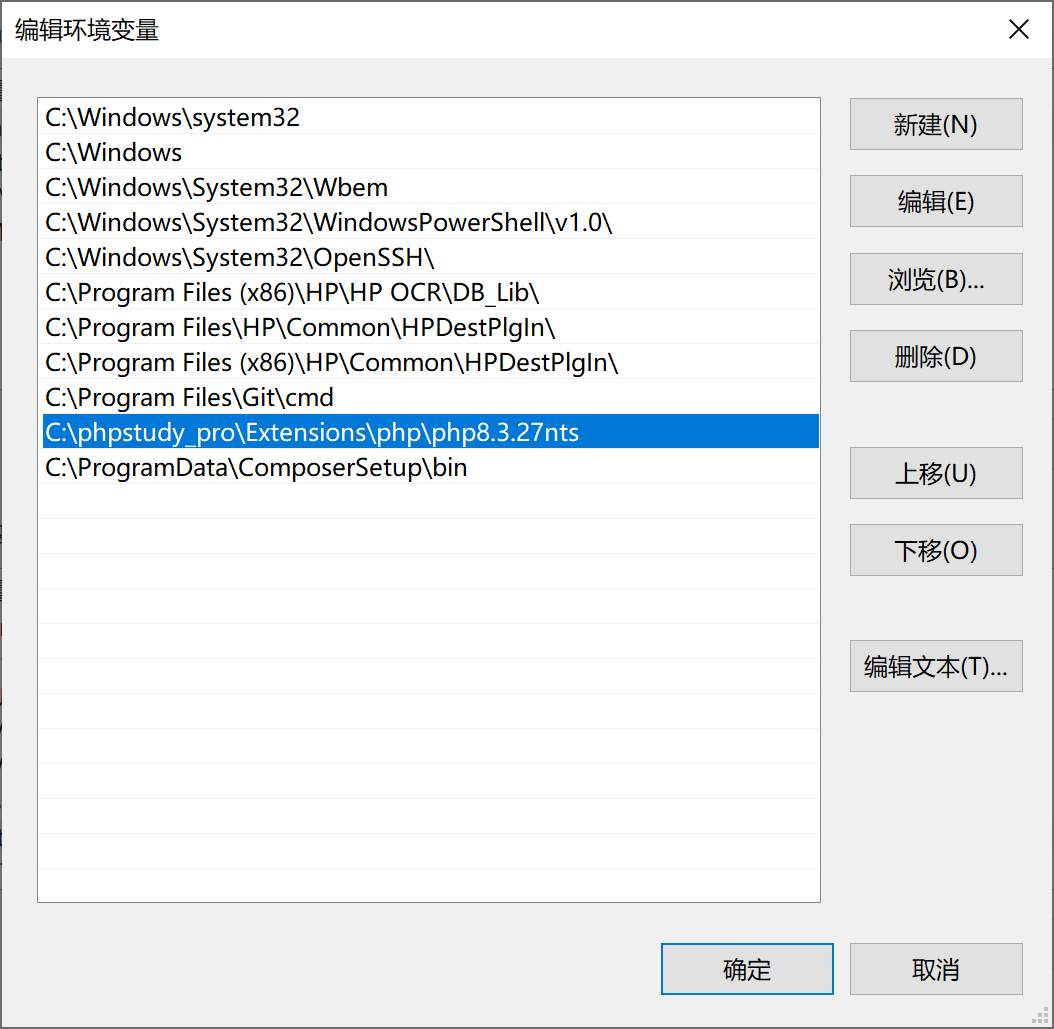
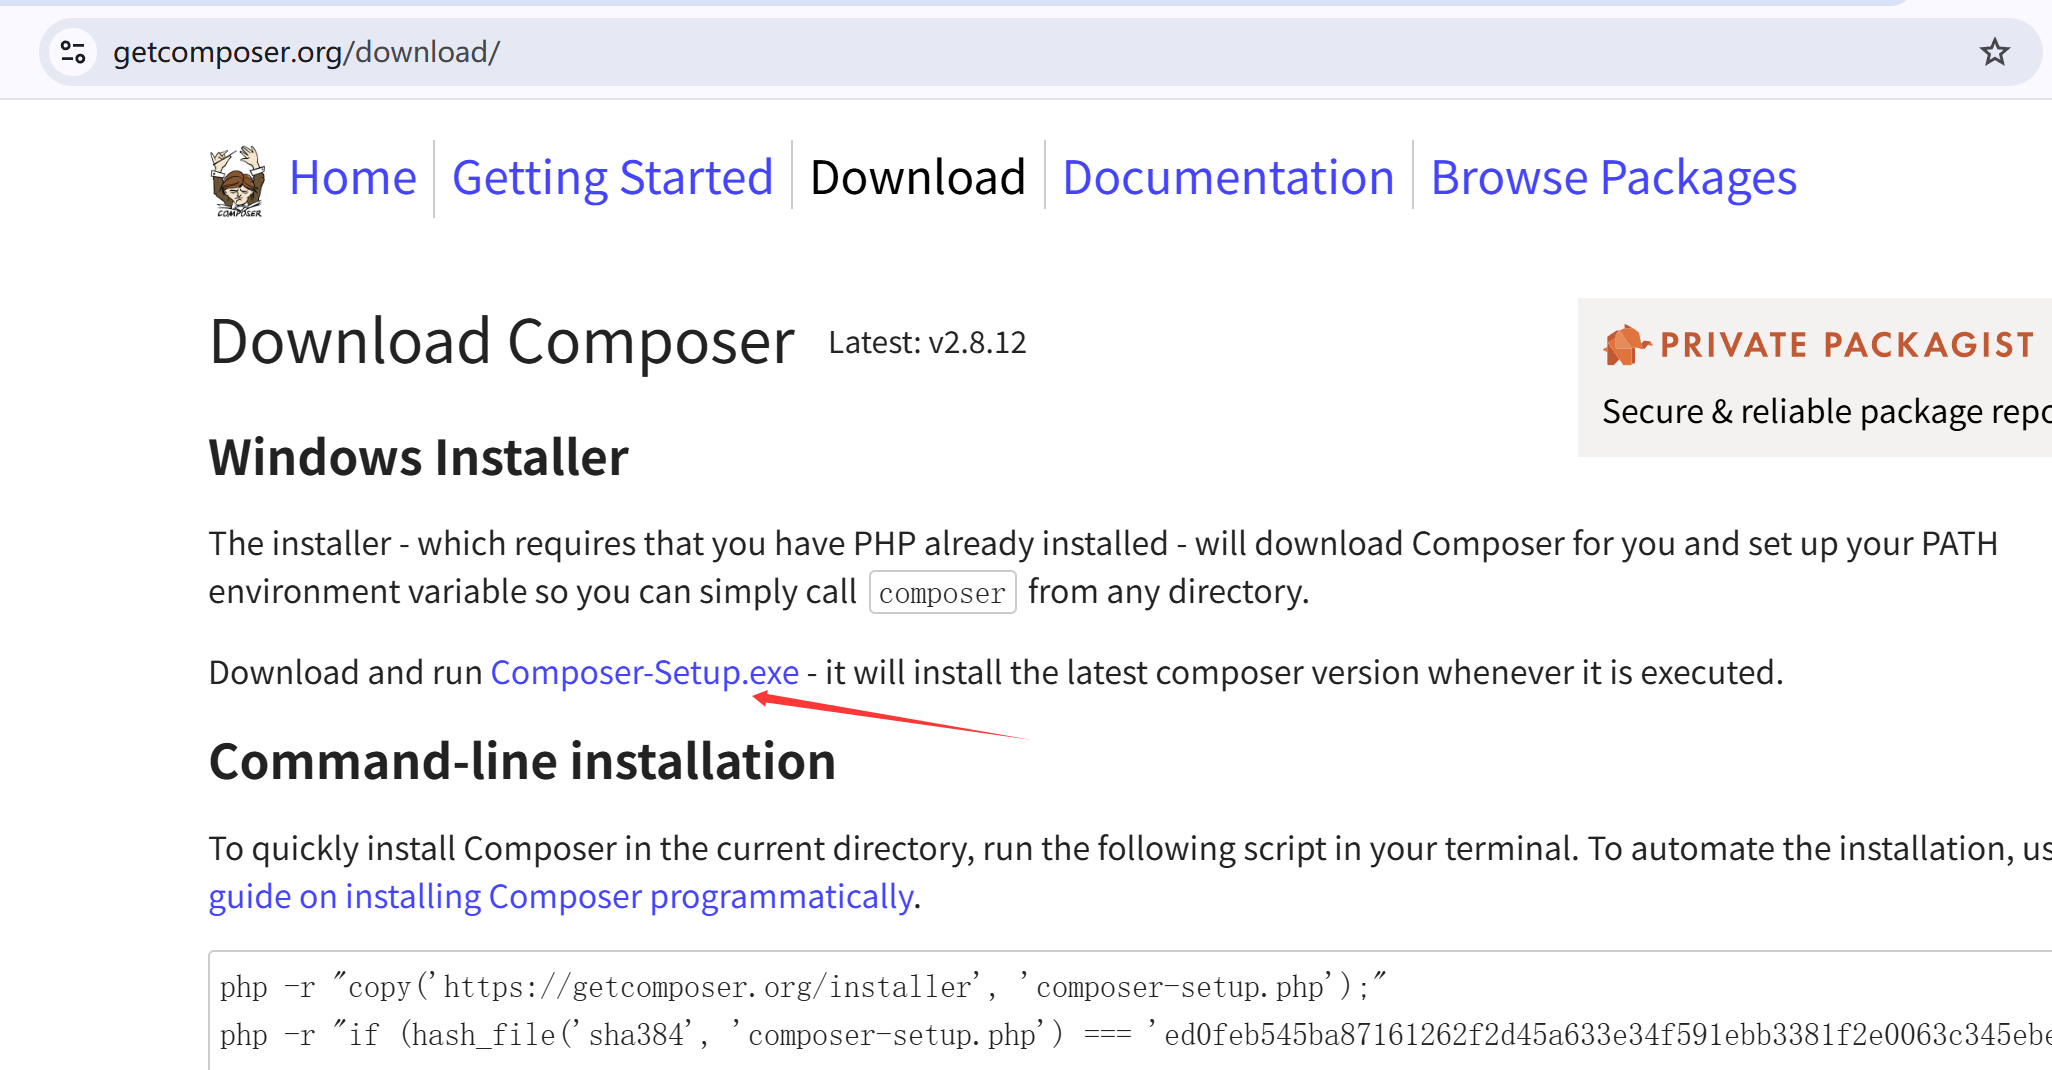
这样就可以在任意打开的cmd命令行里运行php命令了。然后下载composer最新版,直接安装。
然后使用命令安装laravel安装器:
composer global require laravel/installer安装好安装器后,就可以新建laravel最新版了:
laravel new example-app注意,PHPstudy的路径需要指向laravel的public文件夹,宝塔的站点配置里可以指定运行目录。PHPstudy没有这个功能。

然后就是laravel的Nginx配置了:
        location / {
            index index.php index.html error/index.html;
            include C:/Users/andu/web/one/public/nginx.htaccess;
            autoindex  off;
            if (!-e $request_filename) {
                rewrite ^(.*)$ /index.php?s=/$1 last;
                break;
            }
        }
注意,如果点击了PHPstudy的该站点的伪静态,有可能会重置这个配置文件到默认的时候,就要把它修改过来。这个配置是解决只能访问laravel首页的Nginx配置。
记住,每次修改vhosts.conf配置文件,都需要重启Nginx服务,PHPstudy上就是在首页里点击WNMP停止,再点击启动。默认配置如下。
server {
        listen        80;
        server_name  localhost;
        root   "C:/phpstudy_pro/WWW";
        location / {
            index index.php index.html;
            error_page 400 /error/400.html;
            error_page 403 /error/403.html;
            error_page 404 /error/404.html;
            error_page 500 /error/500.html;
            error_page 501 /error/501.html;
            error_page 502 /error/502.html;
            error_page 503 /error/503.html;
            error_page 504 /error/504.html;
            error_page 505 /error/505.html;
            error_page 506 /error/506.html;
            error_page 507 /error/507.html;
            error_page 509 /error/509.html;
            error_page 510 /error/510.html;
            autoindex  off;
        }
        location ~ \.php(.*)$ {
            fastcgi_pass   127.0.0.1:9001;
            fastcgi_index  index.php;
            fastcgi_split_path_info  ^((?U).+\.php)(/?.+)$;
            fastcgi_param  SCRIPT_FILENAME  $document_root$fastcgi_script_name;
            fastcgi_param  PATH_INFO  $fastcgi_path_info;
            fastcgi_param  PATH_TRANSLATED  $document_root$fastcgi_path_info;
            include        fastcgi_params;
        }
}
laravel 12做api后端接口时,默认是没有routes/api.php文件的。需要使用命令生成:
php artisan install:apiroutes/api.php
<?php

use Illuminate\Http\Request;
use Illuminate\Support\Facades\Route;
use App\Http\Controllers\Api\UserController;

Route::get('/user', function (Request $request) {
    return $request->user();
})->middleware('auth:sanctum');

Route::get('/users',[UserController::class,'index']); // 新添加
添加了UserController的index方法,获取所有用户。先生成一些用户。
DatabaseSeeder.php
User::factory(50)->create();使用命令:
php artisan db:seed 自动生成50个用户模拟数据了。
生成控制器:
php artisan make:seed UserSeeder添加index方法:
<?php
namespace App\Http\Controllers\Api;
use App\Http\Controllers\Controller;
use Illuminate\Http\Request;
use App\Models\User;
class UserController extends Controller
{
public function index()
{
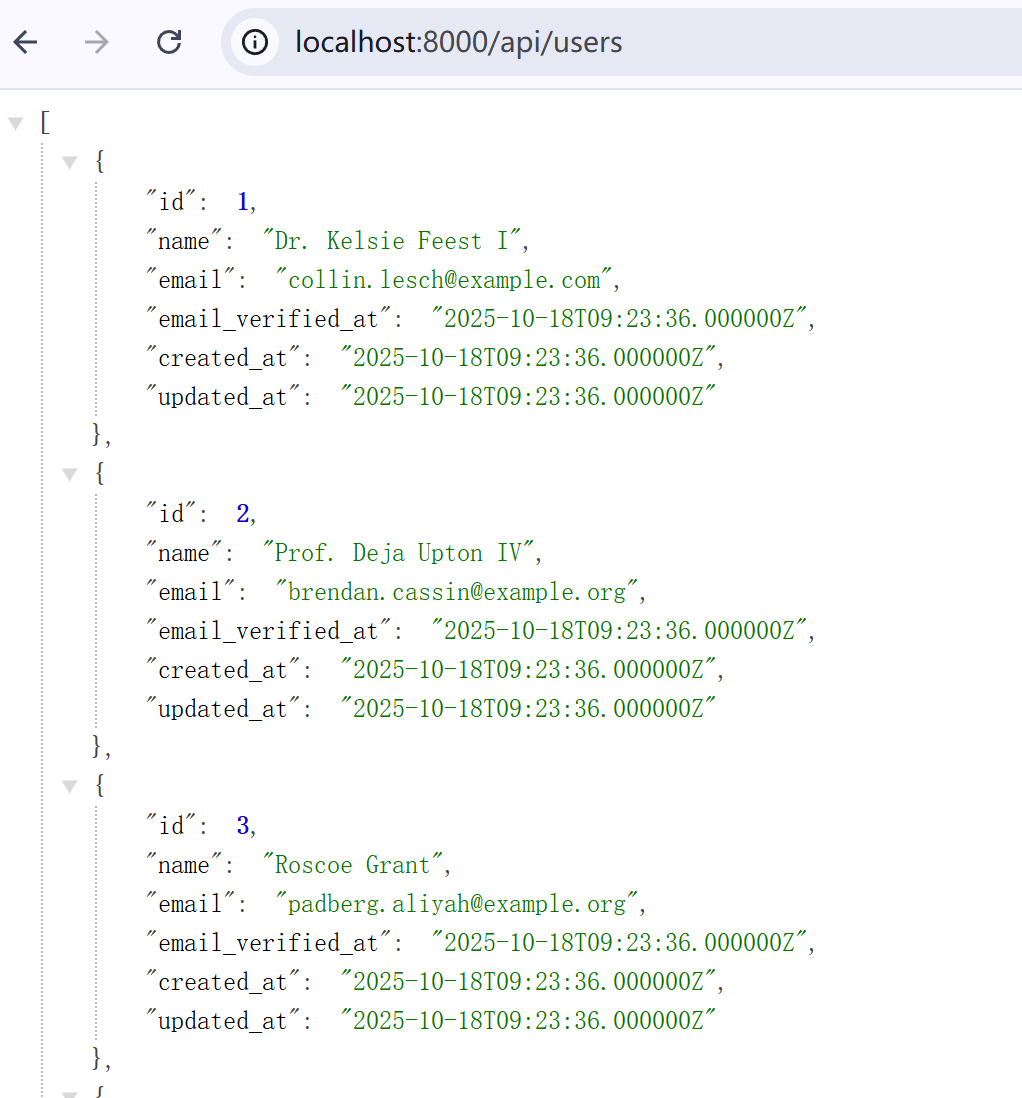
return User::all();
}
}这个时候访问http://localhost:8000/api/users,就可以看到数据了:
Controllers/Api文件夹下的控制器,返回的数据实体对象,会自动的转换成json对象,传递出去。如果是在Controllers下面的控制器,就需要转换一下:
// Returning a collection of models
$users = User::all();
return response()->json($users);
如果是layui 的 table,还需要返回特定的参数:
class UserController extends Controller
{
    public function getTableData(Request $request)
    {
        // 获取分页参数
        $page = $request->get('page', 1);
        $limit = $request->get('limit', 10);

        // 使用 Eloquent 模型的 paginate 方法,它会自动处理分页
        $data = User::paginate($limit, ['*'], 'page', $page);

        // 构造符合 layui 要求的 JSON 格式
        $response = [
            'code' => 0, // 成功状态码
            'msg' => '', // 提示信息
            'count' => $data->total(), // 总数据条数
            'data' => $data->items(), // 当前页数据
        ];

        return response()->json($response);
    }
}
虽然api文件夹下的控制器返回的实体对象,会自动转换成json对象,但如果你返回本身就是json对象,那也可以啊,laravel会保持沉默。除了Eloquent对象会自动转换,其他的都不会。
添加一个给layui的table接收的方法:
public function index2(Request $request)
{
// 从layui table获取分页参数,如果没有则使用默认值
$page = $request->get('page', 1);
$limit = $request->get('limit', 10);
// 使用Laravel的Eloquent模型进行分页查询
$users = User::paginate($limit, ['*'], 'page', $page);
// 构造符合layui table要求的JSON格式
$response = [
'code' => 0, // 状态码:0代表成功
'msg' => '', // 提示信息
'count' => $users->total(), // 总数据条数
'data' => $users->items(), // 当前页数据
];
return response()->json($response);
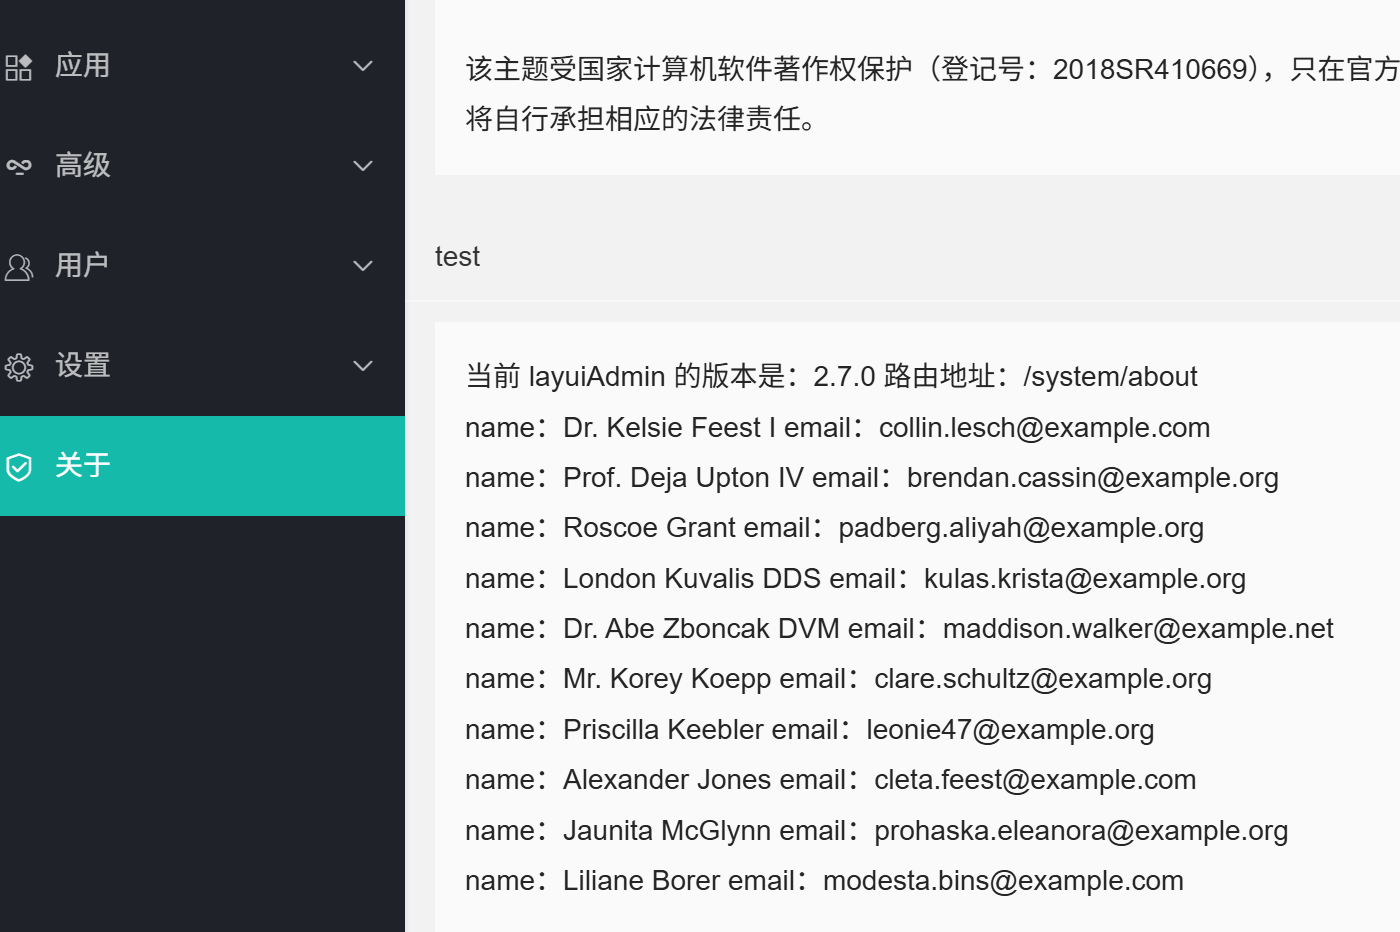
}在/#/system/about页面里,添加引用代码:
<div class="layui-card-header">test</div>
<div class="layui-card-body layui-text layadmin-about">
  <blockquote class="layui-elem-quote" style="border: none;">
    <script type="text/html" template>
  当前 layuiAdmin 的版本是:{{= layui.admin.v }}
  路由地址:{{= layui.hash().href }}
</script>

<script type="text/html" template lay-url="/api/users2" >
  {{# layui.each(d.data, function(index, item){ }}
    <li>name:{{= item.name }} email:{{= item.email }}</li>
  {{# }); }}
</script>
  </blockquote>
</div>
效果如下:
表格也是类似的套用。