#导包
from selenium import webdriver
from selenium.webdriver.common.by import By
#加上参数,禁止chromedriver 日志写屏
options = webdriver.ChromeOptions()
options.add_experimental_option('excludeSwitches', ['enable-logging'])
# 下载驱动
driver = webdriver.Chrome()
print("成功进入")
#访问网页
driver.get("https://www.byhy.net/cdn2/files/selenium/stock1.html")
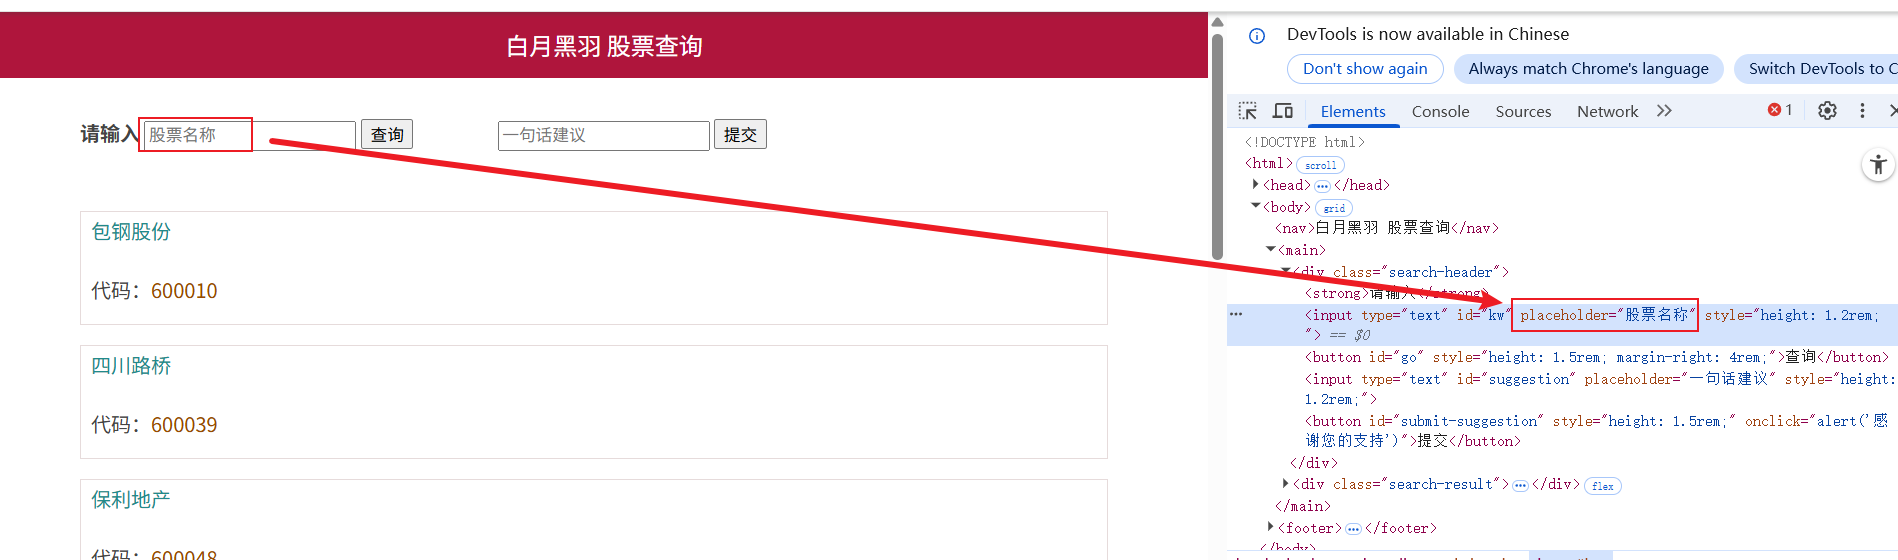
#找到输入框
element = driver.find_element(By.ID, "kw")
#输入\n 会自动回车
element.send_keys("四川\n")
input("回车退出程序")
#关闭浏览器
driver.quit()
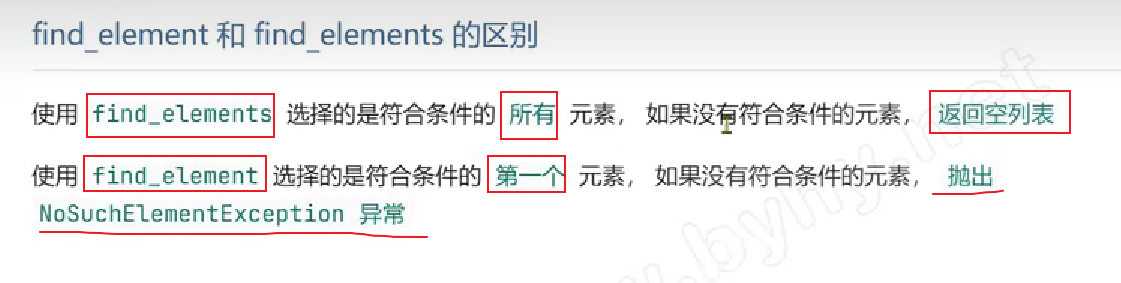
2.1.1 find_element() 和 find_elements()的区别
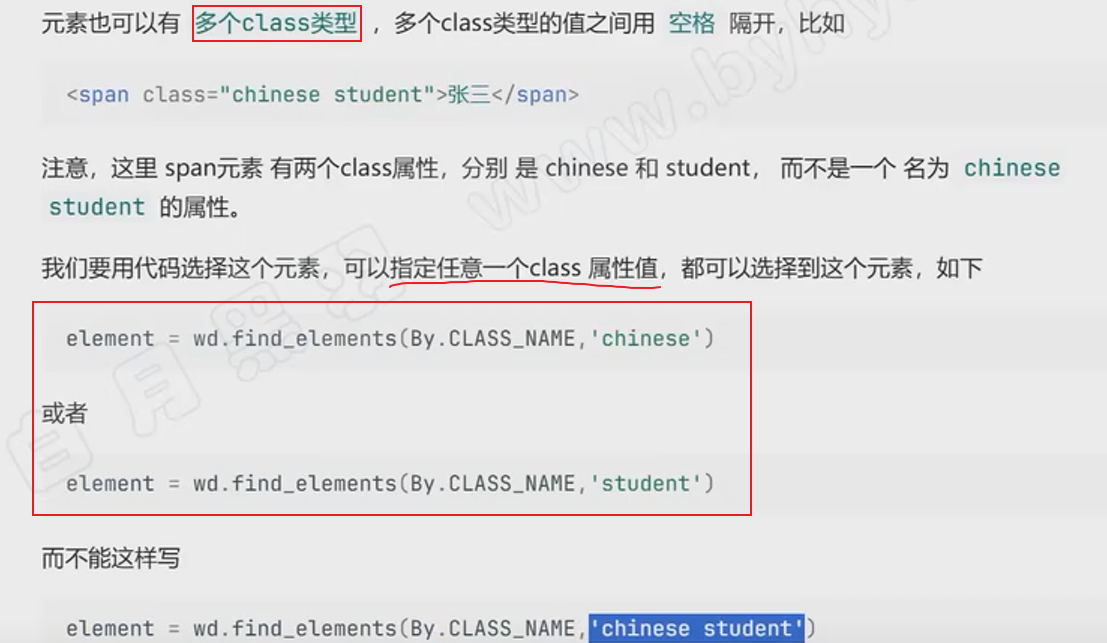
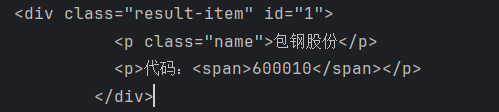
2.2 class name选择器
用与class类型的定位,class在HTML中不是唯一的,不建议使用
python复制代码
#                                  CLASS_NAME  选择器
elements = driver.find_elements(By.CLASS_NAME, "name")
python复制代码
#导包
from selenium import webdriver
from selenium.webdriver.common.by import By
#加上参数,禁止chromedriver 日志写屏
options = webdriver.ChromeOptions()
options.add_experimental_option('excludeSwitches', ['enable-logging'])
# 下载驱动
driver = webdriver.Chrome()
print("成功进入")
#访问网页
driver.get("https://www.byhy.net/cdn2/files/selenium/stock1.html")
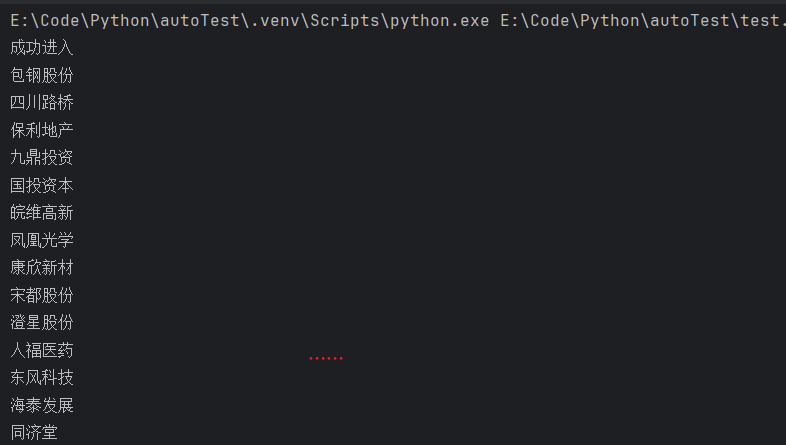
# CLASS_NAME 选择器
elements = driver.find_elements(By.CLASS_NAME, "name")
for e in elements:
print(e.text)
input("回车退出程序")
#关闭浏览器
driver.quit()
结果:
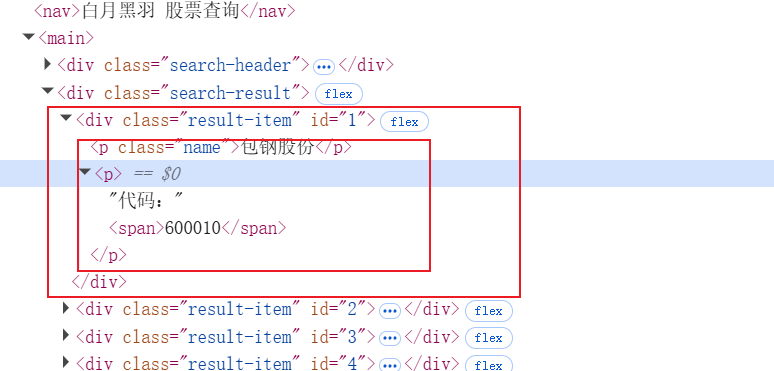
当元素有多个class类型:
2.3 tag name 选择器
用标签定位,例如:<span> <dev>等,需要保证只使用了一个,不建议使用
python复制代码
#                                  TAG_NAME 选择器
elements = driver.find_elements(By.TAG_NAME, "button")
python复制代码
#导包
from selenium import webdriver
from selenium.webdriver.common.by import By
#加上参数,禁止chromedriver 日志写屏
options = webdriver.ChromeOptions()
options.add_experimental_option('excludeSwitches', ['enable-logging'])
# 下载驱动
driver = webdriver.Chrome()
print("成功进入")
#访问网页
driver.get("https://www.byhy.net/cdn2/files/selenium/stock1.html")
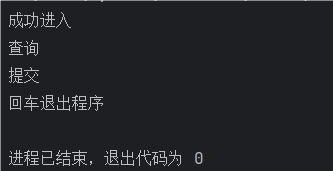
# TAG_NAME 选择器
elements = driver.find_elements(By.TAG_NAME, "button")
for e in elements:
print(e.text)
input("回车退出程序")
#关闭浏览器
driver.quit()
结果:
2.4 name 选择器
由于在HTML中name可以重复名,所以我们使用的使用一定要确保name是唯一的!
python复制代码
driver.get("https://dict.youdao.com/result?word=attribute&lang=en")
element = driver.find_element(By.NAME, "keywords").get_attribute("content")
print(element)
python复制代码
import time
#导包
from selenium import webdriver
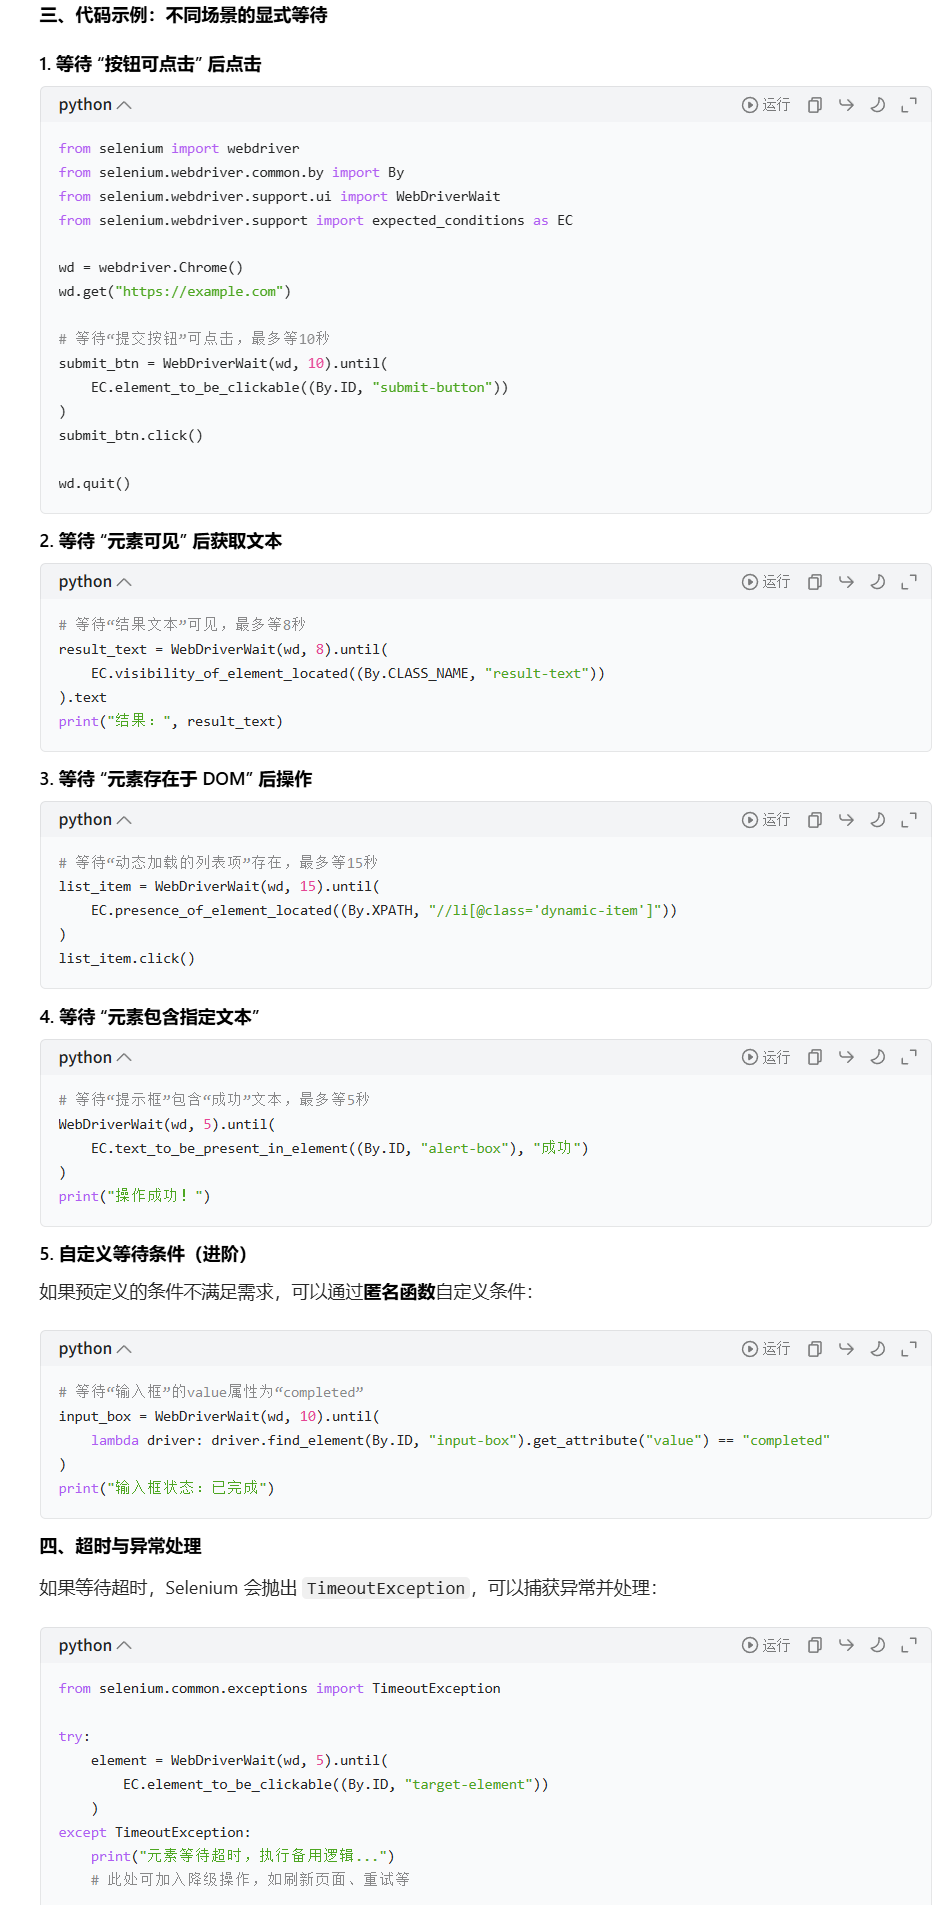
from selenium.webdriver.common.by import By
from selenium.webdriver.support.ui import WebDriverWait
from selenium.webdriver.support import expected_conditions as EC
options = webdriver.ChromeOptions()
options.add_experimental_option('excludeSwitches', ['enable-logging'])
#下载驱动
driver = webdriver.Chrome()
# 隐式等待
driver.implicitly_wait(10)
driver.get("https://dict.youdao.com/result?word=attribute&lang=en")
element = driver.find_element(By.NAME, "keywords").get_attribute("content")
print(element)
input("回车退出")
结果:
2.5 css Selector 选择器
这个选择器是有一些语法的,但是一般通过浏览器复制就可以了,所有我懒不想写了:
在控制台中选中元素,然后右击选择"复制selector"就行了
python复制代码
from selenium import webdriver
from selenium.webdriver.common.action_chains import ActionChains
from selenium.webdriver.common.by import By
from selenium.webdriver.support.ui import WebDriverWait
from selenium.webdriver.support import expected_conditions as EC
import time

driver = webdriver.Chrome()
driver.implicitly_wait(5)

driver.get("https://www.baidu.com/")

es = driver.find_elements(By.CSS_SELECTOR, "#s-hotsearch-wrapper")

for e in es:
    print(e.text)

input("回车退出")
2.6 Xpath 选择器
这个选择器是有一些语法的,但是一般通过浏览器复制就可以了,所有我懒不想写了:
在控制台中选中元素,然后右击选择"复制Xpath"就行了
python复制代码
from selenium import webdriver
from selenium.webdriver.common.action_chains import ActionChains
from selenium.webdriver.common.by import By
from selenium.webdriver.support.ui import WebDriverWait
from selenium.webdriver.support import expected_conditions as EC
import time

driver = webdriver.Chrome()
driver.implicitly_wait(5)

driver.get("https://www.baidu.com/")

es = driver.find_elements(By.XPATH, '//*[@id="s-hotsearch-wrapper"]')

for e in es:
    print(e.text)

input("回车退出")
7、WebElement对象的find_element或者find_elements
💡
webdriver.find_element() 返回的对象 element 也可以使用find_element()/ find_elements(),
只是element 的区域是你选择的标签内部的区域 例如:
<script>
<div></div>
<div></div>
<div></div>
<span></span>
</script>
这里面的元素标签就是element 涵盖的区域,而 webdriver 读取到的是全局的
python复制代码
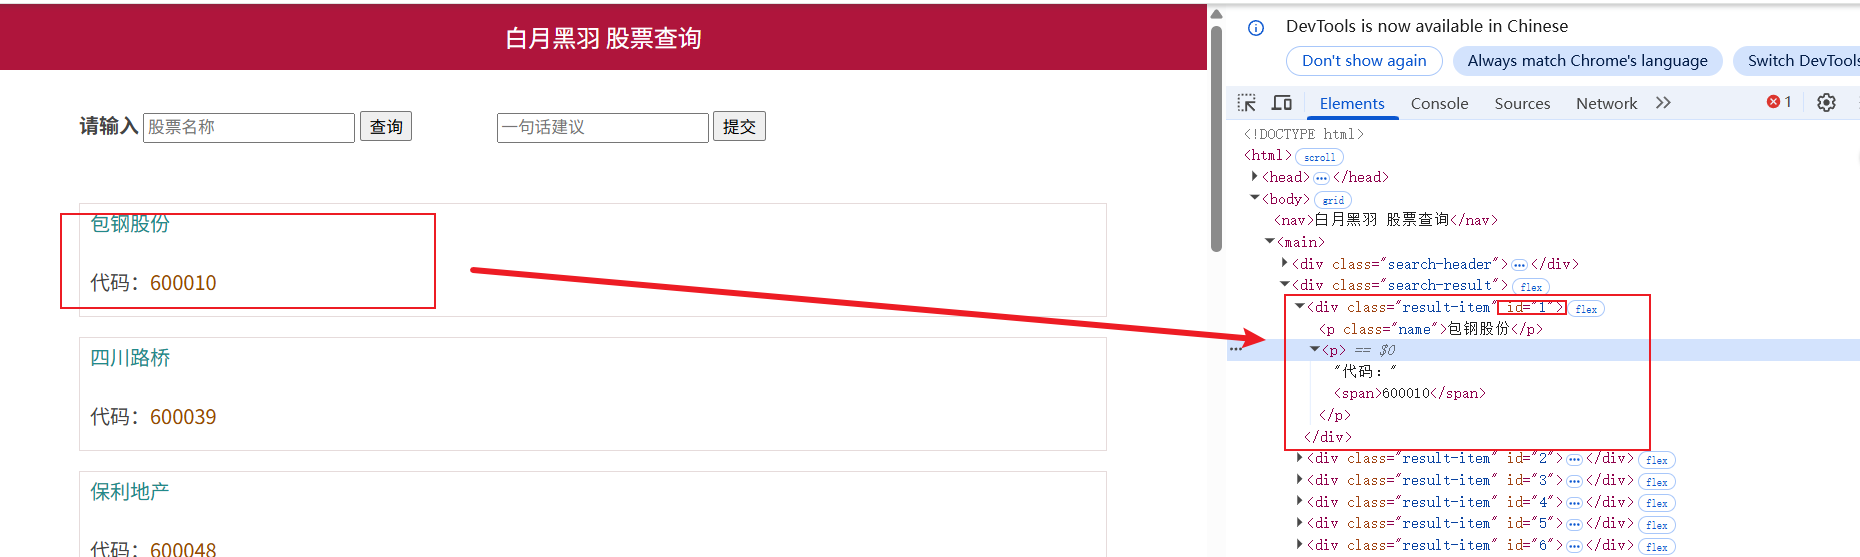
element = driver.find_element(By.CLASS_NAME, "search-result")
# 在 search-result 下的所有元素 都可以通过 find_elements 或者 find_element 访问
es = element.find_elements(By.TAG_NAME, "div")
python复制代码
#导包
from selenium import webdriver
from selenium.webdriver.common.by import By

#加上参数,禁止chromedriver 日志写屏
options = webdriver.ChromeOptions()
options.add_experimental_option('excludeSwitches', ['enable-logging'])
# 下载驱动
driver = webdriver.Chrome()

print("成功进入")

#访问网页
driver.get("https://www.byhy.net/cdn2/files/selenium/stock1.html")

element = driver.find_element(By.CLASS_NAME, "search-result")
# 在 search-result 下的所有元素 都可以通过 find_elements 或者 find_element 访问
es = element.find_elements(By.TAG_NAME, "div")

for e in es:
    print(e.text)

input("回车退出程序")
#关闭浏览器
driver.quit()
如果要读取全局的文本:
python复制代码
elements = driver.find_elements(By.TAG_NAME, "html")

for e in elements:
    print(e.text)
import time
#导包
from selenium import webdriver
from selenium.webdriver.common.by import By
from selenium.webdriver.support.ui import WebDriverWait
from selenium.webdriver.support import expected_conditions as EC
options = webdriver.ChromeOptions()
options.add_experimental_option('excludeSwitches', ['enable-logging'])
#下载驱动
driver = webdriver.Chrome()
# 隐式等待
driver.implicitly_wait(10)
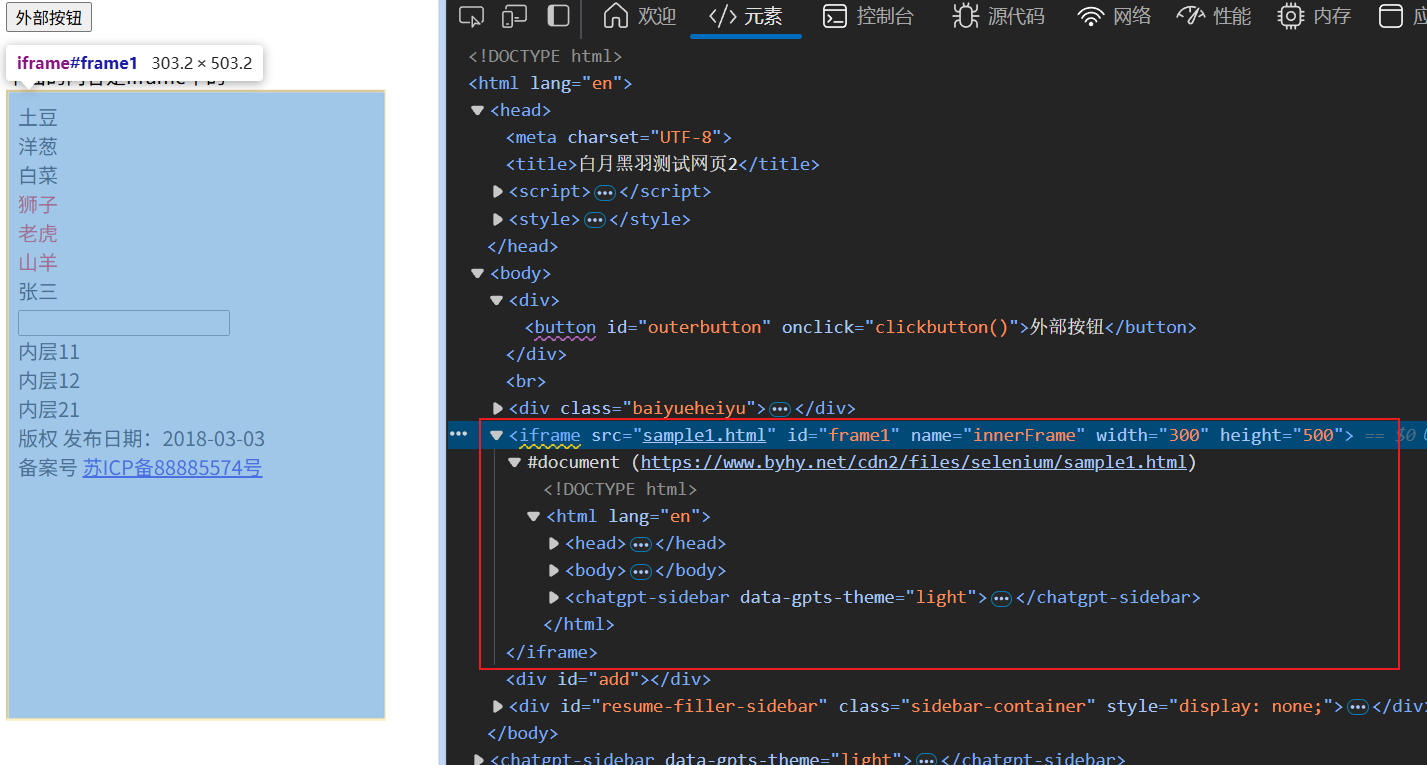
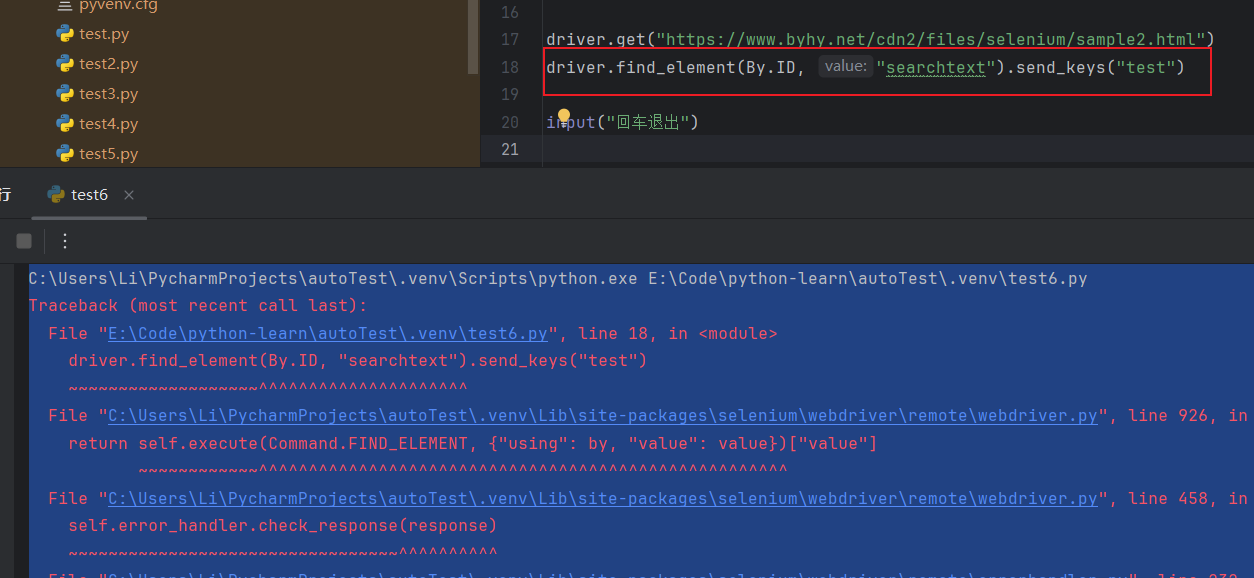
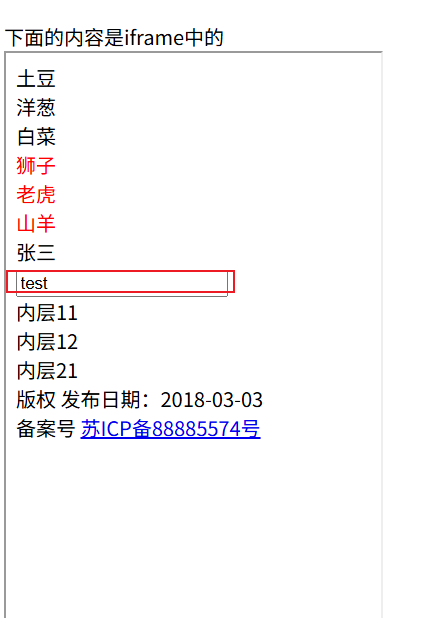
driver.get("https://www.byhy.net/cdn2/files/selenium/sample2.html")
# 切换到内存HTML
driver.switch_to.frame('frame1')
driver.find_element(By.ID, "searchtext").send_keys("test")
input("回车退出")
结果:
那么如果要切换回外层的HTML就使用:
python复制代码
driver.find_element(By.ID, "outerbutton").click()
完整代码:
python复制代码
import time

#导包
from selenium import webdriver
from selenium.webdriver.common.by import By
from selenium.webdriver.support.ui import WebDriverWait
from selenium.webdriver.support import expected_conditions as EC

options = webdriver.ChromeOptions()
options.add_experimental_option('excludeSwitches', ['enable-logging'])

#下载驱动
driver = webdriver.Chrome()
# 隐式等待
driver.implicitly_wait(10)

driver.get("https://www.byhy.net/cdn2/files/selenium/sample2.html")
# 切换到内存HTML
driver.switch_to.frame('frame1')

driver.find_element(By.ID, "searchtext").send_keys("test")

# 切换为外层HTML
driver.switch_to.default_content()

driver.find_element(By.ID, "outerbutton").click()

input("回车退出")
11、窗口页面切换
当打开新的窗口,需要切换页面才可以对新页面进行操作。
当需要关闭新页面回到旧页面,也需要切换回原来的窗口,才可以继续操作
核心代码:
python复制代码
# 获取当前页面id
mainWindow = driver.current_window_handle
# 获取打开页面的id
targetWindow = None
for e in driver.window_handles:
    if e != mainWindow:
        targetWindow = e
# 关闭窗口
driver.close()

#切换窗口
driver.switch_to.window(mainWindow)
所有代码:
python复制代码
import time

#导包
from selenium import webdriver
from selenium.webdriver.common.by import By
from selenium.webdriver.support.ui import WebDriverWait
from selenium.webdriver.support import expected_conditions as EC

options = webdriver.ChromeOptions()
options.add_experimental_option('excludeSwitches', ['enable-logging'])

#下载驱动
driver = webdriver.Chrome()
# 隐式等待
driver.implicitly_wait(10)

driver.get("https://www.byhy.net/cdn2/files/selenium/sample3.html")


print("title :" + driver.title)
# 获取当前页面id
mainWindow = driver.current_window_handle
print("当前窗口id" + mainWindow)

driver.find_element(By.CSS_SELECTOR, "body > a").click()

# 获取打开页面的id
targetWindow = None
for e in driver.window_handles:
    if e != mainWindow:
        targetWindow = e

# 切换窗口
driver.switch_to.window(targetWindow)

print("当前窗口id" + driver.current_window_handle)

time.sleep(2)
# 关闭窗口
driver.close()

#切换窗口
driver.switch_to.window(mainWindow)

driver.find_element(By.CSS_SELECTOR, "#outerbutton").click()

input("回车退出")
# 获取所有以选中的选项
eles = driver.find_elements(By.CSS_SELECTOR, "[name=teachers1]:checked")
python复制代码
import time
#导包
from selenium import webdriver
from selenium.webdriver.common.by import By
from selenium.webdriver.support.ui import WebDriverWait
from selenium.webdriver.support import expected_conditions as EC
options = webdriver.ChromeOptions()
options.add_experimental_option('excludeSwitches', ['enable-logging'])
#下载驱动
driver = webdriver.Chrome()
# 隐式等待
driver.implicitly_wait(10)
driver.get("https://www.byhy.net/cdn2/files/selenium/test2.html")
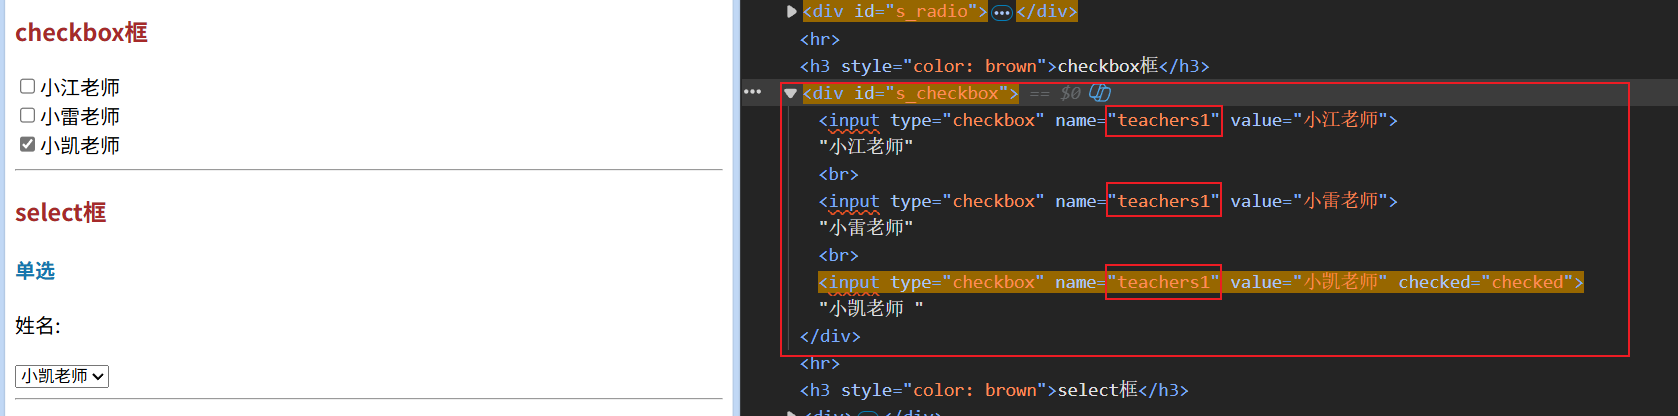
# chekbox选项框
driver.find_element(By.CSS_SELECTOR, "#s_checkbox > input[type=checkbox]:nth-child(3)").click()
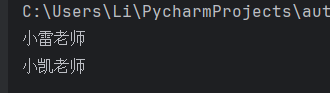
eles = driver.find_elements(By.CSS_SELECTOR, "[name=teachers1]:checked")
for e in eles:
print(e.get_attribute("value"))
结果:
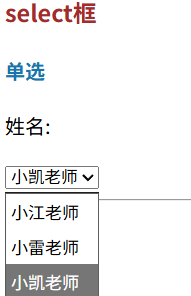
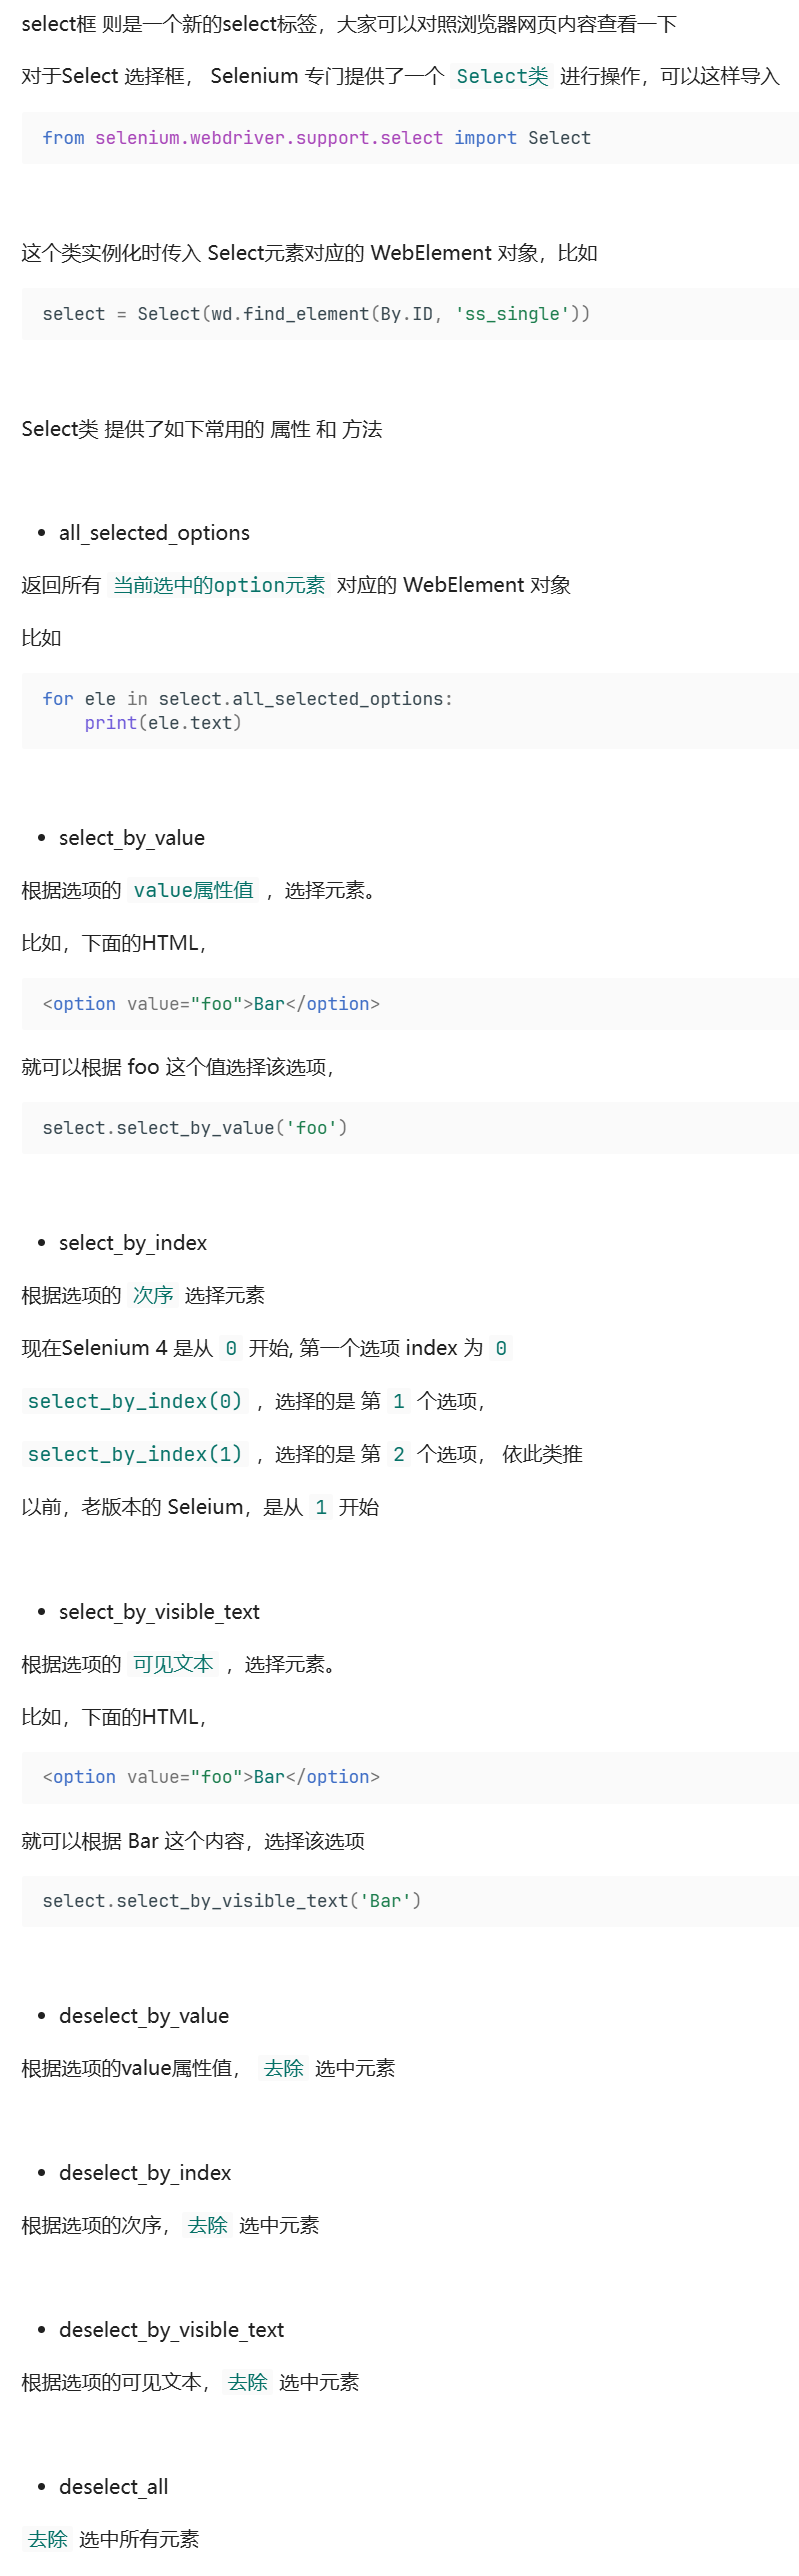
13、下拉框 select
13.1 Select 单选框
获取选项框中被选中的选项。
需要导入一个新的对象Select
核心代码:
python复制代码
from selenium.webdriver.support.select import Select

# 获取当前选中的选项
select = Select(driver.find_element(By.ID, "ss_single"))

for se in select.all_selected_options:
    print(se.text)

input("回车退出")
💡
select.all_selected_options解释:
返回的是所有选项的webelement元素,所以要查看文本得使用 .text
所有代码:
python复制代码
import time
#导包
from selenium import webdriver
from selenium.webdriver.common.by import By
from selenium.webdriver.support.ui import WebDriverWait
from selenium.webdriver.support import expected_conditions as EC
# 导入Select类
from selenium.webdriver.support.select import Select

options = webdriver.ChromeOptions()
options.add_experimental_option('excludeSwitches', ['enable-logging'])

#下载驱动
driver = webdriver.Chrome()
# 隐式等待
driver.implicitly_wait(10)

driver.get("https://www.byhy.net/cdn2/files/selenium/test2.html")

# select框(下拉框单选)
# # 点击其中一个选项
# driver.find_element(By.CSS_SELECTOR, "#ss_single > option:nth-child(2)").click()

# 获取当前选中的选项
select = Select(driver.find_element(By.ID, "ss_single"))

for se in select.all_selected_options:
    print(se.text)

input("回车退出")
13.2 Select的一系列方法
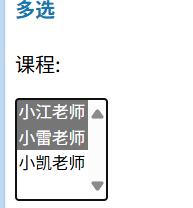
13.3 Select 复选框
核心代码:
python复制代码
# Select 复选框
select = Select(driver.find_element(By.ID, "ss_multi"))
# 清除所有的选项
select.deselect_all()
# 选择选项
select.select_by_visible_text("小江老师")
select.select_by_visible_text("小雷老师")
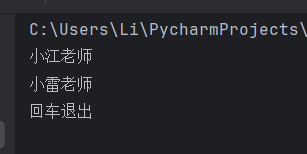
# 查看选择的所有元素
for se in select.all_selected_options:
print(se.text)
input("回车退出")
全部代码:
python复制代码
import time

#导包
from selenium import webdriver
from selenium.webdriver.common.by import By
from selenium.webdriver.support.ui import WebDriverWait
from selenium.webdriver.support import expected_conditions as EC
# 导入Select类
from selenium.webdriver.support.select import Select


options = webdriver.ChromeOptions()
options.add_experimental_option('excludeSwitches', ['enable-logging'])

#下载驱动
driver = webdriver.Chrome()
# 隐式等待
driver.implicitly_wait(10)

driver.get("https://www.byhy.net/cdn2/files/selenium/test2.html")

# Select 复选框
select = Select(driver.find_element(By.ID, "ss_multi"))

# 清除所有的选项
select.deselect_all()

# 选择选项
select.select_by_visible_text("小江老师")
select.select_by_visible_text("小雷老师")

# 查看选择的所有元素
for se in select.all_selected_options:
    print(se.text)

input("回车退出")
结果:
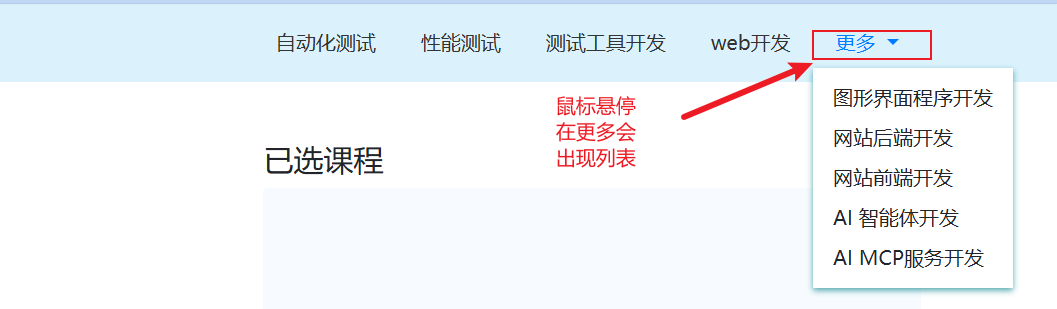
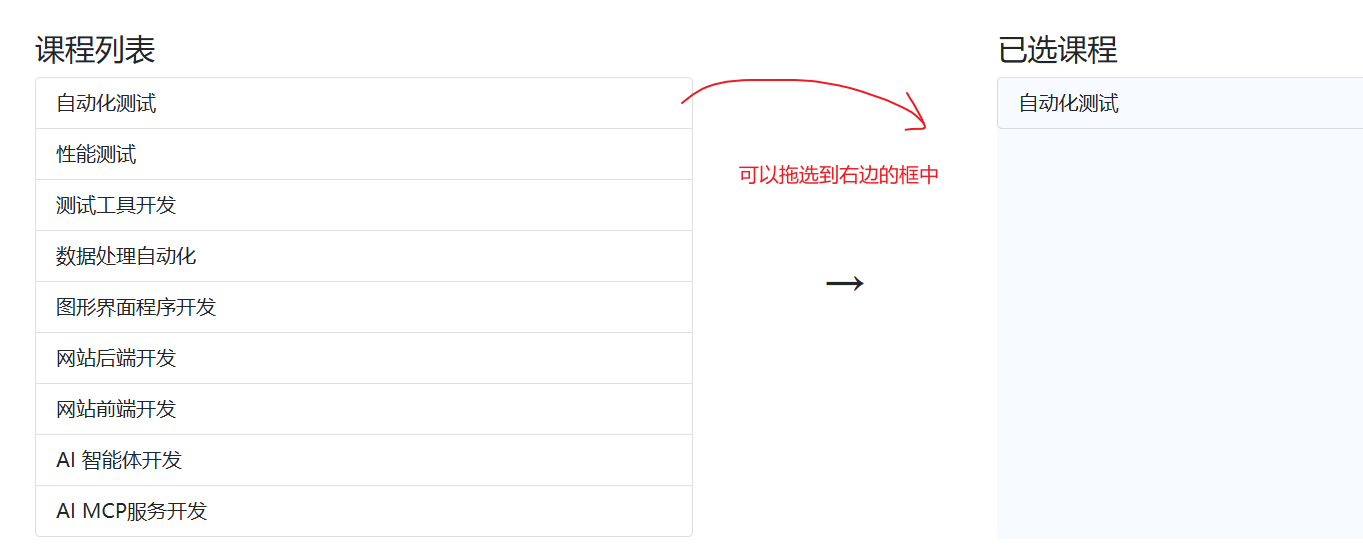
14、ActionChains模拟鼠标操作
14.1 操作试例
完成以下两个动作:
核心代码:
python复制代码
# 需要导入包
from selenium.webdriver.common.action_chains import ActionChains
ac = ActionChains(driver)
# 鼠标选停
ac.move_to_element(
    driver.find_element(By.ID, "navbarDropdown")
).perform()
time.sleep(3)

for i in range(1,6):
    #鼠标拖放
    ac.drag_and_drop(
        # 拖动的元素
        driver.find_element(By.ID, "course-" + str(i)),
        # 放到的位置
        driver.find_element(By.ID, "selected-courses")
    ).perform()
    time.sleep(1)
全部代码:
python复制代码
import time

#导包
from selenium import webdriver
from selenium.webdriver.common.by import By
from selenium.webdriver.support.ui import WebDriverWait
from selenium.webdriver.support import expected_conditions as EC
from selenium.webdriver.common.action_chains import ActionChains

options = webdriver.ChromeOptions()
options.add_experimental_option('excludeSwitches', ['enable-logging'])

#下载驱动
driver = webdriver.Chrome()
# 隐式等待
driver.implicitly_wait(10)

driver.get("https://www.byhy.net/cdn2/files/selenium/sample4.html")

ac = ActionChains(driver)

# 鼠标选停
ac.move_to_element(
    driver.find_element(By.ID, "navbarDropdown")
).perform()
time.sleep(3)

for i in range(1,6):
    #鼠标拖放
    ac.drag_and_drop(
        # 拖动的元素
        driver.find_element(By.ID, "course-" + str(i)),
        # 放到的位置
        driver.find_element(By.ID, "selected-courses")
    ).perform()
    time.sleep(1)

input("回车退出")