C++中list详解
文章目录
- C++中list详解
-
- 1、list的介绍和使用
-
- [1.1 list的介绍](#1.1 list的介绍)
- [1.2 list的使用](#1.2 list的使用)
-
- [1.2.1 list的构造](#1.2.1 list的构造)
- [1.2.2 list iterator](#1.2.2 list iterator)
- [1.2.3 list capacity](#1.2.3 list capacity)
- [1.2.4 list element access](#1.2.4 list element access)
- [1.2.5 list modifiers](#1.2.5 list modifiers)
- [1.2.6 list迭代器失效](#1.2.6 list迭代器失效)
- 2、list的模拟实现
-
- [2.1 模拟实现list](#2.1 模拟实现list)
- [2.2 list的反向迭代器](#2.2 list的反向迭代器)
- 3.list与vector的对比
1、list的介绍和使用
1.1 list的介绍

1.2 list的使用
list中的接口比较多,此处类似,只需要掌握如何正确的使用,然后再去深入研究背后的原理,已达到可扩展的能力。以下为list中一些常见的重要接口。
1.2.1 list的构造
| 构造函数 | 接口说明 |
|---|---|
| lsit(size_type n, const value_type& val = value_type()) | 构造的list中包含n个值得为val的元素 |
| list() | 构造空的list |
| list(const list& x) | 拷贝构造函数 |
| list(inputlterator first, inputlterator last) | 用list,last区间中的元素构造list |
list的构造使用代码演示
1、list(size_type n, const value_type& val = value_type())
可以使用此构造函数来创建一个有 n 个元素的链表,并初始化每个元素的值为 val。如果没有提供 val,则使用 value_type() 进行默认初始化。
c++
#include <iostream>
#include <list>
using namespace std;

int main() {
    // 创建一个包含 5 个元素,每个元素初始化为 10 的 list
    list<int> l1(5, 10); // 初始化为 10
    cout << "l1: ";
    for (int x : l1) cout << x << " "; // 输出:10 10 10 10 10
    cout << endl;

    // 创建一个包含 3 个默认初始化的元素(值为 0)的 list
    list<int> l2(3);  // 默认初始化,元素值为 0
    cout << "l2: ";
    for (int x : l2) cout << x << " "; // 输出:0 0 0
    cout << endl;

    return 0;
}
2、list()
该构造函数创建一个没有任何元素的空链表。
c++
#include <iostream>
#include <list>
using namespace std;
int main() {
// 创建一个空的 list
list<int> l3;
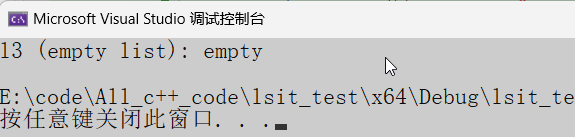
cout << "l3 (empty list): ";
if (l3.empty()) cout << "empty"; // 输出:empty
cout << endl;
return 0;
}
3、list(const list& x)
通过拷贝一个已有的 std::list 来创建一个新的链表,它会复制源链表中的所有元素。
c++
#include <iostream>
#include <list>
using namespace std;
int main() {
// 创建一个包含 3 个元素的 list
list<int> l4(3, 5); // {5, 5, 5}
// 使用拷贝构造函数创建一个新的 list
list<int> l5 = l4; // 拷贝 l4 到 l5
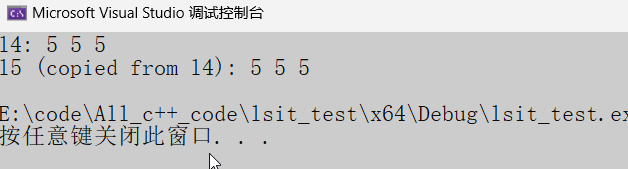
cout << "l4: ";
for (int x : l4) cout << x << " "; // 输出:5 5 5
cout << endl;
cout << "l5 (copied from l4): ";
for (int x : l5) cout << x << " "; // 输出:5 5 5
cout << endl;
return 0;
}
4、list(input_iterator first, input_iterator last)
通过输入迭代器定义一个区间,将该区间的所有元素添加到新的 std::list 中。可以通过迭代器来指定要从哪开始,哪里结束。
c++
#include <iostream>
#include <list>
#include <vector>
using namespace std;
int main() {
// 使用 vector 构造 list
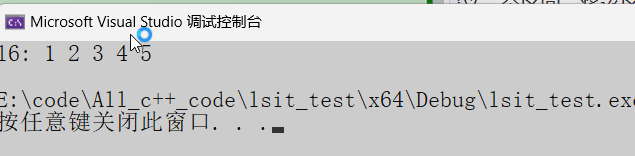
vector<int> v = { 1, 2, 3, 4, 5 };
// 使用 input_iterator 构造 list
list<int> l6(v.begin(), v.end()); // 通过 vector 的迭代器初始化 list
cout << "l6: ";
for (int x : l6) cout << x << " "; // 输出:1 2 3 4 5
cout << endl;
return 0;
}
1.2.2 list iterator
此处,大家可暂时将迭代器理解成一个指针,该指针指向list中的某一个节点
| 函数声明 | 接口说明 |
|---|---|
| begin + end | 返回第一个元素的迭代器+返回最后一个元素下一个位置的迭代器 |
| rebegin + rend | 返回第一个元素的reverse_iterator,即end位置,返回最后一个元素下一个位置的reverse_iterator |
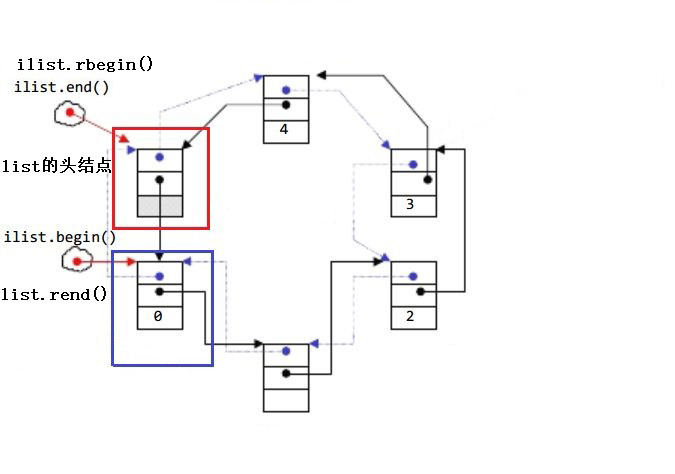
!CAUTION
- begin与end为正向迭代器,对迭代器执行++操作,迭代器向后移动
- rbegin(end)与rend(begin)为反向迭代器,对迭代器执行++操作,迭代器向前移动
c++
#include <iostream>
#include <list>
#include <algorithm> // find, for_each
#include <iterator>  // next, prev, advance
using namespace std;

int main() {
    // 1) 基本:获取迭代器并遍历(可修改)
    list<int> a{ 1,2,3,4,5 };
    cout << "[1] 原始 a: ";
    for (auto x : a) cout << x << ' '; cout << '\n';

    // begin()/end() 返回 iterator,可修改元素
    for (auto it = a.begin(); it != a.end(); ++it) {
        *it *= 10; // 修改元素
    }
    cout << "[1] 修改后 a: ";
    for (auto x : a) cout << x << ' '; cout << '\n';

    // 2) 只读遍历:const_iterator / cbegin()/cend()
    const list<int>& ca = a; // 引用成 const,或使用 cbegin()/cend()
    cout << "[2] 只读遍历 ca: ";
    for (list<int>::const_iterator it = ca.cbegin(); it != ca.cend(); ++it) {
        // *it = 0; // ❌ 编译错误:const_iterator 不能修改
        cout << *it << ' ';
    }
    cout << '\n';

    // 3) 反向遍历:reverse_iterator / rbegin()/rend()
    cout << "[3] 反向遍历 a: ";
    for (auto rit = a.rbegin(); rit != a.rend(); ++rit) {
        cout << *rit << ' ';
    }
    cout << '\n';

    // 4) 借助迭代器插入:insert 在 it 前插入;使用 std::find 定位 it
    //    注意:list 的插入不会使其他迭代器失效(除了指向被擦除的那个)
    auto it3 = find(a.begin(), a.end(), 30);
    if (it3 != a.end()) {
        // 在 30 前面插入 25、26
        a.insert(it3, { 25, 26 });
    }
    cout << "[4] insert 前置插入: ";
    for (auto x : a) cout << x << ' '; cout << '\n';

    // 5) 借助迭代器删除:erase(it) 返回删除元素后的"下一个"迭代器
    //    安全的"边遍历边删除"写法
    //    目标:删除能被 20 整除的元素
    for (auto it = a.begin(); it != a.end(); /* no ++ here */) {
        if (*it % 20 == 0) {
            it = a.erase(it); // 使用返回值接住下一个位置
        }
        else {
            ++it;
        }
    }
    cout << "[5] 边遍历边删除(删%20==0): ";
    for (auto x : a) cout << x << ' '; cout << '\n';

    // 6) 使用 std::next / std::prev / advance 移动迭代器
    //    next(it, n) 返回新迭代器,不改原 it;advance 会原地移动 it
    auto itBegin = a.begin();
    auto itAfter1 = next(itBegin, 1); // 向后移动 1
    // prev 需要确保不越过 begin()
    auto itLast = a.empty() ? a.end() : prev(a.end(), 1);

    cout << "[6] next/prev 示例: \n";
    if (itAfter1 != a.end()) cout << "  next(begin,1): " << *itAfter1 << '\n';
    if (itLast != a.end())   cout << "  prev(end,1): " << *itLast << '\n';

    // advance 原地移动
    auto itAdv = a.begin();
    if (!a.empty()) {
        advance(itAdv, min<size_t>(2, a.size() - 1)); // 最多前进到倒数第二
        cout << "  advance 到位置值: " << *itAdv << '\n';
    }

    // 7) 结合算法 + 迭代器:for_each 只读/可改都行(这里演示输出)
    cout << "[7] for_each 输出: ";
    for_each(a.begin(), a.end(), [](int v) { cout << v << ' '; });
    cout << '\n';

    // 8) 与 insert/erase 组合:在指定位置批量插入与删除
    //    在表头后插入两个元素 111, 222,然后删除表头后的那个元素
    if (!a.empty()) {
        auto pos = next(a.begin());      // 表头的后一个位置
        a.insert(pos, { 111, 222 });       // 在 pos 前插入 -> 插到第2个位置
        cout << "[8] 批量插入结果: ";
        for (auto x : a) cout << x << ' '; cout << '\n';

        pos = next(a.begin());           // 重新获取第二个位置
        pos = a.erase(pos);              // 删除第二个元素,pos 现在指向"新"第二个
        cout << "    删除后指向的值(若存在): ";
        if (pos != a.end()) cout << *pos << '\n'; else cout << "(end)\n";
        cout << "    删除后列表: ";
        for (auto x : a) cout << x << ' '; cout << '\n';
    }

    // 9) const_reverse_iterator:只读的反向迭代器
    const list<int>& ca2 = a;
    cout << "[9] const reverse 遍历: ";
    for (list<int>::const_reverse_iterator crit = ca2.crbegin();
        crit != ca2.crend(); ++crit) {
        cout << *crit << ' ';
    }
    cout << '\n';

    // 10) 与字符串 list 简单演示(结合 find/insert/erase)
    list<string> names{ "Bob","Alice","Tom" };
    auto itAlice = find(names.begin(), names.end(), "Alice");
    if (itAlice != names.end()) {
        names.insert(itAlice, "Zoe"); // 在 Alice 前
    }
    // 删除 "Tom"
    auto itTom = find(names.begin(), names.end(), "Tom");
    if (itTom != names.end()) names.erase(itTom);

    cout << "[10] names: ";
    for (const auto& s : names) cout << s << ' '; cout << '\n';

    // 小贴士:不要解引用 end();不要在 erase 之后继续使用被删迭代器;
    // list 的插入/拼接(splice)不会使其他迭代器失效(被删元素的迭代器除外)。

    return 0;
}
1.2.3 list capacity
| 函数声明 | 接口说明 |
|---|---|
| empty | 检测list是否为空,返回true,否则返回false |
| size | 返回list中有效节点的个数 |
1.2.4 list element access
| 函数声明 | 接口说明 |
|---|---|
| front | 返回list的第一个节点中引用值的引用 |
| back | 返回list的最后一个节点中值的引用 |
1.2.5 list modifiers
| 函数声明 | 接口说明 |
|---|---|
| push front | 在list首元素前插入值为val的元素 |
| pop front | 删除list中第一个元素 |
| push back | 在list尾部插入值为val的元素 |
| pop back | 删除list中最后一个元素 |
| insert | 在list position 位置中插入值为val的元素 |
| erase | 删除list position位置的元素 |
| swap | 交换两个list中的元素 |
| clear | 清空list中的有效元素 |
list的插入和删除代码演示
c++
#include <iostream>
#include <list>
using namespace std;

int main() {
    // 创建一个空链表
    list<int> myList;

    // 在链表尾部插入元素
    myList.push_back(10);
    myList.push_back(20);
    myList.push_back(30);

    // 在链表头部插入元素
    myList.push_front(5);

    // 打印链表
    cout << "After push_back and push_front operations: ";
    for (int val : myList) {
        cout << val << " ";
    }
    cout << endl;

    // 删除链表头部的元素
    myList.pop_front();
    cout << "After pop_front operation: ";
    for (int val : myList) {
        cout << val << " ";
    }
    cout << endl;

    // 删除链表尾部的元素
    myList.pop_back();
    cout << "After pop_back operation: ";
    for (int val : myList) {
        cout << val << " ";
    }
    cout << endl;

    // 使用 insert 在链表中间插入元素
    auto it = myList.begin();
    advance(it, 1);  // 移动到链表的第二个位置
    myList.insert(it, 15);  // 在第二个位置插入 15

    cout << "After insert operation: ";
    for (int val : myList) {
        cout << val << " ";
    }
    cout << endl;

    // 使用 erase 删除链表中的第二个元素
    it = myList.begin();
    advance(it, 1);  // 移动到链表的第二个位置
    myList.erase(it);  // 删除第二个元素

    cout << "After erase operation: ";
    for (int val : myList) {
        cout << val << " ";
    }
    cout << endl;

    // 清空链表
    myList.clear();
    cout << "After clear operation, size of list: " << myList.size() << endl;

    return 0;
}
1.2.6 list迭代器失效
前面说过,此处大家可将迭代器暂时理解成类似于指针,迭代器失效即迭代器所指向的节点的无效,即该节点被删除了。因为list的底层结构为带头结点的双向循环链表,因此在list中进行插入时是不会导致list的迭代器失效的,只有在删除时才会失效,并且失效的只是指向被删除节点的迭代器,其他迭代器不会受到影响。
c++
void TestListIterator1()
{
	int array[] = { 1, 2, 3, 4, 5, 6, 7, 8, 9, 0 };
	list<int> l(array, array + sizeof(array) / sizeof(array[0]));
	auto it = l.begin();
	while (it != l.end())
	{
		// erase()函数执行后,it所指向的节点已被删除,因此it无效,在下一次使用it时,必须先给
		其赋值
			l.erase(it);
		++it;
	}
}
// 改正
void TestListIterator()
{
	int array[] = { 1, 2, 3, 4, 5, 6, 7, 8, 9, 0 };
	list<int> l(array, array + sizeof(array) / sizeof(array[0]));
	auto it = l.begin();
	while (it != l.end())
	{
		l.erase(it++); // it = l.erase(it);
	}
}
2、list的模拟实现
2.1 模拟实现list
要模拟实现list,必须要熟悉list的底层结构以及其接口的含义,通过上面的学习,这些内容已基本掌握,现在我们来模拟实现list。
c++
#include <iostream>
using namespace std;

// 节点结构体
template <typename T>
struct Node {
    T data;       // 节点存储的数据
    Node* next;   // 指向下一个节点的指针
    Node* prev;   // 指向前一个节点的指针

    Node(T val) : data(val), next(nullptr), prev(nullptr) {}
};

// 双向链表类
template <typename T>
class MyList {
private:
    Node<T>* head;   // 链表的头指针
    Node<T>* tail;   // 链表的尾指针
    int size;        // 链表的大小

public:
    // 构造函数
    MyList() : head(nullptr), tail(nullptr), size(0) {}

    // 析构函数
    ~MyList() {
        clear();
    }

    // 插入元素到链表末尾
    void push_back(T val) {
        Node<T>* newNode = new Node<T>(val);
        if (tail == nullptr) {
            head = tail = newNode;  // 如果链表为空
        } else {
            tail->next = newNode;
            newNode->prev = tail;
            tail = newNode;
        }
        size++;
    }

    // 插入元素到链表头部
    void push_front(T val) {
        Node<T>* newNode = new Node<T>(val);
        if (head == nullptr) {
            head = tail = newNode;  // 如果链表为空
        } else {
            newNode->next = head;
            head->prev = newNode;
            head = newNode;
        }
        size++;
    }

    // 删除链表末尾的元素
    void pop_back() {
        if (tail == nullptr) return; // 空链表
        Node<T>* temp = tail;
        tail = tail->prev;
        if (tail) {
            tail->next = nullptr;
        } else {
            head = nullptr;  // 如果链表只有一个元素
        }
        delete temp;
        size--;
    }

    // 删除链表头部的元素
    void pop_front() {
        if (head == nullptr) return; // 空链表
        Node<T>* temp = head;
        head = head->next;
        if (head) {
            head->prev = nullptr;
        } else {
            tail = nullptr;  // 如果链表只有一个元素
        }
        delete temp;
        size--;
    }

    // 遍历并打印链表元素
    void print() {
        Node<T>* current = head;
        while (current != nullptr) {
            cout << current->data << " ";
            current = current->next;
        }
        cout << endl;
    }

    // 获取链表的大小
    int get_size() const {
        return size;
    }

    // 清空链表
    void clear() {
        while (head != nullptr) {
            pop_front();
        }
    }

    // 获取链表的头节点
    Node<T>* get_head() const {
        return head;
    }

    // 获取链表的尾节点
    Node<T>* get_tail() const {
        return tail;
    }
};

int main() {
    MyList<int> list;

    // 插入元素
    list.push_back(10);
    list.push_back(20);
    list.push_front(5);
    list.push_back(30);

    // 打印链表
    cout << "List elements: ";
    list.print();

    // 删除元素
    list.pop_front();  // 删除头部元素
    list.pop_back();   // 删除尾部元素

    cout << "After pop operations, list elements: ";
    list.print();

    // 输出链表大小
    cout << "Size of list: " << list.get_size() << endl;

    // 清空链表
    list.clear();
    cout << "After clearing, size of list: " << list.get_size() << endl;

    return 0;
}
2.2 list的反向迭代器
通过前面例子知道,反向迭代器的++就是正向迭代器的--,反向迭代器的--就是正向迭代器的++,因此反向迭代器的实现可以借助正向迭代器,即:反向迭代器内部可以包含一个正向迭代器,对正向迭代器的接口进行包装即可。
c++
template<class Iterator>
class ReverseListIterator
{
    // 注意:此处typename的作用是明确告诉编译器,Ref是Iterator类中的类型,而不是静态
    成员变量
        // 否则编译器编译时就不知道Ref是Iterator中的类型还是静态成员变量
        // 因为静态成员变量也是按照 类名::静态成员变量名 的方式访问的
public:
    typedef typename Iterator::Ref Ref;
    typedef typename Iterator::Ptr Ptr;
    typedef ReverseListIterator<Iterator> Self;
public:
    //////////////////////////////////////////////
    // 构造
    ReverseListIterator(Iterator it) : _it(it) {}
    //////////////////////////////////////////////
    // 具有指针类似行为
    Ref operator*() {
        Iterator temp(_it);
        --temp;
        return *temp;
    }
    Ptr operator->() { return &(operator*()); }
    //////////////////////////////////////////////
    // 迭代器支持移动
    Self& operator++() {
        --_it;
        return *this;
    }
    Self operator++(int) {
        Self temp(*this);
        --_it;
        return temp;
    }
    Self& operator--() {
        ++_it;
        return *this;
    }
    Self operator--(int)
    {
        Self temp(*this);
        ++_it;
        return temp;
    }
    //////////////////////////////////////////////
    // 迭代器支持比较
    bool operator!=(const Self& l)const { return _it != l._it; }
    bool operator==(const Self& l)const { return _it != l._it; }
    Iterator _it;
};
3.list与vector的对比
vector与list都是STL中非常重要的序列式容器,由于两个容器的底层结构不同,导致其特性以及应用场景不同,其主要不同如下:
| vector | list | |
|---|---|---|
| 底 层 结 构 | 动态顺序表,一段连续空 | 带头结点的双向循环链表 |
| 随 机 访 问 | 支持随机访问,访问某个元素效率O(1) | 不支持随机访问,访问某个元 素效率O(N) |
| 插 入 和 删 除 | 任意位置插入和删除效率低,需要搬移元素,时间 复杂度为O(N),插入时有可能需要增容,增容: 开辟新空间,拷贝元素,释放旧空间,导致效率更 低 | 任意位置插入和删除效率高, 不需要搬移元素,时间复杂度 为O(1) |
| 空 间 利 用 率 | 底层为连续空间,不容易造成内存碎片,空间利用 率高,缓存利用率高 | 底层节点动态开辟,小节点容 易造成内存碎片,空间利用率 低,缓存利用率低 |
| 迭 代 器 | 原生态指针 | 对原生态指针(节点指针)进行 封装 |
| 迭 代 器 失 效 | 在插入元素时,要给所有的迭代器重新赋值,因为 插入元素有可能会导致重新扩容,致使原来迭代器 失效,删除时,当前迭代器需要重新赋值否则会失 效 | 插入元素不会导致迭代器失 效,删除元素时,只会导致当 前迭代器失效,其他迭代器不 受影响 |
| 使 用 场 景 | 需要高效存储,支持随机访问,不关心插入删除效 率 | 大量插入和删除操作,不关心 随机访问 |
|