大家好,我是大华!今天给大家分享一个实用的Vue组件:弹性标签导航,代码非常简洁,主要效果由CSS实现。 这个组件不仅美观可以,而且用起来也很流畅,弹性的效果就像橡皮筋一样。
先看看效果:
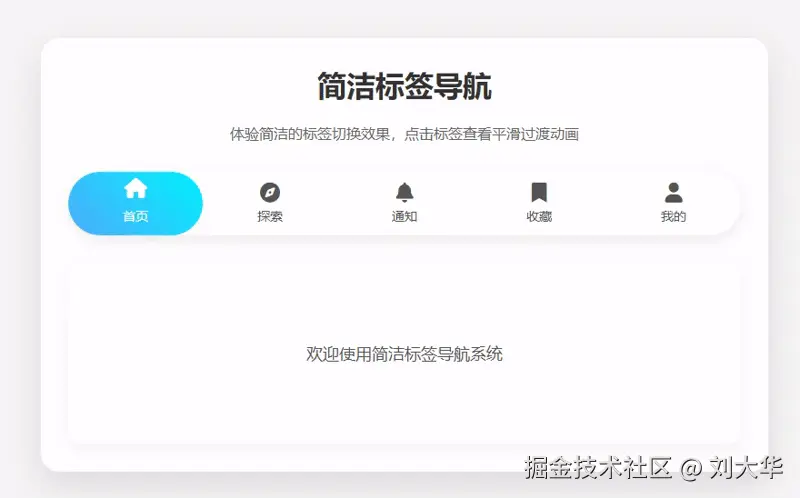
导航有以下几个特点: 1.底部有一个彩色渐变背景条,会随着点击滑动 2.点击标签时图标会轻轻上弹一下 3.切换时有弹性动画效果
完整组件代码在文末哦~
代码解析
1. 模板部分
html
<div class="nav-container">
  <div class="indicator" :style="indicatorStyle"></div>
  <div class="nav">
    <div
      v-for="(tab, index) in tabs"
      :key="index"
      class="nav-item"
      :class="{ active: activeTab === index }"
      @click="changeTab(index)"
    >
      <i :class="tab.icon"></i>
      <span>{{ tab.label }}</span>
    </div>
  </div>
</div>
这里有三层结构:
nav-container是整个导航的外壳indicator是底部滑动的彩色条nav里面用v-for循环渲染每个标签项
2. JavaScript部分
javascript
setup(props) {
  const activeTab = ref(props.initialTab)

  const indicatorStyle = computed(() => ({
    left: `${activeTab.value * (100 / props.tabs.length)}%`,
    width: `${100 / props.tabs.length}%`
  }))

  const changeTab = (index) => {
    activeTab.value = index
    emit('tab-change', index)
  }

  return {
    activeTab,
    indicatorStyle,
    changeTab
  }
}
这里用到了Vue3的setup语法:
activeTab记录当前选中的标签indicatorStyle动态计算指示条的位置和宽度changeTab处理标签切换逻辑
3. CSS部分
css
.indicator {
  background: linear-gradient(45deg, #4facfe 0%, #00f2fe 100%);
  transition: all 0.5s cubic-bezier(0.68, -0.55, 0.265, 1.55);
}

.nav-item.active i {
  transform: translateY(-5px);
}
这里有两个关键点:
cubic-bezier实现弹性动画效果transform让选中图标上浮
实现原理讲解
1. 指示条位置计算
指示条的位置是通过当前激活的标签索引计算的:
js
left = (当前标签索引 / 总标签数) * 100%
width = 100% / 总标签数
比如有5个标签,点击第3个时:
js
left = (2 / 5) * 100% = 40%
width = 100% / 5 = 20%
2. 弹性动画
普通的ease或linear过渡比较生硬,这里用了cubic-bezier(0.68, -0.55, 0.265, 1.55)这个贝塞尔曲线,它会让动画: 1.先快速移动 2.稍微超过目标位置 3.再回弹到准确位置
就像橡皮筋拉过头又弹回来一样!
3. 图标上浮效果
选中标签时,图标会向上移动5像素:
css
transform: translateY(-5px)配合transition实现平滑过渡
如何使用这个组件
使用起来超级简单:
html
<ElasticTabs
  :tabs="tabs"
  @tab-change="handleTabChange"
/>
只需要传入 tabs 数组,格式如下:
javascript
[
  { icon: 'fas fa-home', label: '首页' },
  { icon: 'fas fa-compass', label: '探索' },
  // 更多标签...
]
适用场景
1. 移动端应用 底部导航栏 设置页面分类导航 内容分类切换
2. 后台管理系统 数据报表切换 功能模块导航 筛选条件切换
3. 产品展示页面 产品特性介绍 价格方案选择 功能对比切换
4. 个人作品集 项目分类展示 技能标签切换 作品类型筛选
如果你想把这个组件做得更强大,可以考虑: 1.增加徽标提示功能(比如小红点) 2.支持自定义主题颜色 3.添加滑动切换手势 4.支持动态增减标签 5.增加加载状态效果
完整组件代码
html
<template>
  <div class="nav-container">
    <div class="indicator" :style="indicatorStyle"></div>
    <div class="nav">
      <div
        v-for="(tab, index) in tabs"
        :key="index"
        class="nav-item"
        :class="{ active: activeTab === index }"
        @click="changeTab(index)"
      >
        <i :class="tab.icon"></i>
        <span>{{ tab.label }}</span>
      </div>
    </div>
  </div>
</template>

<script>
import { ref, computed } from 'vue'

export default {
  name: 'ElasticTabs',
  props: {
    tabs: {
      type: Array,
      required: true,
      validator: (value) => {
        return value.every(item =>
          item.hasOwnProperty('icon') &&
          item.hasOwnProperty('label')
        )
      }
    },
    initialTab: {
      type: Number,
      default: 0
    }
  },
  setup(props) {
    const activeTab = ref(props.initialTab)

    const indicatorStyle = computed(() => ({
      left: `${activeTab.value * (100 / props.tabs.length)}%`,
      width: `${100 / props.tabs.length}%`
    }))

    const changeTab = (index) => {
      activeTab.value = index
      emit('tab-change', index)
    }

    return {
      activeTab,
      indicatorStyle,
      changeTab
    }
  }
}
</script>

<style scoped>
.nav-container {
  position: relative;
  width: 100%;
  height: 70px;
  background: #fff;
  border-radius: 35px;
  box-shadow: 0 5px 15px rgba(0,0,0,0.08);
  overflow: hidden;
}

.nav {
  position: relative;
  display: flex;
  width: 100%;
  height: 100%;
  z-index: 1;
}

.nav-item {
  flex: 1;
  display: flex;
  flex-direction: column;
  justify-content: center;
  align-items: center;
  color: #555;
  font-size: 14px;
  font-weight: 500;
  text-decoration: none;
  transition: all 0.3s ease;
  cursor: pointer;
  z-index: 2;
}

.nav-item i {
  font-size: 22px;
  margin-bottom: 5px;
  transition: all 0.3s ease;
}

.nav-item.active {
  color: #fff;
}

.nav-item.active i {
  transform: translateY(-5px);
}

.indicator {
  position: absolute;
  top: 0;
  height: 100%;
  background: linear-gradient(45deg, #4facfe 0%, #00f2fe 100%);
  border-radius: 35px;
  transition: all 0.5s cubic-bezier(0.68, -0.55, 0.265, 1.55);
  z-index: 0;
}

@media (max-width: 600px) {
  .nav-item {
    font-size: 12px;
  }

  .nav-item i {
    font-size: 18px;
  }
}
</style>
更多实用组件,可以看我的Github组件地址 : github.com/1344160559-...
总结
这个弹性标签导航组件实现起来并不复杂,但效果非常棒。关键点在于: 1.动态计算指示条位置 2.使用贝塞尔曲线实现弹性动画 3.图标选中状态的微交互
不管你是Vue初学者还是有一定经验的开发者,这个组件都能为你带来启发。
本文首发于公众号:程序员刘大华,专注分享前后端开发的实战笔记。关注我,少走弯路,一起进步!
📌往期精彩
《MySQL 为什么不推荐用雪花ID 和 UUID 做主键?》