Zabbix企业级分布式监控系统
Zabbix管理
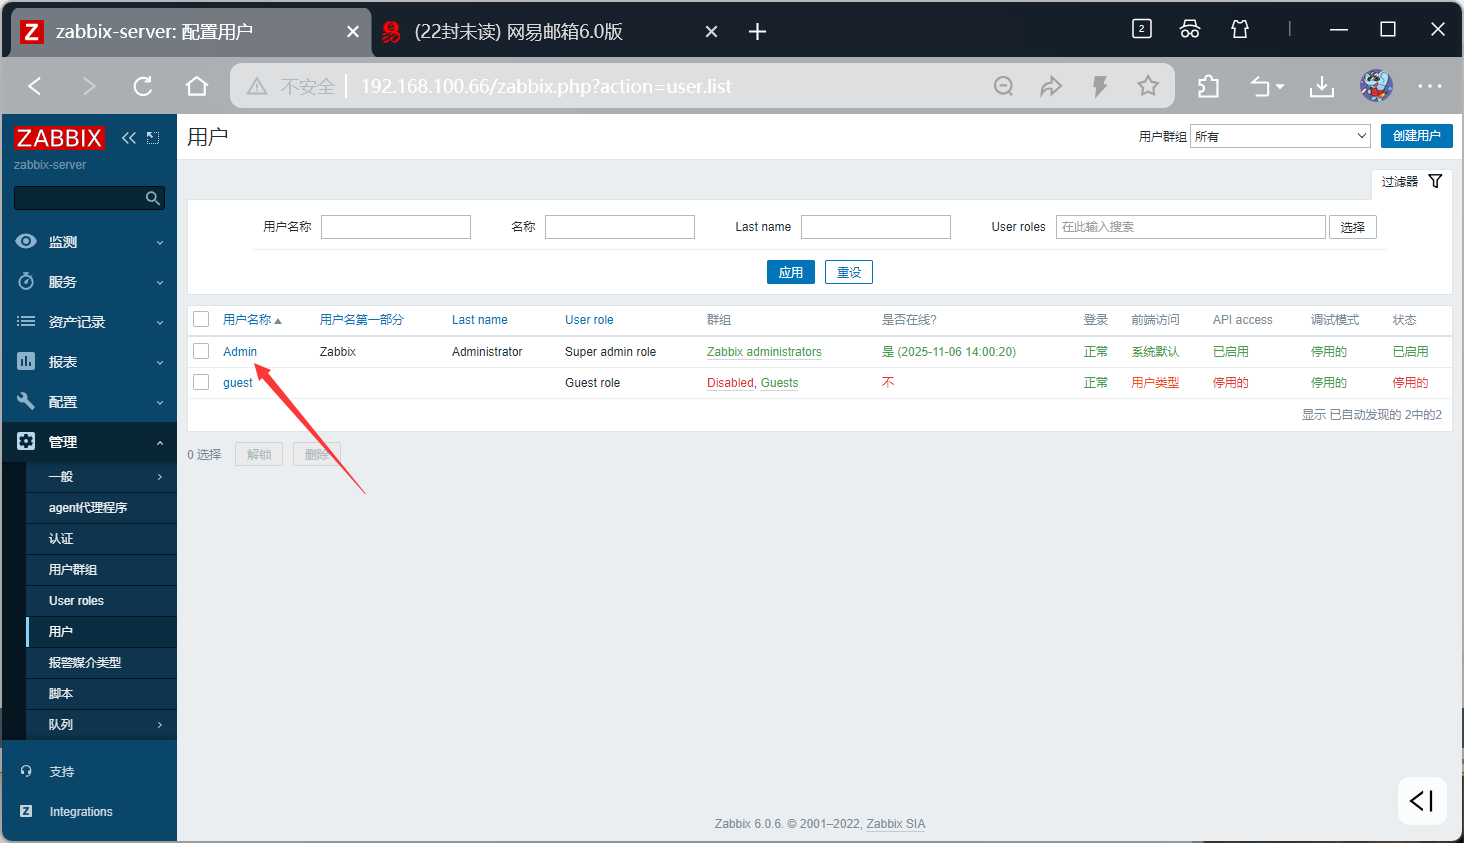
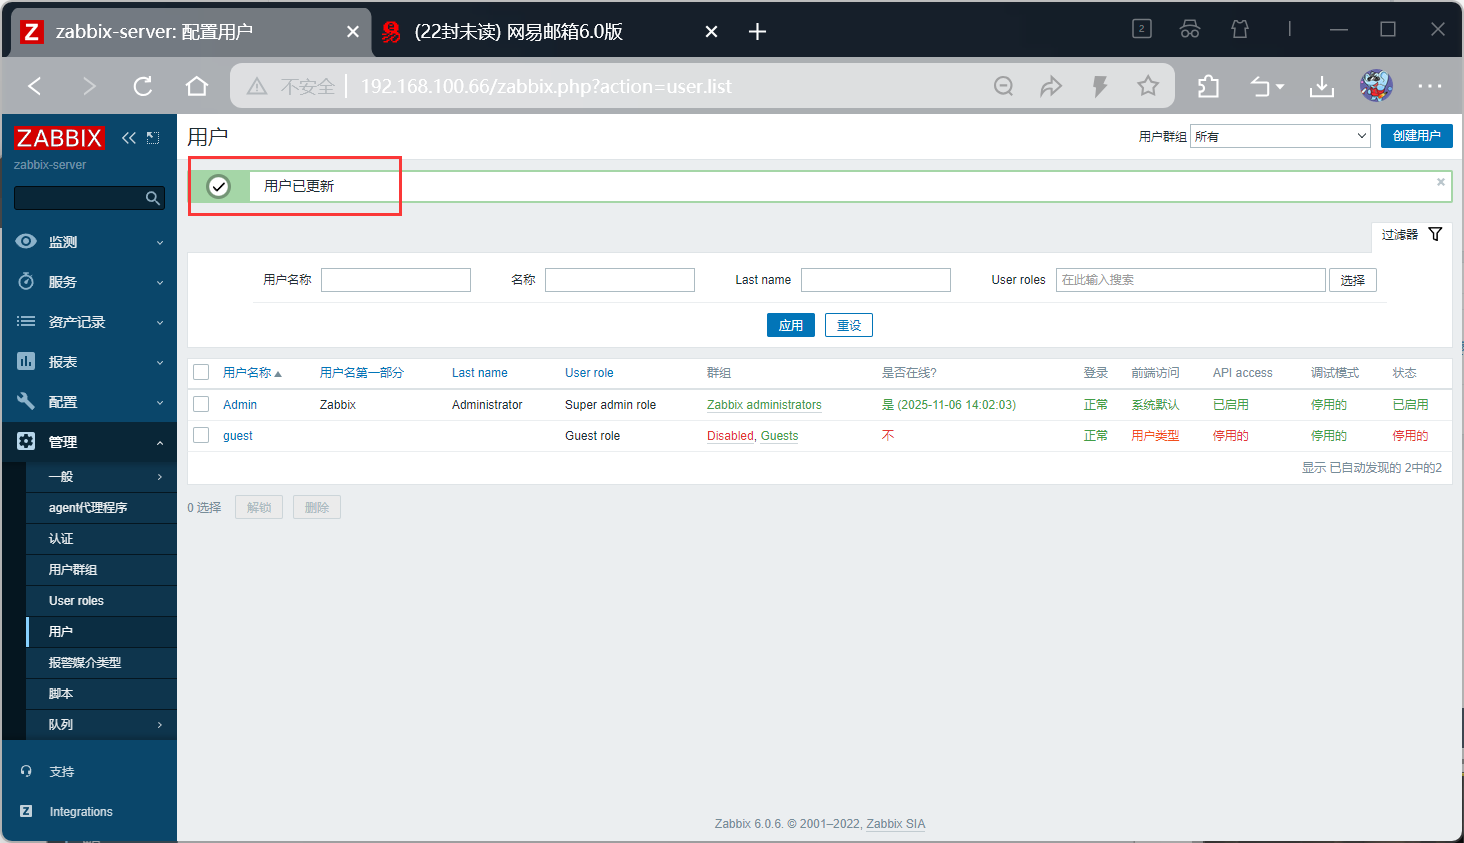
- 用户与权限:创建用户 / 用户组,基于 RBAC 分配权限,控制资源访问范围,管理会话安全。
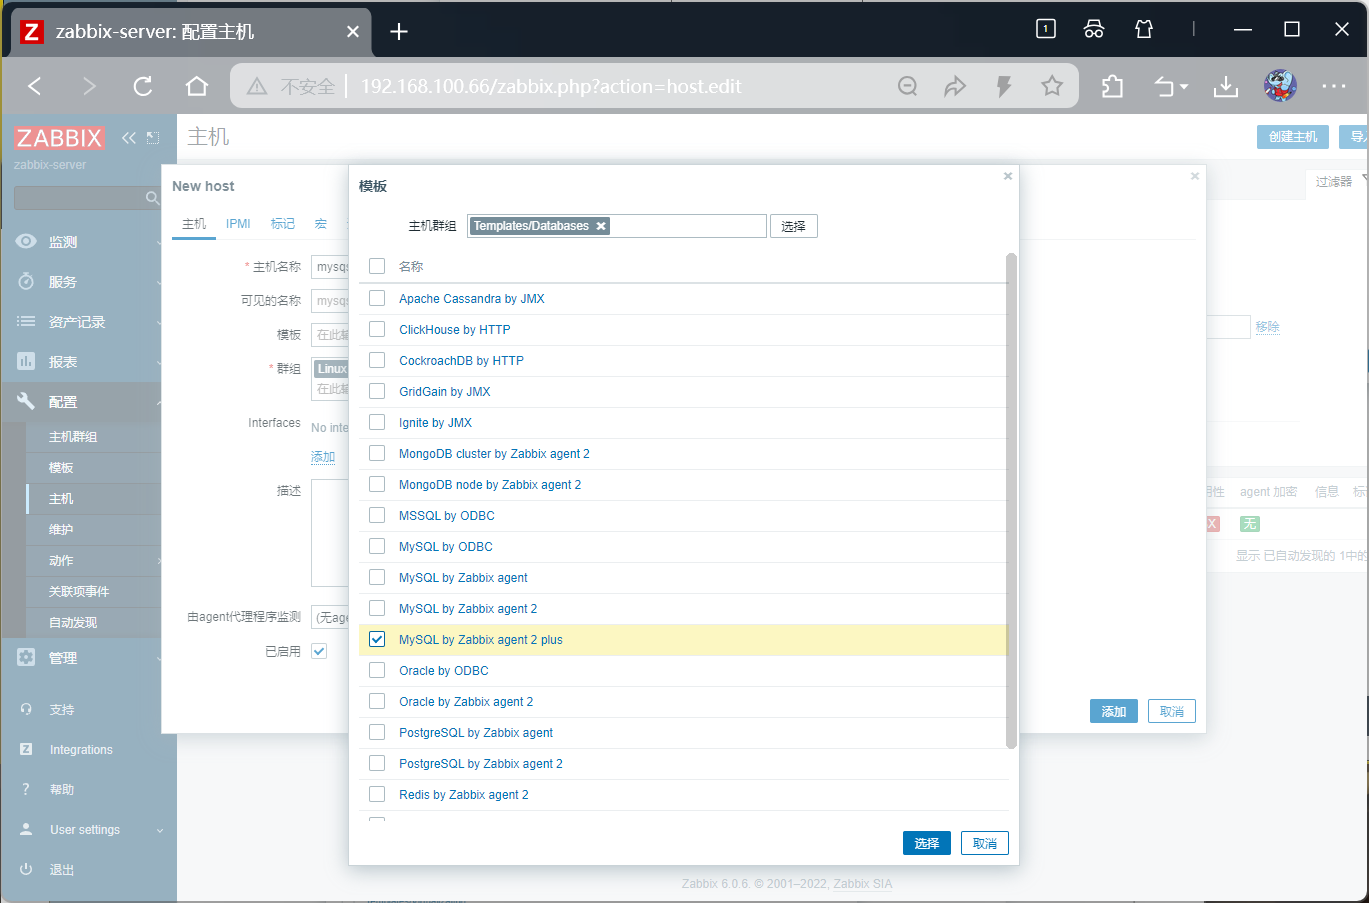
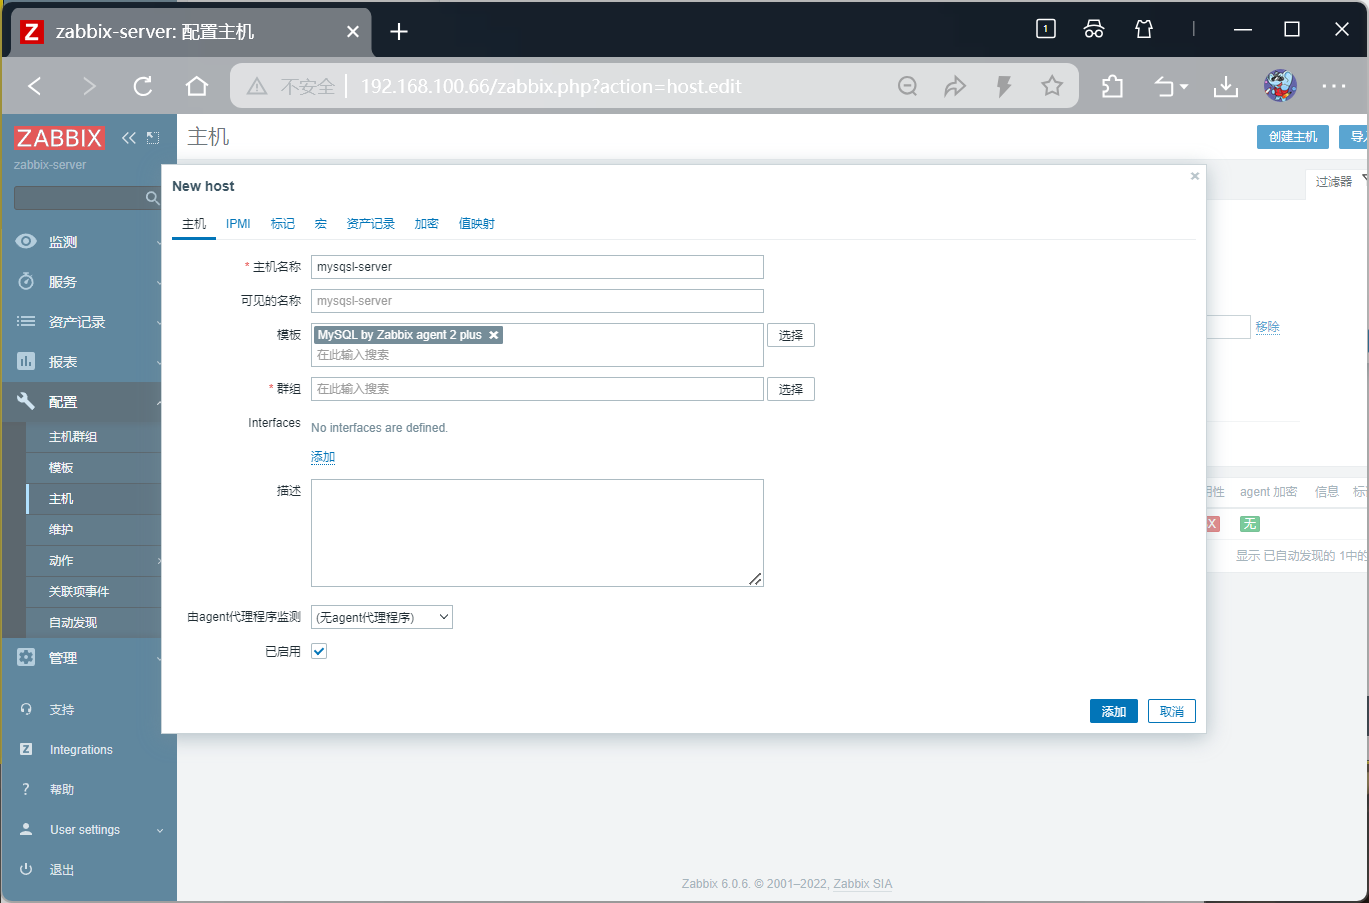
- 主机与主机组:添加主机并分组,关联模板,维护模式切换,监控主机在线状态。
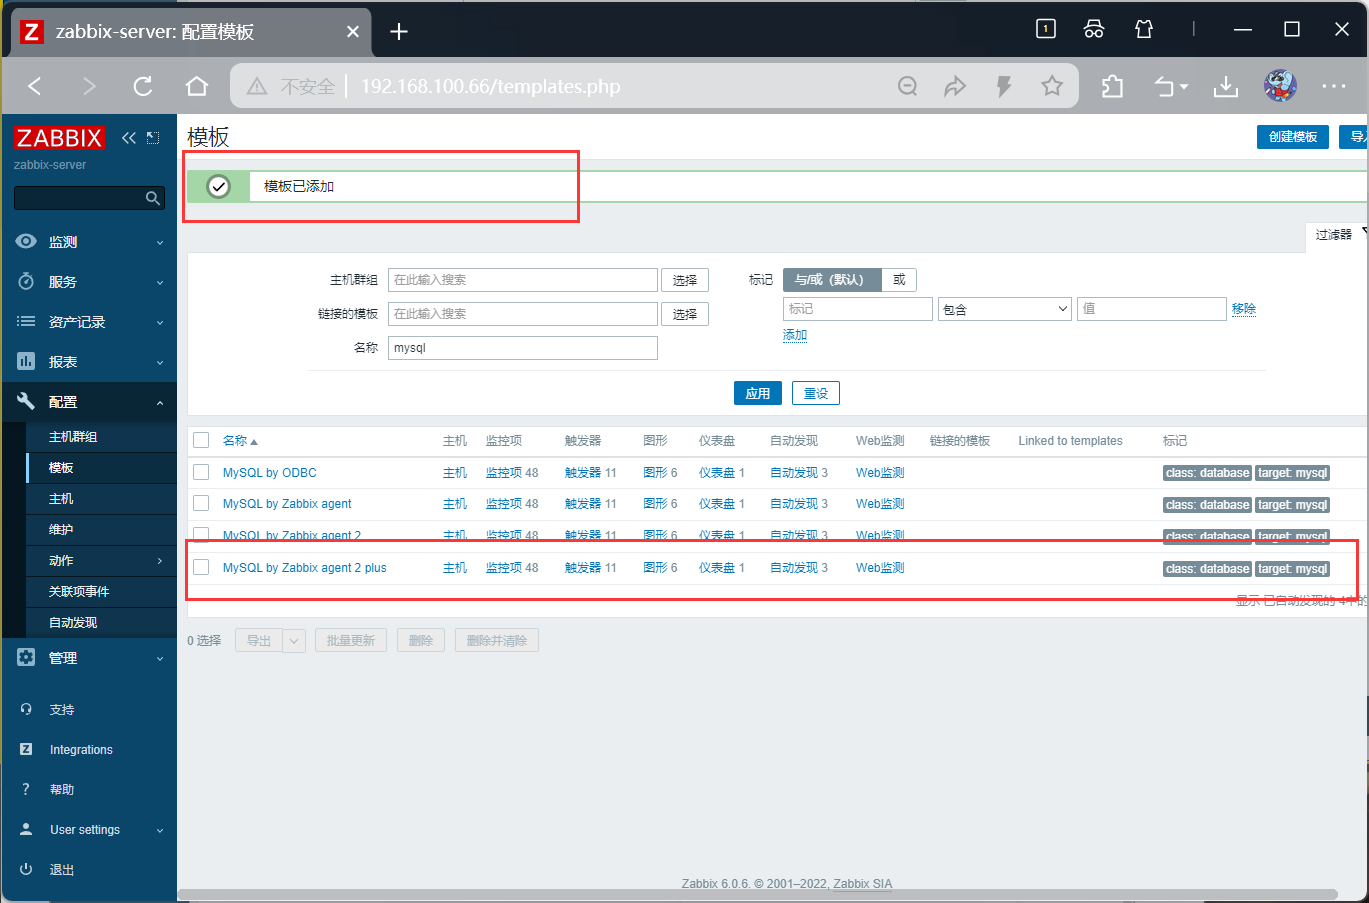
- 模板管理:创建 / 导入模板,实现监控配置复用,支持模板继承与批量关联。
- 监控项与触发器:配置指标采集规则,设置告警阈值与优先级,建立触发器依赖,批量操作优化效率。
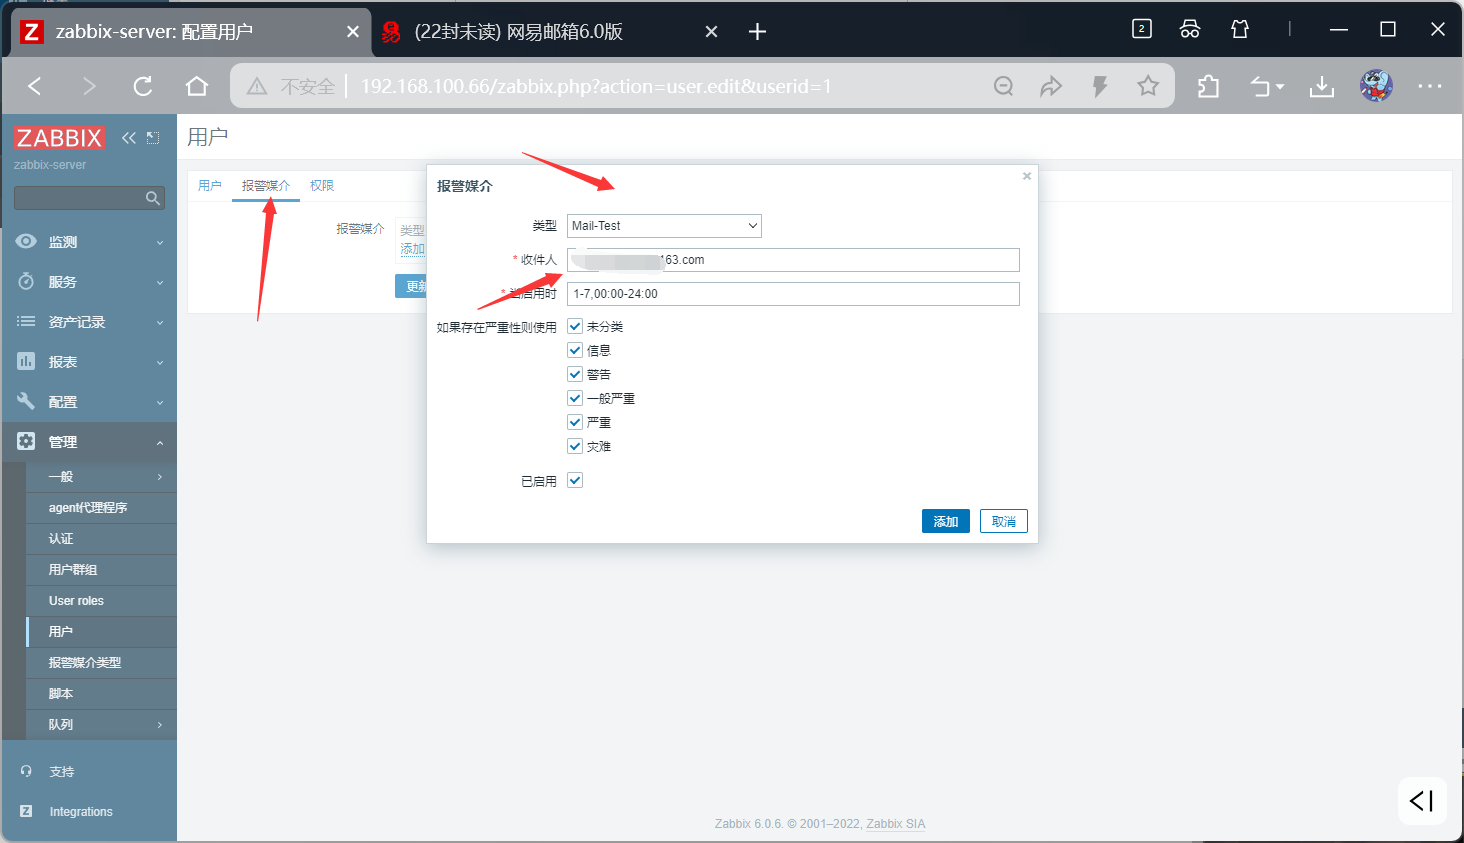
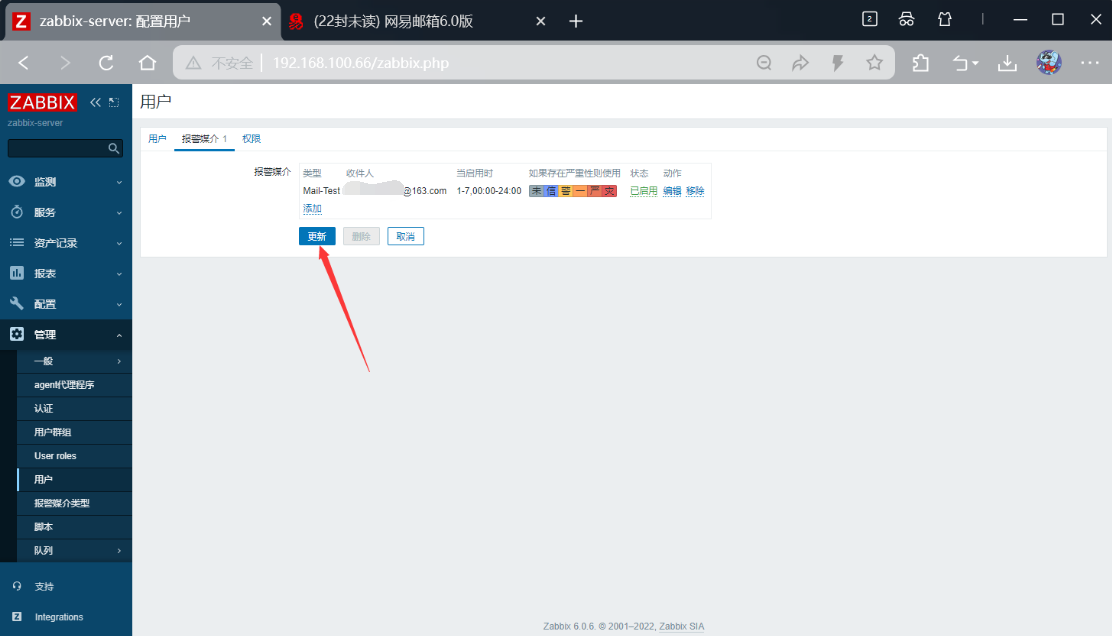
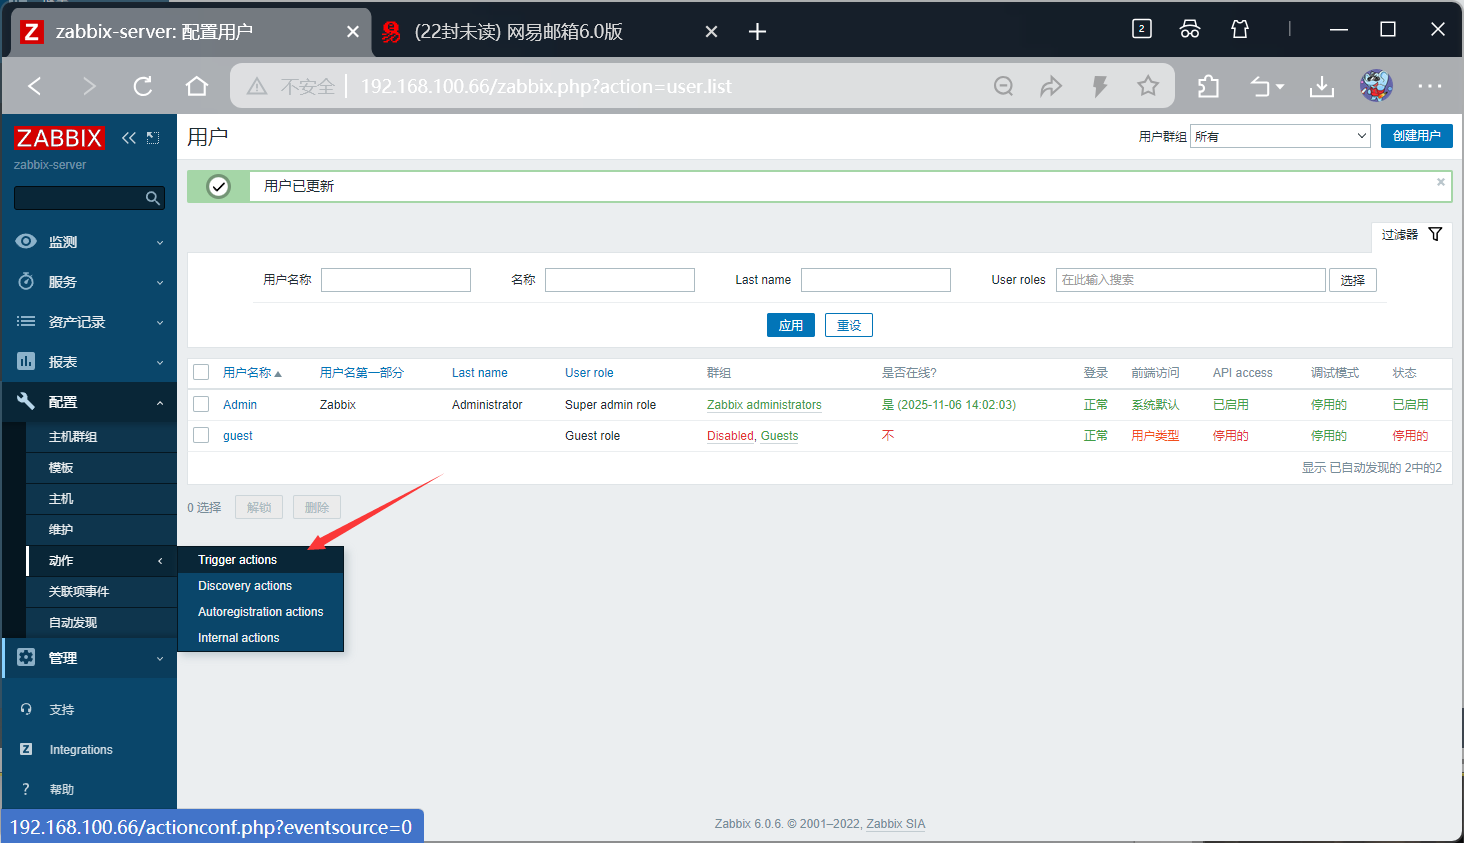
- 告警与动作:定义告警级别,配置通知(邮件 / 钉钉)与自动执行命令,设置告警升级、抑制与日志追溯。
- 分布式架构:部署 Proxy 分担 Server 压力,配置通信模式,超大规模场景使用 Node 节点。
- 数据管理:设置数据保留周期,通过 housekeeper 清理过期数据,优化数据库性能。
- 性能优化:监控 Server/Proxy/Agent 运行状态,调整配置参数,精简冗余监控项。
- 备份恢复:定期备份配置文件与数据库,制定灾难恢复流程。
- 日志审计:查看系统运行日志,记录用户操作,便于故障定位与变更追溯。
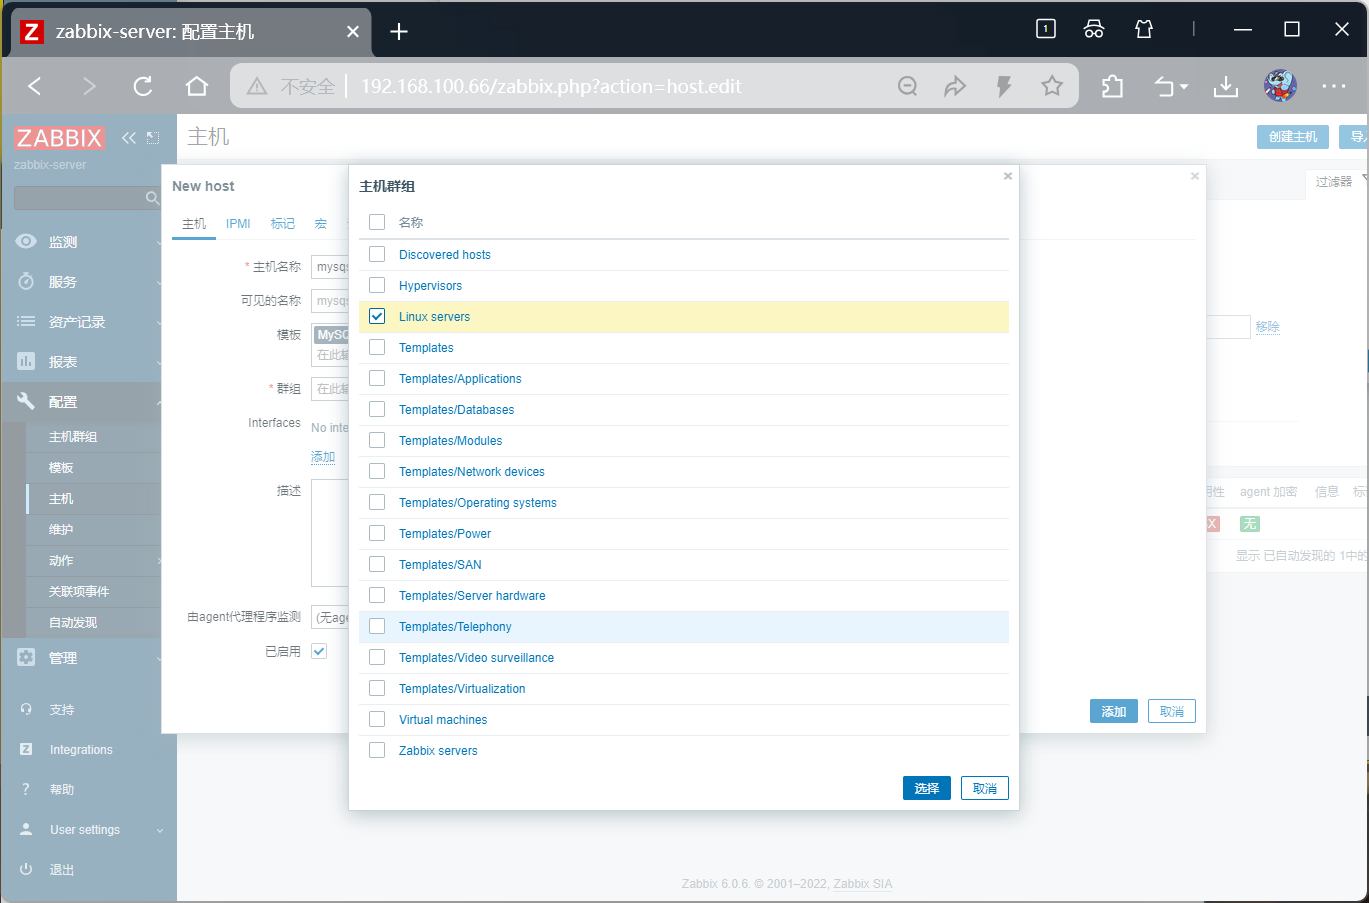
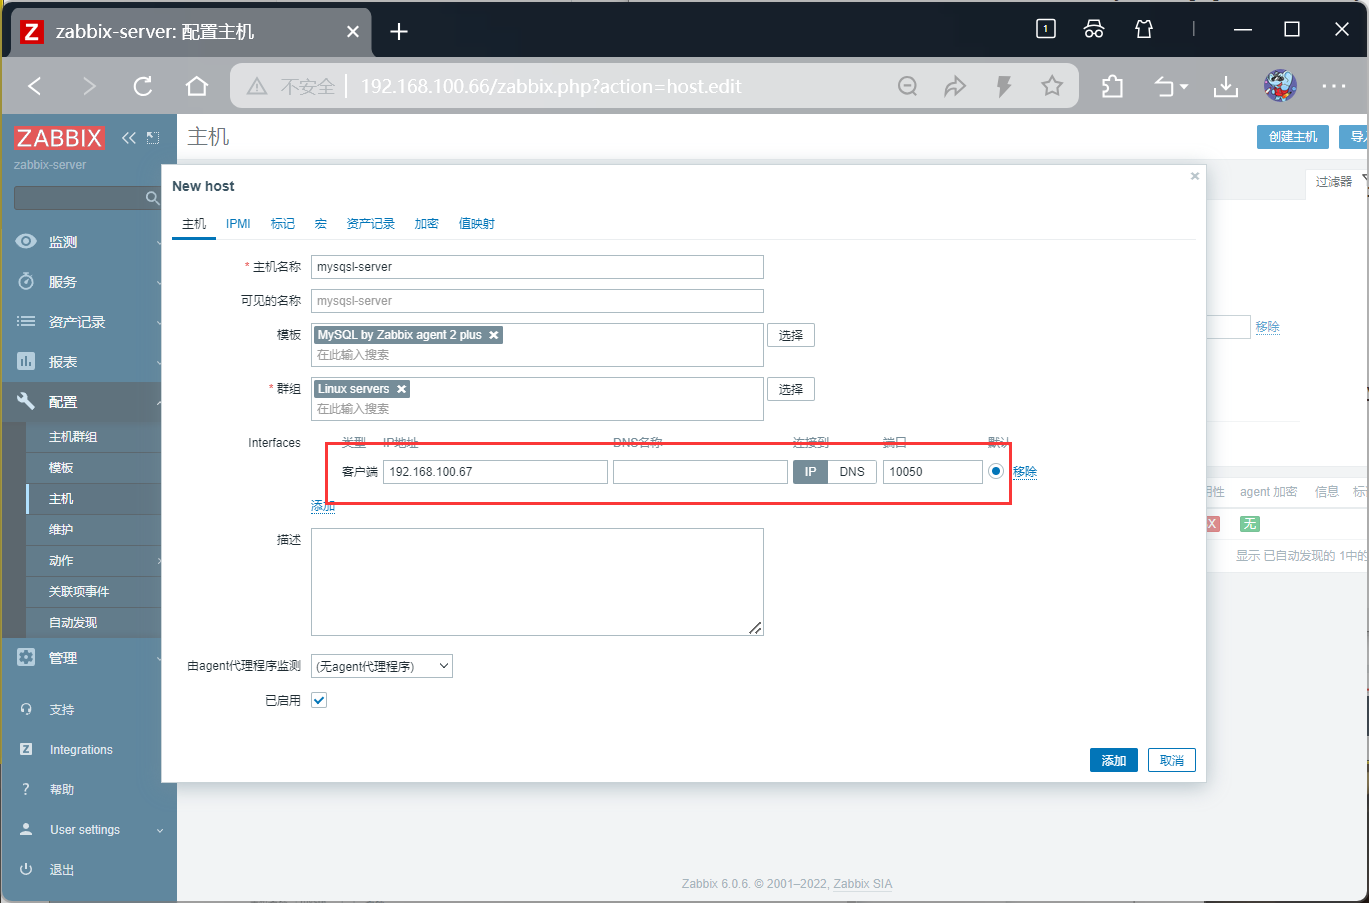
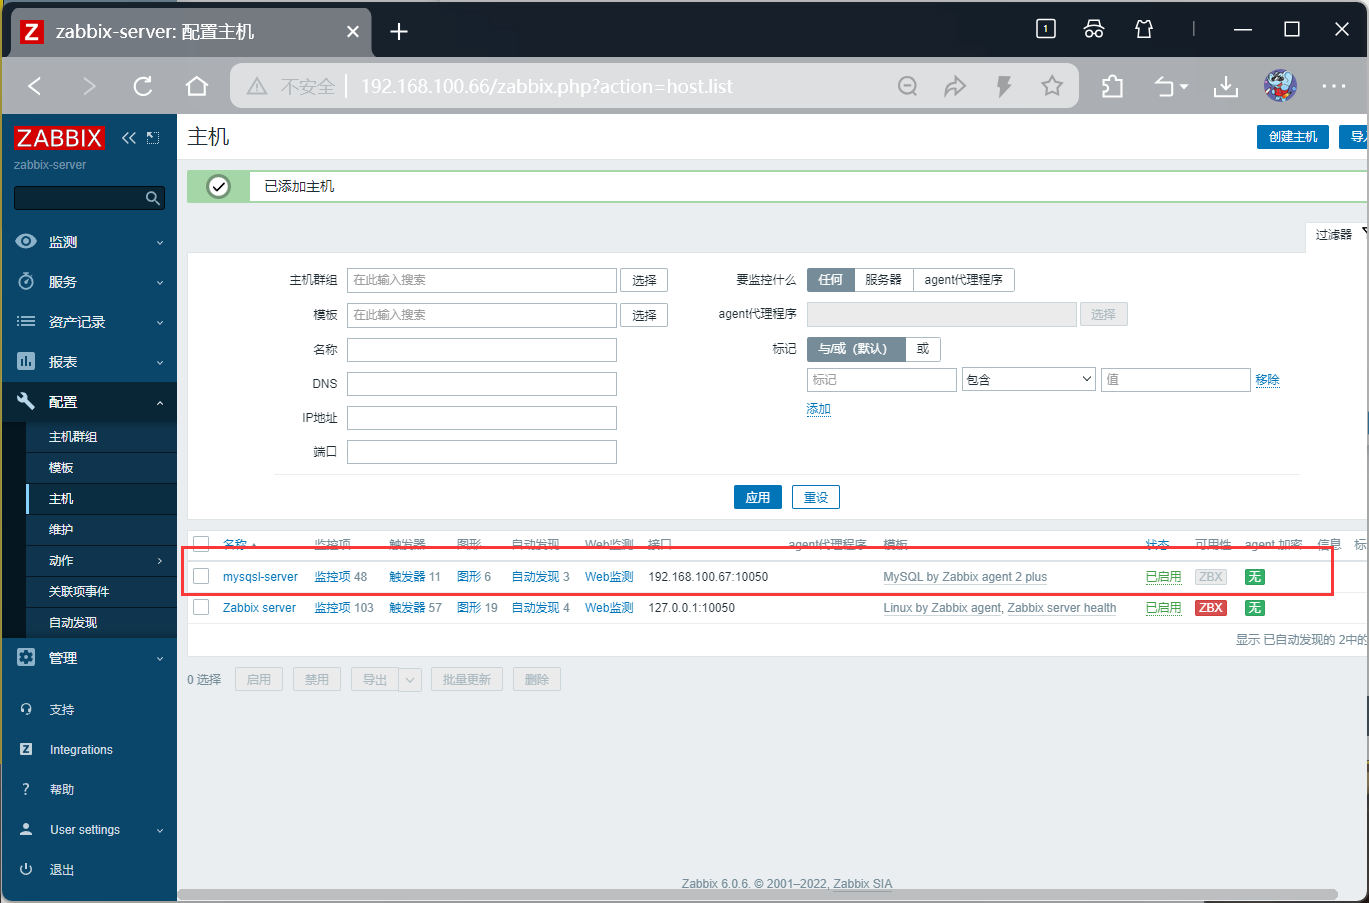
监控主机
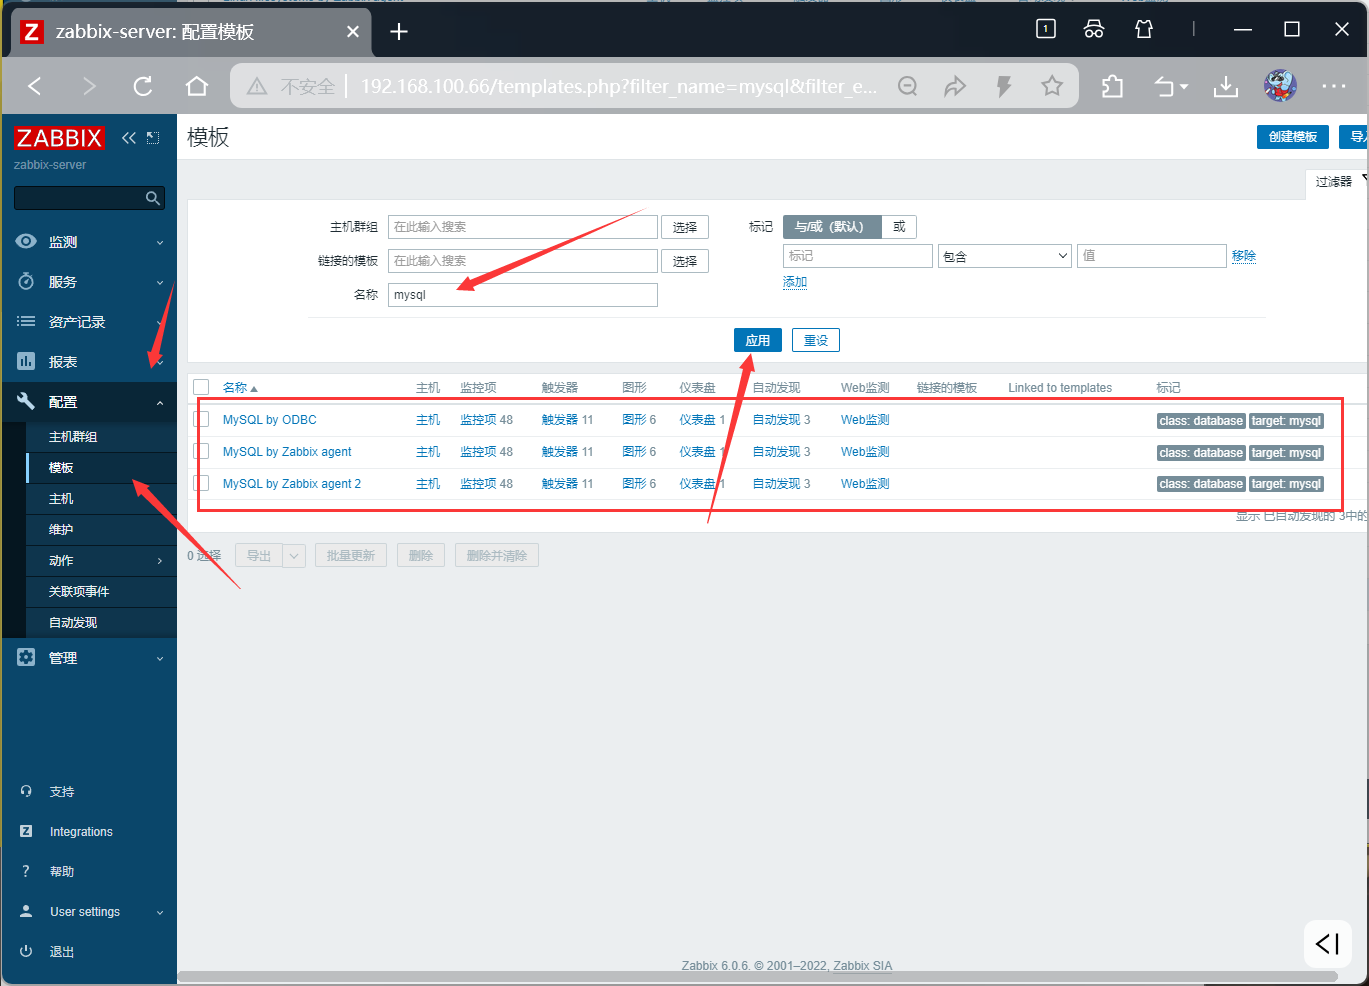
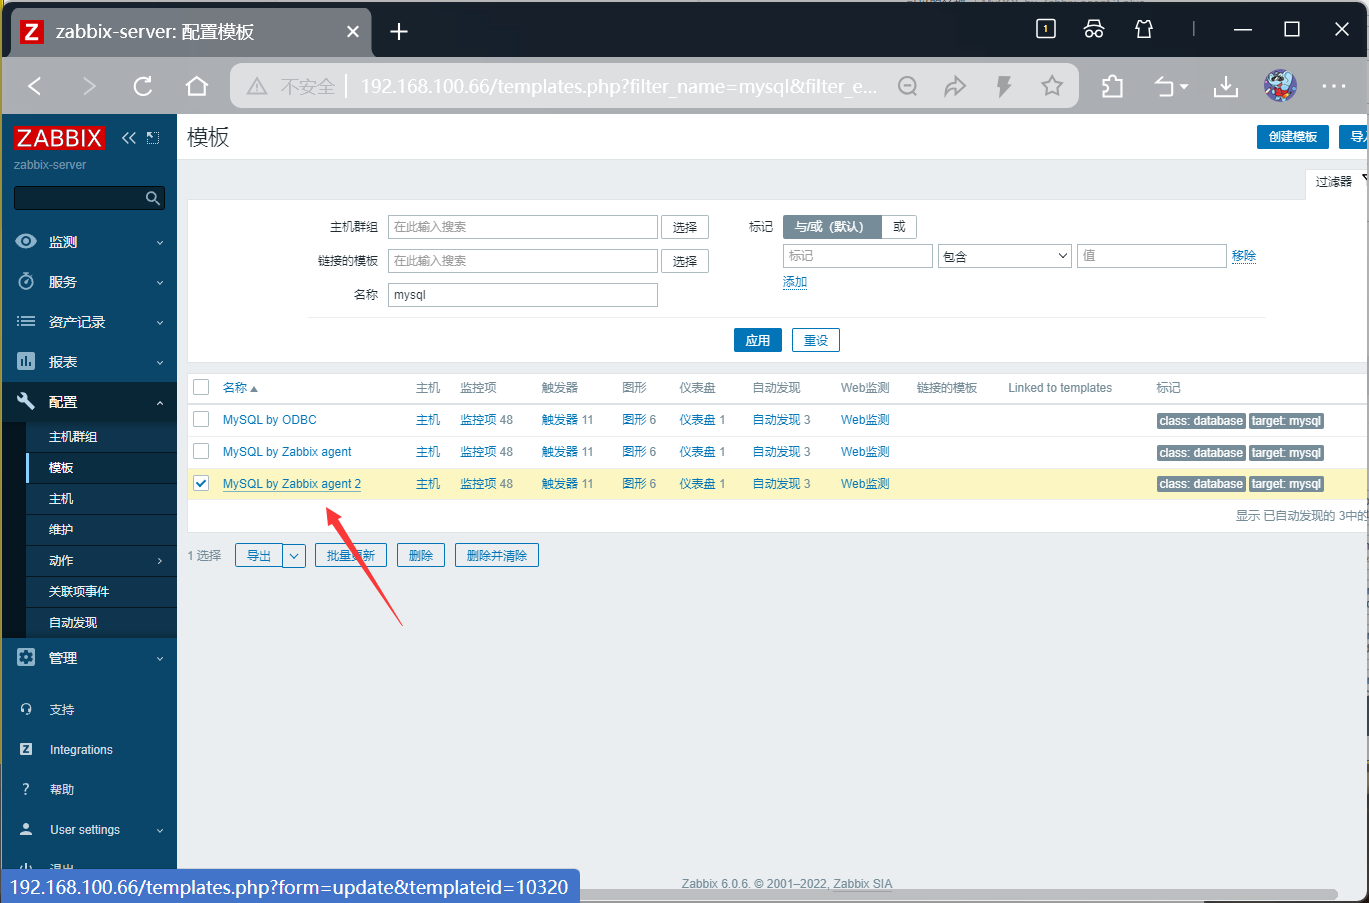
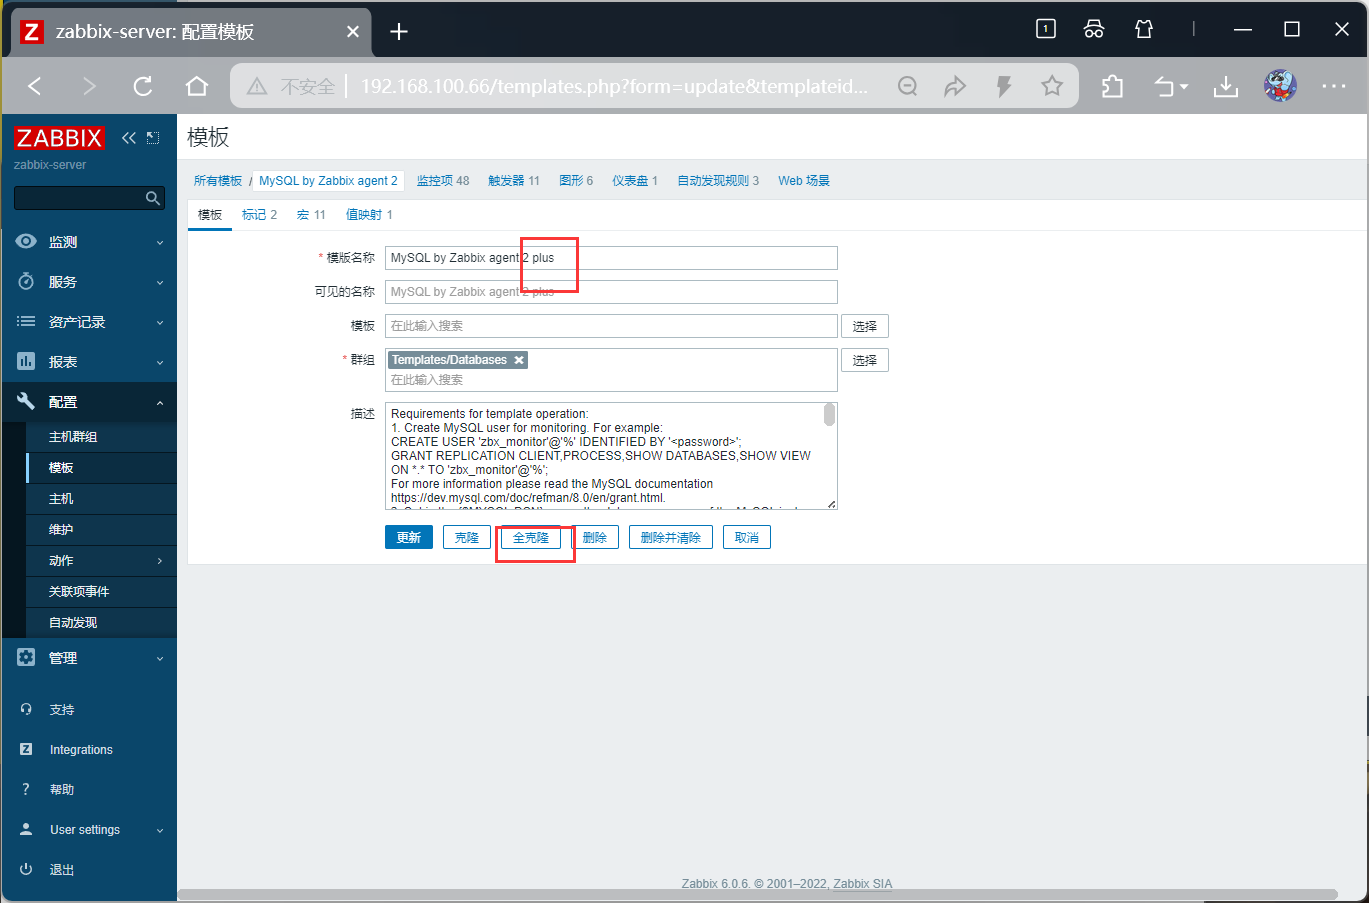
可以更改名称,并完全克隆
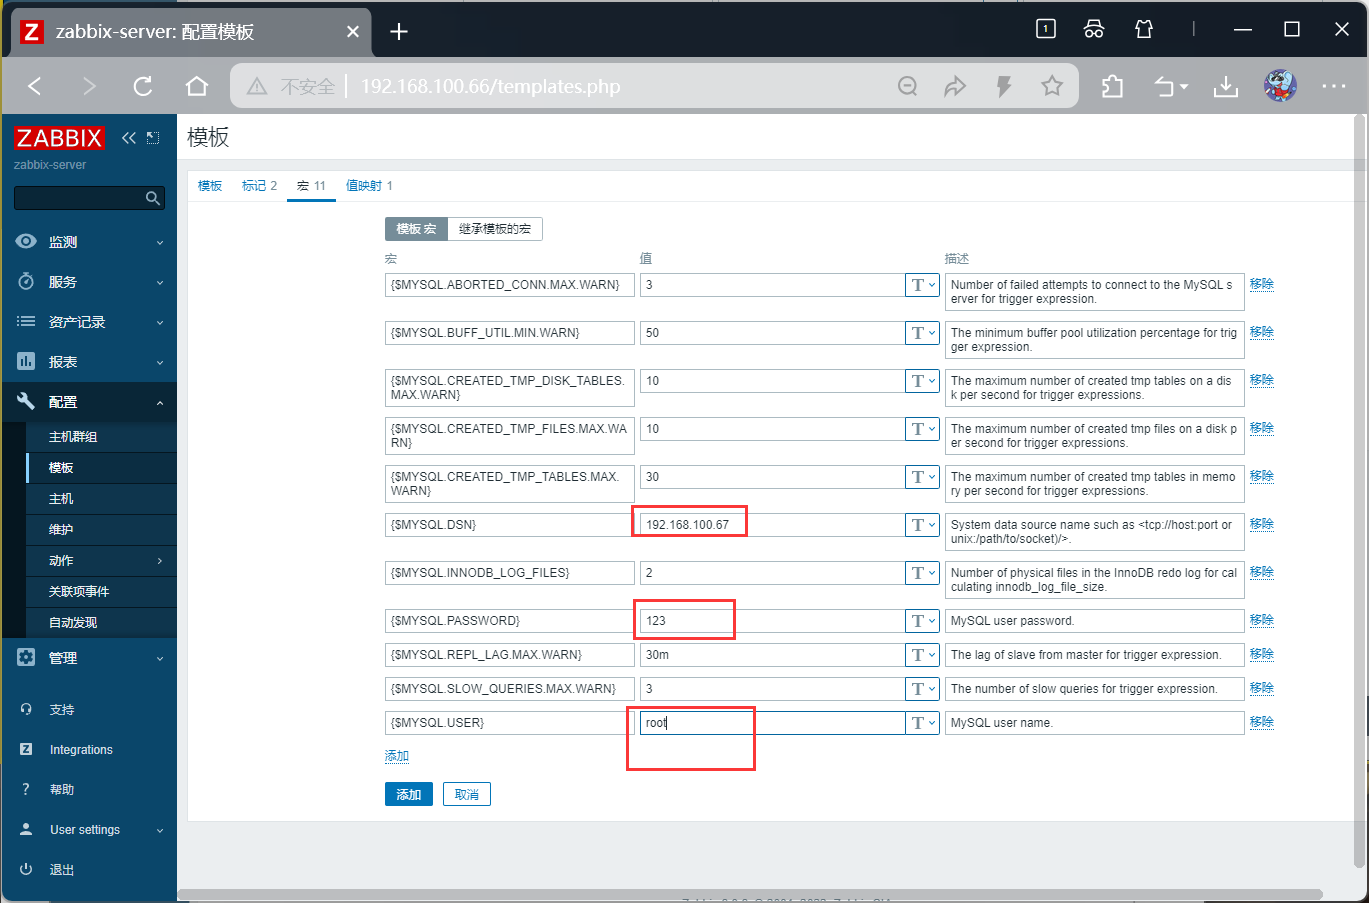
更新宏,添加被监控端的ip以及数据库
bash
#被监控端添加数据库
[root@zabbix-agent ~]# yum -y install \
ncurses \
ncurses-devel \
bison \
cmake

#创建程序用户
[root@zabbix-agent ~]# useradd -s /sbin/nologin  mysql
[root@zabbix-agent ~]# id mysql
uid=1001(mysql) gid=1001(mysql) groups=1001(mysql)

#把所需安装包拖进来
[root@zabbix-agent ~]# rz -E
rz waiting to receive.
[root@zabbix-agent ~]# rz -E
rz waiting to receive.
[root@zabbix-agent ~]# ls
anaconda-ks.cfg      Desktop    Downloads             Music                Pictures  Templates
boost_1_59_0.tar.gz  Documents  initial-setup-ks.cfg  mysql-5.7.17.tar.gz  Public    Videos


#解压,重命名
[root@zabbix-agent ~]# tar zxvf boost_1_59_0.tar.gz -C /usr/local/

[root@zabbix-agent ~]# cd /usr/local/
[root@zabbix-agent local]# ls
bin  boost_1_59_0  etc  games  include  lib  lib64  libexec  sbin  share  src
[root@zabbix-agent local]# mv boost_1_59_0/ boost
[root@zabbix-agent local]# ls
bin  boost  etc  games  include  lib  lib64  libexec  sbin  share  src

[root@zabbix-agent ~]# tar zxvf mysql-5.7.17.tar.gz

[root@zabbix-agent ~]# cd mysql-5.7.17/


#开始编译
#安装工具
[root@zabbix-agent mysql-5.7.17]# yum install gcc gcc-c++

#配置安装参数
cmake \
-DCMAKE_INSTALL_PREFIX=/usr/local/mysql \
-DMYSQL_UNIX_ADDR=/usr/local/mysql/mysql.sock \
-DSYSCONFDIR=/etc \
-DSYSTEMD_PID_DIR=/usr/local/mysql \
-DDEFAULT_CHARSET=utf8  \
-DDEFAULT_COLLATION=utf8_general_ci \
-DWITH_INNOBASE_STORAGE_ENGINE=1 \
-DWITH_ARCHIVE_STORAGE_ENGINE=1 \
-DWITH_BLACKHOLE_STORAGE_ENGINE=1 \
-DWITH_PERFSCHEMA_STORAGE_ENGINE=1 \
-DMYSQL_DATADIR=/usr/local/mysql/data \
-DWITH_BOOST=/usr/local/boost \
-DWITH_SYSTEMD=1

#并行编译源码生成可执行文件
[root@zabbix-agent mysql-5.7.17]# make -j4
#将编译结果安装到指定目录
[root@zabbix-agent mysql-5.7.17]# make && make install


[root@zabbix-agent mysql-5.7.17]# chown -R mysql.mysql /usr/local/mysql/


[root@zabbix-agent mysql-5.7.17]# vim /etc/my.cnf
[root@zabbix-agent mysql-5.7.17]# cat /etc/my.cnf
[client]
port = 3306
default-character-set=utf8
socket = /usr/local/mysql/mysql.sock

[mysql]
port = 3306
default-character-set=utf8
socket = /usr/local/mysql/mysql.sock

[mysqld]
user = mysql
basedir = /usr/local/mysql
datadir = /usr/local/mysql/data
port = 3306
character_set_server=utf8
pid-file = /usr/local/mysql/mysqld.pid
socket = /usr/local/mysql/mysql.sock
server-id = 1

sql_mode=NO_ENGINE_SUBSTITUTION,STRICT_TRANS_TABLES,NO_AUTO_CREATE_USER,NO_AUTO_VALUE_ON_ZERO,NO_ZERO_IN_DATE,NO_ZERO_DATE,ERROR_FOR_DIVISION_BY_ZERO,PIPES_AS_CONCAT,ANSI_QUOTES


#权限
[root@zabbix-agent mysql-5.7.17]# chown mysql:mysql /etc/my.cnf


#设置环境变量
[root@zabbix-agent mysql-5.7.17]# vim /etc/profile
#如下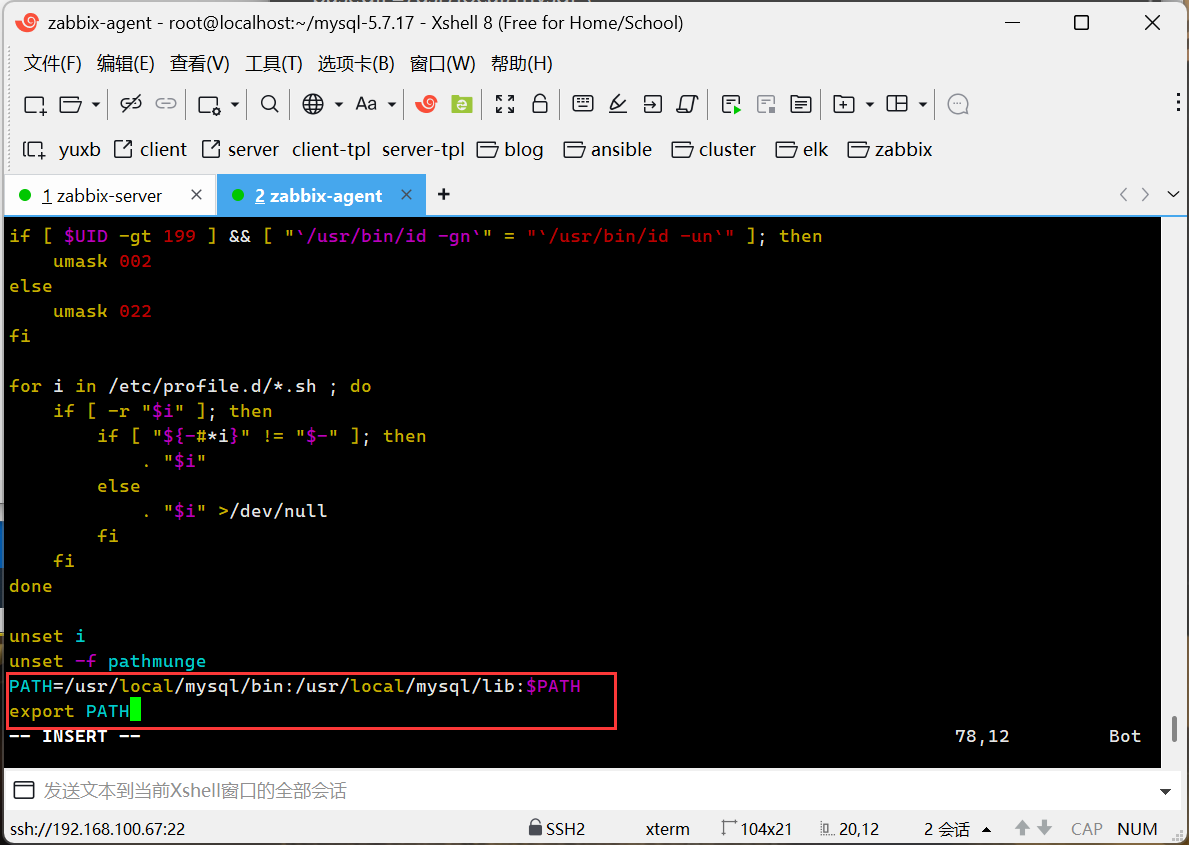
bash
[root@zabbix-agent mysql-5.7.17]# source /etc/profile

#数据库初始化
[root@zabbix-agent mysql-5.7.17]# cd /usr/local/mysql/
[root@zabbix-agent mysql]# bin/mysqld \
--initialize-insecure \
--user=mysql \
--basedir=/usr/local/mysql \
--datadir=/usr/local/mysql/data


[root@zabbix-agent mysql]# cp /usr/local/mysql/usr/lib/systemd/system/mysqld.service /usr/lib/systemd/system/

[root@zabbix-agent mysql]# systemctl daemon-reload
[root@zabbix-agent mysql]# systemctl start mysqld
[root@zabbix-agent mysql]# netstat -anpt | grep 3306
tcp6       0      0 :::3306                 :::*                    LISTEN      23745/mysqld

[root@zabbix-agent mysql]# systemctl enable mysqld
Created symlink from /etc/systemd/system/multi-user.target.wants/mysqld.service to /usr/lib/systemd/system/mysqld.service.


#数据库密码设置
[root@zabbix-agent mysql]# mysqladmin -u root -p password "123"
Enter password:
mysqladmin: [Warning] Using a password on the command line interface can be insecure.
Warning: Since password will be sent to server in plain text, use ssl connection to ensure password safety.

[root@zabbix-agent mysql]# mysql -u root -p123
mysql: [Warning] Using a password on the command line interface can be insecure.
Welcome to the MySQL monitor.  Commands end with ; or \g.
Your MySQL connection id is 5
Server version: 5.7.17 Source distribution

Copyright (c) 2000, 2016, Oracle and/or its affiliates. All rights reserved.

Oracle is a registered trademark of Oracle Corporation and/or its
affiliates. Other names may be trademarks of their respective
owners.

Type 'help;' or '\h' for help. Type '\c' to clear the current input statement.

mysql>


#授权远程登陆
[root@zabbix-agent mysql]# mysql -u root -p123
mysql: [Warning] Using a password on the command line interface can be insecure.
Welcome to the MySQL monitor.  Commands end with ; or \g.
Your MySQL connection id is 6
Server version: 5.7.17 Source distribution

Copyright (c) 2000, 2016, Oracle and/or its affiliates. All rights reserved.

Oracle is a registered trademark of Oracle Corporation and/or its
affiliates. Other names may be trademarks of their respective
owners.

Type 'help;' or '\h' for help. Type '\c' to clear the current input statement.

mysql> grant all privileges on *.* to 'root'@'%' identified by '123' with grant option;
Query OK, 0 rows affected, 1 warning (0.00 sec)

mysql> flush privileges;
Query OK, 0 rows affected (0.00 sec)
邮件服务
server端发送邮件
bash
#zabbix-server安装邮箱服务
[root@zabbix-server ~]# yum install -y mailx
配置邮箱服务
bash
[root@zabbix-server ~]# vim /etc/mail.rc
----文件末尾新增---
set from=邮箱地址
set smtp=smtp.163.com
set smtp-auth-user=邮箱地址
set smtp-auth-password=代码
set smtp-auth=login
发送测试邮件
bash
[root@zabbix-server ~]# echo "hello world" | mail -s "zb-test" 邮件地址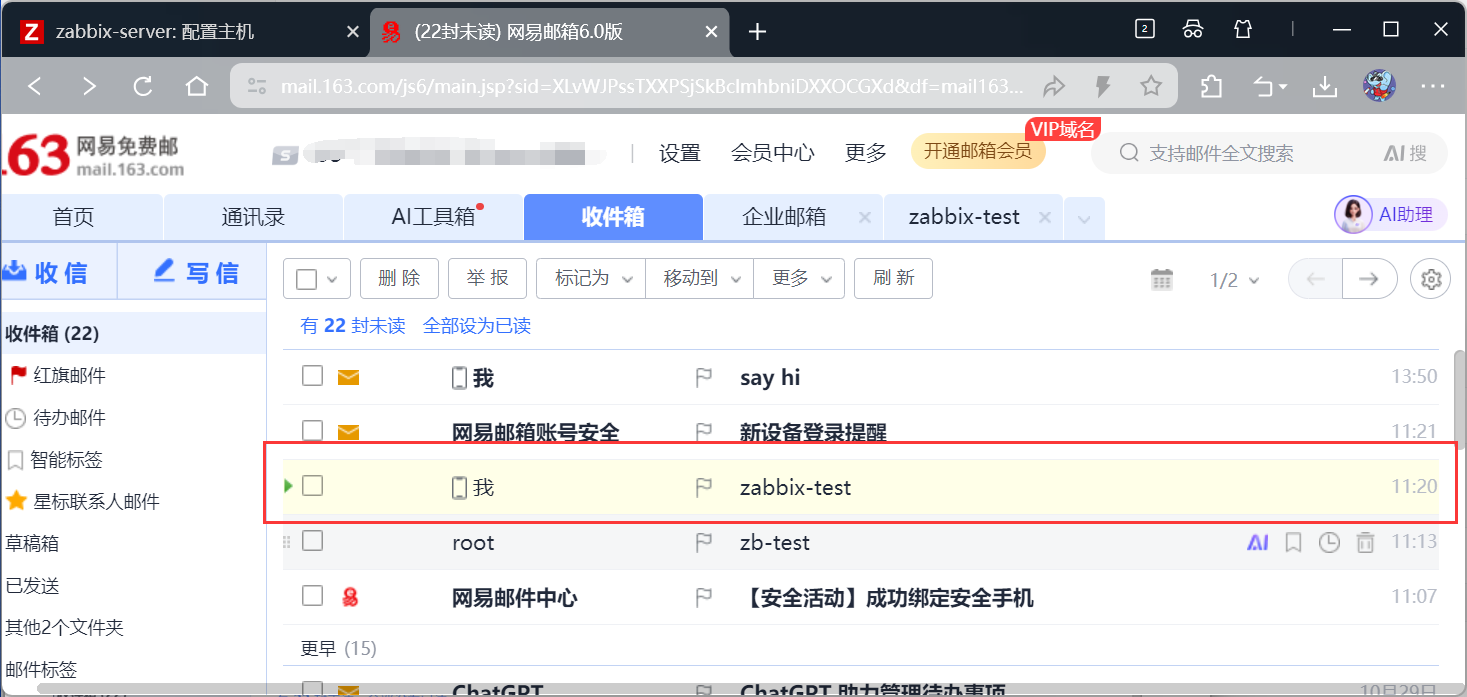

用脚本发邮件
bash
#创建脚本目录,并重启zabbix服务
[root@zabbix-server ~]# vim /etc/zabbix/zabbix_server.conf

[root@zabbix-server ~]# mkdir -p /usr/lib/zabbix/alertscripts
[root@zabbix-server ~]# chown -R zabbix:zabbix /usr/lib/zabbix/alertscripts
[root@zabbix-server ~]# systemctl restart zabbix-server.service
[root@zabbix-server ~]# systemctl status zabbix-server.service

#编写邮件发送脚本
[root@zabbix-server ~]# cd /usr/local/
[root@zabbix-server local]# vim mailx.sh
[root@zabbix-server local]# cat mailx.sh
#!/bin/bash
#send mail
messages=`echo $3 | tr '\r\n' '\n'`
subject=`echo $2 | tr '\r\n' '\n'`
echo "${messages}" | mail -s "${subject}" $1 >>/tmp/mailx.log 2>&1


[root@zabbix-server local]# touch /tmp/mailx.log
[root@zabbix-server local]# chown -R zabbix.zabbix /tmp/mailx.log
[root@zabbix-server local]# mv mailx.sh /usr/lib/zabbix/alertscripts/
[root@zabbix-server local]# cd /usr/lib/zabbix/alertscripts/
[root@zabbix-server alertscripts]# ls
mailx.sh
[root@zabbix-server alertscripts]# chmod +x mailx.sh


#发送邮件
[root@zabbix-server alertscripts]# ./mailx.sh 邮件地址 "say hi" "This is test"
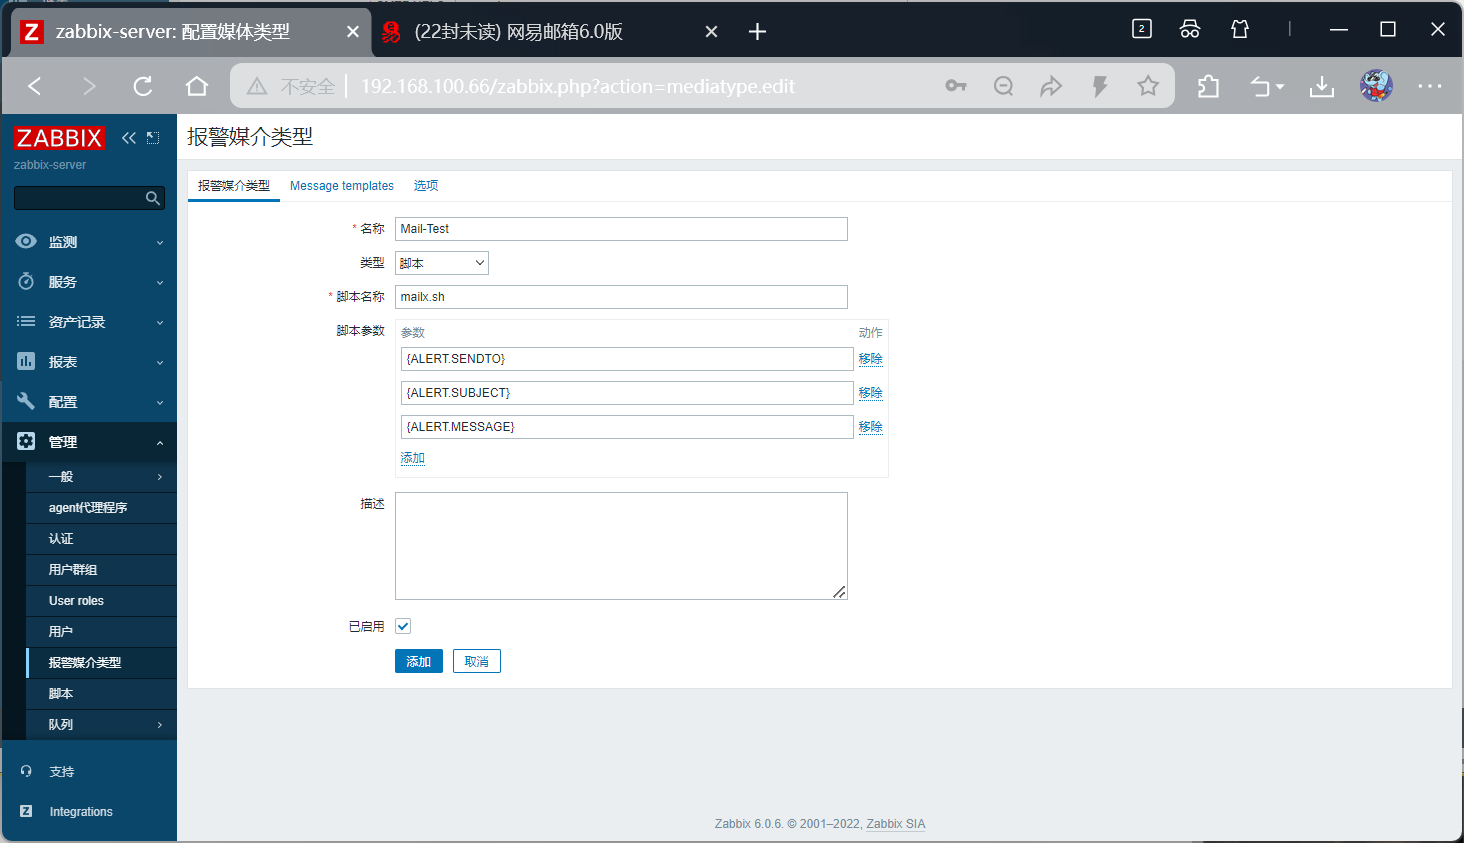
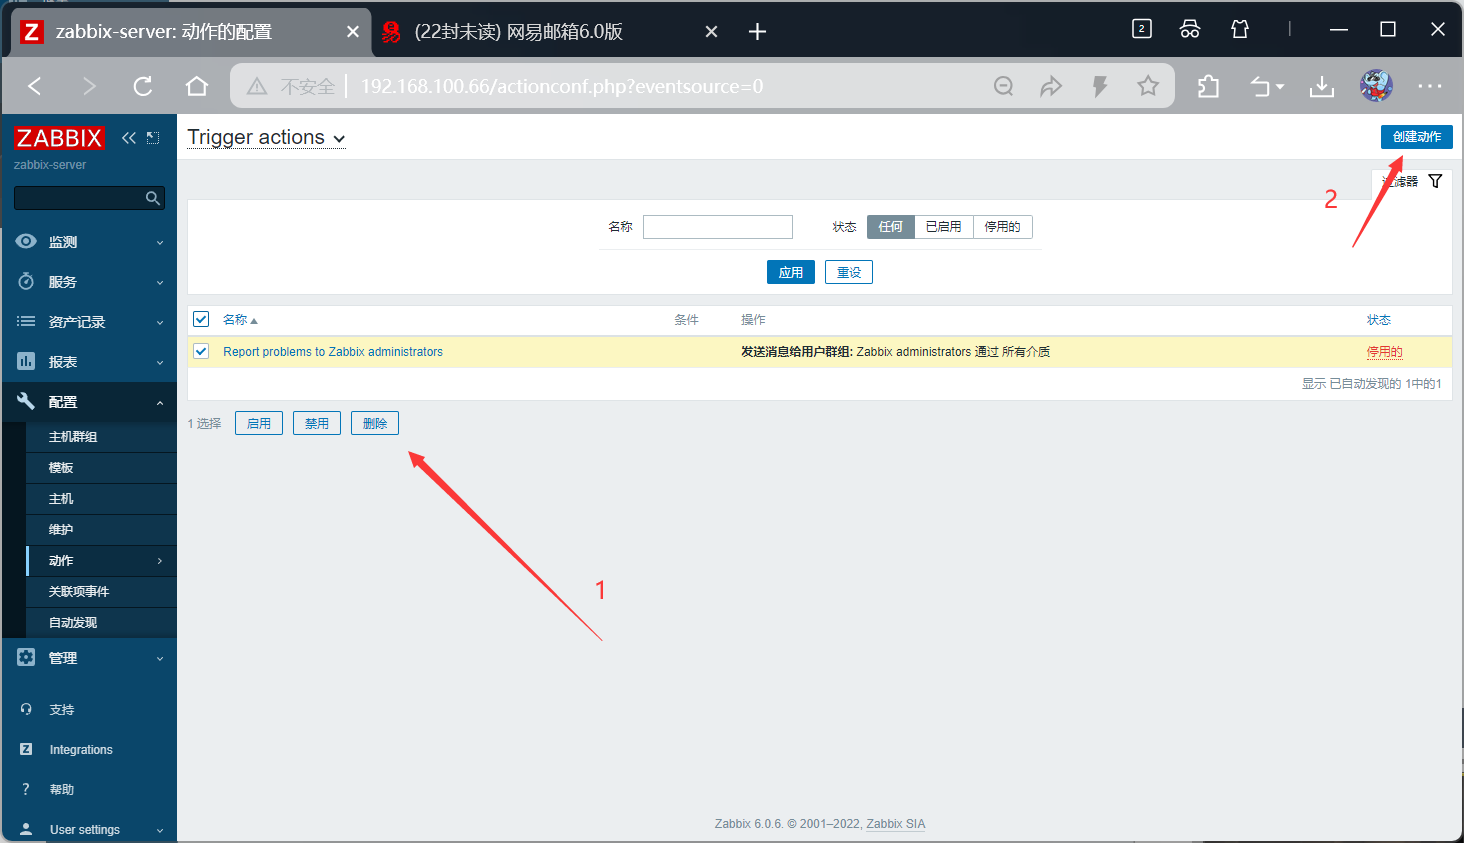
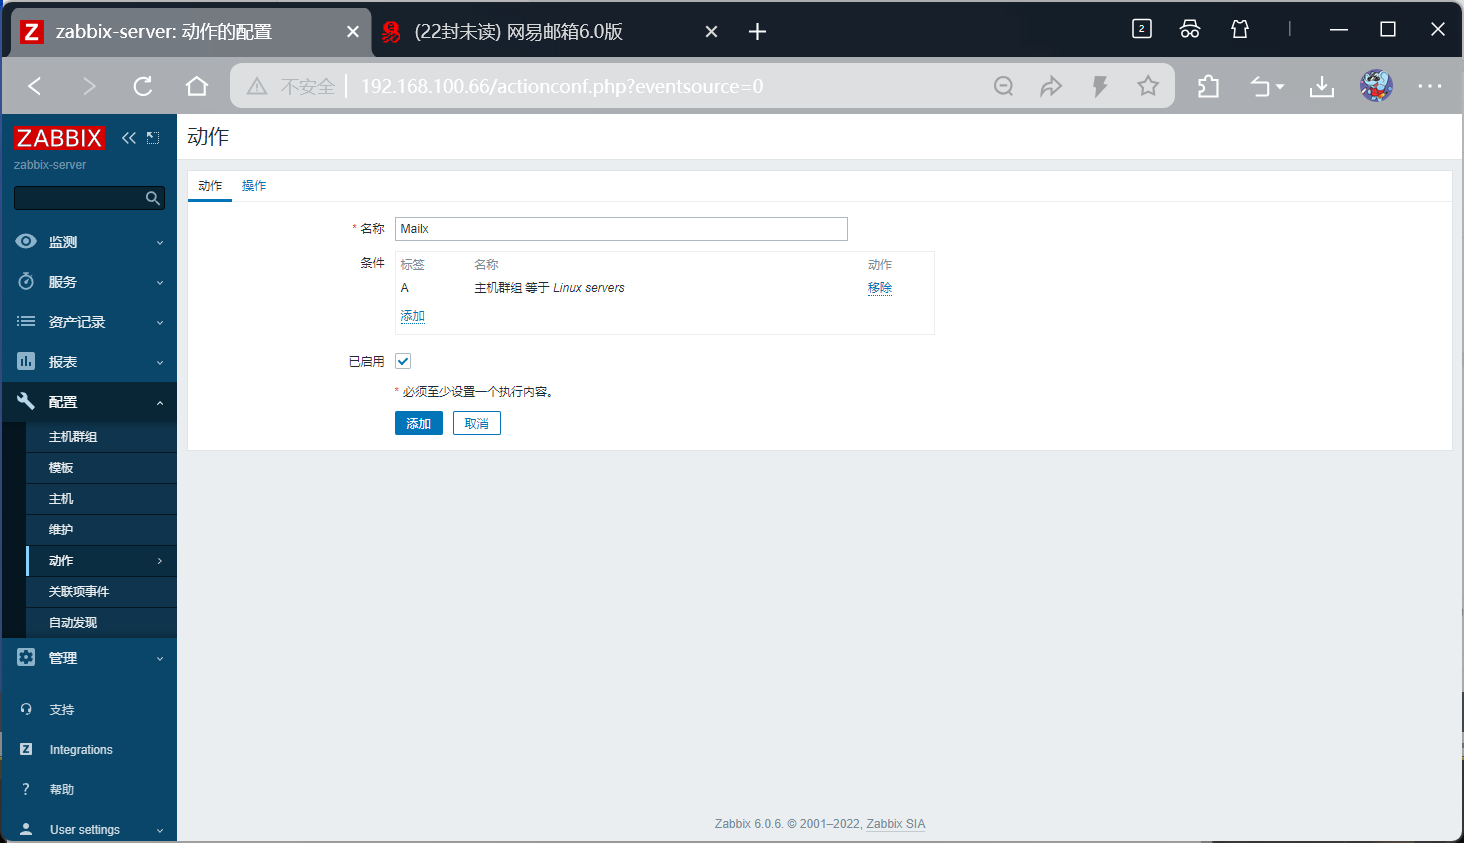
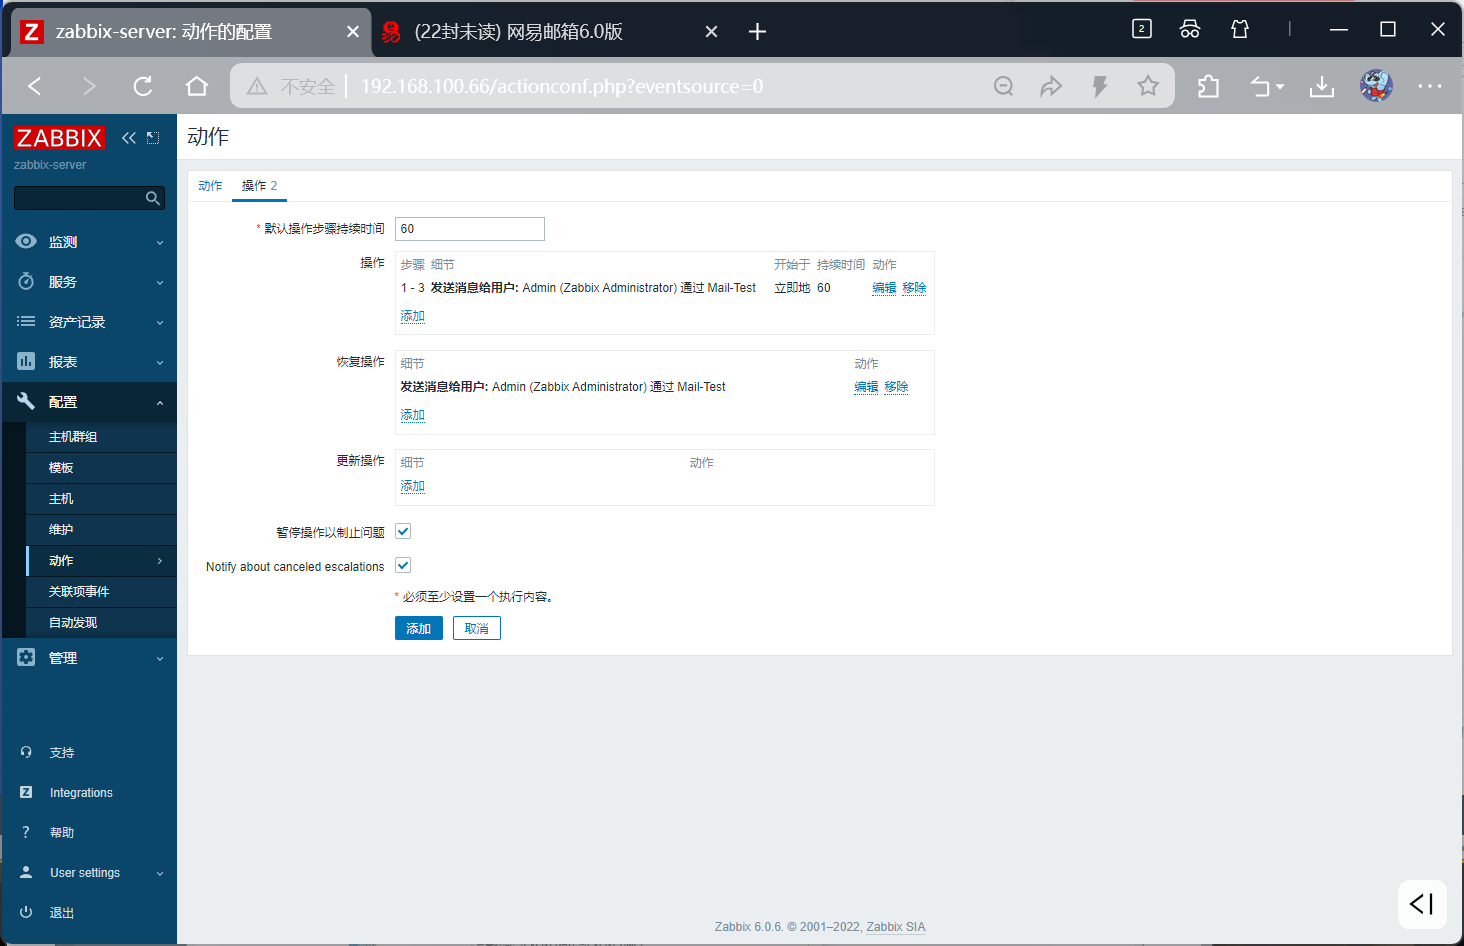
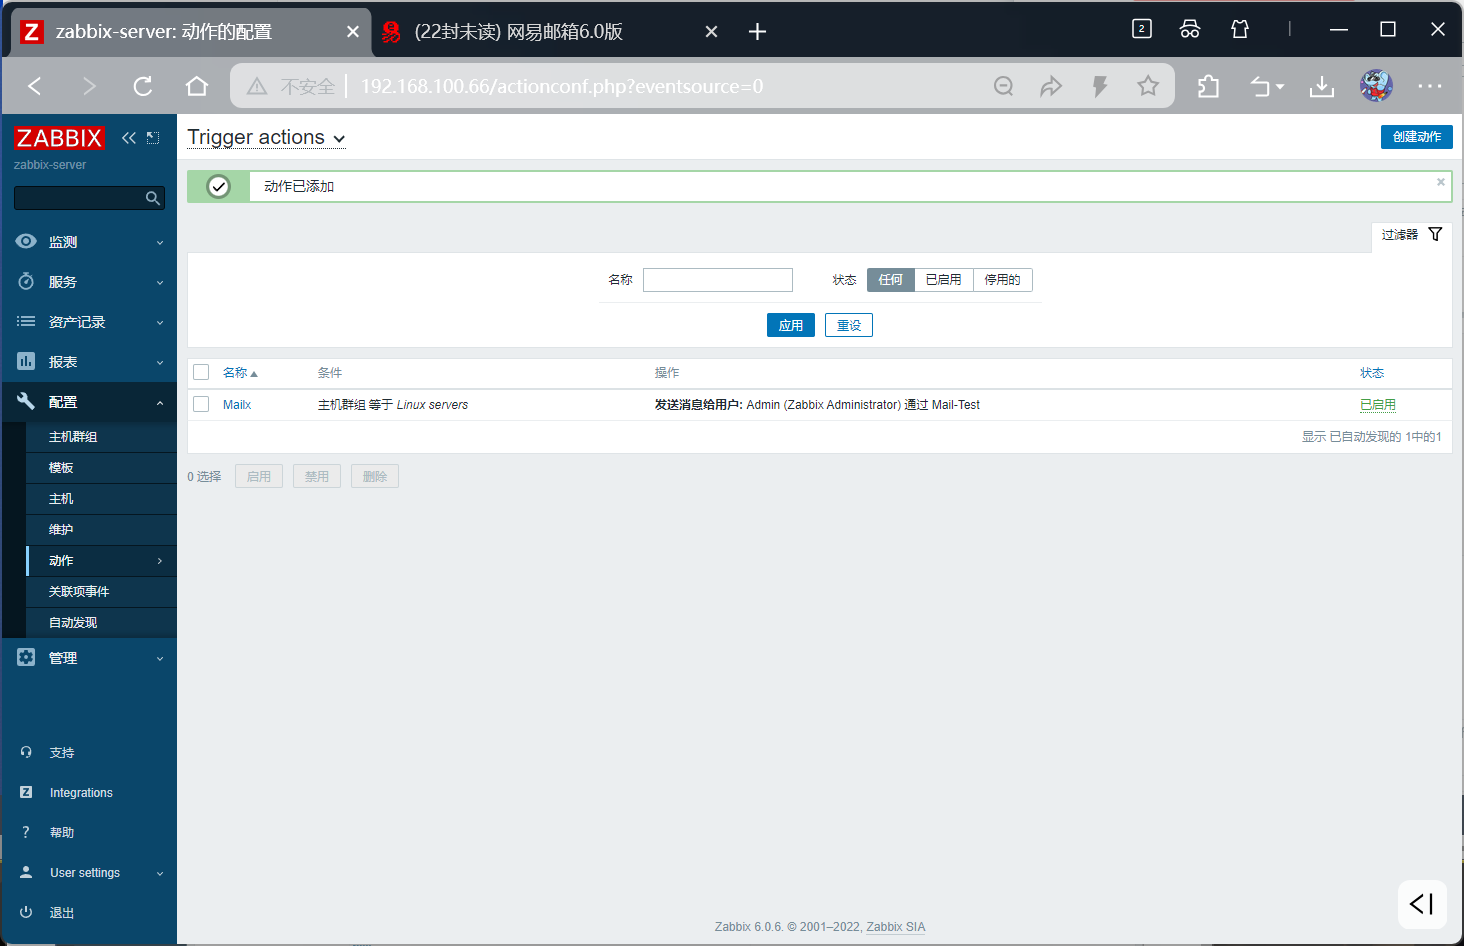
告警服务
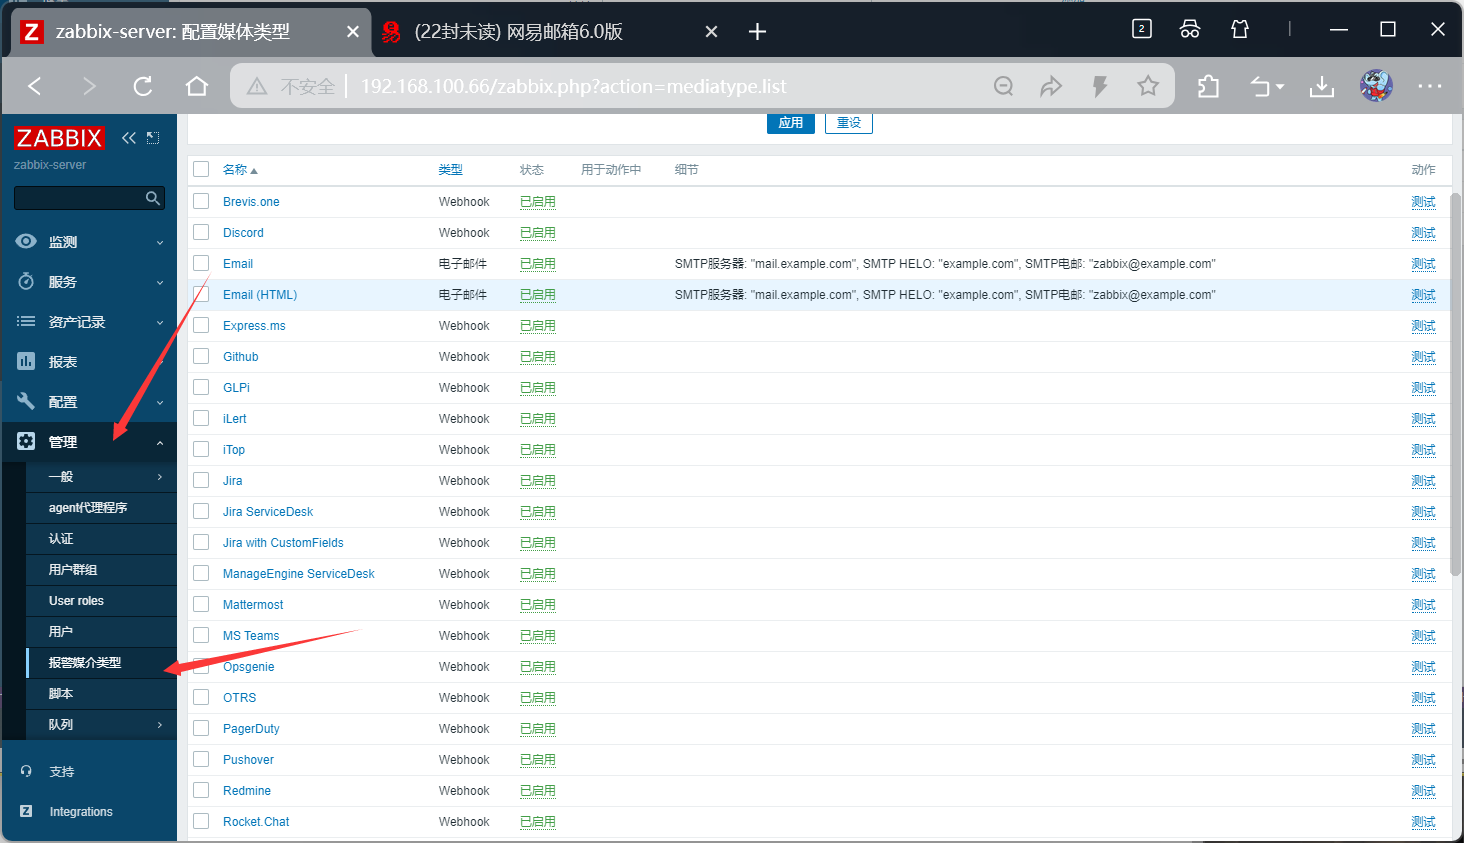
bash
#脚本参数
{ALERT.SENDTO}
{ALERT.SUBJECT}
{ALERT.MESSAGE}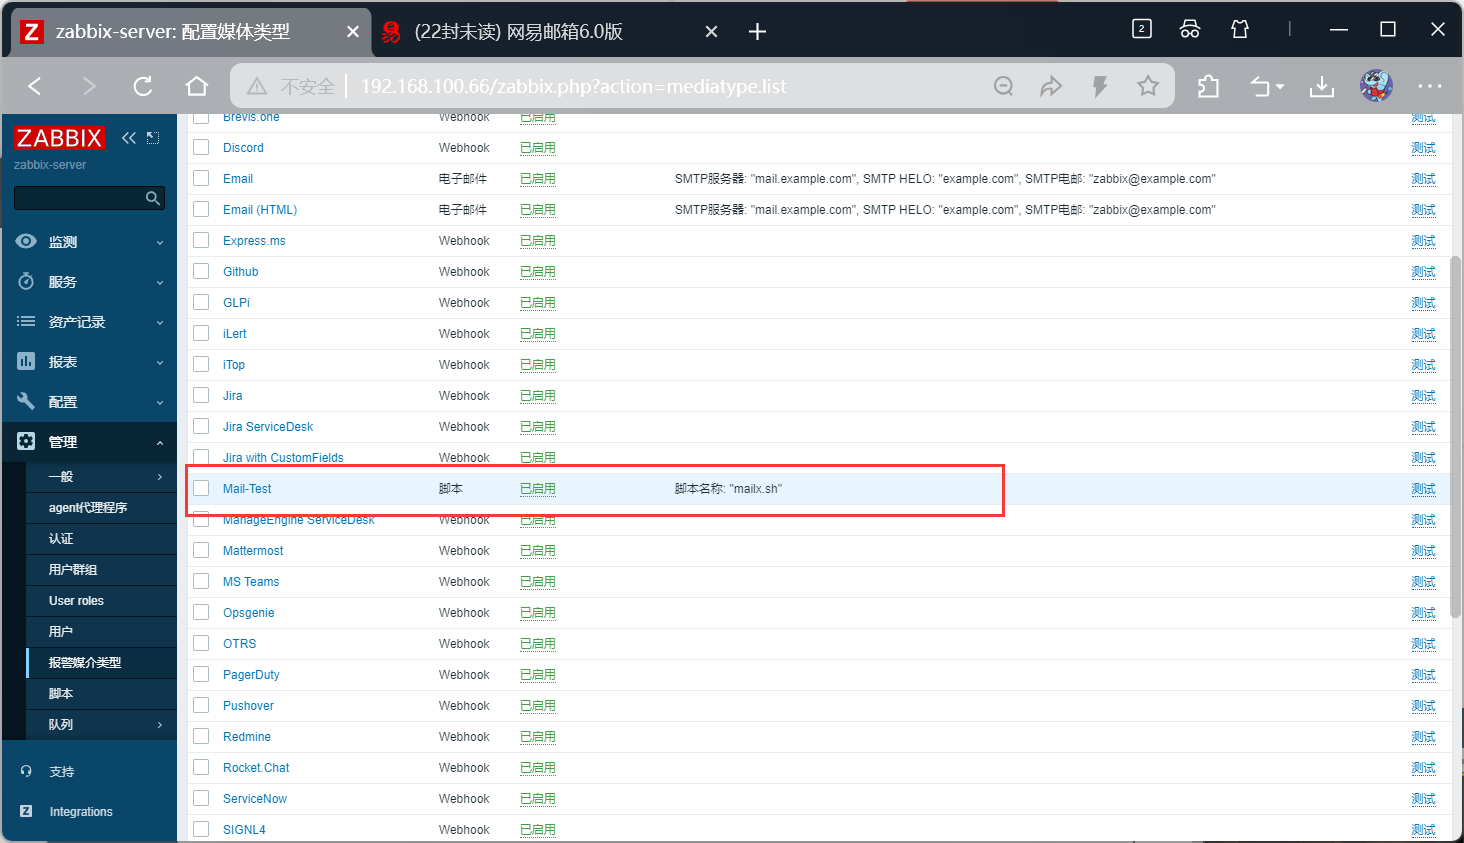
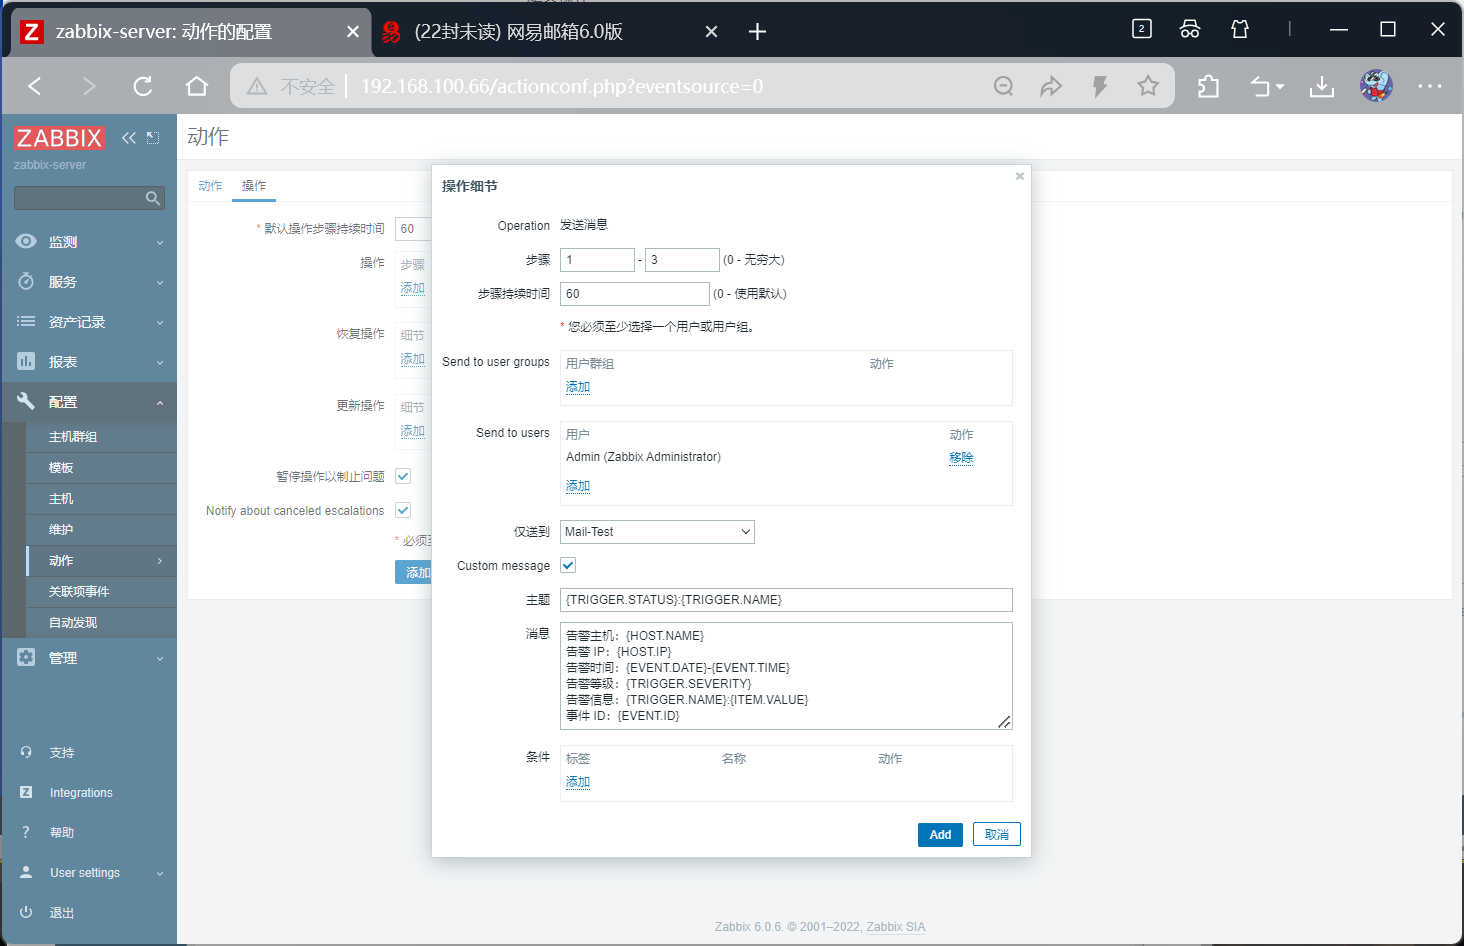
bash
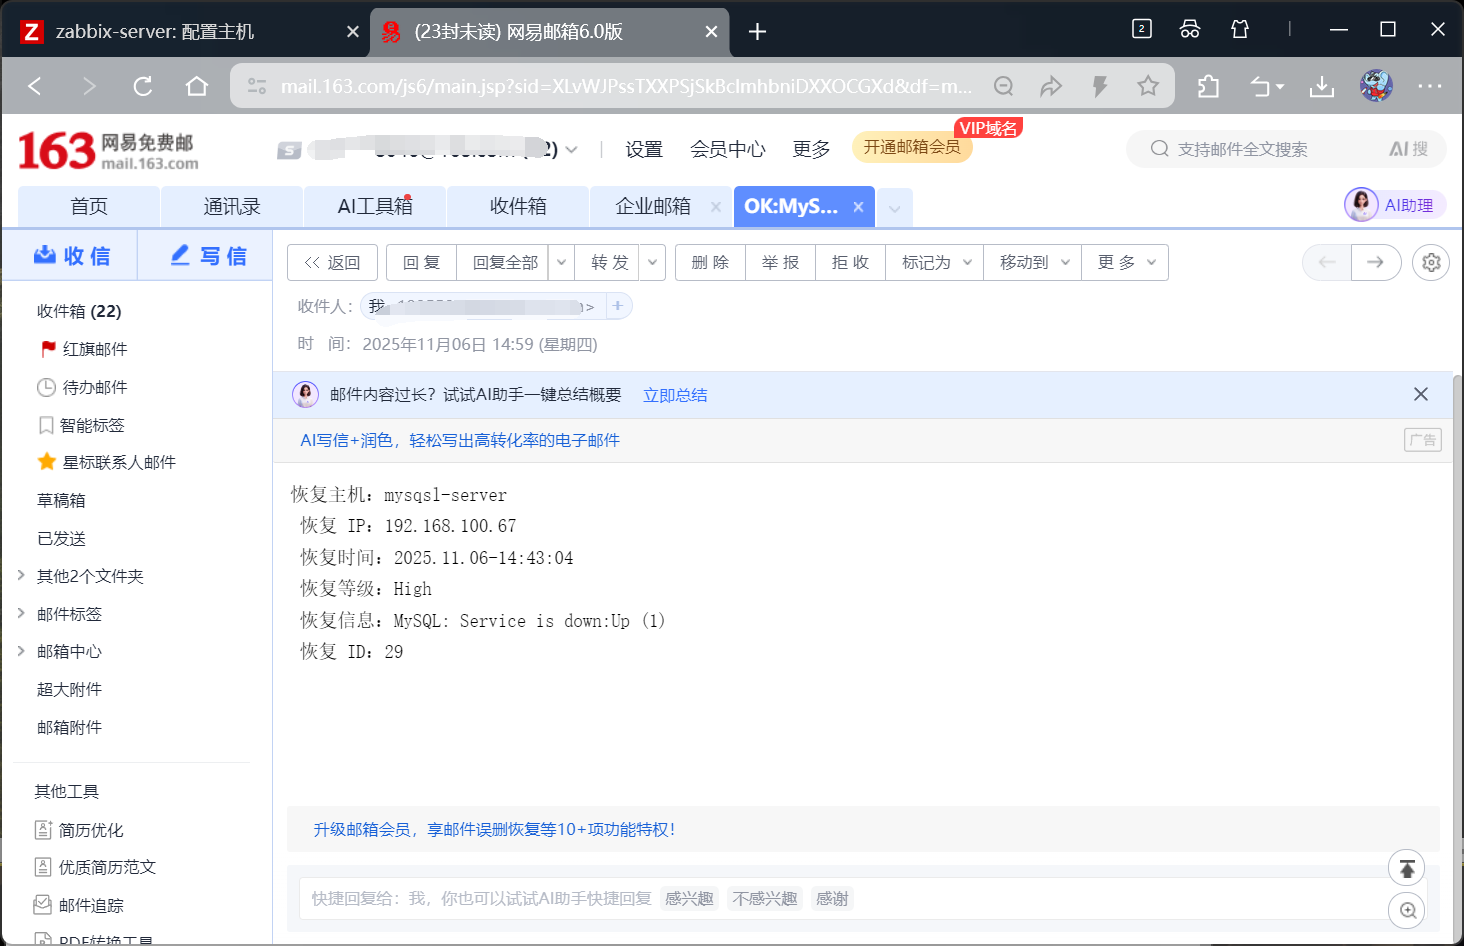
默认接收人 : {TRIGGER.STATUS}:{TRIGGER.NAME}

告警主机:{HOST.NAME}
告警 IP:{HOST.IP}
告警时间:{EVENT.DATE}-{EVENT.TIME}
告警等级:{TRIGGER.SEVERITY}
告警信息:{TRIGGER.NAME}:{ITEM.VALUE}
事件 ID:{EVENT.ID}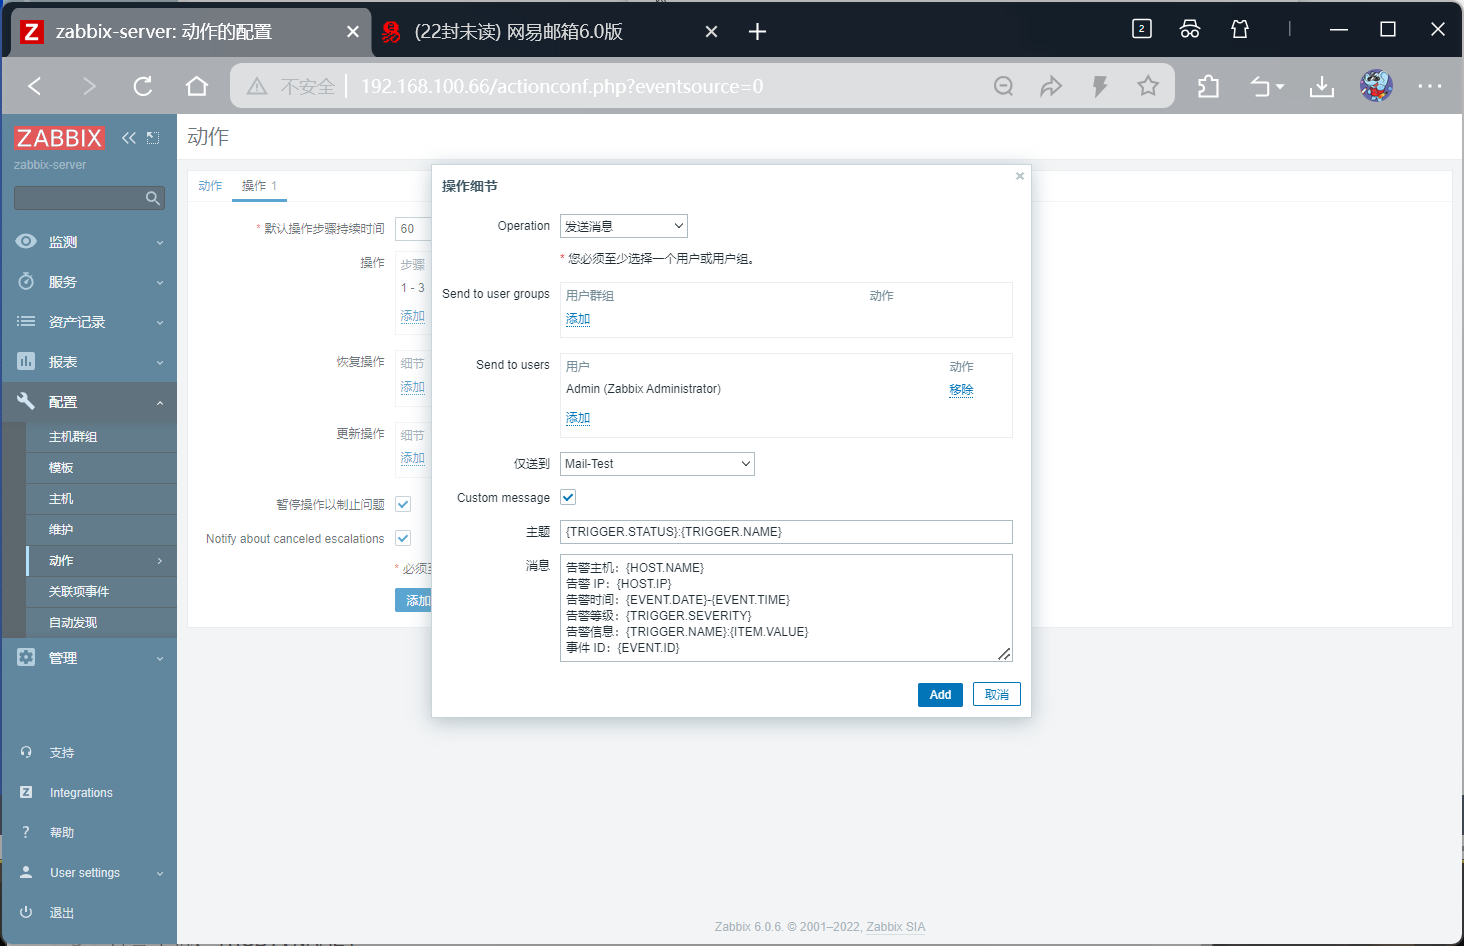
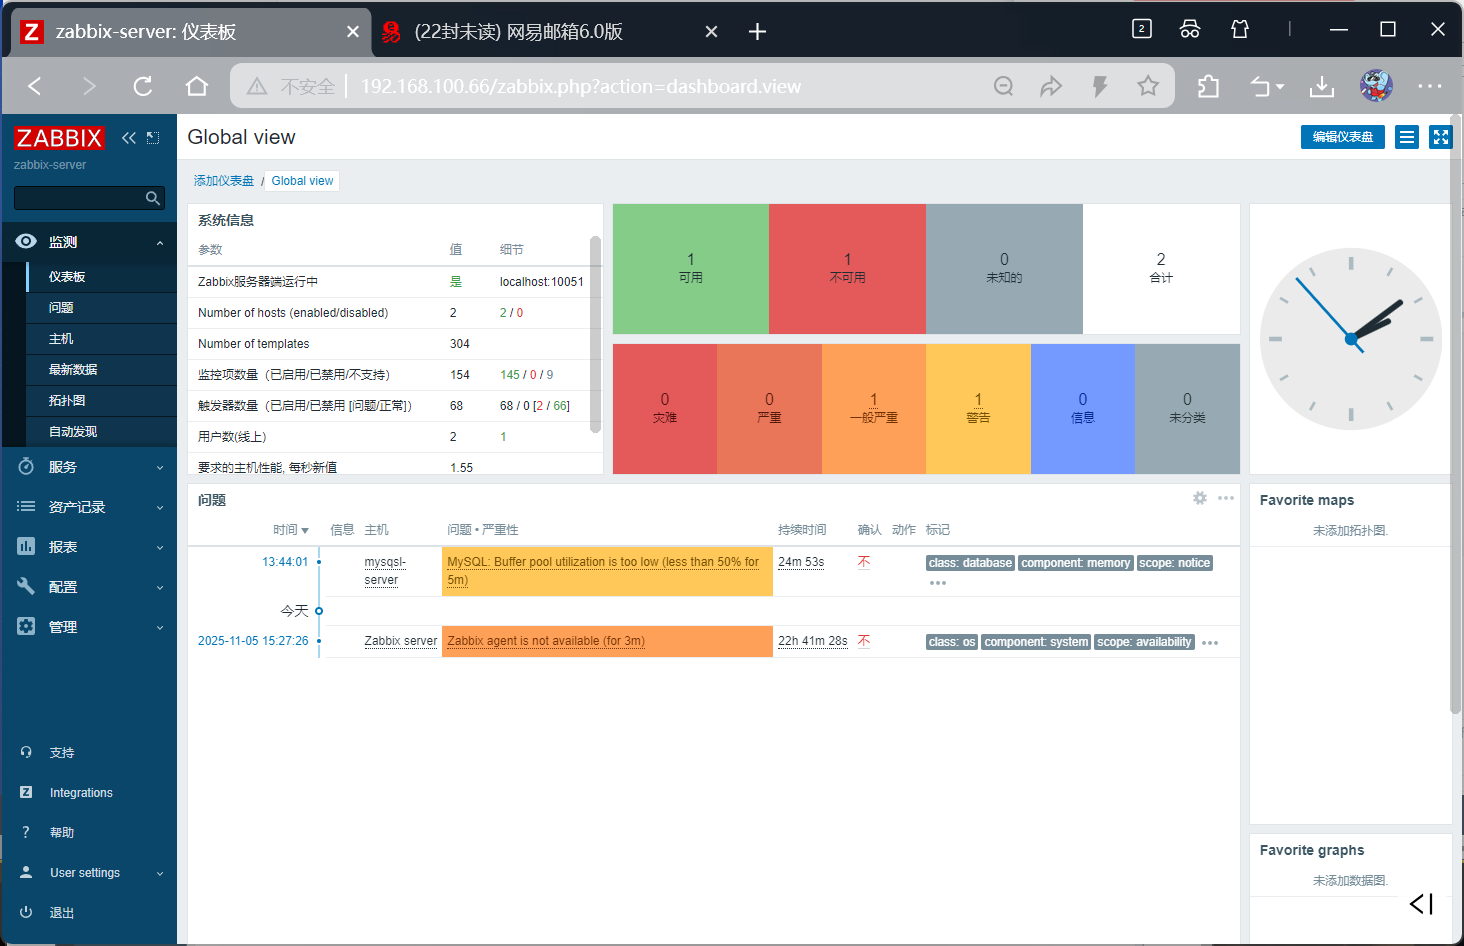
bash
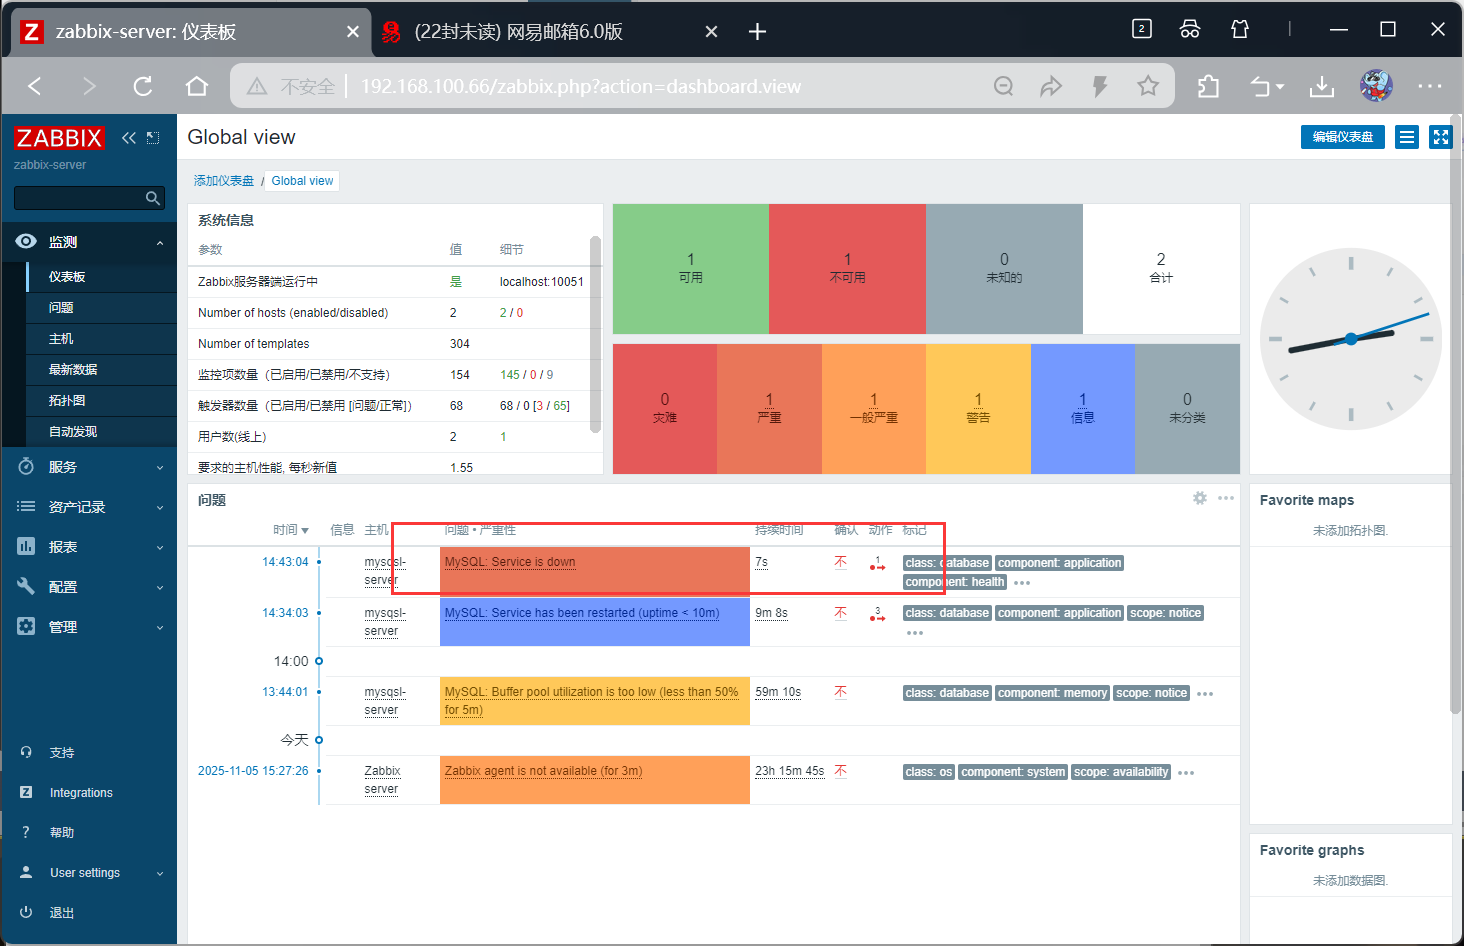
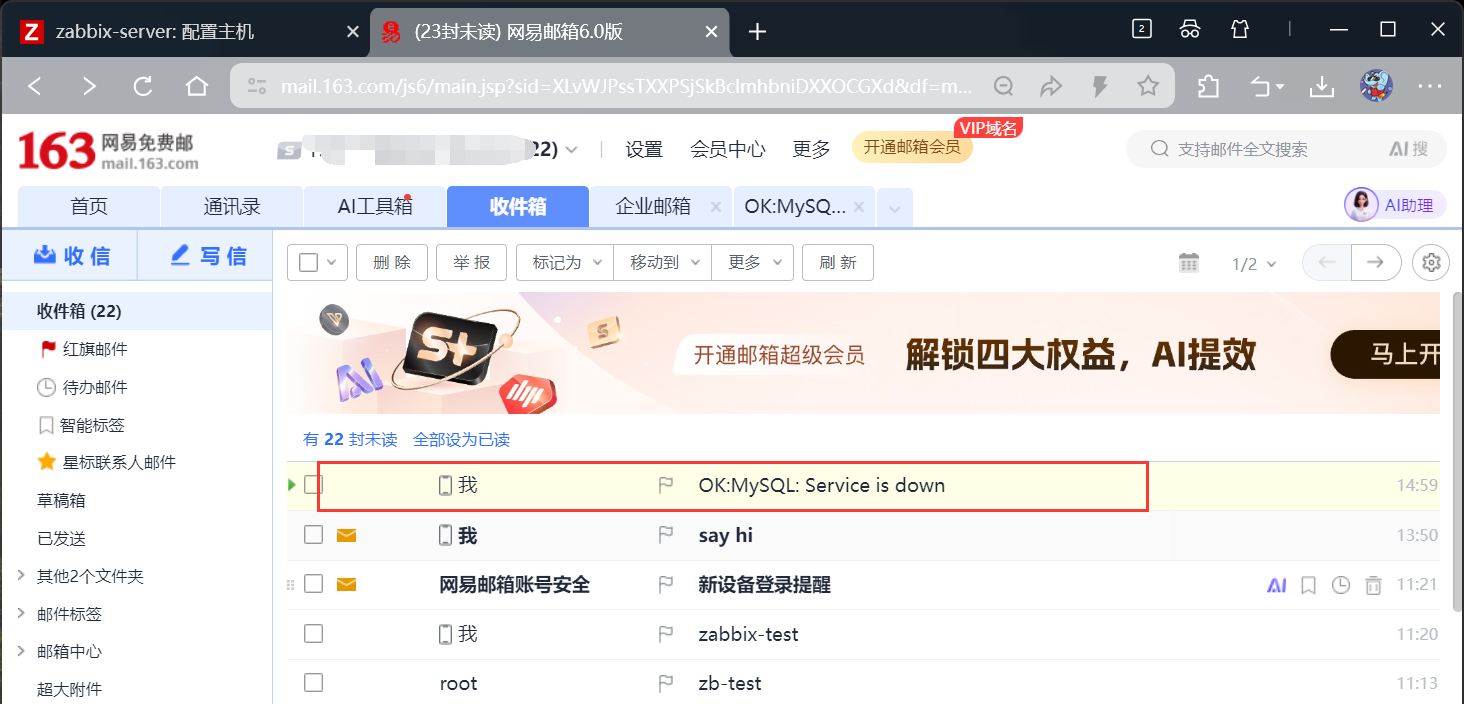
#在被监控端关闭数据库服务
init 0
重启后
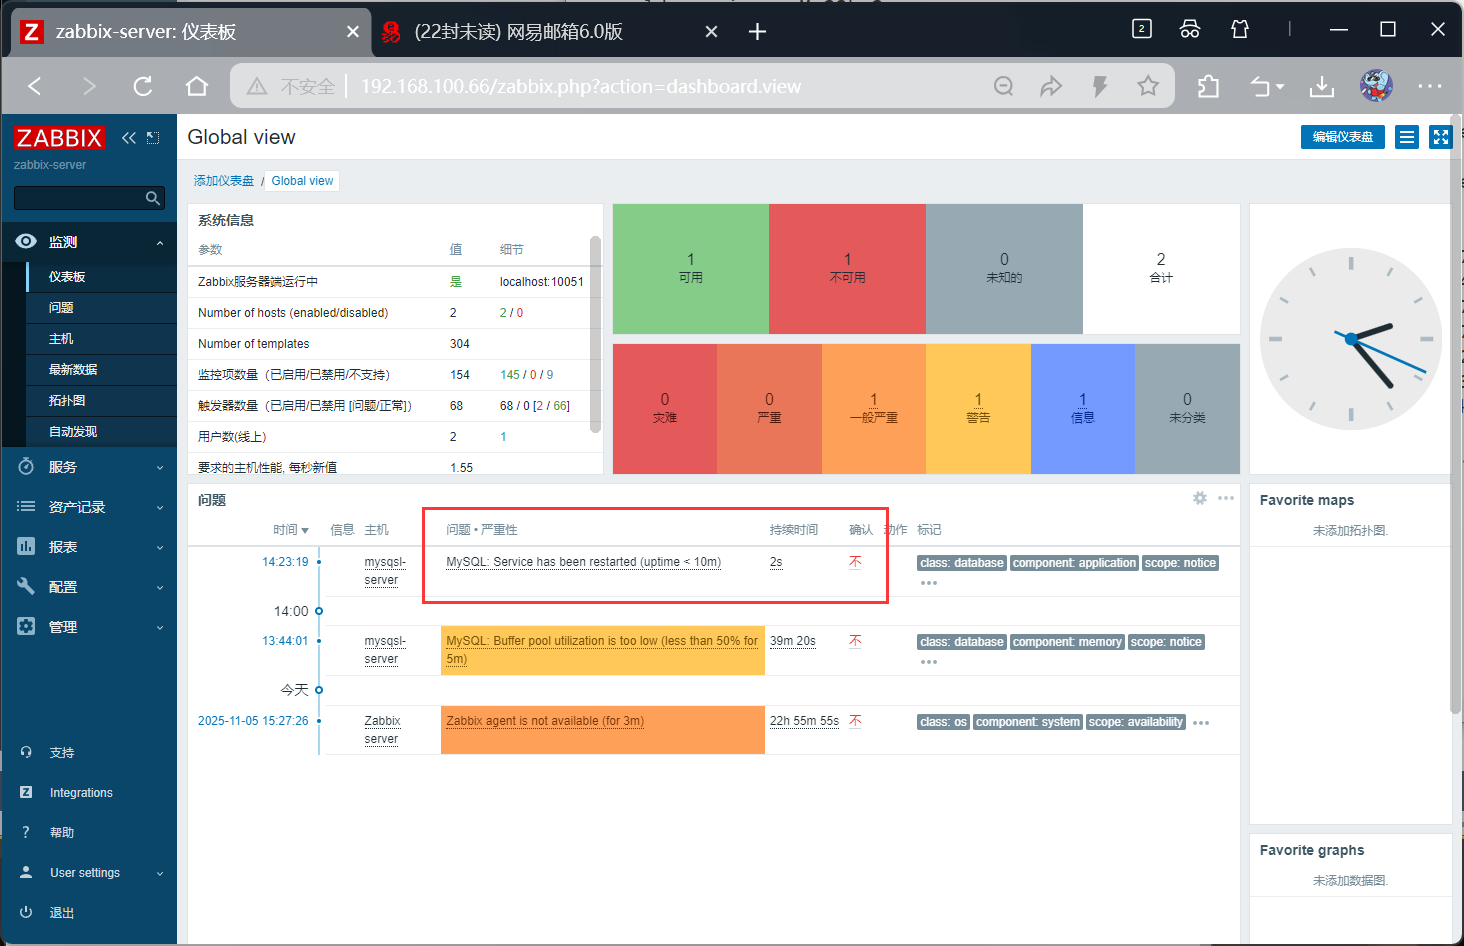
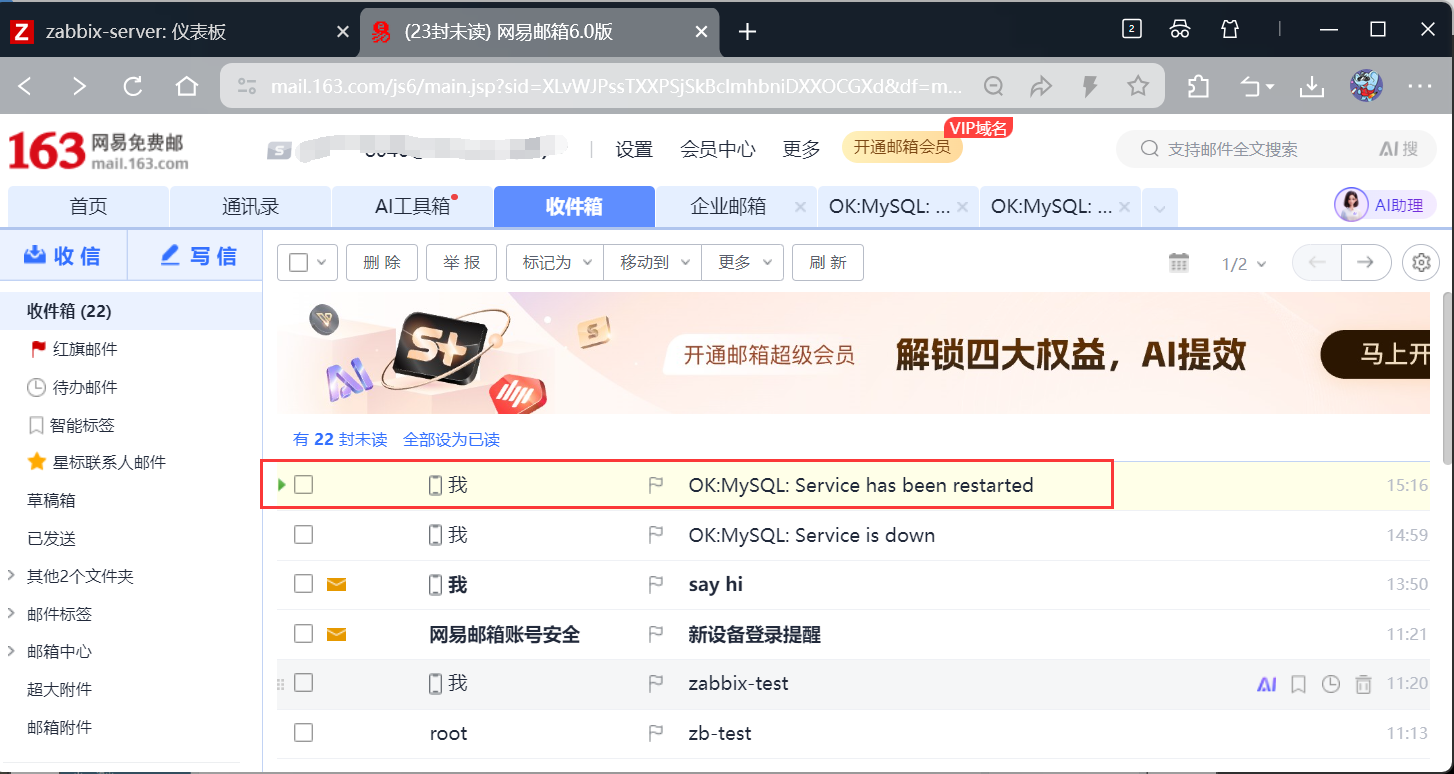

关闭再启动mysql后
问题排查与优化
常见故障排查
- Agent 离线:检查端口(10050/10051)、防火墙、配置文件中 Server 地址是否正确。
- 数据采集异常:查看 Agent 日志(/var/log/zabbix/)、监控项类型与权限(如脚本执行权限)。
- 告警不触发:排查触发器表达式、动作配置(接收人、媒介)、告警抑制规则。