前言: 『OpenGL学习』 从零打造 Android 滤镜相机
上一篇:# 『OpenGL学习滤镜相机』- Day4: 纹理贴图基础
Github: OpenGLTest
📚 今日目标
- 理解变换矩阵的概念(平移、旋转、缩放)
- 学习 MVP 矩阵(模型-视图-投影)
- 掌握 Android Matrix 工具类的使用
- 实现图片的旋转、缩放、平移
- 学习手势控制图片变换
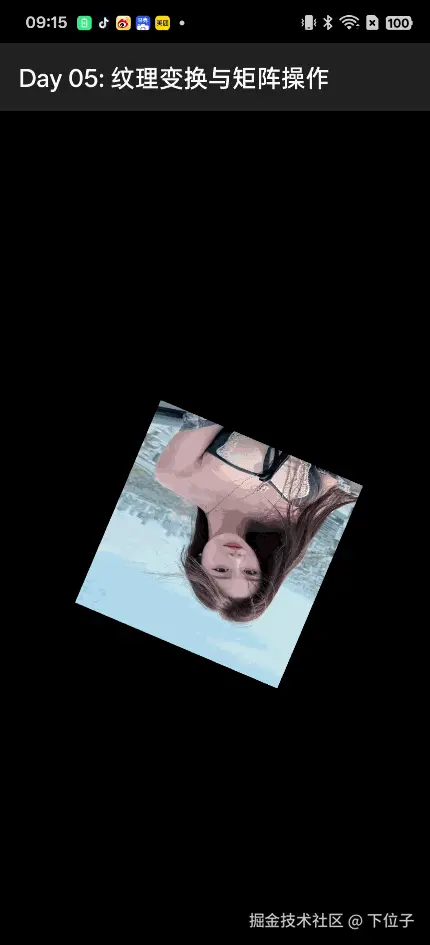
运行效果:
🎯 学习内容
1. 为什么需要矩阵变换?
问题:如果要旋转、缩放图片,难道要手动计算每个顶点的新位置吗?
答案 :使用变换矩阵,一次计算就能对所有顶点应用相同的变换!
原始顶点 × 变换矩阵 = 变换后的顶点2. 基本变换类型
平移(Translation)
移动物体的位置:
css
[ 1  0  0  tx ]
[ 0  1  0  ty ]
[ 0  0  1  tz ]
[ 0 0 0 1 ]- tx, ty, tz:在 X、Y、Z 轴的平移距离
缩放(Scale)
改变物体的大小:
css
[ sx  0   0   0 ]
[ 0   sy  0   0 ]
[ 0   0   sz  0 ]
[ 0 0 0 1 ]- sx, sy, sz:在各轴的缩放因子
旋转(Rotation)
绕 Z 轴旋转(2D 旋转):
arduino
[ cos(θ)  -sin(θ)   0   0 ]
[ sin(θ)   cos(θ)   0   0 ]
[   0        0      1   0 ]
[ 0 0 0 1 ]- θ:旋转角度(弧度)
3. MVP 矩阵
在 3D 图形学中,通常使用三个矩阵的组合:
markdown
最终位置 = 投影矩阵 × 视图矩阵 × 模型矩阵 × 原始顶点
└────────────── MVP ───────────────┘| 矩阵 | 英文 | 作用 |
|---|---|---|
| 模型矩阵 | Model Matrix | 物体本身的变换(旋转、缩放、平移) |
| 视图矩阵 | View Matrix | 相机位置和方向 |
| 投影矩阵 | Projection Matrix | 3D 到 2D 的投影(透视或正交) |
2D 图形处理通常只需要模型矩阵。
4. Android Matrix 类
Android 提供了 android.opengl.Matrix 工具类,简化矩阵操作:
kotlin
// 创建单位矩阵
val matrix = FloatArray(16)
Matrix.setIdentityM(matrix, 0)

// 平移
Matrix.translateM(matrix, 0, tx, ty, tz)

// 缩放
Matrix.scaleM(matrix, 0, sx, sy, sz)

// 旋转(绕 Z 轴)
Matrix.rotateM(matrix, 0, angle, 0f, 0f, 1f)

// 组合变换(矩阵相乘)
val result = FloatArray(16)
Matrix.multiplyMM(result, 0, matrix1, 0, matrix2, 0)
5. 变换顺序很重要!
矩阵乘法不满足交换律:A × B ≠ B × A
kotlin
// 方式 1:先缩放再旋转
Matrix.setIdentityM(matrix, 0)
Matrix.scaleM(matrix, 0, 2f, 2f, 1f)   // 放大 2 倍
Matrix.rotateM(matrix, 0, 45f, 0f, 0f, 1f)  // 旋转 45°

// 方式 2:先旋转再缩放(结果不同!)
Matrix.setIdentityM(matrix, 0)
Matrix.rotateM(matrix, 0, 45f, 0f, 0f, 1f)  // 旋转 45°
Matrix.scaleM(matrix, 0, 2f, 2f, 1f) // 放大 2 倍推荐顺序:缩放 → 旋转 → 平移(SRT)
6. 在着色器中使用矩阵
顶点着色器
glsl
attribute vec4 aPosition;
attribute vec2 aTexCoord;
varying vec2 vTexCoord;

uniform mat4 uMatrix;  // 变换矩阵

void main() {
    vTexCoord = aTexCoord;
    gl_Position = uMatrix * aPosition;  // 应用变换
}注意:矩阵在左,顶点在右!
Renderer 代码
kotlin
// 创建矩阵
val matrix = FloatArray(16)
Matrix.setIdentityM(matrix, 0)

// 应用变换
Matrix.scaleM(matrix, 0, 0.5f, 0.5f, 1f)     // 缩小到 50%
Matrix.rotateM(matrix, 0, 45f, 0f, 0f, 1f)   // 旋转 45°

// 传递给着色器
val uMatrixLocation = GLES20.glGetUniformLocation(program, "uMatrix")
GLES20.glUniformMatrix4fv(uMatrixLocation, 1, false, matrix, 0)
7. 正交投影矩阵
处理不同屏幕宽高比,避免图片变形:
kotlin
fun onSurfaceChanged(gl: GL10?, width: Int, height: Int) {
    GLES20.glViewport(0, 0, width, height)

    val ratio = width.toFloat() / height.toFloat()

    // 创建正交投影矩阵
    if (width > height) {
        // 横屏
        Matrix.orthoM(projectionMatrix, 0, -ratio, ratio, -1f, 1f, -1f, 1f)
    } else {
        // 竖屏
        Matrix.orthoM(projectionMatrix, 0, -1f, 1f, -1 / ratio, 1 / ratio, -1f, 1f)
    }
}
💻 代码实践
Day05Renderer 实现
kotlin
class Day05Renderer(private val context: Context) : GLSurfaceView.Renderer {

    private val vertexShaderCode = """
        attribute vec4 aPosition;
        attribute vec2 aTexCoord;
        varying vec2 vTexCoord;
        uniform mat4 uMatrix;

        void main() {
            vTexCoord = aTexCoord;
            gl_Position = uMatrix * aPosition;
        }
    """.trimIndent()

    private val fragmentShaderCode = """
        precision mediump float;
        varying vec2 vTexCoord;
        uniform sampler2D uTexture;

        void main() {
            gl_FragColor = texture2D(uTexture, vTexCoord);
        }
    """.trimIndent()

    // 正方形顶点
    private val vertices = floatArrayOf(
        // 位置          纹理坐标
        -0.5f,  0.5f, 0f,   0f, 0f,  // 左上
        -0.5f, -0.5f, 0f,   0f, 1f,  // 左下
         0.5f,  0.5f, 0f,   1f, 0f,  // 右上

        -0.5f, -0.5f, 0f,   0f, 1f,  // 左下
         0.5f, -0.5f, 0f,   1f, 1f,  // 右下
         0.5f,  0.5f, 0f,   1f, 0f   // 右上
    )

    private lateinit var vertexBuffer: FloatBuffer
    private var program: Int = 0
    private var textureId: Int = 0

    private var uMatrixLocation: Int = 0

    // 变换参数
    private var rotation: Float = 0f      // 旋转角度
    private var scale: Float = 1.0f       // 缩放比例
    private var translateX: Float = 0f    // X 平移
    private var translateY: Float = 0f    // Y 平移

    private val modelMatrix = FloatArray(16)
    private val projectionMatrix = FloatArray(16)
    private val mvpMatrix = FloatArray(16)

    override fun onSurfaceCreated(gl: GL10?, config: EGLConfig?) {
        GLES20.glClearColor(0.0f, 0.0f, 0.0f, 1.0f)

        // 初始化缓冲和程序(省略,同 Day 04)
        // ...

        uMatrixLocation = GLES20.glGetUniformLocation(program, "uMatrix")

        // 加载纹理
        textureId = TextureHelper.loadTexture(context, R.drawable.sample_image)
    }

    override fun onSurfaceChanged(gl: GL10?, width: Int, height: Int) {
        GLES20.glViewport(0, 0, width, height)

        // 创建正交投影矩阵
        val ratio = width.toFloat() / height.toFloat()
        if (width > height) {
            Matrix.orthoM(projectionMatrix, 0, -ratio, ratio, -1f, 1f, -1f, 1f)
        } else {
            Matrix.orthoM(projectionMatrix, 0, -1f, 1f, -1 / ratio, 1 / ratio, -1f, 1f)
        }
    }

    override fun onDrawFrame(gl: GL10?) {
        GLES20.glClear(GLES20.GL_COLOR_BUFFER_BIT)

        // 构建模型矩阵
        Matrix.setIdentityM(modelMatrix, 0)
        Matrix.translateM(modelMatrix, 0, translateX, translateY, 0f)
        Matrix.rotateM(modelMatrix, 0, rotation, 0f, 0f, 1f)
        Matrix.scaleM(modelMatrix, 0, scale, scale, 1f)

        // 计算 MVP 矩阵
        Matrix.multiplyMM(mvpMatrix, 0, projectionMatrix, 0, modelMatrix, 0)

        // 使用程序
        GLES20.glUseProgram(program)

        // 传递矩阵
        GLES20.glUniformMatrix4fv(uMatrixLocation, 1, false, mvpMatrix, 0)

        // 绑定纹理和设置属性(省略,同 Day 04)
        // ...

        // 绘制
        GLES20.glDrawArrays(GLES20.GL_TRIANGLES, 0, 6)
    }

    // 公共方法,用于外部控制
    fun setRotation(angle: Float) {
        rotation = angle
    }

    fun setScale(s: Float) {
        scale = s.coerceIn(0.1f, 5.0f)  // 限制范围
    }

    fun setTranslate(x: Float, y: Float) {
        translateX = x
        translateY = y
    }
}
Activity 中添加控制
kotlin
class Day05Activity : AppCompatActivity() {

    private lateinit var glSurfaceView: GLSurfaceView
    private lateinit var renderer: Day05Renderer

    override fun onCreate(savedInstanceState: Bundle?) {
        super.onCreate(savedInstanceState)

        glSurfaceView = GLSurfaceView(this)
        glSurfaceView.setEGLContextClientVersion(2)

        renderer = Day05Renderer(this)
        glSurfaceView.setRenderer(renderer)
        glSurfaceView.renderMode = GLSurfaceView.RENDERMODE_CONTINUOUSLY

        setContentView(glSurfaceView)

        // 添加 SeekBar 控制旋转
        // 添加按钮控制缩放
        // 添加触摸手势控制平移
    }
}
手势控制示例
kotlin
// 在 Activity 中
private var lastX = 0f
private var lastY = 0f

override fun onTouchEvent(event: MotionEvent): Boolean {
    when (event.action) {
        MotionEvent.ACTION_DOWN -> {
            lastX = event.x
            lastY = event.y
        }
        MotionEvent.ACTION_MOVE -> {
            val dx = (event.x - lastX) / width * 2  // 归一化
            val dy = (lastY - event.y) / height * 2  // Y 轴翻转

            renderer.setTranslate(
                renderer.translateX + dx,
                renderer.translateY + dy
            )

            lastX = event.x
            lastY = event.y

            glSurfaceView.requestRender()
        }
    }
    return true
}
🎨 练习任务
基础任务
-
旋转动画
- 让图片持续旋转
- 提示:在
onDrawFrame中累加 rotation
-
缩放控制
- 添加 SeekBar 控制图片大小
- 范围:0.5 ~ 3.0
-
重置按钮
- 添加按钮,重置所有变换
- 旋转 = 0°,缩放 = 1.0,平移 = (0, 0)
进阶任务
-
手势缩放
- 使用双指缩放手势控制图片大小
- 提示:使用 ScaleGestureDetector
-
手势旋转
- 使用双指旋转手势控制图片角度
- 提示:使用 RotationGestureDetector
-
平滑动画
- 点击按钮后,图片平滑旋转到指定角度
- 使用 ValueAnimator 实现
📖 重要概念总结
矩阵相关 API
| API | 说明 |
|---|---|
Matrix.setIdentityM(matrix, offset) |
设置为单位矩阵 |
Matrix.translateM(m, offset, x, y, z) |
平移 |
Matrix.scaleM(m, offset, x, y, z) |
缩放 |
Matrix.rotateM(m, offset, angle, x, y, z) |
旋转 |
Matrix.multiplyMM(result, rOffset, lhs, lhsOffset, rhs, rhsOffset) |
矩阵相乘 |
Matrix.orthoM(m, offset, left, right, bottom, top, near, far) |
正交投影 |
glUniformMatrix4fv(location, count, transpose, value, offset) |
传递矩阵到着色器 |
关键概念
- 单位矩阵:不做任何变换的矩阵(对角线为 1)
- 矩阵乘法顺序:变换顺序很重要
- MVP 矩阵:Model-View-Projection 的组合
- 正交投影:避免因宽高比导致的图像变形
❓ 常见问题
Q1: 为什么图片变形了?
可能是屏幕宽高比问题。使用正交投影矩阵修正。
Q2: 矩阵乘法的顺序怎么理解?
代码中的顺序(从上到下):
kotlin
Matrix.scaleM(...)    // 第 3 步执行
Matrix.rotateM(...)   // 第 2 步执行
Matrix.translateM(...) // 第 1 步执行实际应用顺序相反(从下到上)!
Q3: glUniformMatrix4fv 的 transpose 参数是什么?
false:按列主序(OpenGL 标准)true:按行主序
Android Matrix 使用列主序,传递 false。
Q4: 如何实现围绕特定点旋转?
kotlin
// 围绕点 (px, py) 旋转
Matrix.translateM(matrix, 0, px, py, 0f)     // 1. 移动到原点
Matrix.rotateM(matrix, 0, angle, 0f, 0f, 1f) // 2. 旋转
Matrix.translateM(matrix, 0, -px, -py, 0f)   // 3. 移回原位置
🔗 扩展阅读
✅ 今日小结
今天我们:
- ✅ 理解了变换矩阵的概念和类型
- ✅ 学习了 MVP 矩阵的组成
- ✅ 掌握了 Android Matrix 工具类
- ✅ 实现了图片的旋转、缩放、平移
- ✅ 学习了正交投影矩阵避免变形