本文译自「Creating a CRT Screen Effect in Jetpack Compose」,原文链接www.sinasamaki.com/creating-a-...,由sinasamaki发布于2025年11月7日。
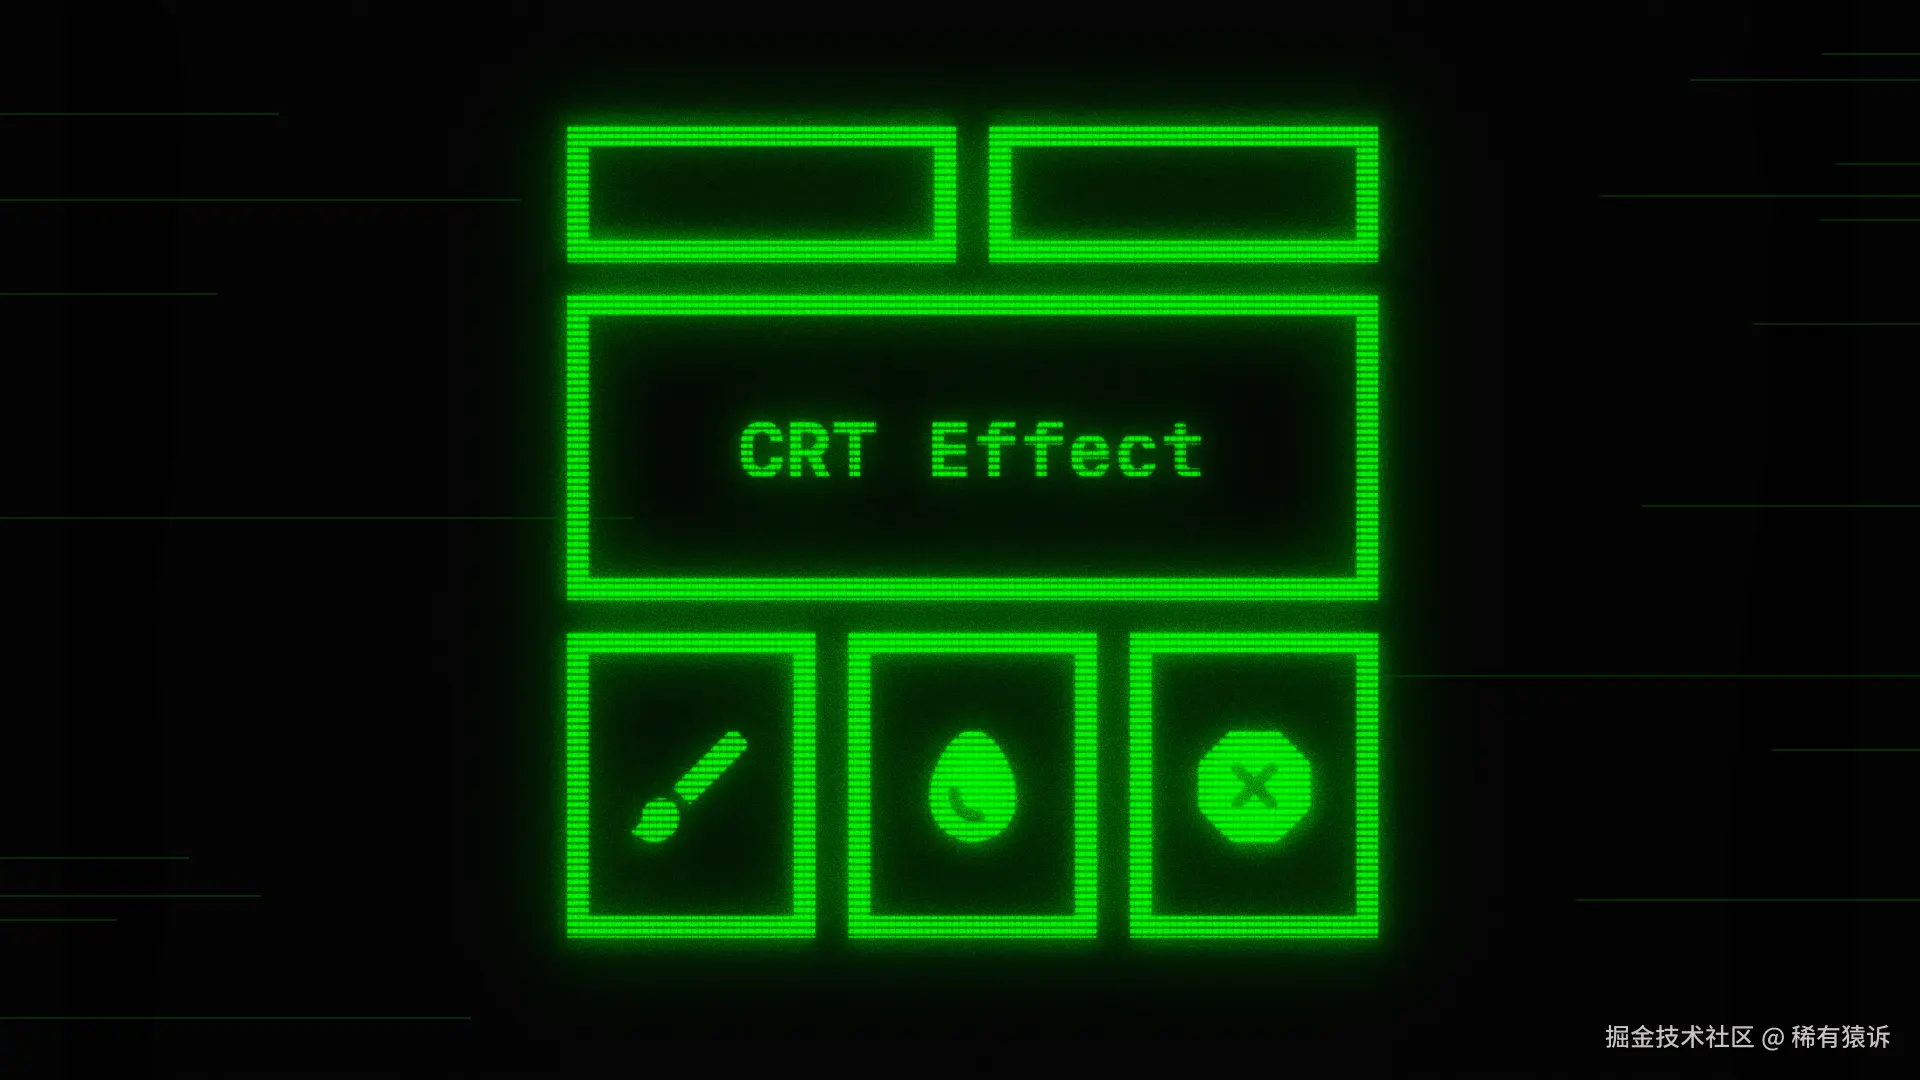
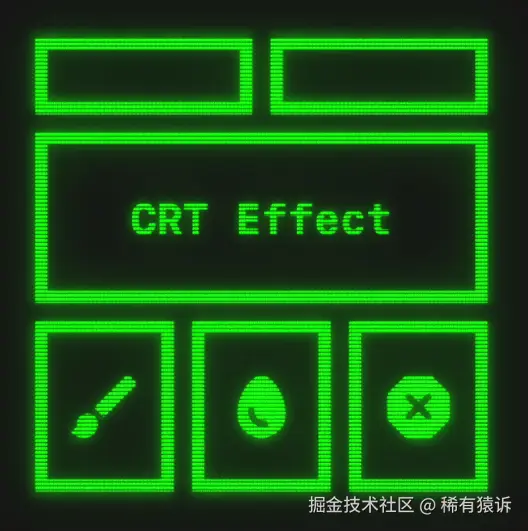
CRT 显示器具有独特而怀旧的外观:模糊的边缘、扫描线和轻微的色彩溢出。让我们尝试使用 GraphicsLayer 和一些巧妙的图层技巧在 Jetpack Compose 中重现 这种效果。
GraphicsLayer
与上一篇文章一样,此效果的基础是 GraphicsLayer。它允许我们将内容绘制一次到屏幕外缓冲区。然后,我们可以以极低的性能开销多次使用不同的效果重新绘制它。
kotlin
val graphicsLayer = rememberGraphicsLayer()

Box(Modifier.drawWithContent {
    graphicsLayer.record {
        this@drawWithContent.drawContent()
    }
}) {
    content()
}
一旦我们将内容记录到 graphicsLayer 中,就可以使用 drawLayer(graphicsLayer) 根据需要多次绘制它。
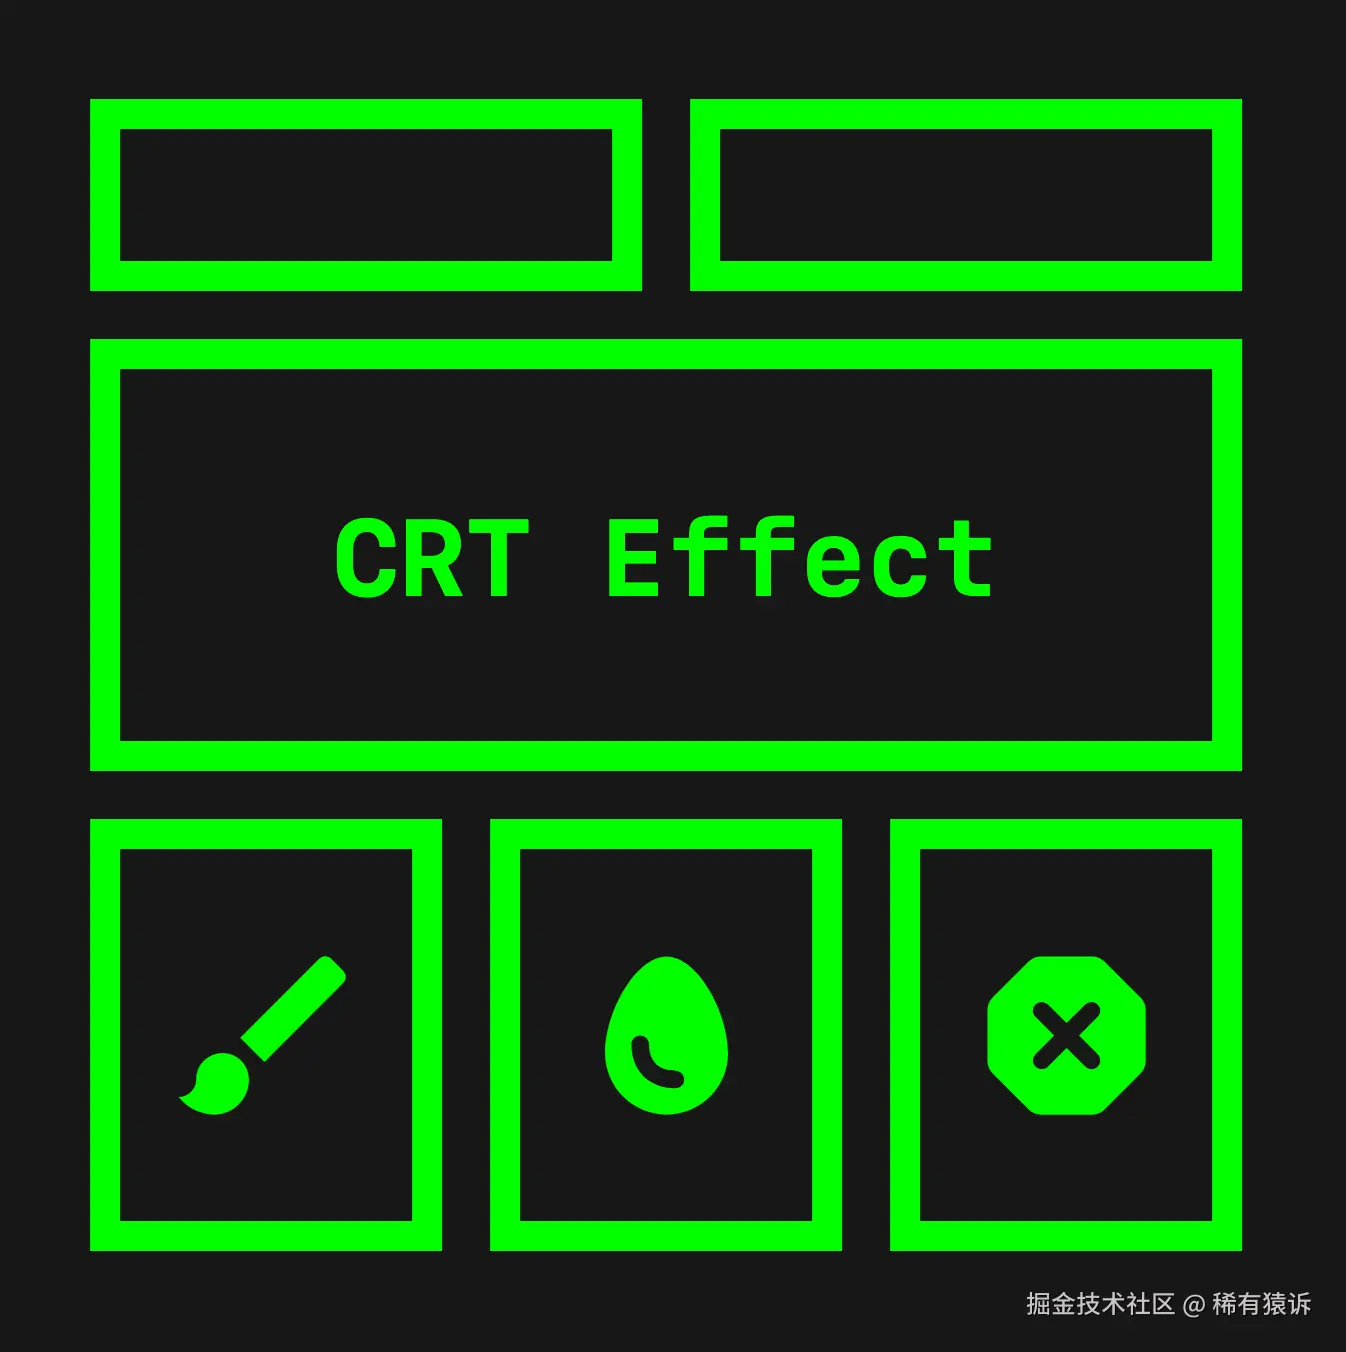
我喜欢在黑色背景上绘制色彩鲜艳、饱和度高的内容,并运用这种效果。以下是我们将应用此效果的基础可组合对象。
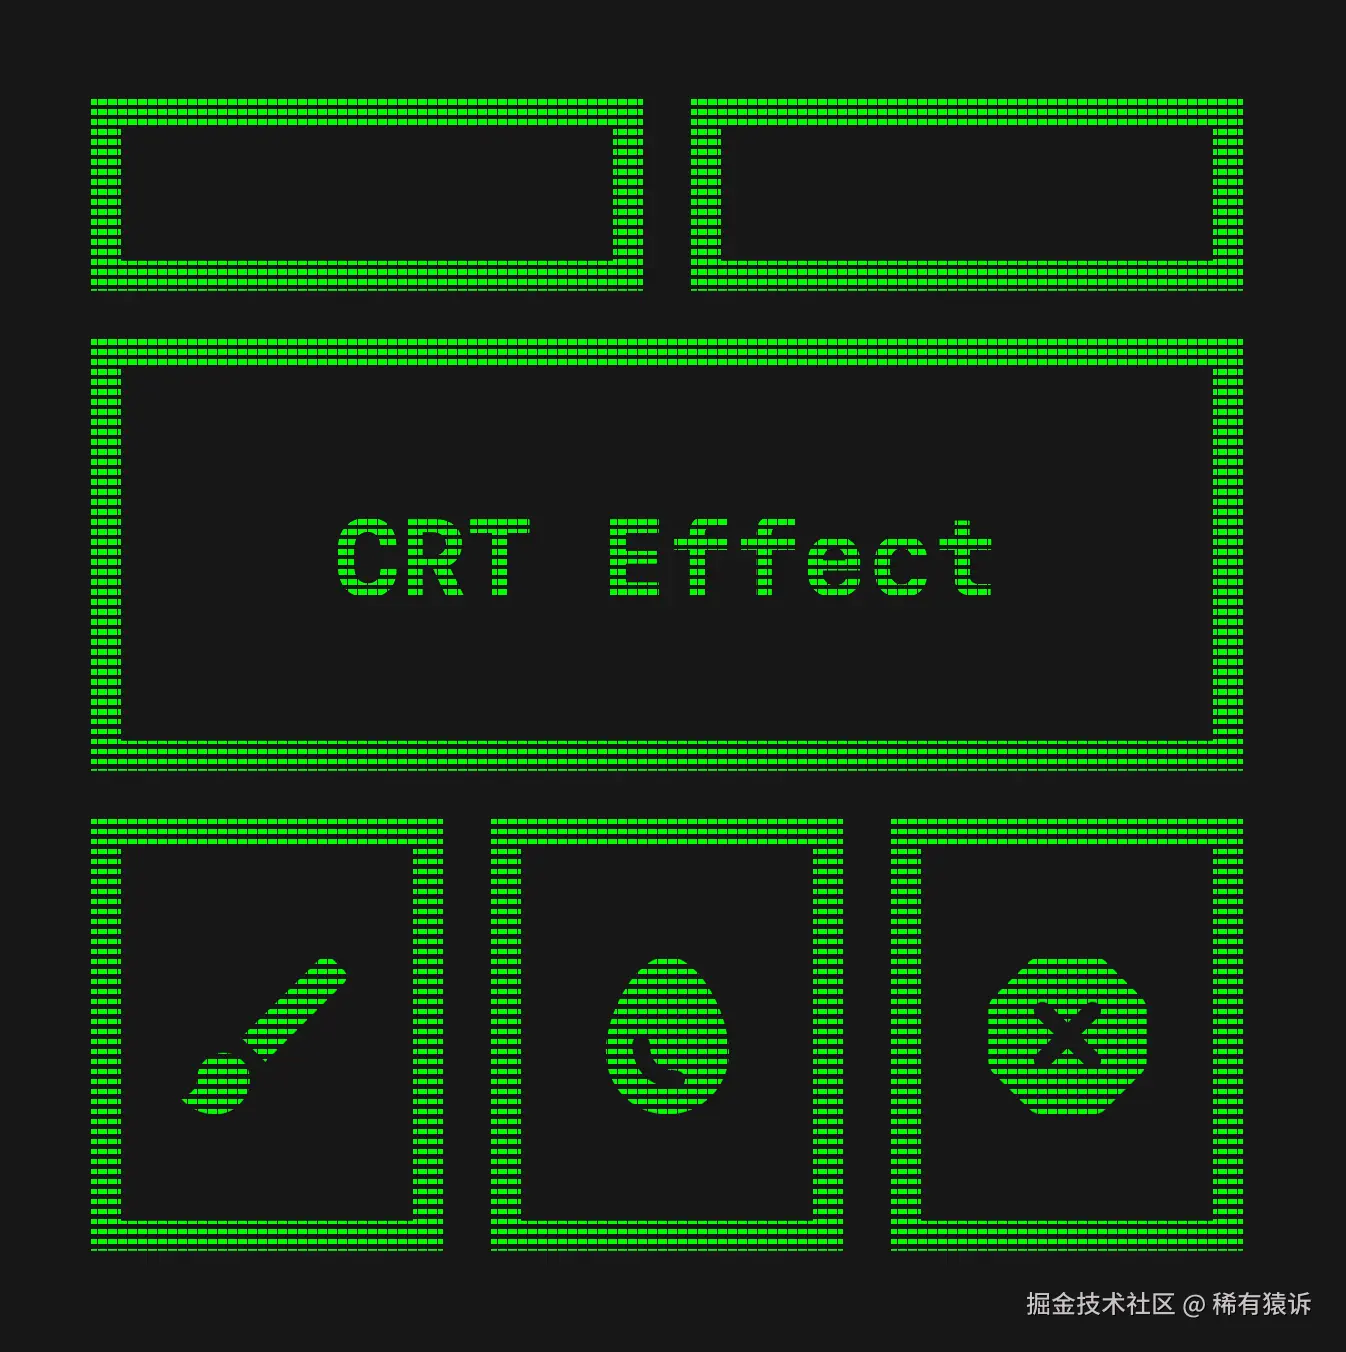
添加扫描线
为了模拟 CRT 显示器上的水平扫描线,我们将使用重复渐变。让我们将其放入一个扩展函数中,如下所示:
kotlin
private fun DrawScope.drawScanLines(alpha: Float, blendMode: BlendMode) {
    val color = Colors.Black.copy(alpha = alpha)
    drawRect(
        brush = Brush.verticalGradient(
            0f to color,
            0.4f to color,
            0.4f to Colors.Transparent,
            1f to Colors.Transparent,
            tileMode = TileMode.Repeated,
            startY = 0f,
            endY = 10f,
        ),
        blendMode = blendMode
    )
    drawRect(
        brush = Brush.horizontalGradient(
            0f to color,
            0.1f to color,
            0.1f to Colors.Transparent,
            1f to Colors.Transparent,
            tileMode = TileMode.Repeated,
            startX = 0f,
            endX = 10f,
        ),
        blendMode = blendMode
    )
}
我们手动定义颜色停止点,以便在颜色之间形成清晰的边缘,然后将 tileMode 设置为 Repeated。这样,再加上较短的起点和终点,就能得到许多重复的平行线。
扩展函数还会接收我们所需的透明度和 BlendMode 参数。
然后,我们可以使用此函数在 graphicsLayer 上绘制扫描线。
kotlin
.drawBehind {
    layer {
        drawLayer(graphicsLayer)
        drawScanLines(alpha = 1f, blendMode = BlendMode.DstOut)
    }
}
将混合模式设置为 DstOut 会从绘制的内容中"减去"我们的渐变,从而产生这种效果。
构建模糊图层
为了实现 CRT 屏幕常见的发光效果,我们将多次绘制 graphicsLayer 图层,每次绘制时分别设置不同的模糊半径、透明度和缩放比例。
kotlin
val blurLayers = remember {
    listOf(
        Triple(1.dp, 0.2f, 1.02f to 1.03f),
        Triple(0.dp, .2f, 1f to 1f),
        Triple(1.dp, 0.9f, 1f to 1f),
        Triple(10.dp, 1f, 1f to 1f),
        Triple(40.dp, 1f, 1f to 1f),
    )
}
我们将使用一个 Triple 列表来存储每个图层的数据。该列表的顺序也定义了它们的绘制顺序。我建议你尝试调整这些值和顺序,以获得所需的效果。但这是我目前使用的方法。
kotlin
blurLayers.forEach { (blur, alpha, scale) ->
    Box(
        Modifier
            .matchParentSize()
            .blur(blur, BlurredEdgeTreatment.Unbounded)
            .graphicsLayer {
                scaleX = scale.first
                scaleY = scale.second
                this.alpha = alpha
            }
            .drawBehind {
                layer {
                    drawLayer(graphicsLayer)
                    drawScanLines(alpha = 1f, blendMode = BlendMode.DstOut)
                }
            }
    )
}
然后,我们使用列表中的值绘制每个图层。在 drawBehind 修改器上方,我们将图层大小设置为与父图层匹配,并应用模糊、缩放和透明度。请记住将模糊设置为 Unbounded,使其超出包含它的可组合对象的边界。
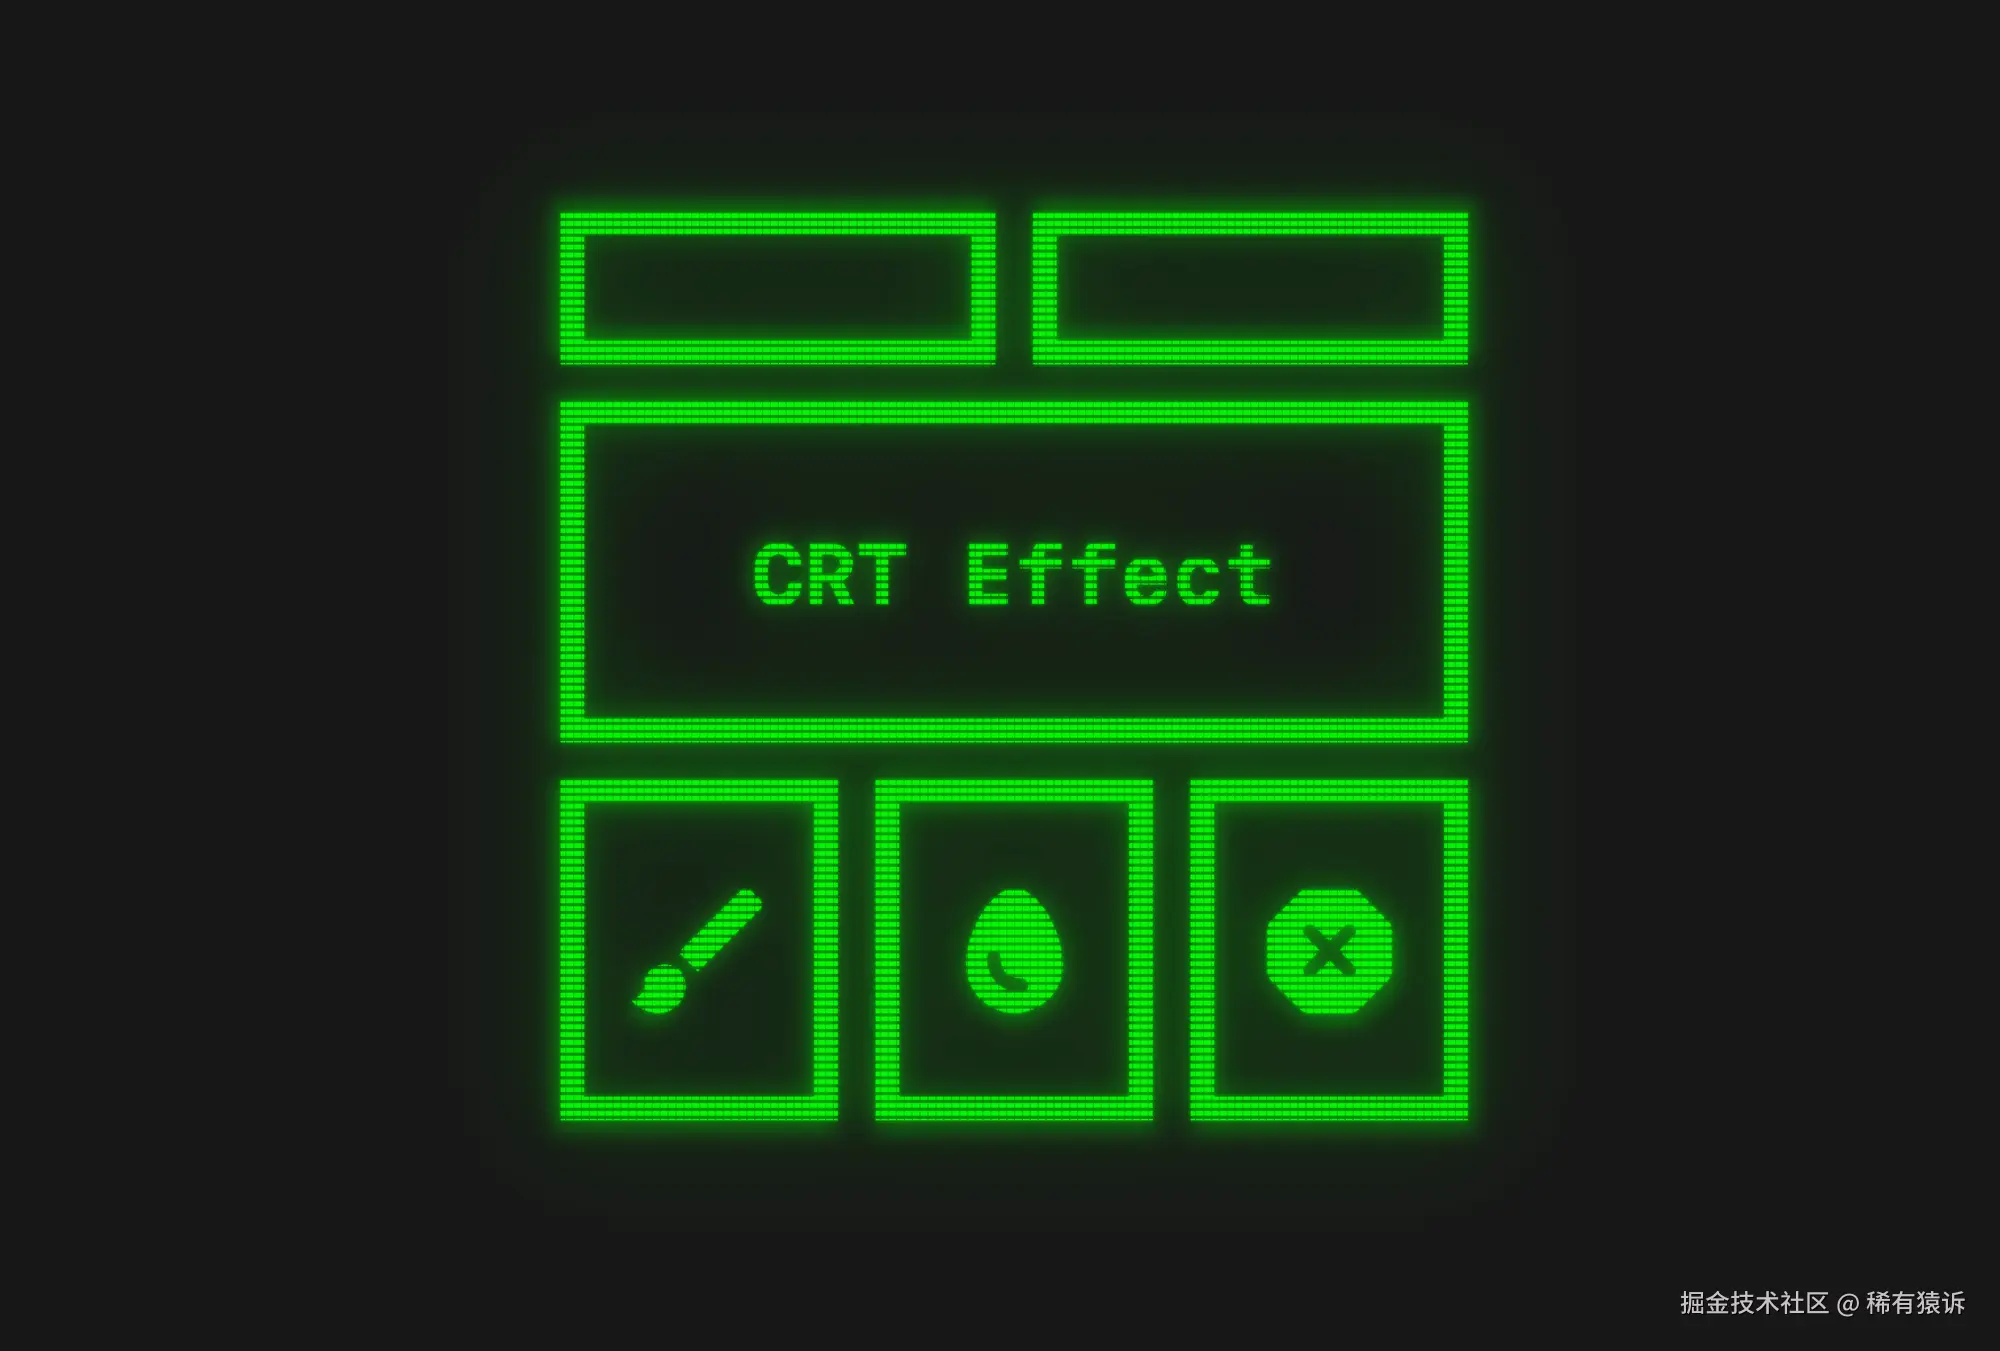
屏幕抖动
最后,我们来添加屏幕抖动效果,以模拟 CRT 显示器特有的抖动。我们可以通过创建一个 Offset 对象,并用 -1 到 1 之间的随机浮点值来更新它。
kotlin
var shake by remember { mutableStateOf(Offset.Zero) }

LaunchedEffect(Unit) {
    while (true) {
        shake = Offset(
            Random.nextInt(-1, 1) * Random.nextFloat(),
            Random.nextInt(-1, 1) * Random.nextFloat(),
        )
        delay(32)
    }
}
这里只需在一个 while 循环中即可完成。可以调整延迟时间来控制闪烁的间隔频率。
kotlin
modifier = modifier
    .graphicsLayer {
        translationX = shake.x
        translationY = shake.y
    }
然后可以使用修饰符来应用此偏移量。
整合所有功能
让我们将所有这些功能组合成一个可轻松使用的组合。它会接收 content 参数以及 flickerDelay 参数,后者用于控制闪烁频率。
kotlin
@Composable
fun CRTBox(
    modifier: Modifier = Modifier,
    flickerDelay: Int = 32,
    content: @Composable () -> Unit,
) {
    var shake by remember { mutableStateOf(Offset.Zero) }

    LaunchedEffect(Unit) {
        while (flickerDelay > 0) {
            shake = Offset(
                Random.nextInt(-1, 1) * Random.nextFloat(),
                Random.nextInt(-1, 1) * Random.nextFloat(),
            )
            delay(flickerDelay.toLong())
        }
    }

    val graphicsLayer = rememberGraphicsLayer()

    Box(
        modifier = modifier
            .graphicsLayer {
                translationX = shake.x
                translationY = shake.y
            }
    ) {
        Box(Modifier.drawWithContent {
            graphicsLayer.record { this@drawWithContent.drawContent() }
        }) {
            content()
        }

        val blurLayers = remember {
            listOf(
                Triple(5.dp, .3f, 1.02f to 1.03f),
                Triple(0.dp, .8f, 1f to 1f),
                Triple(1.dp, .9f, 1f to 1f),
                Triple(10.dp, .6f, 1.001f to 1f),
                Triple(40.dp, .7f, 1f to 1f),
            )
        }

        blurLayers.forEach { (blur, alpha, scale) ->
            Box(
                Modifier
                    .matchParentSize()
                    .blur(blur, BlurredEdgeTreatment.Unbounded)
                    .graphicsLayer {
                        scaleX = scale.first
                        scaleY = scale.second
                        this.alpha = alpha
                    }
                    .drawBehind {
                        layer {
                            drawLayer(graphicsLayer)
                            drawScanLines(alpha = 1f, blendMode = BlendMode.DstOut)
                        }
                    }
            )
        }
    }}

private fun DrawScope.layer(
    bounds: Rect = size.toRect(),
    block: DrawScope.() -> Unit
) =
    drawIntoCanvas { canvas ->
        canvas.withSaveLayer(
            bounds = bounds,
            paint = Paint(),
        ) { block() }
    }

private fun DrawScope.drawScanLines(alpha: Float, blendMode: BlendMode) {
    val color = Colors.Black.copy(alpha = alpha)
    drawRect(
        brush = Brush.verticalGradient(
            0f to color,
            0.4f to color,
            0.4f to Colors.Transparent,
            1f to Colors.Transparent,
            tileMode = TileMode.Repeated,
            startY = 0f,
            endY = 10f,
        ),
        blendMode = blendMode
    )
    drawRect(
        brush = Brush.horizontalGradient(
            0f to color,
            0.1f to color,
            0.1f to Colors.Transparent,
            1f to Colors.Transparent,
            tileMode = TileMode.Repeated,
            startX = 0f,
            endX = 10f,
        ),
        blendMode = blendMode
    )
}
然后,你可以像使用其他可组合组件一样使用它:
kotlin
CRTBox {
    Text("GAME OVER")
}
Sweeper 更新
如果你想查看实际效果,请查看最新的 Sweeper 更新,该更新使用 CRT 效果创建了一个令人毛骨悚然的万圣节主题。
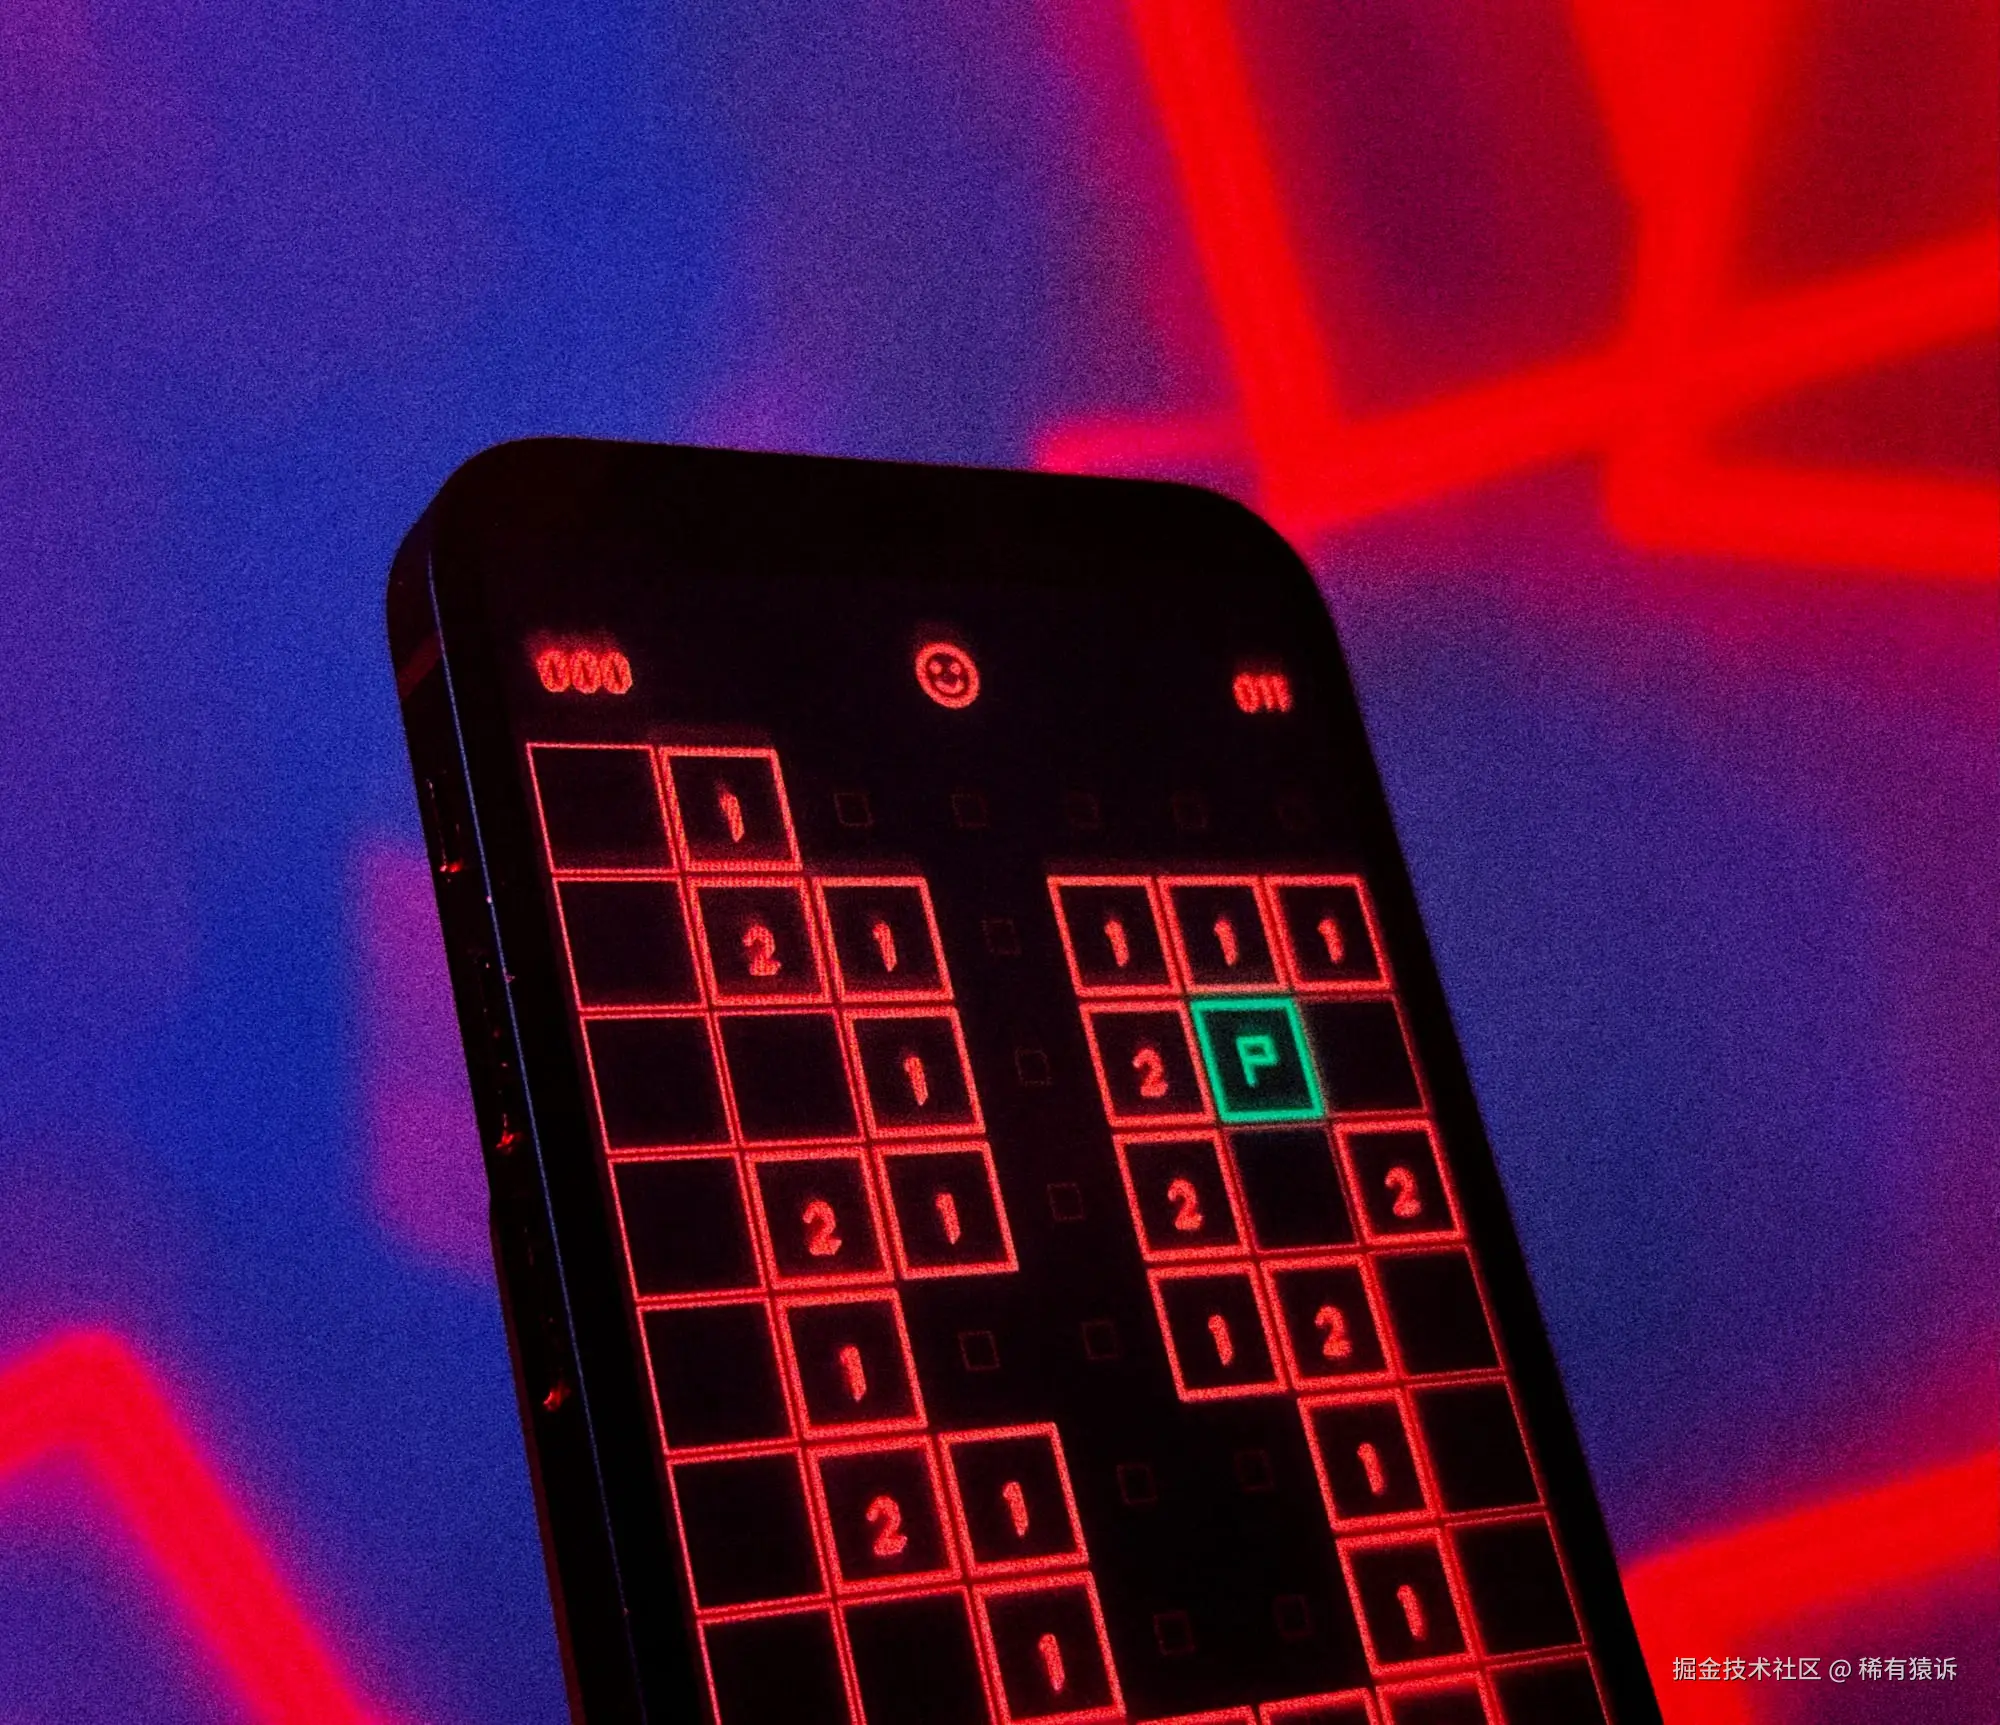
play.google.com/store/apps/...
感谢阅读,祝你好运!
欢迎搜索并关注 公众号「稀有猿诉」 获取更多的优质文章!
保护原创,请勿转载!