1、使用前后端分离的技术搭建一个环境,要求实现负载均衡,模式为WRR,优化最大连接数、epoll、gzip 压缩与Nginx 缓冲区优化
1.准备三台虚拟机
一台前端nginx
两台后端tomcat (使用Java包自带环境)

后端先将jar包放进去后 使用Java -version查看一下安装情况

查看一下静态进程
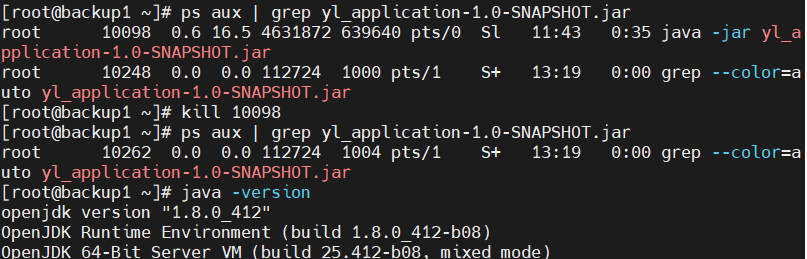
将之前的kill一下
java -jar yl_application-1.0-SNAPSHOT.jar --server.port=8080
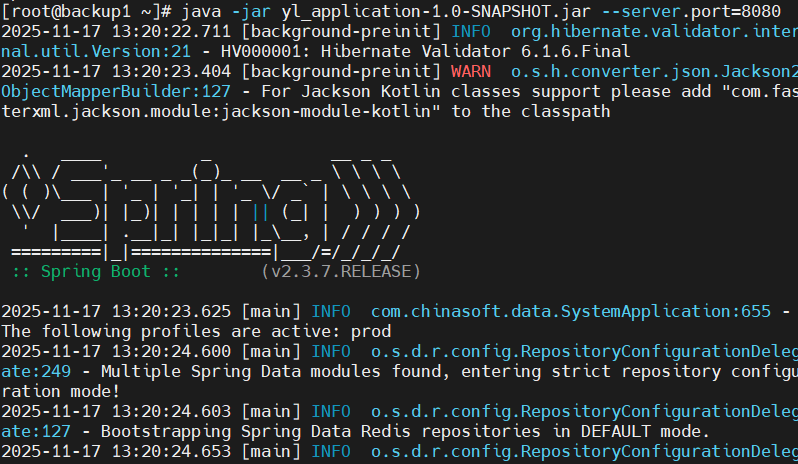
运行一下java页面环境(这里是生成html页面所需要的)
前端 nginx
将实现负载均衡,模式为WRR,优化最大连接数、epoll、gzip 压缩与Nginx 缓冲区优化

将这个源码配置文件内容放入 /etc/nginx/nginx.conf 文件中
user nginx nginx; worker_processes auto; # 根据CPU核心数自动调整
error_log logs/error.log warn; # 开启错误日志 pid logs/nginx.pid;
events { worker_connections 1024; # 增加连接数 use epoll; # 使用epoll事件模型 multi_accept on; }
http { include mime.types; default_type application/octet-stream;
日志格式
log_format main 'remote_addr - remote_user $time_local "$request" '
'status body_bytes_sent "$http_referer" '
'"http_user_agent" "http_x_forwarded_for" '
'upstream: upstream_addr response_time: upstream_response_time';
access_log logs/access.log main;
性能优化
sendfile on;
tcp_nopush on;
tcp_nodelay on;
keepalive_timeout 65;
keepalive_requests 1000;
开启Gzip压缩
gzip on;
gzip_min_length 1k;
gzip_comp_level 2;
gzip_types text/plain text/css text/xml text/javascript application/json application/javascript application/xml+rss;
gzip_vary on;
上游服务器配置 - 负载均衡
upstream backend {
WRR加权轮询配置
server 192.168.10.130:8080 weight=1; # 权重1
server 192.168.10.131:8080 weight=2; # 权重2
负载均衡策略
least_conn; # 最少连接数
健康检查相关
keepalive 32; # 保持连接
}
server {
listen 8080;
server_name 192.168.152.129; # Nginx服务器IP
字符集设置
charset utf-8;
前端静态文件配置
location / {
root /usr/local/nginx/html/dist;
index index.html index.htm;
处理前端路由(Vue/React)
try_files uri uri/ /index.html;
缓存设置
location ~* \.(html|htm)$ {
expires -1;
add_header Cache-Control "no-cache, no-store, must-revalidate";
}
静态资源长期缓存
location ~* \.(js|css|png|jpg|jpeg|gif|ico|svg|woff|woff2)$ {
expires 1y;
add_header Cache-Control "public, immutable";
access_log off;
}
}
后端API代理 - 负载均衡
location /ylApp/ {
修复代理配置
proxy_pass http://backend/ylApp/; # 注意结尾的斜杠
proxy_set_header X-Real-IP $remote_addr;
proxy_set_header X-Forwarded-For $proxy_add_x_forwarded_for; # 修复:删除空格
proxy_set_header Host $http_host; # 修复:删除空格
proxy_set_header X-Nginx-Proxy true;
连接超时设置
proxy_connect_timeout 30s;
proxy_send_timeout 30s;
proxy_read_timeout 30s;
缓冲区优化
proxy_buffering on;
proxy_buffer_size 4k;
proxy_buffers 8 4k;
proxy_busy_buffers_size 16k;
重试机制
proxy_next_upstream error timeout http_500 http_502 http_503 http_504;
proxy_next_upstream_tries 3;
proxy_next_upstream_timeout 30s;
保持连接
proxy_http_version 1.1;
proxy_set_header Connection "";
}
健康检查端点
location /nginx_status {
stub_status on;
access_log off;
allow 127.0.0.1;
allow 192.168.0.0/16; # 允许内网访问
deny all;
}
上游服务器状态检查
location /upstream_status {
proxy_pass http://backend/ylApp/actuator/health; # 根据实际健康检查端点调整
access_log off;
}
或者改为基础检查
location /upstream_status {
return 200 "OK - Nginx is working with backend servers\n";
add_header Content-Type text/plain;
access_log off;
}
}
systemctl restart nginx 刷新一下


关一下防火墙和核心防护

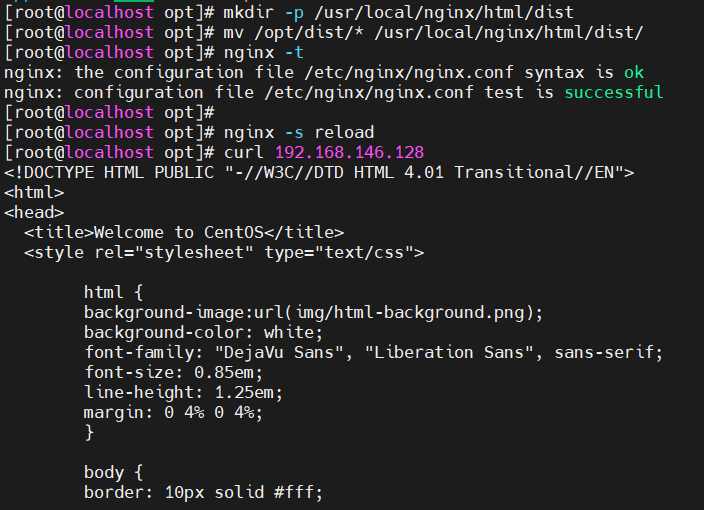
解压这个源码文件
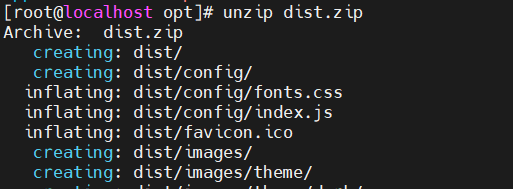
创建一个dist目录的html文件
出现了一个报错 配置文件内的绝对路径出现问题
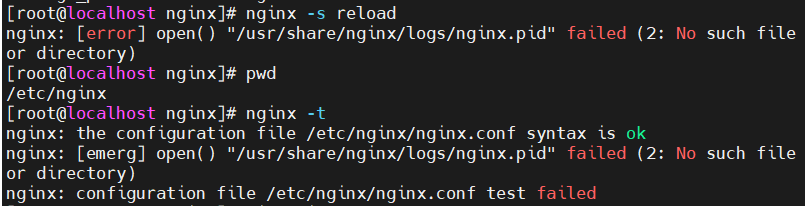

解决思路:配置文件的路径错误 更改配置文件路径外在+检查之前写入 的ngin.conf文件中出现的问题
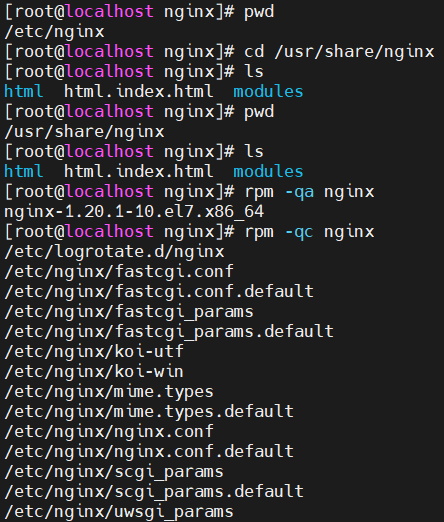

查看pid在哪个路径下 并修改nginx.conf 修改pid 路径改成pid /run/nginx.pid;
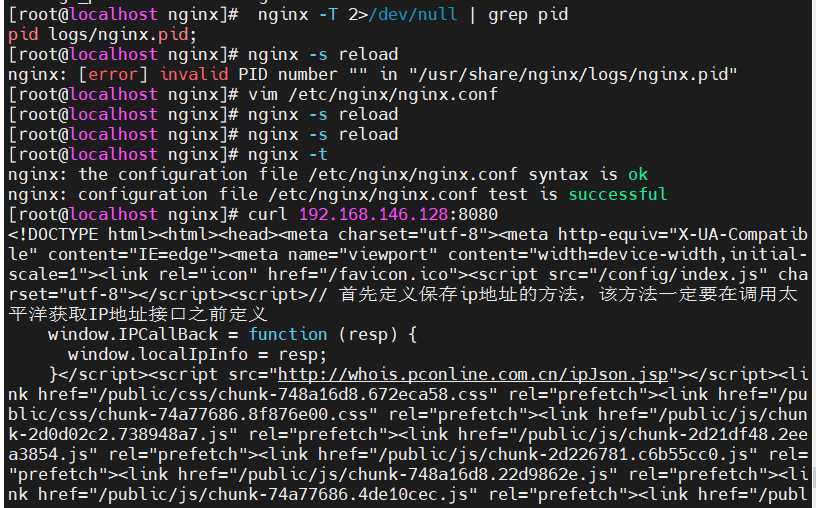
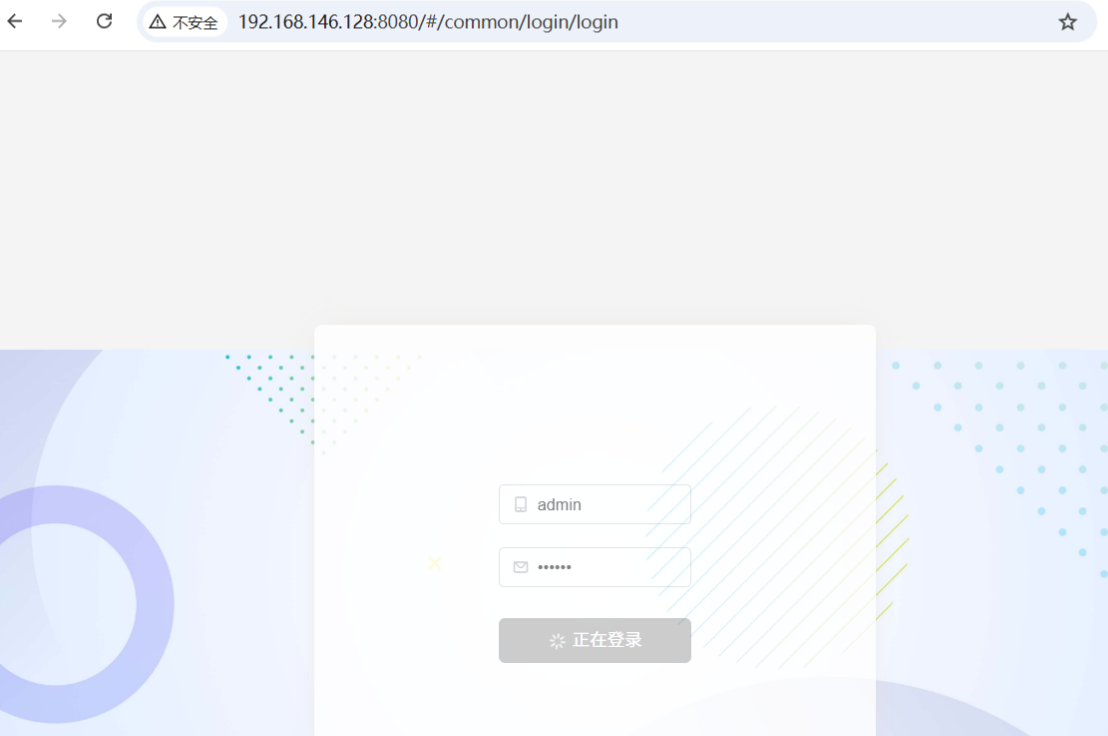
在使用前端ip加:8080端口在外部浏览器查看