参考:https://download.sourcefind.cn:65024/5/main 海光社区
参考:https://sourcefind.cn/#/service-list 光源
1--驱动版本 hy-smi 工具版本需求
dtk驱动程序>= 24.04 驱动版本≥6.3.15 k8s 版本≥1.18
Linux(建议 ubuntu20.04 及以上、 Centos7.6 及以上)
查看驱动版本hy-smi --showdriverversion

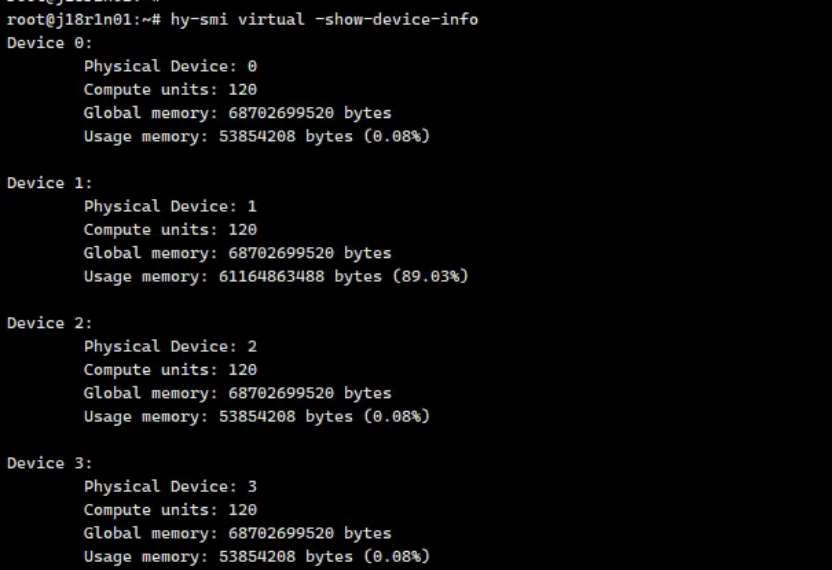
查看卡资源
hy-smi virtual -show-device-info
2-介绍K8S dcu-device-plugin
kubectl label node <node-name> dcu=true --overwrite
kubectl apply -f k8s-dcu-plugin.yaml #部署dcu device插件
K8S dcu-device v2.3.0版本支持标准模式,mig。mig功能官方即将弃用。
开启MIG功能之后,vdcu虚拟化功能不可用
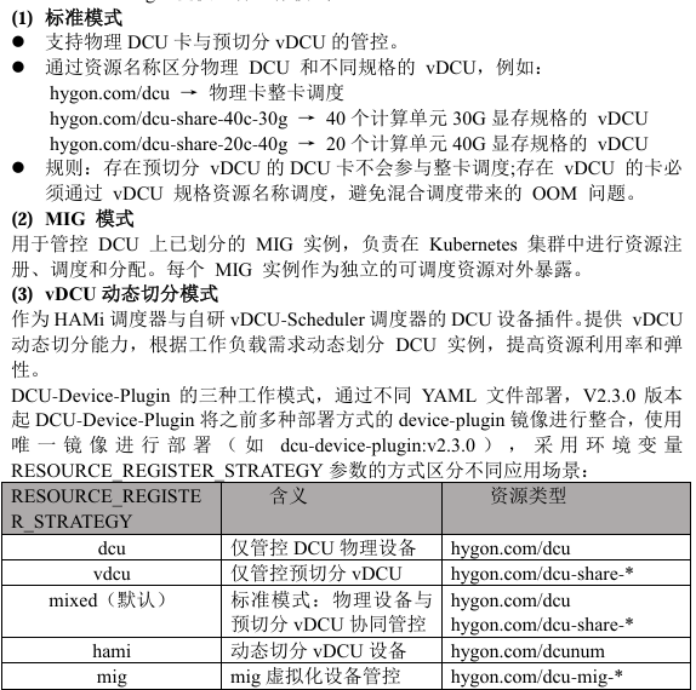
3-手动物理混用
手动切分资源vdcu
均匀切分
hy-smi virtual -d 0 --create-vdevices 4
The virtual device is created successfully!
创建4个vdcu,均匀切分1个物理dcu,资源平分给4个vdcu,vdcu资源相同
不均匀切分,需要根据上方整卡资源对卡进行切分(可能会失败,机器计算资源可能不一致,需要多调试几次)
hy-smi virtual -d 0 --create-vdevices 4 \
>   --vdevice-compute-units "40,30,30,20" \
>   --vdevice-memory-size "25000,15000,15000,10000"
The virtual device is created successfully!
查看vdcu
hy-smi virtual -show-vdevice-info
Virtual Device 0:
	Physical Device: 0
	Compute units: 30
	Global memory: 17175674880 bytes
Virtual Device 1:
	Physical Device: 0
	Compute units: 30
	Global memory: 17175674880 bytes
Virtual Device 2:
	Physical Device: 0
	Compute units: 30
	Global memory: 17175674880 bytes
Virtual Device 3:
	Physical Device: 0
	Compute units: 30
	Global memory: 17175674880 bytes
销毁vdcu
hy-smi virtual -d 0 --destroy-vdevices
The virtual device is destroyed successfully!
手动切分vdcu与物理卡混用,需要修改dcu-device-plugin环境变量,RESOURCE_REGISTER_STRATEGY的value值为mixed
切分后,kubectl describe node节点资源会显示
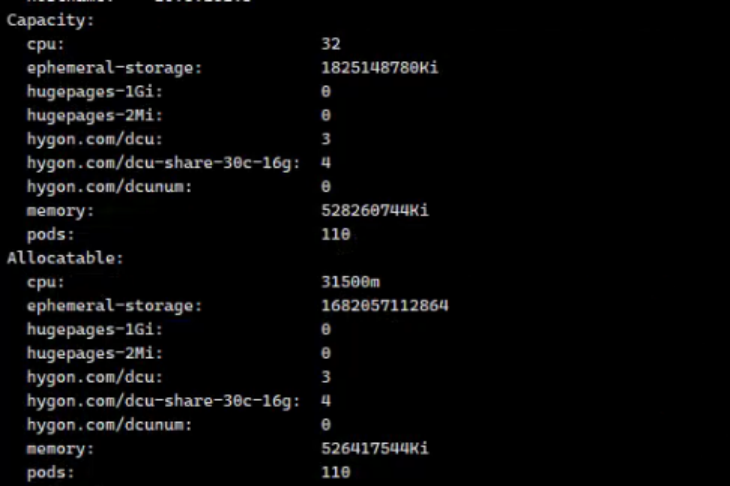
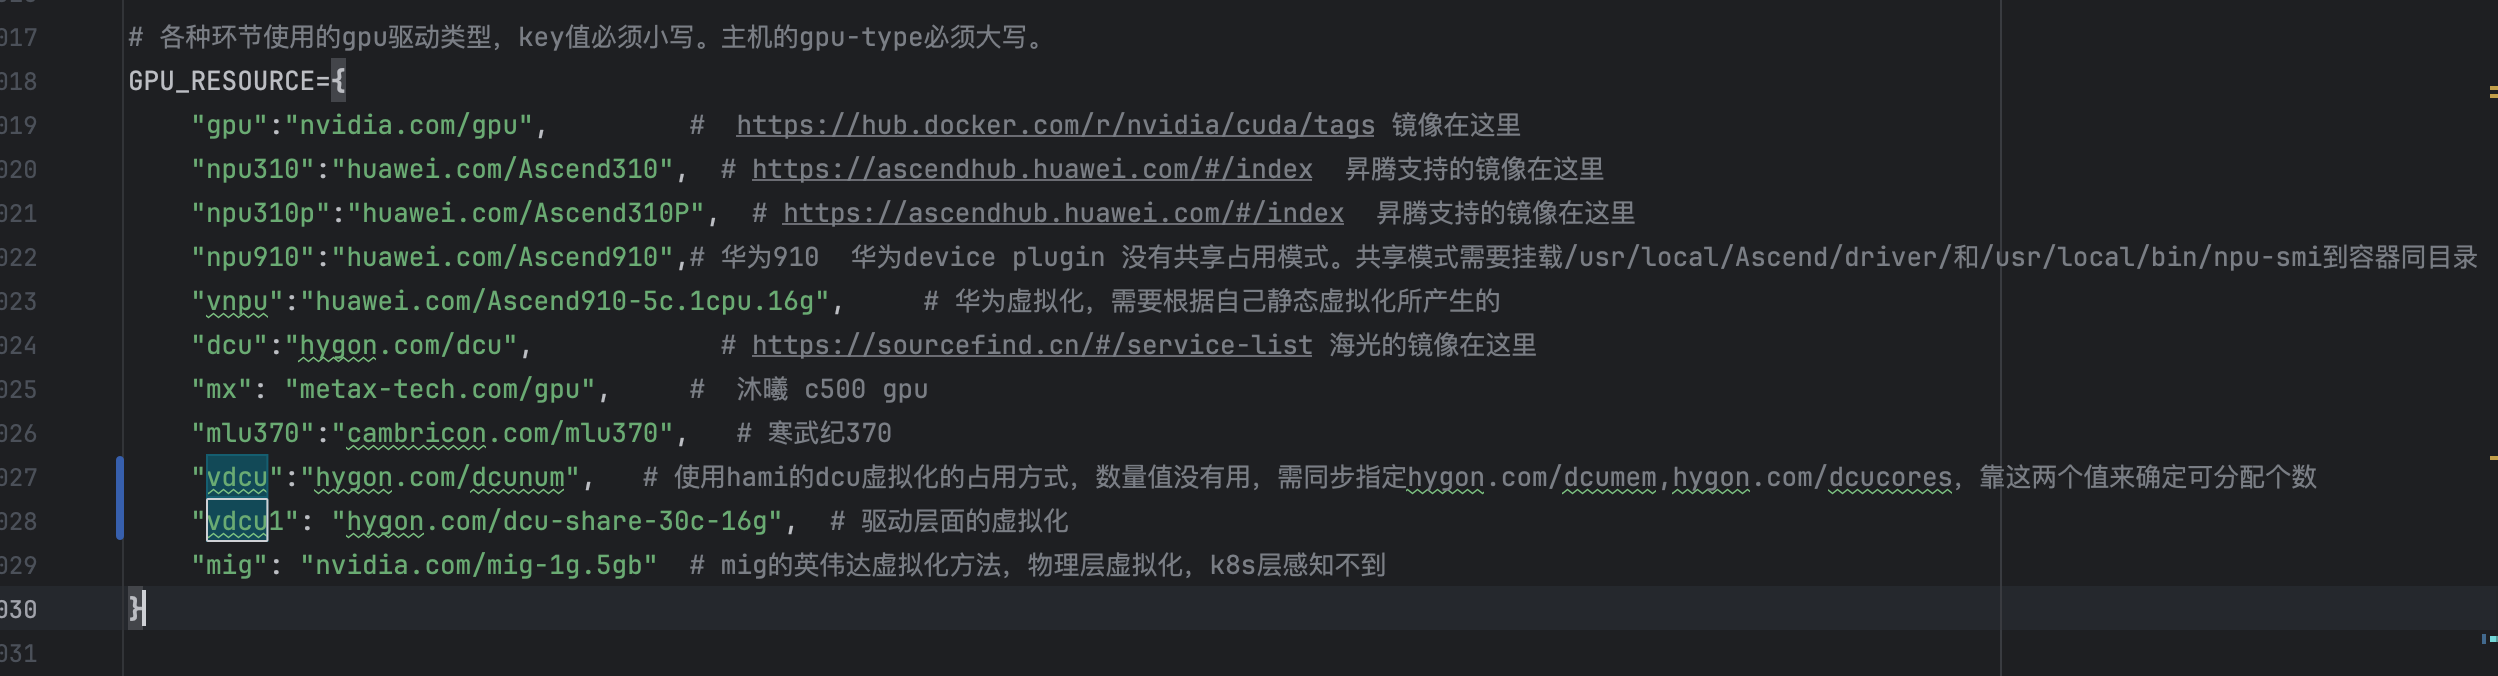
根据节点资源中hygon.com/dcu, hygon.com/dcu-share-xxc-xg设置GPU_RESOURCE
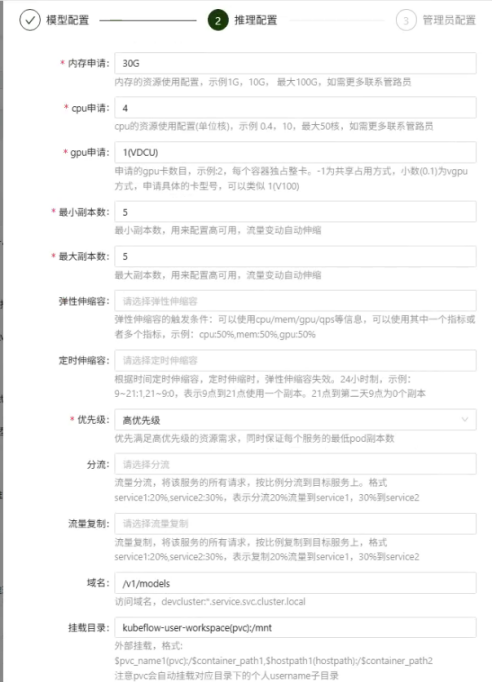
使用资源时gpu:1(dcu) /gpu:1(mvdcu)即可 dcu/mvdcu为上方GPU_RESOURCE定义的资源名
如果出现路径错误
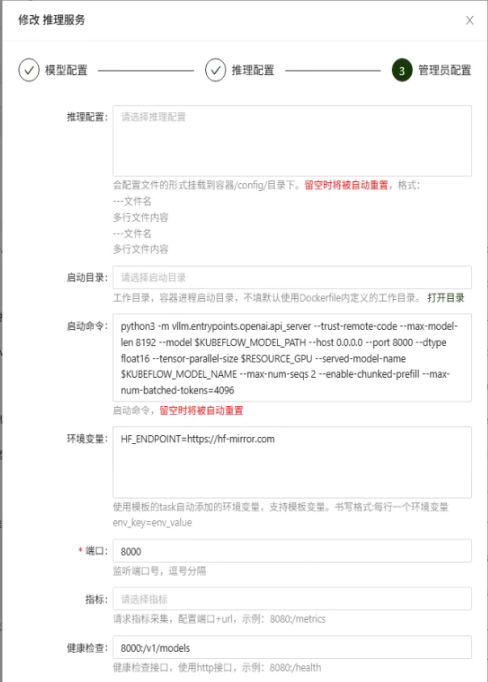
在环境变量中添加
LD_LIBRARY_PATH=/opt/dtk/lib:/opt/dtk/hipblas/lib:/opt/hyhal/lib:/usr/lib64:/lib64:/usr/lib:/lib
启动命令添加
bash /opt/dtk/env.sh
kubeflow-user-workspace(pvc):/mnt,/opt/hyhal(hostpath):/opt/hyhal,/dev(hostpath):/dev,/dev/kfd(hostpath):/dev/kfd,/dev/dri(hostpath):/dev/dri
正常情况下,device会自动挂载,如果device没有做这部操作,需要手动挂载。
4-动态切分vdcu(hami)
kubectl label node <node-name> dcu=on --overwrite
kubectl apply -f vdcu-admission-webhook.yaml
kubectl apply -f vdcu-scheduler.yaml
kubectl apply -f k8s-dcu-plugin-hami.yaml
需要修改vdcu-admission-webhook.yaml vdcu-scheduler.yaml
nodeSelector:
   node-role.kubernetes.io/control-plane: "" # 高可用集群 master
kubectl get node <node-name> --show-labels,需要把上方标签改为当前节点control标签

nodeName: master
"kubectl describe node <node-name> | grep Name: ",将master修改为自己节点的nodename。

volumes:
  - name: kubelet
   hostPath:
     path: /usr/local/bin/kubelet
查看本地kubelet二进制文件是否为此路径,如果路径不同需要更换
删除vdcu-scheduler.yaml k8s-dcu-plugin-hami.yaml时,需同步删除
kubectl delete secrets -n kube-system   admission-webhook-dcu-certs
kubectl delete mutatingwebhookconfigurations mutating-webhook-dcu-cfg
部署成功后
Kubectl describe node <node-name>
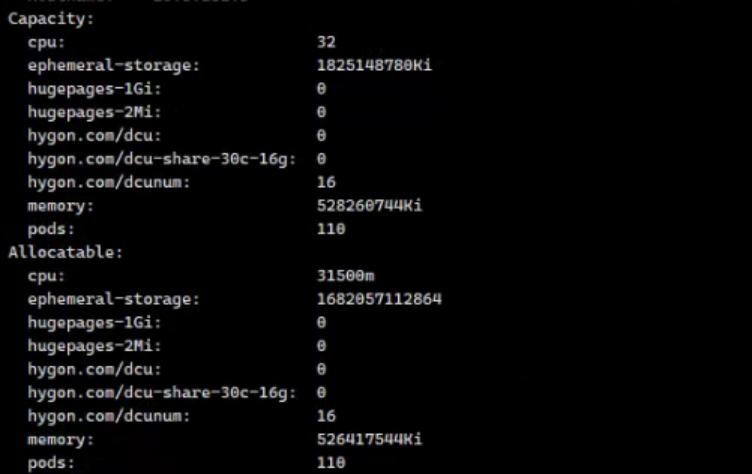

根据节点资源中hygon.com/dcunum设置GPU_RESOURCE
使用资源时gpu:1(vdcu)即可 vdcu为上方GPU_RESOURCE定义的资源名
只指定hygon.com/dcumum: 1,没有指定hygon.com/dcumem,hygon.com/dcucores,则一块vdcu使用一整张物理卡资源
Vdcu使用测试
如果出现路径错误
在环境变量中添加
LD_LIBRARY_PATH=/opt/dtk/lib:/opt/dtk/hipblas/lib:/opt/hyhal/lib:/usr/lib64:/lib64:/usr/lib:/lib
启动命令添加
bash /opt/dtk/env.sh
kubeflow-user-workspace(pvc):/mnt,/opt/hyhal(hostpath):/opt/hyhal,/dev(hostpath):/dev,/dev/kfd(hostpath):/dev/kfd,/dev/dri(hostpath):/dev/dri
正常情况下,device会自动挂载,如果device没有做这部操作,需要手动挂载。