【保姆级教程】Windows + Podman 从零部署 Duix-Avatar 数字人项目
写在前面 :
这是一个深度依赖 NVIDIA 显卡和 Linux 环境的 AI 项目。在 Windows 上使用 Podman 部署需要对源码进行"外科手术式"的修改。请务必严格按照步骤执行,不要跳过任何一步。
本篇是上一篇记录博客《【笔记】Podman Desktop 部署 开源数字人 HeyGem.ai》的内容完善进阶和补充篇,请结合着一起查看。
第一篇:环境准备 (地基)
在开始任何代码操作前,新电脑必须具备以下环境。
1. 硬件检查
- 显卡:必须是 NVIDIA 显卡(显存建议 8GB 以上)。
- 驱动 :去 NVIDIA 官网下载并安装最新的 Game Ready 或 Studio 驱动。
2. 基础软件安装 (必装)
请依次下载并安装,建议全部安装在默认路径:
- Git :下载地址 (安装后打开 CMD 输入
git --version验证)。 - Node.js (v18+):下载地址 (安装后输入
node -v验证) 。 - VS Code :下载地址 或 PyCharm (推荐,建议通过JetBrains Toolbox 管理安装)下载地址 (用于编辑代码)。
- Podman Desktop :下载地址 (安装时勾选安装 WSL2 (基于Fedora Linux 42),安装后重启电脑)。
3. FFmpeg 安装 (关键)
这是音频处理的核心,手动配置或命令行方式配置(推荐)。
手动配置方式举例:
- 下载 Windows 版 FFmpeg:下载链接
- 解压压缩包,将文件夹重命名为
ffmpeg,移动到C:\根目录(即路径为C:\ffmpeg)。 - 配置环境变量 :
- 搜索"编辑系统环境变量" -> "环境变量" -> "系统变量" -> 找到
Path-> "编辑" -> "新建"。 - 输入:
C:\ffmpeg\bin - 点击确定保存。
- 搜索"编辑系统环境变量" -> "环境变量" -> "系统变量" -> 找到
- 验证 :打开 CMD,输入
ffmpeg -version,有输出即成功。
命令配置方式举例(推荐,可免去手动配置环境变量)
bash
scoop install ffmpeg第二篇:Podman 核心配置 (打通任督二脉)
Podman 默认配置无法运行此项目,必须进行权限和显卡配置。
1. 初始化并开启最高权限
打开 PowerShell (管理员身份),依次执行:
powershell
# 1. 初始化 Podman
podman machine init

# 2. 开启 Rootful 模式 (解决网络报错的核心)
podman machine set --rootful

# 3. 启动虚拟机
podman machine start
2. 配置显卡穿透 (CDI)
在 PowerShell 中执行以下命令进入虚拟机:
powershell
podman machine ssh进入虚拟机终端(显示 [root@... ~]#)后,复制执行以下命令:
bash
# 安装 NVIDIA 工具包
sudo dnf install -y nvidia-container-toolkit

# 创建配置目录
sudo mkdir -p /etc/cdi

# 生成显卡配置文件 (关键)
sudo nvidia-ctk cdi generate --output=/etc/cdi/nvidia.yaml

# 退出虚拟机
exit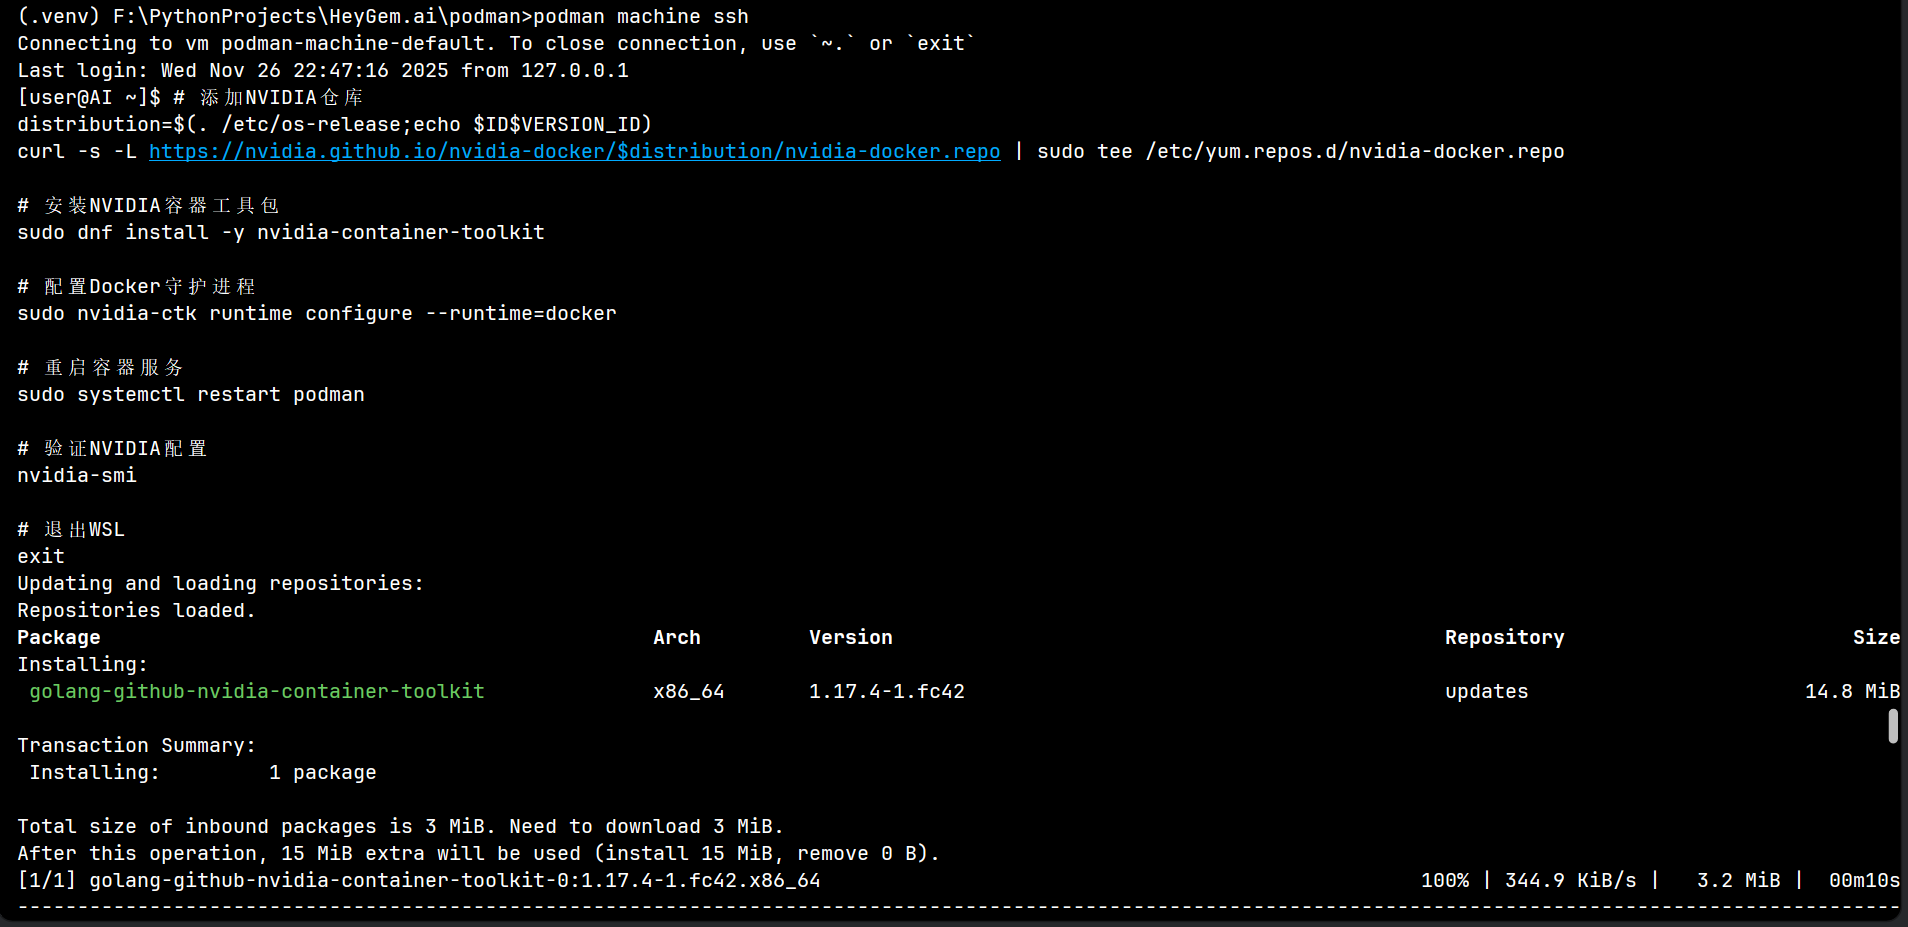
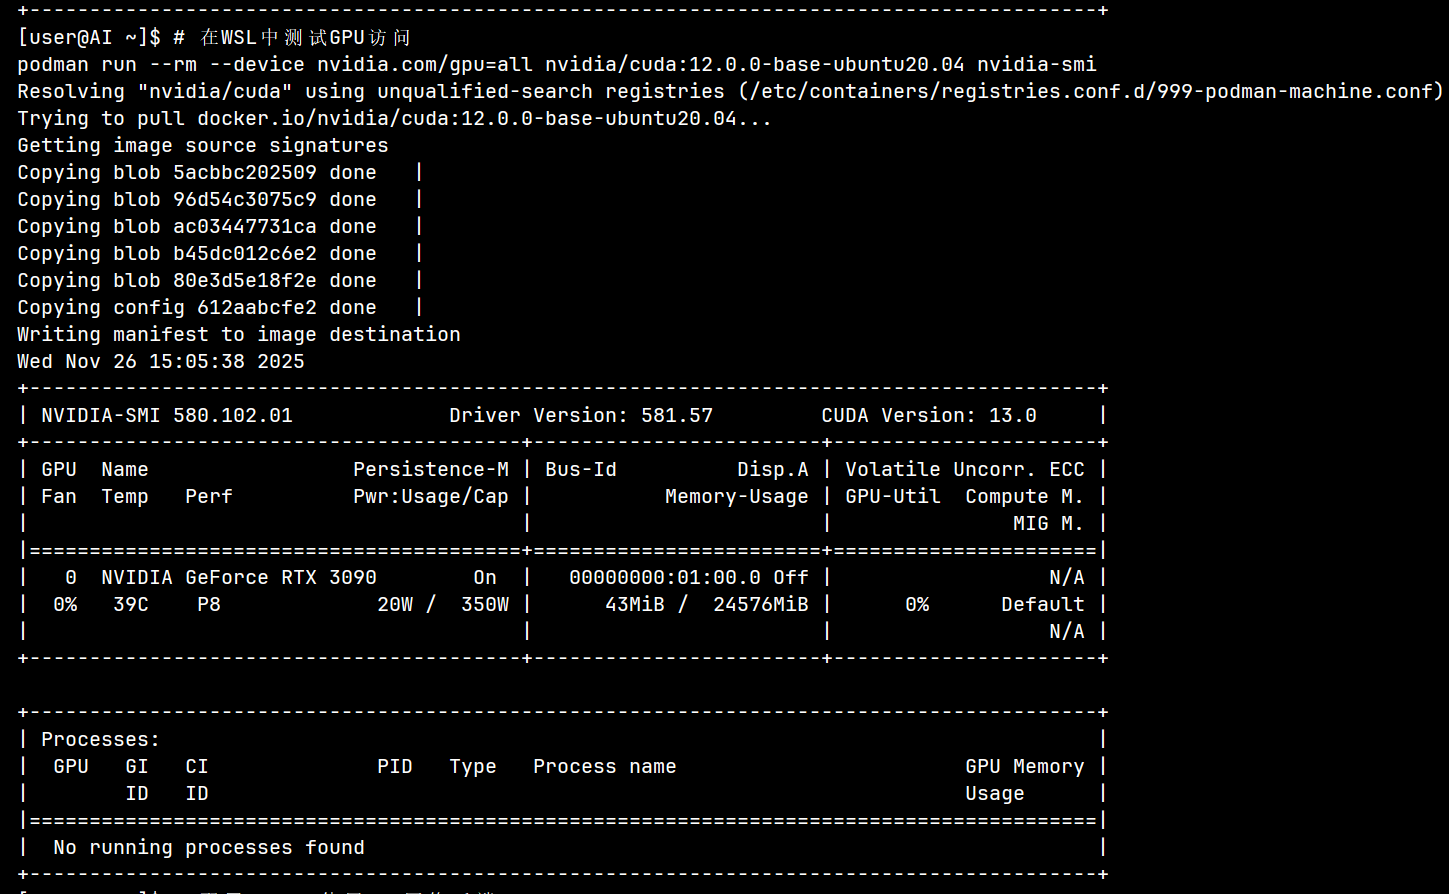
验证 GPU: 在 Windows 终端运行:
PowerShell
podman run --rm --device=nvidia.com/gpu=all ubuntu nvidia-smi如果看到了显卡信息表格,说明 GPU 穿透成功!
第三篇:获取代码与"魔改" (核心)
1. 获取项目源码
在 PowerShell 中执行:
powershell
# 进入你想要存放项目的盘符(例如 F 盘)
F:
# 克隆项目
git clone https://github.com/duixcom/Duix-Avatar.git F:\PythonProjects\HeyGem.ai
# 进入目录
cd F:\PythonProjects\HeyGem.ai
# 安装依赖 或 创建虚拟环境
npm install
在Windows中创建虚拟环境(推荐)
python -m venv .venv
.venv\Scripts\activate.bat
安装或升级必要的Python工具
python -m pip install -U pip setuptools wheel安装podman-compose
pip install podman-compose2. 植入"修复补丁" (请按顺序修改文件)
我们需要修改 7 个文件来适配 Windows + Podman 环境。请用 VS Code 打开项目文件夹。
【修改 1】 创建 Podman 编排文件
- 位置 :在项目根目录下的
podman文件夹中,新建文件podman-compose_fixed_final.yml。 - 内容 :(请填入下方代码,这是解决了 Host 网络和 Windows 挂载 Bug 的最终版本)
yaml
# ---------------------------
# 在此处填入我们最终修复好的 podman-compose.yml 内容
# 重点检查:network_mode: host, extra_hosts, 以及 volumes 的长格式写法
# ---------------------------
version: '3.8'

services:
  duix-avatar-tts:
    image: guiji2025/fish-speech-ziming
    container_name: duix-avatar-tts
    restart: always
    network_mode: host
    extra_hosts:
      - "duix-avatar-asr:127.0.0.1"
    environment:
      - NVIDIA_VISIBLE_DEVICES=all
      - NVIDIA_DRIVER_CAPABILITIES=compute,graphics,utility,video,display
      - ASR_PORT=10095
      - FUNASR_PORT=10095
      - ASR_URL=ws://127.0.0.1:10095
    volumes:
      - type: bind
        source: D:/duix_avatar_data/voice/data
        target: /code/data
      - type: bind
        source: D:/duix_avatar_data/voice/sessions
        target: /code/sessions
      # 挂载本地修复后的 config.py
      - type: bind
        source: F:/PythonProjects/HeyGem.ai/podman/config/config.py
        target: /code/config/config.py
    command: /bin/bash -c "/opt/conda/envs/python310/bin/python3 tools/api_server.py --listen 0.0.0.0:18180"
    devices:
      - nvidia.com/gpu=all

  duix-avatar-asr:
    image: guiji2025/fun-asr
    container_name: duix-avatar-asr
    restart: always
    privileged: true
    network_mode: host
    working_dir: /workspace/FunASR/runtime
    command: sh /run.sh
    environment:
      - NVIDIA_VISIBLE_DEVICES=all
      - NVIDIA_DRIVER_CAPABILITIES=compute,graphics,utility,video,display
    devices:
      - nvidia.com/gpu=all

  duix-avatar-gen-video:
    image: guiji2025/duix.avatar
    container_name: duix-avatar-gen-video
    restart: always
    privileged: true
    network_mode: host
    volumes:
      - type: bind
        source: D:/duix_avatar_data/face2face
        target: /code/data
    environment:
      - PYTORCH_CUDA_ALLOC_CONF=max_split_size_mb:512
      - NVIDIA_VISIBLE_DEVICES=all
      - NVIDIA_DRIVER_CAPABILITIES=compute,graphics,utility,video,display
    shm_size: "8g"
    command: python /code/app_local.py
    devices:
      - nvidia.com/gpu=all
【修改 2】 创建后端配置文件
- 位置 :在
podman文件夹下新建文件夹config,在里面新建文件config.py。 - 内容 :(请填入下方代码,核心是修复 IP 为 127.0.0.1 和端口 10095)
python
# ---------------------------
# 在此处填入我们修改后的 Python config.py 内容
# 重点:import os, fun_asr_host = '127.0.0.1', fun_asr_port = '10095'
# ---------------------------
import os

# 是否本地离线版本
is_local = True

download_path = os.path.join(os.getcwd(), "sessions")
# enum 状态
task_start = 1
task_running = 2
task_complete = 3
task_fail = -1

down_load_time_out = 1200
cache_interval = 7200

# 最小音频长度, 单位是秒
min_wav_time = 10
# 最大音频长度, 单位是秒
max_wav_time = 40

# 待训练录音的保存路径
media_path = '/code/data'

# 是否开启compile加速,30系列显卡使用有问题 建议4090开启
is_compile = True
base_reference_text = "无论你是寻找舒适的驾驶体验,还是享受环保的出行方式,吉利银河E8都是你的不二之选。"
base_reference_audio = "https://digital-public-dev.obs.myhuaweicloud.com/TTS_MODELS/20240715/slice_remove.wav"

# obs
obs_end_point = 'http://obs.cn-east-3.myhuaweicloud.com'
obs_access_key = 'A0MGG9DH'
obs_secret = 'JplniUNAiu'
obs_bucket_name = 'digital-public-dev'
obs_path_prefix = 'vcm_server/'
obs_http_url_prefix = 'https://d.obs.myhuaweicloud.com/'

# 阿里asr
access_key_id = 'access_key_data'
access_key_secret = 'access_key_secret'
appKey_cn = 'ZL6BdNok'
appKey_en = 'IN2DNTDme'


# 本地funasr相关信息
fun_asr_host = os.getenv('FUN_ASR_HOST', '127.0.0.1')
fun_asr_port = os.getenv('FUN_ASR_PORT', '10095')

# 字符串分割
split_len = 100
split_symbols = ["。", "?", "?", "!", "!", ";", ";", ",", ",", "、"]

# 参数中chunk_length被强行写为200,避免单句过长,导致强行断句
max_chunk_length = 200
【修改 3】 修复 FFmpeg 路径
- 文件 :
src/main/util/ffmpeg.js - 操作:全选覆盖。
- 注意 :代码中
const systemFfmpegPath的路径必须修改为新电脑的实际安装路径(如C:\\ffmpeg\\bin\\ffmpeg.exe)。 - 内容 :(请填入修复了 initFFmpeg 函数的代码)
javascript
// ---------------------------
// 在此处填入修复后的 ffmpeg.js 代码
// ---------------------------
import ffmpeg from 'fluent-ffmpeg'
import path from 'path'
import fs from 'fs'
import log from '../logger.js'

function initFFmpeg() {
  // --- 修改开始:优先使用系统 FFmpeg ---

  // 1. 定义您电脑上已知的正确路径
  const systemFfmpegPath = 'C:\\ffmpeg\\bin\\ffmpeg.exe';
  const systemFfprobePath = 'C:\\ffmpeg\\bin\\ffprobe.exe';

  // 2. 检查系统路径是否存在,如果存在直接用,不再去项目里找
  if (fs.existsSync(systemFfmpegPath)) {
    log.info('>>> [FFmpeg] 检测到系统 FFmpeg,使用路径:', systemFfmpegPath);
    ffmpeg.setFfmpegPath(systemFfmpegPath);
    ffmpeg.setFfprobePath(systemFfprobePath);
    return;
  }

  // --- 如果系统路径不对,再走原来的逻辑作为备用 (旧代码) ---
  const ffmpegPath = {
    'development-win32': path.join(__dirname, '../../resources/ffmpeg/win-amd64/bin/ffmpeg.exe'),
    'development-linux': path.join(__dirname, '../../resources/ffmpeg/linux-amd64/ffmpeg'),
    'production-win32': path.join(process.resourcesPath, 'app.asar.unpacked', 'resources', 'ffmpeg', 'win-amd64', 'bin', 'ffmpeg.exe'),
    'production-linux': path.join(process.resourcesPath, 'app.asar.unpacked', 'resources', 'ffmpeg', 'linux-amd64', 'ffmpeg')
  }

  if(process.env.NODE_ENV === undefined){
    process.env.NODE_ENV = 'production'
  }

  const envKey = `${process.env.NODE_ENV}-${process.platform}`;
  const ffmpegPathValue = ffmpegPath[envKey];

  log.info('>>> [FFmpeg] 尝试使用内置路径:', ffmpegPathValue);
  if (ffmpegPathValue && fs.existsSync(ffmpegPathValue)) {
      ffmpeg.setFfmpegPath(ffmpegPathValue);
  } else {
      log.warn('>>> [FFmpeg] 内置路径不存在,将尝试使用系统默认 PATH 变量');
      // 不设置 setFfmpegPath,让它自动去环境变量里找
  }

  // 设置 FFprobe (类似逻辑)
  const ffprobePath = {
    'development-win32': path.join(__dirname, '../../resources/ffmpeg/win-amd64/bin/ffprobe.exe'),
    'development-linux': path.join(__dirname, '../../resources/ffmpeg/linux-amd64/ffprobe'),
    'production-win32': path.join(process.resourcesPath, 'app.asar.unpacked', 'resources', 'ffmpeg', 'win-amd64', 'bin', 'ffprobe.exe'),
    'production-linux': path.join(process.resourcesPath, 'app.asar.unpacked', 'resources', 'ffmpeg', 'linux-amd64', 'ffprobe')
  }
  const ffprobePathValue = ffprobePath[envKey];
  if (ffprobePathValue && fs.existsSync(ffprobePathValue)) {
      ffmpeg.setFfprobePath(ffprobePathValue);
  }
}

initFFmpeg()

export function extractAudio(videoPath, audioPath) {
  console.log('[FFmpeg] 开始提取音频:', videoPath, '->', audioPath);
  return new Promise((resolve, reject) => {
    ffmpeg(videoPath)
      .noVideo()
      .save(audioPath)
      .on('start', (commandLine) => {
        console.log('[FFmpeg] 执行命令:', commandLine);
      })
      .on('end', () => {
        console.log('[FFmpeg] 音频提取成功!');
        log.info('audio split done')
        resolve(true)
      })
      .on('error', (err) => {
        console.error('[FFmpeg] 音频提取失败:', err);
        reject(err)
      })
  })
}

export async function toH264(videoPath, outputPath) {
  console.log('[FFmpeg] 开始转码视频:', videoPath, '->', outputPath);
  // const hasNvidia = await detectNvidia()
  return new Promise((resolve, reject) => {
    ffmpeg(videoPath)
      .videoCodec('libx264')
      .outputOptions('-pix_fmt yuv420p')
      .save(outputPath)
      .on('start', (commandLine) => {
        console.log('[FFmpeg] 执行命令:', commandLine);
      })
      .on('end', () => {
        console.log('[FFmpeg] 视频转码成功!');
        log.info('video convert to h264 done')
        resolve(true)
      })
      .on('error', (err) => {
        console.error('[FFmpeg] 视频转码失败:', err);
        reject(err)
      })
  })
}

function detectNvidia() {
  return new Promise((resolve) => {
    const exec = require('child_process').exec;
    exec('nvidia-smi', (error, stdout, stderr) => {
      if (error || stderr) {
        resolve(false);
      } else {
        resolve(true);
      }
    });
  });
}

export function getVideoDuration(videoPath) {
  return new Promise((resolve, reject) => {
    ffmpeg(videoPath).ffprobe((err, data) => {
      if (err) {
        log.error("🚀 ~ ffmpeg ~ err:", err)
        reject(err)
      } else if (data && data.streams && data.streams.length > 0) {
        resolve(data.streams[0].duration) // 单位秒
      } else {
        log.error('No streams found')
        reject(new Error('No streams found'))
      }
    })
  })
}
【修改 4】 修复数据库报错
- 文件 :
src/main/dao/f2f-model.js - 操作:全选覆盖。
- 内容 :(请填入加入了 safe() 函数的代码)
javascript
// ---------------------------
// 在此处填入 f2f-model.js 代码,包含 safe() 函数
// ---------------------------
import { connect } from '../db/index.js'

// --- 数据清洗函数 ---
function safe(val) {
  // 如果是 undefined 或 null,转为 null
  if (val === undefined || val === null) {
    return null
  }
  // 如果是对象(比如报错信息 {code: -1...}),转为 JSON 字符串
  if (typeof val === 'object') {
    return JSON.stringify(val)
  }
  // 其他情况(数字、字符串)直接返回
  return val
}

export function insert({ modelName, videoPath, audioPath, voiceId }) {
  const db = connect()

  // --- 调试日志:看看最终写入了什么 ---
  console.log('[DAO] 准备写入数据库:', {
    modelName: safe(modelName),
    voiceId_raw: voiceId,
    voiceId_safe: safe(voiceId)
  });

  const stmt = db.prepare(
    'INSERT INTO f2f_model (name, video_path, audio_path, voice_id, created_at) VALUES (?, ?, ?, ?, ?)'
  )

  // 使用 safe() 包裹所有可能出问题的字段
  const info = stmt.run(
    safe(modelName),
    safe(videoPath),
    safe(audioPath),
    safe(voiceId),
    Date.now()
  )
  return info.lastInsertRowid
}

export function selectPage({ page, pageSize, name = '' }) {
  const db = connect()
  const offset = (page - 1) * pageSize
  const rows = db
    .prepare(
      `SELECT * FROM f2f_model WHERE name like '%${name}%' ORDER BY created_at DESC LIMIT ${pageSize} OFFSET ${offset}`
    )
    .all()
  return rows
}

export function count(name = '') {
  const db = connect()
  const rows = db
    .prepare(`SELECT COUNT(*) as total FROM f2f_model WHERE name like '%${name}%'`)
    .get()
  return rows.total
}

export function selectByID(id) {
  const db = connect()
  const stmt = db.prepare('SELECT * FROM f2f_model WHERE id = ?')
  const row = stmt.get(id)
  return row
}

export function remove(id) {
  const db = connect()
  db.prepare(`DELETE FROM f2f_model WHERE id = ?`).run(id)
}
【修改 5 & 6】 移除写死的调试逻辑
- 文件 1 :
src/main/service/model.js - 文件 2 :
src/main/service/video.js - 操作:全选覆盖。
- 内容 :(请填入删除了
test.wav逻辑的 model.js 和 video.js 代码)
model.js 代码:
javascript
import { ipcMain } from 'electron'
import fs from 'fs'
import path from 'path'
import dayjs from 'dayjs'
import { isEmpty } from 'lodash'
import { insert, selectPage, count, selectByID, remove as deleteModel } from '../dao/f2f-model.js'
import { train as trainVoice } from './voice.js'
import { assetPath } from '../config/config.js'
import log from '../logger.js'
import { extractAudio, toH264 } from '../util/ffmpeg.js'
const MODEL_NAME = 'model'

/**
 * 辅助函数:清洗数据,确保符合 SQLite 要求
 * SQLite 报错 "can only bind numbers, strings... and null" 通常是因为传入了 undefined 或 Object
 */
function safeValue(val) {
  if (val === undefined || val === null) {
    return null; // 强制转为 null
  }
  if (typeof val === 'object') {
    return JSON.stringify(val); // 强制转为字符串
  }
  return String(val); // 其他情况(如数字)转为字符串
}

/**
 * 新增模特
 * @param {string} modelName 模特名称
 * @param {string} videoPath 模特视频路径
 * @returns
 */
async function addModel(modelName, videoPath) {
  console.log('[ModelService] 开始添加模特:', modelName, videoPath);

  if (!fs.existsSync(assetPath.model)) {
    fs.mkdirSync(assetPath.model, {
      recursive: true
    })
  }
  // copy video to model video path
  const extname = path.extname(videoPath)
  const modelFileName = dayjs().format('YYYYMMDDHHmmssSSS') + extname
  const modelPath = path.join(assetPath.model, modelFileName)

  await toH264(videoPath, modelPath)

  // 用ffmpeg分离音频
  if (!fs.existsSync(assetPath.ttsTrain)) {
    fs.mkdirSync(assetPath.ttsTrain, {
      recursive: true
    })
  }
  const audioPath = path.join(assetPath.ttsTrain, modelFileName.replace(extname, '.wav'))

  return extractAudio(modelPath, audioPath).then(() => {
    // 训练语音模型
    const relativeAudioPath = path.relative(assetPath.ttsRoot, audioPath)

    // --- [关键修改点] ---
    // 移除原本的 if (process.env.NODE_ENV === 'development') 判断
    // 无论开发环境还是生产环境,都强制使用刚刚生成的真实音频文件
    console.log('[ModelService] 开始训练语音,使用文件:', relativeAudioPath);
    return trainVoice(relativeAudioPath, 'zh')
    // -------------------

  }).then((trainResult) => {
    // --- [修复逻辑] 深度清洗 ---
    console.log('[ModelService] trainVoice 返回:', JSON.stringify(trainResult));

    let voiceId = null;
    if (trainResult && typeof trainResult === 'object') {
      // 尝试获取真正的 ID,如果获取不到,则转字符串存入
      voiceId = trainResult.data || trainResult.voiceId || trainResult.id || JSON.stringify(trainResult);
    } else {
      voiceId = trainResult;
    }

    // 准备插入的数据
    const relativeModelPath = path.relative(assetPath.model, modelPath);
    const relativeAudioPath = path.relative(assetPath.ttsRoot, audioPath);

    const dbPayload = {
      modelName: safeValue(modelName),
      videoPath: safeValue(relativeModelPath),
      audioPath: safeValue(relativeAudioPath),
      voiceId: safeValue(voiceId)
    };

    console.log('[ModelService] 正在写入数据库:', dbPayload);

    // insert model info to db
    const id = insert(dbPayload);
    return id;
  }).catch(err => {
    console.error('[ModelService] addModel 发生错误:', err);
    throw err; // 继续抛出让前端捕获
  })
}

function page({ page, pageSize, name = '' }) {
  const total = count(name)
  return {
    total,
    list: selectPage({ page, pageSize, name }).map((model) => ({
      ...model,
      video_path: path.join(assetPath.model, model.video_path),
      audio_path: path.join(assetPath.ttsRoot, model.audio_path)
    }))
  }
}

function findModel(modelId) {
  const model = selectByID(modelId)
  return {
    ...model,
    video_path: path.join(assetPath.model, model.video_path),
    audio_path: path.join(assetPath.ttsRoot, model.audio_path)
  }
}

function removeModel(modelId) {
  const model = selectByID(modelId)
  log.debug('~ removeModel ~ modelId:', modelId)

  // 删除视频
  const videoPath = path.join(assetPath.model, model.video_path || '')
  if (!isEmpty(model.video_path) && fs.existsSync(videoPath)) {
    fs.unlinkSync(videoPath)
  }

  // 删除音频
  const audioPath = path.join(assetPath.ttsRoot, model.audio_path || '')
  if (!isEmpty(model.audio_path) && fs.existsSync(audioPath)) {
    fs.unlinkSync(audioPath)
  }

  deleteModel(modelId)
}

function countModel(name = '') {
  return count(name)
}

export function init() {
  ipcMain.handle(MODEL_NAME + '/addModel', (event, ...args) => {
    return addModel(...args)
  })
  ipcMain.handle(MODEL_NAME + '/page', (event, ...args) => {
    return page(...args)
  })
  ipcMain.handle(MODEL_NAME + '/find', (event, ...args) => {
    return findModel(...args)
  })
  ipcMain.handle(MODEL_NAME + '/count', (event, ...args) => {
    return countModel(...args)
  })
  ipcMain.handle(MODEL_NAME + '/remove', (event, ...args) => {
    return removeModel(...args)
  })
}
video.js 代码:
javascript
import { ipcMain } from 'electron'
import crypto from 'crypto'
import path from 'path'
import fs from 'fs'
import { isEmpty } from 'lodash'
import { assetPath } from '../config/config.js'
import { selectPage,selectByStatus, updateStatus, remove as deleteVideo, findFirstByStatus } from '../dao/video.js'
import { selectByID as selectF2FModelByID } from '../dao/f2f-model.js'
import { selectByID as selectVoiceByID } from '../dao/voice.js'
import {
  insert as insertVideo,
  count,
  update,
  selectByID as selectVideoByID
} from '../dao/video.js'
import { makeAudio4Video, copyAudio4Video } from './voice.js'
import { makeVideo as makeVideoApi,getVideoStatus } from '../api/f2f.js'
import log from '../logger.js'
import { getVideoDuration } from '../util/ffmpeg.js'

const MODEL_NAME = 'video'

/**
 * 分页查询合成结果
 * @param {number} page
 * @param {number} pageSize
 * @returns
 */
function page({ page, pageSize, name = '' }) {
  // 查询的有waiting状态的视频
  const waitingVideos = selectByStatus('waiting').map((v) => v.id)
  const total = count(name)
  const list = selectPage({ page, pageSize, name }).map((video) => {
    video = {
      ...video,
      file_path: video.file_path ? path.join(assetPath.model, video.file_path) : video.file_path
    }

    if(video.status === 'waiting'){
      video.progress = `${waitingVideos.indexOf(video.id) + 1} / ${waitingVideos.length}`
    }
    return video
  })

  return {
    total,
    list
  }
}

function findVideo(videoId) {
  const video = selectVideoByID(videoId)
  return {
    ...video,
    file_path: video.file_path ? path.join(assetPath.model, video.file_path) : video.file_path
  }
}

function countVideo(name = '') {
  return count(name)
}

function saveVideo({ id, model_id, name, text_content, voice_id, audio_path }) {
  const video = selectVideoByID(id)
  if(audio_path){
    audio_path = copyAudio4Video(audio_path)
  }

  if (video) {
    return update({ id, model_id, name, text_content, voice_id, audio_path })
  }
  return insertVideo({ model_id, name, status: 'draft', text_content, voice_id, audio_path })
}

/**
 * 合成视频
 * 更新视频状态为waiting
 * @param {number} videoId
 * @returns
 */
function makeVideo(videoId) {
  update({ id: videoId, status: 'waiting' })
  return videoId
}

export async function synthesisVideo(videoId) {
  try{
    update({
      id: videoId,
      file_path: null,
      status: 'pending',
      message: '正在提交任务',
    })

    // 查询Video
    const video = selectVideoByID(videoId)
    log.debug('~ makeVideo ~ video:', video)

    // 根据modelId获取model信息
    const model = selectF2FModelByID(video.model_id)
    log.debug('~ makeVideo ~ model:', model)

    let audioPath
    if(video.audio_path){
      // 将audio_path复制到ttsProduct目录下
      audioPath = video.audio_path
    }else{
      // 根据model信息中的voiceId获取voice信息
      const voice = selectVoiceByID(video.voice_id || model.voice_id)
      log.debug('~ makeVideo ~ voice:', voice)

      // 调用tts接口生成音频
      audioPath = await makeAudio4Video({
        voiceId: voice.id,
        text: video.text_content
      })
      log.debug('~ makeVideo ~ audioPath:', audioPath)
    }

    // 调用视频生成接口生成视频
    let result, param

    // [FIX] 无论开发环境还是生产环境,都强制使用真实路径,禁止使用 test.wav
    log.info('~ makeVideo ~ Starting F2F with:', audioPath, model.video_path)
    ;({ result, param } = await makeVideoByF2F(audioPath, model.video_path))

    log.debug('~ makeVideo ~ result, param:', result, param)

    // 插入视频表
    if(10000 === result.code){ // 成功
      update({
        id: videoId,
        file_path: null,
        status: 'pending',
        message: result,
        audio_path: audioPath,
        param,
        code: param.code
      })
    }else{ // 失败
      update({
        id: videoId,
        file_path: null,
        status: 'failed',
        message: result.msg,
        audio_path: audioPath,
        param,
        code: param.code
      })
    }
  } catch (error) {
    log.error('~ synthesisVideo ~ error:', error.message)
    updateStatus(videoId, 'failed', error.message)
  }

  // 6. 返回视频id
  return videoId
}

export async function loopPending() {
  const video = findFirstByStatus('pending')
  if (!video) {
    synthesisNext()

    setTimeout(() => {
      loopPending()
    }, 2000)
    return
  }

  const statusRes = await getVideoStatus(video.code)

  if ([9999, 10002, 10003].includes(statusRes.code)) {
    updateStatus(video.id, 'failed', statusRes.msg)
  } else if (statusRes.code === 10000) {
    if (statusRes.data.status === 1) {
      updateStatus(
        video.id,
        'pending',
        statusRes.data.msg,
        statusRes.data.progress,
      )
    }else if (statusRes.data.status === 2) { // 合成成功
      // ffmpeg 获取视频时长
      // [FIX] 总是使用真实计算,不使用写死的 88 秒
      const resultPath = path.join(assetPath.model, statusRes.data.result)
      let duration = 0
      try {
        duration = await getVideoDuration(resultPath)
      } catch (e) {
        log.warn('Failed to get video duration, using default 0', e)
      }

      update({
        id: video.id,
        status: 'success',
        message: statusRes.data.msg,
        progress: statusRes.data.progress,
        file_path: statusRes.data.result,
        duration
      })

    } else if (statusRes.data.status === 3) {
      updateStatus(video.id, 'failed', statusRes.data.msg)
    }
  }

  setTimeout(() => {
    loopPending()
  }, 2000)
  return video
}

/**
 * 合成下一个视频
 */
function synthesisNext() {
  // 查询所有未完成的视频任务
  const video = findFirstByStatus('waiting')
  if (video) {
    synthesisVideo(video.id)
  }
}

function removeVideo(videoId) {
  // 查询视频
  const video = selectVideoByID(videoId)
  log.debug('~ removeVideo ~ videoId:', videoId)

  // 删除视频
  const videoPath = path.join(assetPath.model, video.file_path ||'')
  if (!isEmpty(video.file_path) && fs.existsSync(videoPath)) {
    fs.unlinkSync(videoPath)
  }

  // 删除音频
  const audioPath = path.join(assetPath.model, video.audio_path ||'')
  if (!isEmpty(video.audio_path) && fs.existsSync(audioPath)) {
    fs.unlinkSync(audioPath)
  }

  // 删除视频表
  return deleteVideo(videoId)
}

function exportVideo(videoId, outputPath) {
  const video = selectVideoByID(videoId)
  const filePath = path.join(assetPath.model, video.file_path)
  fs.copyFileSync(filePath, outputPath)
}

/**
 * 调用face2face生成视频
 * @param {string} audioPath
 * @param {string} videoPath
 * @returns
 */
async function makeVideoByF2F(audioPath, videoPath) {
  const uuid = crypto.randomUUID()
  const param = {
    audio_url: audioPath,
    video_url: videoPath,
    code: uuid,
    chaofen: 0,
    watermark_switch: 0,
    pn: 1
  }
  const result = await makeVideoApi(param)
  return { param, result }
}

function modify(video) {
  return update(video)
}

export function init() {
  ipcMain.handle(MODEL_NAME + '/page', (event, ...args) => {
    return page(...args)
  })
  ipcMain.handle(MODEL_NAME + '/make', (event, ...args) => {
    return makeVideo(...args)
  })
  ipcMain.handle(MODEL_NAME + '/modify', (event, ...args) => {
    return modify(...args)
  })
  ipcMain.handle(MODEL_NAME + '/save', (event, ...args) => {
    return saveVideo(...args)
  })
  ipcMain.handle(MODEL_NAME + '/find', (event, ...args) => {
    return findVideo(...args)
  })
  ipcMain.handle(MODEL_NAME + '/count', (event, ...args) => {
    return countVideo(...args)
  })
  ipcMain.handle(MODEL_NAME + '/export', (event, ...args) => {
    return exportVideo(...args)
  })
  ipcMain.handle(MODEL_NAME + '/remove', (event, ...args) => {
    return removeVideo(...args)
  })
}
【修改 7】 修复前端配置
- 文件 :
src/main/config/config.js - 操作 :修改
serviceUrl为本机地址。 - 内容 :(请填入修改为 127.0.0.1 的代码)
javascript
// ---------------------------
// 在此处填入 config.js 代码
// ---------------------------
import path from 'path'
import os from 'os'

const isDev = process.env.NODE_ENV === 'development'
const isWin = process.platform === 'win32'

export const serviceUrl = {
  // [关键修复] 无论开发还是生产环境,Podman 映射出来的端口都在本机 127.0.0.1
  // 视频生成服务端口 (日志确认为 8383)
  face2face: 'http://127.0.0.1:8383/easy',
  // TTS 语音服务端口 (之前我们修改配置确认为 18180)
  tts: 'http://127.0.0.1:18180'
}

export const assetPath = {
  model: isWin
    ? path.join('D:', 'duix_avatar_data', 'face2face', 'temp')
    : path.join(os.homedir(), 'duix_avatar_data', 'face2face', 'temp'), // 模特视频
  ttsProduct: isWin
    ? path.join('D:', 'duix_avatar_data', 'face2face', 'temp')
    : path.join(os.homedir(), 'duix_avatar_data', 'face2face', 'temp'), // TTS 产物
  ttsRoot: isWin
    ? path.join('D:', 'duix_avatar_data', 'voice', 'data')
    : path.join(os.homedir(), 'duix_avatar_data', 'voice', 'data'), // TTS服务根目录
  ttsTrain: isWin
    ? path.join('D:', 'duix_avatar_data', 'voice', 'data', 'origin_audio')
    : path.join(os.homedir(), 'duix_avatar_data', 'voice', 'data', 'origin_audio') // TTS 训练产物
}
第四阶段:启动与见证
1. 启动 Podman 服务
进入 podman 目录:
powershell
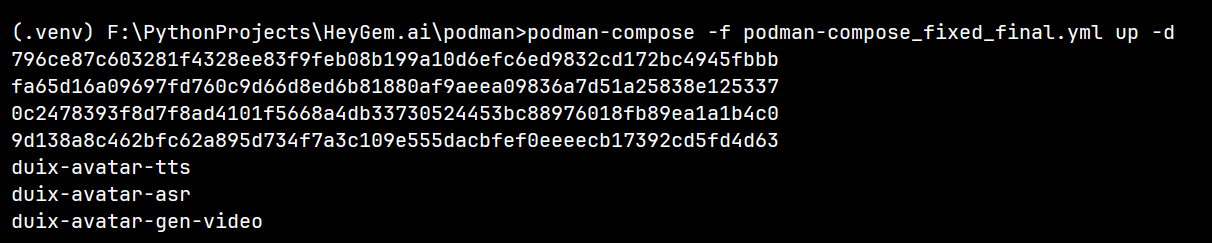
cd F:\PythonProjects\HeyGem.ai\podman
podman-compose -f podman-compose_fixed_final.yml up -d
等待一段时间,直到拉取镜像完成。
2. 启动客户端
powershell
cd F:\PythonProjects\HeyGem.ai
npm run dev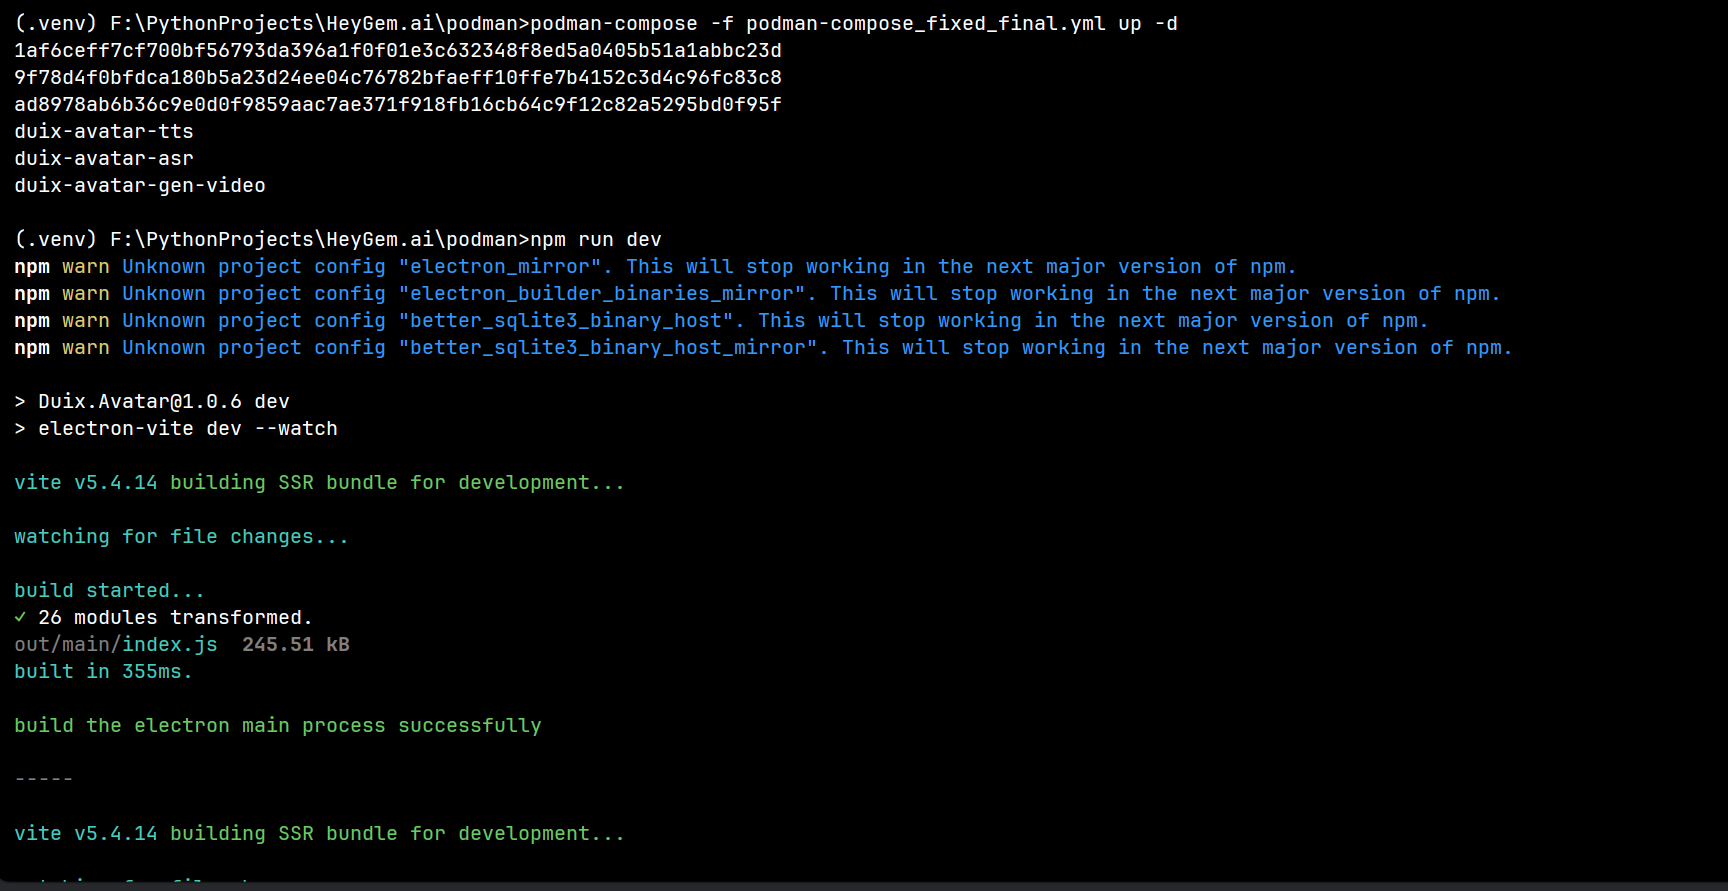
3. 操作流程
- 点击上传视频 -> 等待处理完成。
- 点击试听 -> 确认有声。
- 点击生成视频 -> 成功!

参考资料:
Podman Desktop:现代轻量容器管理利器(Podman与Docker)
PyCharm 链接 Podman Desktop 的 podman-machine-default Linux 虚拟环境
新!在 podman-machine-default 中安装 CUDA、cuDNN、Anaconda、PyTorch 等并验证安装
用Podman Desktop创建自用的WSL-Fedora Linux子系统
Windows 开发环境部署指南:WSL、Docker Desktop、Podman Desktop 部署顺序与存储路径迁移指南
【笔记】 Podman Desktop 中部署 Stable Diffusion WebUI (GPU 支持)
【笔记】在 Podman Machine(Fedora 42)中安装 NVIDIA Container Toolkit 使镜像能使用GPU
在WSL-podman-machine-default (Fedora Linux 42) 中安装 CUDA 13.0、cuDNN 9.14、Anaconda 2025.06、PyTorch 2.10