1. 项目概述
1.1 项目背景
随着旅游业的快速发展,人们对于旅游信息的需求日益增长。本项目旨在构建一个集攻略分享、社交互动、问答交流于一体的综合性旅游平台,为用户提供全方位的旅游信息服务。
1.2 项目目标
- ✅ 构建用户友好的旅游攻略分享平台
- ✅ 实现社交化的旅游信息交流
- ✅ 提供专业的旅游问答服务
- ✅ 建立完善的后台管理体系
- ✅ 确保系统安全性和高性能
1.3 目标用户
| 用户类型 | 描述 | 主要需求 |
|---|---|---|
| 旅游爱好者 | 热爱旅行的普通用户 | 浏览攻略、提问、分享经验 |
| 旅游达人 | 经验丰富的旅行者 | 发布攻略、回答问题、积累粉丝 |
| 自由行用户 | 计划自助旅行的用户 | 获取详细攻略、路线规划 |
| 平台管理员 | 运营和审核人员 | 内容管理、用户管理、数据统计 |
1.4 核心功能模块
旅游攻略系统(用户端)
- 👤 用户管理:注册/登录、个人信息管理、关注系统
- 📝 攻略管理:发布、浏览、搜索、收藏攻略
- 💬 社交互动:点赞、评论、关注、分享
- ❓ 问答社区:提问、回答、最佳答案评选
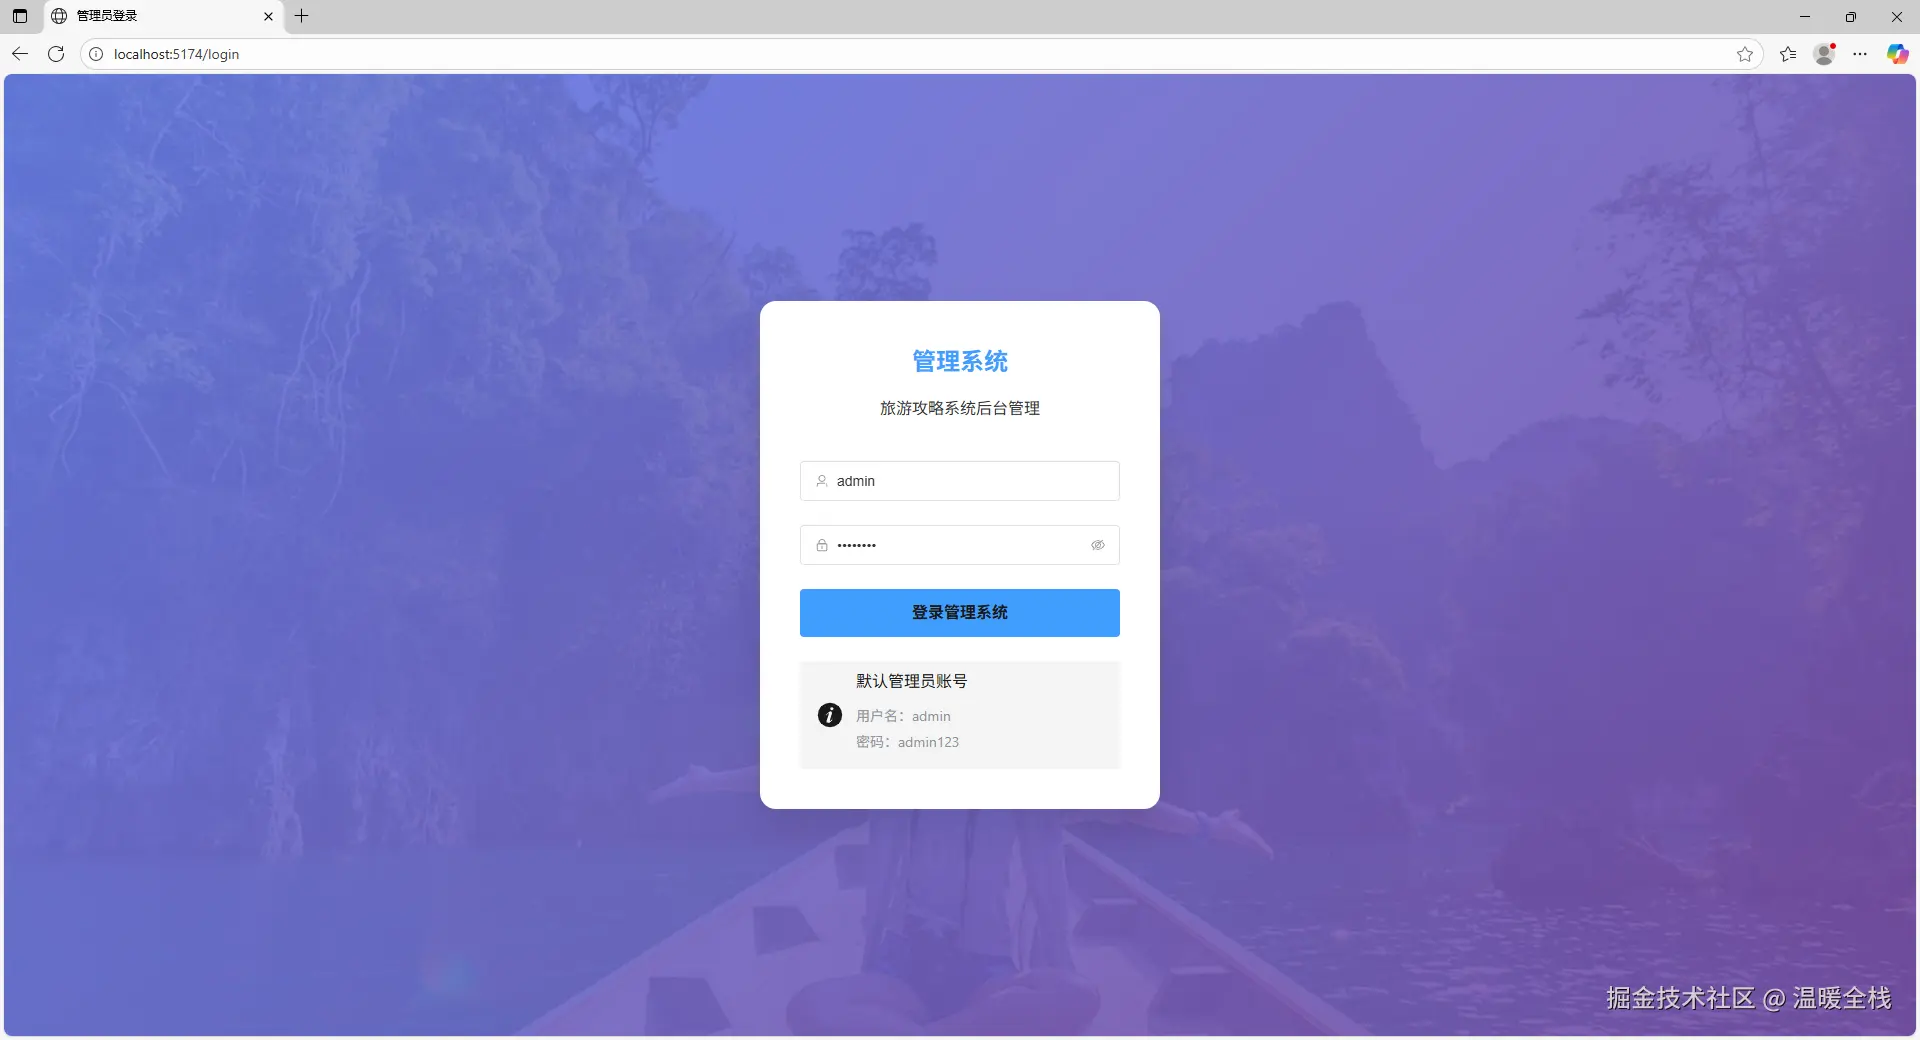
后台管理系统
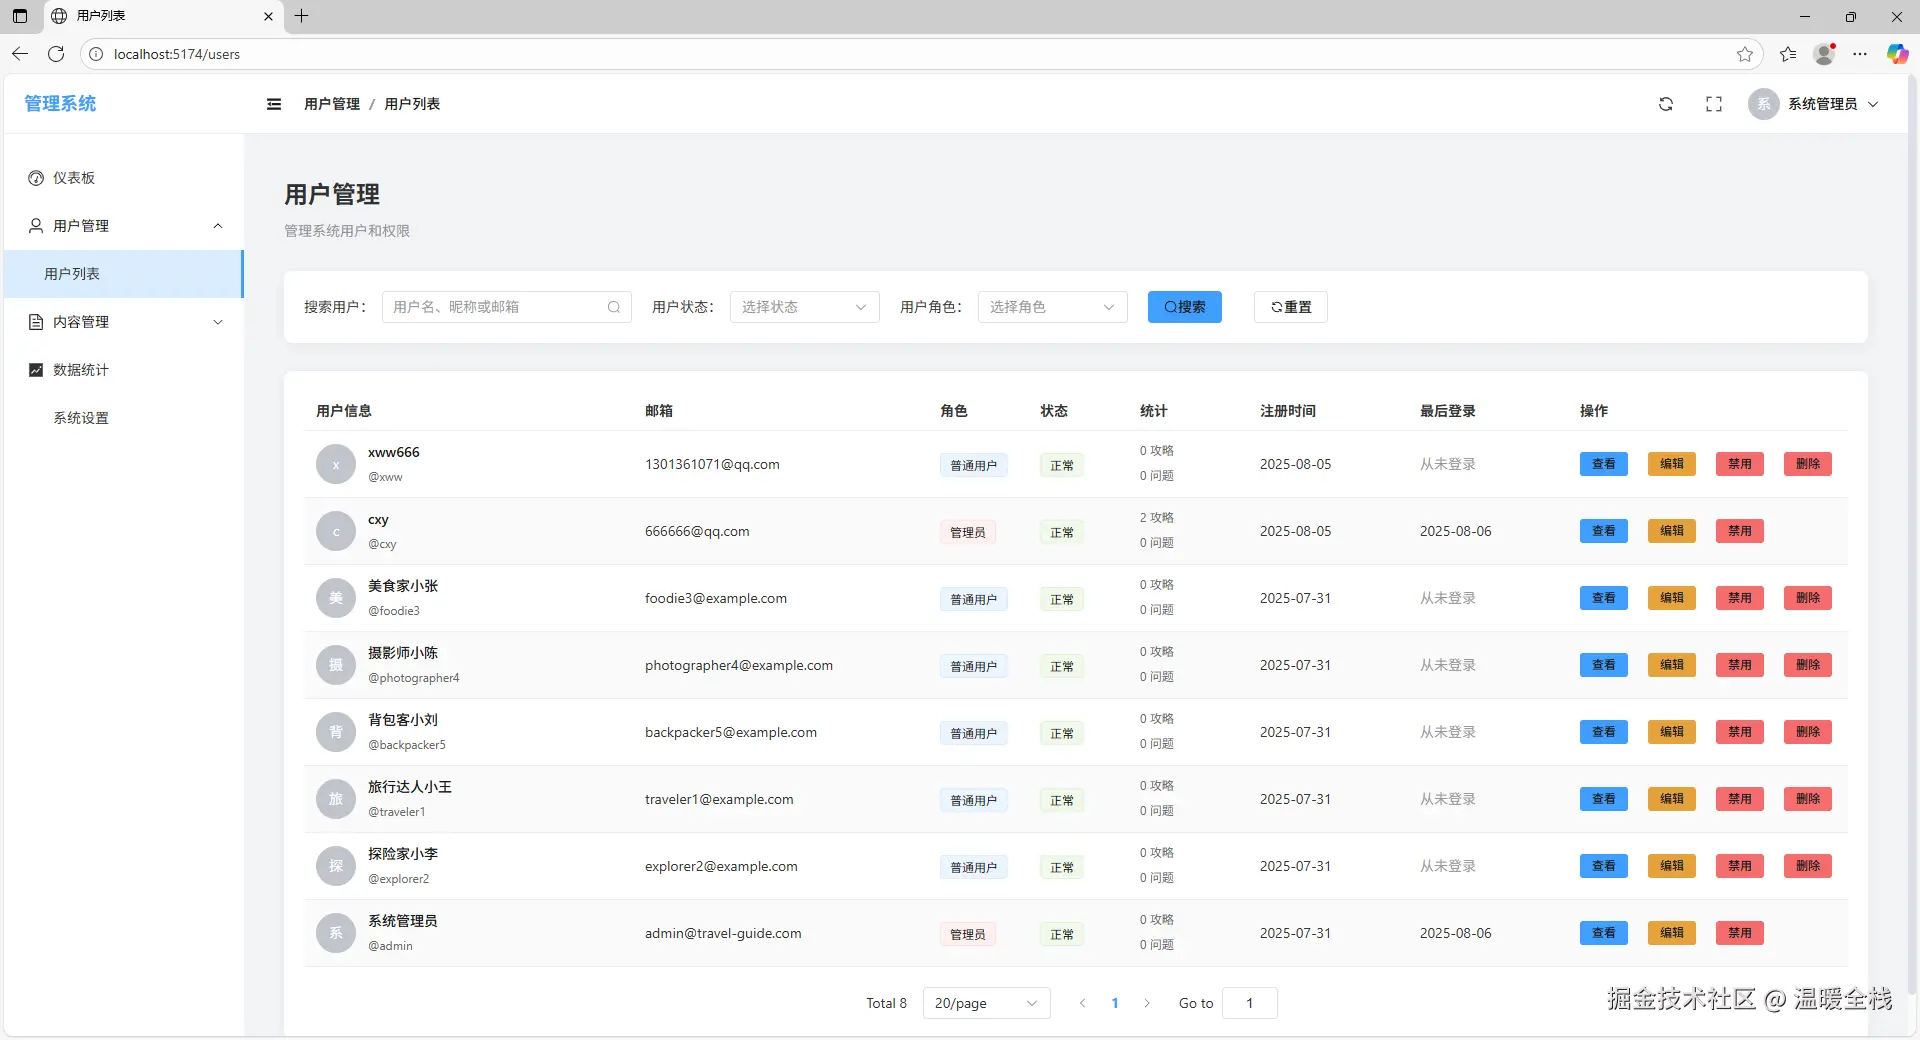
- 👥 用户管理:用户列表、状态控制、权限管理
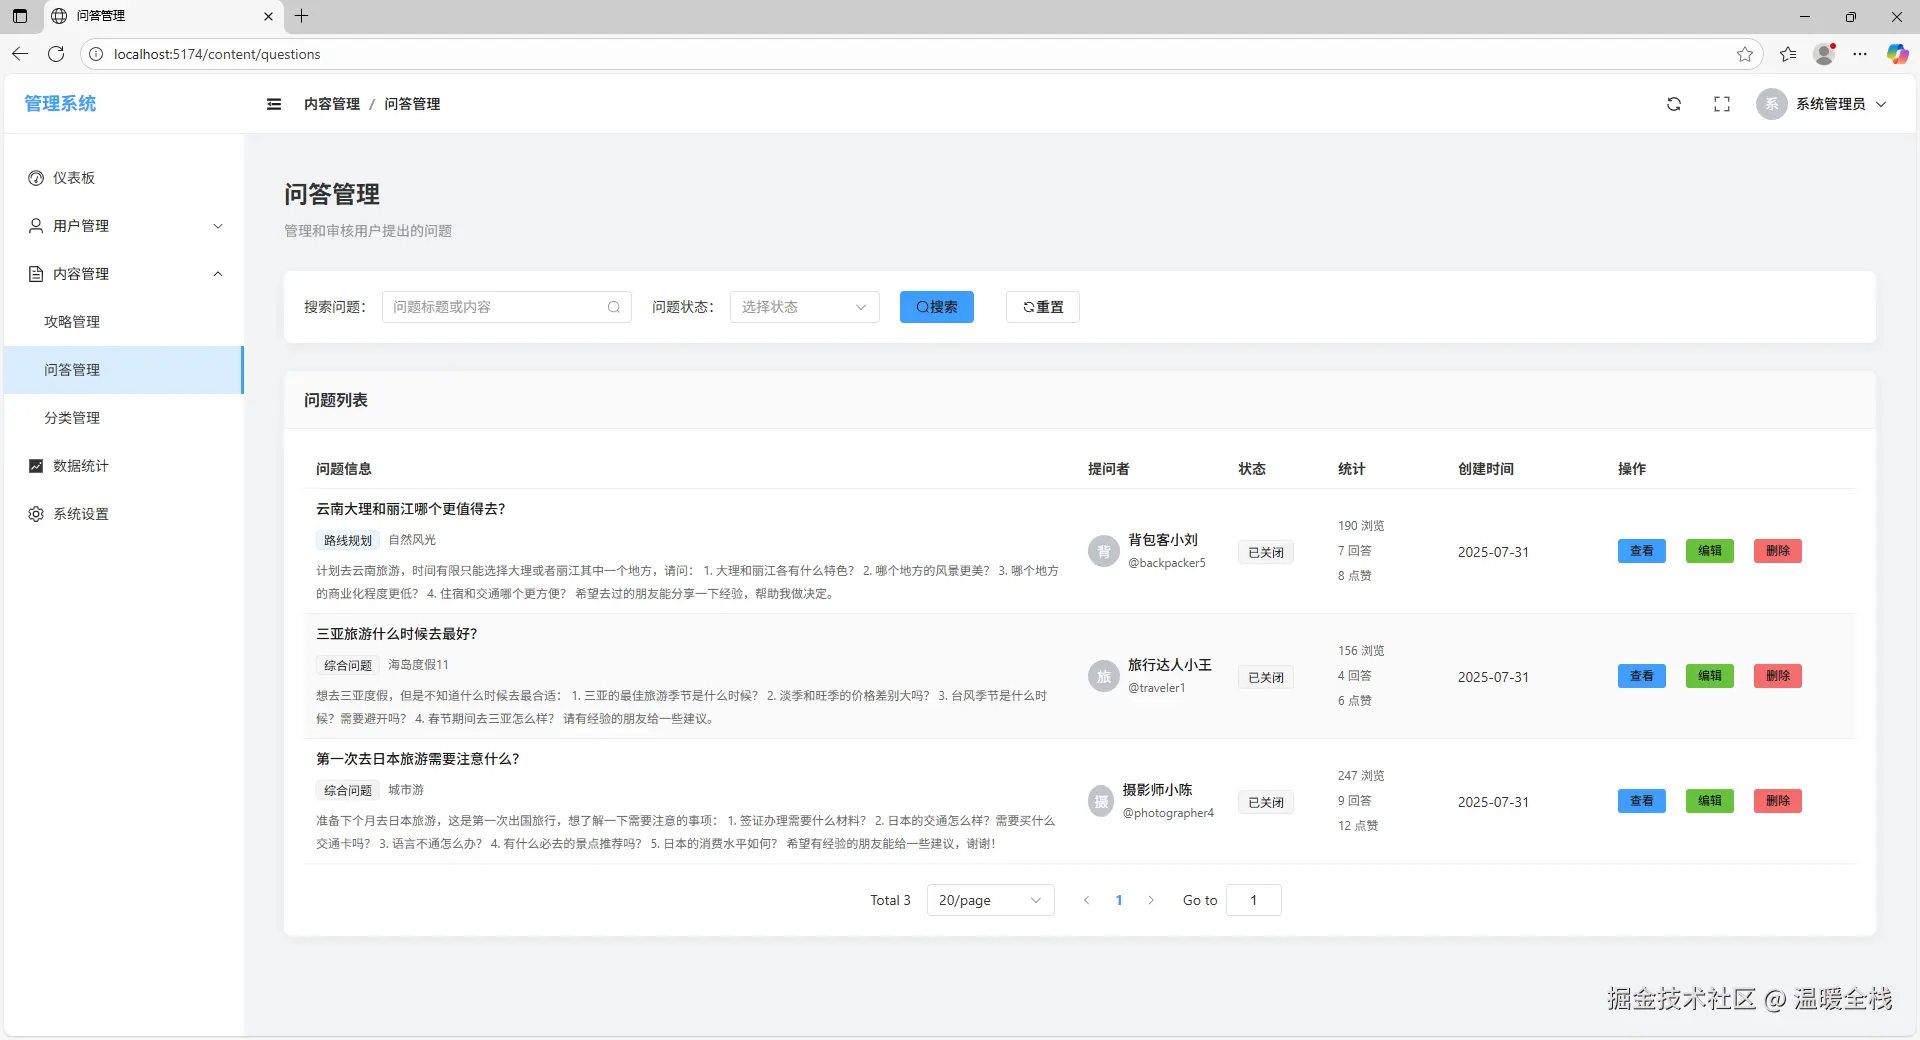
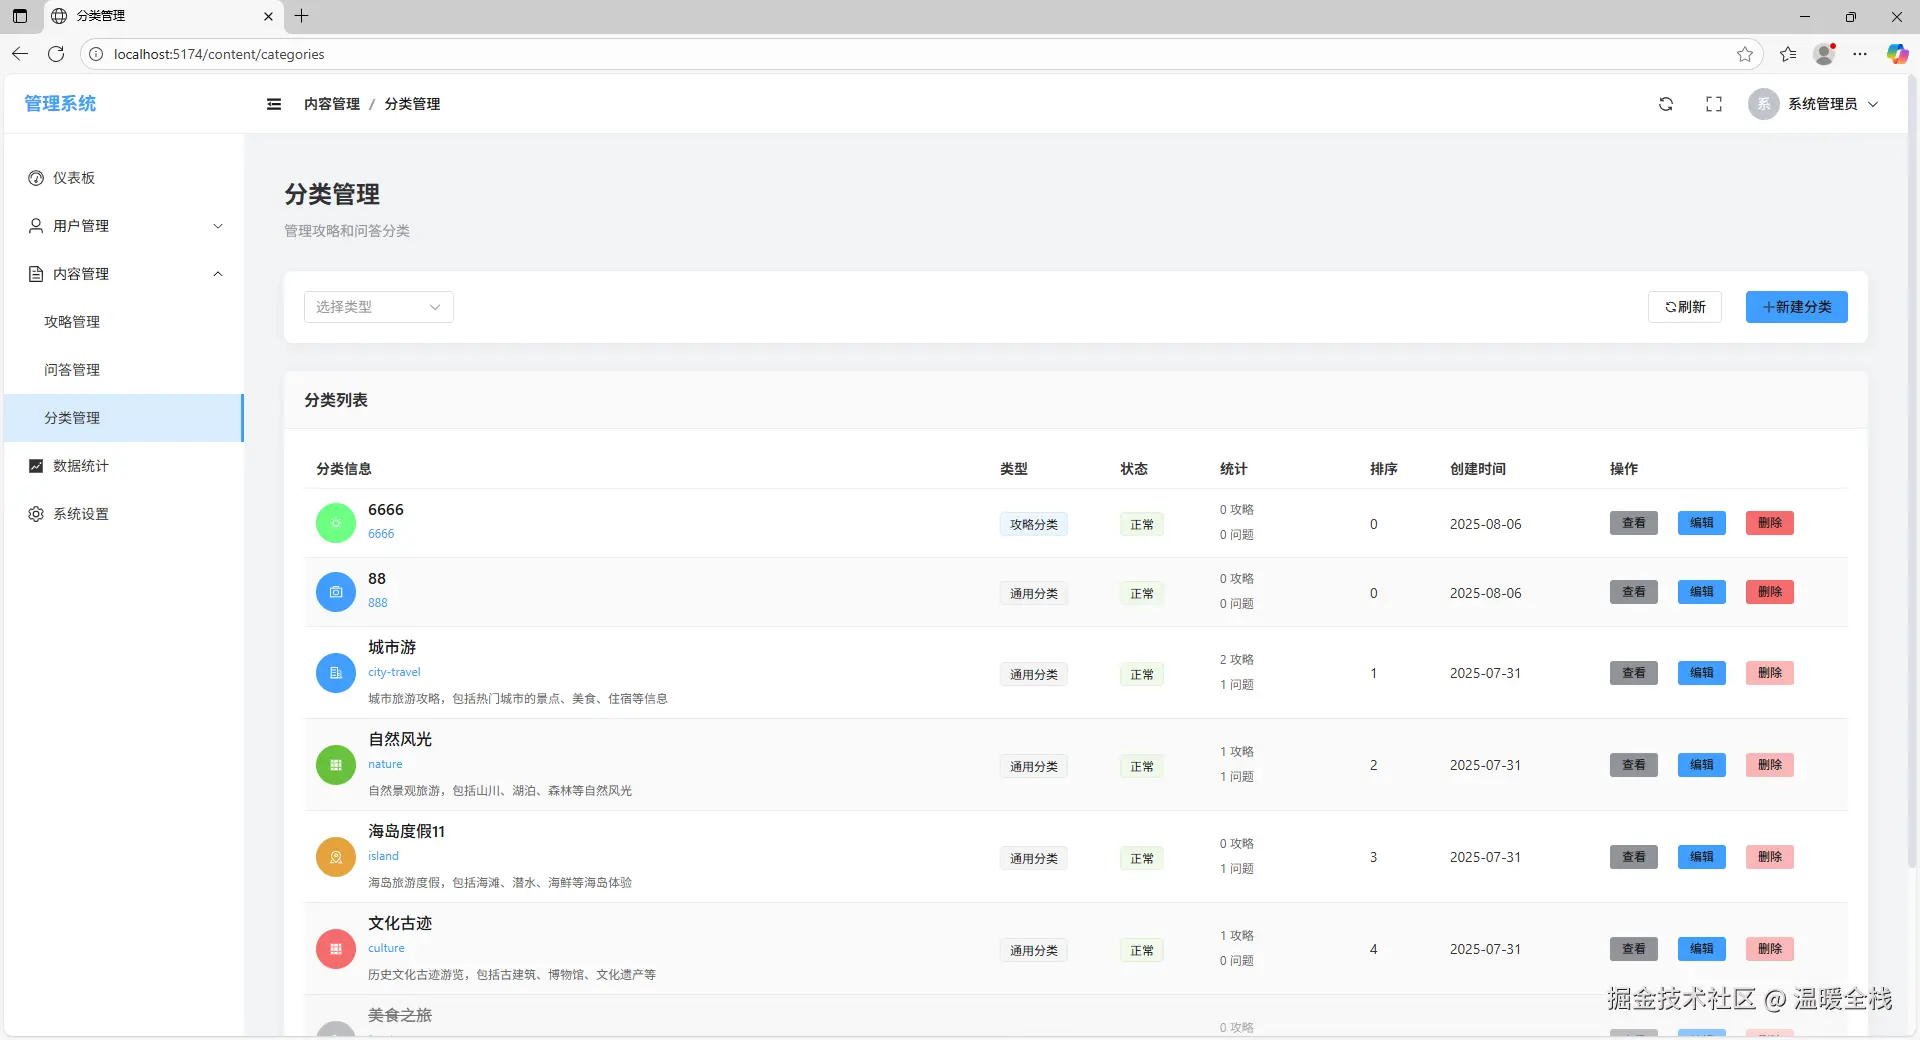
- 📋 内容管理:攻略审核、问答管理、分类管理
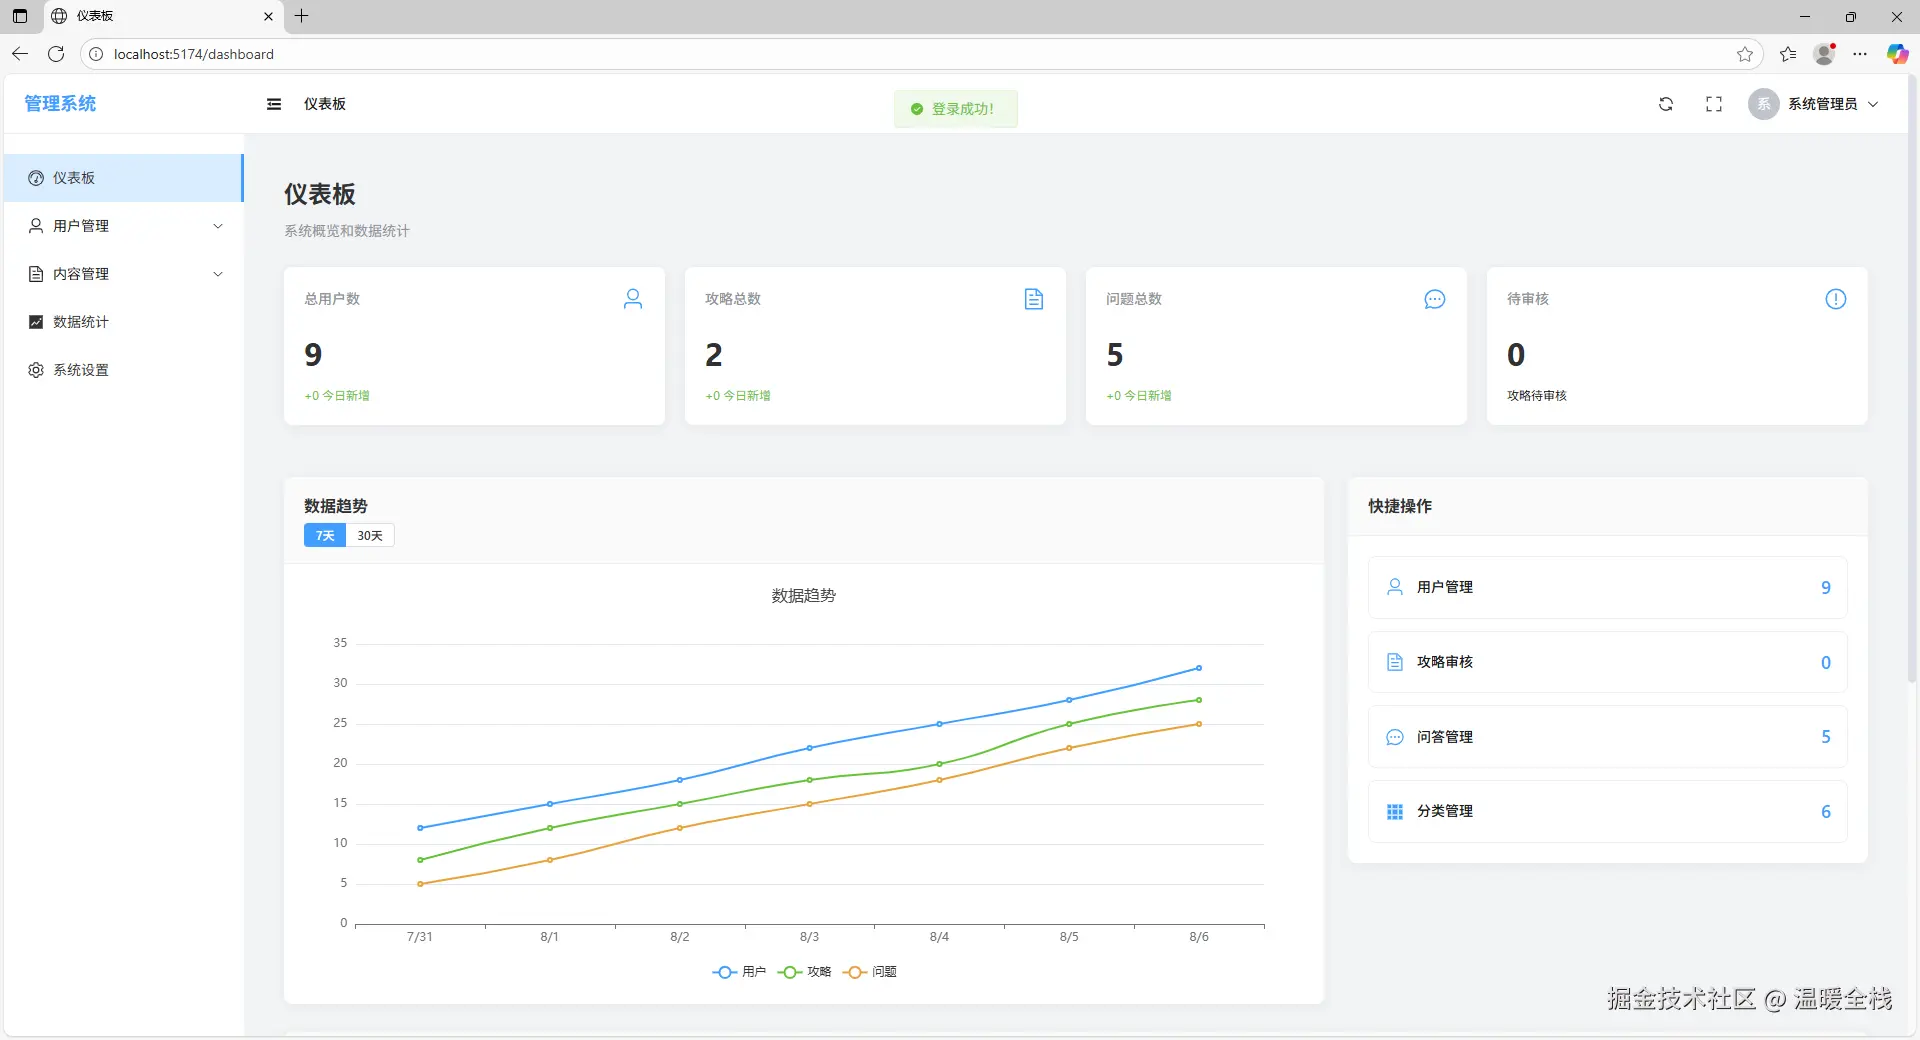
- 📊 数据统计:用户统计、内容分析、访问量统计
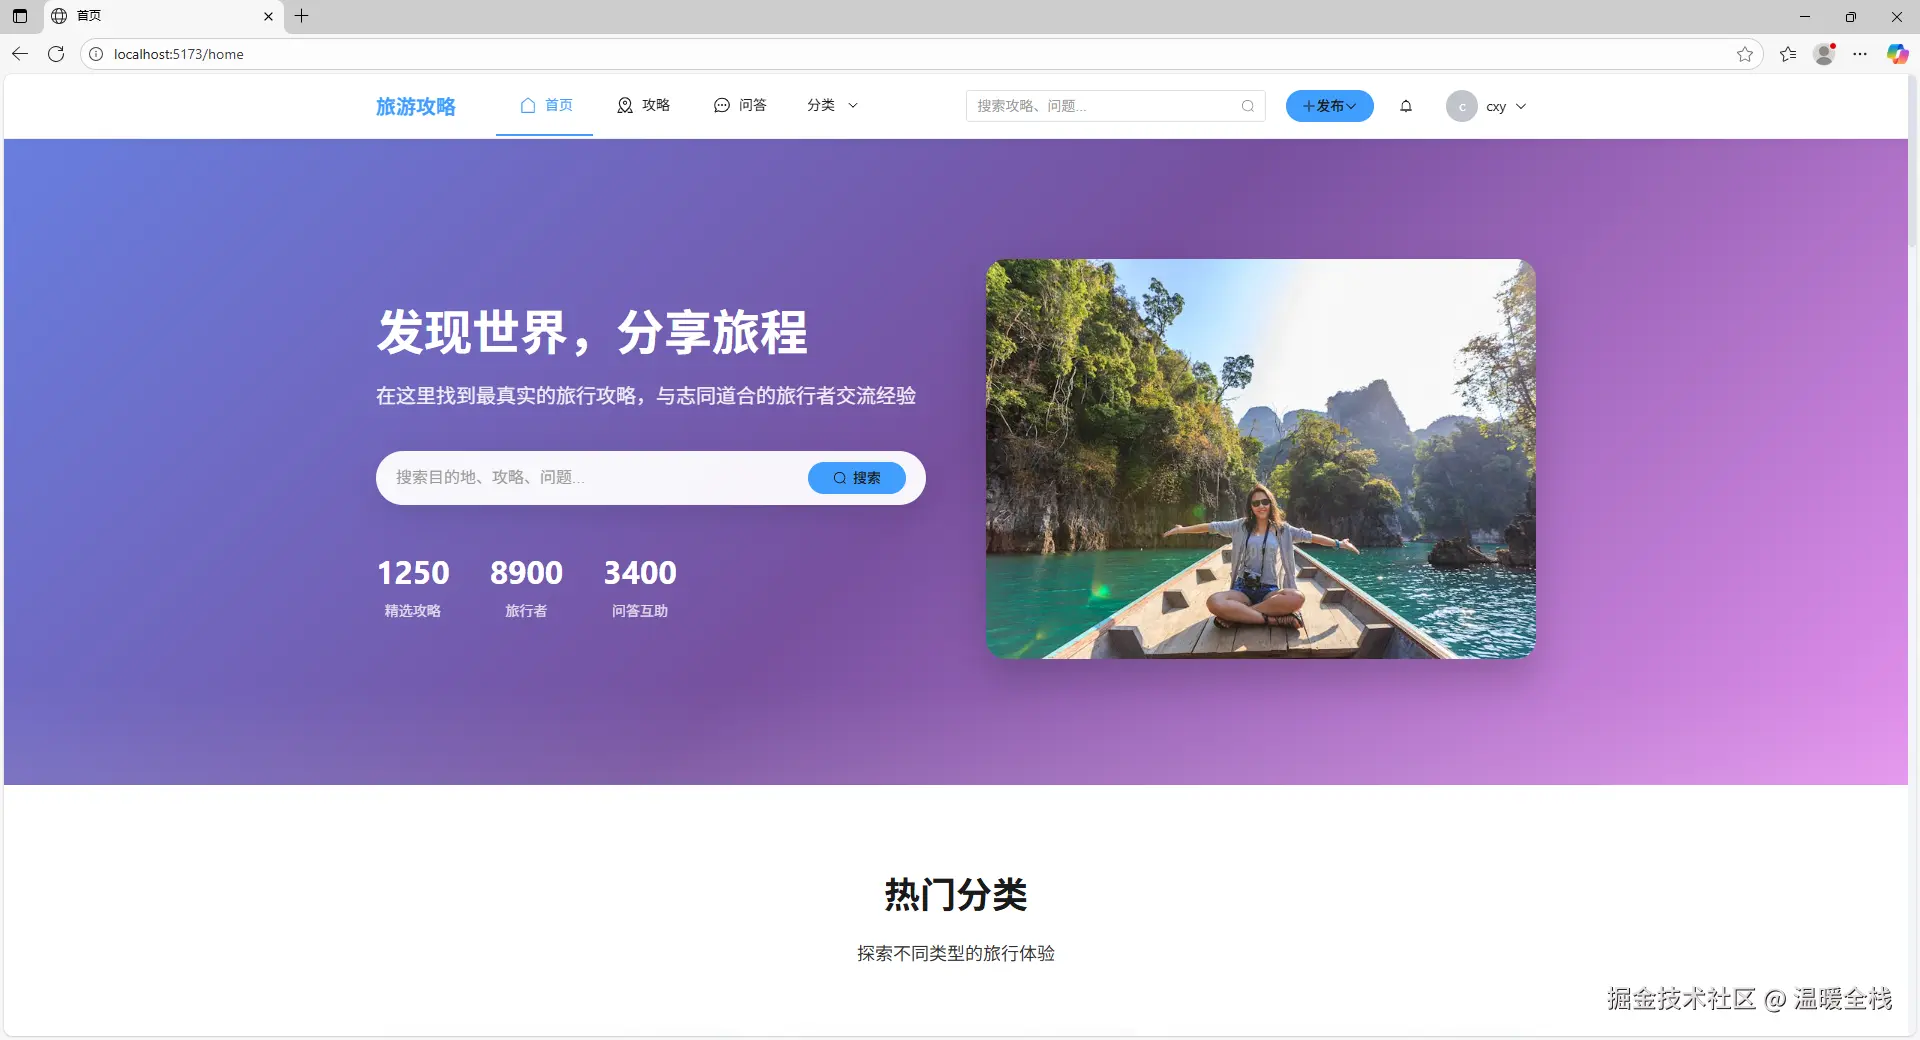
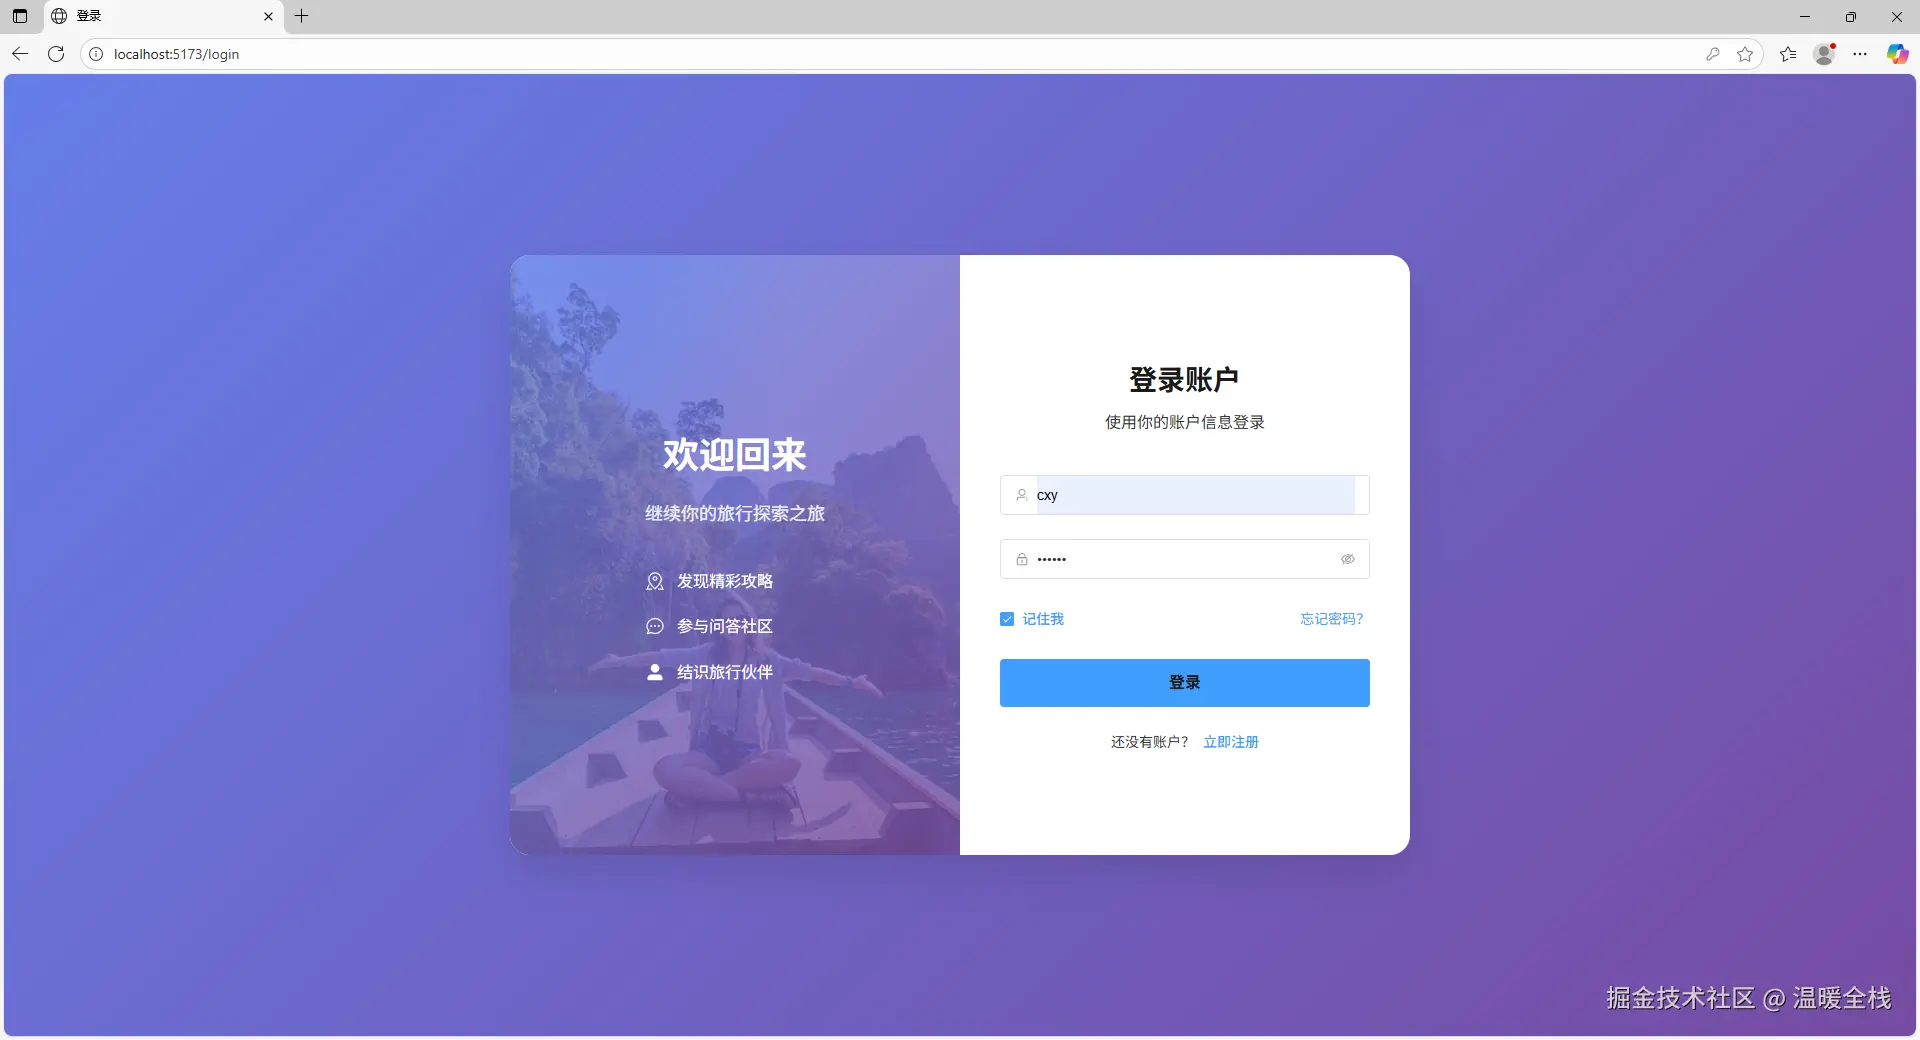
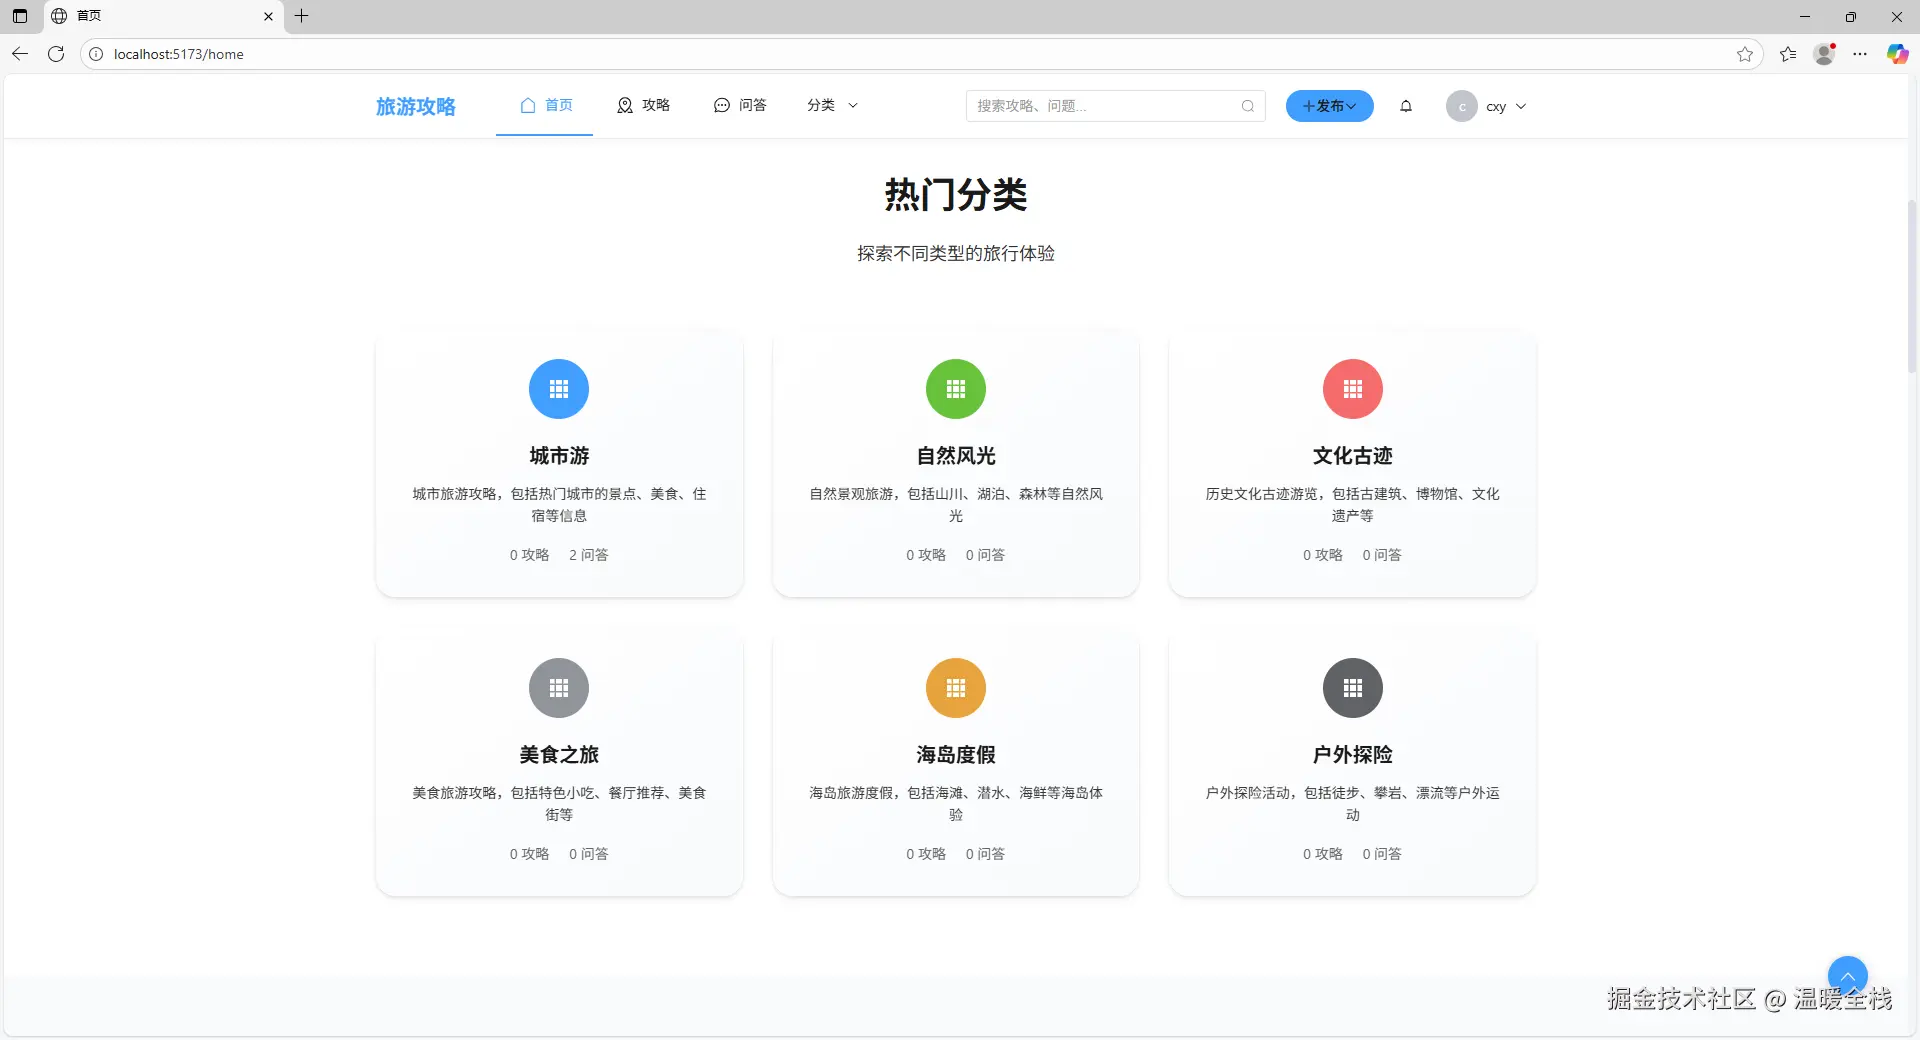
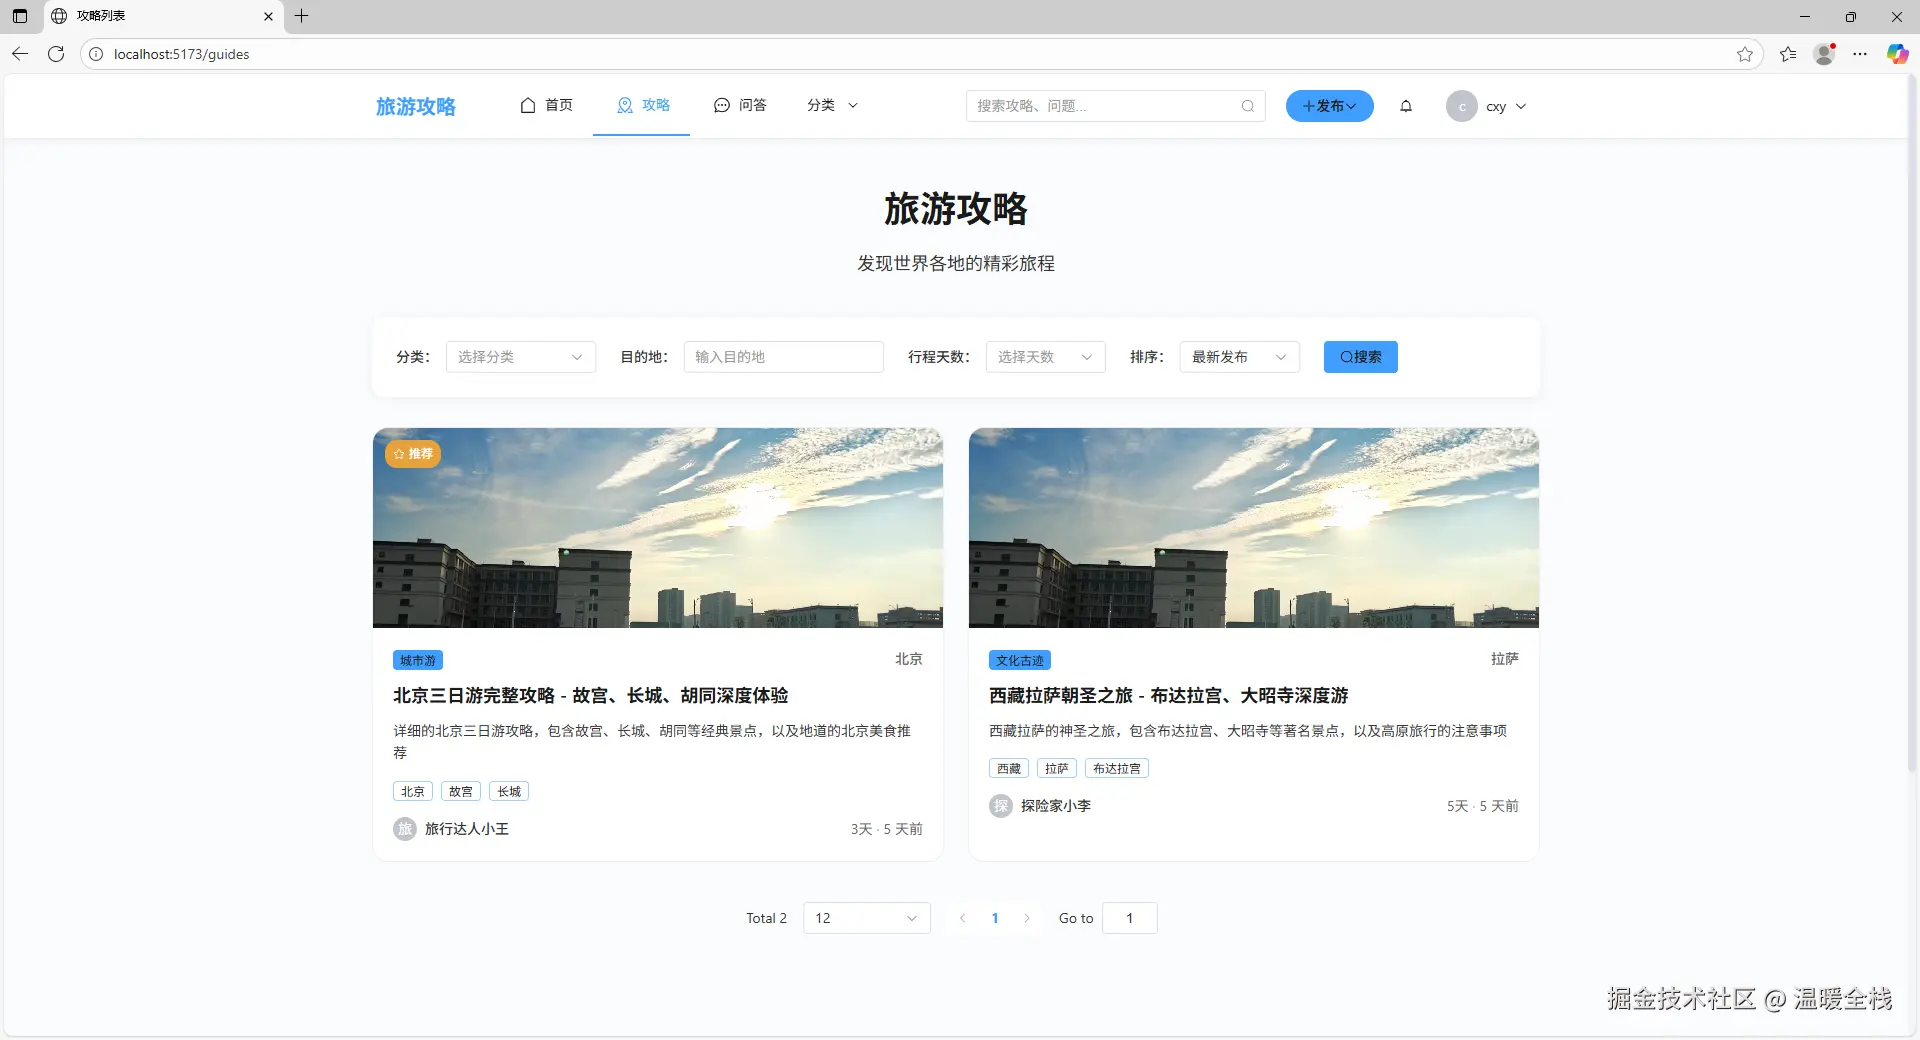
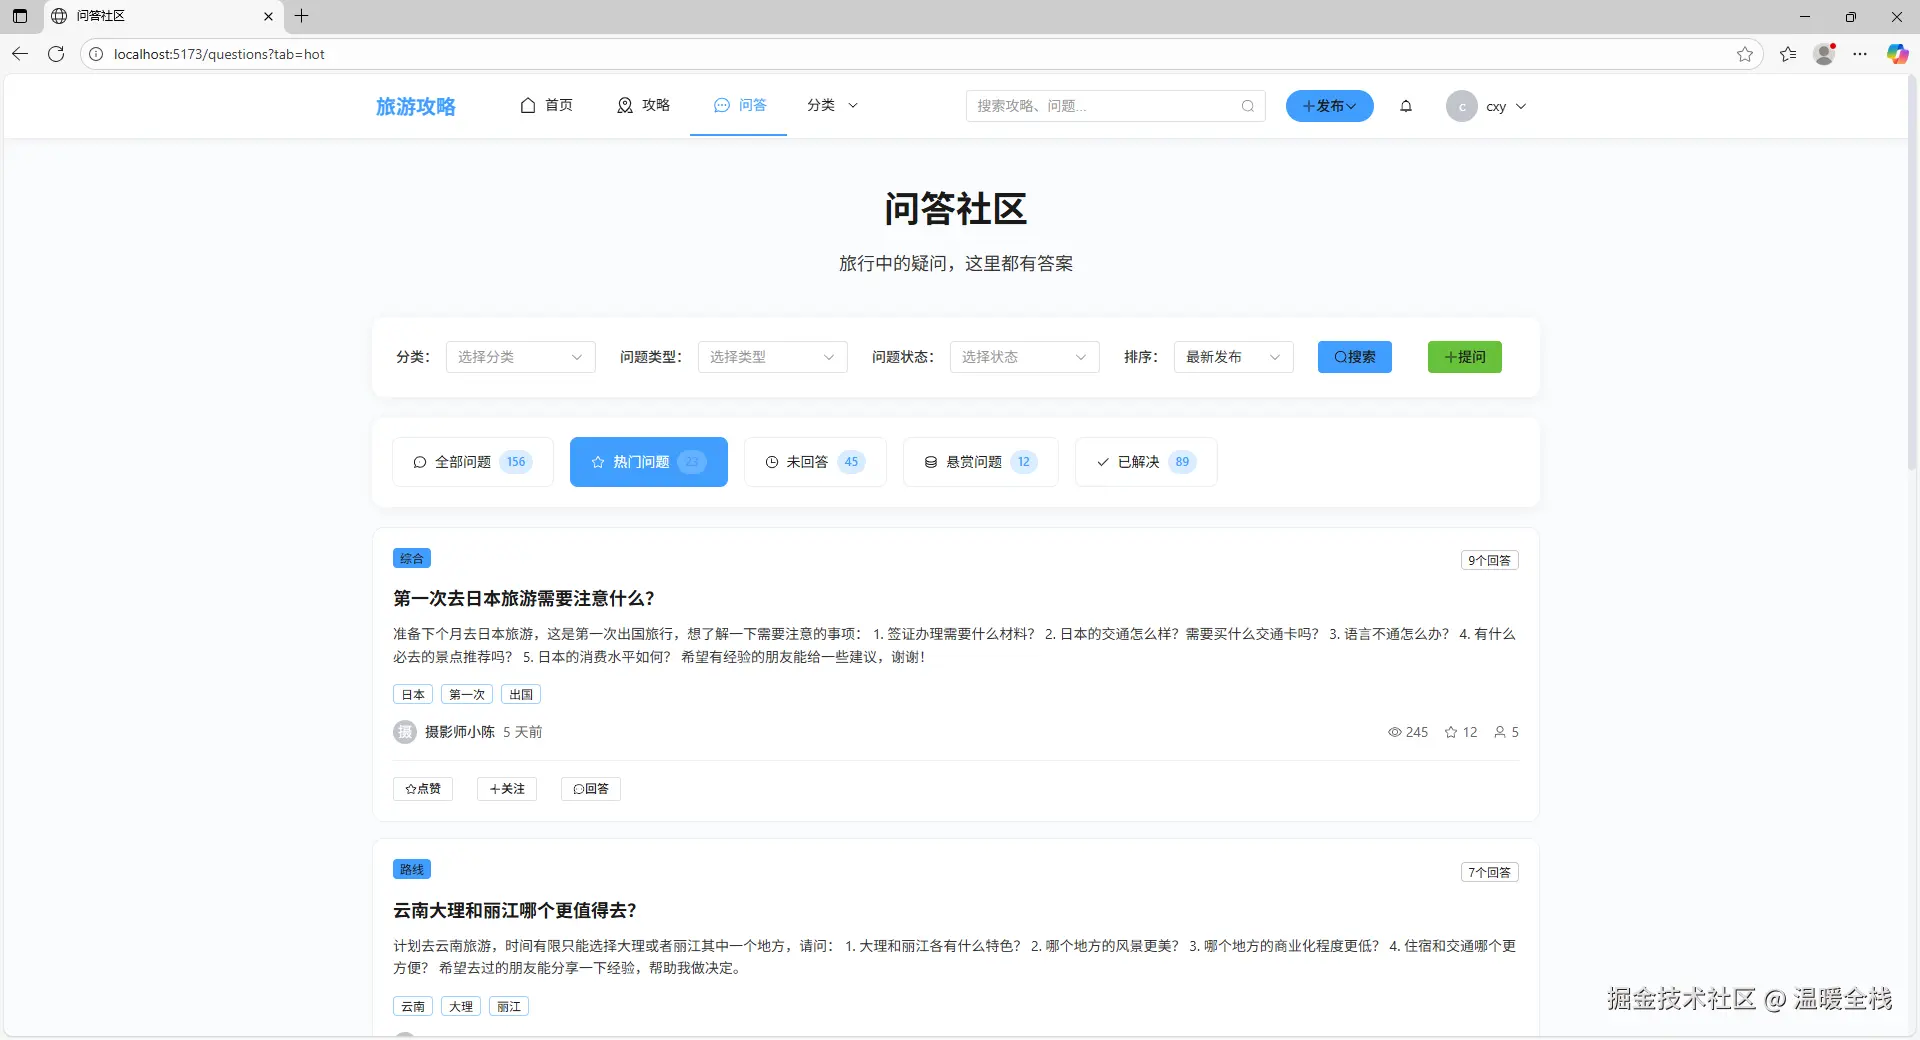
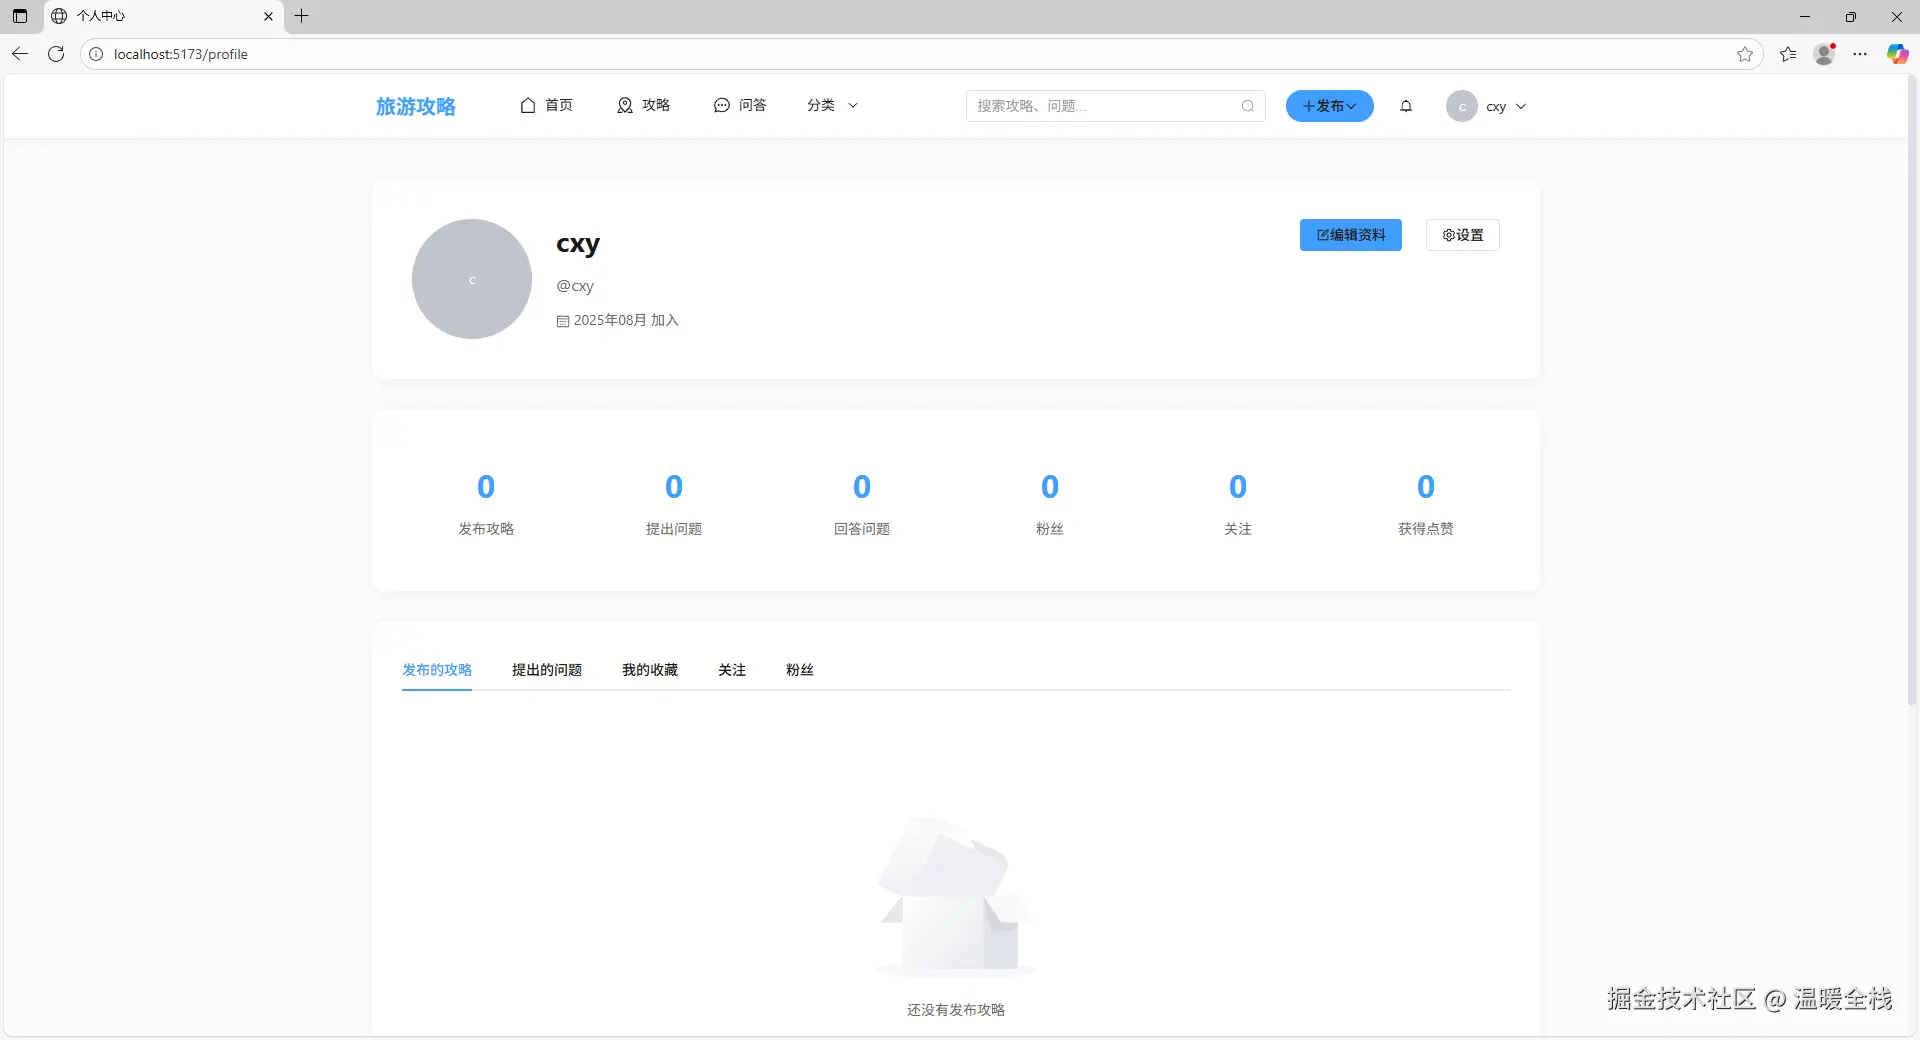
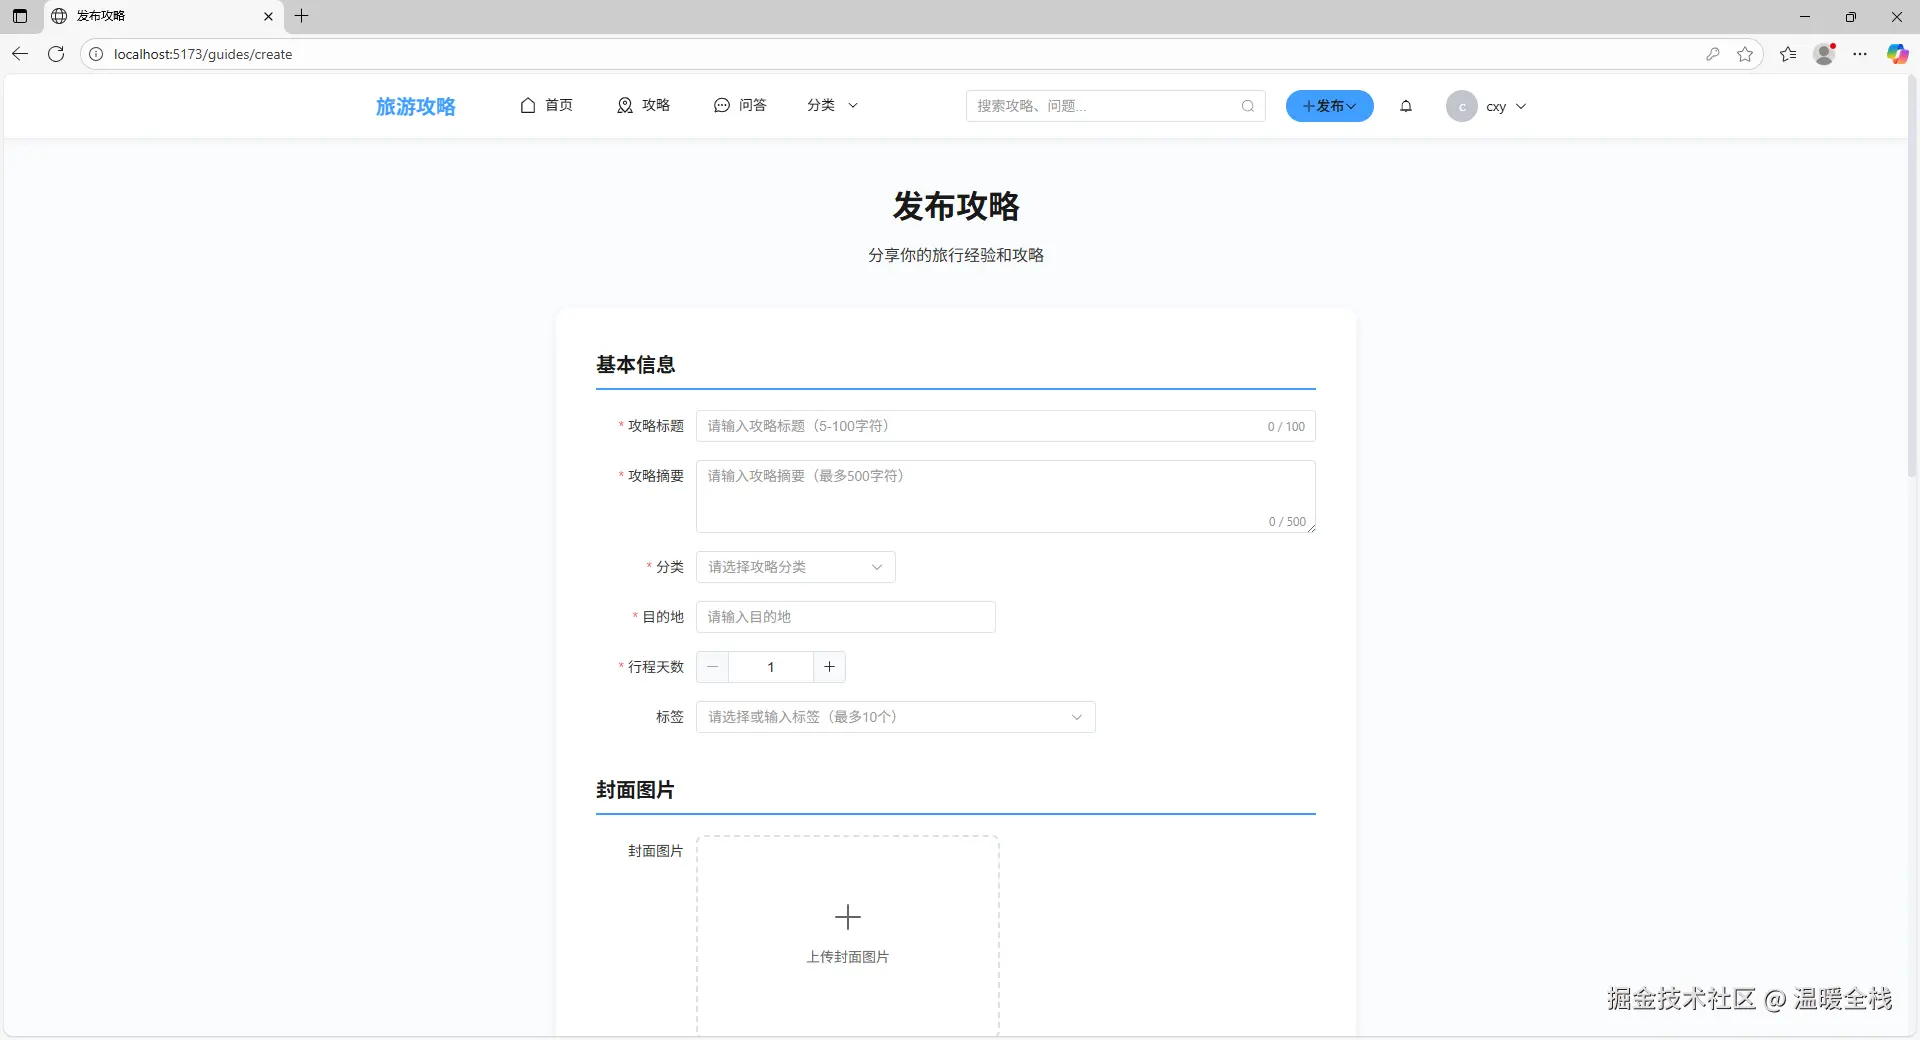
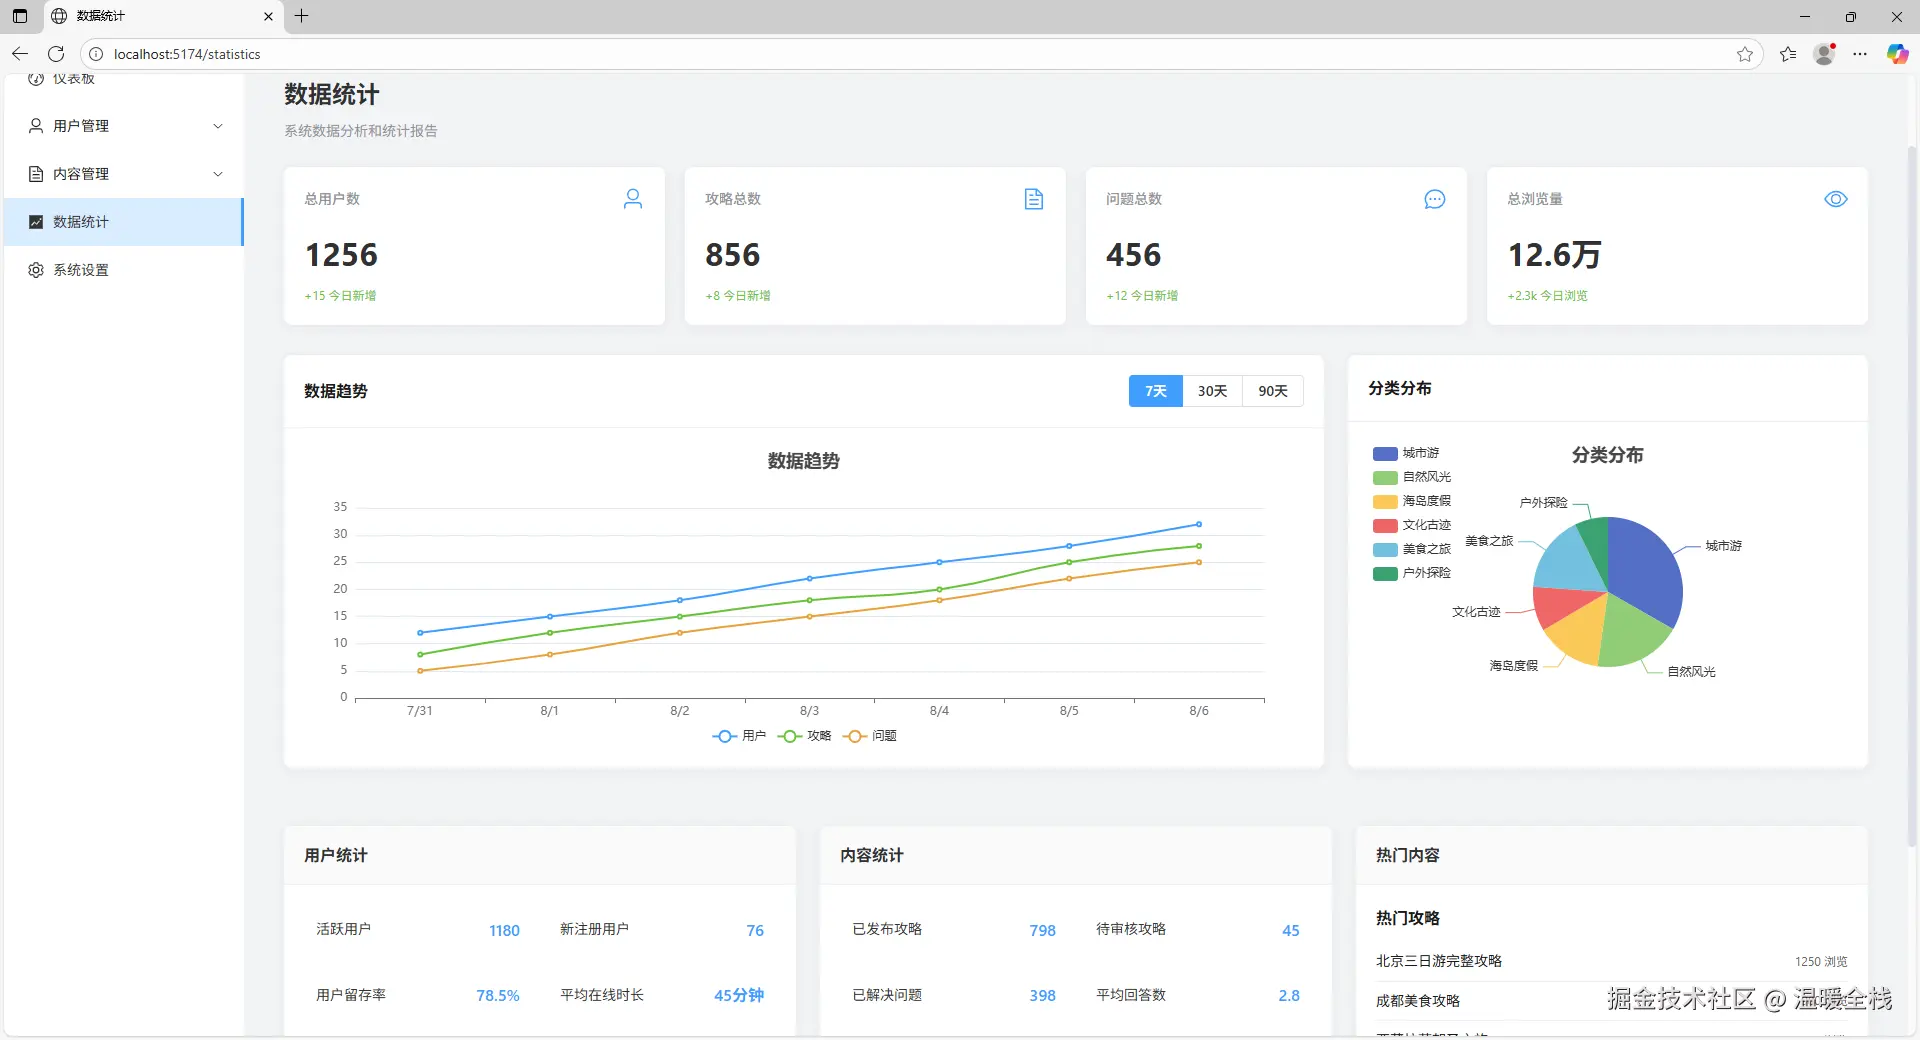
1.5 项目截图


2. 需求分析
2.1 功能需求详解
2.1.1 用户管理模块
核心功能:
- 用户注册与登录(邮箱注册、用户名/邮箱登录)
- 个人信息管理(基本信息编辑、头像上传、个人介绍)
- 密码修改与找回
- 用户关注与粉丝系统
2.1.2 攻略管理模块
核心功能:
- 攻略发布与编辑(富文本编辑器、图片上传)
- 攻略浏览与搜索(关键词搜索、分类筛选)
- 攻略分类管理(6个主要分类)
- 攻略收藏与分享
2.1.3 问答社区模块
核心功能:
- 问题发布与管理
- 答案提交与评选
- 问答分类系统
- 最佳答案机制
2.1.4 后台管理模块
用户管理:
- 用户列表管理(搜索、筛选、分页)
- 用户状态控制(启用/禁用)
- 权限分配管理(用户/管理员)
- 用户行为分析
内容管理:
- 攻略内容审核(待审核、已发布、已拒绝)
- 问答内容管理(问题、答案管理)
- 分类标签管理(新增、编辑、删除)
- 敏感词过滤
数据统计:
- 用户数据统计(注册量、活跃度)
- 内容数据分析(发布量、互动量)
- 访问量统计(PV、UV)
- 趋势分析报告
2.2 数据模型设计
核心数据模型
User(用户模型)
javascript
{
  username: String,        // 用户名(唯一,3-20字符)
  email: String,          // 邮箱(唯一)
  password: String,       // 密码(加密存储)
  nickname: String,       // 昵称
  avatar: String,         // 头像URL
  bio: String,            // 个人简介(最多200字符)
  location: String,       // 位置
  role: String,           // 角色(user/admin)
  status: String,         // 状态(active/disabled)
  followers: [ObjectId],  // 粉丝列表
  following: [ObjectId],  // 关注列表
  created_at: Date,       // 创建时间
  updated_at: Date        // 更新时间
}
Guide(攻略模型)
javascript
{
  title: String,          // 标题(5-100字符)
  content: String,        // 内容(富文本)
  summary: String,        // 摘要(最多200字符)
  cover_image: String,    // 封面图
  author: ObjectId,       // 作者(关联User)
  category: ObjectId,     // 分类(关联Category)
  destination: String,    // 目的地
  tags: [String],         // 标签(最多5个)
  views_count: Number,    // 浏览量
  likes_count: Number,    // 点赞数
  favorites_count: Number,// 收藏数
  comments_count: Number, // 评论数
  status: String,         // 状态(draft/published/rejected)
  created_at: Date,
  updated_at: Date
}
Question(问题模型)
javascript
{
  title: String,          // 标题(10-200字符)
  content: String,        // 内容(20-5000字符)
  author: ObjectId,       // 作者
  category: ObjectId,     // 分类
  tags: [String],         // 标签
  urgency: String,        // 紧急程度(low/normal/high/urgent)
  views_count: Number,    // 浏览量
  answers_count: Number,  // 回答数
  has_best_answer: Boolean, // 是否有最佳答案
  status: String,         // 状态
  created_at: Date,
  updated_at: Date
}
3. 技术架构与知识点
3.1 整体技术架构
yaml
┌─────────────────────────────────────────────────────────┐
│                      用户层                              │
│  ┌──────────────┐              ┌──────────────┐        │
│  │ 旅游攻略系统  │              │ 后台管理系统  │        │
│  │ (Vue 3)      │              │ (Vue 3)      │        │
│  │ Port: 5173   │              │ Port: 5174   │        │
│  └──────────────┘              └──────────────┘        │
└─────────────────────────────────────────────────────────┘
                          │
                          │ HTTP/HTTPS (RESTful API)
                          ▼
┌─────────────────────────────────────────────────────────┐
│                    应用层                                │
│  ┌──────────────────────────────────────────────────┐  │
│  │           后端API服务 (Koa)                       │  │
│  │           Port: 3000                              │  │
│  │  ┌──────────┐  ┌──────────┐  ┌──────────┐      │  │
│  │  │ 路由层    │  │ 控制器层  │  │ 中间件层  │      │  │
│  │  └──────────┘  └──────────┘  └──────────┘      │  │
│  └──────────────────────────────────────────────────┘  │
└─────────────────────────────────────────────────────────┘
                          │
                          │ Mongoose ODM
                          ▼
┌─────────────────────────────────────────────────────────┐
│                    数据层                                │
│  ┌──────────────────────────────────────────────────┐  │
│  │           MongoDB 数据库                          │  │
│  │           Port: 27017                             │  │
│  │  ┌──────┐  ┌──────┐  ┌──────┐  ┌──────┐        │  │
│  │  │ Users│  │Guides│  │Questions│ │Categories│   │  │
│  │  └──────┘  └──────┘  └──────┘  └──────┘        │  │
│  └──────────────────────────────────────────────────┘  │
└─────────────────────────────────────────────────────────┘
3.2 技术栈详解
3.2.1 前端技术栈
| 技术 | 版本 | 用途 | 核心知识点 |
|---|---|---|---|
| Vue 3 | ^3.3.0 | 前端框架 | Composition API、响应式系统、组件化 |
| TypeScript | ^5.0.0 | 类型系统 | 类型定义、泛型、接口 |
| Vite | ^4.0.0 | 构建工具 | 快速开发、HMR、代码分割 |
| Element Plus | ^2.4.0 | UI组件库 | 组件使用、主题定制、按需引入 |
| Pinia | ^2.1.0 | 状态管理 | Store定义、Actions、Getters |
| Vue Router | ^4.2.0 | 路由管理 | 路由配置、导航守卫、动态路由 |
| Axios | ^1.5.0 | HTTP客户端 | 请求拦截、响应处理、错误处理 |
| Sass | ^1.69.0 | CSS预处理器 | 变量、嵌套、混入 |
3.2.2 后端技术栈
| 技术 | 版本 | 用途 | 核心知识点 |
|---|---|---|---|
| Node.js | ^16.0.0 | 运行环境 | 异步编程、模块系统、事件循环 |
| Koa | ^2.14.2 | Web框架 | 中间件机制、上下文对象、错误处理 |
| MongoDB | ^4.4.0 | NoSQL数据库 | 文档模型、索引、聚合查询 |
| Mongoose | ^8.0.3 | ODM | Schema定义、模型方法、中间件 |
| JWT | ^9.0.2 | 身份认证 | Token生成、验证、刷新 |
| bcryptjs | ^2.4.3 | 密码加密 | 哈希算法、盐值、密码比较 |
| Multer | ^1.4.5 | 文件上传 | 文件处理、存储配置、验证 |
| Joi | ^17.11.0 | 数据验证 | Schema验证、自定义规则 |
3.3 核心技术知识点
3.3.1 Vue 3 Composition API
核心概念:
javascript
import { ref, reactive, computed, onMounted, watch } from 'vue'

export default {
  setup() {
    // 响应式数据
    const count = ref(0)
    const user = reactive({
      name: '张三',
      age: 25
    })

    // 计算属性
    const doubleCount = computed(() => count.value * 2)

    // 侦听器
    watch(count, (newVal, oldVal) => {
      console.log(`count changed from ${oldVal} to ${newVal}`)
    })

    // 生命周期钩子
    onMounted(() => {
      console.log('组件已挂载')
    })

    // 方法
    const increment = () => {
      count.value++
    }

    return { count, user, doubleCount, increment }
  }
}优势:
- ✅ 更好的TypeScript支持
- ✅ 逻辑复用更容易(组合式函数)
- ✅ 代码组织更灵活
- ✅ Tree-shaking友好
3.3.2 TypeScript 类型系统
类型定义示例:
typescript
// 用户类型
interface User {
  id: string
  username: string
  email: string
  nickname: string
  avatar?: string
  created_at: string
}

// API响应类型
interface ApiResponse<T = any> {
  code: number
  message: string
  data: T
  timestamp: number
}

// 泛型应用
async function apiRequest<T>(
  url: string,
  options?: RequestInit
): Promise<ApiResponse<T>> {
  const response = await fetch(url, options)
  return response.json()
}

// 使用示例
const userList = await apiRequest<ListResponse<User>>('/api/users')
3.3.3 Pinia 状态管理
Store定义:
javascript
import { defineStore } from 'pinia'

export const useUserStore = defineStore('user', {
  state: () => ({
    userInfo: null as User | null,
    token: localStorage.getItem('token') || '',
    isLoggedIn: false
  }),

  getters: {
    userId: (state) => state.userInfo?.id,
    username: (state) => state.userInfo?.username || '',
    isAdmin: (state) => state.userInfo?.role === 'admin'
  },

  actions: {
    async login(credentials: LoginForm) {
      const response = await authApi.login(credentials)
      this.token = response.data.token
      this.userInfo = response.data.user
      this.isLoggedIn = true
      localStorage.setItem('token', this.token)
    },

    logout() {
      this.token = ''
      this.userInfo = null
      this.isLoggedIn = false
      localStorage.removeItem('token')
    }
  }
})
3.3.4 Koa 中间件机制
中间件示例:
javascript
import Koa from 'koa'
import cors from '@koa/cors'
import bodyParser from 'koa-bodyparser'

const app = new Koa()

// 错误处理中间件
app.use(async (ctx, next) => {
  try {
    await next()
  } catch (error) {
    ctx.status = error.status || 500
    ctx.body = {
      code: ctx.status,
      message: error.message || '服务器内部错误',
      timestamp: Date.now()
    }
  }
})

// 跨域处理
app.use(cors({
  origin: (ctx) => {
    const allowedOrigins = ['http://localhost:5173', 'http://localhost:5174']
    return allowedOrigins.includes(ctx.header.origin) ? ctx.header.origin : false
  },
  credentials: true
}))

// 请求体解析
app.use(bodyParser())

// JWT认证中间件
app.use(async (ctx, next) => {
  const token = ctx.headers.authorization?.replace('Bearer ', '')
  if (token) {
    try {
      const decoded = jwt.verify(token, process.env.JWT_SECRET)
      ctx.user = decoded
    } catch (error) {
      // Token无效,继续执行
    }
  }
  await next()
})
3.3.5 Mongoose 数据建模
模型定义示例:
php
import mongoose from 'mongoose'
import bcrypt from 'bcryptjs'

const userSchema = new mongoose.Schema({
  username: {
    type: String,
    required: [true, '用户名不能为空'],
    unique: true,
    trim: true,
    minlength: [3, '用户名至少3个字符'],
    maxlength: [20, '用户名不能超过20个字符']
  },
  email: {
    type: String,
    required: [true, '邮箱不能为空'],
    unique: true,
    lowercase: true,
    match: [/^\w+@[a-zA-Z_]+?.[a-zA-Z]{2,3}$/, '邮箱格式不正确']
  },
  password: {
    type: String,
    required: [true, '密码不能为空'],
    minlength: [6, '密码至少6个字符'],
    select: false // 查询时默认不返回密码
  }
}, {
  timestamps: {
    createdAt: 'created_at',
    updatedAt: 'updated_at'
  }
})

// 密码加密中间件
userSchema.pre('save', async function(next) {
  if (!this.isModified('password')) return next()
  const salt = await bcrypt.genSalt(10)
  this.password = await bcrypt.hash(this.password, salt)
  next()
})

// 实例方法:验证密码
userSchema.methods.comparePassword = async function(candidatePassword) {
  return bcrypt.compare(candidatePassword, this.password)
}

export default mongoose.model('User', userSchema)
4. 项目实现详解
4.1 Monorepo 架构实现
本项目采用 pnpm workspace 进行 monorepo 管理,统一管理前后端依赖和脚本。
4.1.1 项目结构
perl
travel-pc/                          # 项目根目录(Monorepo)
├── frontend/                       # 前端项目
│   ├── travel-system/             # 旅游攻略系统
│   │   ├── src/
│   │   │   ├── api/               # API接口封装
│   │   │   ├── components/        # 通用组件
│   │   │   ├── views/             # 页面组件
│   │   │   ├── router/            # 路由配置
│   │   │   ├── stores/            # Pinia状态管理
│   │   │   ├── utils/             # 工具函数
│   │   │   ├── types/             # TypeScript类型定义
│   │   │   └── main.ts            # 入口文件
│   │   └── package.json
│   │
│   └── admin-system/              # 后台管理系统
│       ├── src/                   # 源代码(结构同travel-system)
│       └── package.json
│
├── backend/                       # 后端项目
│   ├── src/
│   │   ├── controllers/           # 控制器层
│   │   ├── models/                # 数据模型层
│   │   ├── routes/                # 路由定义
│   │   ├── middleware/            # 中间件
│   │   ├── utils/                 # 工具函数
│   │   ├── config/                # 配置文件
│   │   └── app.js                 # 应用入口
│   ├── scripts/                   # 脚本文件
│   │   ├── import-mock-data.js    # 导入假数据
│   │   ├── check-categories.js    # 检查分类数据
│   │   └── create-admin.js        # 创建管理员
│   └── package.json
│
├── package.json                   # 根配置文件(Monorepo管理)
├── pnpm-workspace.yaml            # pnpm工作区配置
└── .npmrc                         # npm配置
4.2 核心功能实现
4.2.1 用户认证流程
javascript
┌─────────┐         ┌─────────┐         ┌─────────┐
│  前端   │         │  后端   │         │ 数据库  │
└────┬────┘         └────┬────┘         └────┬────┘
     │                   │                   │
     │ 1. 提交登录表单    │                   │
     ├──────────────────>│                   │
     │                   │ 2. 验证用户信息    │
     │                   ├──────────────────>│
     │                   │ 3. 返回用户数据    │
     │                   │<──────────────────┤
     │                   │ 4. 生成JWT Token  │
     │ 5. 返回Token和用户信息                 │
     │<──────────────────┤                   │
     │ 6. 存储Token到localStorage            │
     │ 7. 后续请求携带Token                  │
     ├──────────────────>│                   │
     │                   │ 8. 验证Token      │
     │ 9. 返回数据        │                   │
│<──────────────────┤ │前端实现:
javascript
// stores/user.ts
export const useUserStore = defineStore('user', {
  state: () => ({
    token: localStorage.getItem('token') || '',
    userInfo: null as User | null,
    isLoggedIn: false
  }),

  actions: {
    async login(credentials: LoginForm) {
      const response = await authApi.login(credentials)
      this.token = response.data.token
      this.userInfo = response.data.user
      this.isLoggedIn = true
      localStorage.setItem('token', this.token)
    },

    logout() {
      this.token = ''
      this.userInfo = null
      this.isLoggedIn = false
      localStorage.removeItem('token')
    }
  }
})后端实现:
javascript
// controllers/authController.js
export const login = async (ctx) => {
  const { username, password } = ctx.request.body

  // 查找用户
  const user = await User.findOne({
    $or: [{ username }, { email: username }]
  }).select('+password')

  if (!user) {
    ctx.throw(401, '用户名或密码错误')
  }

  // 验证密码
  const isMatch = await user.comparePassword(password)
  if (!isMatch) {
    ctx.throw(401, '用户名或密码错误')
  }

  // 生成Token
  const token = generateToken({
    id: user._id,
    username: user.username,
    role: user.role
  })

  ctx.body = {
    code: 200,
    message: '登录成功',
    data: {
      token,
      user: {
        id: user._id,
        username: user.username,
        email: user.email,
        nickname: user.nickname,
        avatar: user.avatar,
        role: user.role
      }
    }
  }
}
4.2.2 攻略发布流程
前端实现:
javascript
// views/guides/CreateGuide.vue
const handleSubmit = async () => {
  try {
    // 1. 上传封面图
    if (coverFile.value) {
      const formData = new FormData()
      formData.append('file', coverFile.value)
      const uploadRes = await uploadApi.uploadImage(formData)
      form.cover_image = uploadRes.data.url
    }

    // 2. 提交攻略数据
    const response = await guideApi.createGuide(form)

    ElMessage.success('发布成功')
    router.push(`/guides/${response.data.id}`)
  } catch (error) {
    ElMessage.error('发布失败')
  }
}后端实现:
javascript
// controllers/guideController.js
export const createGuide = async (ctx) => {
  const { title, content, summary, category_id, destination, tags, cover_image } = ctx.request.body

  // 验证分类是否存在
  const category = await Category.findById(category_id)
  if (!category) {
    ctx.throw(400, '分类不存在')
  }

  // 创建攻略
  const guide = new Guide({
    title,
    content,
    summary,
    cover_image,
    author: ctx.user._id,
    category: category_id,
    destination,
    tags,
    status: 'published'
  })

  await guide.save()

  // 填充关联数据
  await guide.populate('author', 'username nickname avatar')
  await guide.populate('category', 'name')

  ctx.body = {
    code: 200,
    message: '发布成功',
    data: guide
  }
}
5. 运行命令
python
# 安装依赖
pnpm install

# 导入假数据
pnpm run import

# 启动开发环境
pnpm run dev
6. 快速修复清单
遇到问题时,按以下顺序检查:
- ✅ MongoDB服务是否启动
- ✅ 后端服务是否正常运行
- ✅ 前端服务是否正常运行
- ✅ 环境变量配置是否正确
- ✅ 数据库中是否有数据
- ✅ 浏览器控制台是否有错误
- ✅ 网络请求是否成功
- ✅ Token是否有效