腾讯混元 HunyuanOCR Huggingface 开源:https://huggingface.co/tencent/HunyuanOCR , 同时modelscope (https://www.modelscope.cn/models/Tencent-Hunyuan/HunyuanOCR)也可以下载了。
github地址: https://github.com/Tencent-Hunyuan/HunyuanOCR/blob/main/README_zh.md
本次在本地部署进行测试,看看实际效果。
1.简介
HunyuanOCR 是由腾讯开发的轻量级端到端OCR专家视觉语言模型(VLM),基于Hunyuan的原生多模态架构。该模型仅包含1B参数,却在多个行业基准测试中达到了最先进的水平,适用于复杂多语言文档解析、文本定位、开放字段信息提取、视频字幕提取和照片翻译等任务。
2.部署环境
官方环境要求:
- 🖥️ 操作系统:Linux
- 🐍 Python版本:3.12+(推荐)
- ⚡ CUDA版本:12.9
- 🔥 PyTorch版本:2.7.1
- 🎮 GPU:支持CUDA的NVIDIA显卡
- 🧠 GPU显存:20GB (for vLLM)
- 💾 磁盘空间:6GB
实际环境:
| 环境 | 版本 |
|---|---|
| ubuntu-24.04.3 Server | release 10.0 |
| Cuda | 12.8 |
| 显卡 RTX 2080 Ti 22G | 驱动 NVIDIA-Linux-x86_64-580.105.08 |
| uv | 0.9.13 |
| 内存 | 32G |
3.下载
这里选择从modelscope 进行下载
shell
pip install modelscope
modelscope download --model Tencent-Hunyuan/HunyuanOCR --cache_dir '/home/qy/models/'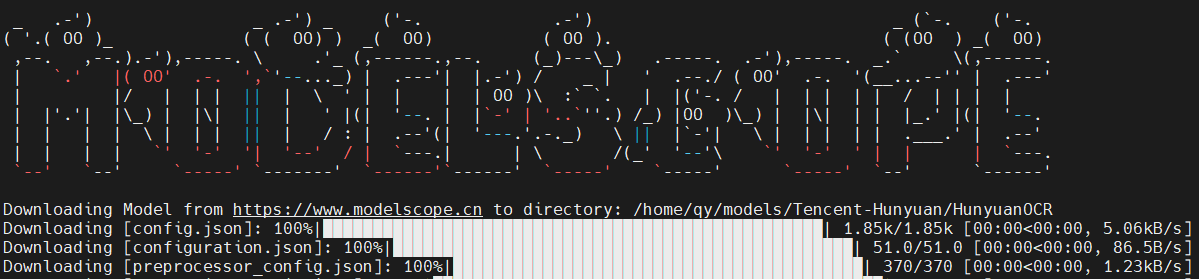
4.uv环境
shell
# 安装UV
curl -LsSf https://astral.sh/uv/install.sh | sh

# 查看python版本
uv python list

# 创建虚拟环境,并指定python版本
uv venv hunyuanocr --python 3.12

cd hunyuanocr
# 激活环境, 激活后,括号中显示 hunyuanocr 表示已经切了环境
source hunyuanocr/bin/activate

# 配置PyPI仓库为国内源
vim ~/.config/uv/uv.toml
[registries.pypi]
index = "https://mirrors.aliyun.com/pypi/simple/"
default = true
5.下载推理源码
shell
git clone https://github.com/Tencent-Hunyuan/HunyuanOCR.git

cd /home/qy/hunyuan/HunyuanOCR-main
uv pip install -r requirements.txt
6.安装vLLM
shell
uv pip install  -U "aiohttp<4"

uv pip install -U vllm  --extra-index-url https://wheels.vllm.ai/nightly
如果按照官方文档:
uv pip install -U vllm --pre --extra-index-url https://wheels.vllm.ai/nightly执行,会报错:
安装报错:

这是因为 aiohttp@4.0.0a1在编译的时候,需要一个头文件,但是当前 conda环境中没有这个头文件。
longintrepr.h 是 CPython 内部头文件,只存在于:
- python-dev(Linux)
- python3.X-devel(CentOS)
为什么pip 会出现这种编译行为?
因为使用了 nightly (--pre) 的 vllm:
shell
uv pip install -U vllm --pre --extra-index-url https://wheels.vllm.ai/nightlyvLLM nightly 依赖: aiohttp==4.0.0a1 这是一个 alpha 版,没有发布 wheel,需要从源码编译,所以会触发 C 扩展构建 → 然后失败。
采用下面办法处理:
强制安装 aiohttp 3.9.x(稳定版,有 wheel), 不再加 --pre, 因为 --pre 会允许 pip 随便升级所有依赖(包括 aiohttp),从而又去编译 aiohttp 4。
shell
uv pip install -U "aiohttp<4"
uv pip install  -U vllm --extra-index-url https://wheels.vllm.ai/nightly
7.安装cuda-compat
提供向后兼容能力,允许基于较新 CUDA 版本开发的应用程序在仅安装旧版 CUDA 驱动的环境中运行
下载地址: https://developer.download.nvidia.com/compute/cuda/repos/ubuntu2404/x86_64/
下载文件:cuda-compat-12-9_575.57.08-0ubuntu1_amd64.deb
shell
sudo dpkg -i cuda-compat-12-9_575.57.08-0ubuntu1_amd64.deb
echo 'export LD_LIBRARY_PATH=/usr/local/cuda-12.9/compat:$LD_LIBRARY_PATH' >> ~/.bashrc
source ~/.bashrc
# verify cuda-compat-12-9
ls /usr/local/cuda-12.9/compat
8.检查环境
shell
nvcc --version
Build cuda_12.8.r12.8/compiler.35583870_0

python
Python 3.12.3
>>> import torch
>>> print(torch.version.cuda)
12.8
>>> print(torch.cuda.is_available())
/home/qy/hunyuanocr/lib/python3.12/site-packages/torch/cuda/__init__.py:182: UserWarning: CUDA initialization: Unexpected error from cudaGetDeviceCount(). Did you run some cuda functions before calling NumCudaDevices() that might have already set an error? Error 803: system has unsupported display driver / cuda driver combination (Triggered internally at /pytorch/c10/cuda/CUDAFunctions.cpp:119.)
  return torch._C._cuda_getDeviceCount() > 0
False
如果是false,则说明 touch 不能使用 CUDA, 我们需要安装正确的touch
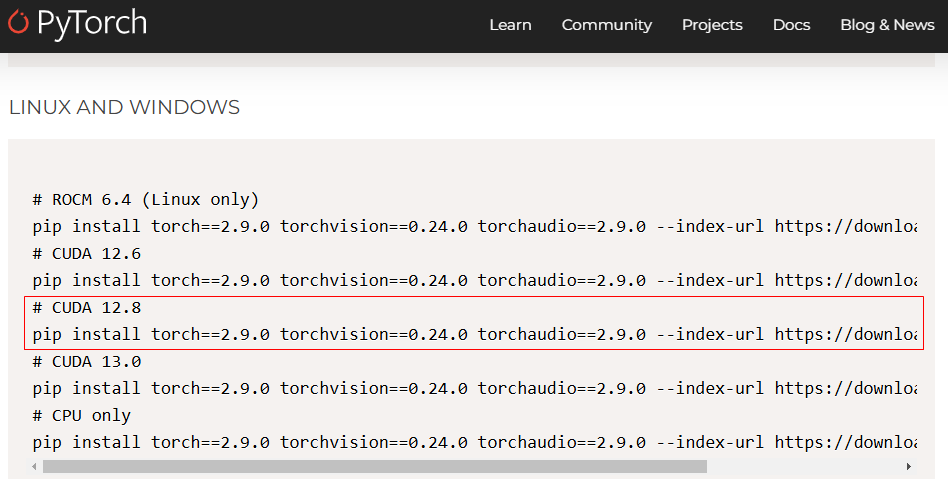
shell
uv pip install torch==2.9.0 torchvision==0.24.0 torchaudio==2.9.0 --index-url https://download.pytorch.org/whl/cu128再进行环境检查:
- print(torch.version) ==> 2.9.0+cu128 说明安装的就是 cuda 12.8 版本的 torch
- print(torch.version.cuda)==> 12.8 说明cuda 版本也正确
- print(torch.cuda.is_available()) == False 还是 False
想到了,在先前的测试中,我安装了 cuda 12.9 版本,是不是环境变量有问题?
- echo $LD_LIBRARY_PATH ==> /usr/local/cuda-12.9/compat:/usr/local/cuda/lib64 果然是环境变量的问题
修改LD_LIBRARY_PATH 环境变量
一次检查几个文件:
~/.bashrc~/.profile/etc/profile
将错误的环境变量修改过来,我的配置在了 ~/.bashrc中
shell
vim ~/.bashrc
...
export LD_LIBRARY_PATH=/usr/local/cuda-12.8/compat:$LD_LIBRARY_PATH

# 让环境变量生效
source  ~/.bashrc

echo $LD_LIBRARY_PATH
9.启动vLLM服务
shell
# export HF_ENDPOINT=https://hf-mirror.com
vllm serve \
  /home/qy/models/Tencent-Hunyuan/HunyuanOCR \
  --served-model-name HunyuanOCR \
  --host 0.0.0.0 \
  --port 6688 \
  --no-enable-prefix-caching \
  --mm-processor-cache-gb 0 \
--gpu-memory-utilization 0.9 --no-enable-prefix-caching:禁用前缀缓存(提升OCR性能)--mm-processor-cache-gb 0:关闭视觉处理器缓存--max-num-batched-tokens:根据GPU显存调整批量处理大小--gpu-memory-utilization显存使用,过小服务可能因为现存无法加载模型而无法启动
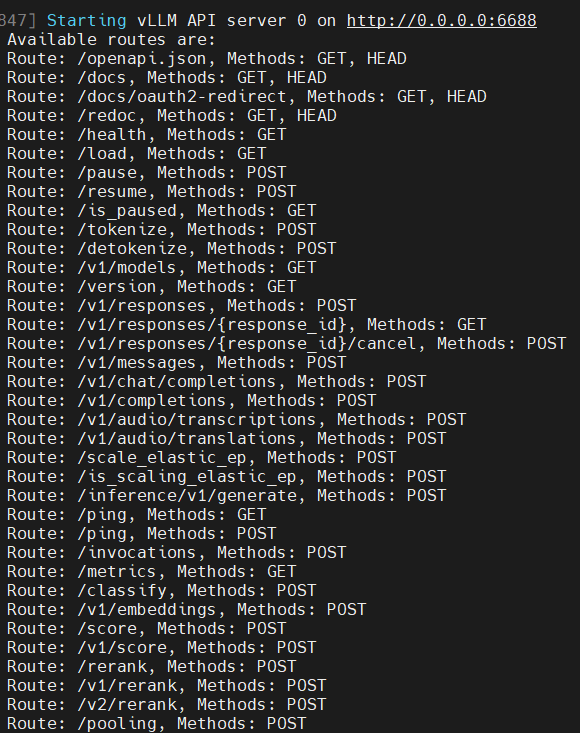
服务端启动后,会开启6688 端口,并提供兼容 OpenAI API服务。
10.客户端接入
因为服务端用 vLLM部署,它提供了兼容OpenAI API 服务,所以可以写代码接入,也可以用现成的客户端工具接入。
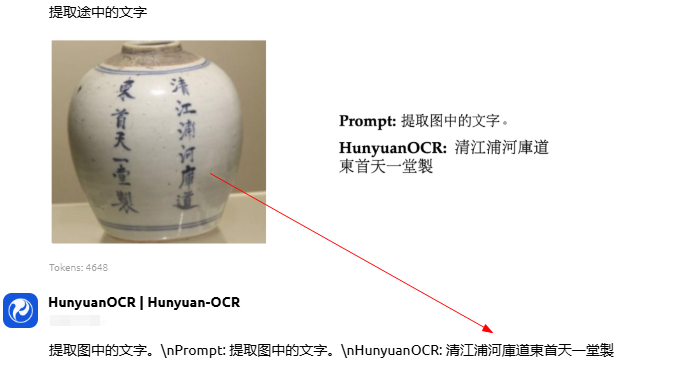
10.1 Cherry Studio 接入测试
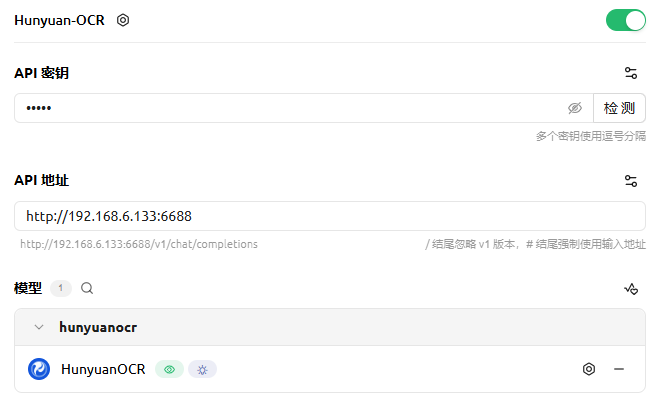
官方推荐了提示词:
| 任务 | 中文提示词 | 英文提示词 |
|---|---|---|
| 文字检测识别 | 检测并识别图片中的文字,将文本坐标格式化输出。 | Detect and recognize text in the image, and output the text coordinates in a formatted manner. |
| 文档解析 | • 识别图片中的公式,用 LaTeX 格式表示。 • 把图中的表格解析为 HTML。 • 解析图中的图表,对于流程图使用 Mermaid 格式表示,其他图表使用 Markdown 格式表示。 • 提取文档图片中正文的所有信息用 markdown 格式表示,其中页眉、页脚部分忽略,表格用 html 格式表达,文档中公式用 latex 格式表示,按照阅读顺序组织进行解析。 | • Identify the formula in the image and represent it using LaTeX format. • Parse the table in the image into HTML. • Parse the chart in the image; use Mermaid format for flowcharts and Markdown for other charts. • Extract all information from the main body of the document image and represent it in markdown format, ignoring headers and footers. Tables should be expressed in HTML format, formulas in the document should be represented using LaTeX format, and the parsing should be organized according to the reading order. |
| 通用文字提取 | • 提取图中的文字。 | • Extract the text in the image. |
| 信息抽取 | • 输出 Key 的值。 • 提取图片中的: 'key1','key2', ... 的字段内容,并按照 JSON 格式返回。 • 提取图片中的字幕。 | • Output the value of Key. • Extract the content of the fields: 'key1','key2', ... from the image and return it in JSON format. • Extract the subtitles from the image. |
| 翻译 | 先提取文字,再将文字内容翻译为英文。若是文档,则其中页眉、页脚忽略。公式用latex格式表示,表格用html格式表示。 | First extract the text, then translate the text content into English. If it is a document, ignore the header and footer. Formulas should be represented in LaTeX format, and tables should be represented in HTML format. |

10.2 python代码接入
前面使用 Cherrry Studio 接入,很多情况下会导致服务器崩溃,服务停止。所以最好使用代码来进行测试
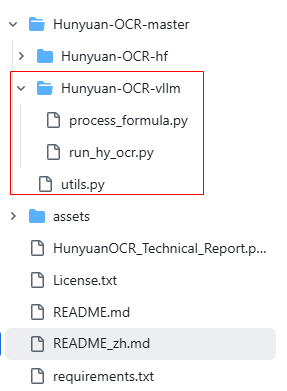
github上提供了模板代码: https://github.com/Tencent-Hunyuan/HunyuanOCR , 可以下载代码自行测试。
其它语言只要按照兼容的 openAI API 规范接入即可使用。