一、练习
新建文件夹14,复制练习文件夹下内容Step 12: Shell Control as Container && Step 13:Margins and Paddings 使用CSS类对页面美化-
1.1 新建style.css
首先在webapp下新建css文件夹,再在css文件下新建style.css文件
css
html .myAppDemoWT .myCustomButton.sapMBtn {
margin-right: 10px;
margin-left: 0.125rem;
color: rgb(18, 92, 239);
}
.myAppDemoWT .myCustomText {
display: inline-block;
font-weight: bold;
color: rgb(18, 92, 239);
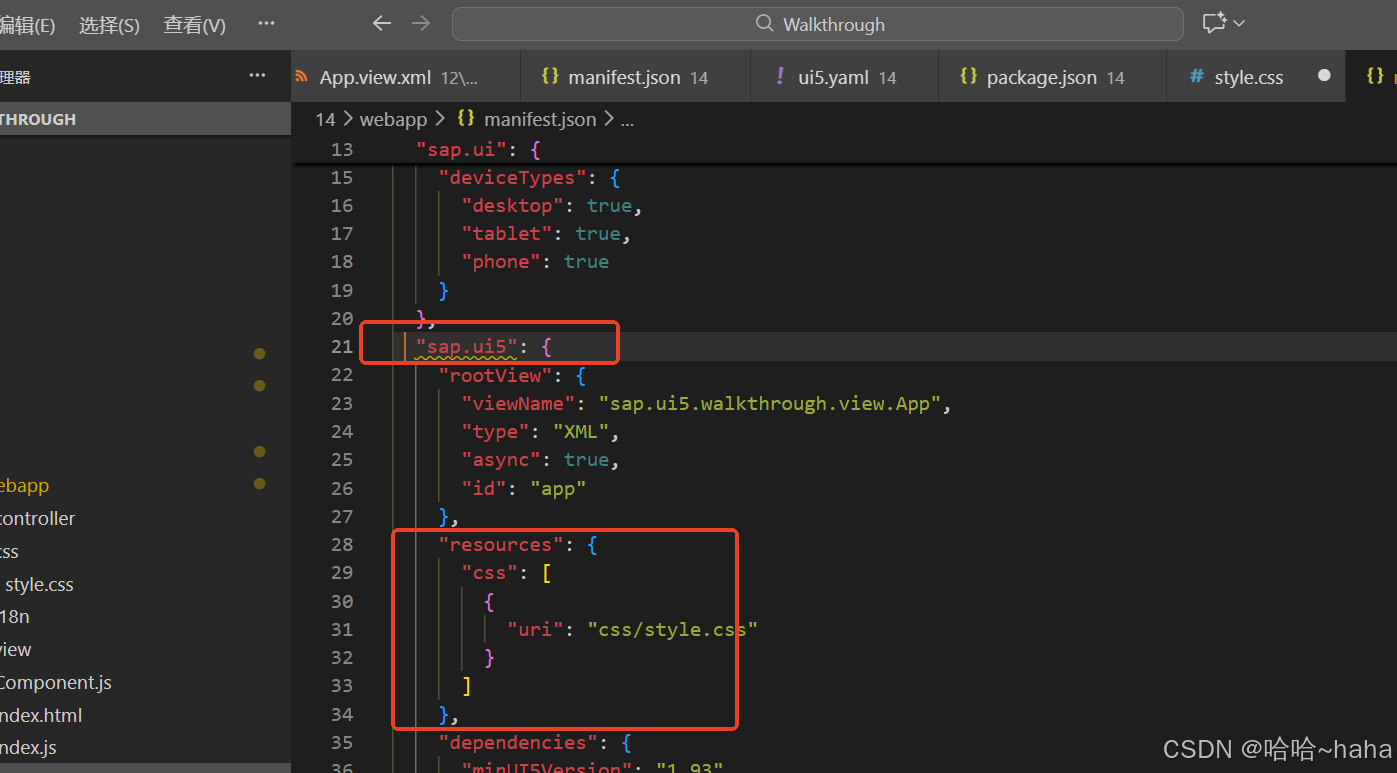
}2.2manifest.json新增配置
"sap.ui5" 新增css配置如下
css
 "resources": {
      "css": [
        {
          "uri": "css/style.css"
        }
      ]
    }
2.3 App.view.xml
XML
<mvc:View
controllerName="sap.ui5.walkthrough.controller.App"
xmlns="sap.m"
xmlns:mvc="sap.ui.core.mvc"
displayBlock="true">
<Shell>
<App class="myAppDemoWT">
<pages>
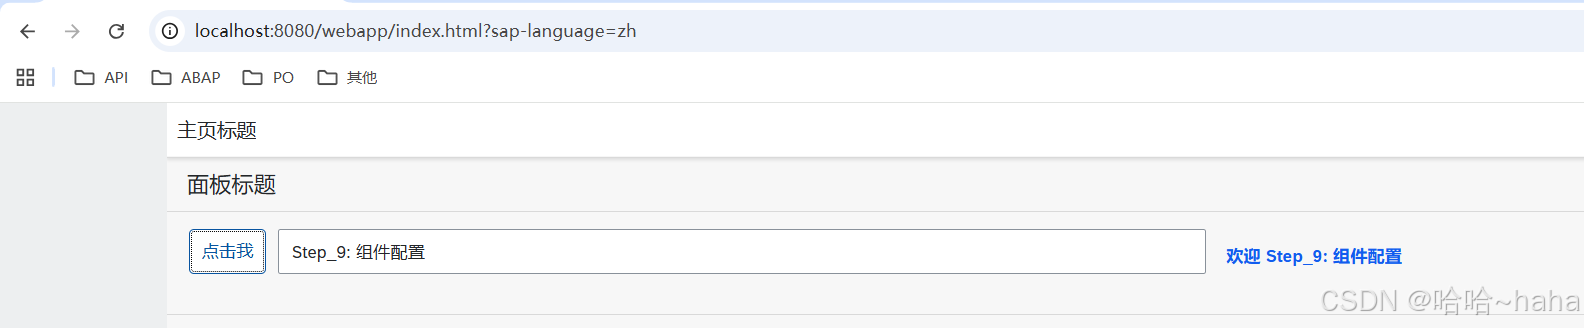
<Page title="{i18n>homePageTitle}">
<content>
<Panel
headerText="{i18n>panelTitle1}">
<content>
<Button
text="{i18n>ButtonText}"
press="onPress"
class="myCustomButton"/>
<Input
id="input2"
value="{/recipient/name}"
valueLiveUpdate="true"
width="60%"/>
<Text
text="{i18n>textDesc} {/recipient/name}"
class="sapUiSmallMargin myCustomText"/>
</content>
</Panel>
</content>
</Page>
</pages>
</App>
</Shell>
</mvc:View>与Step12相比,
- App标签新增class="myAppDemoWT"
- Button类替换class="myCustomButton"
- Text标签类替换class="sapUiSmallMargin myCustomText"
2.4 运行结果