src\store
javascript
src/store/
├── index.js              # 状态管理的入口文件
└── modules/              # 各个功能模块的状态管理
    ├── app.js           # 应用程序级状态(侧边栏、设备类型等)
    ├── dict.js          # 数据字典管理
    ├── permission.js    # 权限和路由管理
    ├── settings.js      # 系统设置管理
    ├── tagsView.js      # 标签视图管理
    └── user.js          # 用户信息管理
index.js
状态管理的入口文件
文件内容:
javascript
const store = createPinia()

export default store
核心功能
1. Pinia Store 实例创建
javascript
const store = createPinia()这行代码使用 Pinia 的 createPinia() 函数创建一个根 store 实例。Pinia 是 Vue 3 推荐的状态管理库,取代了 Vuex。
2. 导出 Store 实例
javascript
export default store将创建的 Pinia store 实例导出,以便在应用的主入口文件中使用。
在 src\main.js 处使用,导入Vuex状态管理存储
modules
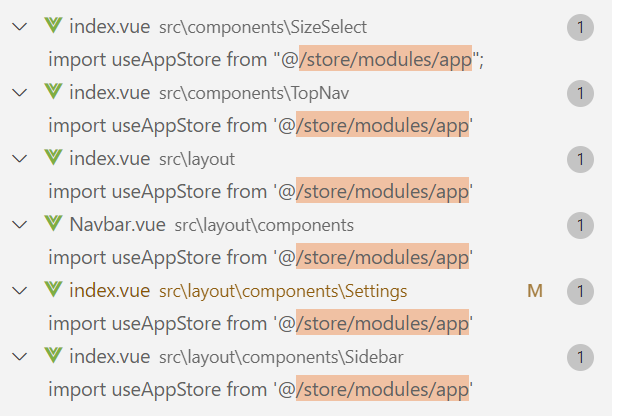
app.js
Pinia store 模块,负责管理应用程序级别的状态,主要是侧边栏、设备类型和界面尺寸等全局 UI 状态
模块结构
javascript
const useAppStore = defineStore(
  'app',
  {
    state: () => ({...}),
    actions: {...}
  }
)

export default useAppStore
使用 Pinia 的 defineStore 函数定义了一个名为 'app' 的 store 模块,包含状态(state)和操作(actions)。
状态(State)
javascript
state: () => ({
  sidebar: {
    opened: Cookies.get('sidebarStatus') ? !!+Cookies.get('sidebarStatus') : true,
    withoutAnimation: false,
    hide: false
  },
  device: 'desktop',
  size: Cookies.get('size') || 'default'
})
1. 侧边栏状态(sidebar)
- opened :侧边栏是否展开
- 从 Cookie 中读取持久化状态
- 使用
!!+Cookies.get('sidebarStatus')将字符串转换为布尔值 - 默认为 true(展开状态)
- withoutAnimation:控制侧边栏切换时是否使用动画
- hide:侧边栏是否完全隐藏
2. 设备类型(device)
- 默认值为 'desktop'(桌面设备)
- 可能的值:'desktop'、'tablet'、'mobile'
- 用于响应式布局,根据设备类型调整 UI
3. 界面尺寸(size)
- 从 Cookie 中读取持久化状态,默认为 'default'
- 可能的值:'default'、'large'、'small'、'mini'
- 用于控制界面元素的整体大小
操作(Actions)
1. 切换侧边栏状态
javascript
 toggleSideBar(withoutAnimation) {
        if (this.sidebar.hide) { //  检查侧边栏是否被隐藏
          return false; //  如果被隐藏,则直接返回false,不执行切换操作
        }
        this.sidebar.opened = !this.sidebar.opened //  切换侧边栏的开启状态
        this.sidebar.withoutAnimation = withoutAnimation //  设置动画效果状态
        if (this.sidebar.opened) { //  如果侧边栏被开启
          Cookies.set('sidebarStatus', 1) //  将开启状态保存到cookie中,值为1
        } else { //  如果条件不满足
          Cookies.set('sidebarStatus', 0) //  设置侧边栏状态为关闭(0)
        }
},- 如果侧边栏被隐藏,则不执行任何操作
- 切换侧边栏的展开/收起状态
- 设置动画标志
- 将状态持久化到 Cookie 中
2. 关闭侧边栏
javascript
    closeSideBar({ withoutAnimation }) {
        Cookies.set('sidebarStatus', 0) //  设置侧边栏状态为关闭(0)
        this.sidebar.opened = false //  设置侧边栏打开状态为false
        this.sidebar.withoutAnimation = withoutAnimation //  设置是否使用动画效果
},- 直接设置侧边栏为关闭状态
- 设置动画标志
- 将状态持久化到 Cookie 中
3. 切换设备类型
javascript
    toggleDevice(device) {
        this.device = device //  更新当前设备类型
},- 更新设备类型状态
- 通常在窗口大小变化时调用
4. 设置界面尺寸
javascript
     setSize(size) {
        this.size = size; //  更新当前尺寸状态
        Cookies.set('size', size) //  将尺寸设置保存到Cookie中
},- 更新界面尺寸状态
- 将设置持久化到 Cookie 中
5. 切换侧边栏隐藏状态
javascript
  toggleSideBarHide(status) {
        this.sidebar.hide = status //  更新侧边栏隐藏状态
}- 控制侧边栏是否完全隐藏
- 在顶部导航模式下可能使用
持久化策略
模块使用 js-cookie 库将部分状态持久化到浏览器 Cookie 中:
- sidebarStatus:侧边栏展开状态(1 或 0)
- size:界面尺寸设置
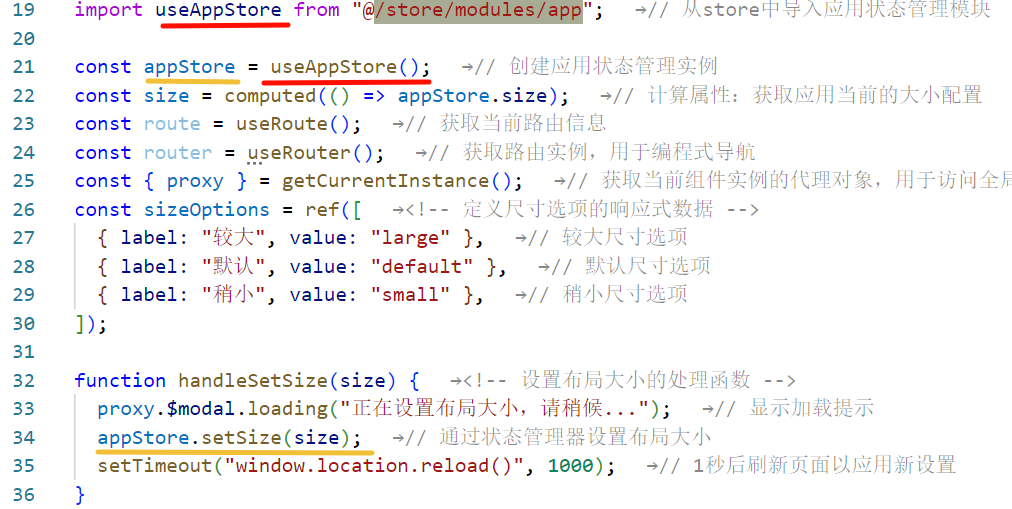
在
处使用
dict.js
Pinia store 模块,专门用于管理应用程序中的数据字典。
模块结构
javascript
const useDictStore = defineStore(
  'dict',
  {
    state: () => ({...}),
    actions: {...}
  }
)

export default useDictStore
使用 Pinia 的 defineStore 函数定义了一个名为 'dict' 的 store 模块,用于管理数据字典。
状态(State)
javascript
state: () => ({
  dict: new Array()
})
模块只有一个状态:
- dict :一个数组,存储所有数据字典项,每个字典项包含
key和value属性
操作(Actions)
1. 获取字典数据
javascript
 // 获取字典
      getDict(_key) {
        if (_key == null && _key == "") { //  检查键是否为空或null
          return null;
        }
        try {
          for (let i = 0; i < this.dict.length; i++) { //  遍历字典数组
            if (this.dict[i].key == _key) { //  检查当前项的键是否匹配
              return this.dict[i].value; //  返回匹配的值
            }
          }
        } catch (e) {
          return null;
        }
},- 根据键名
_key查找对应的字典值 - 如果键为 null 或空字符串,返回 null
- 遍历字典数组查找匹配的项
- 如果找到匹配项,返回其值
- 如果发生异常或未找到,返回 null
2. 设置字典数据
javascript
 // 设置字典
      setDict(_key, value) {
        if (_key !== null && _key !== "") { //  检查键是否有效
          this.dict.push({ //  向字典数组中添加新的键值对
            key: _key,
            value: value
          });
        }
},- 接收键名
_key和值value - 验证键名不为空
- 将新的字典项添加到数组中
3. 删除字典数据
javascript
    // 删除字典
      removeDict(_key) {
        var bln = false; //  标记是否成功移除的变量
        try {
          for (let i = 0; i < this.dict.length; i++) { //  遍历字典数组
            if (this.dict[i].key == _key) { //  检查当前元素的键是否与传入的键匹配
              this.dict.splice(i, 1); //  使用splice方法移除匹配的元素
              return true;
            }
          }
        } catch (e) {
          bln = false;
        }
        return bln;
},- 根据键名
_key查找并删除对应的字典项 - 如果找到并成功删除,返回 true
- 如果未找到或发生异常,返回 false
4. 清空字典
javascript
    // 清空字典
      cleanDict() {
        this.dict = new Array(); //  将当前实例的dict属性设置为新的空数组
},- 重置字典数组为空数组
- 清空所有存储的字典数据
5. 初始化字典
javascript
initDict() {
}- 预留的初始化方法,目前为空
- 可能用于将来添加系统启动时的字典初始化逻辑
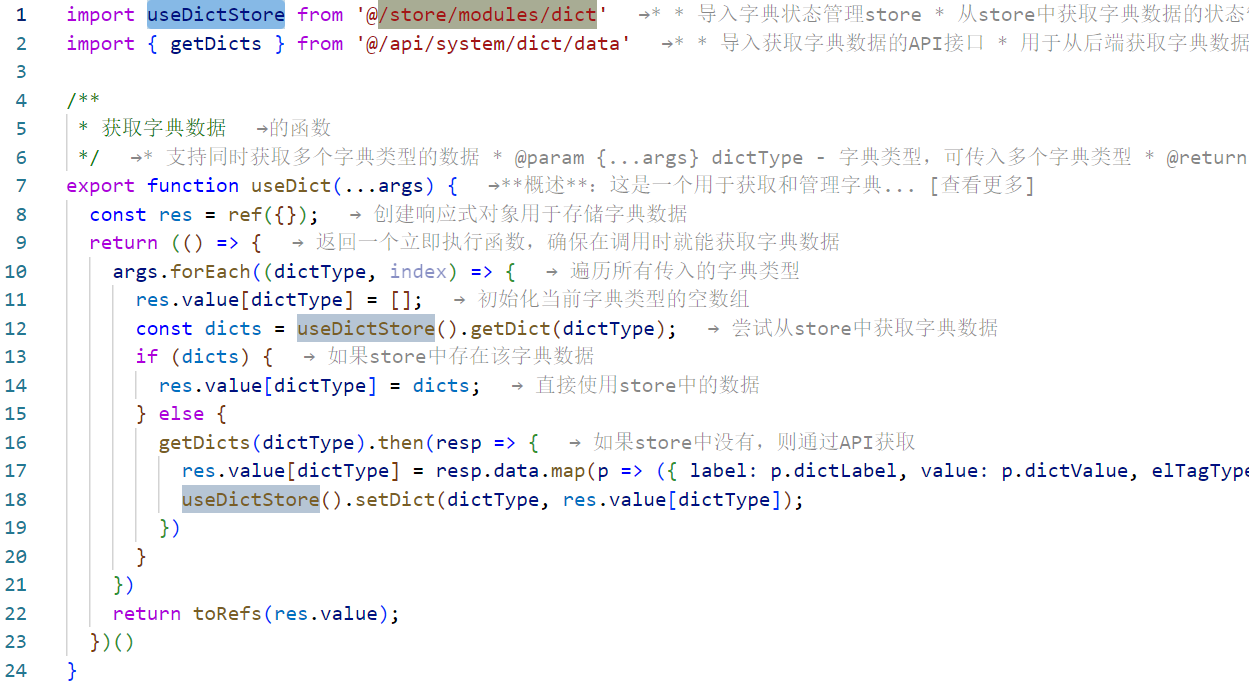
在

处使用,例:
permission.js
权限管理系统的核心模块,负责处理用户权限、路由生成和动态路由加载等关键功能。
模块结构
javascript
const usePermissionStore = defineStore(
  'permission',
  {
    state: () => ({...}),
    actions: {...}
  }
)

export default usePermissionStore
使用 Pinia 的 defineStore 函数定义了一个名为 'permission' 的 store 模块,用于管理权限和路由。
导入依赖
javascript
import auth from '@/plugins/auth'
import router, { constantRoutes, dynamicRoutes } from '@/router'
import { getRouters } from '@/api/menu'
import Layout from '@/layout/index'
import ParentView from '@/components/ParentView'
import InnerLink from '@/layout/components/InnerLink'

// 匹配views里面所有的.vue文件
const modules = import.meta.glob('./../../views/**/*.vue')- auth:权限验证插件
- router:路由实例和路由配置
- getRouters:获取后端路由数据的API
- Layout, ParentView, InnerLink:特殊组件
- modules:Vite 的 glob 功能,导入所有 views 下的 .vue 文件
状态(State)
javascript
state: () => ({
  routes: [],           // 所有路由
  addRoutes: [],        // 动态添加的路由
  defaultRoutes: [],    // 默认路由
  topbarRouters: [],    // 顶部导航路由
  sidebarRouters: []    // 侧边栏路由
})
操作(Actions)
1. 设置路由
javascript
setRoutes(routes) {
  this.addRoutes = routes
  this.routes = constantRoutes.concat(routes)
}- 设置动态路由和完整路由列表
- 将常量路由与动态路由合并
2. 设置默认路由
javascript
setDefaultRoutes(routes) {
  this.defaultRoutes = constantRoutes.concat(routes)
}- 设置默认路由列表
3. 设置顶部导航路由
javascript
setTopbarRoutes(routes) {
  this.topbarRouters = routes
}- 设置顶部导航的路由数据
4. 设置侧边栏路由
javascript
setSidebarRouters(routes) {
  this.sidebarRouters = routes
}- 设置侧边栏的路由数据
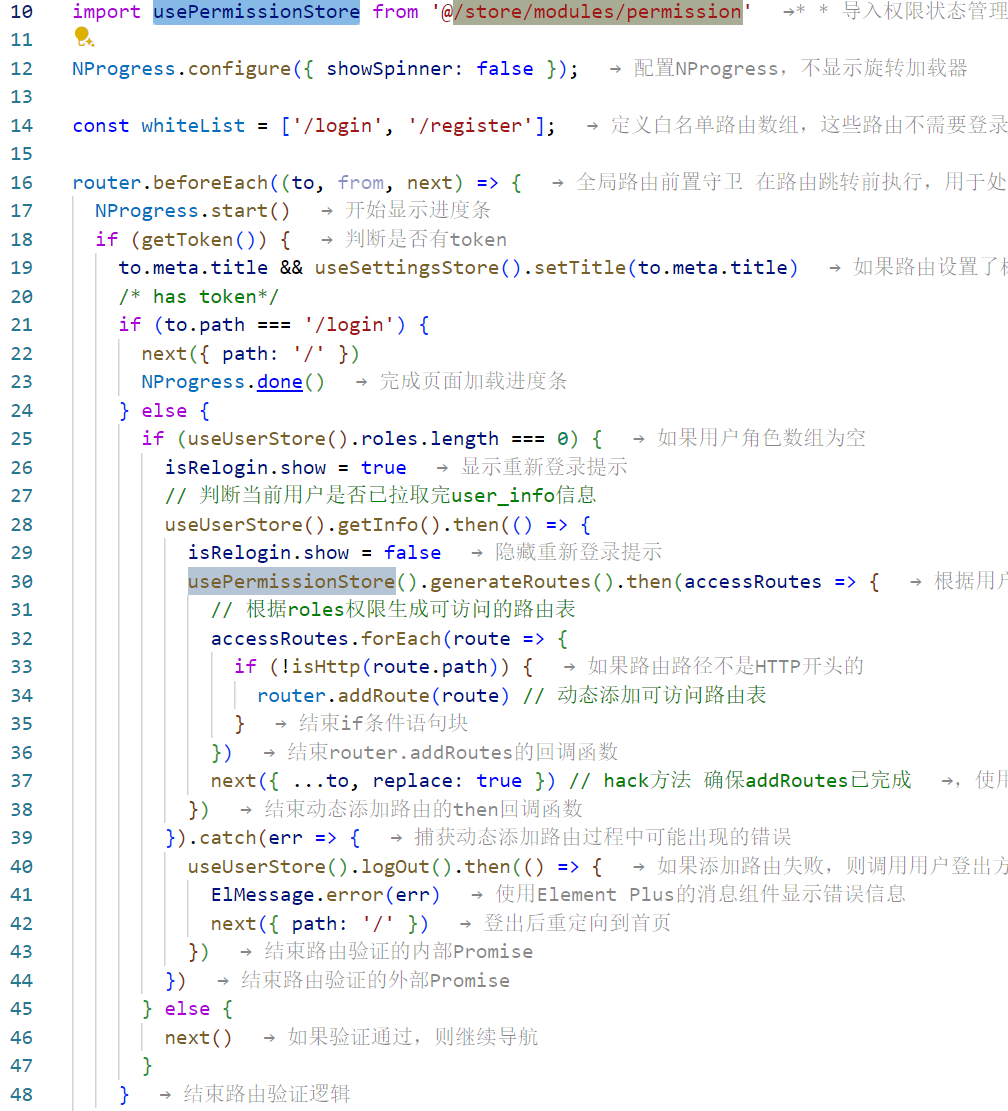
5. 生成路由(核心功能)
javascript
generateRoutes(roles) {
  return new Promise(resolve => {
    // 向后端请求路由数据
    getRouters().then(res => {
      const sdata = JSON.parse(JSON.stringify(res.data))
      const rdata = JSON.parse(JSON.stringify(res.data))
      const defaultData = JSON.parse(JSON.stringify(res.data))
      const sidebarRoutes = filterAsyncRouter(sdata)
      const rewriteRoutes = filterAsyncRouter(rdata, false, true)
      const defaultRoutes = filterAsyncRouter(defaultData)
      const asyncRoutes = filterDynamicRoutes(dynamicRoutes)
      asyncRoutes.forEach(route => { router.addRoute(route) })
      this.setRoutes(rewriteRoutes)
      this.setSidebarRouters(constantRoutes.concat(sidebarRoutes))
      this.setDefaultRoutes(sidebarRoutes)
      this.setTopbarRoutes(defaultRoutes)
      resolve(rewriteRoutes)
    })
  })
}
这是权限管理的核心功能:
- 从后端获取路由数据
- 处理路由数据为不同用途的副本
- 将字符串组件转换为实际组件
- 过滤动态路由并添加到路由器
- 设置各种路由状态
- 返回处理后的路由
辅助函数
1. 过滤异步路由
javascript
function filterAsyncRouter(asyncRouterMap, lastRouter = false, type = false) {
  return asyncRouterMap.filter(route => {
    if (type && route.children) {
      route.children = filterChildren(route.children)
    }
    if (route.component) {
      // Layout ParentView 组件特殊处理
      if (route.component === 'Layout') {
        route.component = Layout
      } else if (route.component === 'ParentView') {
        route.component = ParentView
      } else if (route.component === 'InnerLink') {
        route.component = InnerLink
      } else {
        route.component = loadView(route.component)
      }
    }
    if (route.children != null && route.children && route.children.length) {
      route.children = filterAsyncRouter(route.children, route, type)
    } else {
      delete route['children']
      delete route['redirect']
    }
    return true
  })
}
处理从后端获取的路由数据:
- 特殊组件处理:Layout、ParentView、InnerLink
- 递归处理子路由
- 加载实际组件
- 清理不需要的属性
2. 过滤子路由
javascript
function filterChildren(childrenMap, lastRouter = false) {
  var children = []
  childrenMap.forEach((el, index) => {
    if (el.children && el.children.length) {
      if (el.component === 'ParentView' && !lastRouter) {
        el.children.forEach(c => {
          c.path = el.path + '/' + c.path
          if (c.children && c.children.length) {
            children = children.concat(filterChildren(c.children, c))
            return
          }
          children.push(c)
        })
        return
      }
    }
    if (lastRouter) {
      el.path = lastRouter.path + '/' + el.path
      if (el.children && c.children.length) {
        children = children.concat(filterChildren(el.children, el))
        return
      }
    }
    children = children.concat(el)
  })
  return children
}
处理嵌套路由的子路由,特别处理 ParentView 组件的子路由。
3. 过滤动态路由
javascript
// 动态路由遍历,验证是否具备权限
export function filterDynamicRoutes(routes) {
  const res = []
  routes.forEach(route => {
    if (route.permissions) {
      if (auth.hasPermiOr(route.permissions)) {
        res.push(route)
      }
    } else if (route.roles) {
      if (auth.hasRoleOr(route.roles)) {
        res.push(route)
      }
    }
  })
  return res
}
根据权限过滤动态路由:
- 检查权限(permissions)
- 检查角色(roles)
4. 加载视图组件
javascript
export const loadView = (view) => {
  let res;
  for (const path in modules) {
    const dir = path.split('views/')[1].split('.vue')[0];
    if (dir === view) {
      res = () => modules[path]();
    }
  }
  return res;
}
动态加载组件:
- 使用 Vite 的 import.meta.glob 功能
- 根据组件路径匹配对应的组件文件
- 返回动态导入函数
在
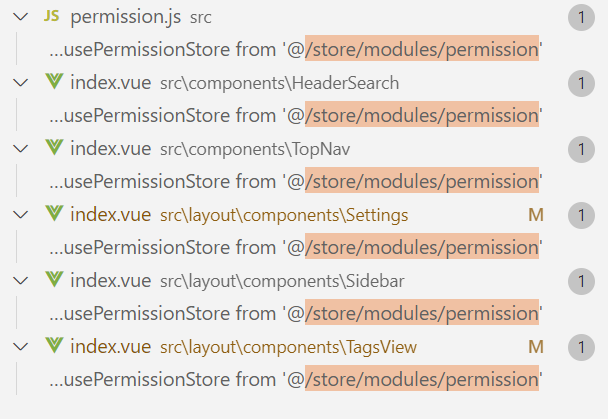
处使用,例:
settings.js
专门用于管理系统的各种设置和配置选项,如主题、布局和其他 UI 相关的配置。
模块结构
javascript
const useSettingsStore = defineStore(
  'settings',
  {
    state: () => ({...}),
    actions: {...}
  }
)

export default useSettingsStore
使用 Pinia 的 defineStore 函数定义了一个名为 'settings' 的 store 模块,用于管理系统设置。
导入依赖
javascript
import defaultSettings from '@/settings'
import { useDynamicTitle } from '@/utils/dynamicTitle'

const { sideTheme, showSettings, topNav, tagsView, fixedHeader, sidebarLogo, dynamicTitle } = defaultSettings
const storageSetting = JSON.parse(localStorage.getItem('layout-setting')) || ''- defaultSettings:从设置文件导入默认配置
- useDynamicTitle:动态标题设置工具函数
- storageSetting:从 localStorage 读取用户保存的设置
状态(State)
javascript
state: () => ({
  title: '',                                    // 网页标题
  theme: storageSetting.theme || '#409EFF',      // 主题颜色
  sideTheme: storageSetting.sideTheme || sideTheme, // 侧边栏主题
  showSettings: showSettings,                    // 是否显示设置面板
  topNav: storageSetting.topNav === undefined ? topNav : storageSetting.topNav, // 是否开启顶部导航
  tagsView: storageSetting.tagsView === undefined ? tagsView : storageSetting.tagsView, // 是否开启标签视图
  fixedHeader: storageSetting.fixedHeader === undefined ? fixedHeader : storageSetting.fixedHeader, // 是否固定头部
  sidebarLogo: storageSetting.sidebarLogo === undefined ? sidebarLogo : storageSetting.sidebarLogo, // 是否显示侧边栏Logo
  dynamicTitle: storageSetting.dynamicTitle === undefined ? dynamicTitle : storageSetting.dynamicTitle // 是否启用动态标题
})
每个状态都采用了优先级策略:
- 优先使用 localStorage 中存储的用户设置
- 如果没有存储的设置,则使用默认设置
操作(Actions)
1. 修改布局设置
javascript
changeSetting(data) {
  const { key, value } = data
  if (this.hasOwnProperty(key)) {
    this[key] = value
  }
}- 接收包含键值对的数据
- 检查键是否存在于 state 中
- 更新对应的设置值
- 这个方法通常在设置面板中被调用
2. 设置网页标题
javascript
setTitle(title) {
  this.title = title
  useDynamicTitle();
}- 设置页面标题
- 调用动态标题工具函数更新页面标题
- 通常在路由切换时调用
在
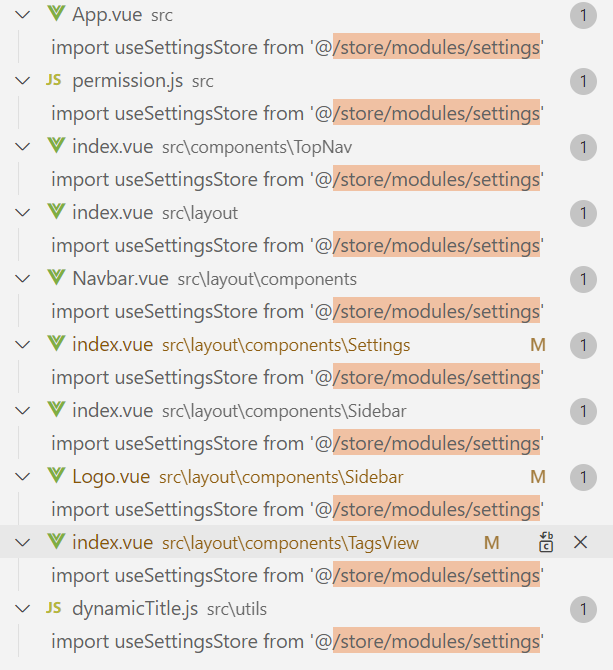
处使用,例

tagsView.js
专门用于管理标签视图(Tabs)的各种状态和操作。
模块结构
javascript
const useTagsViewStore = defineStore(
  'tags-view',
  {
    state: () => ({...}),
    actions: {...}
  }
)

export default useTagsViewStore
使用 Pinia 的 defineStore 函数定义了一个名为 'tags-view' 的 store 模块。
状态(State)
javascript
state: () => ({
  visitedViews: [],  // 已访问的页面标签
  cachedViews: [],   // 缓存的页面组件
  iframeViews: []     // iframe视图集合
})
三个核心状态:
- visitedViews:用户访问过的页面标签列表
- cachedViews:需要缓存的页面组件名称列表,用于页面组件的缓存
- iframeViews:需要以 iframe 方式嵌入的外部页面列表
核心操作(Actions)
1. 添加视图相关操作
javascript
// 同时添加到已访问视图和缓存视图
addView(view) {
  this.addVisitedView(view)
  this.addCachedView(view)
},

// 添加到iframe视图列表
addIframeView(view) {
  if (this.iframeViews.some(v => v.path === view.path)) return
  this.iframeViews.push(
    Object.assign({}, view, {
      title: view.meta.title || 'no-name'
    })
  )
},

// 添加到已访问视图列表
addVisitedView(view) {
  if (this.visitedViews.some(v => v.path === view.path)) return
  this.visitedViews.push(
    Object.assign({}, view, {
      title: view.meta.title || 'no-name'
    })
  )
},

// 添加到缓存视图列表
addCachedView(view) {
  if (this.cachedViews.includes(view.name)) return
  if (!view.meta.noCache) {
    this.cachedViews.push(view.name)
  }
}
这些方法用于将新页面添加到标签列表中:
- 检查是否已存在,避免重复添加
- 处理标题和路径信息
- 根据页面配置决定是否缓存
2. 删除视图相关操作
javascript
// 删除单个视图
delView(view) {
  return new Promise(resolve => {
    this.delVisitedView(view)
    this.delCachedView(view)
    resolve({
      visitedViews: [...this.visitedViews],
      cachedViews: [...this.cachedViews]
    })
  })
},

// 删除单个已访问视图
delVisitedView(view) {
  return new Promise(resolve => {
    for (const [i, v] of this.visitedViews.entries()) {
      if (v.path === view.path) {
        this.visitedViews.splice(i, 1)
        break
      }
    }
    this.iframeViews = this.iframeViews.filter(item => item.path !== view.path)
    resolve([...this.visitedViews])
  })
},

// 删除单个iframe视图
delIframeView(view) {
  return new Promise(resolve => {
    this.iframeViews = this.iframeViews.filter(item => item.path !== view.path)
    resolve([...this.iframeViews])
  })
},

// 删除单个缓存视图
delCachedView(view) {
  return new Promise(resolve => {
    const index = this.cachedViews.indexOf(view.name)
    index > -1 && this.cachedViews.splice(index, 1)
    resolve([...this.cachedViews])
  })
}
删除操作都返回 Promise,允许在操作完成后执行回调函数。
3. 批量删除操作
javascript
// 删除其他视图(保留当前和固定标签)
delOthersViews(view) {
  return new Promise(resolve => {
    this.delOthersVisitedViews(view)
    this.delOthersCachedViews(view)
    resolve({
      visitedViews: [...this.visitedViews],
      cachedViews: [...this.cachedViews]
    })
  })
},

// 删除其他已访问视图
delOthersVisitedViews(view) {
  return new Promise(resolve => {
    this.visitedViews = this.visitedViews.filter(v => {
      return v.meta.affix || v.path === view.path
    })
    this.iframeViews = this.iframeViews.filter(item => item.path === view.path)
    resolve([...this.visitedViews])
  })
},
//删除其他缓存的视图
delOthersCachedViews(view) {
        return new Promise(resolve => {
          const index = this.cachedViews.indexOf(view.name)
          if (index > -1) {
            this.cachedViews = this.cachedViews.slice(index, index + 1)
          } else {
            this.cachedViews = []
          }
          resolve([...this.cachedViews])
        })
      },
// 删除左侧标签
delLeftTags(view) {
  return new Promise(resolve => {
    const index = this.visitedViews.findIndex(v => v.path === view.path)
    if (index === -1) {
      return
    }
    this.visitedViews = this.visitedViews.filter((item, idx) => {
      if (idx >= index || (item.meta && item.meta.affix)) {
        return true
      }
      const i = this.cachedViews.indexOf(item.name)
      if (i > -1) {
        this.cachedViews.splice(i, 1)
      }
      if(item.meta.link) {
        const fi = this.iframeViews.findIndex(v => v.path === item.path)
        this.iframeViews.splice(fi, 1)
      }
      return false
    })
    resolve([...this.visitedViews])
  })
},

// 删除右侧标签
delRightTags(view) {
  return new Promise(resolve => {
    const index = this.visitedViews.findIndex(v => v.path === view.path)
    if (index === -1) {
      return
    }
    this.visitedViews = this.visitedViews.filter((item, idx) => {
      if (idx <= index || (item.meta && item.meta.affix)) {
        return true
      }
      const i = this.cachedViews.indexOf(item.name)
      if (i > -1) {
        this.cachedViews.splice(i, 1)
      }
      if(item.meta.link) {
        const fi = this.iframeViews.findIndex(v => v.path === item.path)
        this.iframeViews.splice(fi, 1)
      }
      return false
    })
    resolve([...this.visitedViews])
  })
}
这些方法提供了灵活的批量删除功能:
- 保留固定标签(
meta.affix为 true 的标签) - 根据位置关系删除左侧或右侧标签
- 同时处理已访问视图、缓存视图和 iframe 视图
4. 删除所有视图
javascript
// 删除所有视图(保留固定标签)
delAllViews(view) {
  return new Promise(resolve => {
    this.delAllVisitedViews(view)
    this.delAllCachedViews(view)
    resolve({
      visitedViews: [...this.visitedViews],
      cachedViews: [...this.cachedViews]
    })
  })
},

// 删除所有已访问视图
delAllVisitedViews(view) {
  return new Promise(resolve => {
    const affixTags = this.visitedViews.filter(tag => tag.meta.affix)
    this.visitedViews = affixTags
    this.iframeViews = []
    resolve([...this.visitedViews])
  })
},

// 删除所有缓存视图
delAllCachedViews(view) {
  return new Promise(resolve => {
    this.cachedViews = []
    resolve([...this.cachedViews])
  })
}
删除所有视图时,会保留固定标签,因为这些通常是系统核心页面。
5. 更新和辅助操作
javascript
// 更新已访问视图
updateVisitedView(view) {
  for (let v of this.visitedViews) {
    if (v.path === view.path) {
      v = Object.assign(v, view)
      break
    }
  }
}
更新视图信息,通常在路由参数变化时使用。
在
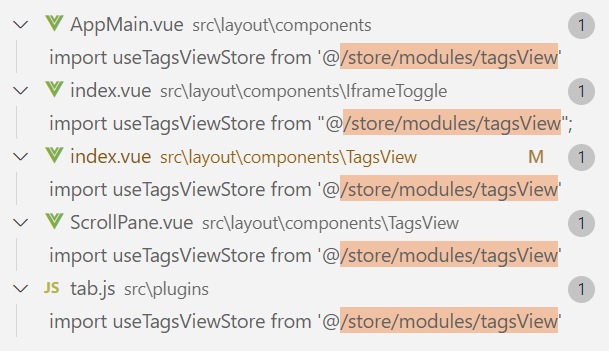
处使用,例

user.js
专门用于管理用户相关的状态,包括用户登录、用户信息获取和退出系统等核心功能。
模块结构
javascript
const useUserStore = defineStore(
  'user',
  {
    state: () => ({...}),
    actions: {...}
  }
)

export default useUserStore
使用 Pinia 的 defineStore 函数定义了一个名为 'user' 的 store 模块。
导入依赖
javascript
import { login, logout, getInfo } from '@/api/login'
import { getToken, setToken, removeToken } from '@/utils/auth'
import defAva from '@/assets/images/profile.jpg'- login, logout, getInfo:与用户认证相关的 API 方法
- getToken, setToken, removeToken:操作 token 的工具函数
- defAva:默认头像图片
状态(State)
javascript
state: () => ({
  token: getToken(),        // 用户令牌,从本地存储中获取
  id: '',                   // 用户ID
  name: '',                 // 用户名
  avatar: '',               // 用户头像
  roles: [],                // 用户角色列表
  permissions: []           // 用户权限列表
})
这些状态构成了用户的基本信息:
-
token:用户认证凭证,存储在本地存储中
-
id:用户的唯一标识符
-
name:用户名称
-
avatar:用户头像URL
-
roles:用户拥有的角色列表,用于权限控制
-
permissions:用户拥有的权限列表,用于细粒度权限控制
操作(Actions)
1. 登录操作
javascript
login(userInfo) {
  const username = userInfo.username.trim()
  const password = userInfo.password
  const code = userInfo.code
  const uuid = userInfo.uuid
  return new Promise((resolve, reject) => {
    login(username, password, code, uuid).then(res => {
      setToken(res.data.token)
      this.token = res.data.token
      resolve()
    }).catch(error => {
      reject(error)
    })
  })
}
登录流程:
- 从用户信息中提取用户名、密码、验证码和UUID
- 调用登录 API
- 登录成功后,将返回的 token 存储到本地存储和状态中
- 返回 Promise,允许在登录完成后执行其他操作
2. 获取用户信息
javascript
getInfo() {
  return new Promise((resolve, reject) => {
    getInfo().then(res => {
      const user = res.data.user
      const avatar = (user.avatar == "" || user.avatar == null) ? defAva : user.avatar;

      if (res.data.roles && res.data.roles.length > 0) { // 验证返回的roles是否是一个非空数组
        this.roles = res.data.roles
        this.permissions = res.data.permissions
      } else {
        this.roles = ['ROLE_DEFAULT']
      }
      this.id = user.userId
      this.name = user.userName
      this.avatar = avatar
      resolve(res)
    }).catch(error => {
      reject(error)
    })
  })
}
获取用户信息流程:
- 调用获取用户信息 API
- 处理用户头像,如果没有设置则使用默认头像
- 设置用户角色和权限,如果没有角色则设置默认角色
- 更新用户基本信息到状态中
- 返回 Promise,允许在获取信息后执行其他操作
3. 退出系统
javascript
logOut() {
  return new Promise((resolve, reject) => {
    logout(this.token).then(() => {
      this.token = ''
      this.roles = []
      this.permissions = []
      removeToken()
      resolve()
    }).catch(error => {
      reject(error)
    })
  })
}
退出系统流程:
- 调用退出 API
- 清空本地状态中的用户信息
- 从本地存储中移除 token
- 返回 Promise,允许在退出后执行其他操作
在
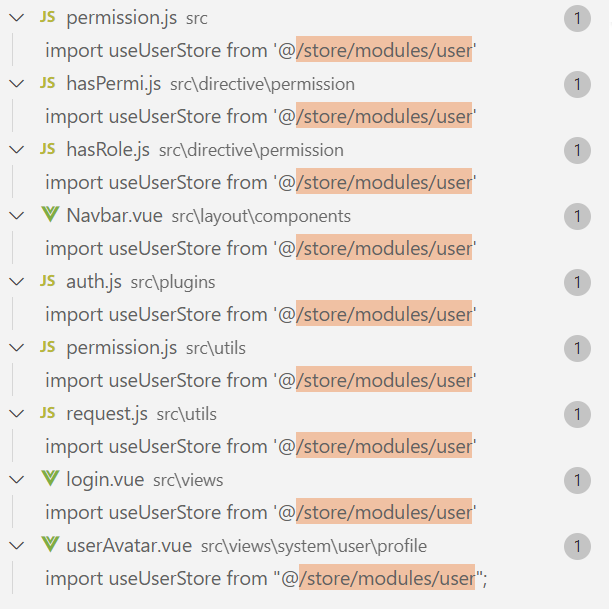
处使用,例

src\router\index.js
静态路由与动态路由的混合使用
路由结构概览
// 1. 公共路由 - 所有用户都可访问
export const constantRoutes = [
  // 登录相关
  // 401 错误页面
  // 首页
  // 用户个人中心
]

// 2. 动态路由 - 基于用户权限动态加载
export const dynamicRoutes = [
  // 权限相关的特殊路由
  // 需要特定权限才能访问
]
路由元数据详解
元数据注释解析
代码前端的注释详细说明了各种路由配置选项:
javascript
/**
 * Note: 路由配置项
 *
 * hidden: true                     // 当设置 true 的时候该路由不会再侧边栏出现 如401,login等页面,或者如一些编辑页面/edit/1
 * alwaysShow: true                 // 当你一个路由下面的 children 声明的路由大于1个时,自动会变成嵌套的模式--如组件页面
 *                                  // 只有一个时,会将那个子路由当做根路由显示在侧边栏--如引导页面
 *                                  // 若你想不管路由下面的 children 声明的个数都显示你的根路由
 *                                  // 你可以设置 alwaysShow: true,这样它就会忽略之前定义的规则,一直显示根路由
 * redirect: noRedirect             // 当设置 noRedirect 的时候该路由在面包屑导航中不可被点击
 * name:'router-name'               // 设定路由的名字,一定要填写不然使用<keep-alive>时会出现各种问题
 * query: '{"id": 1, "name": "ry"}' // 访问路由的默认传递参数
 * roles: ['admin', 'common']       // 访问路由的角色权限
 * permissions: ['a:a:a', 'b:b:b']  // 访问路由的菜单权限
 * meta : {
    noCache: true                   // 如果设置为true,则不会被 <keep-alive> 缓存(默认 false)
    title: 'title'                  // 设置该路由在侧边栏和面包屑中展示的名字
    icon: 'svg-name'                // 设置该路由的图标,对应路径src/assets/icons/svg
    breadcrumb: false               // 如果设置为false,则不会在breadcrumb面包屑中显示
    activeMenu: '/system/user'      // 当路由设置了该属性,则会高亮相对应的侧边栏。
  }
 */
实际应用
公共路由分析
公共路由结构
javascript
// 公共路由
export const constantRoutes = [
  {
    path: '/redirect',
    component: Layout,
    hidden: true,
    children: [
      {
        path: '/redirect/:path(.*)',
        component: () => import('@/views/redirect/index.vue')
      }
    ]
  },
  {
    path: '/dashboard',
    component: () => import('@/views/dashboard/index'),
    hidden: true
  },
  {
    path: '/login',
    component: () => import('@/views/login'),
    hidden: true
  },
  {
    path: '/register',
    component: () => import('@/views/register'),
    hidden: true
  },
  {
    path: "/:pathMatch(.*)*",
    component: () => import('@/views/error/404'),
    hidden: true
  },
  {
    path: '/401',
    component: () => import('@/views/error/401'),
    hidden: true
  },
  {
    path: '',
    component: Layout,
    redirect: '/index',
    children: [
      {
        path: '/index',
        component: () => import('@/views/index'),
        name: 'Index',
        meta: { title: '首页', icon: 'dashboard', affix: true }
      }
    ]
  },
  {
    path: '/user',
    component: Layout,
    hidden: true,
    redirect: 'noredirect',
    children: [
      {
        path: 'profile',
        component: () => import('@/views/system/user/profile/index'),
        name: 'Profile',
        meta: { title: '个人中心', icon: 'user' }
      }
    ]
  }
]重定向路由:
- 用途:处理页面内重定向,保持当前参数
- 路径模式:
/redirect/:path(.*)捕获所有路径 - 隐藏属性:不在导航中显示
错误处理路由:
- 404路由:使用
pathMatch(.*)*捕获所有未匹配路径 - 401路由:处理未授权访问
- 统一隐藏:不在侧边栏显示
根路由:
- 默认重定向到
/index - 使用
Layout组件作为容器 - 设置
affix: true使首页标签不可关闭
动态路由分析
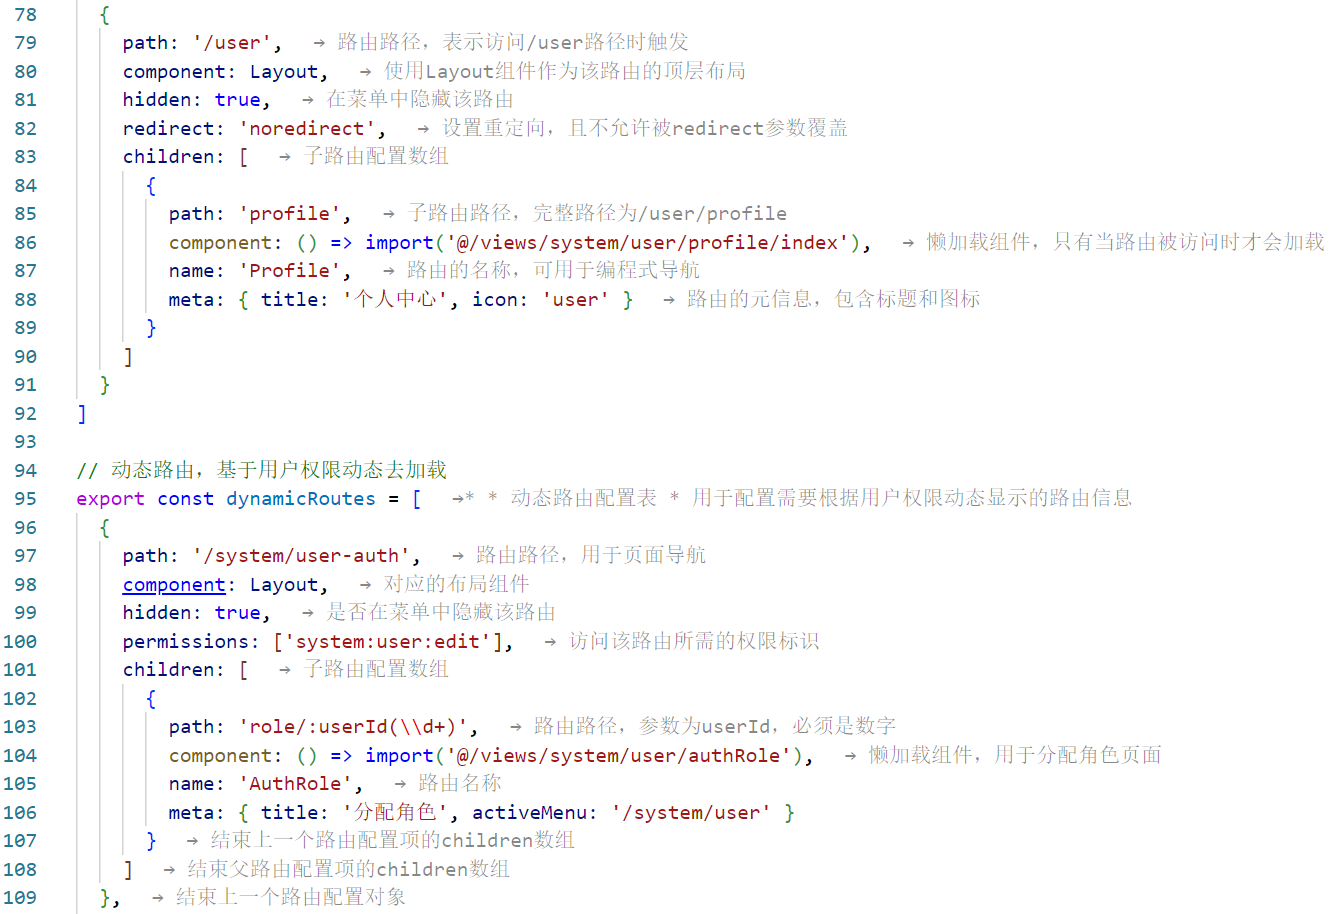
动态路由结构
javascript
// 动态路由,基于用户权限动态去加载
export const dynamicRoutes = [
  // 1. 用户授权路由
  {
    path: '/system/user-auth',
    component: Layout,
    hidden: true,
    permissions: ['system:user:edit'],
    children: [
      {
        path: 'role/:userId(\\d+)',
        component: () => import('@/views/system/user/authRole'),
        name: 'AuthRole',
        meta: { title: '分配角色', activeMenu: '/system/user' }
      }
    ]
  },

  // 2. 角色授权路由
  {
    path: '/system/role-auth',
    component: Layout,
    hidden: true,
    permissions: ['system:role:edit'],
    children: [
      {
        path: 'user/:roleId(\\d+)',
        component: () => import('@/views/system/role/authUser'),
        name: 'AuthUser',
        meta: { title: '分配用户', activeMenu: '/system/role' }
      }
    ]
  },

  // 3. 字典数据路由
  {
    path: '/system/dict-data',
    component: Layout,
    hidden: true,
    permissions: ['system:dict:list'],
    children: [
      {
        path: 'index/:dictId(\\d+)',
        component: () => import('@/views/system/dict/data'),
        name: 'Data',
        meta: { title: '字典数据', activeMenu: '/system/dict' }
      }
    ]
  }
{
    path: '/system/oss-config',
    component: Layout,
    hidden: true,
    permissions: ['system:oss:list'],
    children: [
      {
        path: 'index',
        component: () => import('@/views/system/oss/config'),
        name: 'OssConfig',
        meta: { title: '配置管理', activeMenu: '/system/oss'}
      }
    ]
  },
  {
    path: '/tool/gen-edit',
    component: Layout,
    hidden: true,
    permissions: ['tool:gen:edit'],
    children: [
      {
        path: 'index/:tableId(\\d+)',
        component: () => import('@/views/tool/gen/editTable'),
        name: 'GenEdit',
        meta: { title: '修改生成配置', activeMenu: '/tool/gen' }
      }
    ]
  }
]权限控制:
- 每个路由都指定了
permissions数组:permissions: 'system:user:edit' - 只有具有相应权限的用户才能访问
参数化路由:role/:userId(\\d+)
- 使用
:userId(\\d+)等参数化路径 - 正则表达式
\\d+限制参数为数字 - 便于在组件内通过
useRoute().params获取参数
特殊高亮:activeMenu: '/system/user'
- 使用
activeMenu指定高亮的父级菜单 - 隐藏页面访问时,保持父级菜单高亮状态:hidden: true
统一布局:
- 所有动态路由都使用
Layout组件 - 确保整体页面结构一致性
- 设置
hidden: true不在侧边栏显示
路由器实例创建
路由器配置
javascript
const router = createRouter({
  history: createWebHistory(import.meta.env.VITE_APP_CONTEXT_PATH),
  routes: constantRoutes,
  scrollBehavior(to, from, savedPosition) {
    if (savedPosition) {
      return savedPosition
    } else {
      return { top: 0 }
    }
  },
});历史模式:
- 使用
createWebHistory创建 HTML5 历史模式 VITE_APP_CONTEXT_PATH环境变量指定应用基础路径
路由注册:
- 只注册
constantRoutes作为初始路由 dynamicRoutes动态路由,在权限验证后动态添加
滚动行为:
javascript
scrollBehavior(to, from, savedPosition) {
    if (savedPosition) {
      return savedPosition
    } else {
      return { top: 0 }
    }
},- 保存滚动位置:
savedPosition记录用户滚动位置 - 新页面滚动到顶部:
{ top: 0 } - 提供良好的导航体验
src\layout
src/layout/
├── index.vue                    # 主布局容器
└── components/                  # 布局组件
    ├── index.js                 # 组件导出文件
    ├── AppMain.vue              # 主内容区域
    ├── Navbar.vue               # 顶部导航栏
    ├── Sidebar/                 # 侧边栏
    │   ├── index.vue           # 侧边栏主组件
    │   ├── Logo.vue            # Logo组件
    │   ├── Link.vue            # 侧边栏链接
    │   └── SidebarItem.vue     # 侧边栏菜单项
    ├── TagsView/               # 页面标签导航
    │   ├── index.vue          # 标签导航主组件
    │   └── ScrollPane.vue     # 滚动面板
    ├── Settings/               # 布局设置
    │   └── index.vue         # 设置面板
    ├── IframeToggle/          # 内嵌页面切换
    │   └── index.vue
    ├── InnerLink/             # 内部链接
        └── index.vue
index.vue
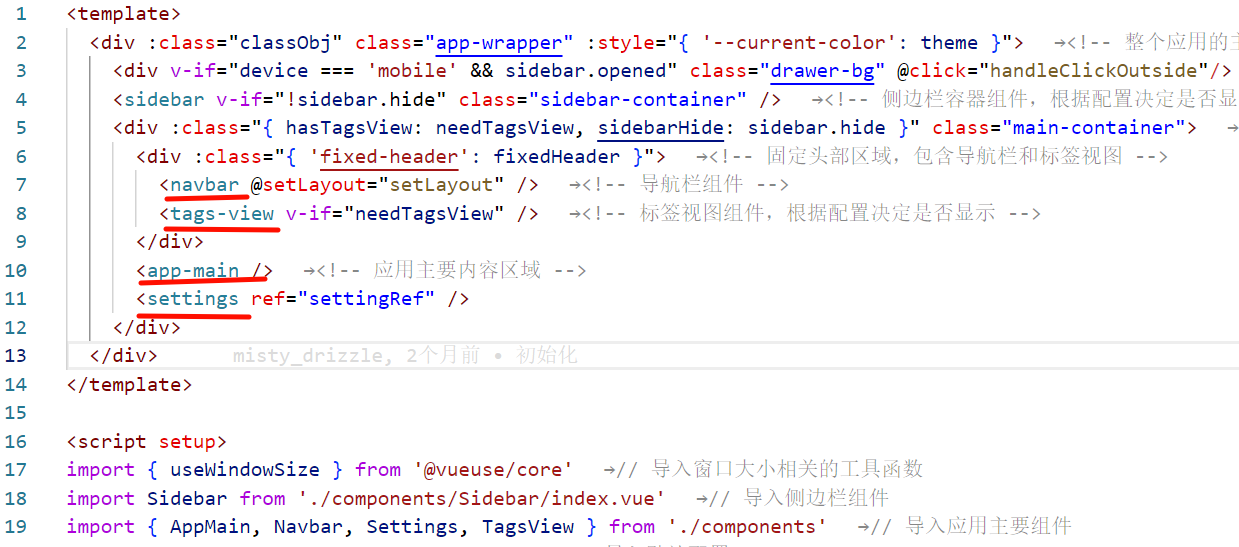
src/layout/index.vue 是整个应用的主布局组件,负责组织页面的整体结构、响应式处理和状态管理。
组件结构:
html
<template>
  <div :class="classObj" class="app-wrapper" :style="{ '--current-color': theme }">
    <!-- 移动端遮罩层 -->
    <div v-if="device === 'mobile' && sidebar.opened" class="drawer-bg" @click="handleClickOutside"/>

    <!-- 侧边栏 -->
    <sidebar v-if="!sidebar.hide" class="sidebar-container" />

    <!-- 主内容区 -->
    <div :class="{ hasTagsView: needTagsView, sidebarHide: sidebar.hide }" class="main-container">
      <!-- 固定头部区 -->
      <div :class="{ 'fixed-header': fixedHeader }">
        <navbar @setLayout="setLayout" />
        <tags-view v-if="needTagsView" />
      </div>

      <!-- 主内容 -->
      <app-main />

      <!-- 设置面板 -->
      <settings ref="settingRef" />
    </div>
  </div>
</template>
布局层级关系
app-wrapper (主容器)
├── drawer-bg (移动端遮罩层)
├── sidebar-container (侧边栏)
└── main-container (主内容区)
    ├── 固定头部区 (navbar + tags-view)
    ├── app-main (主内容)
    └── settings (设置面板)
关键状态与计算属性
状态管理集成
javascript
// 从多个store中获取状态
const settingsStore = useSettingsStore()
const theme = computed(() => settingsStore.theme);              // 主题色
const sideTheme = computed(() => settingsStore.sideTheme);      // 侧边栏主题
const sidebar = computed(() => useAppStore().sidebar);         // 侧边栏状态
const device = computed(() => useAppStore().device);          // 设备类型
const needTagsView = computed(() => settingsStore.tagsView);    // 是否需要标签视图
const fixedHeader = computed(() => settingsStore.fixedHeader);  // 是否固定头部
动态类名计算
javascript
// 动态计算容器类名,使用计算属性避免重复计算
const classObj = computed(() => ({
  hideSidebar: !sidebar.value.opened,      // 隐藏侧边栏
  openSidebar: sidebar.value.opened,        // 打开侧边栏
  withoutAnimation: sidebar.value.withoutAnimation, // 无动画
  mobile: device.value === 'mobile'         // 移动端样式
}))
窗口尺寸监听
javascript
// 使用 VueUse 获取窗口尺寸
const { width, height } = useWindowSize();
const WIDTH = 992; // 响应式断点,参考 Bootstrap

// 监听窗口尺寸变化,实现响应式布局
watchEffect(() => {
  if (device.value === 'mobile' && sidebar.value.opened) {
    useAppStore().closeSideBar({ withoutAnimation: false })
  }
  if (width.value - 1 < WIDTH) {
    useAppStore().toggleDevice('mobile')
    useAppStore().closeSideBar({ withoutAnimation: true })
  } else {
    useAppStore().toggleDevice('desktop')
  }
})
响应式布局机制
断点设计
javascript
// 响应式断点逻辑
const WIDTH = 992; // 992px 是桌面/移动端分界点

// 窗口宽度小于 992px 时
if (width.value - 1 < WIDTH) {
  useAppStore().toggleDevice('mobile')     // 切换到移动端模式
  useAppStore().closeSideBar({ withoutAnimation: true }) // 无动画关闭侧边栏
} else {
  useAppStore().toggleDevice('desktop')   // 切换到桌面模式
}
移动端适配
javascript
<!-- 移动端遮罩层 -->
<div v-if="device === 'mobile' && sidebar.opened" class="drawer-bg" @click="handleClickOutside"/>

<!-- 遮罩层点击事件 -->
function handleClickOutside() {
  useAppStore().closeSideBar({ withoutAnimation: false })
}
样式适配
css
  @import "@/assets/styles/mixin.scss";

.app-wrapper {
  @include clearfix;
  position: relative;
  height: 100%;
  width: 100%;

  // 移动端特殊样式
  &.mobile.openSidebar {
    position: fixed;
    top: 0;
  }
}

.drawer-bg {
  background: #000;
  opacity: 0.3;
  width: 100%;
  top: 0;
  height: 100%;
  position: absolute;
  z-index: 999;
}
侧边栏控制机制
侧边栏状态
javascript
// 侧边栏显示状态控制
const sidebar = computed(() => useAppStore().sidebar);
// sidebar 对象包含:
// - opened: boolean          // 是否打开
// - withoutAnimation: boolean // 是否关闭动画
条件渲染
javascript
<!-- 侧边栏条件渲染 -->
<sidebar v-if="!sidebar.hide" class="sidebar-container" />

<!-- 主内容区类名控制 -->
<div :class="{ hasTagsView: needTagsView, sidebarHide: sidebar.hide }" class="main-container">
动态样式
css
 @import "@/assets/styles/variables.module.scss";
// 固定头部样式动态调整
.fixed-header {
  position: fixed;
  top: 0;
  right: 0;
  z-index: 9;
  width: calc(100% - #{$base-sidebar-width}); // 减去侧边栏宽度
  transition: width 0.28s;
}

// 隐藏侧边栏时的样式调整
.hideSidebar .fixed-header {
  width: calc(100% - 54px); // 侧边栏折叠时的宽度
}

// 完全隐藏侧边栏时的样式
.sidebarHide .fixed-header {
  width: 100%;
}

// 移动端样式
.mobile .fixed-header {
  width: 100%;
}
主题系统集成
主题色应用
html
<!-- 在根元素应用主题色变量 -->
<div :class="classObj" class="app-wrapper" :style="{ '--current-color': theme }">
固定头部机制
固定头部配置
javascript
const fixedHeader = computed(() => settingsStore.fixedHeader);HTML
html
   <div :class="{ 'fixed-header': fixedHeader }">
        <navbar @setLayout="setLayout" />
        <tags-view v-if="needTagsView" />
      </div>
头部样式适配
css
.fixed-header {
  position: fixed;
  top: 0;
  right: 0;
  z-index: 9;
  width: calc(100% - #{$base-sidebar-width});
  transition: width 0.28s;
}

.hideSidebar .fixed-header {
  width: calc(100% - 54px);
}

.sidebarHide .fixed-header {
  width: 100%;
}

.mobile .fixed-header {
  width: 100%;
}
设置面板集成
设置面板引用
javascript
const settingRef = ref(null);
function setLayout() {
  settingRef.value.openSetting();
}
html
<!-- 设置面板组件 -->
<settings ref="settingRef" />
设置面板触发
src\layout\components\index.js
javascript
export { default as Settings } from './Settings'src\layout\components\Settings\index.vue
components\index.js
一个简洁但重要的模块导出文件
文件内容:
javascript
// 导出 AppMain 组件
export { default as AppMain } from './AppMain'

// 导出 Navbar 组件
export { default as Navbar } from './Navbar'

// 导出 Settings 组件
export { default as Settings } from './Settings'

// 导出 TagsView 组件(注意路径包含子目录)
export { default as TagsView } from './TagsView/index.vue'
该文件使用 ES6 的命名导出语法,将各个布局组件统一导出
在src\layout\index.vue处使用
components\AppMain.vue
布局系统中的核心组件之一,负责渲染应用的主内容区域
组件结构
javascript
<template>
  <section class="app-main">
    <router-view v-slot="{ Component, route }">
      <transition name="fade-transform" mode="out-in">
        <keep-alive :include="tagsViewStore.cachedViews">
          <component v-if="!route.meta.link" :is="Component" :key="route.path"/>
        </keep-alive>
      </transition>
    </router-view>
    <iframe-toggle />
  </section>
</template>
html
<router-view v-slot="{ Component, route }">
  <!-- 内容渲染 -->
</router-view>
核心功能:
路由渲染机制
html
<router-view v-slot="{ Component, route }">
  <!-- 内容渲染 -->
</router-view>
组件使用了 Vue Router 的作用域插槽语法:
- Component:当前路由匹配的组件
- route:当前路由对象
条件渲染逻辑
html
<component v-if="!route.meta.link" :is="Component" :key="route.path"/>- 当
route.meta.link不存在时,渲染路由组件 - 使用
:is动态绑定组件 - 使用
:key确保组件正确更新
页面缓存机制
html
<keep-alive :include="tagsViewStore.cachedViews">
        ...
</keep-alive>- include 属性:只有匹配的组件会被缓存
- 数据来源 :
tagsViewStore.cachedViews来自状态管理 - 动态缓存:根据用户访问行为动态更新缓存列表
缓存管理
javascript
import useTagsViewStore from '@/store/modules/tagsView'

const tagsViewStore = useTagsViewStore()
导入src\store\modules\tagsView.js
javascript
// 在其他组件中管理缓存
// 添加到缓存
tagsViewStore.addCachedView(view)

// 从缓存中移除
tagsViewStore.delCachedView(view)
过渡动画系统
html
   <transition name="fade-transform" mode="out-in">
      ....
</transition>- name :
fade-transform定义了动画类名 - mode :
out-in确保先退出再进入,避免动画冲突
src\assets\styles\transition.scss
css
// 在全局样式中定义
.fade-transform-leave-active,
.fade-transform-enter-active {
  transition: all .5s;
}

.fade-transform-enter-from {
  opacity: 0;
  transform: translateX(-30px);
}

.fade-transform-leave-to {
  opacity: 0;
  transform: translateX(30px);
}
内嵌页面支持
css
<iframe-toggle />样式
css
.app-main {
  /* 50= navbar  50  */
  min-height: calc(100vh - 50px);
  width: 100%;
  position: relative;
  overflow: hidden;
}
固定头部适配
css
.fixed-header + .app-main {
  padding-top: 50px;
}
标签视图适配
css
.hasTagsView {
  .app-main {
    /* 84 = navbar + tags-view = 50 + 34 */
    min-height: calc(100vh - 84px);
  }

  .fixed-header + .app-main {
    padding-top: 84px;
  }
}
全局样式调整
css
// 修复弹窗样式
.el-popup-parent--hidden {
  .fixed-header {
    padding-right: 6px;
  }
}

// 自定义滚动条样式
::-webkit-scrollbar {
  width: 6px;
  height: 6px;
}

::-webkit-scrollbar-track {
  background-color: #f1f1f1;
}

::-webkit-scrollbar-thumb {
  background-color: #c0c0c0;
  border-radius: 3px;
}
components\Navbar.vue
组件结构
html
<template>
  <div class="navbar">
    <hamburger id="hamburger-container" :is-active="appStore.sidebar.opened" class="hamburger-container" @toggleClick="toggleSideBar" />
    <breadcrumb id="breadcrumb-container" class="breadcrumb-container" v-if="!settingsStore.topNav" />
    <top-nav id="topmenu-container" class="topmenu-container" v-if="settingsStore.topNav" />

    <div class="right-menu">
      <template v-if="appStore.device !== 'mobile'">
        <el-tooltip content="大屏" effect="dark" placement="bottom">
          <el-icon class="right-menu-item hover-effect" size="24px" style="margin-top: 12px;margin-right : 12px;"
            @click=" goToDashboard">
            <TrendCharts />
          </el-icon>
        </el-tooltip>
        <header-search id="header-search" class="right-menu-item" />

        <el-tooltip content="源码地址" effect="dark" placement="bottom">
          <ruo-yi-git id="ruoyi-git" class="right-menu-item hover-effect" />
        </el-tooltip>

        <el-tooltip content="文档地址" effect="dark" placement="bottom">
          <ruo-yi-doc id="ruoyi-doc" class="right-menu-item hover-effect" />
        </el-tooltip>

        <screenfull id="screenfull" class="right-menu-item hover-effect" />

        <el-tooltip content="布局大小" effect="dark" placement="bottom">
          <size-select id="size-select" class="right-menu-item hover-effect" />
        </el-tooltip>
      </template>
      <div class="avatar-container">
        <el-dropdown @command="handleCommand" class="right-menu-item hover-effect" trigger="click">
          <div class="avatar-wrapper">
            <img :src="userStore.avatar" class="user-avatar" />
            <el-icon><caret-bottom /></el-icon>
          </div>
          <template #dropdown>
            <el-dropdown-menu>
              <router-link to="/user/profile">
                <el-dropdown-item>个人中心</el-dropdown-item>
              </router-link>
              <el-dropdown-item command="setLayout" v-if="settingsStore.showSettings">
                <span>布局设置</span>
              </el-dropdown-item>
              <el-dropdown-item divided command="logout">
                <span>退出登录</span>
              </el-dropdown-item>
            </el-dropdown-menu>
          </template>
        </el-dropdown>
      </div>
    </div>
  </div>
</template>
主要功能区域
左侧区域
-
汉堡菜单按钮:用于切换侧边栏的展开/收起状态
html<hamburger id="hamburger-container" :is-active="appStore.sidebar.opened" class="hamburger-container" @toggleClick="toggleSideBar" /> -
面包屑导航 :显示当前页面路径(当
settingsStore.topNav为 false 时显示)html<breadcrumb id="breadcrumb-container" class="breadcrumb-container" v-if="!settingsStore.topNav" /> -
顶部导航菜单 :显示顶部菜单(当
settingsStore.topNav为 true 时显示)html<top-nav id="topmenu-container" class="topmenu-container" v-if="settingsStore.topNav" />
右侧功能区域(桌面版)
在桌面设备上( appStore.device !== 'mobile' ),右侧包含以下功能:
-
大屏按钮:点击跳转到仪表盘页面
html<el-icon class="right-menu-item hover-effect" size="24px" style="margin-top: 12px;margin-right : 12px;" @click=" goToDashboard"> <TrendCharts /> </el-icon> -
搜索功能 :
header-search组件提供全局搜索
html
<header-search id="header-search" class="right-menu-item" />- 源码地址:链接到项目源码仓库
html
<el-tooltip content="源码地址" effect="dark" placement="bottom">
<ruo-yi-git id="ruoyi-git" class="right-menu-item hover-effect" />
</el-tooltip>- 文档地址:链接到项目文档
html
<el-tooltip content="文档地址" effect="dark" placement="bottom">
<ruo-yi-doc id="ruoyi-doc" class="right-menu-item hover-effect" />
</el-tooltip>- 全屏按钮 :
screenfull组件提供全屏功能
html
<screenfull id="screenfull" class="right-menu-item hover-effect" />- 布局大小选择 :
size-select组件用于调整界面元素大小
html
<el-tooltip content="布局大小" effect="dark" placement="bottom">
<size-select id="size-select" class="right-menu-item hover-effect" />
</el-tooltip>用户信息区域
html
<div class="avatar-container">
<el-dropdown @command="handleCommand" class="right-menu-item hover-effect" trigger="click">
<div class="avatar-wrapper">
<img :src="userStore.avatar" class="user-avatar" />
<el-icon><caret-bottom /></el-icon>
</div>
<!-- 下拉菜单 -->
</el-dropdown>
</div>- 个人中心(链接到
/user/profile)
html
<router-link to="/user/profile">
<el-dropdown-item>个人中心</el-dropdown-item>
</router-link>- 布局设置(如果
settingsStore.showSettings为 true)
html
<el-dropdown-item command="setLayout" v-if="settingsStore.showSettings">
<span>布局设置</span>
</el-dropdown-item>- 退出登录
html
<el-dropdown-item divided command="logout">
<span>退出登录</span>
</el-dropdown-item>核心功能实现
状态管理
组件使用了 Pinia store 进行状态管理
appStore:管理应用级状态(如侧边栏状态)
javascript
const appStore = useAppStore()
function toggleSideBar() {
appStore.toggleSideBar()
}
html
<hamburger id="hamburger-container" :is-active="appStore.sidebar.opened"
           class="hamburger-container" @toggleClick="toggleSideBar" />
<div class="right-menu">
<template v-if="appStore.device !== 'mobile'">
</template>
</div>userStore:管理用户信息
javascript
const userStore = useUserStore()
function logout() {
ElMessageBox.confirm('确定注销并退出系统吗?', '提示', {
confirmButtonText: '确定',
cancelButtonText: '取消',
type: 'warning'
}).then(() => {
userStore.logOut().then(() => {
location.href = import.meta.env.VITE_APP_CONTEXT_PATH + 'index';
})
}).catch(() => { });
}
html
<div class="avatar-wrapper">
<img :src="userStore.avatar" class="user-avatar" />
</div>settingsStore:管理系统设置
javascript
const settingsStore = useSettingsStore()
javascript
<breadcrumb id="breadcrumb-container" class="breadcrumb-container"
            v-if="!settingsStore.topNav" />
<top-nav id="topmenu-container" class="topmenu-container"
         v-if="settingsStore.topNav" />
<div class="avatar-container">
<el-dropdown @command="handleCommand" class="right-menu-item hover-effect" trigger="click">
<template #dropdown>
<el-dropdown-menu>
              <el-dropdown-item command="setLayout" v-if="settingsStore.showSettings">
                <span>布局设置</span>
              </el-dropdown-item>
</template>
</el-dropdown>
</div>侧边栏切换
javascript
function toggleSideBar() {
  appStore.toggleSideBar()
}
退出登录功能
javascript
function logout() {
  ElMessageBox.confirm('确定注销并退出系统吗?', '提示', {
    confirmButtonText: '确定',
    cancelButtonText: '取消',
    type: 'warning'
  }).then(() => {
    userStore.logOut().then(() => {
      location.href = import.meta.env.VITE_APP_CONTEXT_PATH + 'index';
    })
  })
}
退出时会显示确认对话框,确认后调用 userStore.logOut() 方法并重定向到首页.
跳转到大屏
javascript
const goToDashboard = () => {
  router.push('/dashboard');
};
样式设计
导航栏采用固定高度(50px),白色背景,带有轻微阴影效果。右侧菜单项使用 hover-effect 类实现悬停效果,用户头像使用圆角设计。
css
<style lang='scss' scoped>
.navbar {
  height: 50px;
  overflow: hidden;
  position: relative;
  background: #fff;
  box-shadow: 0 1px 4px rgba(0, 21, 41, 0.08);

  .hamburger-container {
    line-height: 46px;
    height: 100%;
    float: left;
    cursor: pointer;
    transition: background 0.3s;
    -webkit-tap-highlight-color: transparent;

    &:hover {
      background: rgba(0, 0, 0, 0.025);
    }
  }

  .breadcrumb-container {
    float: left;
  }

  .topmenu-container {
    position: absolute;
    left: 50px;
  }

  .errLog-container {
    display: inline-block;
    vertical-align: top;
  }

  .right-menu {
    float: right;
    height: 100%;
    line-height: 50px;
    display: flex;

    &:focus {
      outline: none;
    }

    .right-menu-item {
      display: inline-block;
      padding: 0 8px;
      height: 100%;
      font-size: 18px;
      color: #5a5e66;
      vertical-align: text-bottom;

      &.hover-effect {
        cursor: pointer;
        transition: background 0.3s;

        &:hover {
          background: rgba(0, 0, 0, 0.025);
        }
      }
    }

    .avatar-container {
      margin-right: 40px;

      .avatar-wrapper {
        margin-top: 5px;
        position: relative;

        .user-avatar {
          cursor: pointer;
          width: 40px;
          height: 40px;
          border-radius: 10px;
        }

        i {
          cursor: pointer;
          position: absolute;
          right: -20px;
          top: 25px;
          font-size: 12px;
        }
      }
    }
  }
}
</style>
components\Sidebar
index.vue
侧边栏的主要组件,负责渲染系统的导航菜单。
组件结构
html
<template>
  <div :class="{ 'has-logo': showLogo }" :style="{ backgroundColor: sideTheme === 'theme-dark' ? variables.menuBackground : variables.menuLightBackground }">
    <logo v-if="showLogo" :collapse="isCollapse" />
    <el-scrollbar :class="sideTheme" wrap-class="scrollbar-wrapper">
      <el-menu
        :default-active="activeMenu"
        :collapse="isCollapse"
        :background-color="sideTheme === 'theme-dark' ? variables.menuBackground : variables.menuLightBackground"
        :text-color="sideTheme === 'theme-dark' ? variables.menuColor : variables.menuLightColor"
        :unique-opened="true"
        :active-text-color="theme"
        :collapse-transition="false"
        mode="vertical"
      >
        <sidebar-item
          v-for="(route, index) in sidebarRouters"
          :key="route.path + index"
          :item="route"
          :base-path="route.path"
        />
      </el-menu>
    </el-scrollbar>
  </div>
</template>
主要组成部分
Logo 组件
html
<logo v-if="showLogo" :collapse="isCollapse" />- 条件渲染:只有当
showLogo为 true 时才显示 - 接收
collapse属性控制 Logo 的显示状态(展开/收起)
菜单区域
html
<el-scrollbar :class="sideTheme" wrap-class="scrollbar-wrapper">
      <el-menu
        :default-active="activeMenu"
        :collapse="isCollapse"
        :background-color="sideTheme === 'theme-dark' ? variables.menuBackground : variables.menuLightBackground"
        :text-color="sideTheme === 'theme-dark' ? variables.menuColor : variables.menuLightColor"
        :unique-opened="true"
        :active-text-color="theme"
        :collapse-transition="false"
        mode="vertical"
      >
        <sidebar-item
          v-for="(route, index) in sidebarRouters"
          :key="route.path + index"
          :item="route"
          :base-path="route.path"
        />
      </el-menu>
    </el-scrollbar>
菜单区域使用 Element Plus 的 el-menu 组件构建,包含以下特性:
- 滚动条 :使用
el-scrollbar包装,使菜单在内容过多时可以滚动 - 主题适配 :根据
sideTheme的值应用不同的背景色和文字颜色 - 折叠状态 :根据
isCollapse控制菜单是否折叠 - 唯一展开 :
unique-opened="true"确保只有一个子菜单展开 - 垂直模式 :
mode="vertical"设置为垂直菜单
状态管理
使用了多个计算属性来响应式地获取状态
javascript
// 获取侧边栏路由
const sidebarRouters = computed(() => permissionStore.sidebarRouters);

// 是否显示Logo
const showLogo = computed(() => settingsStore.sidebarLogo);

// 侧边栏主题
const sideTheme = computed(() => settingsStore.sideTheme);

// 系统主题色
const theme = computed(() => settingsStore.theme);

// 侧边栏是否折叠
const isCollapse = computed(() => !appStore.sidebar.opened);
当前激活菜单
javascript
const activeMenu = computed(() => {
  const { meta, path } = route;
  // 如果设置了meta.activeMenu,侧边栏将高亮设置的路径
  if (meta.activeMenu) {
    return meta.activeMenu;
  }
  return path;
})- 首先检查路由的
meta.activeMenu属性 - 如果没有设置,则使用当前路由的路径
样式
javascript
import variables from '@/assets/styles/variables.module.scss'通过 sideTheme 计算属性,组件可以动态切换主题:
theme-dark:深色主题theme-light:浅色主题
html
:style="{ backgroundColor: sideTheme === 'theme-dark' ? variables.menuBackground : variables.menuLightBackground }"
:background-color="sideTheme === 'theme-dark' ? variables.menuBackground : variables.menuLightBackground"
:text-color="sideTheme === 'theme-dark' ? variables.menuColor : variables.menuLightColor"
子组件
- Logo 组件:显示系统 Logo
- SidebarItem 组件:递归渲染菜单项,可以处理多级菜单
javascript
import Logo from './Logo'
import SidebarItem from './SidebarItem'
在src\layout\index.vue 处使用
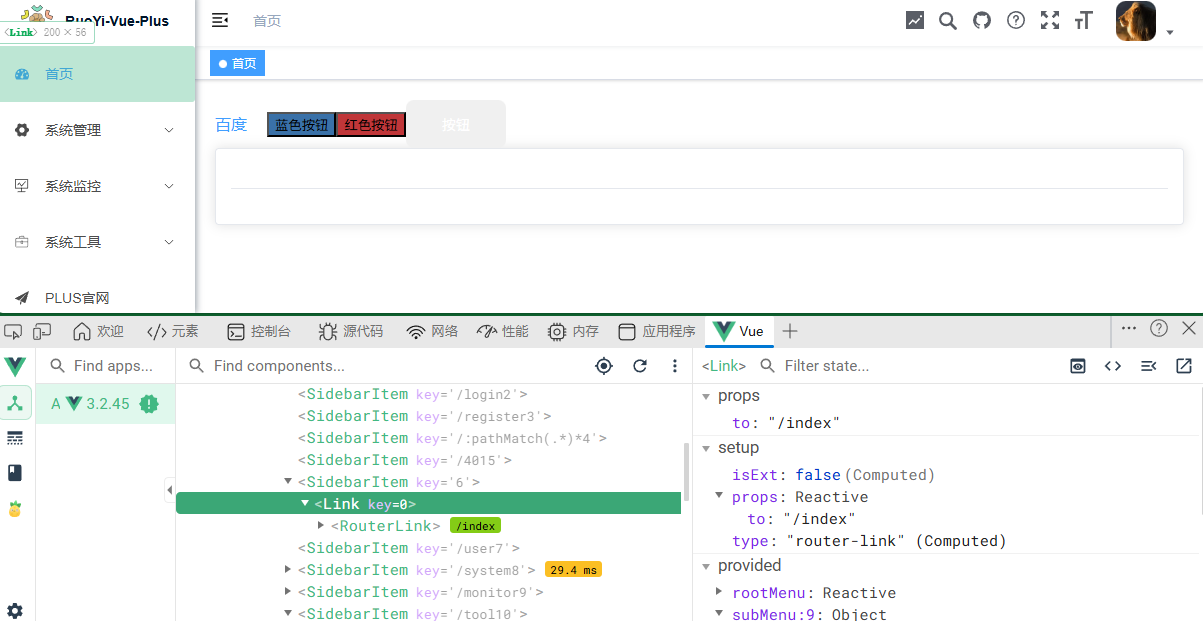
Link.vue
组件结构
html
<template>
  <component :is="type" v-bind="linkProps()">
    <slot />
  </component>
</template>
组件属性
javascript
const props = defineProps({
  to: {
    type: [String, Object],
    required: true
  }
})
核心逻辑
判断是否为外部链接:
javascript
import { isExternal } from '@/utils/validate'

const isExt = computed(() => {
  return isExternal(props.to)
})
src\utils\validate.js
javascript
/**
 * 判断path是否为外链
 * @param {string} path
 * @returns {Boolean}
 */
 export function isExternal(path) {
  return /^(https?:|mailto:|tel:)/.test(path)
}
动态决定组件类型:
javascript
const type = computed(() => {
  if (isExt.value) {
    return 'a'
  }
  return 'router-link'
})- 外部链接:返回
'a'(普通链接) - 内部路由:返回
'router-link'(Vue Router 路由链接)
动态设置组件属性:
javascript
function linkProps() {
  if (isExt.value) {
    return {
      href: props.to,
      target: '_blank',
      rel: 'noopener'
    }
  }
  return {
    to: props.to
  }
}外部链接属性:
href:设置链接地址target="_blank":在新标签页打开rel="noopener":安全属性,防止新页面访问原页面的 window 对象
内部路由属性:
to:传递给router-link的路由地址
在src\layout\components\Sidebar\SidebarItem.vue 处使用
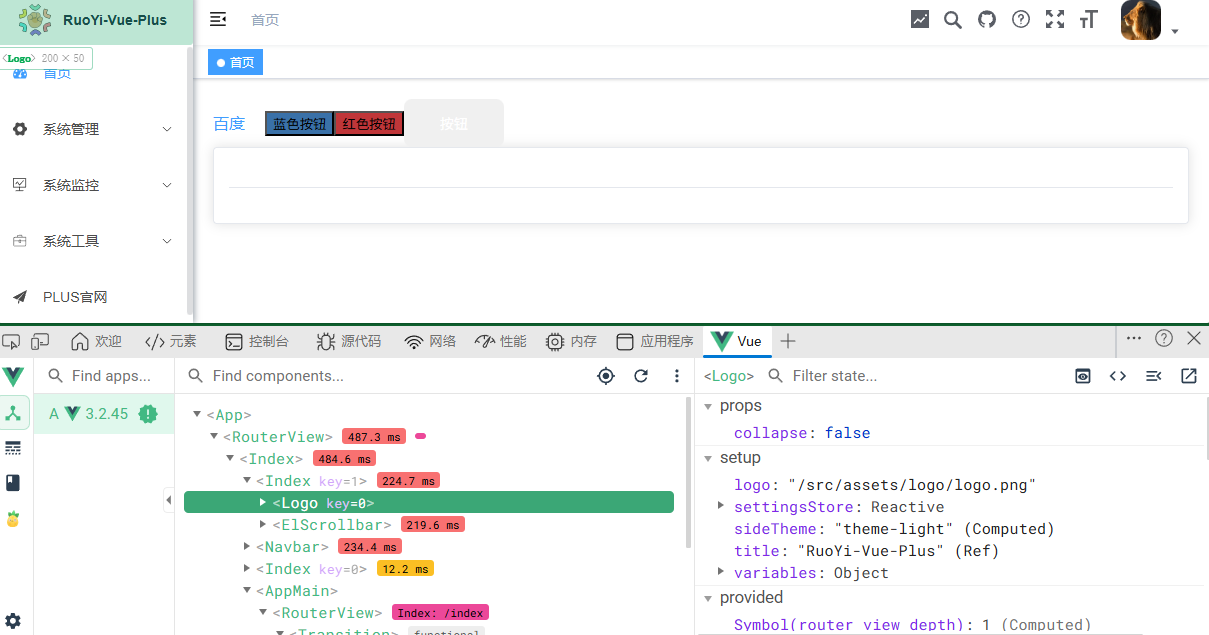
Logo.vue
组件结构
html
<template>
  <div class="sidebar-logo-container" :class="{ 'collapse': collapse }" :style="{ backgroundColor: sideTheme === 'theme-dark' ? variables.menuBackground : variables.menuLightBackground }">
    <transition name="sidebarLogoFade">
      <router-link v-if="collapse" key="collapse" class="sidebar-logo-link" to="/">
        <img v-if="logo" :src="logo" class="sidebar-logo" />
        <h1 v-else class="sidebar-title" :style="{ color: sideTheme === 'theme-dark' ? variables.logoTitleColor : variables.logoLightTitleColor }">{{ title }}</h1>
      </router-link>
      <router-link v-else key="expand" class="sidebar-logo-link" to="/">
        <img v-if="logo" :src="logo" class="sidebar-logo" />
        <h1 class="sidebar-title" :style="{ color: sideTheme === 'theme-dark' ? variables.logoTitleColor : variables.logoLightTitleColor }">{{ title }}</h1>
      </router-link>
    </transition>
  </div>
</template>
响应式 Logo 显示
组件根据 collapse 属性切换显示状态
html
<router-link v-if="collapse" key="collapse" class="sidebar-logo-link" to="/">
  <img v-if="logo" :src="logo" class="sidebar-logo" />
  <h1 v-else class="sidebar-title" :style="{ color: ... }">{{ title }}</h1>
</router-link>
<router-link v-else key="expand" class="sidebar-logo-link" to="/">
  <img v-if="logo" :src="logo" class="sidebar-logo" />
  <h1 class="sidebar-title" :style="{ color: ... }">{{ title }}</h1>
</router-link>-
折叠状态:只显示 Logo 图片或标题
-
展开状态:同时显示 Logo 图片和标题
-
使用
key属性确保 Vue 能正确处理两个router-link元素的切换
导航链接
html
<router-link class="sidebar-logo-link" to="/">
  <!-- Logo 内容 -->
</router-link>
整个 Logo 区域是一个链接,点击后会导航到首页(根路径 / ),这是常见的网站 Logo 行为。
过渡动画
html
<transition name="sidebarLogoFade">
    ...
</transition>
CSS
css
.sidebarLogoFade-enter-active { /* 定义侧边栏logo淡入动画的进入过渡效果,持续时间为1.5秒 */
  transition: opacity 1.5s;
}

.sidebarLogoFade-enter, /* 定义侧边栏logo淡入动画的进入和离开状态,透明度为0 */
.sidebarLogoFade-leave-to {
  opacity: 0;
}
主题适配
css
<div :style="{ backgroundColor: sideTheme === 'theme-dark' ? variables.menuBackground : variables.menuLightBackground }">
  <h1 :style="{ color: sideTheme === 'theme-dark' ? variables.logoTitleColor : variables.logoLightTitleColor }">
    {{ title }}
  </h1>
</div>
使用 SCSS 变量来控制样式,支持深色和浅色主题。
javascript
import variables from '@/assets/styles/variables.module.scss'组件属性
javascript
defineProps({ // 定义组件属性
  collapse: { // 侧边栏折叠状态,必填属性
    type: Boolean,
    required: true
  }
})
组件状态
javascript
import logo from '@/assets/logo/logo.png'
import useSettingsStore from '@/store/modules/settings'

const title = ref('RuoYi-Vue-Plus');
const settingsStore = useSettingsStore();
const sideTheme = computed(() => settingsStore.sideTheme);title:系统标题,默认为 'RuoYi-Vue-Plus'logo:从资源目录导入的 Logo 图片sideTheme:从 Pinia store 获取当前主题设置
样式设计
css
.sidebar-logo-container {
  position: relative;
  width: 100%;
  height: 50px;
  line-height: 50px;
  background: #2b2f3a;
  text-align: center;
  overflow: hidden;

  & .sidebar-logo-link {
    height: 100%;
    width: 100%;

    & .sidebar-logo {
      width: 32px;
      height: 32px;
      vertical-align: middle;
      margin-right: 12px;
    }

    & .sidebar-title {
      display: inline-block;
      margin: 0;
      color: #fff;
      font-weight: 600;
      line-height: 50px;
      font-size: 14px;
      font-family: Avenir, Helvetica Neue, Arial, Helvetica, sans-serif;
      vertical-align: middle;
    }
  }

  &.collapse {
    .sidebar-logo {
      margin-right: 0px;
    }
  }
}- 固定高度:Logo 容器高度固定为 50px
- 垂直居中 :使用
line-height和vertical-align实现内容垂直居中 - 响应式布局:折叠状态下移除 Logo 图片的右边距
- 字体设置:使用现代化的字体族,提供更好的可读性
在src\layout\components\Sidebar\index.vue 处使用
SidebarItem.vue
组件结构
html
<template>
  <div v-if="!item.hidden">
    <template v-if="hasOneShowingChild(item.children, item) && (!onlyOneChild.children || onlyOneChild.noShowingChildren) && !item.alwaysShow">
      <app-link v-if="onlyOneChild.meta" :to="resolvePath(onlyOneChild.path, onlyOneChild.query)">
        <el-menu-item :index="resolvePath(onlyOneChild.path)" :class="{ 'submenu-title-noDropdown': !isNest }">
          <svg-icon :icon-class="onlyOneChild.meta.icon || (item.meta && item.meta.icon)"/>
          <template #title><span class="menu-title" :title="hasTitle(onlyOneChild.meta.title)">{{ onlyOneChild.meta.title }}</span></template>
        </el-menu-item>
      </app-link>
    </template>

    <el-sub-menu v-else ref="subMenu" :index="resolvePath(item.path)" popper-append-to-body>
      <template v-if="item.meta" #title>
        <svg-icon :icon-class="item.meta && item.meta.icon" />
        <span class="menu-title" :title="hasTitle(item.meta.title)">{{ item.meta.title }}</span>
      </template>

      <sidebar-item
        v-for="child in item.children"
        :key="child.path"
        :is-nest="true"
        :item="child"
        :base-path="resolvePath(child.path)"
        class="nest-menu"
      />
    </el-sub-menu>
  </div>
</template>
单个菜单项渲染:
html
<template v-if="hasOneShowingChild(item.children, item) && (!onlyOneChild.children || onlyOneChild.noShowingChildren) && !item.alwaysShow">
  <app-link v-if="onlyOneChild.meta" :to="resolvePath(onlyOneChild.path, onlyOneChild.query)">
    <el-menu-item :index="resolvePath(onlyOneChild.path)" :class="{ 'submenu-title-noDropdown': !isNest }">
      <svg-icon :icon-class="onlyOneChild.meta.icon || (item.meta && item.meta.icon)"/>
      <template #title>
        <span class="menu-title" :title="hasTitle(onlyOneChild.meta.title)">{{ onlyOneChild.meta.title }}</span>
      </template>
    </el-menu-item>
  </app-link>
</template>
多级菜单渲染:
html
<el-sub-menu v-else ref="subMenu" :index="resolvePath(item.path)" popper-append-to-body>
  <template v-if="item.meta" #title>
    <svg-icon :icon-class="item.meta && item.meta.icon" />
    <span class="menu-title" :title="hasTitle(item.meta.title)">{{ item.meta.title }}</span>
  </template>

  <sidebar-item
    v-for="child in item.children"
    :key="child.path"
    :is-nest="true"
    :item="child"
    :base-path="resolvePath(child.path)"
    class="nest-menu"
  />
</el-sub-menu>-
使用 Element Plus 的
el-sub-menu组件 -
递归调用自身渲染子菜单项
-
添加
popper-append-to-body属性确保子菜单正确显示
递归设计
组件通过递归调用自身实现多级菜单的渲染:
html
<sidebar-item
  v-for="child in item.children"
  :key="child.path"
  :is-nest="true"
  :item="child"
  :base-path="resolvePath(child.path)"
  class="nest-menu"
/>
每次递归时:
- 传递子菜单项作为新的
item - 设置
is-nest为 true,表示嵌套菜单 - 更新
base-path为当前解析的路径 - 添加
nest-menu类用于样式控制
图标显示
html
<svg-icon :icon-class="onlyOneChild.meta.icon || (item.meta && item.meta.icon)"/>优先使用子菜单项的图标,如果子菜单项没有图标,则使用父菜单项的图标。
组件属性
javascript
const props = defineProps({
  // 路由对象
  item: {
    type: Object,
    required: true
  },
  // 是否为嵌套菜单
  isNest: {
    type: Boolean,
    default: false
  },
  // 基础路径
  basePath: {
    type: String,
    default: ''
  }
})
核心方法
判断是否只有一个可显示的子菜单
javascript
function hasOneShowingChild(children = [], parent) {
  if (!children) { // 如果children不存在,则初始化一个空数组
    children = [];
  }
  const showingChildren = children.filter(item => { // 过滤出需要显示的子路由项
    if (item.hidden) {
      return false
    } else {
      // Temp set(will be used if only has one showing child)
      onlyOneChild.value = item
      return true
    }
  })

  // When there is only one child router, the child router is displayed by default
  if (showingChildren.length === 1) { // 如果只有一个子路由,则直接显示该子路由
    return true
  }

  // Show parent if there are no child router to display
  if (showingChildren.length === 0) { // 判断子菜单是否为空
    onlyOneChild.value = { ...parent, path: '', noShowingChildren: true }
    return true
  }

  return false
};- 过滤出所有不隐藏的子菜单
- 如果只有一个可显示的子菜单,返回 true
- 如果没有可显示的子菜单,将父菜单作为子菜单显示,返回 true
- 其他情况返回 false
解析路径
javascript
function resolvePath(routePath, routeQuery) {
  if (isExternal(routePath)) {
    return routePath
  }
  if (isExternal(props.basePath)) {
    return props.basePath
  }
  if (routeQuery) {
    let query = JSON.parse(routeQuery);
    return { path: getNormalPath(props.basePath + '/' + routePath), query: query }
  }
  return getNormalPath(props.basePath + '/' + routePath)
}
src\utils\validate.js
javascript
/**
 * 判断path是否为外链
 * @param {string} path
 * @returns {Boolean}
 */
 export function isExternal(path) {
  return /^(https?:|mailto:|tel:)/.test(path)
}- 如果是外部链接,直接返回
- 如果基础路径是外部链接,直接返回基础路径
- 如果有查询参数,构造包含查询参数的路由对象
- 否则,返回拼接后的路径
处理长标题
javascript
function hasTitle(title){
  if (title.length > 5) {
    return title;
  } else {
    return "";
  }
}
当标题超过5个字符时,返回标题作为 title 属性值,用于鼠标悬停时显示完整标题
在 src\layout\components\Sidebar\index.vue 处使用

components\TagsView
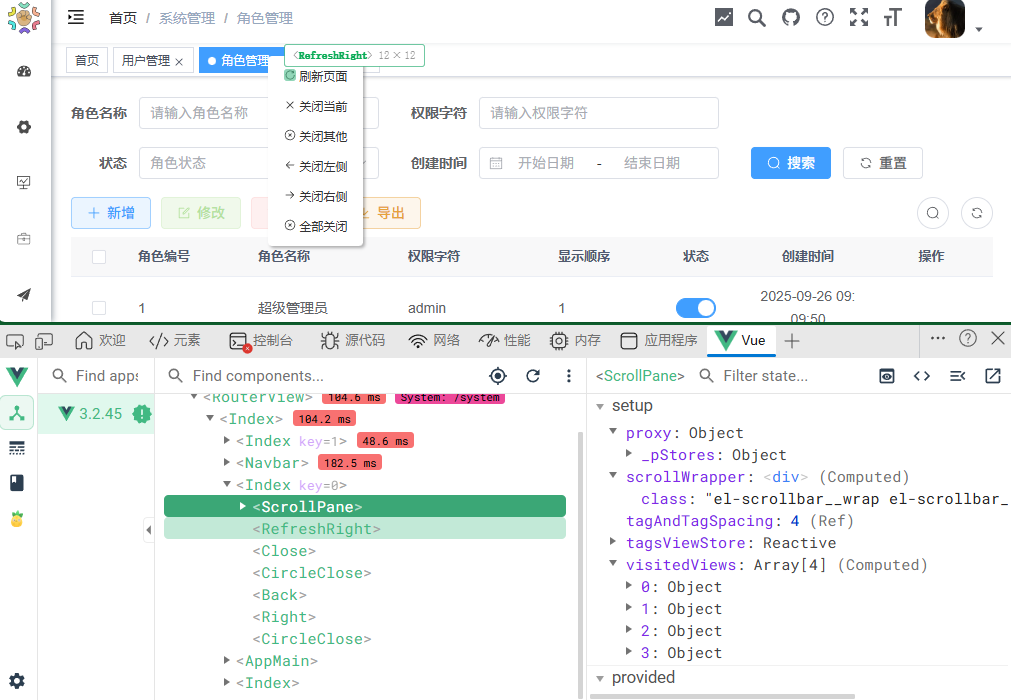
index.vue
标签页导航组件
组件结构
html
<template>
  <div id="tags-view-container" class="tags-view-container">
    <scroll-pane ref="scrollPaneRef" class="tags-view-wrapper" @scroll="handleScroll">
      <router-link
        v-for="tag in visitedViews"
        :key="tag.path"
        :data-path="tag.path"
        :class="isActive(tag) ? 'active' : ''"
        :to="{ path: tag.path, query: tag.query, fullPath: tag.fullPath }"
        class="tags-view-item"
        :style="activeStyle(tag)"
        @click.middle="!isAffix(tag) ? closeSelectedTag(tag) : ''"
        @contextmenu.prevent="openMenu(tag, $event)"
      >
        {{ tag.title }}
        <span v-if="!isAffix(tag)" @click.prevent.stop="closeSelectedTag(tag)">
          <close class="el-icon-close" style="width: 1em; height: 1em;vertical-align: middle;" />
        </span>
      </router-link>
    </scroll-pane>
    <ul v-show="visible" :style="{ left: left + 'px', top: top + 'px' }" class="contextmenu">
      <li @click="refreshSelectedTag(selectedTag)">
        <refresh-right style="width: 1em; height: 1em;" /> 刷新页面
      </li>
      <li v-if="!isAffix(selectedTag)" @click="closeSelectedTag(selectedTag)">
        <close style="width: 1em; height: 1em;" /> 关闭当前
      </li>
      <li @click="closeOthersTags">
        <circle-close style="width: 1em; height: 1em;" /> 关闭其他
      </li>
      <li v-if="!isFirstView()" @click="closeLeftTags">
        <back style="width: 1em; height: 1em;" /> 关闭左侧
      </li>
      <li v-if="!isLastView()" @click="closeRightTags">
        <right style="width: 1em; height: 1em;" /> 关闭右侧
      </li>
      <li @click="closeAllTags(selectedTag)">
        <circle-close style="width: 1em; height: 1em;" /> 全部关闭
      </li>
    </ul>
  </div>
</template>
1.标签滚动区域
html
<scroll-pane ref="scrollPaneRef" class="tags-view-wrapper" @scroll="handleScroll">
  <router-link
    v-for="tag in visitedViews"
    :key="tag.path"
    :data-path="tag.path"
    :class="isActive(tag) ? 'active' : ''"
    :to="{ path: tag.path, query: tag.query, fullPath: tag.fullPath }"
    class="tags-view-item"
    :style="activeStyle(tag)"
    @click.middle="!isAffix(tag) ? closeSelectedTag(tag) : ''"
    @contextmenu.prevent="openMenu(tag, $event)"
  >
    {{ tag.title }}
    <span v-if="!isAffix(tag)" @click.prevent.stop="closeSelectedTag(tag)">
      <close class="el-icon-close" style="width: 1em; height: 1em;vertical-align: middle;" />
    </span>
  </router-link>
</scroll-pane>- 滚动容器 :使用
ScrollPane组件包装,支持横向滚动 - 标签项 :遍历
visitedViews数组渲染每个标签 - 活动标签高亮 :通过
isActive和activeStyle方法实现 - 路由导航:点击标签可跳转到对应页面
- 中键关闭:鼠标中键点击可关闭非固定标签
- 右键菜单:右键点击标签显示操作菜单
- 关闭按钮:非固定标签显示关闭按钮
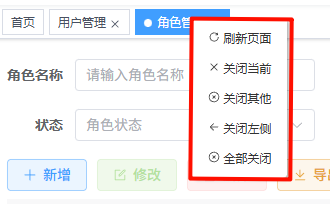
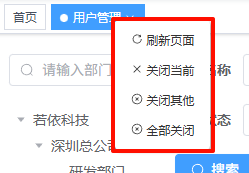
2.右键菜单
html
<ul v-show="visible" :style="{ left: left + 'px', top: top + 'px' }" class="contextmenu">
  <li @click="refreshSelectedTag(selectedTag)">
    <refresh-right style="width: 1em; height: 1em;" /> 刷新页面
  </li>
  <li v-if="!isAffix(selectedTag)" @click="closeSelectedTag(selectedTag)">
    <close style="width: 1em; height: 1em;" /> 关闭当前
  </li>
  <li @click="closeOthersTags">
    <circle-close style="width: 1em; height: 1em;" /> 关闭其他
  </li>
  <li v-if="!isFirstView()" @click="closeLeftTags">
    <back style="width: 1em; height: 1em;" /> 关闭左侧
  </li>
  <li v-if="!isLastView()" @click="closeRightTags">
    <right style="width: 1em; height: 1em;" /> 关闭右侧
  </li>
  <li @click="closeAllTags(selectedTag)">
    <circle-close style="width: 1em; height: 1em;" /> 全部关闭
  </li>
</ul>
右键菜单提供多种标签操作:
- 刷新当前页面
- 关闭当前标签
- 关闭其他标签
- 关闭左侧标签
- 关闭右侧标签
- 关闭所有标签
核心功能实现
1. 状态管理
javascript
const visible = ref(false); // 菜单是否可见
const top = ref(0); // 菜单位置
const left = ref(0);
const selectedTag = ref({}); // 选中的标签
const affixTags = ref([]); // 固定标签
const scrollPaneRef = ref(null); // 滚动容器引用

// 计算属性
const visitedViews = computed(() => useTagsViewStore().visitedViews);
const routes = computed(() => usePermissionStore().routes);
const theme = computed(() => useSettingsStore().theme);
2. 监听路由变化
javascript
watch(route, () => {
  addTags()
  moveToCurrentTag()
})
当路由变化时:
- 添加新标签到已访问列表
- 将当前标签滚动到可见区域
3. 初始化标签
固定标签(设置了 meta.affix 的路由)不可关闭始终显示
javascript
function isAffix(tag) { /** * 判断标签是否为固定标签 * @param {Object} tag - 标签对象 * @returns {Boolean} - 如果标签有meta属性且meta.affix为true则返回true,否则返回false */
  return tag.meta && tag.meta.affix
}
javascript
function filterAffixTags(routes, basePath = '') {
  let tags = [] // 定义一个空数组,用于存储标签页信息
  routes.forEach(route => { // 遍历路由配置数组
    if (route.meta && route.meta.affix) {
      const tagPath = getNormalPath(basePath + '/' + route.path)
      tags.push({ /** * 向标签数组中添加标签对象 * 每个标签对象包含路径、名称和元信息 */
        fullPath: tagPath,
        path: tagPath,
        name: route.name,
        meta: { ...route.meta }
      })
    }
    if (route.children) { /** * 递归处理路由,过滤出固定标签 * @param {Array} routes - 路由数组 * @param {String} parentPath - 父级路径 */
      const tempTags = filterAffixTags(route.children, route.path)
      if (tempTags.length >= 1) {
        tags = [...tags, ...tempTags]
      }
    }
  })
  return tags
}
javascript
onMounted(() => { // 组件挂载时的生命周期钩子
  initTags() // 初始化标签
  addTags()
})
function initTags() { /* 初始化标签 过滤出所有固定标签并添加到已访问视图中 */
  const res = filterAffixTags(routes.value);
  affixTags.value = res;
  for (const tag of res) {
    // Must have tag name
    if (tag.name) {
       useTagsViewStore().addVisitedView(tag)
    }
  }
}
初始化时会:
- 过滤出所有固定标签(设置了
meta.affix的路由) - 将这些固定标签添加到已访问列表
固定标签
4. 标签操作
javascript
function addTags() {
  const { name } = route
  if (name) {
    useTagsViewStore().addView(route)
    if (route.meta.link) {
      useTagsViewStore().addIframeView(route);
    }
  }
  return false
}
function closeSelectedTag(view) { /* 关闭选中的标签页  view-当前视图对象 */
  proxy.$tab.closePage(view).then(({ visitedViews }) => {
    if (isActive(view)) {
      toLastView(visitedViews, view)
    }
  })
}
function refreshSelectedTag(view) { /* 刷新当前选中的标签页 view-当前视图对象 */
  proxy.$tab.refreshPage(view);
  if (route.meta.link) {
    useTagsViewStore().delIframeView(route);
  }
}
支持将外部链接嵌入到 iframe 中显示。
javascript
    if (route.meta.link) { // 如果路由包含链接元信息,则添加iframe视图
      useTagsViewStore().addIframeView(route);
}- 添加标签 :
addTags方法将当前路由添加到已访问列表 - 关闭标签 :
closeSelectedTag方法关闭指定标签 - 刷新标签 :
refreshSelectedTag方法刷新指定标签对应的页面 - 批量操作:提供关闭左侧、右侧、其他标签等批量操作

5. 右键菜单控制
javascript
function openMenu(tag, e) {
  // 计算菜单位置
  const menuMinWidth = 105
  const offsetLeft = proxy.$el.getBoundingClientRect().left
  const offsetWidth = proxy.$el.offsetWidth
  const maxLeft = offsetWidth - menuMinWidth
  const l = e.clientX - offsetLeft + 15

  if (l > maxLeft) {
    left.value = maxLeft
  } else {
    left.value = l
  }

  top.value = e.clientY
  visible.value = true
  selectedTag.value = tag
}

function closeMenu() {
  visible.value = false
}
右键菜单的显示和隐藏逻辑:
- 计算菜单位置,确保不超出容器边界
- 显示菜单并记录当前选中的标签
- 通过全局点击事件隐藏菜单

6. 样式设计
css
.contextmenu { /* 右键菜单本身的样式 */
    margin: 0;
    background: #fff;
    z-index: 3000;
    position: absolute;
    list-style-type: none;
    padding: 5px 0;
    border-radius: 4px;
    font-size: 12px;
    font-weight: 400;
    color: #333;
    box-shadow: 2px 2px 3px 0 rgba(0, 0, 0, 0.3);
    li {
      margin: 0;
      padding: 7px 16px;
      cursor: pointer;
      &:hover {
        background: #eee;
      }
    }
}- 白色背景,带有轻微阴影
- 活动标签高亮显示(背景色为主题色)
- 关闭按钮悬停效果
- 响应式布局和动画效果
在src\layout\index.vue 处使用
components\Settings
index.vue
系统设置组件
组件结构
html
<template>
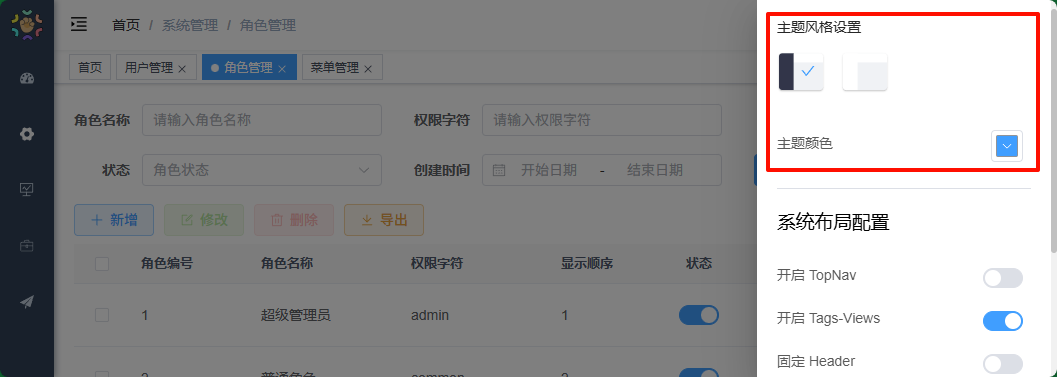
<el-drawer v-model="showSettings" :withHeader="false" direction="rtl" size="300px" :close-on-click-modal="true">
<div class="setting-drawer-title">
<h3 class="drawer-title">主题风格设置</h3>
</div>
<div class="setting-drawer-block-checbox">
<div class="setting-drawer-block-checbox-item" @click="handleTheme('theme-dark')">
<img src="@/assets/images/dark.svg" alt="dark" />
<div v-if="sideTheme === 'theme-dark'" class="setting-drawer-block-checbox-selectIcon" style="display: block;">
<i aria-label="图标: check" class="anticon anticon-check">
<svg viewBox="64 64 896 896" data-icon="check" width="1em" height="1em" :fill="theme" aria-hidden="true" focusable="false" class>
<path d="M912 190h-69.9c-9.8 0-19.1 4.5-25.1 12.2L404.7 724.5 207 474a32 32 0 0 0-25.1-12.2H112c-6.7 0-10.4 7.7-6.3 12.9l273.9 347c12.8 16.2 37.4 16.2 50.3 0l488.4-618.9c4.1-5.1.4-12.8-6.3-12.8z" />
</svg>
</i>
</div>
</div>
<div class="setting-drawer-block-checbox-item" @click="handleTheme('theme-light')">
<img src="@/assets/images/light.svg" alt="light" />
<div v-if="sideTheme === 'theme-light'" class="setting-drawer-block-checbox-selectIcon" style="display: block;">
<i aria-label="图标: check" class="anticon anticon-check">
<svg viewBox="64 64 896 896" data-icon="check" width="1em" height="1em" :fill="theme" aria-hidden="true" focusable="false" class>
<path d="M912 190h-69.9c-9.8 0-19.1 4.5-25.1 12.2L404.7 724.5 207 474a32 32 0 0 0-25.1-12.2H112c-6.7 0-10.4 7.7-6.3 12.9l273.9 347c12.8 16.2 37.4 16.2 50.3 0l488.4-618.9c4.1-5.1.4-12.8-6.3-12.8z" />
</svg>
</i>
</div>
</div>
</div>
<div class="drawer-item">
<span>主题颜色</span>
<span class="comp-style">
<el-color-picker v-model="theme" :predefine="predefineColors" @change="themeChange"/>
</span>
</div>
<el-divider />
<h3 class="drawer-title">系统布局配置</h3>
<div class="drawer-item">
<span>开启 TopNav</span>
<span class="comp-style">
<el-switch v-model="topNav" class="drawer-switch" />
</span>
</div>
<div class="drawer-item">
<span>开启 Tags-Views</span>
<span class="comp-style">
<el-switch v-model="tagsView" class="drawer-switch" />
</span>
</div>
<div class="drawer-item">
<span>固定 Header</span>
<span class="comp-style">
<el-switch v-model="fixedHeader" class="drawer-switch" />
</span>
</div>
<div class="drawer-item">
<span>显示 Logo</span>
<span class="comp-style">
<el-switch v-model="sidebarLogo" class="drawer-switch" />
</span>
</div>
<div class="drawer-item">
<span>动态标题</span>
<span class="comp-style">
<el-switch v-model="dynamicTitle" class="drawer-switch" />
</span>
</div>
<el-divider />
<el-button type="primary" plain icon="DocumentAdd" @click="saveSetting">保存配置</el-button>
<el-button plain icon="Refresh" @click="resetSetting">重置配置</el-button>
</el-drawer>
</template>组件使用 Element Plus 的 el-drawer 抽屉组件,从右侧滑出,宽度为 300px。
主要功能区域
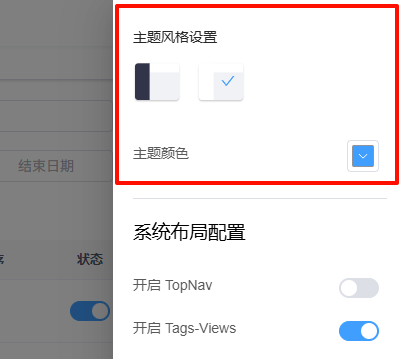
1. 主题风格设置
html
<div class="setting-drawer-title">
  <h3 class="drawer-title">主题风格设置</h3>
</div>
<div class="setting-drawer-block-checbox">
  <div class="setting-drawer-block-checbox-item" @click="handleTheme('theme-dark')">
    <img src="@/assets/images/dark.svg" alt="dark" />
    <div v-if="sideTheme === 'theme-dark'" class="setting-drawer-block-checbox-selectIcon" style="display: block;">
      <!-- 选中标记 -->
    </div>
  </div>
  <div class="setting-drawer-block-checbox-item" @click="handleTheme('theme-light')">
    <img src="@/assets/images/light.svg" alt="light" />
    <div v-if="sideTheme === 'theme-light'" class="setting-drawer-block-checbox-selectIcon" style="display: block;">
      <!-- 选中标记 -->
    </div>
  </div>
</div>
<div class="drawer-item">
  <span>主题颜色</span>
  <span class="comp-style">
    <el-color-picker v-model="theme" :predefine="predefineColors" @change="themeChange"/>
  </span>
</div>
主题设置包括:
- 主题风格 :深色主题 (
theme-dark) 和浅色主题 (theme-light),通过图片预览选择 - 主题颜色:使用颜色选择器选择系统主题色,提供了预设的颜色选项
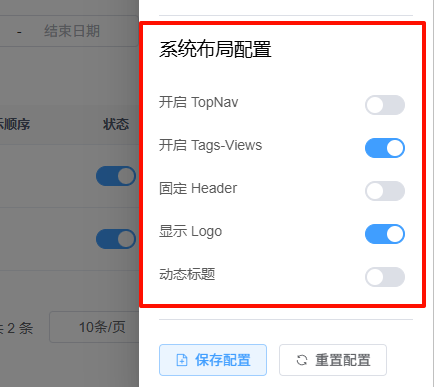
2. 系统布局配置
html
<h3 class="drawer-title">系统布局配置</h3>

<div class="drawer-item">
  <span>开启 TopNav</span>
  <span class="comp-style">
    <el-switch v-model="topNav" class="drawer-switch" />
  </span>
</div>

<div class="drawer-item">
  <span>开启 Tags-Views</span>
  <span class="comp-style">
    <el-switch v-model="tagsView" class="drawer-switch" />
  </span>
</div>

<div class="drawer-item">
  <span>固定 Header</span>
  <span class="comp-style">
    <el-switch v-model="fixedHeader" class="drawer-switch" />
  </span>
</div>

<div class="drawer-item">
  <span>显示 Logo</span>
  <span class="comp-style">
    <el-switch v-model="sidebarLogo" class="drawer-switch" />
  </span>
</div>

<div class="drawer-item">
  <span>动态标题</span>
  <span class="comp-style">
    <el-switch v-model="dynamicTitle" class="drawer-switch" />
  </span>
</div>- TopNav:是否开启顶部导航
- Tags-Views:是否开启标签页导航
- 固定 Header:是否固定顶部导航栏
- 显示 Logo:是否在侧边栏显示 Logo
- 动态标题:是否启用动态网页标题
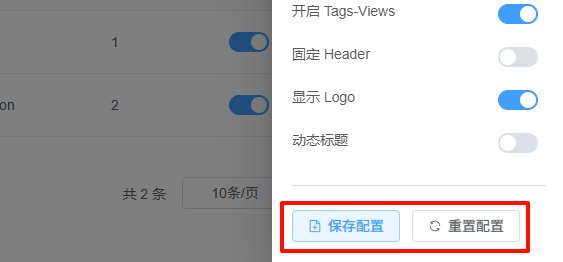
3. 操作按钮
html
    <el-button type="primary" plain icon="DocumentAdd" @click="saveSetting">保存配置</el-button>
<el-button plain icon="Refresh" @click="resetSetting">重置配置</el-button>- 保存配置:将当前设置保存到本地存储
- 重置配置:清除本地存储的设置并刷新页面
核心功能实现
1. 状态管理
javascript
const appStore = useAppStore()
const settingsStore = useSettingsStore()
const permissionStore = usePermissionStore()
const showSettings = ref(false);
const theme = ref(settingsStore.theme);
const sideTheme = ref(settingsStore.sideTheme);
const storeSettings = computed(() => settingsStore);
组件使用 Pinia store 管理状态,特别是 settingsStore 用于存储系统设置。
2. 计算属性
javascript
/** 是否需要topnav */
const topNav = computed({
  get: () => storeSettings.value.topNav,
  set: (val) => {
    settingsStore.changeSetting({ key: 'topNav', value: val })
    if (!val) {
      appStore.toggleSideBarHide(false);
      permissionStore.setSidebarRouters(permissionStore.defaultRoutes);
    }
  }
})
/** 是否需要tagview */
const tagsView = computed({
  get: () => storeSettings.value.tagsView,
  set: (val) => {
    settingsStore.changeSetting({ key: 'tagsView', value: val })
  }
})
/**是否需要固定头部 */
const fixedHeader = computed({
  get: () => storeSettings.value.fixedHeader,
  set: (val) => {
    settingsStore.changeSetting({ key: 'fixedHeader', value: val })
  }
})
/**是否需要侧边栏的logo */
const sidebarLogo = computed({
  get: () => storeSettings.value.sidebarLogo,
  set: (val) => {
    settingsStore.changeSetting({ key: 'sidebarLogo', value: val })
  }
})
/**是否需要侧边栏的动态网页的title */
const dynamicTitle = computed({
  get: () => storeSettings.value.dynamicTitle,
  set: (val) => {
    settingsStore.changeSetting({ key: 'dynamicTitle', value: val })
    // 动态设置网页标题
    useDynamicTitle()
  }
})
每个设置选项都使用计算属性实现双向绑定,在设置值时不仅更新状态,还执行相应的操作。
3. 主题切换
javascript
function themeChange(val) { /** * 主题切换函数 * @param {any} val - 主题值 * 将主题值保存到store并更新当前主题样式 */
  settingsStore.changeSetting({ key: 'theme', value: val })
  theme.value = val;
  handleThemeStyle(val);
}
function handleTheme(val) { /** * 侧边栏主题处理函数 * @param {any} val - 侧边栏主题值 * 将侧边栏主题值保存到store并更新当前侧边栏主题 */
  settingsStore.changeSetting({ key: 'sideTheme', value: val })
  sideTheme.value = val;
}themeChange:处理主题颜色变化,并调用handleThemeStyle应用主题样式handleTheme:处理主题风格(深色/浅色)变化
4. 保存和重置设置
javascript
function saveSetting() {
  proxy.$modal.loading("正在保存到本地,请稍候...");
  let layoutSetting = {
    "topNav": storeSettings.value.topNav,
    "tagsView": storeSettings.value.tagsView,
    "fixedHeader": storeSettings.value.fixedHeader, // 是否固定头部
    "sidebarLogo": storeSettings.value.sidebarLogo, // 侧边栏是否显示Logo,从storeSettings中获取
    "dynamicTitle": storeSettings.value.dynamicTitle, // 是否开启动态标题,从storeSettings中获取
    "sideTheme": storeSettings.value.sideTheme, // 侧边栏主题,从storeSettings中获取
    "theme": storeSettings.value.theme // 整体主题,从storeSettings中获取
  };
  localStorage.setItem("layout-setting", JSON.stringify(layoutSetting));
  setTimeout(proxy.$modal.closeLoading(), 1000)
}
function resetSetting() {
  proxy.$modal.loading("正在清除设置缓存并刷新,请稍候...");
  localStorage.removeItem("layout-setting")
  setTimeout("window.location.reload()", 1000)
}saveSetting:将当前所有设置保存到localStorage中resetSetting:清除localStorage中的设置并刷新页面
5. 暴露方法
javascript
function openSetting() {
  showSettings.value = true;
}

defineExpose({
  openSetting,
})
组件通过 defineExpose 暴露 openSetting 方法,允许父组件打开设置面板。
样式设计
css
<style lang='scss' scoped>
.setting-drawer-title {
  margin-bottom: 12px;
  color: rgba(0, 0, 0, 0.85);
  line-height: 22px;
  font-weight: bold;
  .drawer-title {
    font-size: 14px;
  }
}
.setting-drawer-block-checbox {
  display: flex;
  justify-content: flex-start;
  align-items: center;
  margin-top: 10px;
  margin-bottom: 20px;

  .setting-drawer-block-checbox-item {
    position: relative;
    margin-right: 16px;
    border-radius: 2px;
    cursor: pointer;

    img {
      width: 48px;
      height: 48px;
    }

    .custom-img {
      width: 48px;
      height: 38px;
      border-radius: 5px;
      box-shadow: 1px 1px 2px #898484;
    }

    .setting-drawer-block-checbox-selectIcon {
      position: absolute;
      top: 0;
      right: 0;
      width: 100%;
      height: 100%;
      padding-top: 15px;
      padding-left: 24px;
      color: #1890ff;
      font-weight: 700;
      font-size: 14px;
    }
  }
}

.drawer-item {
  color: rgba(0, 0, 0, 0.65);
  padding: 12px 0;
  font-size: 14px;

  .comp-style {
    float: right;
    margin: -3px 8px 0px 0px;
  }
}
</style>- 设置项的垂直排列和间距
- 主题预览图片的布局和选中标记
- 开关组件的对齐
- 响应式设计
在src\layout\index.vue 处使用
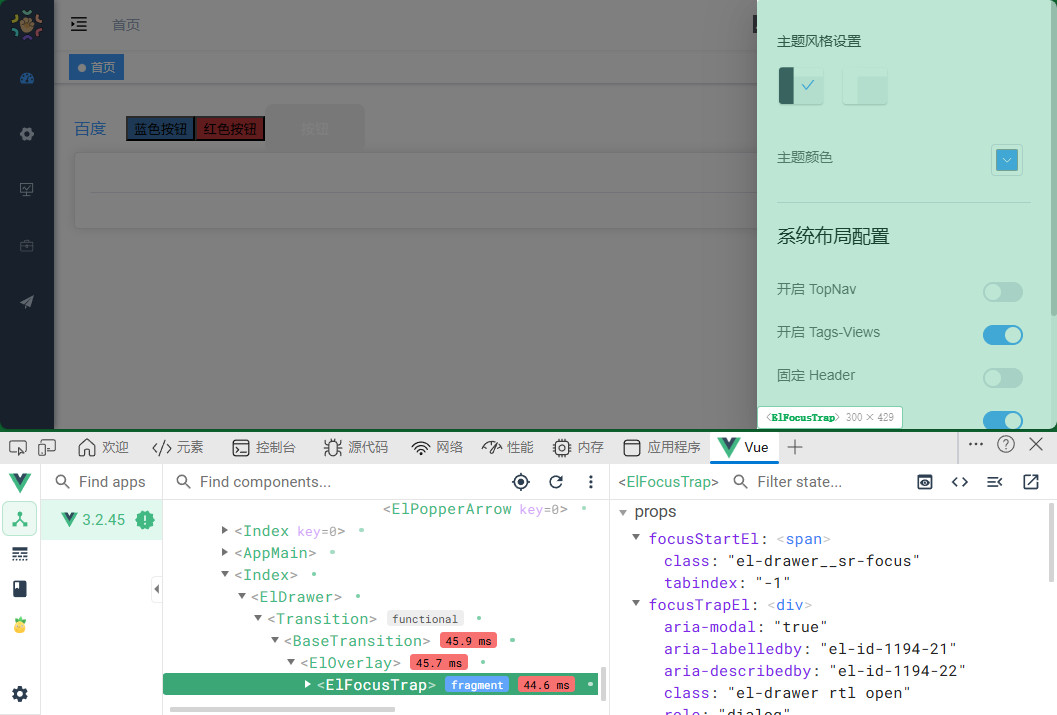
components\IframeToggle
index.vue
用于管理多个 iframe 切换显示的组件
组件结构
html
<template>
  <transition-group name="fade-transform" mode="out-in">
    <inner-link
      v-for="(item, index) in tagsViewStore.iframeViews"
      :key="item.path"
      :iframeId="'iframe' + index"
      v-show="route.path === item.path"
      :src="iframeUrl(item.meta.link, item.query)"
    ></inner-link>
  </transition-group>
</template>
组件使用 Vue 的 transition-group 包装多个 inner-link 组件,实现切换动画效果。
核心功能
1. iframe 列表渲染
html
<inner-link
  v-for="(item, index) in tagsViewStore.iframeViews"
  :key="item.path"
  :iframeId="'iframe' + index"
  v-show="route.path === item.path"
  :src="iframeUrl(item.meta.link, item.query)"
></inner-link>
组件遍历 tagsViewStore.iframeViews 数组,为每个 iframe 视图创建一个 inner-link 组件:
v-for:遍历所有 iframe 视图:key:使用路径作为唯一标识:iframeId:为每个 iframe 分配唯一 ID('iframe' + index)v-show:只有当前路由路径匹配的 iframe 才显示:src:动态计算 iframe 的 URL
2. 过渡动画
html
<transition-group name="fade-transform" mode="out-in">
  ...
</transition-group>
使用 transition-group 实现切换动画效果:
name="fade-transform":指定动画类名mode="out-in":先出后进的动画模式,确保切换流畅
核心方法
iframe URL 构建函数
javascript
function iframeUrl(url, query) {
  if (Object.keys(query).length > 0) {
    let params = Object.keys(query).map((key) => key + "=" + query[key]).join("&");
    return url + "?" + params;
  }
  return url;
}- 检查是否有查询参数
- 如果有查询参数,将查询对象转换为 URL 参数字符串
- 将参数拼接到基础 URL 后面
- 如果没有查询参数,直接返回基础 URL
状态管理
javascript
const route = useRoute();
const tagsViewStore = useTagsViewStore();route:获取当前路由信息tagsViewStore:访问标签视图 store,管理 iframe 视图列表
在 src\layout\components\AppMain.vue 处使用

components\InnerLink
index.vue
组件结构
html
<template>
  <div :style="'height:' + height">
    <iframe
      :id="iframeId"
      style="width: 100%; height: 100%"
      :src="src"
      frameborder="no"
    ></iframe>
  </div>
</template>
组件属性
javascript
const props = defineProps({
  src: {
    type: String,
    default: "/"
  },
  iframeId: {
    type: String
  }
});- src:iframe 的源地址,默认为 "/"
- iframeId:iframe 元素的 ID,用于唯一标识
核心功能实现
1. 自适应高度
javascript
const height = ref(document.documentElement.clientHeight - 94.5 + "px");组件计算并设置 iframe 的高度:
document.documentElement.clientHeight:获取浏览器窗口的内部高度- 减去 94.5px:这个值通常是顶部导航栏和标签栏等固定元素的高度
- 将计算结果转换为带 "px" 单位的字符串
2. iframe 渲染
html
<iframe
  :id="iframeId"
  style="width: 100%; height: 100%"
  :src="src"
  frameborder="no"
></iframe>:id="iframeId":动态设置 iframe ID,便于后续操作style="width: 100%; height: 100%":使 iframe 占满父容器:src="src":动态设置 iframe 的源地址frameborder="no":移除 iframe 边框,使嵌入更无缝
在src\layout\components\IframeToggle\index.vue 处使用
 chu图像 小部件