一、引言:为什么要在鸿蒙 Flutter 中接入系统能力?
随着鸿蒙 OS(HarmonyOS)生态的持续扩张,越来越多的跨平台开发者选择使用 Flutter 作为鸿蒙应用的前端开发框架。Flutter 的热重载、跨端一致性体验等优势,与鸿蒙的分布式架构、全场景部署能力形成了强大的互补。
但在实际开发中,仅依靠 Flutter 的跨端 API 往往无法满足业务需求 ------本地通知的定时提醒、系统级推送的消息触达、后台任务的持续运行等核心场景,都需要深度接入鸿蒙系统原生能力。本文将从实战角度出发,手把手教你实现 Flutter 与鸿蒙系统能力的无缝对接,覆盖本地通知、华为推送(Push)、后台任务三大核心模块,包含完整可运行的代码示例和避坑指南。
核心价值
- 原生体验:系统级通知与后台任务相比纯 Flutter 实现,具有更高的优先级和稳定性(如后台任务不会被系统轻易回收)。
- 全场景适配:适配鸿蒙手机、平板、手表等多终端,符合鸿蒙分布式生态理念。
- 业务闭环:解决跨端应用的消息触达、定时任务等关键需求,适用于社交、办公、物联网等场景。
前置知识
- 掌握 Flutter 基础开发(StatefulWidget、MethodChannel、插件使用)。
- 了解鸿蒙应用开发基础(Ability、ArkTS/Java 开发、配置文件)。
- 开发环境:
- Flutter 3.16+(需支持鸿蒙平台,参考Flutter 鸿蒙适配指南)。
- 鸿蒙 DevEco Studio 4.0+(配置鸿蒙 SDK 9.0+)。
- 华为开发者账号(用于推送服务接入,注册地址)。
二、核心概念与技术选型
在开始实战前,先明确鸿蒙系统能力与 Flutter 的交互逻辑,以及关键技术选型。
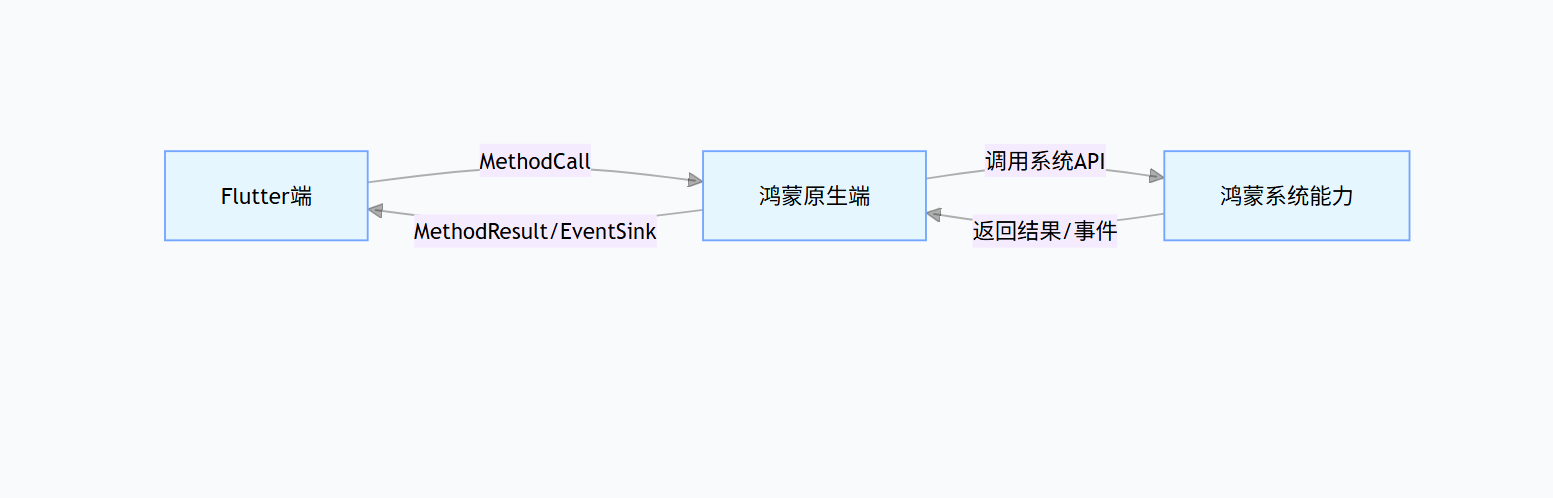
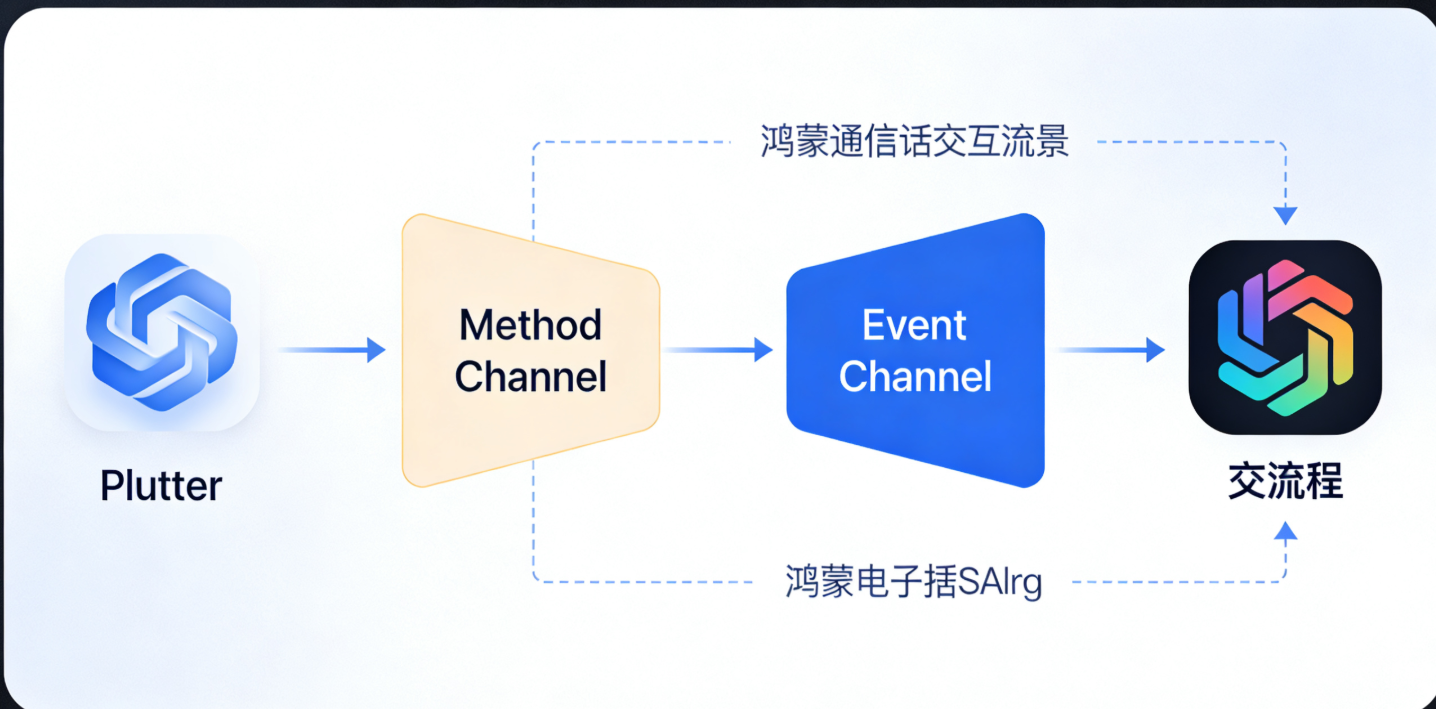
2.1 交互原理:Flutter 与鸿蒙的通信方式
Flutter 作为跨端框架,无法直接调用鸿蒙原生 API,需通过MethodChannel (方法调用)和EventChannel(事件流)实现跨端通信:
- MethodChannel:用于 Flutter 主动调用鸿蒙原生方法(如创建本地通知、启动后台任务)。
- EventChannel:用于鸿蒙原生向 Flutter 发送事件(如推送消息接收、后台任务回调)。
交互流程如下图所示:
2.2 技术选型说明
| 功能模块 | 鸿蒙原生技术 | Flutter 侧依赖 | 核心优势 |
|---|---|---|---|
| 本地通知 | NotificationManager、NotificationSlot | 自定义 MethodChannel | 完全适配鸿蒙通知机制,支持自定义样式、优先级 |
| 推送通知 | 华为推送服务(HMS Core Push) | huawei_push_plugin(鸿蒙适配版) | 系统级推送,送达率高,支持离线消息 |
| 后台任务 | BackgroundTaskManager、Continuation | 自定义 MethodChannel + EventChannel | 支持长时 / 短时后台任务,适配鸿蒙电源管理 |
注意:华为推送服务(Push)是鸿蒙生态推荐的推送方案,支持跨设备消息同步,本文优先采用该方案。
三、实战一:接入鸿蒙本地通知
本地通知适用于定时提醒、任务完成通知等场景(如闹钟、日程提醒),无需依赖网络。本节将实现从 Flutter 调用鸿蒙原生 API 创建、取消、更新本地通知的完整流程。
3.1 鸿蒙原生端配置(Java/ArkTS)
步骤 1:添加权限
在entry/src/main/module.json5中添加通知权限:
json
{
"module": {
"abilities": [...],
"requestPermissions": [
{
"name": "ohos.permission.NOTIFICATION" // 通知权限
}
]
}
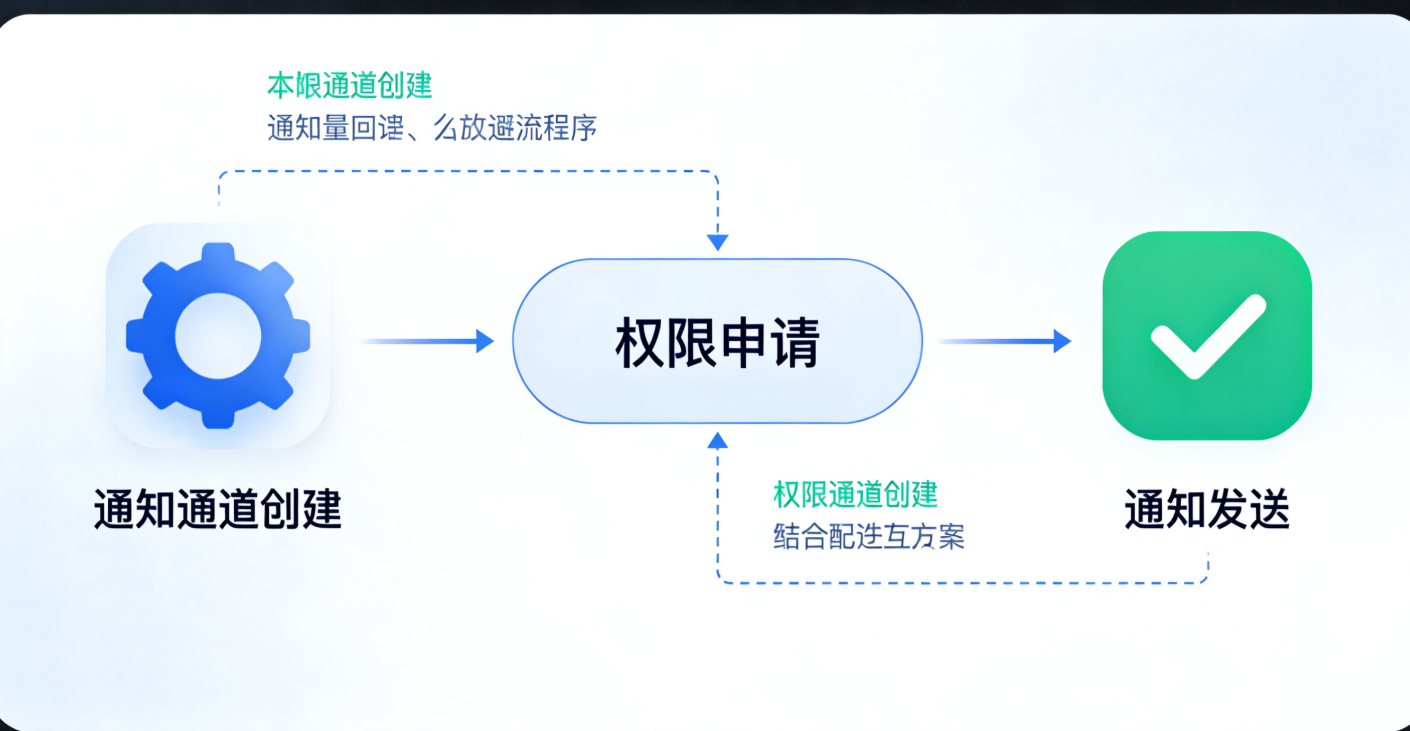
}步骤 2:创建通知通道(NotificationSlot)
鸿蒙要求通知必须关联通知通道,用于分类管理通知的优先级、声音、震动等。在MainAbility的onCreate方法中初始化:
java
运行
// 鸿蒙原生端:MainAbility.java
import ohos.aafwk.ability.Ability;
import ohos.aafwk.content.Intent;
import ohos.agp.window.service.WindowManager;
import ohos.distributedschedule.interwork.DeviceInfo;
import ohos.event.notification.NotificationHelper;
import ohos.event.notification.NotificationSlot;
import ohos.event.notification.NotificationSlotType;

public class MainAbility extends Ability {
    // 通知通道ID(需唯一)
    public static final String NOTIFICATION_SLOT_ID = "flutter_harmony_notification_slot";
    // 通知通道名称
    public static final String NOTIFICATION_SLOT_NAME = "Flutter鸿蒙通知";
    // MethodChannel名称(需与Flutter端一致)
    public static final String METHOD_CHANNEL_NOTIFICATION = "com.example.flutter_harmony/notification";

    @Override
    public void onCreate() {
        super.onCreate();
        // 初始化通知通道
        initNotificationSlot();
        // 注册MethodChannel
        registerNotificationChannel();
    }

    // 初始化通知通道
    private void initNotificationSlot() {
        NotificationSlot slot = new NotificationSlot(NOTIFICATION_SLOT_ID, NOTIFICATION_SLOT_NAME, NotificationSlotType.SERVICE_INFORMATION);
        // 设置通知优先级(HIGH:弹窗显示,NORMAL:仅通知栏)
        slot.setPriority(NotificationSlot.PRIORITY_HIGH);
        // 设置震动(可选)
        slot.setVibrationEnabled(true);
        // 设置声音(可选,需添加音频资源)
        // slot.setSoundUri(Uri.parse("ohos.resource://com.example.flutter_harmony/raw/notification_sound"));
        // 注册通知通道到系统
        NotificationHelper.createNotificationSlot(this, slot);
    }

    // 注册MethodChannel,处理Flutter调用
    private void registerNotificationChannel() {
        new MethodChannel(getAbilityContext().getExternalAbility(), METHOD_CHANNEL_NOTIFICATION)
                .setMethodCallHandler((call, result) -> {
                    switch (call.method) {
                        case "showLocalNotification":
                            // 显示本地通知
                            showLocalNotification(call, result);
                            break;
                        case "cancelLocalNotification":
                            // 取消本地通知
                            cancelLocalNotification(call, result);
                            break;
                        case "cancelAllLocalNotifications":
                            // 取消所有本地通知
                            cancelAllLocalNotifications(result);
                            break;
                        default:
                            result.notImplemented();
                            break;
                    }
                });
    }

    // 核心方法:显示本地通知
    private void showLocalNotification(MethodCall call, MethodChannel.Result result) {
        try {
            // 从Flutter端获取参数
            int notificationId = call.argument("notificationId");
            String title = call.argument("title");
            String content = call.argument("content");
            String clickAction = call.argument("clickAction"); // 点击通知后的跳转动作

            // 创建通知对象
            NotificationHelper.NotificationBuilder builder = new NotificationHelper.NotificationBuilder(this, NOTIFICATION_SLOT_ID);
            Notification notification = builder
                    .setContentTitle(title)
                    .setContentText(content)
                    .setAutoCancel(true) // 点击后自动取消
                    .setWhen(System.currentTimeMillis()) // 通知时间
                    .setSmallIcon(ResourceTable.Media_icon_notification) // 小图标(需在资源文件中添加)
                    .build();

            // 点击通知的跳转逻辑(示例:打开应用主页面)
            Intent intent = new Intent();
            Operation operation = new Intent.OperationBuilder()
                    .withDeviceId(DeviceInfo.getDeviceId())
                    .withBundleName(getBundleName())
                    .withAbilityName(MainAbility.class.getName())
                    .build();
            intent.setOperation(operation);
            PendingIntent pendingIntent = PendingIntent.getAbilityPendingIntent(this, 0, intent, PendingIntent.FLAG_UPDATE_CURRENT);
            notification.setContentIntent(pendingIntent);

            // 发送通知
            NotificationHelper.publishNotification(notificationId, notification);
            result.success(true);
        } catch (Exception e) {
            result.error("SHOW_NOTIFICATION_FAILED", "显示本地通知失败:" + e.getMessage(), null);
        }
    }

    // 取消指定ID的本地通知
    private void cancelLocalNotification(MethodCall call, MethodChannel.Result result) {
        try {
            int notificationId = call.argument("notificationId");
            NotificationHelper.cancelNotification(notificationId);
            result.success(true);
        } catch (Exception e) {
            result.error("CANCEL_NOTIFICATION_FAILED", "取消本地通知失败:" + e.getMessage(), null);
        }
    }

    // 取消所有本地通知
    private void cancelAllLocalNotifications(MethodChannel.Result result) {
        try {
            NotificationHelper.cancelAllNotifications();
            result.success(true);
        } catch (Exception e) {
            result.error("CANCEL_ALL_NOTIFICATIONS_FAILED", "取消所有本地通知失败:" + e.getMessage(), null);
        }
    }
}
步骤 3:添加通知图标资源
在entry/src/main/resources/base/media目录下添加通知图标(建议尺寸:48x48px,格式为 png),并在resource.index中注册(DevEco Studio 会自动注册)。
3.2 Flutter 端封装与调用
步骤 1:创建通知工具类(封装 MethodChannel)
dart
// lib/services/harmony_notification_service.dart
import 'package:flutter/services.dart';

class HarmonyNotificationService {
  // 与鸿蒙原生端一致的MethodChannel名称
  static const MethodChannel _channel = MethodChannel('com.example.flutter_harmony/notification');

  /// 显示本地通知
  /// [notificationId]:通知唯一ID(用于更新/取消)
  /// [title]:通知标题
  /// [content]:通知内容
  /// [clickAction]:点击通知后的动作(可选)
  static Future<bool> showLocalNotification({
    required int notificationId,
    required String title,
    required String content,
    String? clickAction,
  }) async {
    try {
      final result = await _channel.invokeMethod<bool>('showLocalNotification', {
        'notificationId': notificationId,
        'title': title,
        'content': content,
        'clickAction': clickAction,
      });
      return result ?? false;
    } on PlatformException catch (e) {
      print('显示本地通知失败:${e.code} - ${e.message}');
      return false;
    }
  }

  /// 取消指定ID的本地通知
  static Future<bool> cancelLocalNotification({required int notificationId}) async {
    try {
      final result = await _channel.invokeMethod<bool>('cancelLocalNotification', {
        'notificationId': notificationId,
      });
      return result ?? false;
    } on PlatformException catch (e) {
      print('取消本地通知失败:${e.code} - ${e.message}');
      return false;
    }
  }

  /// 取消所有本地通知
  static Future<bool> cancelAllLocalNotifications() async {
    try {
      final result = await _channel.invokeMethod<bool>('cancelAllLocalNotifications');
      return result ?? false;
    } on PlatformException catch (e) {
      print('取消所有本地通知失败:${e.code} - ${e.message}');
      return false;
    }
  }
}
步骤 2:Flutter 页面调用示例
dart
// lib/pages/notification_demo.dart
import 'package:flutter/material.dart';
import 'package:flutter_harmony_demo/services/harmony_notification_service.dart';

class NotificationDemoPage extends StatefulWidget {
  const NotificationDemoPage({super.key});

  @override
  State<NotificationDemoPage> createState() => _NotificationDemoPageState();
}

class _NotificationDemoPageState extends State<NotificationDemoPage> {
  final TextEditingController _titleController = TextEditingController(text: "鸿蒙Flutter通知测试");
  final TextEditingController _contentController = TextEditingController(text: "这是一条来自Flutter的鸿蒙本地通知!");
  int _notificationId = 1;

  @override
  Widget build(BuildContext context) {
    return Scaffold(
      appBar: AppBar(title: const Text("本地通知测试")),
      body: Padding(
        padding: const EdgeInsets.all(16.0),
        child: Column(
          crossAxisAlignment: CrossAxisAlignment.stretch,
          children: [
            TextField(
              controller: _titleController,
              decoration: const InputDecoration(labelText: "通知标题"),
            ),
            const SizedBox(height: 16),
            TextField(
              controller: _contentController,
              decoration: const InputDecoration(labelText: "通知内容"),
              minLines: 3,
              maxLines: 5,
            ),
            const SizedBox(height: 32),
            ElevatedButton(
              onPressed: () async {
                final success = await HarmonyNotificationService.showLocalNotification(
                  notificationId: _notificationId,
                  title: _titleController.text,
                  content: _contentController.text,
                );
                if (success) {
                  ScaffoldMessenger.of(context).showSnackBar(
                    const SnackBar(content: Text("通知发送成功!")),
                  );
                  _notificationId++; // 每次发送递增ID,避免覆盖
                } else {
                  ScaffoldMessenger.of(context).showSnackBar(
                    const SnackBar(content: Text("通知发送失败!")),
                  );
                }
              },
              child: const Text("发送本地通知"),
            ),
            const SizedBox(height: 16),
            ElevatedButton(
              onPressed: () async {
                final success = await HarmonyNotificationService.cancelLocalNotification(
                  notificationId: _notificationId - 1, // 取消上一条通知
                );
                if (success) {
                  ScaffoldMessenger.of(context).showSnackBar(
                    const SnackBar(content: Text("通知取消成功!")),
                  );
                }
              },
              child: const Text("取消上一条通知"),
            ),
            const SizedBox(height: 16),
            ElevatedButton(
              onPressed: () async {
                final success = await HarmonyNotificationService.cancelAllLocalNotifications();
                if (success) {
                  ScaffoldMessenger.of(context).showSnackBar(
                    const SnackBar(content: Text("所有通知取消成功!")),
                  );
                }
              },
              child: const Text("取消所有通知"),
            ),
          ],
        ),
      ),
    );
  }
}
3.3 测试与验证
- 运行鸿蒙模拟器或连接真实设备。
- 打开
NotificationDemoPage,输入标题和内容,点击 "发送本地通知"。 - 验证结果:
- 通知栏应显示对应的本地通知。
- 点击通知应跳转回应用主页面。
- 点击 "取消" 按钮应能正常取消通知。
3.4 高级用法:自定义通知样式
如果需要更复杂的通知样式(如大图、列表、进度条),可在鸿蒙原生端扩展NotificationBuilder:
java
运行
// 示例:带进度条的通知
Notification notification = builder
        .setContentTitle("文件下载")
        .setContentText("下载中...")
        .setProgressBar(100, 50, false) // 总进度100,当前50,非不确定进度
        .setSmallIcon(ResourceTable.Media_icon_notification)
.build();更多通知样式参考鸿蒙官方文档:Notification 开发指南
四、实战二:接入鸿蒙推送通知(华为 Push)
推送通知适用于服务器向客户端发送消息(如聊天消息、活动通知、系统公告),鸿蒙生态中推荐使用华为推送服务(HMS Core Push),支持离线消息、跨设备同步、高送达率。
4.1 前置准备:开通华为推送服务
步骤 1:创建华为开发者应用
- 登录华为开发者联盟,进入 "应用市场"→"我的应用",创建鸿蒙应用(需填写应用包名,与 DevEco Studio 中的包名一致)。
- 开通 "推送服务":在应用详情页→"开发"→"推送服务",点击 "开通",并完成实名认证。
- 下载
agconnect-services.json文件:在推送服务页面,点击 "添加应用"→"下载配置文件",将文件复制到entry/src/main目录下。
步骤 2:配置鸿蒙原生项目依赖
在entry/build.gradle中添加华为推送服务依赖:
gradle
// entry/build.gradle
dependencies {
    // 华为推送服务SDK(鸿蒙适配版)
    implementation 'com.huawei.hms:push-ohos:6.11.0.300'
    // AGConnect配置依赖
    implementation 'com.huawei.agconnect:agconnect-core-ohos:1.9.0.300'
}在module.json5中添加推送相关权限:
json
{
  "module": {
    "requestPermissions": [
      {
        "name": "ohos.permission.INTERNET" // 推送需要网络权限
      },
      {
        "name": "ohos.permission.GET_NETWORK_INFO"
      },
      {
        "name": "ohos.permission.ACCESS_WIFI_STATE"
      }
    ]
  }
}
4.2 鸿蒙原生端推送配置
步骤 1:初始化推送服务
在MainAbility的onCreate方法中初始化 AGConnect 和推送服务:
java
运行
// MainAbility.java
import com.huawei.agconnect.AGConnectInstance;
import com.huawei.hms.push.HmsMessaging;
import com.huawei.hms.push.pushconstant.PushConstant;

@Override
public void onCreate() {
    super.onCreate();
    // 初始化AGConnect(需传入应用包名)
    AGConnectInstance.initialize(getAbilityContext(), getBundleName());
    // 初始化推送服务
    initPushService();
    // 其他初始化(通知通道、MethodChannel等)
}

// 初始化推送服务
private void initPushService() {
    // 开启推送通知权限(引导用户授权)
    HmsMessaging.getInstance(getAbilityContext()).turnOnPush().addOnCompleteListener(task -> {
        if (task.isSuccessful()) {
            Log.i("PushService", "开启推送成功");
            // 获取设备Token(用于服务器推送)
            getDeviceToken();
        } else {
            Log.e("PushService", "开启推送失败:" + task.getException().getMessage());
        }
    });

    // 注册推送消息接收器
    registerPushReceiver();
}

// 获取设备Token(关键:用于服务器向该设备推送消息)
private void getDeviceToken() {
    HmsMessaging.getInstance(getAbilityContext()).getToken().addOnCompleteListener(task -> {
        if (task.isSuccessful() && task.getResult() != null) {
            String token = task.getResult();
            Log.i("PushService", "设备Token:" + token);
            // 将Token发送到Flutter端
            sendTokenToFlutter(token);
        } else {
            Log.e("PushService", "获取Token失败:" + task.getException().getMessage());
        }
    });
}

// 通过EventChannel将Token发送到Flutter端
private void sendTokenToFlutter(String token) {
    EventChannel eventChannel = new EventChannel(getAbilityContext().getExternalAbility(), "com.example.flutter_harmony/push_event");
    eventChannel.setStreamHandler(new EventChannel.StreamHandler() {
        @Override
        public void onListen(Object arguments, EventChannel.EventSink events) {
            events.success(token);
        }

        @Override
        public void onCancel(Object arguments) {}
    });
}

// 注册推送消息接收器
private void registerPushReceiver() {
    // 创建推送消息接收器
    PushReceiver pushReceiver = new PushReceiver() {
        // 接收透传消息(应用在前台时触发)
        @Override
        public void onMessageReceived(Context context, RemoteMessage remoteMessage) {
            super.onMessageReceived(context, remoteMessage);
            Log.i("PushService", "收到透传消息:" + remoteMessage.getData());
            // 将透传消息发送到Flutter端
            sendMessageToFlutter(remoteMessage.getData(), "data_message");
        }

        // 接收通知消息(应用在后台/离线时,系统会自动显示通知,点击后触发)
        @Override
        public void onNotificationOpened(Context context, NotificationMessage notificationMessage) {
            super.onNotificationOpened(context, notificationMessage);
            Log.i("PushService", "点击通知消息:" + notificationMessage.getTitle() + " - " + notificationMessage.getBody());
            // 将通知点击事件发送到Flutter端
            Map<String, String> data = new HashMap<>();
            data.put("title", notificationMessage.getTitle());
            data.put("body", notificationMessage.getBody());
            data.put("type", "notification_click");
            sendMessageToFlutter(data, "notification_click");
        }
    };

    // 注册接收器
    HmsMessaging.getInstance(getAbilityContext()).registerPushReceiver(pushReceiver);
}

// 将推送消息发送到Flutter端
private void sendMessageToFlutter(Object data, String messageType) {
    EventChannel eventChannel = new EventChannel(getAbilityContext().getExternalAbility(), "com.example.flutter_harmony/push_event");
    eventChannel.setStreamHandler(new EventChannel.StreamHandler() {
        @Override
        public void onListen(Object arguments, EventChannel.EventSink events) {
            Map<String, Object> result = new HashMap<>();
            result.put("type", messageType);
            result.put("data", data);
            events.success(result);
        }

        @Override
        public void onCancel(Object arguments) {}
    });
}
步骤 2:配置推送服务证书(服务器端用)
- 在华为开发者联盟→应用详情→"推送服务"→"配置",下载 "推送服务证书"(.p12 格式)。
- 记录证书密码,用于服务器端调用华为推送 API 时签名。
4.3 Flutter 端推送封装与调用
步骤 1:创建推送工具类(封装 EventChannel)
dart
// lib/services/harmony_push_service.dart
import 'package:flutter/services.dart';

class HarmonyPushService {
  // 与鸿蒙原生端一致的EventChannel名称
  static const EventChannel _eventChannel = EventChannel('com.example.flutter_harmony/push_event');

  // 监听推送相关事件(Token获取、消息接收、通知点击)
  static Stream<Map<String, dynamic>> listenPushEvents() {
    return _eventChannel.receiveBroadcastStream().map((event) {
      return Map<String, dynamic>.from(event as Map);
    });
  }

  // 向服务器上传设备Token(示例:实际需对接自己的服务器)
  static Future<bool> uploadDeviceToken(String token) async {
    try {
      // 示例:调用服务器API上传Token
      // final response = await Dio().post('https://your-server.com/upload-token', data: {'token': token});
      // return response.statusCode == 200;
      print('设备Token已上传:$token');
      return true;
    } catch (e) {
      print('上传Token失败:$e');
      return false;
    }
  }
}
步骤 2:Flutter 页面监听推送事件
dart
// lib/pages/push_demo.dart
import 'package:flutter/material.dart';
import 'package:flutter_harmony_demo/services/harmony_push_service.dart';

class PushDemoPage extends StatefulWidget {
  const PushDemoPage({super.key});

  @override
  State<PushDemoPage> createState() => _PushDemoPageState();
}

class _PushDemoPageState extends State<PushDemoPage> {
  String _deviceToken = "未获取到Token";
  List<Map<String, dynamic>> _pushMessages = [];

  @override
  void initState() {
    super.initState();
    // 监听推送事件
    _listenPushEvents();
  }

  // 监听推送事件
  void _listenPushEvents() {
    HarmonyPushService.listenPushEvents().listen((event) {
      setState(() {
        switch (event['type']) {
          case 'token':
            // 获取设备Token
            _deviceToken = event['data'] as String;
            // 上传Token到服务器
            HarmonyPushService.uploadDeviceToken(_deviceToken);
            break;
          case 'data_message':
            // 接收透传消息
            _pushMessages.add({
              'title': '透传消息',
              'content': event['data'].toString(),
              'time': DateTime.now().toString(),
            });
            break;
          case 'notification_click':
            // 接收通知点击事件
            _pushMessages.add({
              'title': event['data']['title'] as String,
              'content': event['data']['body'] as String,
              'time': DateTime.now().toString(),
            });
            break;
        }
      });
    });
  }

  @override
  Widget build(BuildContext context) {
    return Scaffold(
      appBar: AppBar(title: const Text("推送通知测试")),
      body: Padding(
        padding: const EdgeInsets.all(16.0),
        child: Column(
          crossAxisAlignment: CrossAxisAlignment.stretch,
          children: [
            Card(
              child: Padding(
                padding: const EdgeInsets.all(16.0),
                child: Column(
                  children: [
                    const Text("设备Token", style: TextStyle(fontSize: 16, fontWeight: FontWeight.bold)),
                    const SizedBox(height: 8),
                    Text(_deviceToken, style: const TextStyle(fontSize: 14, color: Colors.grey)),
                  ],
                ),
              ),
            ),
            const SizedBox(height: 16),
            const Text("推送消息记录", style: TextStyle(fontSize: 16, fontWeight: FontWeight.bold)),
            const SizedBox(height: 8),
            Expanded(
              child: _pushMessages.isEmpty
                  ? const Center(child: Text("暂无消息"))
                  : ListView.builder(
                      itemCount: _pushMessages.length,
                      itemBuilder: (context, index) {
                        final message = _pushMessages[index];
                        return ListTile(
                          title: Text(message['title']!),
                          subtitle: Text("${message['content']!}\n${message['time']!}"),
                        );
                      },
                    ),
            ),
          ],
        ),
      ),
    );
  }
}
4.4 测试推送消息
方法 1:使用华为推送服务测试工具
- 登录华为开发者联盟→应用详情→"推送服务"→"测试"→"发送测试消息"。
- 输入测试设备的 Token(从 Flutter 页面获取),填写通知标题、内容,选择 "通知消息" 或 "透传消息"。
- 点击 "发送",验证设备是否收到通知。
方法 2:服务器端调用华为推送 API
服务器端可通过华为推送 API 向指定 Token 发送消息,示例代码(Java):
java
运行
// 服务器端示例:发送推送通知
import com.huawei.push.android.AndroidNotification;
import com.huawei.push.exception.HuaweiPushException;
import com.huawei.push.reponse.SendResponse;
import com.huawei.push.service.HuaweiPushService;
import com.huawei.push.util.HTTPSClientUtil;

import java.util.ArrayList;
import java.util.List;

public class PushServerDemo {
    // 华为推送API地址
    private static final String PUSH_API_URL = "https://push-api.cloud.huawei.com/v1/{appId}/messages:send";
    // 应用AppId(从华为开发者联盟获取)
    private static final String APP_ID = "your_app_id";
    // 应用Secret(从华为开发者联盟获取)
    private static final String APP_SECRET = "your_app_secret";
    // 推送证书密码
    private static final String CERT_PASSWORD = "your_cert_password";
    // 推送证书路径
    private static final String CERT_PATH = "path/to/agconnect-services.p12";

    public static void main(String[] args) throws HuaweiPushException {
        // 初始化推送服务
        HuaweiPushService pushService = HuaweiPushService.builder()
                .withAppId(APP_ID)
                .withAppSecret(APP_SECRET)
                .withCertPath(CERT_PATH)
                .withCertPassword(CERT_PASSWORD)
                .withHTTPSClient(HTTPSClientUtil.createSSLClient())
                .build();

        // 构建通知内容
        AndroidNotification notification = AndroidNotification.builder()
                .setTitle("服务器推送测试")
                .setBody("这是一条来自服务器的鸿蒙推送通知!")
                .setClickAction("OPEN_APP") // 点击通知打开应用
                .build();

        // 构建推送消息
        com.huawei.push.message.Message message = com.huawei.push.message.Message.builder()
                .setNotification(notification)
                .addToken("device_token") // 目标设备Token
                .build();

        // 发送推送
        SendResponse response = pushService.send(message);
        System.out.println("推送结果:" + response);
    }
}
更多服务器端 API 参考:华为推送服务 API 文档
五、实战三:接入鸿蒙后台任务
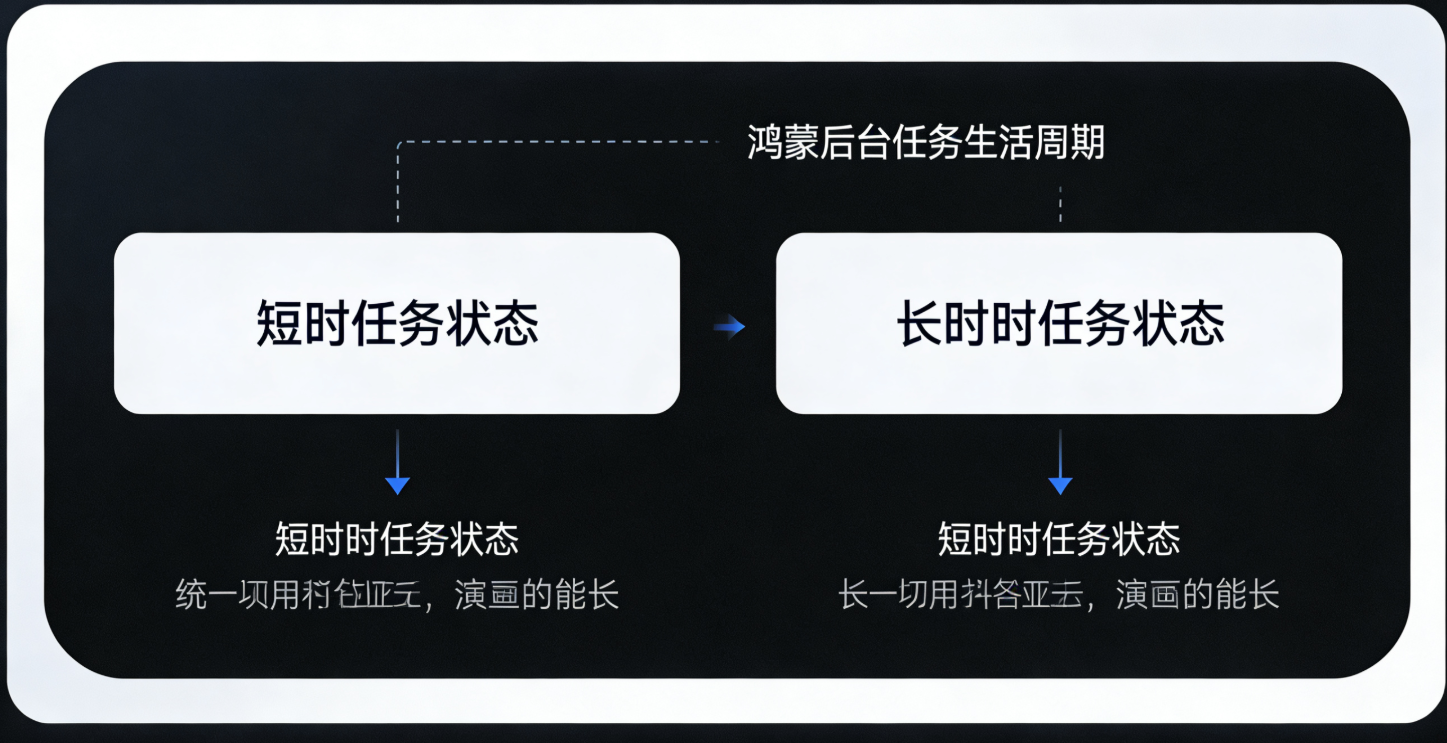
鸿蒙后台任务适用于需要在应用退到后台后继续执行的场景(如数据同步、定位更新、消息轮询)。鸿蒙系统提供了两种后台任务类型:
- 短时后台任务:最长运行 5 分钟,适用于快速完成的任务(如数据上传)。
- 长时后台任务:需用户授权,适用于持续运行的任务(如音乐播放、导航)。
本节将实现 Flutter 调用鸿蒙原生 API 创建短时后台任务,并接收任务执行结果。
5.1 鸿蒙原生端后台任务配置
步骤 1:添加后台任务权限
在module.json5中添加后台任务权限:
json
{
  "module": {
    "requestPermissions": [
      {
        "name": "ohos.permission.KEEP_BACKGROUND_RUNNING" // 后台运行权限
      }
    ],
    "abilities": [
      {
        "name": ".MainAbility",
        // 声明支持后台任务
        "backgroundModes": ["dataTransfer"], // dataTransfer:数据传输类型(根据业务选择)
        ...
      }
    ]
  }
}
步骤 2:创建后台任务服务(Continuation)
创建BackgroundTaskService类,继承Continuation,实现后台任务逻辑:
java
运行
// entry/src/main/java/com/example/flutter_harmony/BackgroundTaskService.java
import ohos.aafwk.ability.AbilityContext;
import ohos.backgroundtaskmanager.BackgroundTaskManager;
import ohos.backgroundtaskmanager.TaskParam;
import ohos.hiviewdfx.HiLog;
import ohos.hiviewdfx.HiLogLabel;
import ohos.rpc.RemoteException;

public class BackgroundTaskService implements Continuation {
    private static final HiLogLabel LABEL = new HiLogLabel(HiLog.DEBUG, 0x00001, "BackgroundTask");
    private final AbilityContext context;
    private final EventChannel.EventSink eventSink; // 用于向Flutter发送任务结果

    public BackgroundTaskService(AbilityContext context, EventChannel.EventSink eventSink) {
        this.context = context;
        this.eventSink = eventSink;
    }

    // 后台任务执行逻辑
    @Override
    public boolean onContinue() {
        HiLog.info(LABEL, "后台任务开始执行");
        try {
            // 示例:模拟数据同步任务(耗时3秒)
            Thread.sleep(3000);
            String result = "数据同步完成:" + System.currentTimeMillis();
            HiLog.info(LABEL, "后台任务执行成功:%s", result);

            // 向Flutter发送任务执行结果
            if (eventSink != null) {
                eventSink.success(result);
            }
            return true; // 任务执行成功
        } catch (InterruptedException e) {
            HiLog.error(LABEL, "后台任务执行失败:%s", e.getMessage());
            if (eventSink != null) {
                eventSink.error("TASK_FAILED", "任务执行失败", e.getMessage());
            }
            return false; // 任务执行失败
        }
    }

    // 任务被系统中断时触发
    @Override
    public void onDisconnect() {
        HiLog.info(LABEL, "后台任务被中断");
    }

    // 启动短时后台任务
    public void startShortBackgroundTask() {
        // 配置后台任务参数(短时任务,优先级默认)
        TaskParam taskParam = new TaskParam(TaskParam.TASK_TYPE_SHORT_TERM);
        try {
            // 提交后台任务
            BackgroundTaskManager.submitContinuationTask(this, taskParam);
            HiLog.info(LABEL, "短时后台任务提交成功");
        } catch (RemoteException e) {
            HiLog.error(LABEL, "提交后台任务失败:%s", e.getMessage());
            if (eventSink != null) {
                eventSink.error("SUBMIT_TASK_FAILED", "提交任务失败", e.getMessage());
            }
        }
    }
}
步骤 3:注册后台任务 MethodChannel
在MainAbility中注册 MethodChannel,处理 Flutter 启动后台任务的请求:
java
运行
// MainAbility.java
public static final String METHOD_CHANNEL_BACKGROUND = "com.example.flutter_harmony/background_task";
public static final String EVENT_CHANNEL_BACKGROUND = "com.example.flutter_harmony/background_event";

@Override
public void onCreate() {
    super.onCreate();
    // 注册后台任务MethodChannel
    registerBackgroundTaskChannel();
}

private void registerBackgroundTaskChannel() {
    // 注册EventChannel,用于发送任务执行结果
    EventChannel backgroundEventChannel = new EventChannel(getAbilityContext().getExternalAbility(), EVENT_CHANNEL_BACKGROUND);
    backgroundEventChannel.setStreamHandler(new EventChannel.StreamHandler() {
        @Override
        public void onListen(Object arguments, EventChannel.EventSink events) {
            // 注册MethodChannel,处理Flutter启动任务的请求
            new MethodChannel(getAbilityContext().getExternalAbility(), METHOD_CHANNEL_BACKGROUND)
                    .setMethodCallHandler((call, result) -> {
                        if (call.method.equals("startShortBackgroundTask")) {
                            // 启动短时后台任务
                            BackgroundTaskService taskService = new BackgroundTaskService(getAbilityContext(), events);
                            taskService.startShortBackgroundTask();
                            result.success(true);
                        } else {
                            result.notImplemented();
                        }
                    });
        }

        @Override
        public void onCancel(Object arguments) {}
    });
}
5.2 Flutter 端后台任务封装与调用
步骤 1:创建后台任务工具类
dart
// lib/services/harmony_background_service.dart
import 'package:flutter/services.dart';

class HarmonyBackgroundService {
  static const MethodChannel _methodChannel = MethodChannel('com.example.flutter_harmony/background_task');
  static const EventChannel _eventChannel = EventChannel('com.example.flutter_harmony/background_event');

  /// 启动短时后台任务
  static Future<bool> startShortBackgroundTask() async {
    try {
      final result = await _methodChannel.invokeMethod<bool>('startShortBackgroundTask');
      return result ?? false;
    } on PlatformException catch (e) {
      print('启动后台任务失败:${e.code} - ${e.message}');
      return false;
    }
  }

  /// 监听后台任务执行结果
  static Stream<String> listenBackgroundTaskResult() {
    return _eventChannel.receiveBroadcastStream().map((event) {
      if (event is String) {
        return event;
      } else if (event is Map) {
        throw PlatformException(
          code: event['code'] as String,
          message: event['message'] as String,
        );
      } else {
        throw PlatformException(code: 'UNKNOWN_ERROR', message: '未知错误');
      }
    });
  }
}
步骤 2:Flutter 页面调用示例
dart
// lib/pages/background_task_demo.dart
import 'package:flutter/material.dart';
import 'package:flutter_harmony_demo/services/harmony_background_service.dart';

class BackgroundTaskDemoPage extends StatefulWidget {
  const BackgroundTaskDemoPage({super.key});

  @override
  State<BackgroundTaskDemoPage> createState() => _BackgroundTaskDemoPageState();
}

class _BackgroundTaskDemoPageState extends State<BackgroundTaskDemoPage> {
  bool _isTaskRunning = false;
  String _taskResult = "未执行任务";

  @override
  void initState() {
    super.initState();
    // 监听后台任务结果
    _listenTaskResult();
  }

  void _listenTaskResult() {
    HarmonyBackgroundService.listenBackgroundTaskResult().listen((result) {
      setState(() {
        _isTaskRunning = false;
        _taskResult = result;
      });
      ScaffoldMessenger.of(context).showSnackBar(
        SnackBar(content: Text("后台任务完成:$result")),
      );
    }).onError((error) {
      setState(() {
        _isTaskRunning = false;
        _taskResult = "任务失败:${error.message}";
      });
      ScaffoldMessenger.of(context).showSnackBar(
        SnackBar(content: Text("后台任务失败:${error.message}")),
      );
    });
  }

  void _startBackgroundTask() async {
    setState(() {
      _isTaskRunning = true;
      _taskResult = "任务执行中...";
    });
    final success = await HarmonyBackgroundService.startShortBackgroundTask();
    if (!success) {
      setState(() {
        _isTaskRunning = false;
        _taskResult = "任务启动失败";
      });
    }
  }

  @override
  Widget build(BuildContext context) {
    return Scaffold(
      appBar: AppBar(title: const Text("后台任务测试")),
      body: Padding(
        padding: const EdgeInsets.all(16.0),
        child: Column(
          crossAxisAlignment: CrossAxisAlignment.stretch,
          children: [
            ElevatedButton(
              onPressed: _isTaskRunning ? null : _startBackgroundTask,
              child: _isTaskRunning
                  ? const CircularProgressIndicator(color: Colors.white)
                  : const Text("启动短时后台任务"),
            ),
            const SizedBox(height: 32),
            Card(
              child: Padding(
                padding: const EdgeInsets.all(16.0),
                child: Column(
                  children: [
                    const Text("任务状态", style: TextStyle(fontSize: 16, fontWeight: FontWeight.bold)),
                    const SizedBox(height: 8),
                    Text(_taskResult, style: const TextStyle(fontSize: 14)),
                  ],
                ),
              ),
            ),
          ],
        ),
      ),
    );
  }
}
5.3 测试与验证
- 运行应用,进入
BackgroundTaskDemoPage,点击 "启动短时后台任务"。 - 将应用退到后台(按返回键或主页键)。
- 等待 3 秒后,查看通知栏或应用内的任务结果:
- 任务执行成功后,应用内会显示 "数据同步完成"。
- 即使应用在后台,任务仍会继续执行。
5.4 长时后台任务(扩展)
如果需要实现长时后台任务(如音乐播放),需额外配置:
- 在
module.json5的backgroundModes中添加对应的类型(如"audioPlayback")。 - 申请用户授权:
java
运行
// 引导用户授权长时后台运行
Intent intent = new Intent();
Operation operation = new Intent.OperationBuilder()
        .withAction("ohos.settings.action.APPLICATION_DETAILS_SETTINGS")
        .withUri(Uri.parse("package:" + getBundleName()))
        .build();
intent.setOperation(operation);
startAbility(intent);- 使用
TaskParam.TASK_TYPE_LONG_TERM创建任务参数。
更多后台任务类型参考:鸿蒙后台任务开发指南
六、常见问题与避坑指南
6.1 本地通知不显示
- 检查
module.json5中是否添加了ohos.permission.NOTIFICATION权限。 - 确认通知通道已创建,且优先级设置正确(
PRIORITY_HIGH才会弹窗)。 - 检查通知图标是否存在,且尺寸符合要求。
6.2 推送 Token 获取失败
- 确认
agconnect-services.json文件已放置在entry/src/main目录下。 - 检查应用包名与华为开发者联盟中的包名一致。
- 确保设备已连接网络,且鸿蒙系统版本支持华为推送服务(需 HarmonyOS 2.0+)。
6.3 后台任务被系统回收
- 短时后台任务最长运行 5 分钟,不可超时。
- 长时后台任务需用户授权,且需在
backgroundModes中声明正确的类型。 - 避免在后台任务中执行耗时过长或资源密集型操作(如大量网络请求、复杂计算)。
6.4 Flutter 与鸿蒙原生通信失败
- 确保 MethodChannel/EventChannel 的名称在两端一致(大小写敏感)。
- 检查参数传递类型是否匹配(如 Flutter 的 int 对应 Java 的 int,Flutter 的 Map 对应 Java 的 HashMap)。
- 在原生端添加日志(
Log.i/HiLog.info),排查方法是否被调用。
七、扩展与进阶
7.1 通知的高级用法
- 自定义通知布局 :通过
setContent方法设置自定义的 RemoteViews 布局。 - 通知分组 :使用
setGroup和setGroupSummary实现通知分组显示。 - 进度条通知:适用于文件下载、任务进度展示,参考 3.4 节。
7.2 推送服务的高级特性
- 离线消息:华为推送服务支持离线消息存储,设备上线后自动推送。
- 消息回执:服务器可获取消息的送达状态、点击状态。
- 多设备同步:同一华为账号下的多台鸿蒙设备可同步接收推送消息。
7.3 后台任务的优化
- 任务调度 :使用
BackgroundTaskManager.scheduleBackgroundTask实现定时后台任务。 - 资源限制:后台任务的 CPU、内存使用受到系统限制,需优化代码效率。
- 电量优化:避免频繁启动后台任务,尽量批量处理任务。
八、总结
本文详细讲解了鸿蒙 Flutter 接入系统能力的三大核心场景:本地通知、推送通知、后台任务,通过 MethodChannel 和 EventChannel 实现了 Flutter 与鸿蒙原生的无缝通信,提供了完整可运行的代码示例和测试方案。
关键要点回顾:
- 本地通知 :需创建通知通道,通过
NotificationHelper发送通知,支持自定义样式和点击跳转。 - 推送通知 :基于华为推送服务,需开通开发者账号并配置
agconnect-services.json,支持透传消息和通知消息。 - 后台任务 :区分短时和长时任务,需声明权限和后台模式,通过
Continuation实现任务逻辑。
通过本文的学习,你可以快速实现鸿蒙 Flutter 应用的系统级能力接入,为用户提供更原生、更稳定的体验。如果在实践中遇到问题,可参考以下资源:
参考资料
欢迎在评论区分享你的实践经验或问题,也可以关注我的专栏《鸿蒙 Flutter 全栈开发实战》,获取更多鸿蒙生态与跨平台技术的深度内容!