1、c++修改qml控件的属性
qml文件
cpp
import QtQuick

Window {
    width: 640
    height: 480
    visible: true
    title: qsTr("Hello World")

    Rectangle{
        objectName: "rect"
        width: 300
        height: 300
        color: "red"

    }

}
main.cpp文件
cpp
#include <QGuiApplication>
#include <QQmlApplicationEngine>
#include <QQmlProperty>
#include <QDebug>

int main(int argc, char *argv[])
{
    QGuiApplication app(argc, argv);

    QQmlApplicationEngine engine;     //QML是使用引擎(QQmlApplicationEngine)把QML里面的对象树渲染出来的
    QObject::connect(
        &engine,
        &QQmlApplicationEngine::objectCreationFailed,
        &app,
        []() { QCoreApplication::exit(-1); },
        Qt::QueuedConnection);
    engine.loadFromModule("QmlCpp", "Main");


    QObject *obj = engine.rootObjects().first();
    qDebug() << "root obj size :" << engine.rootObjects().size() << obj;

    QQmlProperty(obj, "title").write("hello window.");
    QQmlProperty(obj, "width").write("300");
    QQmlProperty(obj, "height").write("300");

    QObject *rect = obj->findChild<QObject *>("rect");
    QQmlProperty(rect, "color").write("blue");
    QQmlProperty(rect, "width").write("100");
    QQmlProperty(rect, "height").write("100");

    return app.exec();
}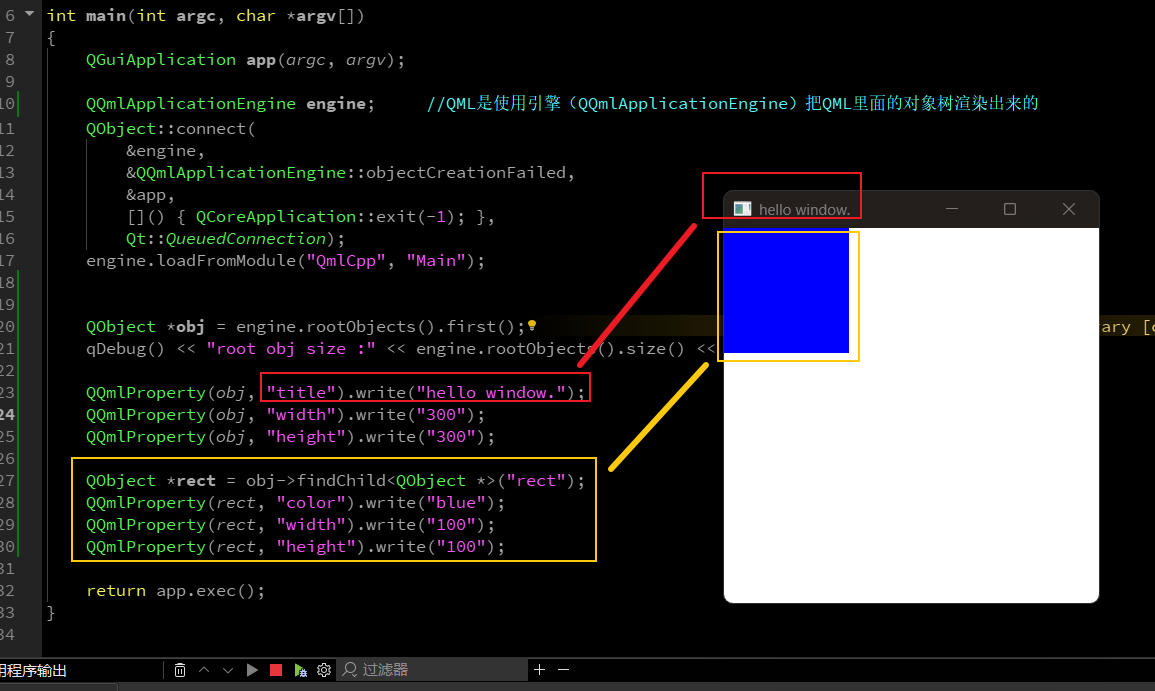
如上图可知,在qml文件里面的qml控件的属性已经被cpp文件的中c++修改了。
为啥可以修改呢?
QML是使用引擎(QQmlApplicationEngine )把QML里面的对象树渲染(直接使用GPU)出来的
那么使用
QObject *rect = obj->findChild<QObject *>("rect");
QQmlProperty(rect, "color").write("blue");
这些就可以使用obj->findChild<QObject *>("rect"); 根据对象的名字找到对应的对象,然后使用QQmlProperty修改对的应的属性了。
2、c++访问qml的功能
cpp
import QtQuick

Window {
    width: 640
    height: 480
    visible: true
    title: qsTr("Hello World")

    signal sig()

    onSig: {
        console.log("window sig is trigger .")
    }

    function func(arg){
        console.log("func arg is :", arg)
        return "funcRet"
    }

    Rectangle{
        objectName: "rect"
        width: 300
        height: 300
        color: "red"

    }

}
main.cpp中加入以下代码
cpp
QMetaObject::invokeMethod(obj, "sig");
QVariant ret;  //获取函数的返回值的
//Q_RETURN_ARG(QVariant, ret),这个第一个的参数是返回值的类型,第二个参数是返回值
//Q_ARG(QVariant, "qweqwe"),第一个是传入参数的类型,第二个是参数的值
QMetaObject::invokeMethod(obj, "func", Q_RETURN_ARG(QVariant, ret), Q_ARG(QVariant, "qweqwe"));
qDebug() << "main.cpp func ret :" << ret;
执行结果:
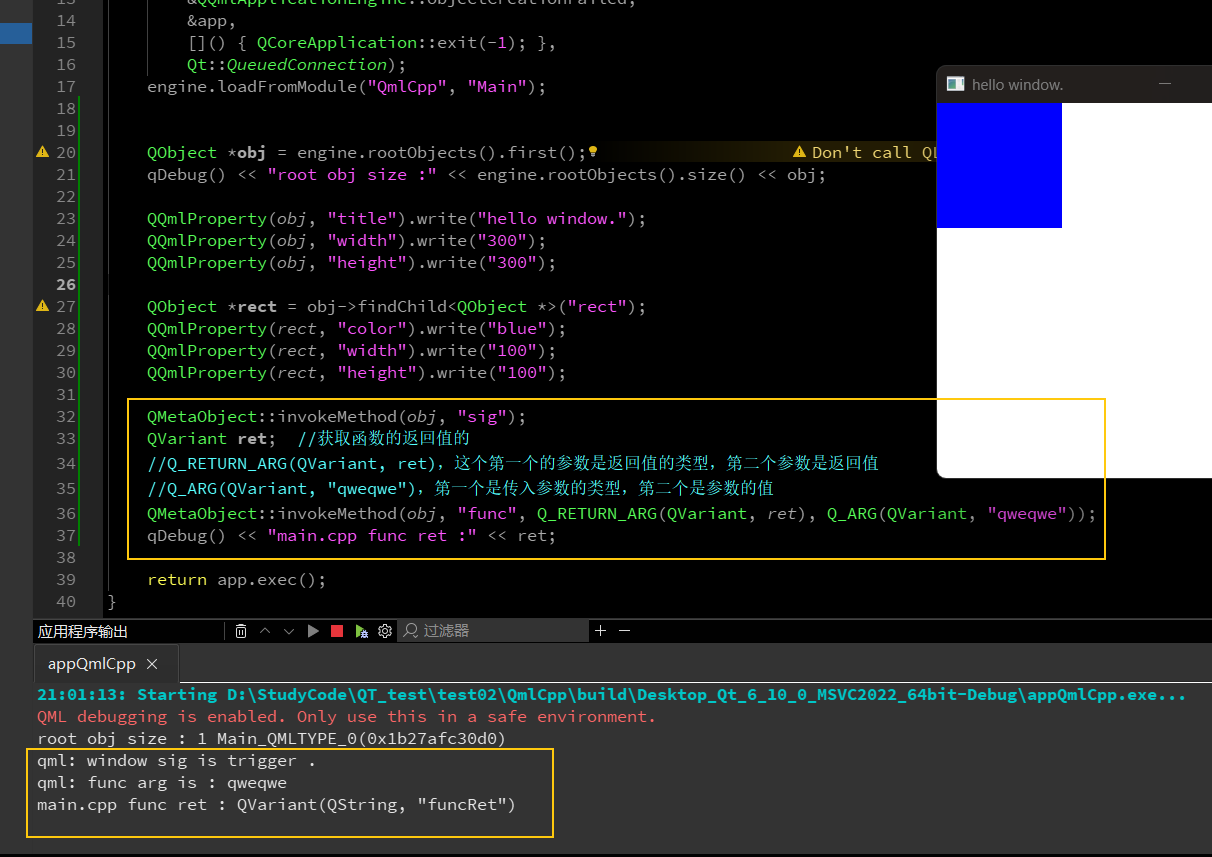
如上图,信号和函数和返回值都触发成功了。
3、qml信号触发c++中的槽函数
先创建一个c++类,然后写一个槽函数
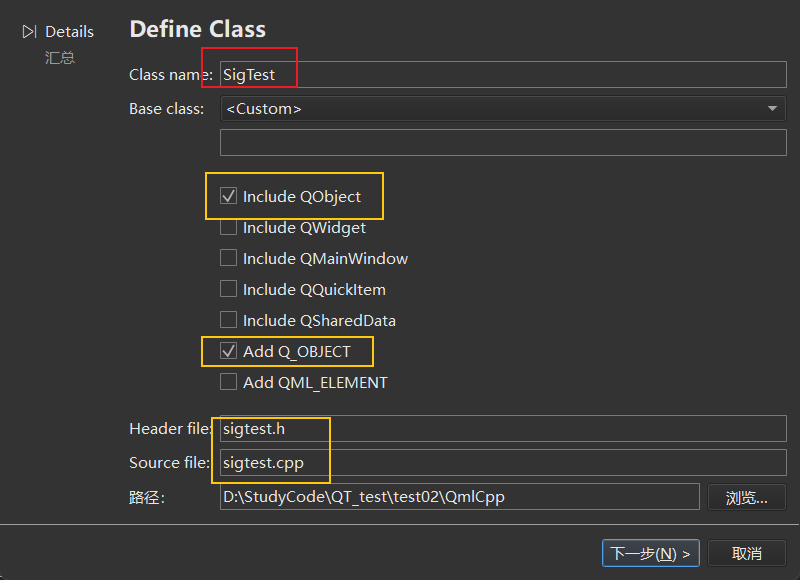
c++槽函数
cpp
#include "sigtest.h"

#include <QDebug>

SigTest::SigTest() {}

void SigTest::printfFunc()
{
    qDebug() << "SigTest::printfFunc";
}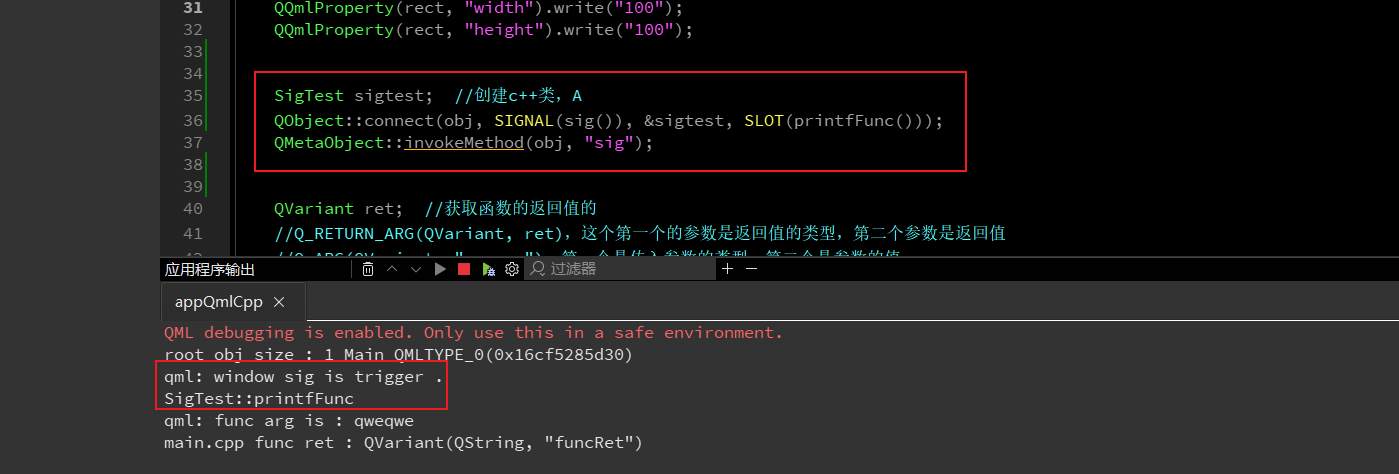
如上图,触发了qml中的信号后,就打印出c++中的槽函数。