1. 组件
1)组件的概念
- 组件是一个独立、可复用的vue实例,也是一段独立的UI视图。
- 把需要复用的代码放到一个vue文件中,即为一个组件。
- 组件由3部分组成:template,script,style。
让组件支持less/scss,style标签中 lang = "less/scss"
装包:npm i less less-loader -D 或者 npm i sass -D
- 哪里需要用到这个文件,就在哪里导入,当作标签使用即可。
如下代码所示,此处的TestThree.vue就可以看成是一个组件,被App.vue文件引用。
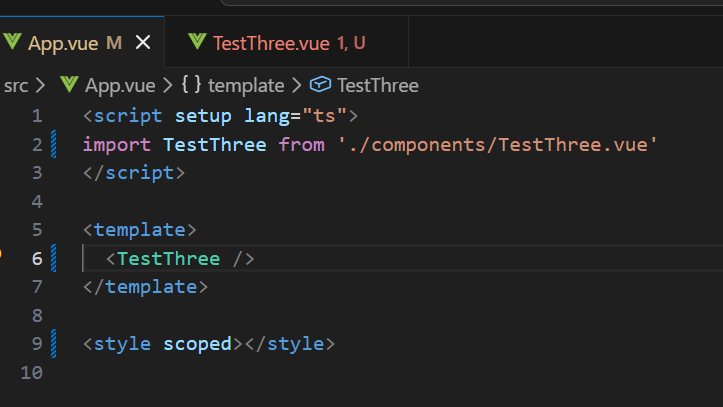
使用时,我们把TestThree当作一个组件使用,即<TestThree>。
2)组件化
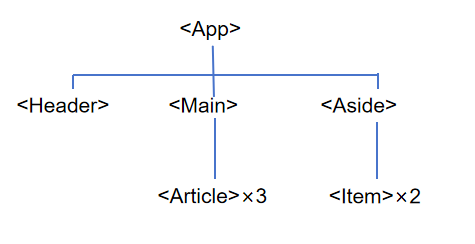
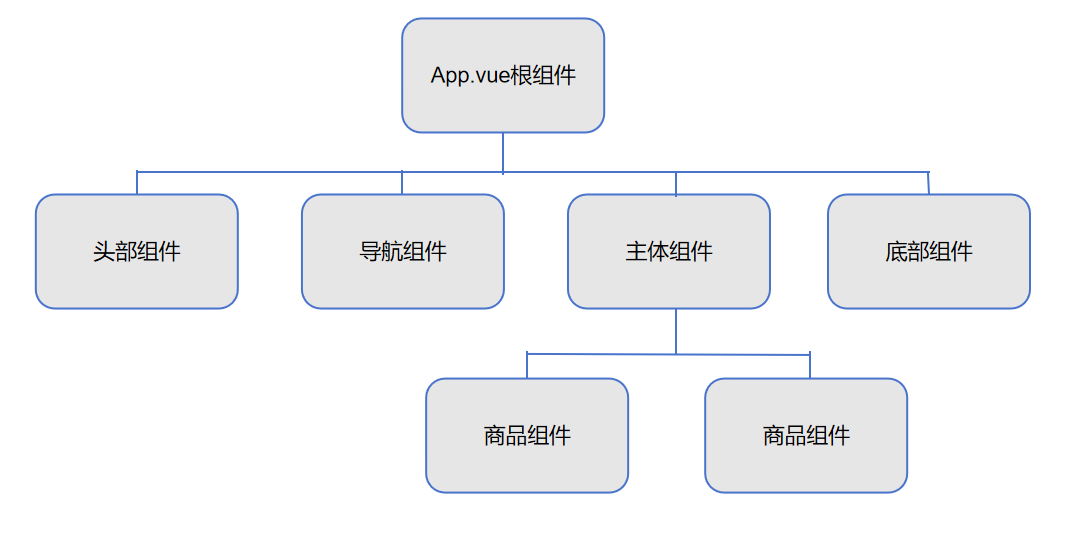
一种开发思想,把页面看作由一个个组件组合而成。可以化大为小、化繁为简,增加代码复用性。
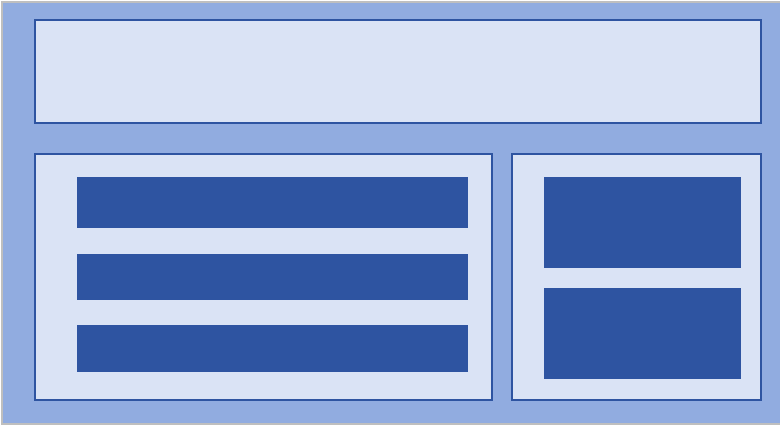
例如:下面这个页面的代码如果都写在一起,内容就会比较混乱,不易理解,不好维护。可以考虑模块化的方式,拆分这个页面。
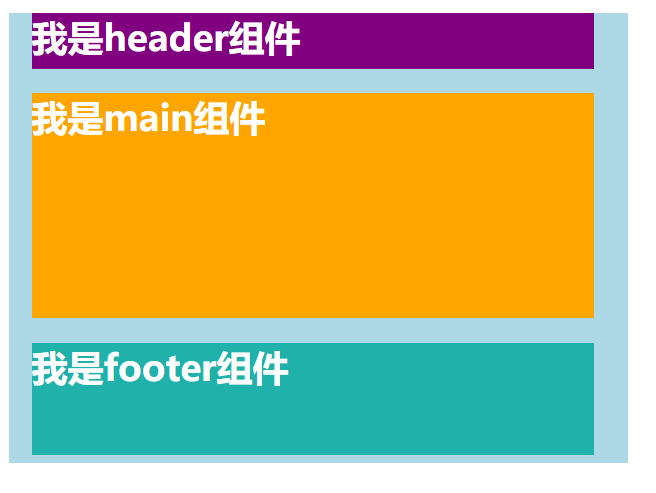
3)根组件 App.vue
根组件是整个应用的最上层,包裹所有普通小组件
4) 组件的使用
① 创建:新建.vue文件,编写组件代码
② 导入
import 组件对象 from '组件路径'
//例如
import MyPanel from '.components/MyPanel.vue'
**注意:**A组件内部导入的组件不能在B组件使用
③ 注册(仅限于全局组件):局部组件无需注册,全局组件需要在main.js中注册
④ 使用:把组件当作自定义标签使用(单双标签均可)
<组件名> </组件名>
<组件名/>
**组件的命名规范:**大驼峰法:MyPanel
示例:
App.vue
html
<script setup lang="ts">
import MyHeader from './components/MyHeader.vue'
import MyMain from './components/MyMain.vue'
import MyFooter from './components/MyFooter.vue'
</script>

<template>
  <div class="top">
    <MyHeader />
    <MyMain />
    <MyFooter />
  </div>
</template>

<style scoped>
.top {
  width: 550px;
  height: 400px;
  background-color: lightblue;
}
</style>
MyHeader.vue
html
<script lang="ts"></script>
<template>
  <div class="header">
    <h1>我是header组件</h1>
  </div>
</template>
<style>
.header {
  width: 500px;
  height: 50px;
  background-color: purple;
  color: white;
  margin: 20px 20px;
}
</style>
MyMain.vue
html
<script lang="ts"></script>
<template>
  <div class="main">
    <h1>我是main组件</h1>
  </div>
</template>
<style>
.main {
  width: 500px;
  height: 200px;
  background-color: orange;
  color: white;
  margin: 20px 20px;
}
</style>
MyFooter.vue
html
<script lang="ts"></script>
<template>
<div class="footer">
<h1>我是footer组件</h1>
</div>
</template>
<style>
.footer {
width: 500px;
height: 100px;
background-color: lightseagreen;
color: white;
margin: 20px 20px;
}
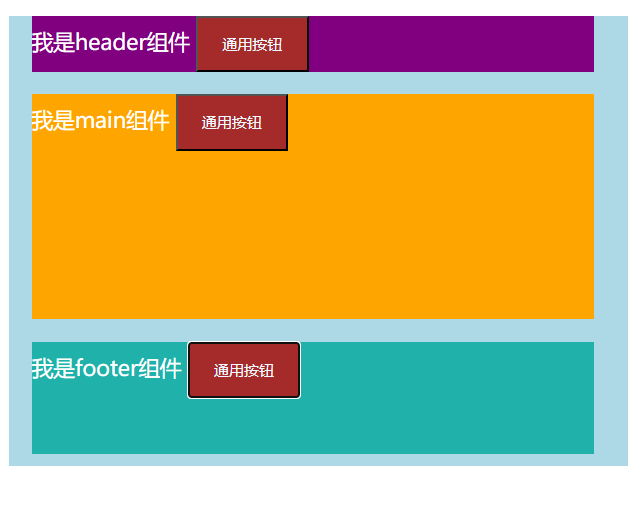
</style>5)组件的全局注册
main.js 导入并全局注册
import MyButton from './components/MyButton.vue'
app.component('MyButton', MyButton)
注册 app.component('组件命名', 组件对象)
注意:在应用挂载前注册通用组件
示例:给刚刚的三个组件分别增加一个通用按钮
main.ts
javascript
import { createApp } from 'vue'
import App from './App.vue'
import MyButton from './components/MyButton.vue'

const app = createApp(App)
app.component('MyButton', MyButton)
app.mount('#app')
MyHeader.vue
html
<script lang="ts"></script>
<template>
  <div class="header">
    我是header组件
    <MyButton />
  </div>
</template>
<style>
.header {
  font-size: larger;
  width: 500px;
  height: 50px;
  background-color: purple;
  color: white;
  margin: 20px 20px;
}
</style>
MyMain.vue
html
<script lang="ts"></script>
<template>
  <div class="main">
    我是main组件
    <MyButton />
  </div>
</template>
<style>
.main {
  font-size: larger;
  width: 500px;
  height: 200px;
  background-color: orange;
  color: white;
  margin: 20px 20px;
}
</style>
MyFooter.vue
html
<script lang="ts"></script>
<template>
  <div class="footer">
    我是footer组件
    <MyButton />
  </div>
</template>
<style>
.footer {
  font-size: larger;
  width: 500px;
  height: 100px;
  background-color: lightseagreen;
  color: white;
  margin: 20px 20px;
}
</style>
2. 组件生命周期
1)组件生命周期的概念:
vue组件从 创建 到 卸载 的全过程。
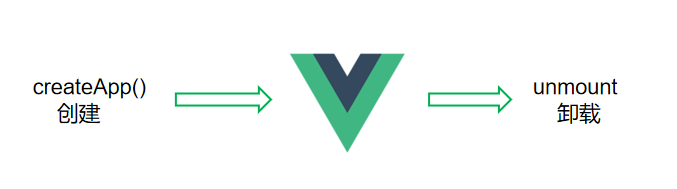
2)生命周期的四个阶段:
① 创建:创建响应式数据
② 挂载:渲染模板
③ 更新:修改数据,更新视图
④ 卸载:卸载组件
3)生命周期钩子:
- 每个组件在创建时都会经历一些初始化步骤,比如设置好数据监听,编译模板,挂载到DOM树上,在数据改变时更新DOM等。在此过程中会自动运行一些函数,称为vue生命周期钩子。
- 钩子的本质就是函数,只不过这些函数比较特殊,无需程序员调用,而是由vue3内部的执行机制调用
- 钩子函数的意义:给了程序员在特定时机有添加自己代码的机会。比如组件创建完毕时,就想发送ajax请求,那么可以在创建的钩子函数中编写相关代码;还比如页面渲染完成后,立刻让输入框自动聚焦,那么可以在挂载后的钩子函数中编写相关代码。
生命周期钩子官网示意图:
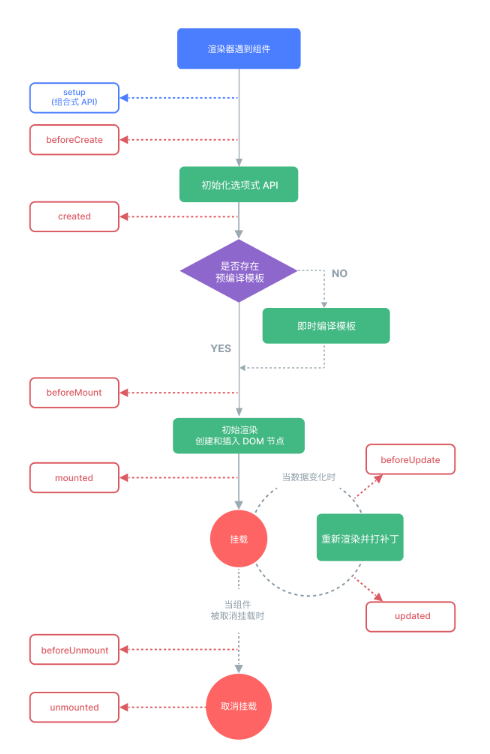
vue3代码编写风格:① 选项式API(Option API) ② 组合式API(Composition API)
4)选项式API生命周期钩子
选项式API下,组件首次渲染,会执行5个钩子:
setup / beforeCreate / created / beforeMount / mounted
- created:一进入组件就发请求
- mounted:最早可操作原生DOM
- unmounted:组件销毁,做优化工作
代码示例:(选项式API)
components/LifeCycle.vue
html
<script>
export default {
// 提供响应式数据
data() {
return {
count: 0
}
},
// 提供⽅法/函数
 methods: {
 fn() {
 console.log('fn 函数执⾏了')
 }
 },
 setup() {
 console.log('0-setup')
 },
 // 创建阶段(第⼀阶段):Vue组件创建/出⽣阶段:

 // 创建前:此时⽆法访问 data 数据,也⽆法调⽤ methods ⽅法
 beforeCreate() {
 console.log('1-beforeCreate')
 // console.log(this.count) // undefined
 // console.log(this.fn) // undefined
 },
 // 创建后:此时可以访问 data 数据,也可以调⽤ methods ⽅法
 created() {
 console.log('2-created')
 // console.log(this.count) // 0
 // // console.log(this.fn)// 访问到函数
 // this.fn()

 // 开启定时器
 // 给当前组件实例新增了⼀个 timerId 属性,保存了当前定时器的 id 值
 this.timerId = setInterval(() => {
 console.log(this.count)
 }, 1000)
 },

 // 挂载阶段(第⼆阶段):模版渲染阶段

 // 挂载前:此时写在 template 下的标签还没有变成真实DOM,故⽽⽆法获取DOM
 beforeMount() {
 console.log('3-beforeMount')
 console.log(document.querySelector('p')) // null
 },

 // 挂载后:此时写在 template 下的标签已经变成了真实DOM,故⽽可以获取DOM(是最早可以
//作DOM的时机)
 mounted() {
 console.log('4-mounted')
 console.log(document.querySelector('p')) // <p>0</p>
 document.querySelector('p').style.color = 'red'
 },

 // 更新阶段(第三阶段):数据变了,组件重新渲染的过程

 // 更新前
 beforeUpdate() {
 console.log('5-beforeUpdate')
 // console.log(this.count)

 console.log(document.querySelector('p').innerText) // 旧内容(以前的内容)
 },

 // 更新后
 updated() {
 console.log('6-updated')
 // console.log(this.count)
 console.log(document.querySelector('p').innerText) // 新内容
 },

 // 卸载阶段(第四阶段):组件移除阶段
 beforeUnmount() {
 console.log('7-beforeUnmount')
 },

unmounted() {
console.log('8-mounted')
// 关闭定时器
clearInterval(this.timerId)
}
}
</script>
<template>
<div>
<p>{{ count }}</p>
<button @click="count++">+1</button>
</div>
</template>
<style scoped></style>
App.vue
javascript
<script setup>
import { ref } from 'vue'
import LifeCycle from './components/LifeCycle.vue'
const isAlive = ref(true)
</script>
<template>
<life-cycle v-if="isAlive"/>
</template>
5)组合式API生命周期钩子
与vue2(选项式生命周期钩子对比)
|------|----------------------|--------------------------------|--------------------------|-----------------------------------|
| | 创建阶段 | 挂载阶段 | 更新阶段 | 销毁阶段 |
| vue2 | beforeCreate created | beforeMount mounted | beforeUpdate updated | beforeUnmount unmounted |
| vue3 | setup(网络请求) | onBeforeMount onMounted(操作DOM) | onBeforeUpdate onUpdated | onBeforeUnmount onUnmounted(清理工作) |
setup:一进入组件就发请求
onMounted:最早可操作原生DOM
onUnmounted:销毁组件,做优化工作
代码示例:
javascript
<script setup>
import { onMounted, onUnmounted } from 'vue'
// 开启定时器
const timer = setInterval(() => {
console.log('Hello World')
}, 1000)
// 组件挂载后
onMounted(() => {
// console.log(document.querySelector('p'))
// 将 p 标签的字体颜⾊设置为 green
document.querySelector('p').style.color = 'green'
})
// 组件卸载后
onUnmounted(() => {
// 关闭定时器
clearInterval(timer)
})
</script>
6)案例:生命周期钩子的应用
javascript
<script>
  import {onMounted, onUnmounted} from 'vue'

  //开启定时器
  const timer = setInterval(() => {
    console.log('hello world')
  },1000)

  //组件挂载后
  onMounted(()=>{
    //将p标签字体颜色设置为green
    document.querySelector('p').style.color = 'green'
  })

  //组件卸载后
  onUnmounted(()=>{
    //关闭定时器
    clearInterval(timer)
  })
</script>
7)在onMounted中操作DOM
html
<script lang="ts" setup>
import { onMounted } from 'vue'

onMounted(() => {
  const input = document.querySelector('input')
  input.focus()
})
</script>
<template>
  <div class = "search-box">
    <input type = "text"/>
    <button>搜索</button>
  </div>
</template>