先准备一台服务器,我用的是腾讯云centos
1.安装 Git
sudo yum install -y git
2 安装 Node(建议用 nvm)
curl -o- https://raw.githubusercontent.com/nvm-sh/nvm/v0.39.7/install.sh | bash
source ~/.bashrc
验证
nvm -v
安装node
nvm install 18
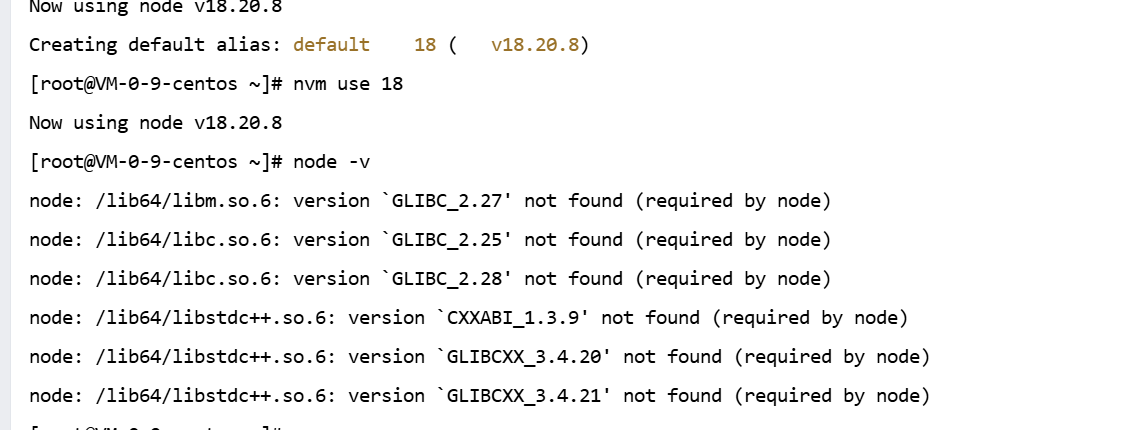 这个错误是因为系统中安装的 GLIBC(GNU C 库)和 libstdc++ 版本低于 Node.js 所需的版本
所以更换低版本node
nvm install 14
检查是否安装成功
node -v
3 创建文件夹
mkdir /var/www
cd /var/www
4 克隆项目
git clone *****
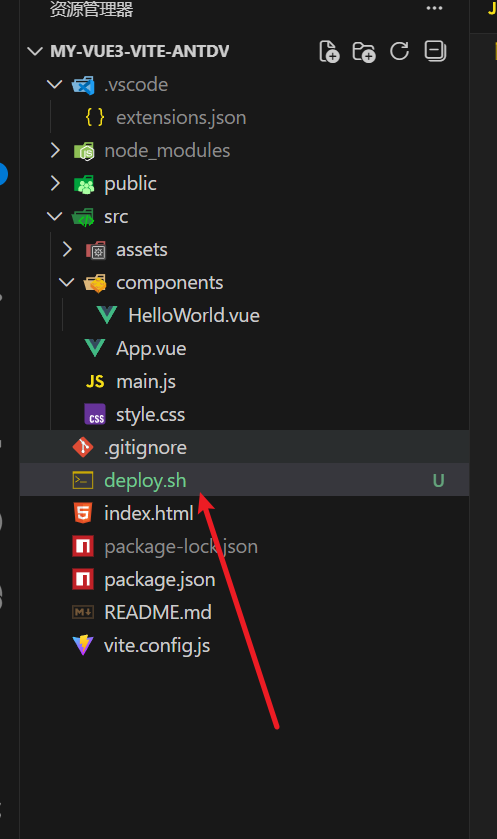
写一个部署脚本 deploy.sh
bash
#!/bin/bash
# 腾讯云CentOS - 修复Yarn缓存/依赖解压失败的部署脚本
# 适配gitee仓库 + 腾讯云npm镜像 + 缓存清理

# ===================== 配置项(根据实际情况修改)=====================
PROJECT_DIR="/var/www/test-automation-deployment"  # 修正为实际项目目录
NGINX_HTML_DIR="/usr/share/nginx/html"
GIT_BRANCH="master"
YARN_CACHE_DIR="/usr/local/share/.cache/yarn"     # Yarn缓存目录(报错路径)
# ====================================================================

# 定义颜色输出
RED='\033[0;31m'
GREEN='\033[0;32m'
YELLOW='\033[1;33m'
NC='\033[0m'

# 日志函数
log() {
    local LEVEL=$1
    local MESSAGE=$2
    local TIMESTAMP=$(date +"%Y-%m-%d %H:%M:%S")
    echo -e "[$TIMESTAMP] [$LEVEL] $MESSAGE"
}

# 错误退出
error_exit() {
    log "${RED}ERROR${NC}" "$1"
    exit 1
}

# 检查命令状态
check_status() {
    if [ $? -ne 0 ]; then
        error_exit "$1"
    fi
}

# 核心修复:清理损坏的Yarn缓存 + 修复权限
fix_yarn_cache() {
    log "${YELLOW}INFO${NC}" "==== 清理损坏的Yarn缓存 ===="
    # 1. 停止所有Yarn进程(防止缓存占用)
    pkill -f yarn >/dev/null 2>&1 || true

    # 2. 彻底删除Yarn缓存目录(核心解决解压报错)
    if [ -d "$YARN_CACHE_DIR" ]; then
        rm -rf "$YARN_CACHE_DIR"
        log "${GREEN}SUCCESS${NC}" "已删除损坏的Yarn缓存: $YARN_CACHE_DIR"
    fi

    # 3. 修复目录权限(解决EEXIST/EACCES错误)
    mkdir -p "$(dirname $YARN_CACHE_DIR)"
    chmod -R 775 "$(dirname $YARN_CACHE_DIR)"
    chown -R root:root "$(dirname $YARN_CACHE_DIR)"  # 腾讯云建议root权限

    # 4. 切换Yarn镜像源(避免腾讯云镜像源异常)
    yarn config set registry https://registry.npm.taobao.org >/dev/null 2>&1
    log "${GREEN}SUCCESS${NC}" "Yarn镜像源已切换为淘宝源(避开腾讯云镜像异常)"
}

# 前置检查
pre_check() {
    log "${YELLOW}INFO${NC}" "==== 前置检查 ===="
    # 检查root权限
    if [ "$(id -u)" != "0" ]; then
        error_exit "请用root执行:sudo ./deploy.sh"
    fi
    # 检查项目目录
    if [ ! -d "$PROJECT_DIR" ]; then
        error_exit "项目目录不存在: $PROJECT_DIR"
    fi
    # 检查核心命令
    command -v git >/dev/null 2>&1 || error_exit "未安装git,请执行:yum install -y git"
    command -v yarn >/dev/null 2>&1 || error_exit "未安装yarn,请执行:npm install -g yarn"
    log "${GREEN}SUCCESS${NC}" "前置检查完成"
}

# 主部署流程
main() {
    log "${YELLOW}INFO${NC}" "==== 自动部署开始 ===="

    # 1. 前置检查
    pre_check

    # 2. 修复Yarn缓存(核心步骤)
    fix_yarn_cache

    # 3. 进入项目目录
    log "${YELLOW}INFO${NC}" "1. 进入项目目录: $PROJECT_DIR"
    cd "$PROJECT_DIR" || error_exit "进入项目目录失败"

    # 4. 拉取最新代码
    log "${YELLOW}INFO${NC}" "2. 拉取最新代码(master分支)"
    git reset --hard
    check_status "git reset失败"
    git pull origin "$GIT_BRANCH"
    check_status "git pull失败(检查gitee仓库权限/网络)"

    # 5. 清理锁文件冲突
    log "${YELLOW}INFO${NC}" "3. 清理依赖锁文件"
    rm -f package-lock.json pnpm-lock.yaml yarn.lock
    log "${GREEN}SUCCESS${NC}" "已删除冲突锁文件"

    # 6. 安装依赖(重新生成缓存)
    log "${YELLOW}INFO${NC}" "4. 安装依赖(重新生成Yarn缓存)"
    yarn install --force --network-timeout 100000  # 延长超时(解决网络问题)
    check_status "yarn install失败(依赖下载/解压异常)"

    # 7. 构建项目
    log "${YELLOW}INFO${NC}" "5. 构建项目"
    yarn run build
    check_status "yarn build失败"
    # 检查dist目录
    if [ ! -d "./dist" ] || [ -z "$(ls -A ./dist)" ]; then
        error_exit "dist目录为空或不存在"
    fi

    # 8. 部署到Nginx
    log "${YELLOW}INFO${NC}" "6. 覆盖到Nginx目录"
    rm -rf "$NGINX_HTML_DIR"/*
    check_status "清空Nginx目录失败"
    cp -r dist/* "$NGINX_HTML_DIR/"
    check_status "复制dist文件失败"

    # 9. 修复Nginx权限
    chown -R nginx:nginx "$NGINX_HTML_DIR"
    systemctl restart nginx >/dev/null 2>&1 || service nginx restart >/dev/null 2>&1

    log "${GREEN}SUCCESS${NC}" "==== 部署完成 ===="
}

# 启动主流程
main
5.安装nginx
sudo yum install -y nginx && sudo systemctl start nginx && sudo systemctl enable nginx
编辑nginx front.conf文件
echo 'server { listen 80; server_name 你的域名或IP; root /usr/share/nginx/html; index index.html; }' | sudo tee /etc/nginx/conf.d/front.conf && sudo nginx -t && sudo systemctl reload nginx
重启nginx
sudo nginx -s reload
6.配置gitee webhook
管理 → Webhooks → 添加 WebHook
URL
字段 值
URL http://你的服务器IP:9001/deploy
触发事件 推送 Push
密码
自己设置(如:abc123)
7.创建 webhook 服务:webhook.js
cd /var/www
mkdir webhook && cd webhook
写入文件
cat > webhook.js << 'EOF'在这里插入代码片
javascript
const http = require('http');
const crypto = require('crypto');
const { exec } = require('child_process');
const SECRET = 'abc123'; // 与 Gitee Webhook 密码一致
function sign(body) {
return crypto
.createHmac('sha256', SECRET)
.update(body)
.digest('hex');
}
http.createServer((req, res) => {
if (req.url === '/deploy' && req.method === 'POST') {
let body = '';
req.on('data', chunk => (body += chunk));
req.on('end', () => {
// 校验签名
const signature = req.headers['x-gitee-timestamp'];
if (!signature) {
res.end('No sign');
return;
}
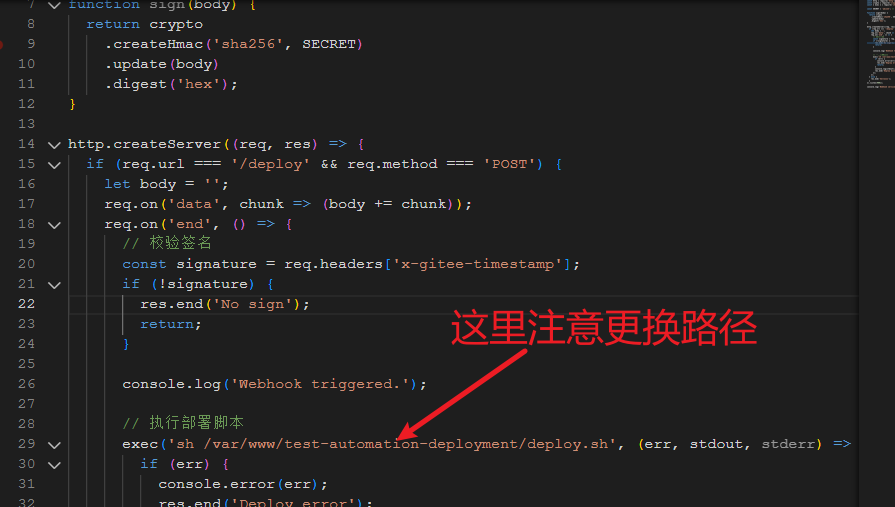
console.log('Webhook triggered.');
// 执行部署脚本 这里记得更换自己所在项目文件夹
exec('sh /var/www/test-automation-deployment/deploy.sh', (err, stdout, stderr) => {
if (err) {
console.error(err);
res.end('Deploy error');
return;
}
console.log(stdout);
res.end('Deploy done1112211');
});
});
} else {
res.end('hello111');
}
}).listen(9001);
console.log('Webhook service running at port 9001');EOF
改成自己所在项目路径
8.让 webhook 永久运行
npm install -g pm2
依赖管理工具yarn
npm install -g yarn
pm2 start webhook.js
pm2 save
pm2 startup
所有项目重启
pm2 restart all
查看日志
pm2 log
完工 撒花 自己提交代码试试吧