要开始折腾折腾 Azure Kinect 了,注意它和 Kinect 并不是一个东西。
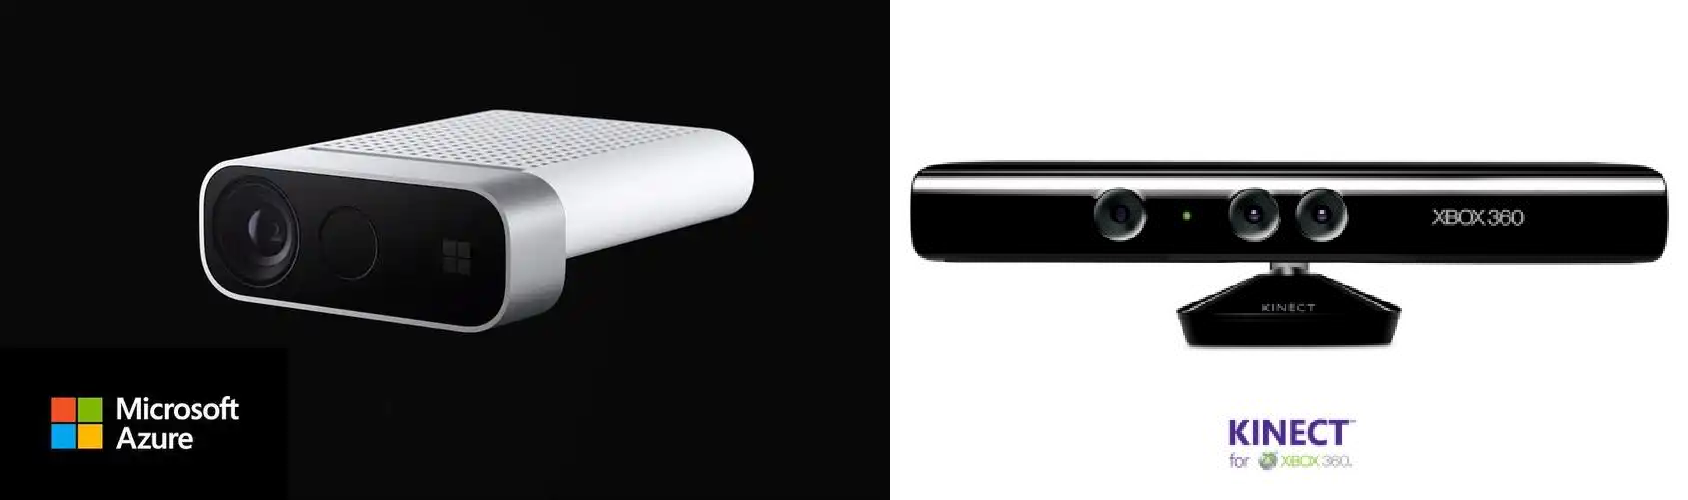
左边这个是 Azure Kinect,右边那个是 Kinect,或者叫 Microsoft Kinect 或者 Kinect for Windows,它两既长得不一样,用法也不一样,所以不要弄混了。Azure Kinect 用起来要简单一些。
Azure Kinect 的官方文档网址是 aka.ms/kinectdocs,它会跳转到 https://learn.microsoft.com/zh-cn/previous-versions/azure/kinect-dk/,我们也可以直接访问这个网址。这个是机翻的中文文档,内容不多,按照文档一步步操作就行,没什么难度。唯一要吐槽的就是这个鸡翻,没错,就像是鸡翻译的。举几个例子。
这里 "正文" 其实是 body。然后还有

这里标题中的 "车身框架" 和 下面的 "主体框架" 实际上都是 body frame,后面的 "主体索引映射" 是 body index map。更离谱的是下面这个。

"尸体" ??body 愣是给干成了 "尸体",你就说是不是从入门到入坟吧。
如果想看英文原文的话,可以把文档连接中的 zh_cn 替换成 en-us 就可以了。虽然官方文档的内容不算多,但也不是这一篇博客能完全涵盖的,这里只是告诉大家如何正确的开始,正所谓师傅领进门。
言归正传。
安装SDK
Azure Kinect 有两个 SDK:
第一个 SDK 只能装在 C 盘,第二个可以自由选择安装路径。这两个 SDK 在安装目录的 tools 目录里下也提供了一些工具给我们,可以将 tools 目录添加到环境变量,方便使用。
比如传感器 SDK 提供的 k4aviewer.exe 可以查看摄像头和麦克风数据,k4arecorder.exe 可以用来录制视频。骨架追踪 SDK 提供的 k4abt_simple_3d_viewer.exe 可以用来查看人体骨骼关节。我们可以用它们来验证设备是否正常工作。
需要注意的是 Azure Kinect 必须连接到 USB 3.0 接口,大多数电脑用蓝色标记,联想电脑在 USB 接口旁边有 SS 字样标记。
代码获取数据
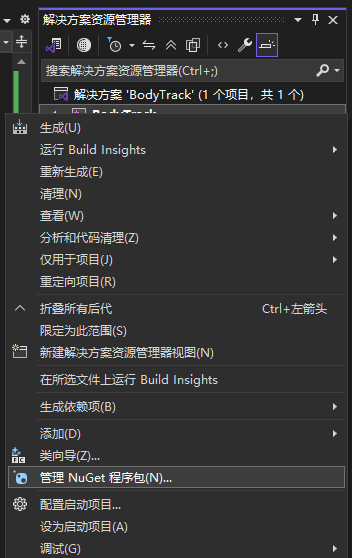
官网的示例可以直接跑,我们先来创建一个c++控制台工程,我用的是 visual studio 2022。在解决方案管理器中右键项目名,点击 管理 NuGet 程序包。
打开包管理页面后,在搜索框中输入 Microsoft.Azure.Kinect,然后依次点击前两个包,在右边详情页点击安装。因为我已经安装过来,所以显示的是卸载按钮。

Microsoft.Azure.Kinect.Sensor包用来获取传感器数据;Microsoft.Azure.Kinect.BodyTracking包用来获取人体骨架关节,如果不做人体追踪,只安装第一个就行。
依赖包会安装到项目的 packages 目录下,还自动生成了 packages.config 文件。不得不说,c嘎嘎终于鸟枪换炮了,包管理还是香。当然,你也可以用以前的那种方式去依赖之前安装的 SDK,头文件和库文件都在安装目录的 sdk 目录下。
添加完依赖以后,就可以导入相关头文件开始编程了。
c
#include <k4a/k4a.h>
#include <k4abt.h>
传感器相关的功能都在 k4a 下,人体追踪相关的功能都在 k4abt 下,bt 就是 B ody Tracking 的缩写。
把构建您的第一个身体追踪应用程序的示例程序拷贝到cpp文件中。
c
#include <stdio.h>
#include <stdlib.h>

#include <k4a/k4a.h>
#include <k4abt.h>

#define VERIFY(result, error)                                                                            \
    if(result != K4A_RESULT_SUCCEEDED)                                                                   \
    {                                                                                                    \
        printf("%s \n - (File: %s, Function: %s, Line: %d)\n", error, __FILE__, __FUNCTION__, __LINE__); \
        exit(1);                                                                                         \
    }                                                                                                    \

int main()
{
    k4a_device_t device = NULL;
    VERIFY(k4a_device_open(0, &device), "Open K4A Device failed!");

    // Start camera. Make sure depth camera is enabled.
    k4a_device_configuration_t deviceConfig = K4A_DEVICE_CONFIG_INIT_DISABLE_ALL;
    deviceConfig.depth_mode = K4A_DEPTH_MODE_NFOV_UNBINNED;
    deviceConfig.color_resolution = K4A_COLOR_RESOLUTION_OFF;
    VERIFY(k4a_device_start_cameras(device, &deviceConfig), "Start K4A cameras failed!");

    k4a_calibration_t sensor_calibration;
    VERIFY(k4a_device_get_calibration(device, deviceConfig.depth_mode, deviceConfig.color_resolution, &sensor_calibration),
        "Get depth camera calibration failed!");

    k4abt_tracker_t tracker = NULL;
    k4abt_tracker_configuration_t tracker_config = K4ABT_TRACKER_CONFIG_DEFAULT;
    VERIFY(k4abt_tracker_create(&sensor_calibration, tracker_config, &tracker), "Body tracker initialization failed!");

    int frame_count = 0;
    do
    {
        k4a_capture_t sensor_capture;
        k4a_wait_result_t get_capture_result = k4a_device_get_capture(device, &sensor_capture, K4A_WAIT_INFINITE);
        if (get_capture_result == K4A_WAIT_RESULT_SUCCEEDED)
        {
            frame_count++;
            k4a_wait_result_t queue_capture_result = k4abt_tracker_enqueue_capture(tracker, sensor_capture, K4A_WAIT_INFINITE);
            k4a_capture_release(sensor_capture); // Remember to release the sensor capture once you finish using it
            if (queue_capture_result == K4A_WAIT_RESULT_TIMEOUT)
            {
                // It should never hit timeout when K4A_WAIT_INFINITE is set.
                printf("Error! Add capture to tracker process queue timeout!\n");
                break;
            }
            else if (queue_capture_result == K4A_WAIT_RESULT_FAILED)
            {
                printf("Error! Add capture to tracker process queue failed!\n");
                break;
            }

            k4abt_frame_t body_frame = NULL;
            k4a_wait_result_t pop_frame_result = k4abt_tracker_pop_result(tracker, &body_frame, K4A_WAIT_INFINITE);
            if (pop_frame_result == K4A_WAIT_RESULT_SUCCEEDED)
            {
                // Successfully popped the body tracking result. Start your processing

                size_t num_bodies = k4abt_frame_get_num_bodies(body_frame);
                printf("%zu bodies are detected!\n", num_bodies);

                k4abt_frame_release(body_frame); // Remember to release the body frame once you finish using it
            }
            else if (pop_frame_result == K4A_WAIT_RESULT_TIMEOUT)
            {
                //  It should never hit timeout when K4A_WAIT_INFINITE is set.
                printf("Error! Pop body frame result timeout!\n");
                break;
            }
            else
            {
                printf("Pop body frame result failed!\n");
                break;
            }
        }
        else if (get_capture_result == K4A_WAIT_RESULT_TIMEOUT)
        {
            // It should never hit time out when K4A_WAIT_INFINITE is set.
            printf("Error! Get depth frame time out!\n");
            break;
        }
        else
        {
            printf("Get depth capture returned error: %d\n", get_capture_result);
            break;
        }

    } while (frame_count < 100);

    printf("Finished body tracking processing!\n");

    k4abt_tracker_shutdown(tracker);
    k4abt_tracker_destroy(tracker);
    k4a_device_stop_cameras(device);
    k4a_device_close(device);

    return 0;
}
把 Azure Kinect 插上电源,连接到电脑,然后点击运行按钮,大功告成。
需要更多功能可以查看相关 API 或者查看官方示例程序:
- https://microsoft.github.io/Azure-Kinect-Body-Tracking/release/1.x.x/structk4abt__frame__t.html
- https://github.com/microsoft/Azure-Kinect-Samples/tree/master