一句话说清 MCP
MCP 让 AI(比如 Claude、Cursor 的 AI)能安全地使用外部工具,比如操作文件、调用 API、查询数据库。
┌─────────────────┐    JSON-RPC over stdio    ┌─────────────────┐
│   AI 客户端      │ ◄──────────────────────► │   MCP 服务器     │
│  (Claude/Cursor) │                          │  (自定义工具)    │
└─────────────────┘                          └─────────────────┘
         │                                          │
         │                                          │
         ▼                                          ▼
    ┌─────────┐                              ┌─────────────┐
    │  用户    │                              │ 外部资源    │
    │ 交互界面 │                              │ (文件/API)  │
    └─────────┘                              └─────────────┘
为什么需要 MCP?
没有 MCP 时:AI 只能"想",不能"做"。
有了 MCP 后:AI 可以"想"并"做"(通过你写的工具)。
30分钟搞懂 MCP
第1步:安装
javascript
# 创建项目
mkdir my-mcp-tools
cd my-mcp-tools

# 安装必要包
npm init -y
npm install @modelcontextprotocol/sdk zod
第2步:写服务器(最简版)
TypeScript
// server.js
import { z } from "zod";
import fs from "node:fs";
import { McpServer } from "@modelcontextprotocol/sdk/server/mcp.js";
import { StdioServerTransport } from "@modelcontextprotocol/sdk/server/stdio.js";

// 创建 MCP 服务器
const server = new McpServer({
  name: "demo-mcp-server",
  version: "1.0.0",
});

// 定义求和工具
server.registerTool(
  "sum",
  {
    title: "数字求和",
    description: "两个数字求和",
    inputSchema: z.object({
      a: z.number().describe("第一个数字"),
      b: z.number().describe("第二个数字"),
    }),
  },
  ({ a, b }) => {
    const result = a + b;
    return {
      content: [
        {
          type: "text",
          text: `计算结果: ${a} + ${b} = ${result}`,
        },
      ],
    };
  }
);

// 定义创建文件工具
server.registerTool(
  "createFile",
  {
    title: "创建文件",
    description: "创建一个文本文件",
    inputSchema: z.object({
      fileName: z.string().describe("文件名(可包含路径)"),
      content: z.string().describe("文件内容"),
    }),
  },
  ({ fileName, content }) => {
    try {
      fs.writeFileSync(fileName, content);
      return {
        content: [
          {
            type: "text",
            text: `文件创建成功: ${fileName}\n大小: ${stats.size} 字节`,
          },
        ],
      };
    } catch (error) {
      return {
        content: [
          {
            type: "text",
            text: `错误: ${error.message}`,
          },
        ],
        isError: true,
      };
    }
  }
);

// 启动服务器
async function main() {
  const transport = new StdioServerTransport();
  await server.connect(transport);
  console.error("MCP 服务器已启动,使用标准输入输出通信");
}

main().catch((error) => {
  console.error("服务器启动失败:", error);
  process.exit(1);
});
第3步:在 Cursor 中使用
配置 Cursor
打开 Cursor 设置,找到 MCP 设置,添加:
TypeScript
{
  "mcpServers": {
    "my-tools": {
      "command": "node",
      "args": ["/绝对路径/server.js"]
    }
  }
}
实际使用
在 Cursor 中:
TypeScript
# 让AI帮我计算 15 + 28
# AI会自动调用 calculator 工具
# "计算结果: 15 + 28 = 43

# 让AI帮我创建文件:mcp.txt,内容为:Hello MCP
# AI会自动调用 note 工具
# 结果:文件创建成功
调试技巧
1. 用 Inspector 查看通信
TypeScript
npx @modelcontextprotocol/inspector启动后连接你的服务器,能看到所有 JSON-RPC 消息。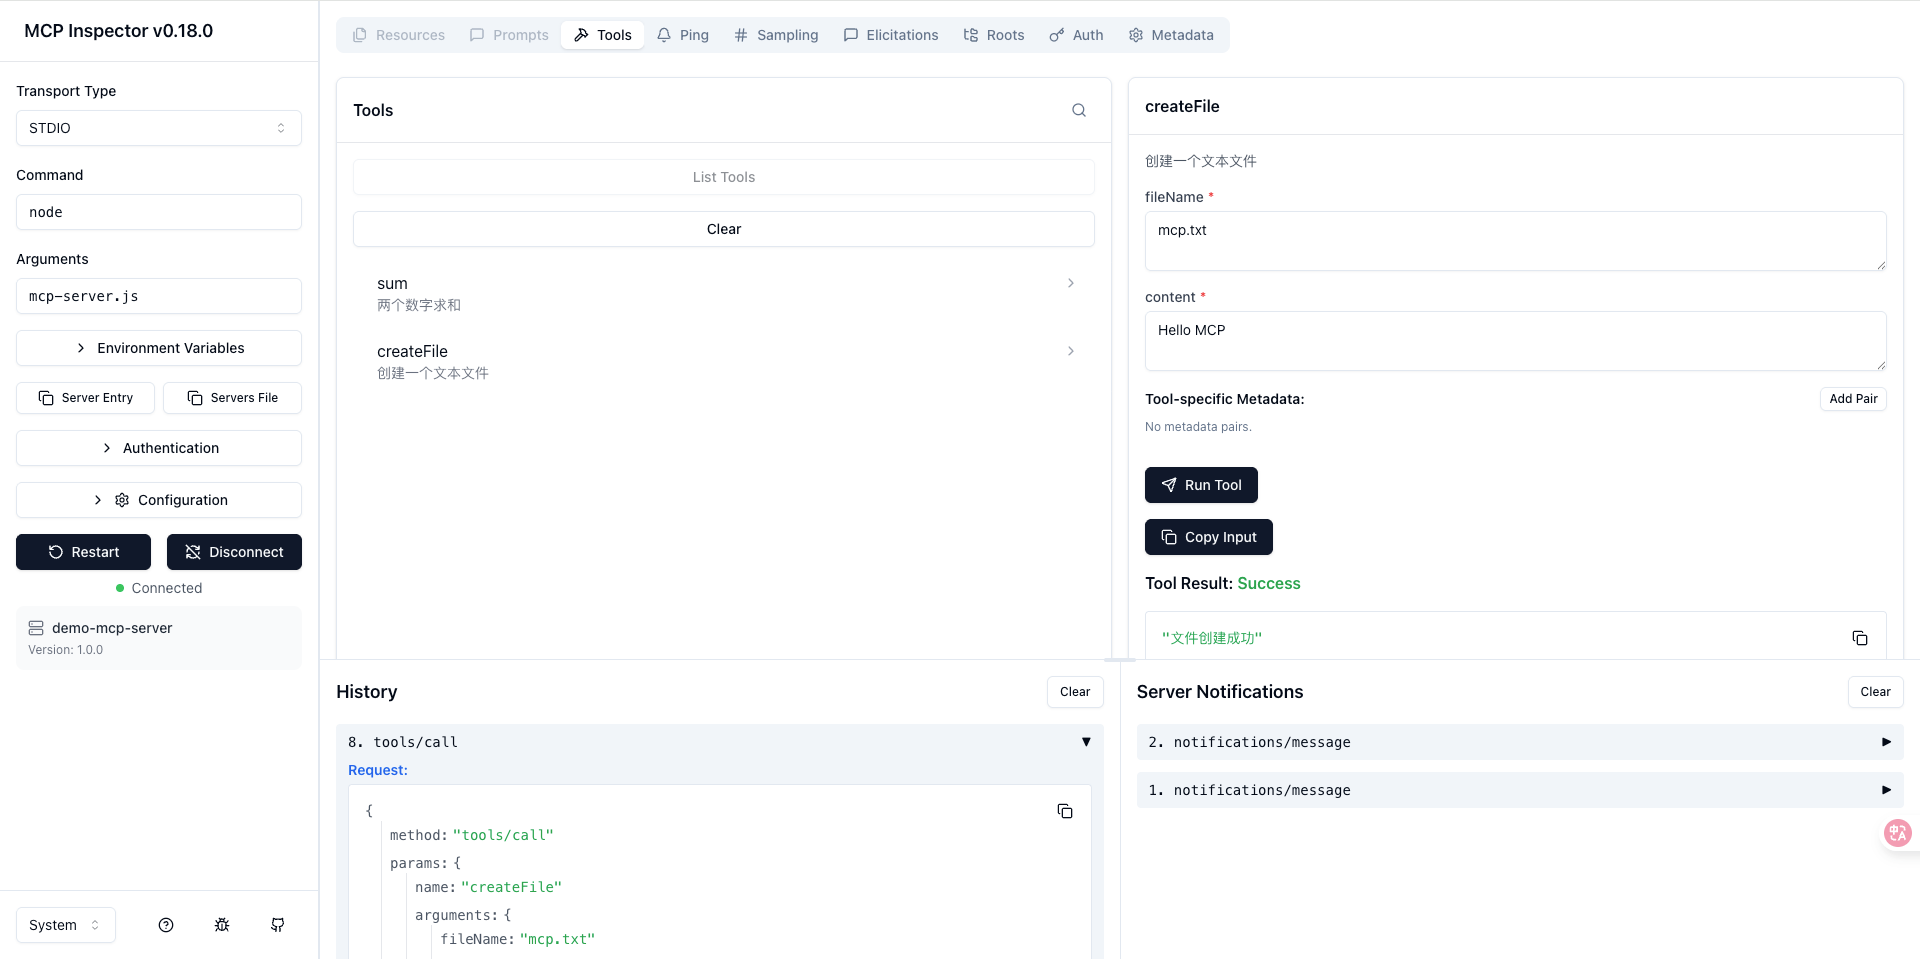
2. 手动测试
TypeScript
# 启动服务器
node server.js

# 另开终端,手动发请求
echo '{"jsonrpc":"2.0","id":1,"method":"initialize","params":{}}' | node server.js
真实场景案例
案例1:开发助手
TypeScript
// 添加开发工具
server.registerTool(
  "createComponent",
  {
    title: "创建组件",
    description: "创建一个React、Vue或svelte组件",
    inputSchema: {
      name: z.string(),
      type: z.enum(["react", "vue", "svelte"])
    }
  },
  ({ name, type }) => {
    const templates = {
      react: `export default function ${name}() {
  return <div>${name} Component</div>;
}`,
      vue: `<template>
  <div>${name} Component</div>
</template>`
    };

    const filename = `${name}.${type === 'react' ? 'jsx' : 'vue'}`;
    require("fs").writeFileSync(filename, templates[type]);

    return {
      content: [{
        type: "text",
        text: `创建了 ${filename}`
      }]
    };
  }
);
在 Cursor 中使用:
TypeScript
// 创建一个 React 组件叫 UserCard
// AI会调用 createComponent 工具
案例2:数据库查询
TypeScript
import { createClient } from '@libsql/client';

const db = createClient({
  url: process.env.DATABASE_URL
});

server.registerTool(
  "queryUsers",
  {
    title: "查询用户信息",
    description: "查询用户信息",
    inputSchema: {
      limit: z.number().default(10)
    }
  },
  async ({ limit }) => {
    const result = await db.execute(
      "SELECT * FROM users LIMIT ?",
      [limit]
    );

    return {
      content: [{
        type: "text",
        text: `找到 ${result.rows.length} 个用户:\n` +
          result.rows.map(r => `- ${r.name}`).join('\n')
      }]
    };
  }
);
案例3:调用外部 API
TypeScript
server.tool(
  "getWeather",
  {
    title: "查询天气",
    description: "查询城市天气情况",
    inputSchema: {
      city: z.string()
    }
  },
  async ({ city }) => {
    const response = await fetch(
      `https://api.weather.com/v1?city=${city}`
    );
    const data = await response.json();

    return {
      content: [{
        type: "text",
        text: `${city}天气: ${data.temp}°C, ${data.condition}`
      }]
    };
  }
);
记住这几点
-
MCP 很简单:就是写 JavaScript 函数,AI 来调用
-
调试很容易:用 Inspector 看所有通信
-
集成很顺畅:Cursor、Claude Desktop 都支持
-
扩展很方便:随时添加新工具