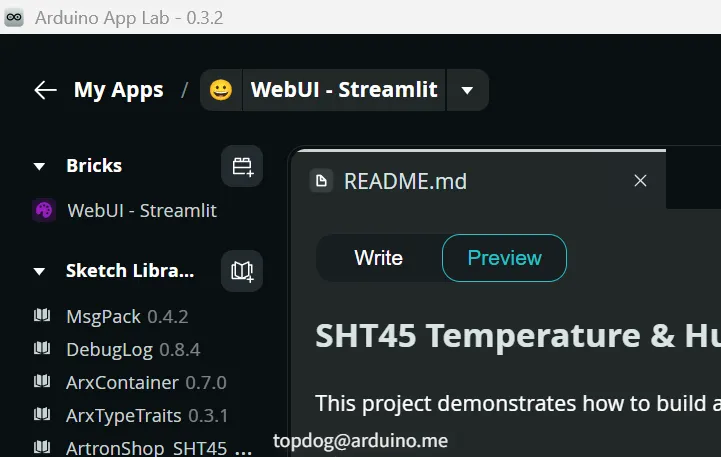
本示例是展示了如何将Arduino硬件与Python Web UI无缝集成,基于Arduino App Bricks框架构建一个实时温湿度监控系统。SHT45传感器每秒检测环境温湿度,通过Bridge通信层将数据传输到Python应用,最终在美观的Streamlit Web界面中实时展示。Arduino App Lab中的Streamlit金砖基于Python Web框架Streamlit的强大封装。她解决了传统Web开发的三大痛点:
1,无需前端技能:摆脱HTML/CSS/JavaScript的束缚,
2,即写即显:Python代码实时生成UI组件,
3,硬件无缝集成:内置Arduino专属组件和方法。
Arduino UNO Q中采用Streamlit将硬件开发门槛降低了90%,现在任何Python开发者都能5分钟内为设备创建控制面板。
项目系统架构
┌─────────────────────────────────────┐
│        Arduino UNO Q 开发板         │
│  ┌───────────────────────────────┐  │
│  │  sketch.ino (C++)             │  │
│  │  每秒读取SHT45传感器数据       │  │
│  │  通过Bridge.notify()发送到Python  │
│  └─────────────┬─────────────────┘  │
└───────────────┼─────────────────────┘
                │
                │ Arduino Router Bridge
                │ (基于Unix Socket/TCP的RPC)
                │
┌───────────────▼─────────────────────┐
│         Python 应用层               │
│  ┌───────────────────────────────┐  │
│  │  main.py                      │  │
│  │  接收并存储温湿度数据           │  │
│  │  渲染自动刷新的Streamlit UI    │  │
│  └─────────────┬─────────────────┘  │
└───────────────┼─────────────────────┘
                │ HTTP (端口 7000)
                │
┌───────────────▼─────────────────────┐
│           Web浏览器 (用户)           │
│  实时温湿度数字显示                  │
│  历史数据趋势图                      │
│  每小时统计数据                      │
│  每1秒自动刷新                       │
└─────────────────────────────────────┘
三步引入Streamlit砖块
一,添加砖块
1,创建新的项目 My Apps --> Geate new app+ ,
2,项目中搜索选择"WebUI Streamlit"金砖,add brick,
3,确认后砖块显示在工程组件中。
二,Python部分
1,python数据流管理

2,python程序如下:
import time
from datetime import datetime, timezone, timedelta
import json

from arduino.app_utils import App, Bridge
from arduino.app_bricks.streamlit_ui import st

# 全局变量,用于消息计数
message_count = 0

# 保存传感器数据到文件
def save_data(temp, hum, ts):
    """保存数据到文件"""
    data = {
        'temperature': temp,
        'humidity': hum,
        'timestamp': ts.isoformat()
    }
    try:
        with open('/tmp/sht45_data.json', 'w') as f:
            json.dump(data, f)
    except:
        pass

# 从文件读取传感器数据
def load_data():
    """从文件加载数据"""
    try:
        with open('/tmp/sht45_data.json', 'r') as f:
            data = json.load(f)
        return (
            data.get('temperature'),
            data.get('humidity'),
            datetime.fromisoformat(data['timestamp'])
        )
    except:
        return None, None, None


def record_sensor_samples(celsius: float, humidity: float) -> None:
    """供 Arduino 端调用的回调函数。"""
    print(f"温度: {celsius:.2f}°C, 湿度: {humidity:.2f}%")

    # 保存到文件
    save_data(celsius, humidity, datetime.now())


def initialize_bridge():
    """初始化Bridge连接(只执行一次)"""
    print("📡 注册传感器数据回调...")
    Bridge.provide("record_sensor_samples", record_sensor_samples)
    print("✅ 回调注册完成")


def create_streamlit_ui() -> None:
    """构建并显示温湿度的 Streamlit 页面。"""

    # 页面标题
    st.arduino_header("SHT45 温湿度监控器")

    # 从文件读取数据
    temp, hum, ts = load_data()

    # 两列布局:左边温度,右边湿度
    col1, col2 = st.columns(2)

    with col1:
        if temp is not None:
            st.markdown(
                f"<h1 style='text-align:center; font-size:80px; color:#00BFFF; margin:0px; font-weight:300;'>{temp:.1f}°C</h1>",
                unsafe_allow_html=True,
            )
            st.markdown("<h2 style='text-align:center; margin:0px; color:#00BFFF; font-weight:500;'>温度</h2>", unsafe_allow_html=True)
        else:
            st.markdown("<h1 style='text-align:center; font-size:80px; color:#00BFFF; margin:0px; font-weight:300;'>--</h1>", unsafe_allow_html=True)
            st.markdown("<h2 style='text-align:center; margin:0px; color:#00BFFF; font-weight:500;'>温度</h2>", unsafe_allow_html=True)

    with col2:
        if hum is not None:
            st.markdown(
                f"<h1 style='text-align:center; font-size:80px; color:#00BFFF; margin:0px; font-weight:300;'>{hum:.1f}%</h1>",
                unsafe_allow_html=True,
            )
            st.markdown("<h2 style='text-align:center; margin:0px; color:#00BFFF; font-weight:500;'>湿度</h2>", unsafe_allow_html=True)
        else:
            st.markdown("<h1 style='text-align:center; font-size:80px; color:#00BFFF; margin:0px; font-weight:300;'>--</h1>", unsafe_allow_html=True)
            st.markdown("<h2 style='text-align:center; margin:0px; color:#00BFFF; font-weight:500;'>湿度</h2>", unsafe_allow_html=True)

    # 最后更新时间
    if ts is not None:
        # 转换为UTC+8时区
        utc8_timezone = timezone(timedelta(hours=8))
        local_time = ts.astimezone(utc8_timezone)
        st.caption(f"更新时间: {local_time.strftime('%H:%M:%S')}")


def streamlit_loop() -> None:
    """主循环:绘制 UI 并每 1 秒自动刷新一次。"""
    create_streamlit_ui()
    time.sleep(1)
    st.rerun()


if __name__ == "__main__":
    print("🚀 正在启动温湿度监控Web界面...")

    # 注册回调,接收来自 Arduino 的传感器数据
    print("📡 注册传感器数据回调...")
    Bridge.provide("record_sensor_samples", record_sensor_samples)
    print("✅ 回调注册完成")

    # 启动主循环
    streamlit_loop()
三,ARDUINO部分
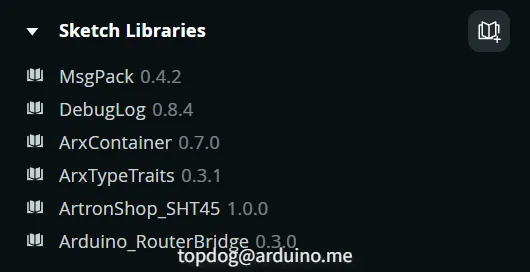
1,要安装ArtronShop_SHT45和Arduino_RouterBridge,Arduino_RouterBridge库没有安装好页面数据不会显示,之前的版本有bug现在已经修复好了。
2,Arduino程序如下:
#include <Arduino.h>
#include <Wire.h>
#include <ArtronShop_SHT45.h>
#include <Arduino_RouterBridge.h>

// Create SHT45 sensor object instance
ArtronShop_SHT45 sht45(&Wire1, 0x44);

unsigned long previousMillis = 0;  // Stores last time values were updated
const long interval = 1000;        // Update interval: 1000ms (1 second)

void setup() {
  // Initialize Bridge for communication with Python
  Bridge.begin();

  // Initialize I2C communication on Wire1
  Wire1.begin();
}

void loop() {
  unsigned long currentMillis = millis(); // Get the current time

  // Check if it's time to read sensor data
  if (currentMillis - previousMillis >= interval) {
    // Save the last time you updated the values
    previousMillis = currentMillis;

    // Measure temperature and humidity from SHT45 sensor
    if (sht45.measure()) {
      float t = sht45.temperature();
      float h = sht45.humidity();

      // Read temperature in Celsius from the sensor
      float celsius = t;

      // Read humidity percentage from the sensor
      float humidity = h;

      // Send sensor data to Python via Bridge
      Bridge.notify("record_sensor_samples", celsius, humidity);
    }
  }
}
页面效果

技术始于好奇,成于实践
创作Arduino UNO Q的大师们通过硬件和软件向爱好者传递着知识,这是创客们独特的文化,如"WebUI Streamlit"金砖笔者接触后就会去翻阅大量的资料,再克服各种硬件的适配难题。UNO Q就是一本编程的百科全书,期待着我们去探秘,她将伴您在硬件开发之路上启航。