前提
在研究websocket集群解决方案的时候发现
可以通过消息中间件的广播模式或者redis的发布订阅 (Pub/Sub)模式来通知其他服务器的websocket节点
那 redis stream 也能实现消息的发布和订阅,不仅比 (Pub/Sub)更可靠,而且比其他消息中间件延迟更低
在实时聊天室、游戏状态同步、轻量级任务队列用 redis stream 作为中间件性能也较为不错
kafka 有注解(@KafkaListener)就可以实现kafka的消息监听,但是 redis stream 却没有相对于的组件
那么就我们就亲手搭建一个用于 redis stream 监听的注解吧(@RedisStreamListener)
项目地址:redisStreamListener: 专注于Redis流数据监听与处理的开源项目,提供高效、可扩展的解决方案,适用于实时数据处理和消息队列场景。
项目版本:springboot 2.6、redis 5.0.14、JDK 1.8
搭建 redis单机 和 redis cluster(windows环境)(有环境就不用看这部分了)
redis windows版 下载安装
本篇文章是使用 redis 5.0.14 的 windows 版来讲解的
搭建流程都差不多,配置文件也可以直接拿去用,只是配置目录密码这些需要自己调整
相信看这篇文章的大伙都对redis有很好的理解了,下载安装就不写了
一、redis 单机 搭建
单机启动很简单,下载的文件里面也有 conf 配置
这里就不展示 redis.windows.conf 文件了,直接用 server 客户端启动即可
bat 文件是windows的批处理文件,linux不可用哦
记得修改 bat 文件的路径这些哦
redis 单机启动脚本(redis-alone.bat)
bash
@echo off
:: 设置Redis目录
set redis_catalogue=D:\Environment\Redis-x64-5.0.14.1
:: redis 密码
set redis_password=123456
:: redis.conf 路径
set redis_conf_catalogue=D:\Environment\Redis-x64-5.0.14.1\redis.windows.conf

start "Redis server" cmd /k "%redis_catalogue%\redis-server.exe %redis_conf_catalogue%"
二、redis cluster 搭建
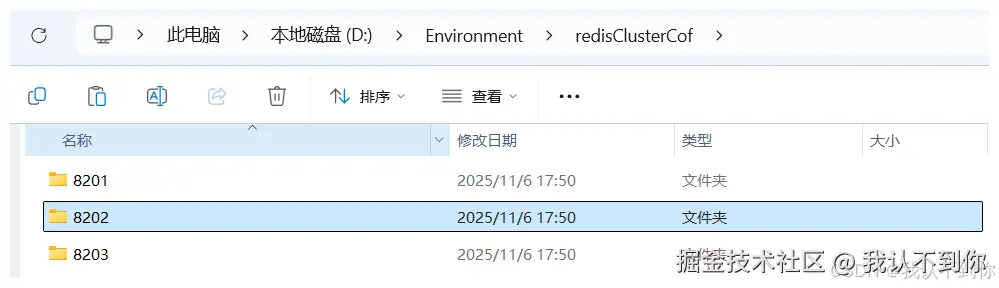
新建文件夹 8201、8202、8203
用三个配置启动三个主节点
新建文件(redis.conf)
每一个文件夹都需要配置一个 redis.conf 文件,文件下面有,需要修改端口号哦
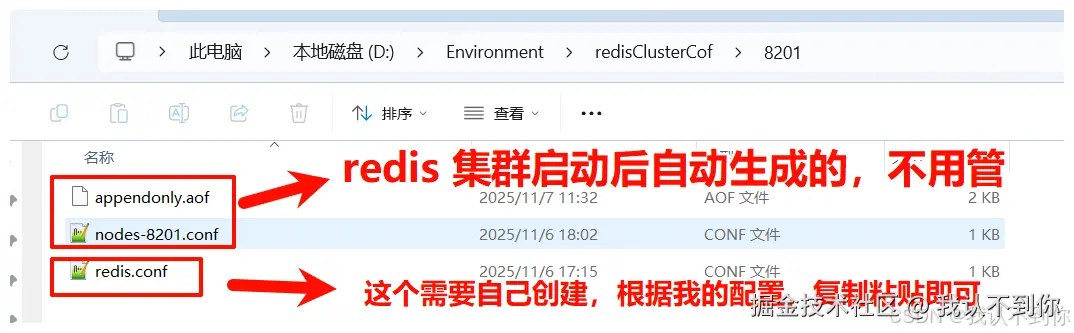
配置文件(redis.conf)
需要修改一下端口号信息哦
比如我的 8201 端口在 8201 目录下,那 8202 目录的配置就是 8202 端口了,以此类推
bash
# 修改为后台启动
# daemonize yes
# 修改端口号
port 8201
# 指定数据文件存储位置
dir D:/Environment/redisClusterCof/8201/
# 开启集群模式
cluster-enabled yes
# 集群节点信息文件配置
cluster-config-file nodes-8201.conf
# 集群节点超时间
cluster-node-timeout 15000
# 去掉bind绑定地址
# bind 127.0.0.1 -::1 (这里没写错就是家#注释掉bind配置)
# 关闭保护模式
protected-mode no
# 开启aof模式持久化
appendonly yes
# 设置连接Redis需要密码123(选配)
requirepass 123456
# 设置Redis节点与节点之间访问需要密码123(选配)
masterauth 123456
redis cluster 启动脚本 (redisCluster .bat)
bat 文件是windows的批处理文件,linux不可用哦
记得修改 bat 文件的路径这些哦
bash
@echo off
setlocal enabledelayedexpansion

:: 设置Redis目录
set redis_catalogue=D:\Environment\Redis-x64-5.0.14.1
:: redis 密码
set redis_password=123456

:: redis配置文件路径
set config_path=D:\Environment\redisClusterCof

:: redis配置文件名
set redis_cof_name=redis.conf

:: 定义集群端口列表 整体路径:D:\Environment\redisClusterCof\8201\redis.conf
set ports=8201 8202 8203

:: 遍历启动所有Redis集群节点
echo Starting Redis Cluster Nodes...
for %%p in (%ports%) do (
    set config_file=%config_path%%%p%redis_cof_name%
    start "Redis Port %%p" cmd /k "%redis_catalogue%\redis-server.exe !config_file!"
    timeout /t 1 /nobreak >nul
)
:: 等待所有节点启动完成
timeout /t 2 /nobreak >nul

:: 启动集群 --cluster-replicas 0 代表没有从节点 全是主节点
:: redis-cli --cluster create --cluster-replicas 0 127.0.0.1:8201 127.0.0.1:8202 127.0.0.1:8203
start "Redis CLI" cmd /c "%redis_catalogue%\redis-cli.exe  -a %redis_password% --cluster create --cluster-replicas 0 127.0.0.1:8201 127.0.0.1:8202 127.0.0.1:8203 --cluster-yes"

:: timeout /t 3 /nobreak >nul

:: 启动Redis CLI 如果没有就算了
:: start "Redis CLI" cmd /c "%redis_catalogue%\redis-cli.exe" -c -p 8201 -a %redis_password%
项目搭建(pom文件、application.yaml)
实现流程
就是利用 BeanPostProcessor 在 spring 的 Bean 注入前后可以操作的生命周期,在 Bean 注入结束后,遍历 Bean 获取到包含 RedisStreamListener 注解的方法,用一个新的线程去监听 redis 的 stream,由于没值会阻塞线程,所以可以直接使用 while (!Thread.currentThread().isInterrupted()) 这样也可以实现方法的中断

代码讲解
监听注解(@RedisStreamListener)
less
/**
 * redis stream 监听注解 类似 @KafkaListener
 * 使用该注解 最好配置 JVM 参数一起启动 如下:
 * java -Dredisson.cluster.stream.broadcast-group-id=*** -Dredisson.cluster.stream.consumer-name=***-jar ***.jar
 */
@Target({ ElementType.METHOD})
@Retention(RetentionPolicy.RUNTIME)
public @interface RedisStreamListener {
    /**
     * 监听容器工厂 Spring 的 Bean 名称
     */
    String containerFactory() default "";

    /**
     * 监听的 topic
     */
    String topic();

    /**
     * 使用默认值 为广播模式
     * 自定义值 为竞争消费
     */
    String groupId() default "";

    /**
     * 自动提交
     */
    boolean autoSubmit() default true;
}
springboot启动后开启监听(RedisStreamListenerProcessor)
BeanPostProcess 的作用简述:
BeanPostProcessor(Bean后置处理器)是 Spring 框架的核心扩展点之一,主要用于在 Bean 初始化前后 执行自定义逻辑,对 Bean 进行增强或修改。
这里就是通过 Bean 初始化后扫描到 @RedisStreamListener 注解所在的方法进行 消息监听
scss
/**
 * RedisStreamListener 注解处理器
 */
@Component
@Slf4j
public class RedisStreamListenerProcessor implements BeanPostProcessor, ApplicationContextAware {

    public static ApplicationContext applicationContext;

    @Override
    public void setApplicationContext(@NotNull ApplicationContext applicationContext) throws BeansException {
        RedisStreamListenerProcessor.applicationContext = applicationContext;
    }

    @Override
    public Object postProcessAfterInitialization(Object bean, @NotNull String beanName) throws BeansException {
        // 获取所有方法
        Class<?> targetClass = bean.getClass();
        Method[] methods = targetClass.getDeclaredMethods();
        // 遍历所有方法
        for (Method method : methods) {
            // 判断是否是RedisStreamListener注解
            if (method.isAnnotationPresent(RedisStreamListener.class)) {
                // 获取注解
                RedisStreamListener annotation = method.getAnnotation(RedisStreamListener.class);
                try {
                    // 启动监听器
                    startConsumerWithHandler(bean, method, annotation);
                } catch (Exception e) {
                    log.error("自动启动监听器失败", e);
                    throw new RuntimeException(e);
                }
            }
        }
        return bean;
    }


    /**
     * 启动监听器
     * @param bean bean的类
     * @param method bean其中之一的方法 因为调用这个方法的方法遍历了 bean 的所有方法
     * @param annotation 方法上的注解
     */
    private void startConsumerWithHandler(Object bean, Method method, RedisStreamListener annotation) {
        // 获取注解参数
        String topic = annotation.topic();
        String groupId = annotation.groupId();
        String factory = annotation.containerFactory();
        boolean autoSubmit = annotation.autoSubmit();
        // 获取 RedissonClient 注解中的 containerFactory 参数可以自定义 RedissonClient 的注入,测试用例有写
        // 使用默认 就是使用主要的 RedissonClient 的 Bean (@Bean + @Primary)
        RedissonClient redissonClient;
        if (StringUtils.isNotBlank(factory)) {
            redissonClient = applicationContext.getBean(factory, RedissonClient.class);
        } else {
            redissonClient = applicationContext.getBean(RedissonClient.class);
        }
        // 创建 RedisStreamConsumer 对象
        RedisStreamConsumer redisStreamConsumer = new RedisStreamConsumer(redissonClient);
        // 启动监听器
        redisStreamConsumer.startProcessing(topic, groupId, autoSubmit, (map, ack) -> handleStreamMessage(bean, method, map, ack));
    }

    /**
     * 处理消息
     * 主要用于赋值 并执行方法体
     */
    private void handleStreamMessage(Object bean, Method method, Map.Entry<StreamMessageId, Map<String, Object>> messageMap, Acknowledgment ack) {
        try {
            method.setAccessible(true);
            // 获取 方法 的所有参数类型
            Class<?>[] parameterTypes = method.getParameterTypes();
            // 根据方法参数类型传递合适的参数
            Object[] args = new Object[parameterTypes.length];
            for (int i = 0; i < parameterTypes.length; i++) {
                Class<?> parameterType = parameterTypes[i];
                // 获取 值
                if (parameterType.equals(Map.class)) {
                    Map<String, Object> value = messageMap.getValue();
                    args[i] = value;
                }
                // 序列化
                if (parameterType.equals(String.class)) {
                    Map<String, Object> value = messageMap.getValue();
                    args[i] = JSONObject.toJSONString(value);
                }
                // 获取 id
                if (StreamMessageId.class.isAssignableFrom(parameterType)) {
                    StreamMessageId key = messageMap.getKey();
                    args[i] = key;
                }
                // 手动提交配置
                if (Acknowledgment.class.isAssignableFrom(parameterType)) {
                    args[i] = ack;
                }
            }
            // 执行方法
            // 就是通过方式 把参数传递给方法体
            method.invoke(bean, args);
        } catch (Exception e) {
            log.error("handleStreamMessage 处理消息失败: {}", e.getMessage(), e);
            throw new RuntimeException(e);
        }
    }
}
手动提交(Acknowledgment)
对于该接口后续的测试用例会讲解
csharp
/**
 * 手动提交接口
 */
public interface Acknowledgment {
    // 提交
    void acknowledge();
}
消息消费类(RedisStreamConsumer)
这里就是我们进行监听消息并消费的地方
typescript
/**
 * redis Stream 消费者
 */
@Slf4j
public class RedisStreamConsumer {

    private final RedissonClient redisson;

    private final static String LOCK = "redis:stream:lock:2dfe3f31";

    /**
     * 可以不用配置 但最好配置一下 可以更好的追踪
     * 广播模式得到的消费组 可以保存在机器上 然后通过 JVM 命令修改
     * 启动命令:java -Dredisson.cluster.stream.broadcast-group-id=*** -jar ***.jar
     */
    private final String BROADCAST_GROUP_ID;

    /**
     * 可以不用配置 但最好配置一下 可以更好的追踪
     * 消费者名称 每个 JVM 示例应该用不同的值 主要用于消费竞争
     * 没有被确认(ack)的消息 会存在 PENDING 列表中 通过 redis命令:xpending streamKey groupId 查看 这里面也保存了 消费者名称等信息
     * 启动命令:java -Dredisson.cluster.stream.consumer-name=*** -jar ***.jar
     */
    private final String CONSUMER_NAME;

    public RedisStreamConsumer(RedissonClient redisson) {
        this.redisson = redisson;
        Environment environment = RedisStreamListenerProcessor.applicationContext.getEnvironment();
        this.BROADCAST_GROUP_ID = environment.getProperty("redisson.cluster.stream.broadcast-group-id", "");
        this.CONSUMER_NAME = environment.getProperty("redisson.cluster.stream.consumer-name", "");
    }

    /**
     * 消费者线程 用于查看或者停止
     */
    private static final Map<String, Thread> consumerThreads = new ConcurrentHashMap<>();

    private static final String ip;

    static {
        try {
            ip = InetAddress.getLocalHost().getHostAddress();
        } catch (UnknownHostException e) {
            log.error("获取本机IP地址失败", e);
            throw new RuntimeException(e);
        }
    }

    /**
     * 启动消息处理 自动提交
     * topic 主题
     * groupId 消费者组 相同为负载均衡 不同为广播模式
     * messageProcessor 消息处理器
     * StreamMessageId 消息ID
     */
    public void startProcessing(String topic, String groupId, Consumer<Map.Entry<StreamMessageId, Map<String, Object>>> messageProcessor) {
        startProcessing(topic, groupId, true, (message, ack) -> messageProcessor.accept(message));
    }


    /**
     * 启动消息处理
     * topic 主题
     * groupId 消费者组 相同为负载均衡 不同为广播模式
     * autoSubmit 是否自动提交
     * messageProcessor 消息处理器
     * StreamMessageId 消息ID
     * Acknowledgment 自动提交类
     */
    public void startProcessing(String topic, String groupId, boolean autoSubmit, BiConsumer<Map.Entry<StreamMessageId, Map<String, Object>>, Acknowledgment> messageProcessor) {
        final String finalGroupId = this.judgmentGroupId(groupId);

        // consumerName 消费者名称 主要用于负载均衡
        String consumerName;
        if (StringUtils.isBlank(CONSUMER_NAME)) {
            consumerName = ip + ":" + UUID.randomUUID();
        } else {
            consumerName = ip + ":" + CONSUMER_NAME;
        }
        // 线程标识 主要用于停止
        String threadKey = topic + ":" + groupId + ":" + consumerName;
        if (consumerThreads.containsKey(threadKey)) {
            log.warn("Consumer already running for: {}", threadKey);
            return;
        }
        Thread consumerThread = new Thread(() ->
                processMessages(topic, finalGroupId, consumerName, autoSubmit, messageProcessor), "stream-consumer-" + threadKey);
        consumerThread.setDaemon(true);
        consumerThread.start();
        // 保存线程 用于查看或者停止
        consumerThreads.put(threadKey, consumerThread);
    }

    /**
     * 判断是否为广播模式
     */
    private String judgmentGroupId(String groupId) {
        // 如果不为空 则为负载均衡模式
        if (StringUtils.isNotBlank(groupId)) {
            return groupId;
        }
        // 如果为空 则为广播模式
        if (StringUtils.isBlank(BROADCAST_GROUP_ID)) {
            return ip + ":" + UUID.randomUUID();
        }
        return BROADCAST_GROUP_ID;
    }

    /**
     * 监听并处理消息
     */
    private void processMessages(String topic, String groupId,
                                 String consumerName, boolean autoSubmit, BiConsumer<Map.Entry<StreamMessageId, Map<String, Object>>, Acknowledgment> processor) {
        // 获取Redisson的RStream对象
        RStream<String, Object> stream = redisson.getStream(topic);


        // 创建消费者组(如果不存在)
        try {
            stream.createGroup(StreamCreateGroupArgs
                    .name(groupId)
                    .makeStream());
        } catch (Exception e) {
            log.debug("Consumer group might already exist: {}", e.getMessage());
        }

        while (!Thread.currentThread().isInterrupted()) {
            try {
                // 批量读取 10条 30秒超时
                Map<StreamMessageId, Map<String, Object>> messages =
                        stream.readGroup(groupId, consumerName,
                                StreamReadGroupArgs
//                                        .greaterThan(StreamMessageId.AUTO_GENERATED)
                                        .neverDelivered()
//                                        .noAck()
                                        .count(10)
                                        .timeout(Duration.ofSeconds(30L)));

                // 如果超时了还没有数据需要处理 这里就处理没有 ack 的数据
                if (messages == null || messages.isEmpty()) {
                    // 在 pending 不常见的情况下 加锁就有性能问题,这里查询了没有数据就不需要加锁了
                    List<PendingEntry> pendingEntries = stream.listPending(groupId, StreamMessageId.MIN, StreamMessageId.MAX, 100);
                    log.debug("pendingEntries: {}", pendingEntries);
                    if (pendingEntries == null || pendingEntries.isEmpty()){
                        continue;
                    }
                    RLock lock = redisson.getLock(LOCK);
                    try {
                        // 加锁 保证 只有一个实例 能消费到 为确认数据
                        if (lock.tryLock(1000, TimeUnit.MILLISECONDS)) {
                            // 处理没确认的数据 就是没有 ack 的 pending 数据
                            messages = stream.pendingRange(groupId, StreamMessageId.MIN, StreamMessageId.MAX, 100);
                        }
                    } finally {
                        // 确保锁被释放
                        if (lock.isHeldByCurrentThread()) {
                            lock.unlock();
                        }
                    }
                    if (messages == null || messages.isEmpty()) {
                        continue;
                    }
                }

                // 处理消息
                for (Map.Entry<StreamMessageId, Map<String, Object>> entry : messages.entrySet()) {
                    // 获取消息ID
                    StreamMessageId messageId = entry.getKey();
                    // 获取消息
                    Map<String, Object> message = entry.getValue();
                    try {
                        log.debug("开始处理消息: messageId={} message={}", messageId, message);

                        // 可以手动提交
                        Acknowledgment acknowledgment = new ConsumerAcknowledgment(stream, groupId, messageId);
                        // 处理消息
                        processor.accept(entry, acknowledgment);
                        // 是否手动提交
                        if (autoSubmit) {
                            // 确认消息
                            stream.ack(groupId, messageId);
                        }
                        log.debug("消息处理完成: messageId={}", messageId);
                    } catch (Exception e) {
                        log.error("处理消息失败: messageId={}", messageId, e);
                    }
                }
            } catch (Exception e) {
                log.error("处理消息时发生错误", e);
                try {
                    Thread.sleep(2000);
                } catch (InterruptedException ex) {
                    throw new RuntimeException(ex);
                }
            }
        }
    }

    /**
     * 停止监听
     */
    public void stopProcessing(String topic, String groupId, String consumerName) {
        String threadKey = topic + ":" + groupId + ":" + consumerName;
        Thread thread = consumerThreads.remove(threadKey);
        if (thread != null) {
            thread.interrupt();
            log.debug("Stopped consumer: {}", threadKey);
        }
    }

    /**
     * 停止所有监听
     */
    public void stopAll() {
        consumerThreads.forEach((key, thread) -> thread.interrupt());
        consumerThreads.clear();
    }

    public Map<String, Thread> getConsumerThreads() {
        return RedisStreamConsumer.consumerThreads;
    }


    /**
     * 确认消息
     */
    private static class ConsumerAcknowledgment implements Acknowledgment {
        private final RStream<String, Object> stream;
        private final String groupId;
        private final StreamMessageId messageId;

        public ConsumerAcknowledgment(RStream<String, Object> stream, String groupId, StreamMessageId messageId) {
            this.stream = stream;
            this.groupId = groupId;
            this.messageId = messageId;
        }

        public void acknowledge() {
            stream.ack(groupId, messageId);
        }

    }
}
消息生产类(RedisStreamProducer)
typescript
@Slf4j
public class RedisStreamProducer {

    private final RedissonClient redisson;

    public RedisStreamProducer(RedissonClient redisson) {
        this.redisson = redisson;
    }

    public RedisStreamProducer() {
        this.redisson = RedisStreamListenerProcessor.applicationContext.getBean(RedissonClient.class);
    }

    /**
     * 发布单一消息到Stream
     */
    public StreamMessageId publishMessage(String streamName, String key, String msg) {
        RStream<String, String> stream = redisson.getStream(streamName);

        // 新的添加消息方式
        StreamMessageId msgId = null;
        try {
            msgId = stream.add(StreamAddArgs.entry(key, msg));
        } catch (Exception e) {
            log.error("publishMessage 添加消息失败 streamName={} ", streamName, e);
            throw e;
        } finally {
            log.debug("publishMessage 发布消息 streamName={} key={} msg={} msgId={} ", streamName, key, msg, msgId);
        }
        return msgId;
    }

    /**
     * 发布带特定字段的消息
     */
    public StreamMessageId publishMessage(String streamName, Map<String, Object> fields) {
        RStream<String, Object> stream = redisson.getStream(streamName);

        StreamMessageId msgId = null;
        try {
            msgId = stream.add(StreamAddArgs.entries(fields));
        } catch (Exception e) {
            log.error("publishMessage 添加消息失败 streamName={} ", streamName, e);
            throw e;
        } finally {
            log.debug("publishMessage 发布消息 streamName={} fields={} msgId={} ", streamName, fields, msgId);
        }
        return msgId;
    }

    private static final ObjectMapper objectMapper = new ObjectMapper();

    /**
     * 发布带特定字段的消息
     */
    public <T> StreamMessageId publishMessage(String streamName, T fields) {
        RStream<String, Object> stream = redisson.getStream(streamName);

        StreamMessageId msgId = null;
        try {
            Map<String, Object> map = objectMapper.convertValue(fields, Map.class);
            msgId = stream.add(StreamAddArgs.entries(map));
        } catch (Exception e) {
            log.error("publishMessage 添加消息失败 streamName={} ", streamName, e);
            throw e;
        } finally {
            log.debug("publishMessage 发布消息 streamName={} fields={} msgId={} ", streamName, fields, msgId);
        }
        return msgId;
    }
}
reidsson配置(RedissonConfig )
里面包含两套配置,一套单机的配置一套集群配置
kotlin
@Configuration
public class RedissonConfig {

    @Value("${redisson.alone.host}")
    private String host;
    @Value("${redisson.alone.port}")
    private Integer port;
    @Value("${redisson.alone.password}")
    private String password;
    @Value("${redisson.alone.database}")
    private Integer database;

    /**
     * 单机模式 主要的
     * 多实例情况下 @Bean 没有加 value 的时候 需要加 @Primary 注解
     */
    @Bean
    @Primary
    public RedissonClient redisson(){
        String redisAddress = "redis://" + host + ":" + port;
        // 配置
        Config config = new Config();
        config.useSingleServer().setAddress(redisAddress).setDatabase(database).setPassword(password);
        // 创建RedissonClient对象
        return Redisson.create(config);
    }


    @Value("${redisson.cluster.nodes}")
    private String clusterNodes;
    @Value("${redisson.cluster.password}")
    private String clusterPassword;

    /**
     * 集群模式
     */
    @Bean("redisson2")
    public RedissonClient redisson2(){
        // 配置
        Config config = new Config();
        config.useClusterServers()
                .addNodeAddress(Arrays.stream(clusterNodes.split(","))
                        .map(node -> "redis://" + node)
                        .toArray(String[]::new))
                .setPassword(clusterPassword);

        // 创建RedissonClient对象
        return Redisson.create(config);
    }
}
消息 监听/消费 测试类(RedisListener )
测试消息的消费
这里就可以看见注解的使用
比如
topic 一样 groupId 一样那么就是负载均衡的消费消息
topic 一样 groupId 不一样就是广播模式
typescript
@Component
@Slf4j
public class RedisListener {

    /**
     * 负载均衡模式 map
     */
    @RedisStreamListener(topic = "map", groupId = "test-group")
    public void map(Map<String, Object> map) {
        log.info("map 接收到消息:map={}", map);
    }

    /**
     * 负载均衡模式 手动提交 并设置工厂为 redisson2 集群模式(这里是配置的不同bean的地方)
     */
    @RedisStreamListener(topic = "acknowledge", groupId = "test-group", autoSubmit = false, containerFactory = "redisson2")
    public void acknowledge(String json, Acknowledgment acknowledgment) {
        log.info("acknowledge 接收到消息:{}", json);
        acknowledgment.acknowledge();
    }

    /**
     * 广播模式 groupId
     * 由配置决定 redisson.cluster.stream.broadcast-group-id
     * 配置为空则取随机值用于广播模式
     */
    @RedisStreamListener(topic = "test")
    public void broadcastMessage(Map<String, Object> map) {
        log.info("broadcastMessage 接收到消息:{}", map);
    }
}
测试消息的新增(RedisStreamController)
less
@RestController
@Slf4j
@RequestMapping("/streamProducer")
public class RedisStreamController {

    /**
     * 单机模式
     */
    @Autowired
    private RedissonClient redisson1;
    /**
     * 集群模式
     */
    @Autowired
    @Qualifier("redisson2")
    private RedissonClient redisson2;

    /**
     * 发送消息
     */
    @PostMapping("/send/json")
    public String send(@RequestBody User user) {
        RedissonClient redisson = redisson1;
        if (user.factory == 2){
            redisson = redisson2;
        }
        StreamProducer streamProducer = new StreamProducer(redisson);
        streamProducer.publishMessage(user.streamName, user);
        return "success";
    }


    /**
     * 测试数据
     */
    @Data
    public static class User {
        // 一些测试数据
        private String name;
        private Integer age;
        private String sex;

        // stream 流的名称 就是topic
        private String streamName;

        // 工厂
        // 1 redisson1 单机
        // 2 redisson2 集群
        private int factory = 1;
    }
}
测试
一、项目启动的 JVM 配置
ini
-Dserver.port=9091
-Dredisson.cluster.stream.broadcast-group-id=9091
-Dredisson.cluster.stream.consumer-name=9091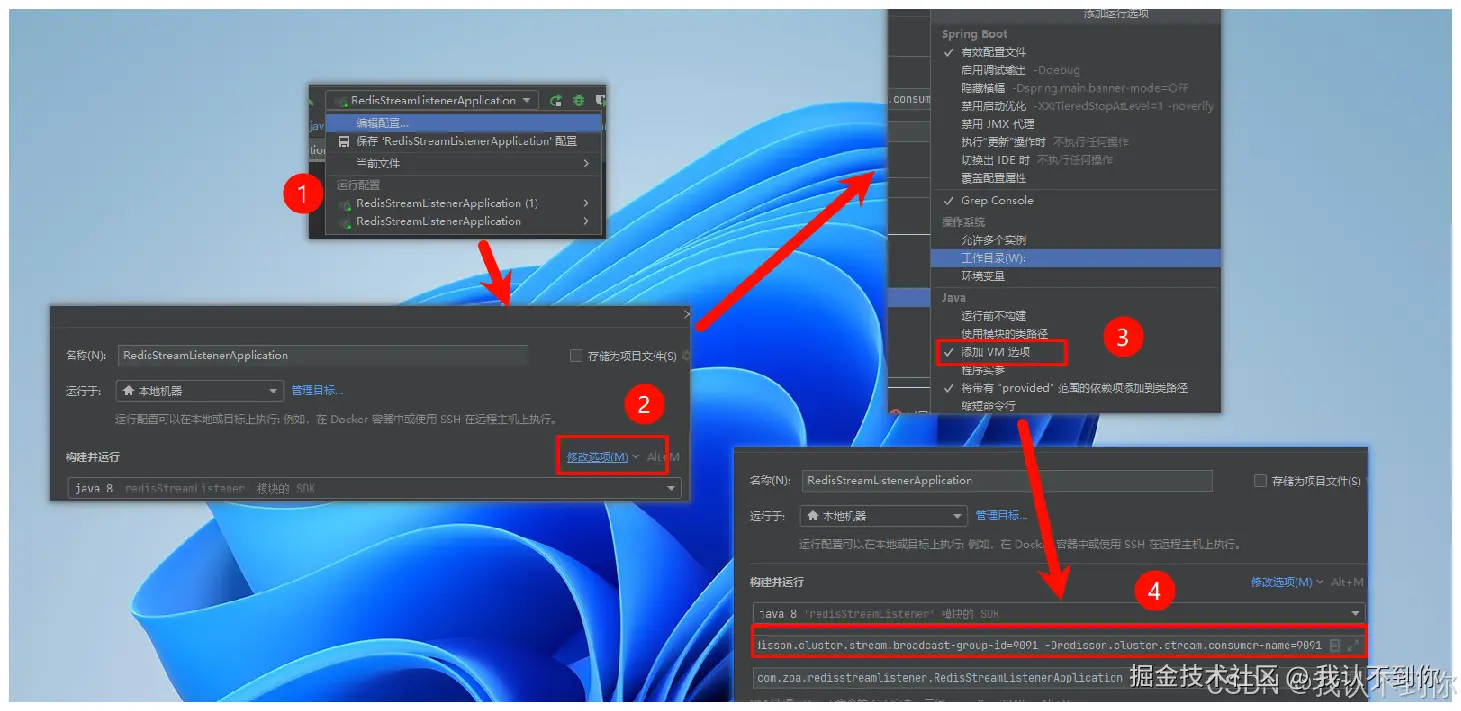
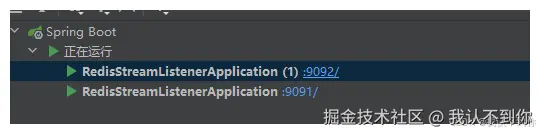
二、启动两个项目
记得 JVM 的配置也需要修改
(
-Dserver.port=9091 -Dredisson.cluster.stream.broadcast-group-id=9091 -Dredisson.cluster.stream.consumer-name=9091
)
怎么启动两个项目可以看我这篇文章:idea实现同时启动两个相同服务但不同端口的项目,全图解_idea启动两个相同的服务-CSDN博客
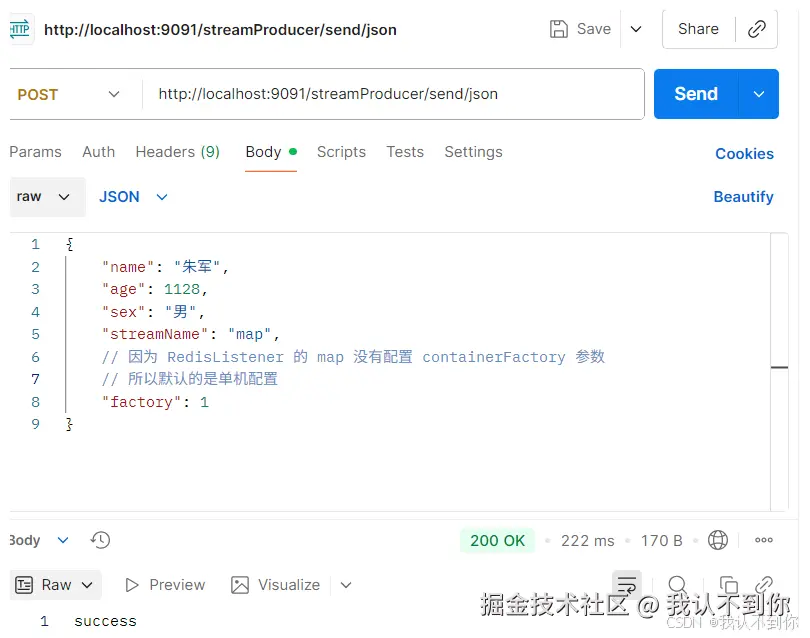
三、负载均衡(消费竞争)模式
调用Controller的接口
发送消息,哪个服务都可以发,所以我用 9091 端口 或者 9092 端口都是一样的
查看日志

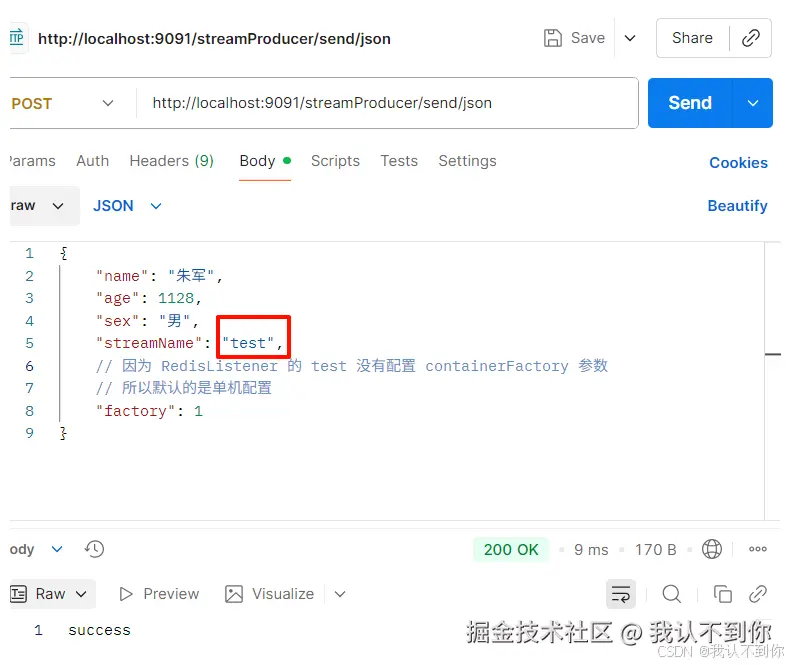
四、广播模式
调用Controller的接口
查看日志

五、手动提交(之前测试的两个都是自动提交)
这里只开9091端口看效果即可
这里我们先把 acknowledgment.acknowledge() 注掉看效果
typescript
    /**
     * 负载均衡模式 手动提交 并设置工厂为 redisson2 集群模式(这里是配置的不同bean的地方)
     */
    @RedisStreamListener(topic = "acknowledge", groupId = "test-group", autoSubmit = false, containerFactory = "redisson2")
    public void acknowledge(String json, Acknowledgment acknowledgment) {
        log.info("acknowledge 接收到消息:{}", json);
//        acknowledgment.acknowledge();
    }
项目重新启动后,调用Controller接口

等30秒看日志
