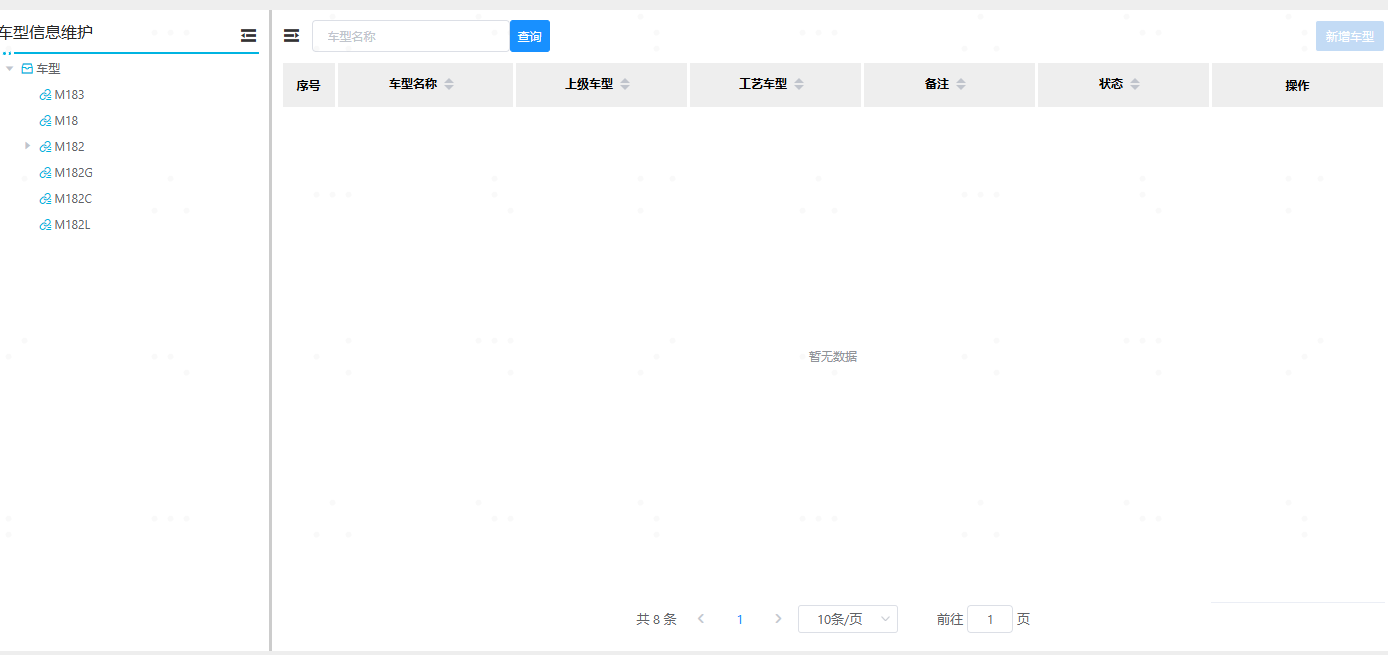
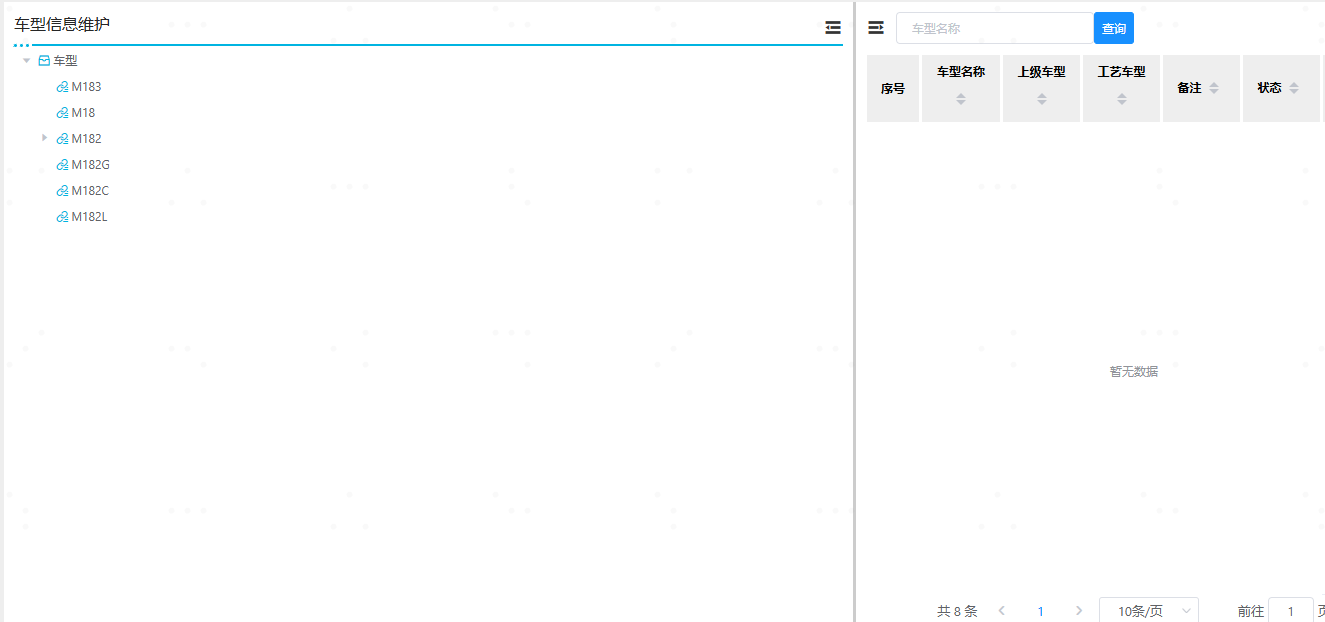
这种布局效果非常常见,左树右表在项目中的使用很多,通过竖线来调整整个布局的样式;以下都是vue2的写法,vue3的可以自己修改下使用。
html
<template>
  <div class="container">
    <!-- 左测 -->
    <div v-show="leftIsShow" class="left">
      <!-- 树头 -->
      <div class="left-tree-header">
        <h3 class="h3">车型信息维护</h3>
        <!-- 收缩 -->
        <el-tooltip effect="dark" :content="'收缩'" placement="top-start">
          <i class="el-icon-s-fold" @click="leftIsShow = false" />
        </el-tooltip>
      </div>
      <!-- 树修饰线 -->
      <div class="simline">
        <div class="point" />
        <div class="point" />
        <div class="point" />
        <div class="line" />
      </div>
      <!-- 树 -->
      <el-tree
        ref="tree"
        style="overflow: auto; height: 90%;"
        :data="treeData"
        :props="defaultProps"
        :load="loadNode"
        lazy
        :default-expanded-keys="showList"
        :highlight-current="true"
        node-key="id"
        @node-click="nodeClick"
      >
        <span slot-scope="{ node }" class="custom-tree-node">
          <span>
            <i v-show="node.level === 1" class="custom-icon">
              <span style="color: #00b4e1" class="iconEpc icon-cangku" />
            </i>
            <i v-show="node.level === 2" class="custom-icon">
              <span style="color: #00b4e1" class="iconEpc icon-guanliancailiao" />
            </i>
            <i v-show="node.level === 3" class="custom-icon">
              <span style="color: #00b4e1" class="iconEpc icon-biaozhunjianmro" />
            </i>
            {{ node.label }}
          </span>
        </span>
      </el-tree>
    </div>
    <!-- 中间修饰线 -->
    <div v-show="leftIsShow" class="drag-bar" />
    <!-- 右侧 -->
    <div class="right">
      <!-- 表格头部 -->
      <div class="right-table-header">
        <!-- 左侧搜索栏 -->
        <div class="search">
          <el-tooltip effect="dark" :content="'展开'" placement="top-start">
            <i class="el-icon-s-unfold" @click="leftIsShow = true" />
          </el-tooltip>
          <el-input v-model="content" placeholder="车型名称" clearable @clear="search" />
          <el-button type="primary" theme="lcs" @click="search">查询</el-button>

        </div>
        <!-- 右侧按钮栏 -->
        <div class="btn">
          <el-button type="primary" theme="lcs" :disabled="isButoon" @click="addCarModel">新增车型</el-button>
        </div>
      </div>
      <div class="table">
        <!-- 表格 -->
        <el-table
          ref="pubicTable"
          class="pubicTable"
          :is-serial="isSerial"
          :table-data="tableData"
          :table-columns="tableColumns"
          :table-operation="operation"
          :border="true"
          @handleClick="handleClick"
          @sortChange="sortChange"
        />
      </div>
      <!-- 分页器 -->
      <pubicPagination
        style="text-align: center;"
        :current-page="page"
        :page-size="pageSize"
        :total="total"
        @handleSizeChange="handleSizeChange"
        @handleCurrentChange="handleCurrentChange"
      />
    </div>
  </div>
</template>
javascript
<script>
export default {
      data() {
        return {
leftIsShow:true, // 这个是主要的
   // 树数据
      code: '',
      nodeData: null,
      showList: [],
      treeData: [],
//这个地方的配置 按照各自项目中后端返回的来
      defaultProps: {
        label: 'code',
        isLeaf: 'leaf'
          },
      tableData: [],
      tableColumns: [
        { prop: 'node_name', sortable: 'custom', label: '车型名称', align: 'center' },
        { prop: 'node_pid', sortable: 'custom', label: '上级车型', align: 'center' },
        { prop: 'node_cid', sortable: 'custom', label: '工艺车型', align: 'center' },
        { prop: 'remark', sortable: 'custom', label: '备注', align: 'center' },
        { prop: 'nodestatuslabel', sortable: 'custom', label: '状态', align: 'center' }
      ],
      //   分页数据
      page: 1,
      pageSize: 10,
      total: 0,
        }
    },
  mounted() {
    this.drag() //这个方法是实现拖拽效果的
  },
methods: {
  drag() {
      const leftMinWidth = 150
      const resize_left = document.querySelector('.drag-bar') // 线条
      const left = document.querySelector('.left')
      const right = document.querySelector('.right')
      const box = document.querySelector('.container')
      resize_left.onmousedown = function(e) {
        const startX = e.clientX
        resize_left.left = resize_left.offsetLeft
        resize_left.left = resize_left.offsetLeft
        // 鼠标拖动事件
        document.onmousemove = function(e) {
          const endX = e.clientX
          let moveLen = resize_left.left - box.offsetLeft + (endX - startX) // (endx-startx)=移动的距离。resize[i].left+移动的距离=左边区域最后的宽度
          const maxT = box.clientWidth - resize_left.offsetWidth // 容器宽度 - 左边区域的宽度 = 右边区域的宽度

          if (moveLen < leftMinWidth) moveLen = leftMinWidth // 左边区域的最小宽度为32px
          if (moveLen > maxT - 400) moveLen = maxT - 400 // 右边区域最小宽度为150px
          resize_left.style.left = moveLen // 设置左侧区域的宽度

          left.style.width = moveLen + 'px'
          right.style.width = box.clientWidth - moveLen - 5 + 'px'
        }
        // 鼠标松开事件
        document.onmouseup = function(evt) {
          document.onmousemove = null
          document.onmouseup = null
          resize_left.releaseCapture && resize_left.releaseCapture() // 当你不在需要继续获得鼠标消息就要应该调用ReleaseCapture()释放掉
        }
        resize_left.setCapture && resize_left.setCapture() // 该函数在属于当前线程的指定窗口里设置鼠标捕获
        return false
      }
    }
    }
}
</script>
css
<style scoped lang="scss">
.container {
    display: flex;
    height: 100%;
}
//   中间修饰线条
.drag-bar {
    flex: 0 0 3px;
    background-color: #ccc;
    cursor: w-resize;
}
// 左侧
.left {
    overflow: auto;
    background-color: #fff;
    padding: 10px;
    width: 20%;
    height: 100%;
    .left-tree-header{
        display: flex;
        justify-content: space-between;
        align-items: center;
        .h3{
            font-weight: 500;
            font-size: 16px;
        }
        i{
            font-size: 20px;
            font-weight: 500;
        }
        // 修饰
        .simline {
            overflow: hidden;
            display: flex;
            flex-wrap: nowrap;
            margin-top: 10px;

            .point {
                width: 3px;
                height: 3px;
                border-radius: 50%;
                background: #00b4e1;
                margin-right: 3px;
            }
        }
    }
}
// 右侧
.right{
    width: 80%;
    height: 100%;
    background-color: #fff;
    padding: 10px;
    flex: 1;
    // 右侧头
    .right-table-header{
        display: flex;
        justify-content: space-between;
        align-items: center;
        // 表格头部搜索
        .search{
            display: flex;
            align-items: center;
            i{
                font-size: 20px;
                font-weight: 500;
                margin-right: 10px;
            }
        }

    }
    // 表格
    .table{
        height:calc(90% - 8px);
        padding-top: 10px;
        overflow: auto;
        .pubicTable{
            height: 100%;
        }
    }
}
::v-deep .el-form{
    display: flex;
    flex-wrap: wrap;
    margin-top: 20px;
  }
</style>
这样就可以实现左右布局可拖拽的效果了,左右两侧的内容 自行补充即可