AI+PySide6实现自定义窗口标题栏目(titleBar)
本教程将详细介绍如何使用 PySide6 实现一个功能完整的自定义标题栏,适合没有 PySide 基础的初学者学习。
目录
效果与完整代码
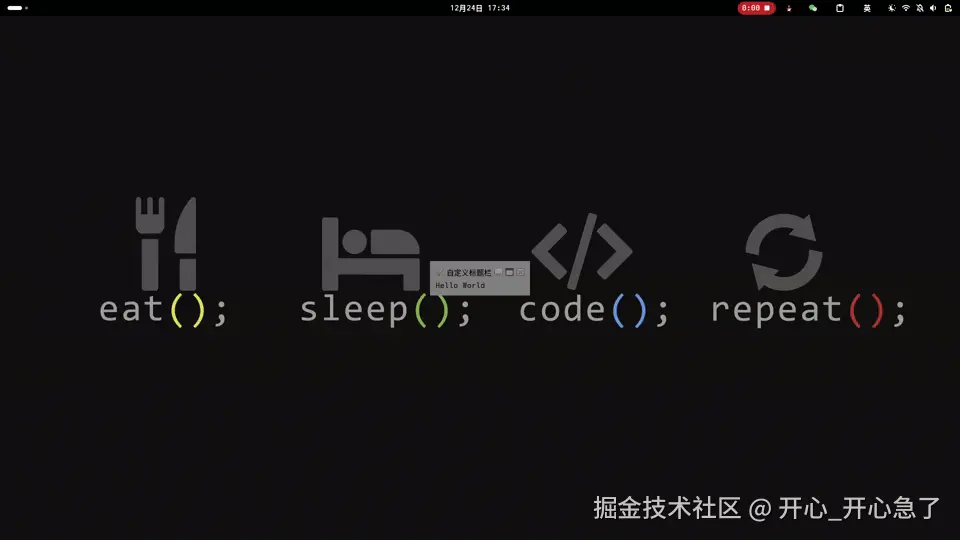
title_bar
完整代码
python
# title_bar.py
from PySide6.QtWidgets import (
                                QWidget,
                                QVBoxLayout,
                                QHBoxLayout,
                                QLabel,
                                QPushButton,
                                QStyle,
                                QApplication,
                            )
from PySide6.QtGui import QMouseEvent
from PySide6.QtCore import Qt


class TitleBar(QWidget):
    """
    自定义标题栏
    """

    def __init__(self, parent=None):
        """构造函数

        :param parent: 父类窗口
        """
        super().__init__(parent)
        self.setWindowFlags(Qt.WindowType.FramelessWindowHint)
        self.setup_ui()
        self.setup_event_bind()

    def setup_ui(self):
        """设置界面"""
        # 全局使用垂直布局
        layout = QVBoxLayout(self)

        # 标题栏使用水平布局
        title_layout = QHBoxLayout()

        # 窗口图标 窗口标题 窗口按钮
        self.icon_label = QLabel(
            pixmap=self.style().standardPixmap(
                QStyle.StandardPixmap.SP_DialogApplyButton
            )
        )
        self.title_label = QLabel("自定义标题栏")
        self.min_btn = QPushButton(
            icon=self.style().standardPixmap(QStyle.StandardPixmap.SP_TitleBarMinButton)
        )
        self.max_btn = QPushButton(
            icon=self.style().standardPixmap(QStyle.StandardPixmap.SP_TitleBarMaxButton)
        )
        self.close_btn = QPushButton(
            icon=self.style().standardPixmap(
                QStyle.StandardPixmap.SP_TitleBarCloseButton
            )
        )

        # 最大化窗口 可勾选 默认不勾选
        self.max_btn.setCheckable(True)
        self.max_btn.setChecked(False)

        # 固定控件大小
        self.min_btn.setFixedSize(16, 16)
        self.max_btn.setFixedSize(16, 16)
        self.close_btn.setFixedSize(16, 16)

        # 添加布局与控件
        layout.addLayout(title_layout)
        title_layout.addWidget(self.icon_label)
        title_layout.addWidget(self.title_label)
        title_layout.addWidget(self.min_btn)
        title_layout.addWidget(self.max_btn)
        title_layout.addWidget(self.close_btn)
        layout.addWidget(QLabel("Hello World"))

    def setup_event_bind(self):
        """设置事件绑定"""
        # 缩小窗口 放大窗口与恢复窗口 关闭窗口
        self.min_btn.clicked.connect(self.showMinimized)
        self.max_btn.clicked.connect(self.toggle_max_restore)
        self.close_btn.clicked.connect(self.close)

    def toggle_max_restore(self, checked: bool):
        """切换窗口最大与恢复"""
        if checked:
            self.max_btn.setIcon(
                self.style().standardPixmap(
                    QStyle.StandardPixmap.SP_TitleBarNormalButton
                )
            )
            self.showMaximized()
        else:
            self.max_btn.setIcon(
                self.style().standardPixmap(QStyle.StandardPixmap.SP_TitleBarMaxButton)
            )
            self.showNormal()

    def mousePressEvent(self, event: QMouseEvent):
        if event.button() == Qt.LeftButton:
            window = self.window().windowHandle()
            if window:
                window.startSystemMove()
            event.accept()


def main():
    """主函数"""
    app = QApplication([])
    title_bar = TitleBar()
    title_bar.setStyleSheet("background-color:grey;")
    title_bar.show()
    app.exec()


if __name__ == "__main__":
    main()
窗口布局
1.0 布局示意图
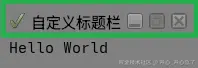
title_bar
- 绿色水平布局(窗口图标,标题栏,窗口图标)
- 整体垂直布局
1.1 基础概念
在 PySide6 中,布局管理器用于自动排列和调整控件的位置和大小。我们的自定义标题栏使用了两种布局:
- QVBoxLayout: 垂直布局,控件从上到下排列
- QHBoxLayout: 水平布局,控件从左到右排列
1.2 界面与布局结构
ruby
class TitleBar(QWidget):
    def __init__(self, parent=None):
        super().__init__(parent)
        self.setWindowFlags(Qt.WindowType.FramelessWindowHint)  # 移除默认边框
        self.setup_ui()
        self.setup_event_bind()
关键点解释:
QWidget: 所有用户界面对象的基础类setWindowFlags(Qt.WindowType.FramelessWindowHint): 移除系统默认的窗口边框,这样我们才能使用自定义标题栏
1.3 布局层次结构
scss
TitleBar (QVBoxLayout - 主布局)
├── title_layout (QHBoxLayout - 标题栏布局)
│   ├── icon_label (QLabel - 窗口图标)
│   ├── title_label (QLabel - 窗口标题)
│   ├── min_btn (QPushButton - 最小化按钮)
│   ├── max_btn (QPushButton - 最大化按钮)
│   └── close_btn (QPushButton - 关闭按钮)
└── QLabel ("Hello World" - 示例内容区域)
1.4 创建布局和控件
ini
def setup_ui(self):
    """设置界面"""
    # 全局使用垂直布局
    layout = QVBoxLayout(self)

    # 标题栏使用水平布局
    title_layout = QHBoxLayout()

    # 创建窗口图标
    self.icon_label = QLabel(
        pixmap=self.style().standardPixmap(
            QStyle.StandardPixmap.SP_DialogApplyButton
        )
    )

    # 创建窗口标题
    self.title_label = QLabel("自定义标题栏")

    # 创建窗口按钮
    self.min_btn = QPushButton(
        icon=self.style().standardPixmap(QStyle.StandardPixmap.SP_TitleBarMinButton)
    )
    self.max_btn = QPushButton(
        icon=self.style().standardPixmap(QStyle.StandardPixmap.SP_TitleBarMaxButton)
    )
    self.close_btn = QPushButton(
        icon=self.style().standardPixmap(
            QStyle.StandardPixmap.SP_TitleBarCloseButton
        )
    )
关键点解释:
-
QLabel: 用于显示文本或图片的控件
-
QPushButton: 按钮控件
-
self.style().standardPixmap() : 获取系统标准图标,确保在不同操作系统上都有原生外观
-
标准图标类型:
SP_DialogApplyButton: 对话框应用按钮图标SP_TitleBarMinButton: 标题栏最小化按钮图标SP_TitleBarMaxButton: 标题栏最大化按钮图标SP_TitleBarCloseButton: 标题栏关闭按钮图标
1.5 控件属性设置
python
# 最大化窗口 可勾选 默认不勾选
self.max_btn.setCheckable(True)
self.max_btn.setChecked(False)

# 固定控件大小
self.min_btn.setFixedSize(16, 16)
self.max_btn.setFixedSize(16, 16)
self.close_btn.setFixedSize(16, 16)
关键点解释:
setCheckable(True): 使按钮可以被选中/取消选中setFixedSize(width, height): 设置控件的固定大小
1.6 布局管理
php
# 添加布局与控件
layout.addLayout(title_layout)  # 将标题栏布局添加到主布局
title_layout.addWidget(self.icon_label)  # 添加图标
title_layout.addWidget(self.title_label)  # 添加标题
title_layout.addWidget(self.min_btn)  # 添加最小化按钮
title_layout.addWidget(self.max_btn)  # 添加最大化按钮
title_layout.addWidget(self.close_btn)  # 添加关闭按钮
layout.addWidget(QLabel("Hello World"))  # 添加内容区域
窗口事件
2.1 窗口拖动功能
为了实现窗口拖动,我们需要重写 mousePressEvent 方法:
scss
def mousePressEvent(self, event: QMouseEvent):
    if event.button() == Qt.LeftButton:
        window = self.window().windowHandle()
        if window:
            window.startSystemMove()
        event.accept()
关键点解释:
- QMouseEvent: 鼠标事件类,包含鼠标操作的所有信息
event.button() == Qt.LeftButton: 检查是否为鼠标左键点击self.window().windowHandle(): 获取窗口句柄window.startSystemMove(): 启动系统级别的窗口移动操作
2.2 跨平台支持
这个实现方式的优势在于:
- Linux (Wayland/X11) :
startSystemMove()方法在 Linux 的两种显示服务器上都能正常工作 - Windows: 在 Windows 系统上同样支持原生窗口移动
- macOS: 也支持 macOS 的窗口移动
这比传统的实现方式(如记录鼠标位置并手动移动窗口)更加可靠和跨平台。
2.3 事件处理机制
csharp
event.accept() # 接受事件,阻止事件继续传播event.accept() 告诉系统我们已经处理了这个事件,不需要进一步处理。
窗口按钮事件
3.1 事件绑定
在 setup_event_bind 方法中,我们将按钮的点击事件连接到相应的处理函数:
python
def setup_event_bind(self):
    """设置事件绑定"""
    # 缩小窗口 放大窗口与恢复窗口 关闭窗口
    self.min_btn.clicked.connect(self.showMinimized)
    self.max_btn.clicked.connect(self.toggle_max_restore)
    self.close_btn.clicked.connect(self.close)
关键点解释:
clicked.connect(): 将按钮的点击信号连接到相应的槽函数- 信号槽机制是 PySide6 的核心特性,用于实现对象间的通信
3.2 最小化窗口
lua
self.min_btn.clicked.connect(self.showMinimized)showMinimized() 是 QWidget 的内置方法,直接将窗口最小化到任务栏。
3.3 最大化与恢复窗口
python
def toggle_max_restore(self, checked: bool):
    """切换窗口最大与恢复"""
    if checked:
        self.max_btn.setIcon(
            self.style().standardPixmap(
                QStyle.StandardPixmap.SP_TitleBarNormalButton
            )
        )
        self.showMaximized()
    else:
        self.max_btn.setIcon(
            self.style().standardPixmap(QStyle.StandardPixmap.SP_TitleBarMaxButton)
        )
        self.showNormal()
关键点解释:
-
checked 参数 : 由于我们设置了
setCheckable(True),这个参数表示按钮的选中状态 -
图标切换:
- 最大化时显示恢复图标 (
SP_TitleBarNormalButton) - 恢复时显示最大化图标 (
SP_TitleBarMaxButton)
- 最大化时显示恢复图标 (
-
窗口状态方法:
showMaximized(): 将窗口最大化showNormal(): 将窗口恢复到正常大小
3.4 关闭窗口
lua
self.close_btn.clicked.connect(self.close)close() 是 QWidget 的内置方法,关闭窗口并退出应用程序。
完整代码解析
4.1 导入模块
python
from PySide6.QtWidgets import (
    QWidget,        # 基础窗口控件
    QVBoxLayout,    # 垂直布局
    QHBoxLayout,    # 水平布局
    QLabel,         # 标签控件
    QPushButton,    # 按钮控件
    QStyle,         # 样式相关类
    QApplication,   # 应用程序类
)
from PySide6.QtGui import QMouseEvent  # 鼠标事件
from PySide6.QtCore import Qt         # 核心枚举和类
4.2 主函数
python
def main():
    """主函数"""
    app = QApplication([])          # 创建应用程序实例
    title_bar = TitleBar()          # 创建自定义标题栏实例
    title_bar.setStyleSheet("background-color:grey;")  # 设置背景色
    title_bar.show()                # 显示窗口
    app.exec()                      # 进入事件循环
关键点解释:
QApplication([]): 创建应用程序对象,管理 GUI 应用程序setStyleSheet(): 设置控件样式,这里设置背景色为灰色show(): 显示窗口app.exec(): 进入应用程序的主事件循环
4.3 运行程序
ini
if __name__ == "__main__":
    main()
这是 Python 的标准写法,确保只有直接运行此文件时才会执行 main() 函数。
总结
通过本教程,我们学习了如何:
- 创建自定义布局: 使用 QVBoxLayout 和 QHBoxLayout 组织界面元素
- 添加窗口控件: 创建图标、标题和按钮等界面元素
- 实现窗口拖动 : 使用
startSystemMove()实现跨平台窗口拖动 - 处理窗口操作: 实现最小化、最大化/恢复、关闭等功能
本文使用 人言兑.md-公众号排版编辑器 排版
- 本文采用「人言兑.md」自动排版 -