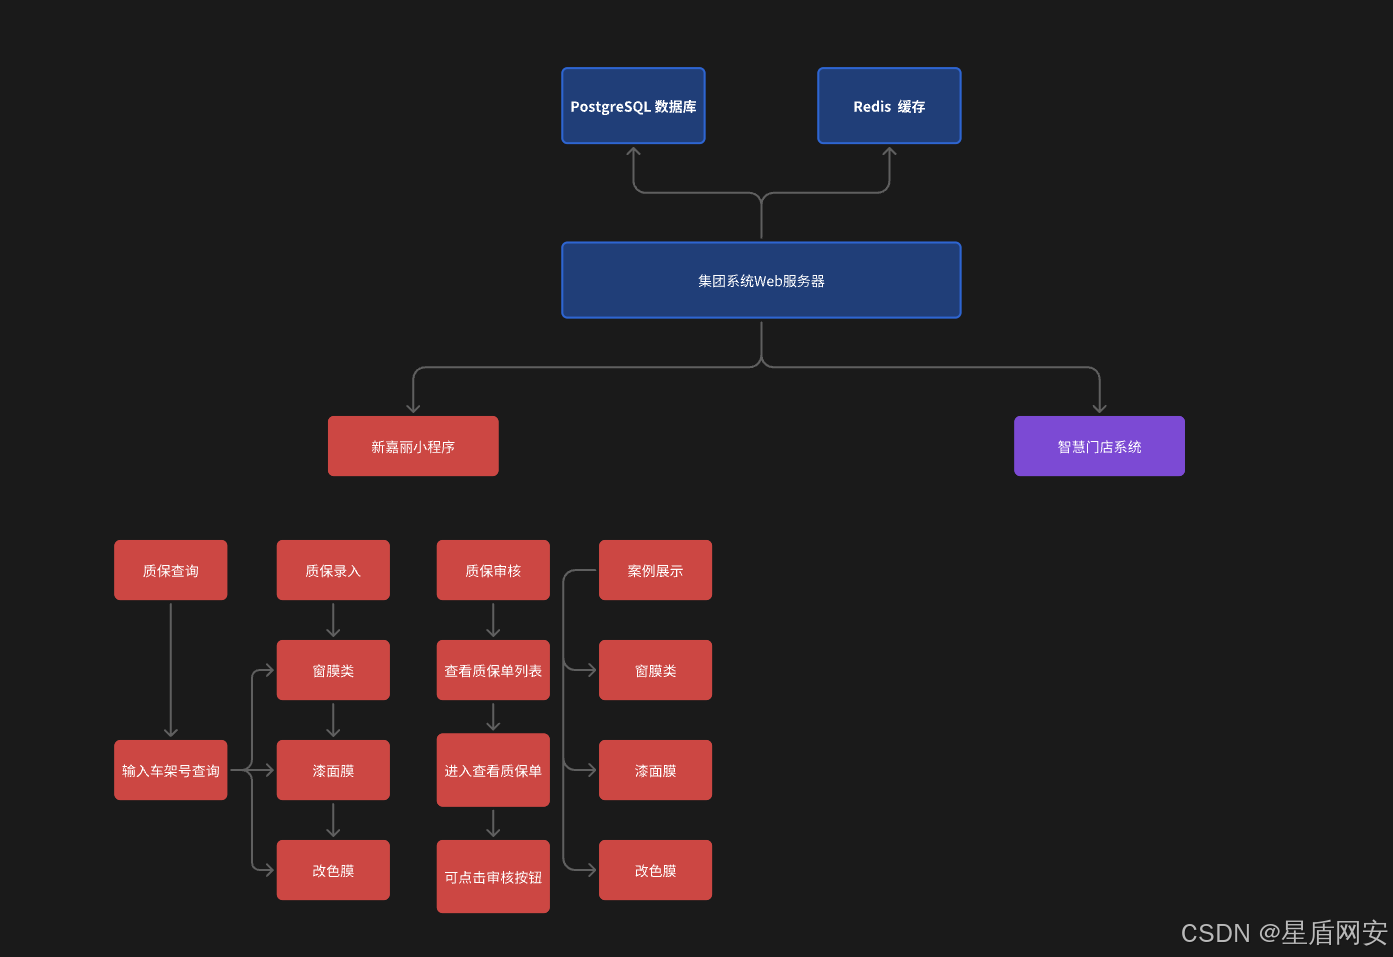
观察小程序功能需求,我们列一下开发步骤
目录
[1. 小程序初始化搭建](#1. 小程序初始化搭建)
[2. 首页搭建](#2. 首页搭建)
[3. 我的页面搭建](#3. 我的页面搭建)
[4. 质保查询选择页面](#4. 质保查询选择页面)
[5. WF质保查询页面](#5. WF质保查询页面)
[6. PPF质保查询页面](#6. PPF质保查询页面)
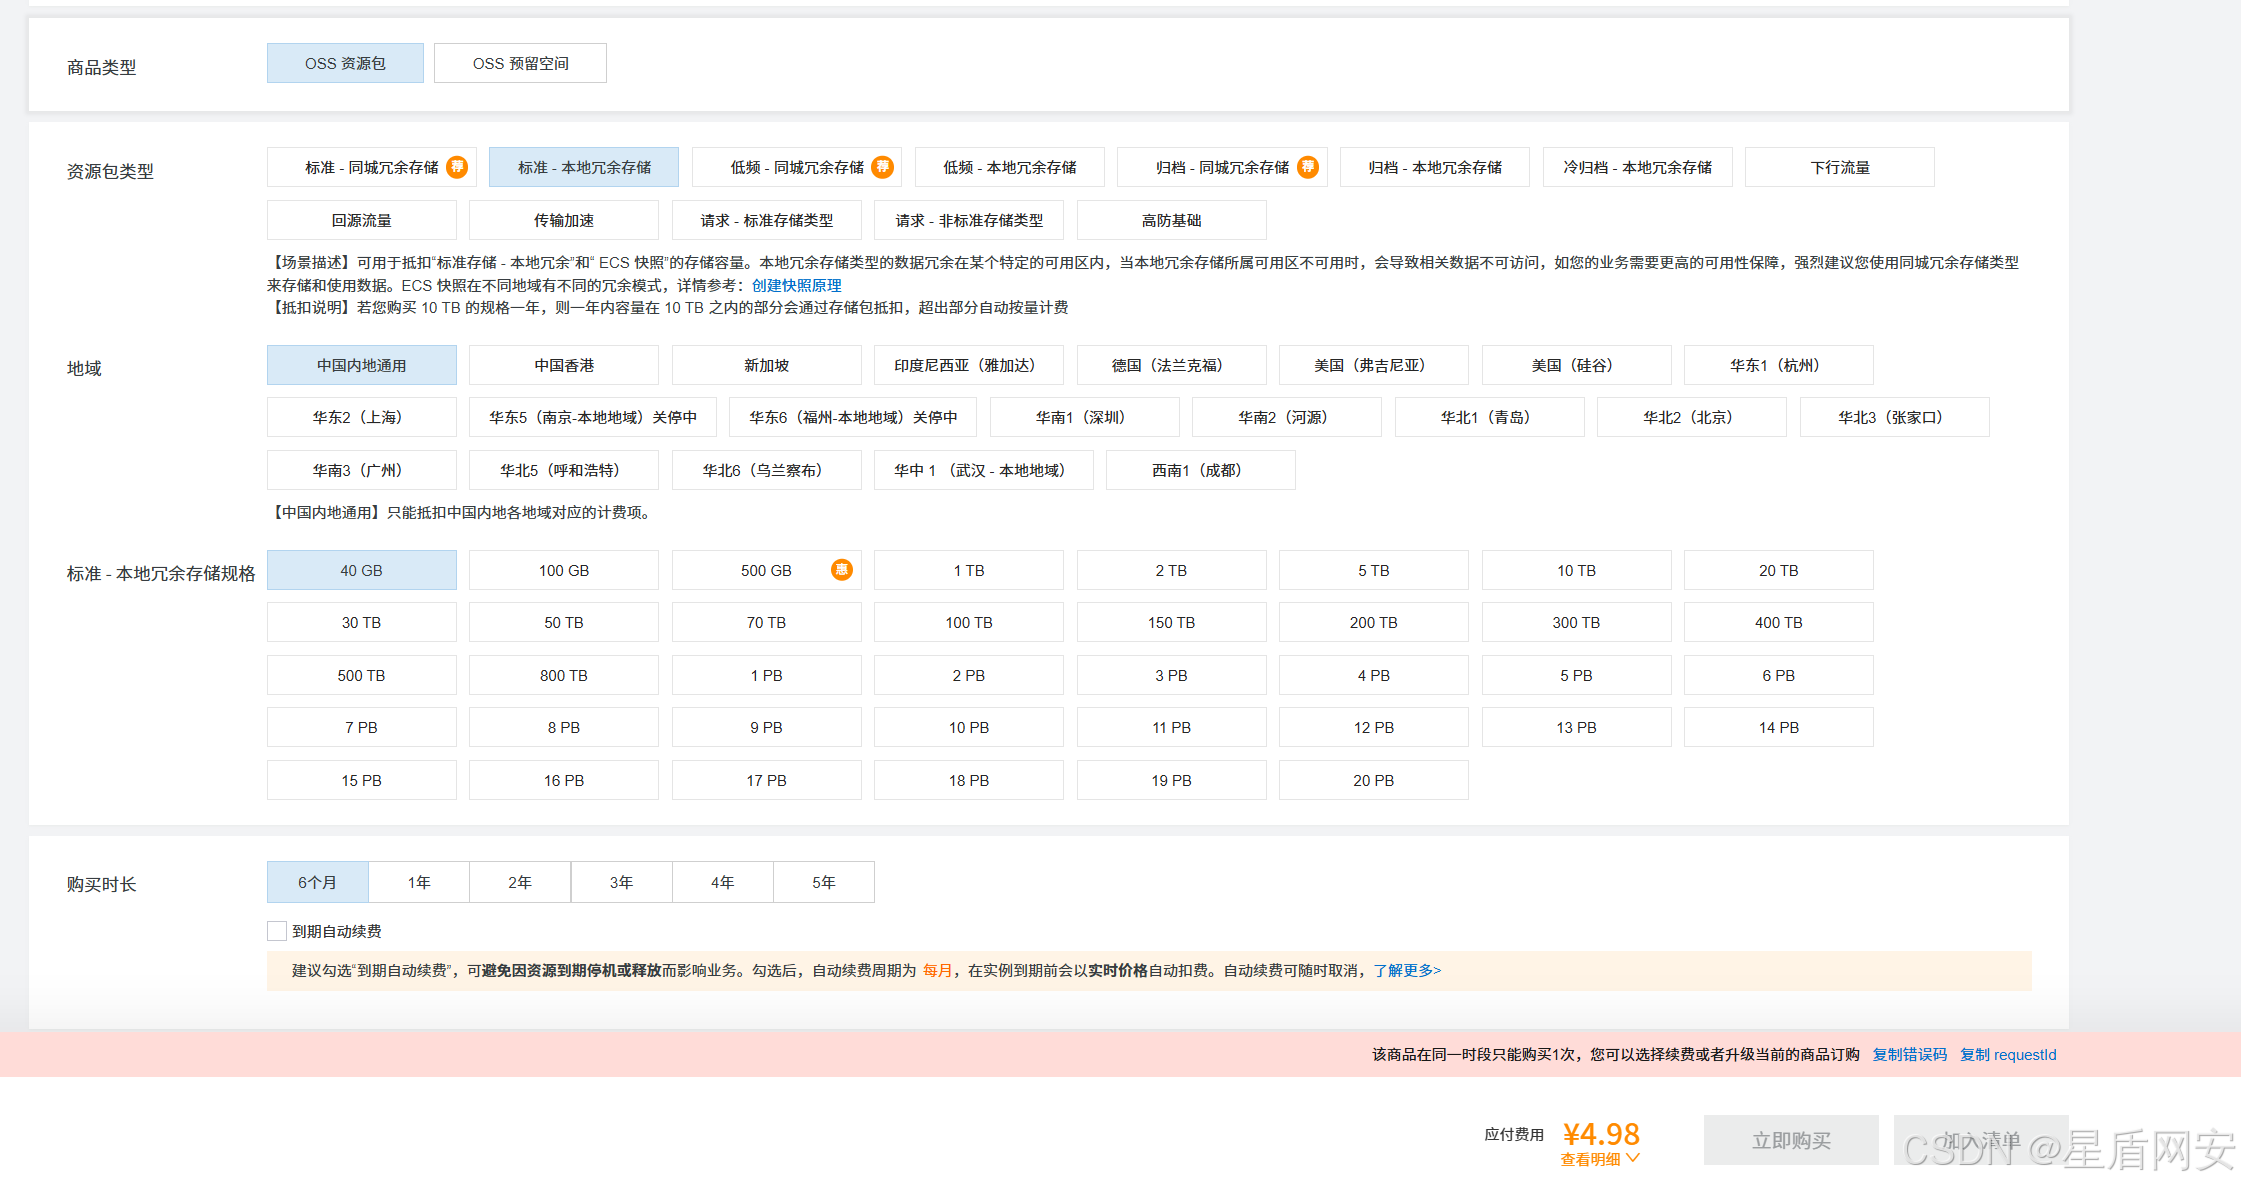
基础准备:阿里云OSS
阿里云OSS对象存储链接:
跟着我的配置买,就存储空间就几块钱而已,就有40G半年,很便宜
为啥不在服务器上部署oss,因为服务器容量其实更贵,买这种OSS服务是最便宜的
服务器的空间用来存数据库数据就很耐存,用来存图片,视频等资源就消耗的很快
而且安装配置有点麻烦,所以出于时间等性价比考虑,还是直接用阿里云最划算
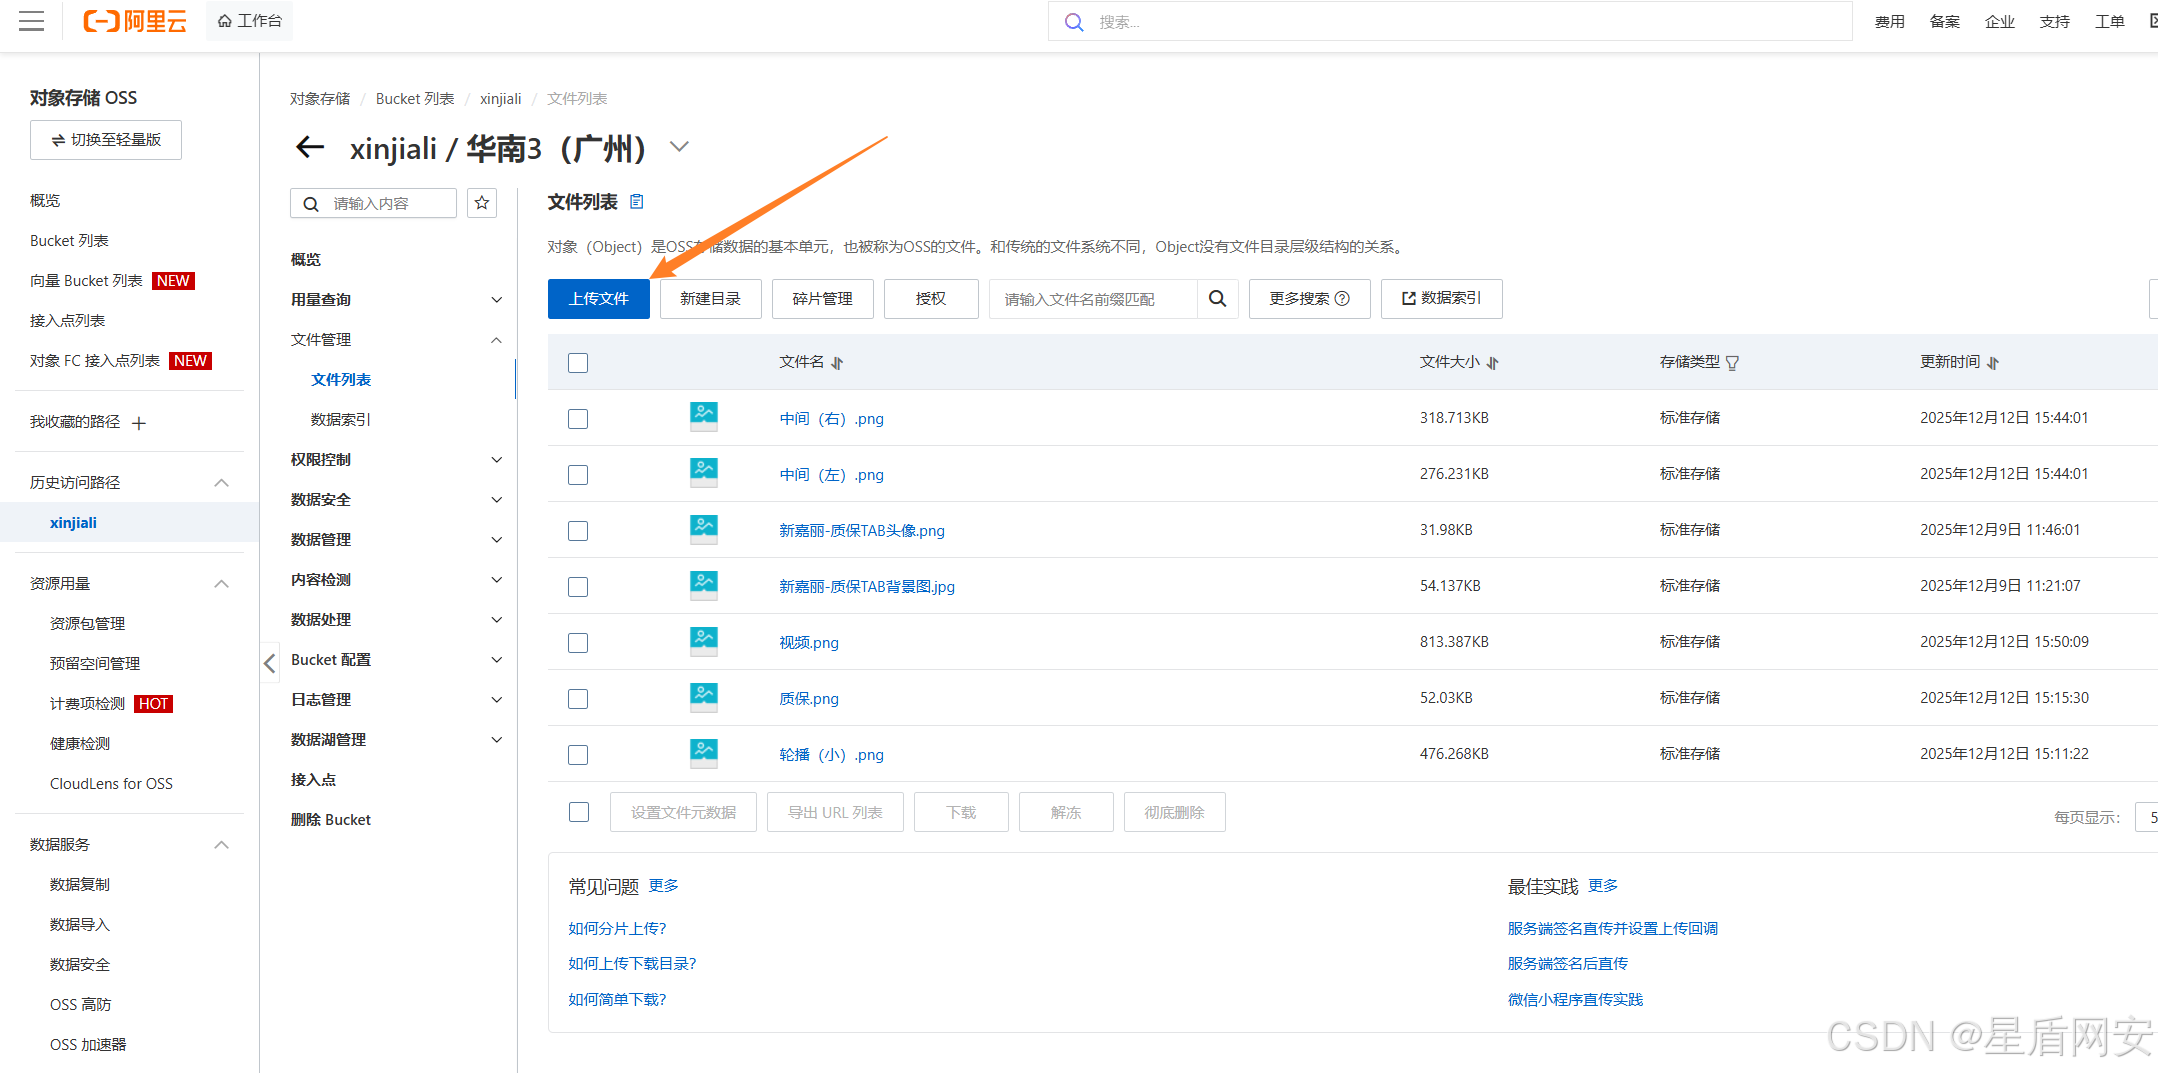
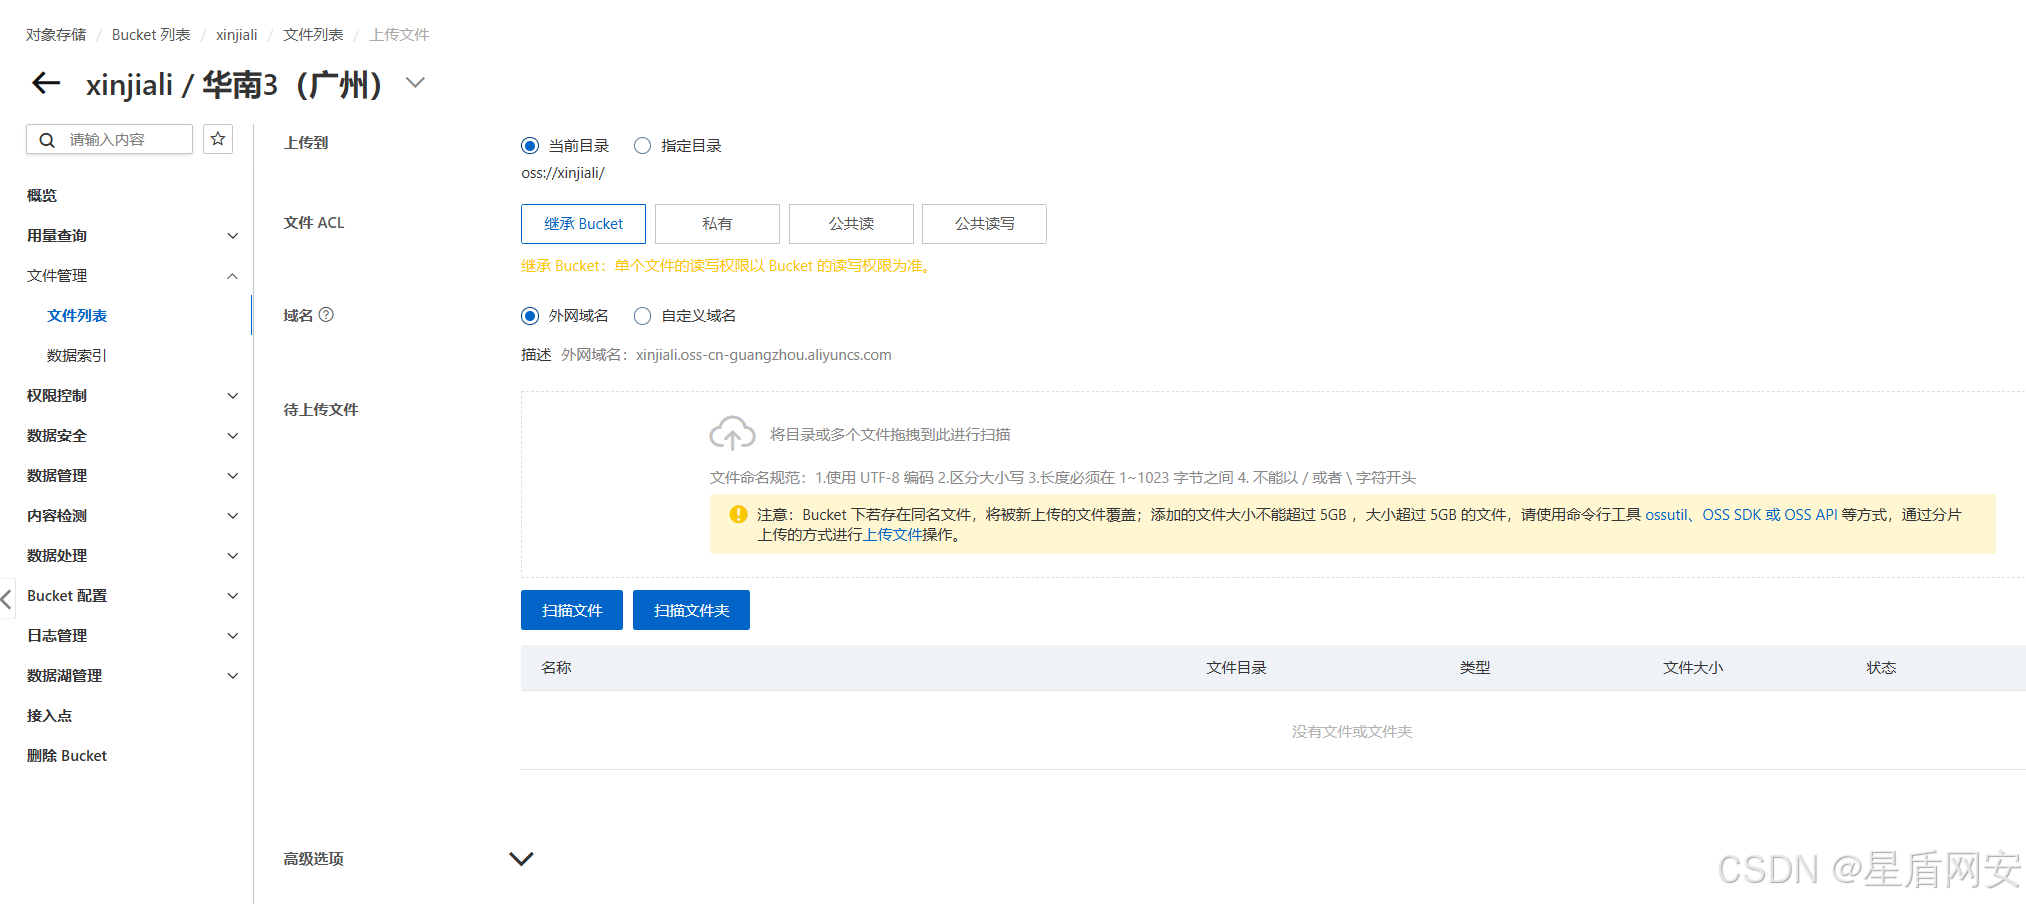
进来之后自行创建Bucket,就当是文件夹就可以了,用来存资源的
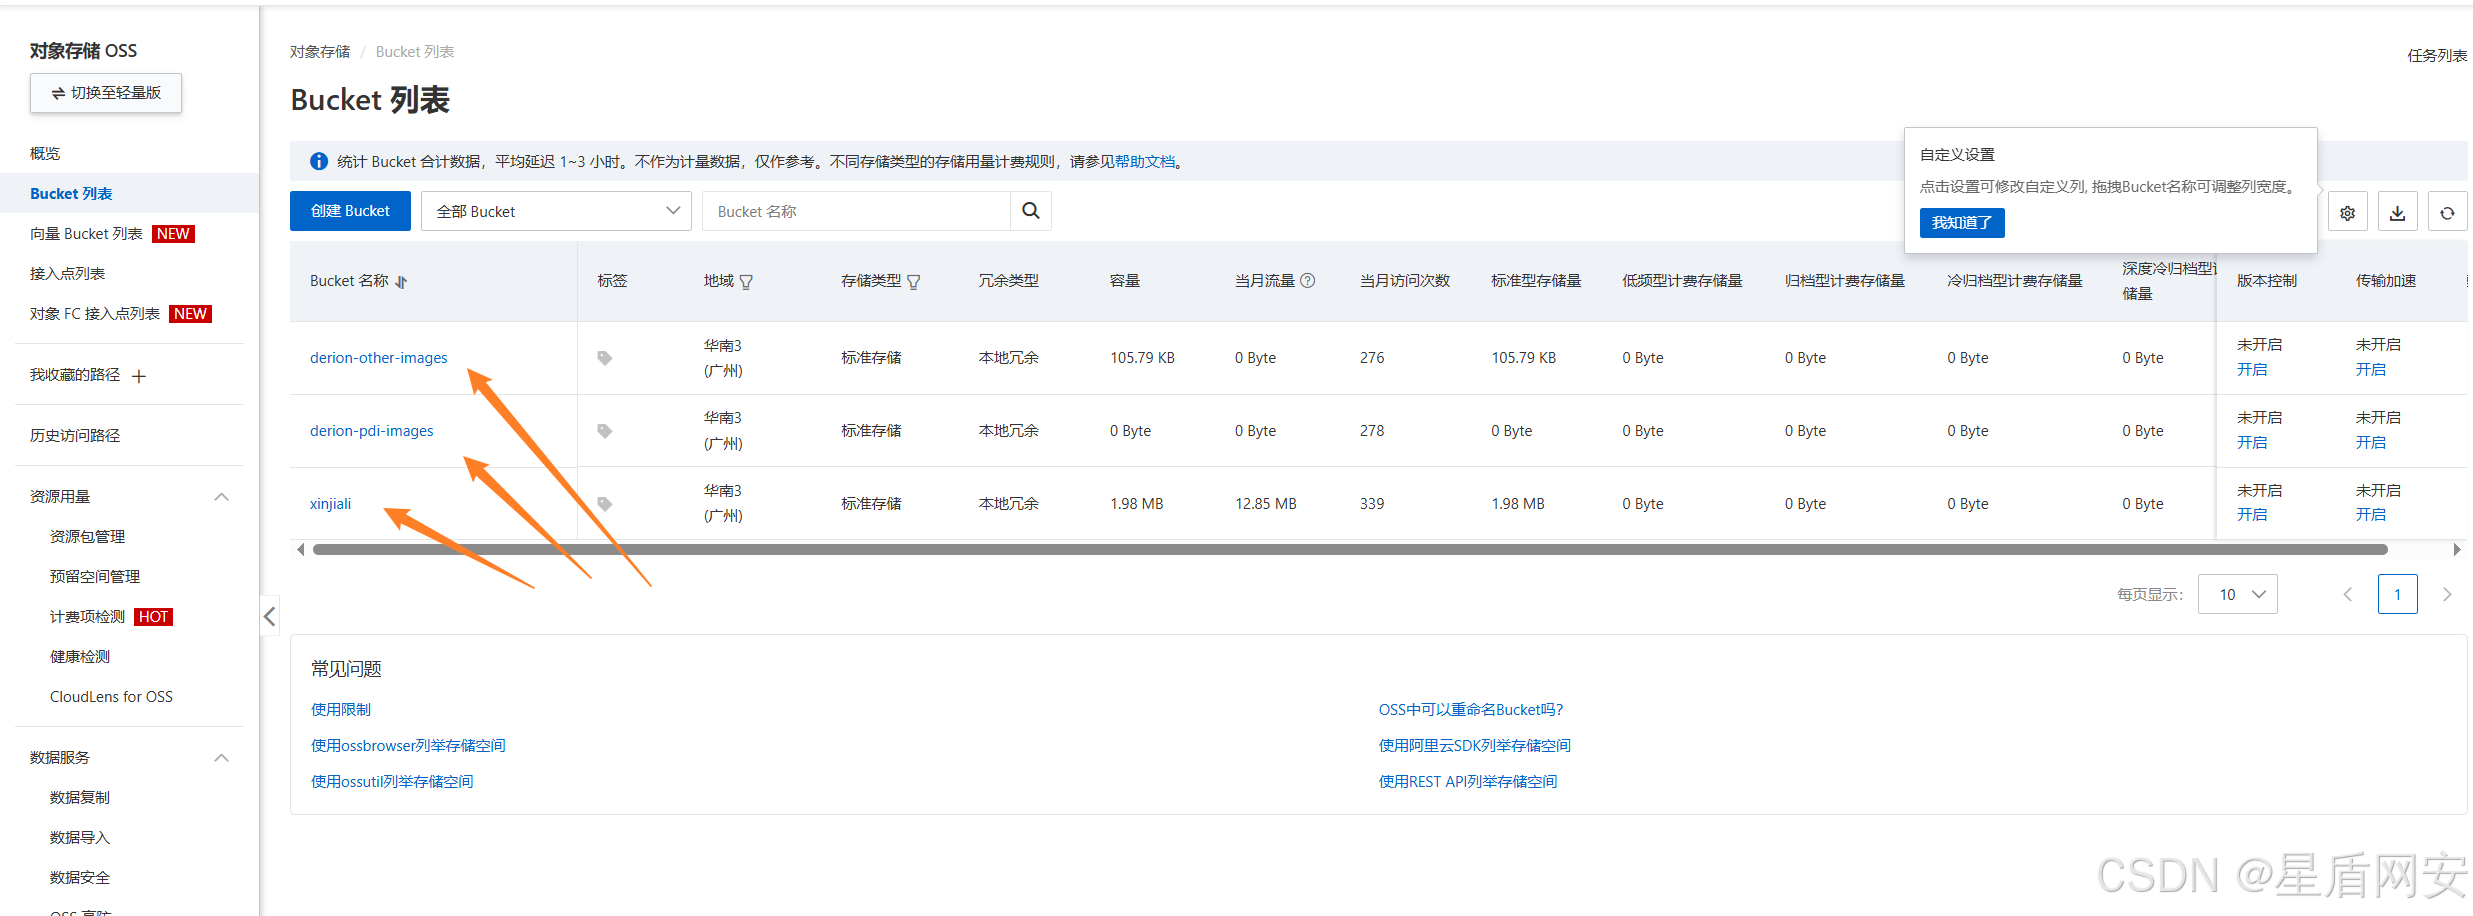
可以手动上传文件,我们用的最多就是图片和视频
先手动上传体验一把,后续我们就用代码来上传了
上传这里也是有点要求的,除了限制大小外,还需要注意权限问题
可以单个文件设置公共读写权限,或者只能读权限等
目前我们先默认就可以了
1. 小程序初始化搭建
我们不用原生的微信开发,用Uniapp开发,那样可以用Vue2和Vue3的语法
先来安装个 HBuilder X 编辑器,网址:https://www.dcloud.io/hbuilderx.html
初始化的快捷键建议选择vscode,因为我个人常用alt+z自动换行功能,比较舒服
左上角来新建一个项目

先找美工看看做的首页
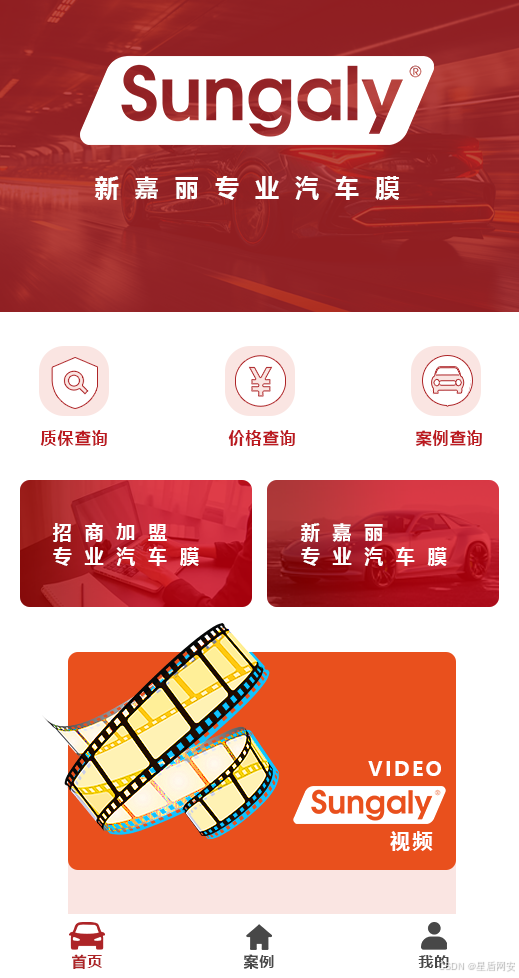
下方有三个导航栏,那么我们就要有三个页面,首页有一个,我们还需要生成两个页面
右键新建页面
因为我是写了一点才想要写文章,所以我这里有几个页面,
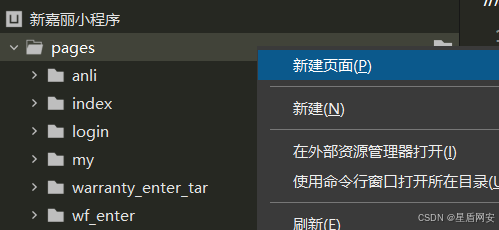
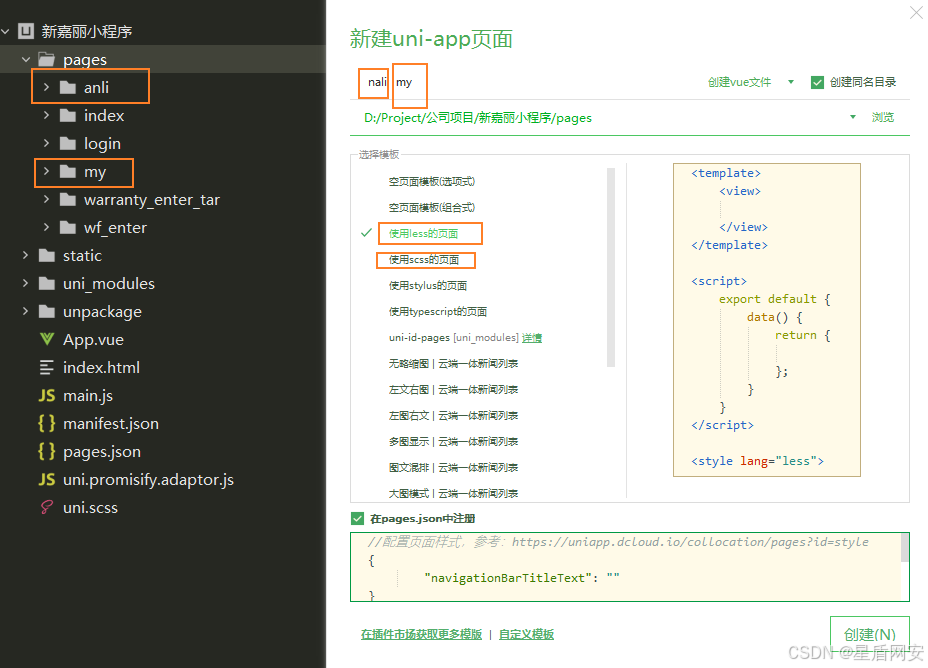
我们来创建anli,my 页面
模板选择less或scss都可以
然后准备两组logo,放入static目录里,这里指的是静态资源文件夹
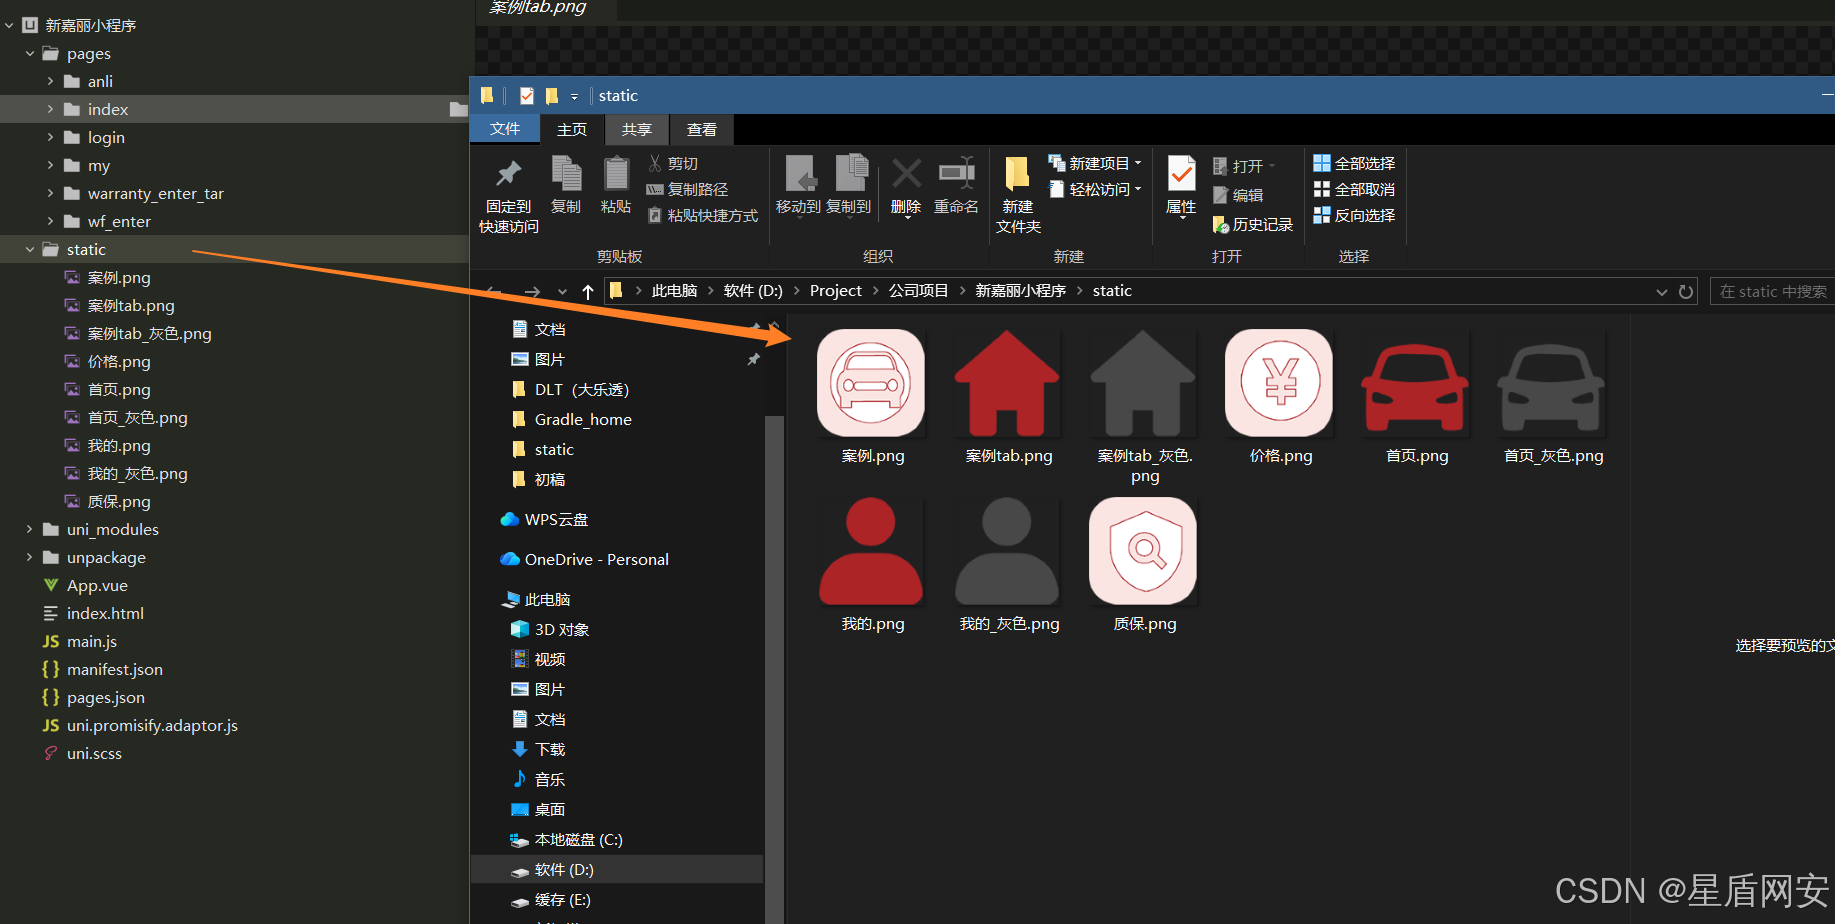
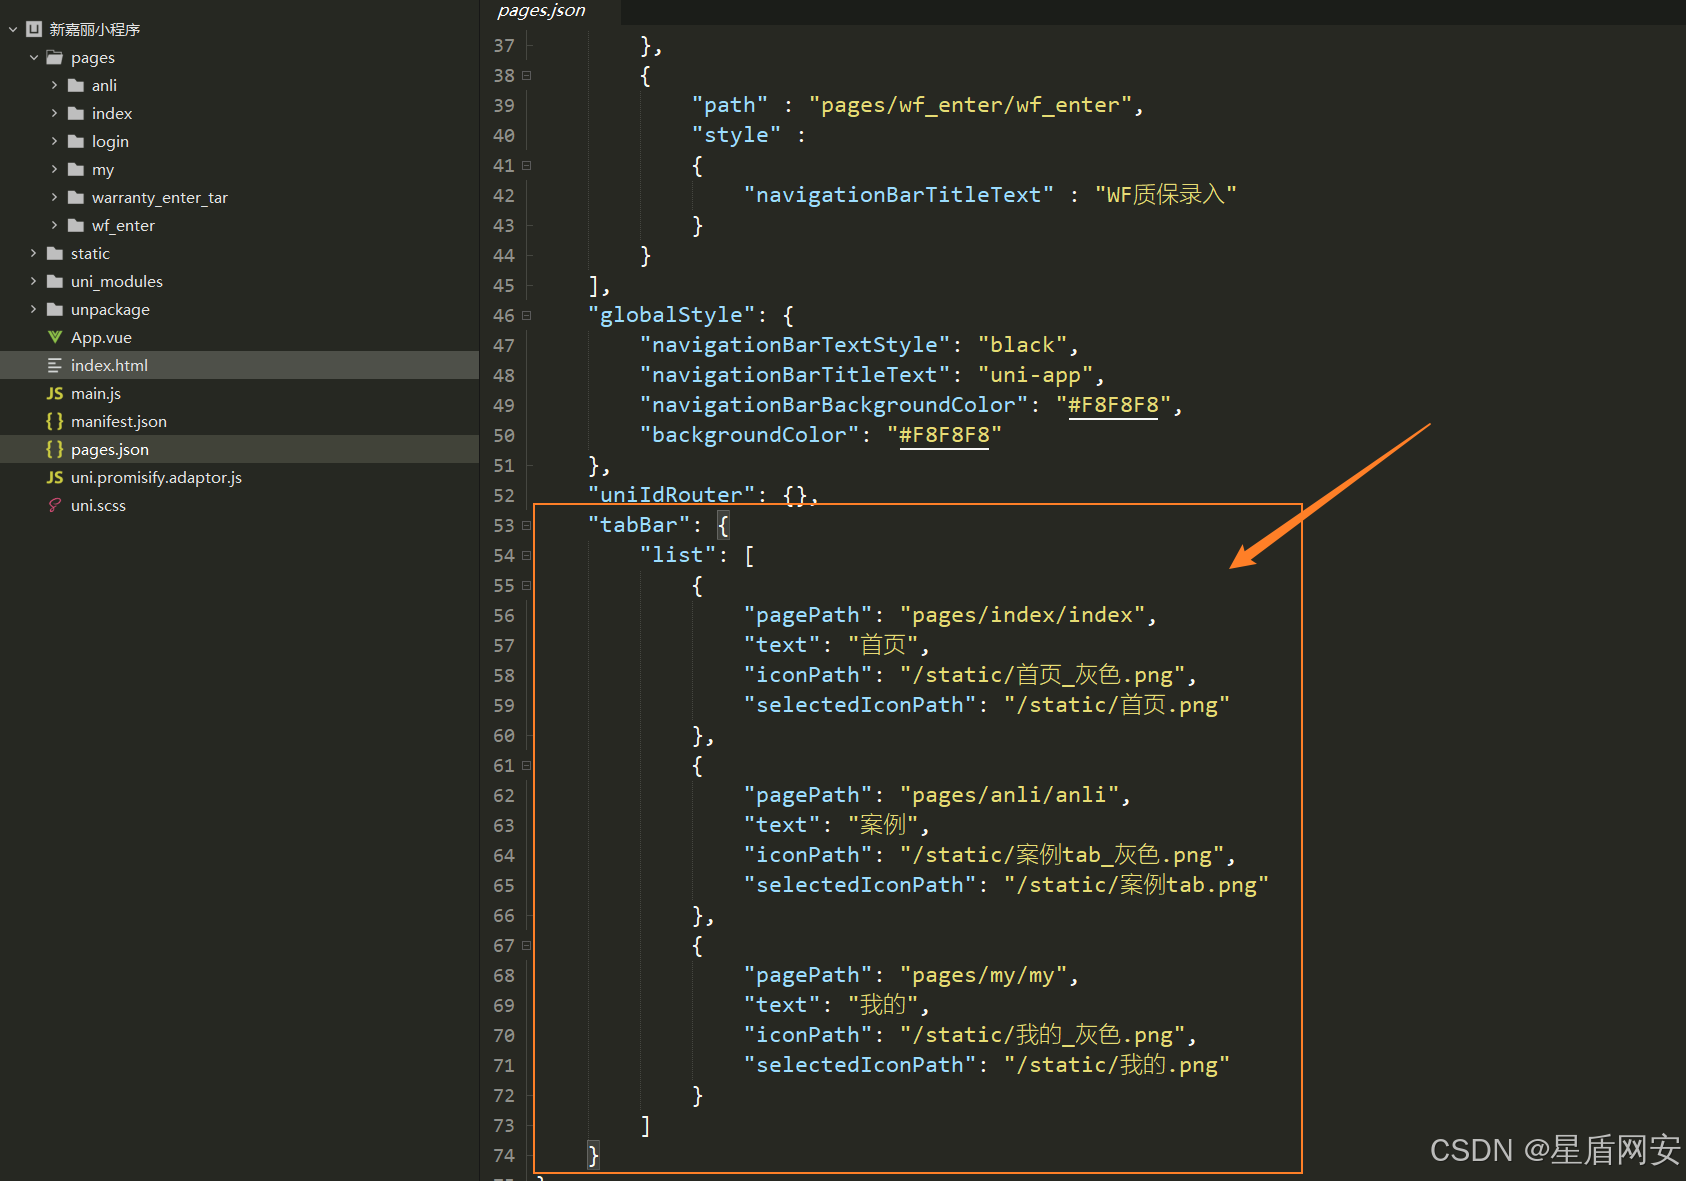
来到pages.json页面,新增tabBar节点,此节点与globalStyle节点是同层级
图标有两组,自己看着来填就行
图标两组的意思是:选中状态下的图标 和 未选中状态下的图标
2. 首页搭建
那么来到 index页面,直接写首页内容
页面有四个结构:轮播图,三个功能,两个招商加盟,一个视频位置
从上到下轮着写就行了
下方的图片url是我放在了阿里云的图片,上面有教阿里云oss如何搭建和上传文件
每个文件都有下载链接的,复制一下放过来url的括号里就可以了
javascript
<template>

	<div class="title"></div>

	<div class="tab">
		<div class="box">
			<div class="icon" style="background-image: url(/static/质保.png);"></div>
			<div class="text">质保查询</div>
		</div>
		<div class="box" @click="goto('质保录入')">
			<div class="icon" style="background-image: url(/static/价格.png);"></div>
			<div class="text">价格查询</div>
		</div>
		<div class="box">
			<div class="icon" style="background-image: url(/static/案例.png);"></div>
			<div class="text">案例查询</div>
		</div>

	</div>

	<div class="tab2">

		<!-- 招商加盟,专业汽车膜 -->
		<div class="box-left"></div>
		<!-- 新嘉丽,专业汽车膜 -->
		<div class="box-right"></div>
	</div>

	<div class="tab3"></div>

</template>


<style lang="less">
	.tab3{
		width: 100%;
		height: 250px;
		background-repeat: no-repeat;
		background-size: contain;
		background-image: url(https://xinjiali.oss-cn-guangzhou.aliyuncs.com/%E8%A7%86%E9%A2%91.png);
	}

	.tab2{
		width: 100%;
		height: 130px;
		margin-top: 30px;
		display: flex;
		justify-content: space-evenly;
		.box-left{
			width: 180px;
			height: 100px;
			background-image: url(https://xinjiali.oss-cn-guangzhou.aliyuncs.com/%E4%B8%AD%E9%97%B4%EF%BC%88%E5%B7%A6%EF%BC%89.png);
			background-repeat: no-repeat;
			background-size: 100% 100%;
			border-radius: 10px;
		}
		.box-right{
			width: 180px;
			height: 100px;
			background-image: url(https://xinjiali.oss-cn-guangzhou.aliyuncs.com/%E4%B8%AD%E9%97%B4%EF%BC%88%E5%8F%B3%EF%BC%89.png);
			background-repeat: no-repeat;
			background-size: 100% 100%;
			border-radius: 10px;
		}
	}

	.title{
		height: 230px;
		width: 100%;
		background-repeat: no-repeat;
		background-size: contain;
		background-image: url(https://xinjiali.oss-cn-guangzhou.aliyuncs.com/%E8%BD%AE%E6%92%AD%EF%BC%88%E5%B0%8F%EF%BC%89.png);
	}

	.tab{
		width: 100%;
		height: 100px;
		// background-color: orange;
		display: flex;
		justify-content: space-between;
		.box{
			width: 33%;
			height: 100%;
			// background-color: yellow;
			display: flex;
			flex-direction: column;
			justify-content: space-evenly;
			align-items: center;
			.icon{
				width: 50px;
				height: 50px;
				background-color: #fff;
				background-size: contain;
			}
			.text{
				margin-top: -15px;
				height: 0px;
				color: #c30e17;
				font-weight: 700;
			}
		}
	}


</style>
完事,写完
3. 我的页面搭建
做我的页面前要知道业务,开质保和审核质保都是内部工作人员
所以暂时没有用户登录,那我们就设计,打开我的页面就识别有没有jwt登录令牌
javascript
<script setup >
import { onMounted, ref } from 'vue'

	// 先检测jwt是否存在
	let jwt = uni.getStorageSync('jwt')
	let 权限 = ref(0)


	const goto = (value)=>{
		switch(value){
			case "质保录入":
				uni.reLaunch({
					url: '/pages/warranty_enter_tar/warranty_enter_tar'
				})
				break;
		}
	}


	onMounted(() => {
		if (!jwt) {
			uni.navigateTo({
				url: '/pages/login/login'
			})
		}
		else{
			// 获取是否有门店权限
			uni.request({
				url: uni.$url+"/xinjiali_get_store_permission",
				method: 'GET',
				header:{jwt:jwt},
				success: (res) => {
					console.log("获取门店权限⬇️")
					console.log(res)
					权限.value = res.data.data
				}
			})
		}
	})


</script>
没有的话,我们直接就跳到登录页面
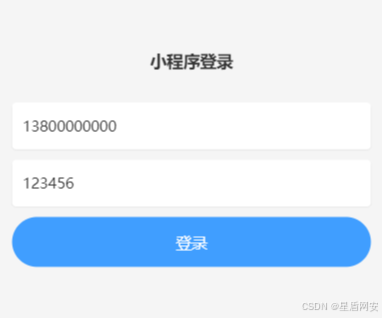
登录界面因为是给内部人看的,所以我直接用AI生成了CSS代码
登录
javascript
<script setup>
	import {
		ref
	} from 'vue';

    // 先把账号密码直接写了,方便调试
	// 响应式变量(替代原 data 选项)
	const phone = ref('13800000000'); // 手机号
	const password = ref('123456'); // 密码


	// 处理登录逻辑
	const handleLogin = () => {
		uni.request({
			url: uni.$url+'/xinjiali_store_login',
			method: 'POST',
			data:{
				手机号: phone.value,
				密码: password.value,
			},
			success: (res) => {
				console.log(res)
				if(res.data.code===1){
					console.log("登录成功")
					uni.setStorageSync("jwt",res.data.data)
					uni.showToast({
						title: '登录成功',
						icon: 'success',
						duration: 1000
					})
					setTimeout(()=>{
						uni.reLaunch({
							url: '/pages/index/index'
						})
					},1000)

				}
				else{
					console.log("登录失败")
				}
			}
		})
	};
</script>


<template>
	<view class="login-page">
		<!-- 顶部Logo区域 -->
		<view class="logo-container">
			<view class="app-title">小程序登录</view>
		</view>

		<!-- 登录表单 -->
		<view class="form-container">
			<!-- 手机号输入框 -->
			<view class="input-group">

				<input class="input-field" type="number" placeholder="请输入手机号" v-model="phone" maxlength="11"
					placeholder-class="placeholder-style" />
			</view>

			<!-- 密码输入框 -->
			<view class="input-group">
				<input class="input-field" placeholder="请输入密码" v-model="password"
					placeholder-class="placeholder-style" />
			</view>

			<!-- 登录按钮 -->
			<button class="login-btn" style="width: 100%;" @click="handleLogin">登录</button>
		</view>


	</view>
</template>


<style lang="less">
	/* 页面整体样式 */
	.login-page {
		min-height: 100vh;
		background-color: #f5f5f5;
		padding: 0 30rpx;
		box-sizing: border-box;
		display: flex;
		flex-direction: column;
		justify-content: space-between;
	}

	/* Logo区域 */
	.logo-container {
		padding-top: 120rpx;
		display: flex;
		flex-direction: column;
		align-items: center;
	}

	.logo {
		width: 160rpx;
		height: 160rpx;
		border-radius: 50%;
		background-color: #fff;
		padding: 20rpx;
		box-shadow: 0 2rpx 10rpx rgba(0, 0, 0, 0.1);
	}

	.app-title {
		margin-top: 30rpx;
		font-size: 32rpx;
		font-weight: 600;
		color: #333;
	}

	/* 表单区域 */
	.form-container {
		margin-top: 60rpx;
		flex: 1;
		display: flex;
		flex-direction: column;
	}

	/* 输入框组 */
	.input-group {
		display: flex;
		align-items: center;
		background-color: #fff;
		border-radius: 8rpx;
		padding: 0 20rpx;
		height: 90rpx;
		margin-bottom: 20rpx;
		box-shadow: 0 1rpx 3rpx rgba(0, 0, 0, 0.05);
	}

	.input-icon {
		width: 36rpx;
		height: 36rpx;
		margin-right: 20rpx;
	}

	.input-field {
		flex: 1;
		height: 100%;
		font-size: 28rpx;
		color: #333;
	}

	.placeholder-style {
		color: #999;
		font-size: 28rpx;
	}

	.eye-icon {
		width: 36rpx;
		height: 36rpx;
	}

	/* 忘记密码 */
	.forget-pwd {
		align-self: flex-end;
		margin: 15rpx 0 40rpx;
		font-size: 24rpx;
		color: #409eff;
	}

	/* 登录按钮 */
	.login-btn {
		background-color: #409eff;
		color: #fff;
		font-size: 30rpx;
		height: 96rpx;
		line-height: 96rpx;
		border-radius: 48rpx;
		width: 100px;
	}

	.login-btn::after {
		border: none;
	}

	/* 加载状态 */
	.loading-wrapper {
		display: flex;
		align-items: center;
		justify-content: center;
	}

	.loading-text {
		margin-left: 10rpx;
		font-size: 30rpx;
	}

	/* 注册区域 */
	.register-container {
		display: flex;
		justify-content: center;
		align-items: center;
		margin-bottom: 60rpx;
		font-size: 26rpx;
		color: #666;
	}

	.register-btn {
		margin-left: 15rpx;
		color: #409eff;
		font-weight: 500;
	}
</style>
页面就这样,简简单单
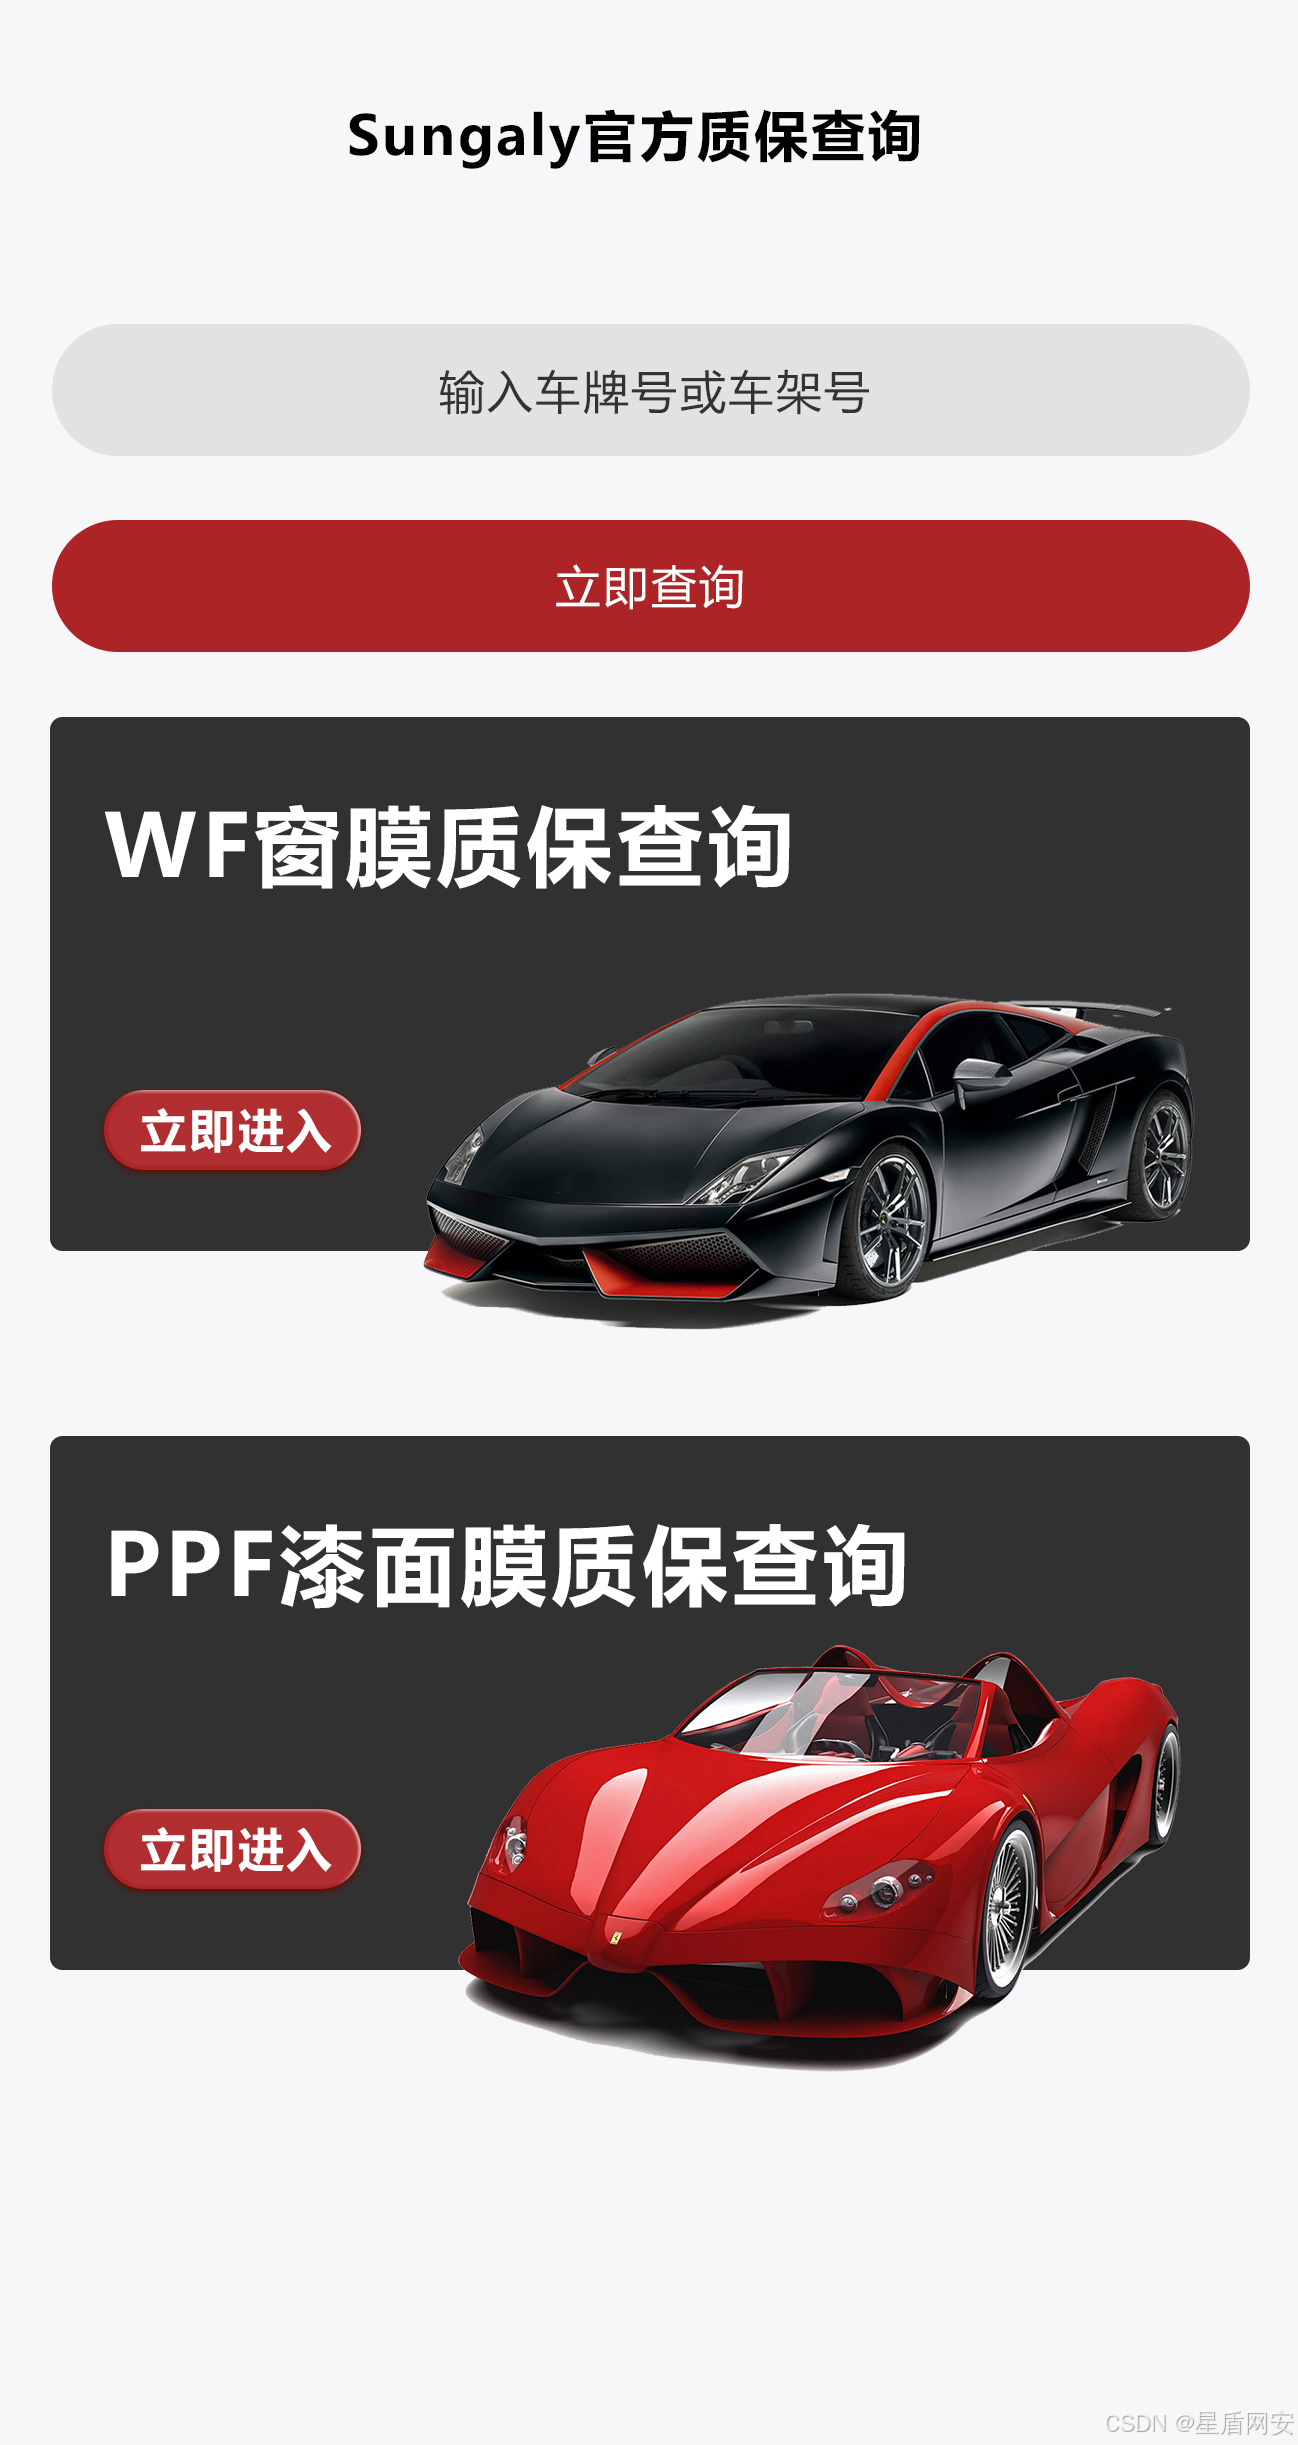
4. 质保查询选择页面
接下来做客户查询质保的界面,因为有分窗膜和车衣,数据格式也不一样
所以需要有一个选择的界面,再跳转到对应的质保查询界面
这里我也叫美工做好了
上图⬇️
先在首页的质保查询的图标里添加一个点击事件
XML
<div class="box">
	<div class="icon" style="background-image: url(/static/质保.png);" @click="goto('质保查询')"></div>
	<div class="text">质保查询</div>
</div>
再弄一个goto函数,通过传参来跳转界面即可
javascript
<script setup >
const goto = (value)=>{
switch(value){
case '质保查询':
uni.navigateTo({
url: '/pages/warranty_enter_tar/warranty_enter_tar'
})
break;
}
}
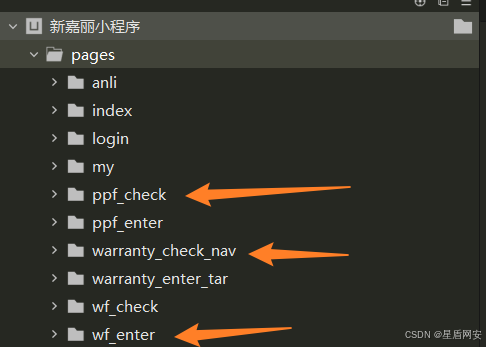
</script>然后创建三个页面:
warranty_check_nav 用来导航查询 wf 或 ppf 页面
ppf_check 车衣查询页面
wf_check 窗膜查询页面
其他的enter页面都是管理员录入质保的页面,先不管,我创建多了而已
我们来到warranty_check_nav页面,看着设计图直接写就行了,也就三个内容
标题,和两个图片,分别写一个跳转,ok
XML
<!-- warranty_check_nav.vue 页面 -->
<script setup>
const goto = (value)=>{
switch(value){
case 'wf':
uni.navigateTo({
url: '/pages/wf_enter/wf_enter'
})
break;
case "PPF":
uni.navigateTo({
url: '/pages/ppf_enter/ppf_enter'
})
break;
}
}
</script>
<template>
<div class="title">Sungaly官方质保查询</div>
<div class="WF" @click="goto('WF')"></div>
<div class="PPF" @click="goto("PPF")"></div>
</template>
<style lang="less">
.title{
margin-top: 150px;
font-size: 17px;
font-weight: 700;
text-align: center;
}
.WF{
width: 320px;
height: 180px;
background-repeat: no-repeat;
background-size: contain;
background-image: url(https://xinjiali.oss-cn-guangzhou.aliyuncs.com/WF%E7%AA%97%E8%86%9C%E8%B4%A8%E4%BF%9D%E6%9F%A5%E8%AF%A2.png);
margin: 0 auto;
margin-top: 50px;
}
.PPF{
width: 320px;
height: 180px;
background-repeat: no-repeat;
background-size: contain;
background-image: url(https://xinjiali.oss-cn-guangzhou.aliyuncs.com/PPF%E6%BC%86%E9%9D%A2%E8%86%9C%E8%B4%A8%E4%BF%9D%E6%9F%A5%E8%AF%A2.png);
margin: 0 auto;
margin-top: 50px;
}
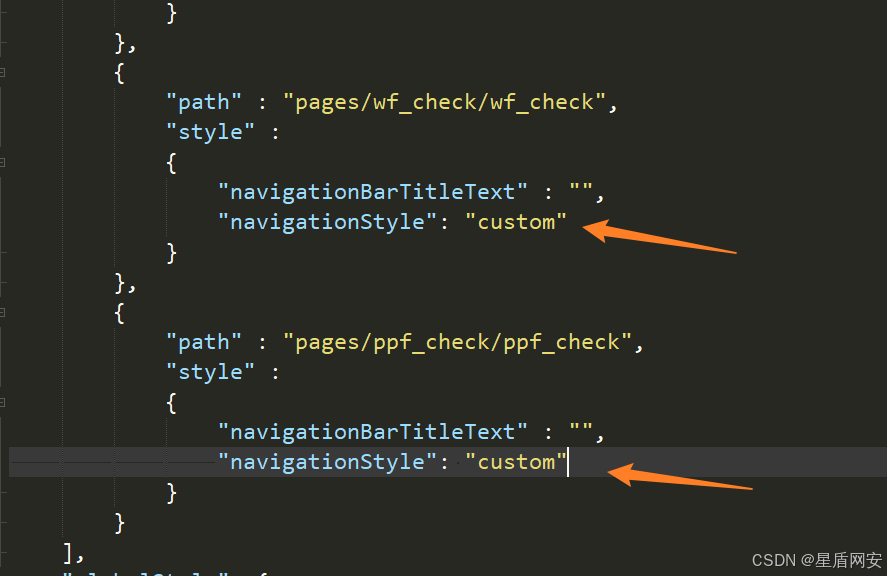
</style>5. WF质保查询页面
下面两个页面版面都是一样的,先去取消一下默认标题栏
javascript
<!-- wf_check.vue WF质保查询页面 -->
<script setup>
</script>
<template>
<div class="image" ></div>
<div class="title" style="margin-left: 10px;display: flex;">
<div style="color: red;">*</div>
<div>车架</div>
</div>
<input class="ipt" type="text" placeholder="请输入车架号" placeholder-style="color:#3f3f3f;" />
<button style="background-color: #c30e17;">立刻查询</button>
</template>
<style lang="less">
.image{
width: 100%;
height: 300px;
background-repeat: no-repeat;
background-size: contain;
background-image: url(https://xinjiali.oss-cn-guangzhou.aliyuncs.com/WF%E6%9F%A5%E8%AF%A2%E8%BD%AE%E6%92%AD%E5%9B%BE.png);
}
.ipt{
width: 90%;
height: 40px;
background-color: #dadada;
border-radius: 20px;
margin: 0 auto;
margin-top: 15px;
text-align: center;
placeholder-color: #3d6360;
}
.ipt::placeholder {
text-align: center;
font-size: 14px;
}
button{
width: 90%;
border-radius: 20px;
margin-top: 20px;
color: white;
}
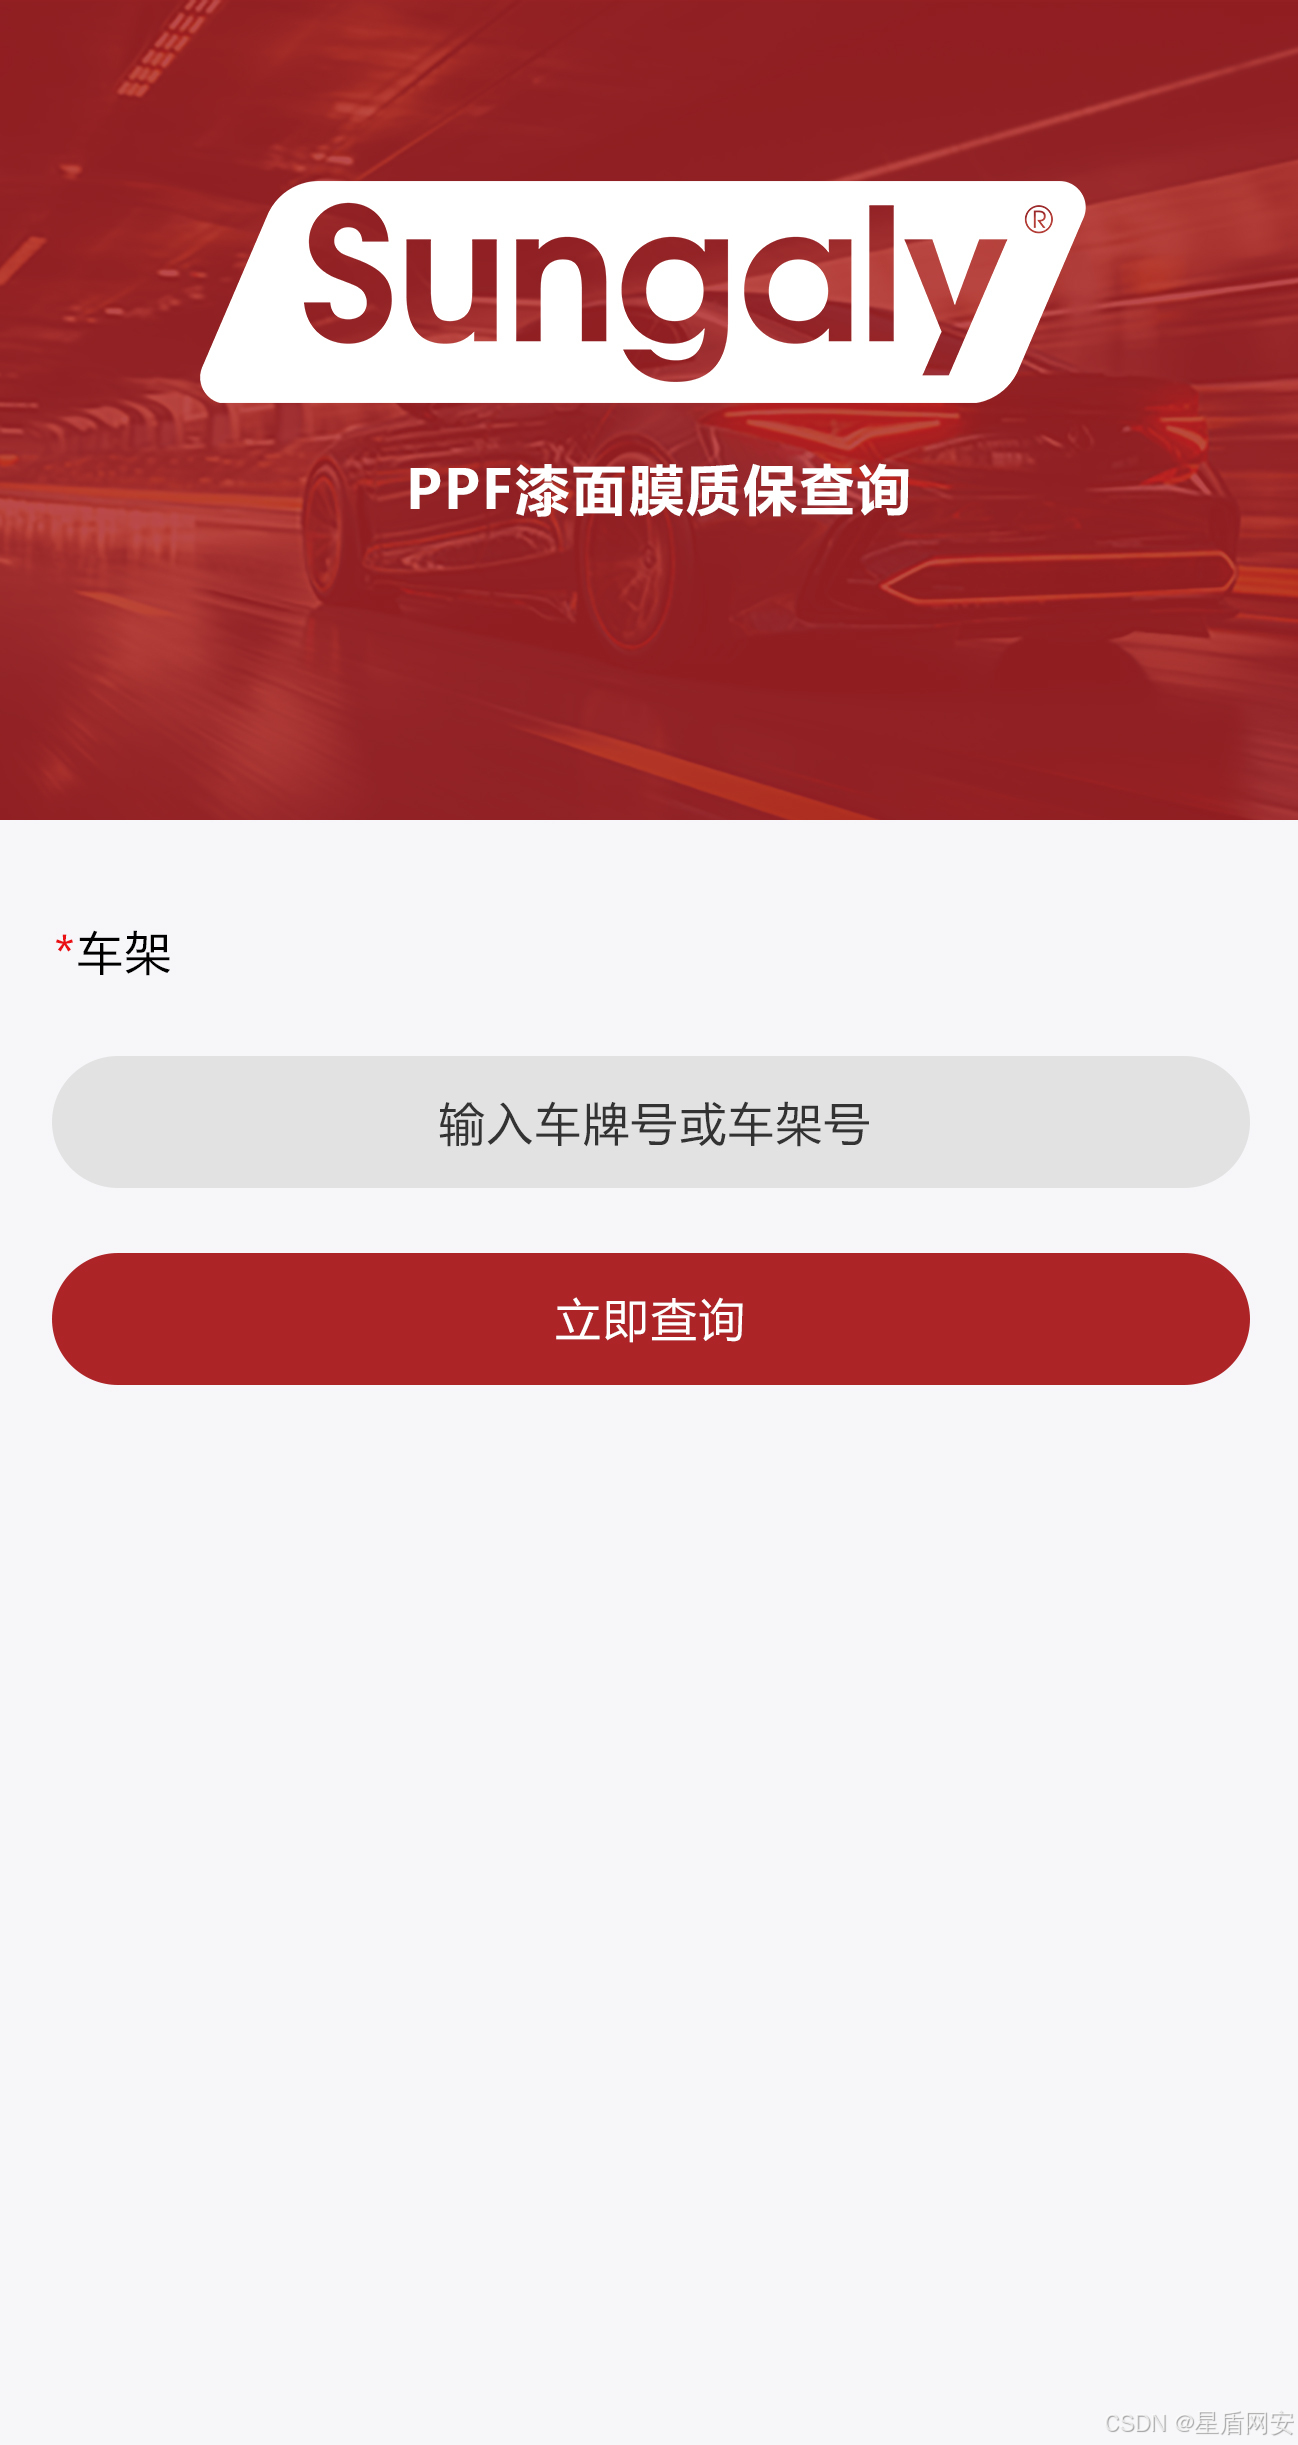
</style>6. PPF质保查询页面
布局一样,所以代码都是一样的,改一下WF变成PPF的图片即可
后续的访问请求稍后再写,需要开始搭建Web服务器了
javascript
<!-- ppc_check.vue PPF质保查询页面 -->
<script setup>


</script>

<template>
	<div class="image" ></div>

	<div class="title" style="margin-left: 10px;display: flex;">
		<div style="color: red;">*</div>
		<div>车架</div>
	</div>
	<input class="ipt" type="text" placeholder="请输入车架号" placeholder-style="color:#3f3f3f;" />
	<button style="background-color: #c30e17;">立刻查询</button>
</template>


<style lang="less">
	.image{
		width: 100%;
		height: 300px;
		background-repeat: no-repeat;
		background-size: contain;
		background-image: url(https://xinjiali.oss-cn-guangzhou.aliyuncs.com/PPF%E6%9F%A5%E8%AF%A2%E8%BD%AE%E6%92%AD%E5%9B%BE.png);
	}
	.ipt{
		width: 90%;
		height: 40px;
		background-color: #dadada;
		border-radius: 20px;
		margin: 0 auto;
		margin-top: 15px;
		text-align: center;
		placeholder-color: #3d6360;
	}
	.ipt::placeholder {
		text-align: center;
		font-size: 14px;
	}
	button{
		width: 90%;
		border-radius: 20px;
		margin-top: 20px;
		color: white;
	}


</style>