背景
让我们按照 From Nand to Tetris 里 Project 3 的要求,来完成下列的设计。
- 实现
Bit - 实现
Register - 实现
RAM8 - 实现
RAM64(todo) - 实现
RAM512(todo) - 实现
RAM4K(todo) - 实现
RAM16K(todo) - 实现
PC(Program Counter, 程序计数器) (todo)
正文
1. 实现 Bit
前往 Nand to Tetris Online IDE,选择 Project 3 里的 Bit,效果如下图所示 ⬇️

我们的目标是用 DFF(Data Flip Flop, 数据触发器) 以及 Project 1/Project 2 里已经实现的各种 chip 实现一个 Bit(即,一位寄存器)。
注释中的相关描述如下 ⬇️
text
/**
 * 1-bit register:
 * If load is asserted, the register's value is set to in;
 * Otherwise, the register maintains its current value:
 * if (load(t)) out(t+1) = in(t), else out(t+1) = out(t)
*/- 输入是
- in
- load
- 输出是
- out
书中有一些关于一位 Bit寄存器设计的描述 ⬇️

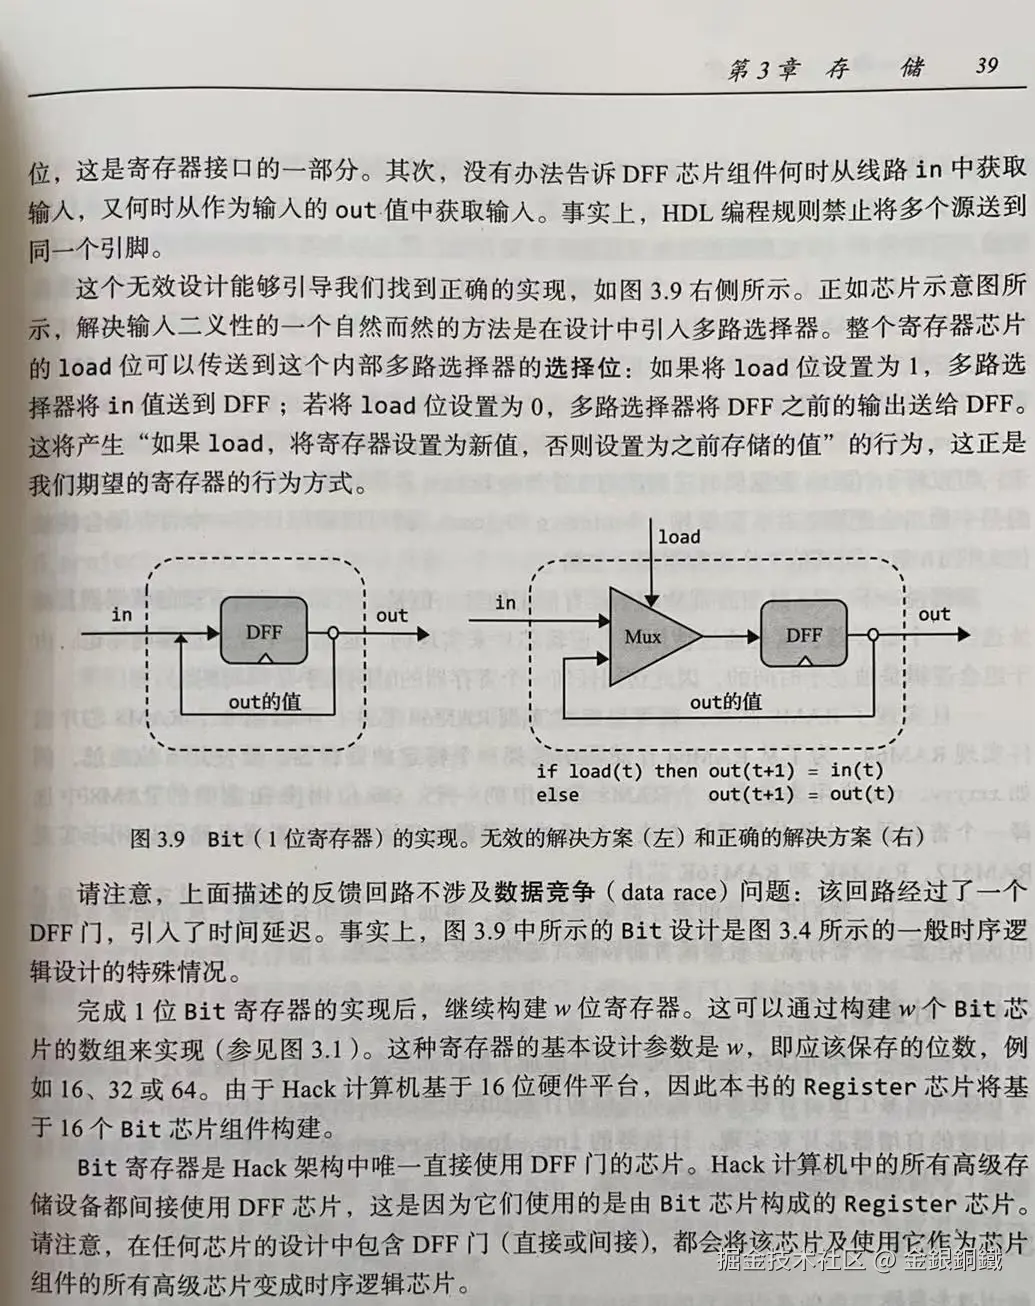
结合书中的描述,我们可以这样来实现
hdl
CHIP Bit {
IN in, load;
OUT out;
PARTS:
Mux(a= previousOut, b= in, sel= load, out= nextOut);
DFF(in= nextOut, out=out, out= previousOut);
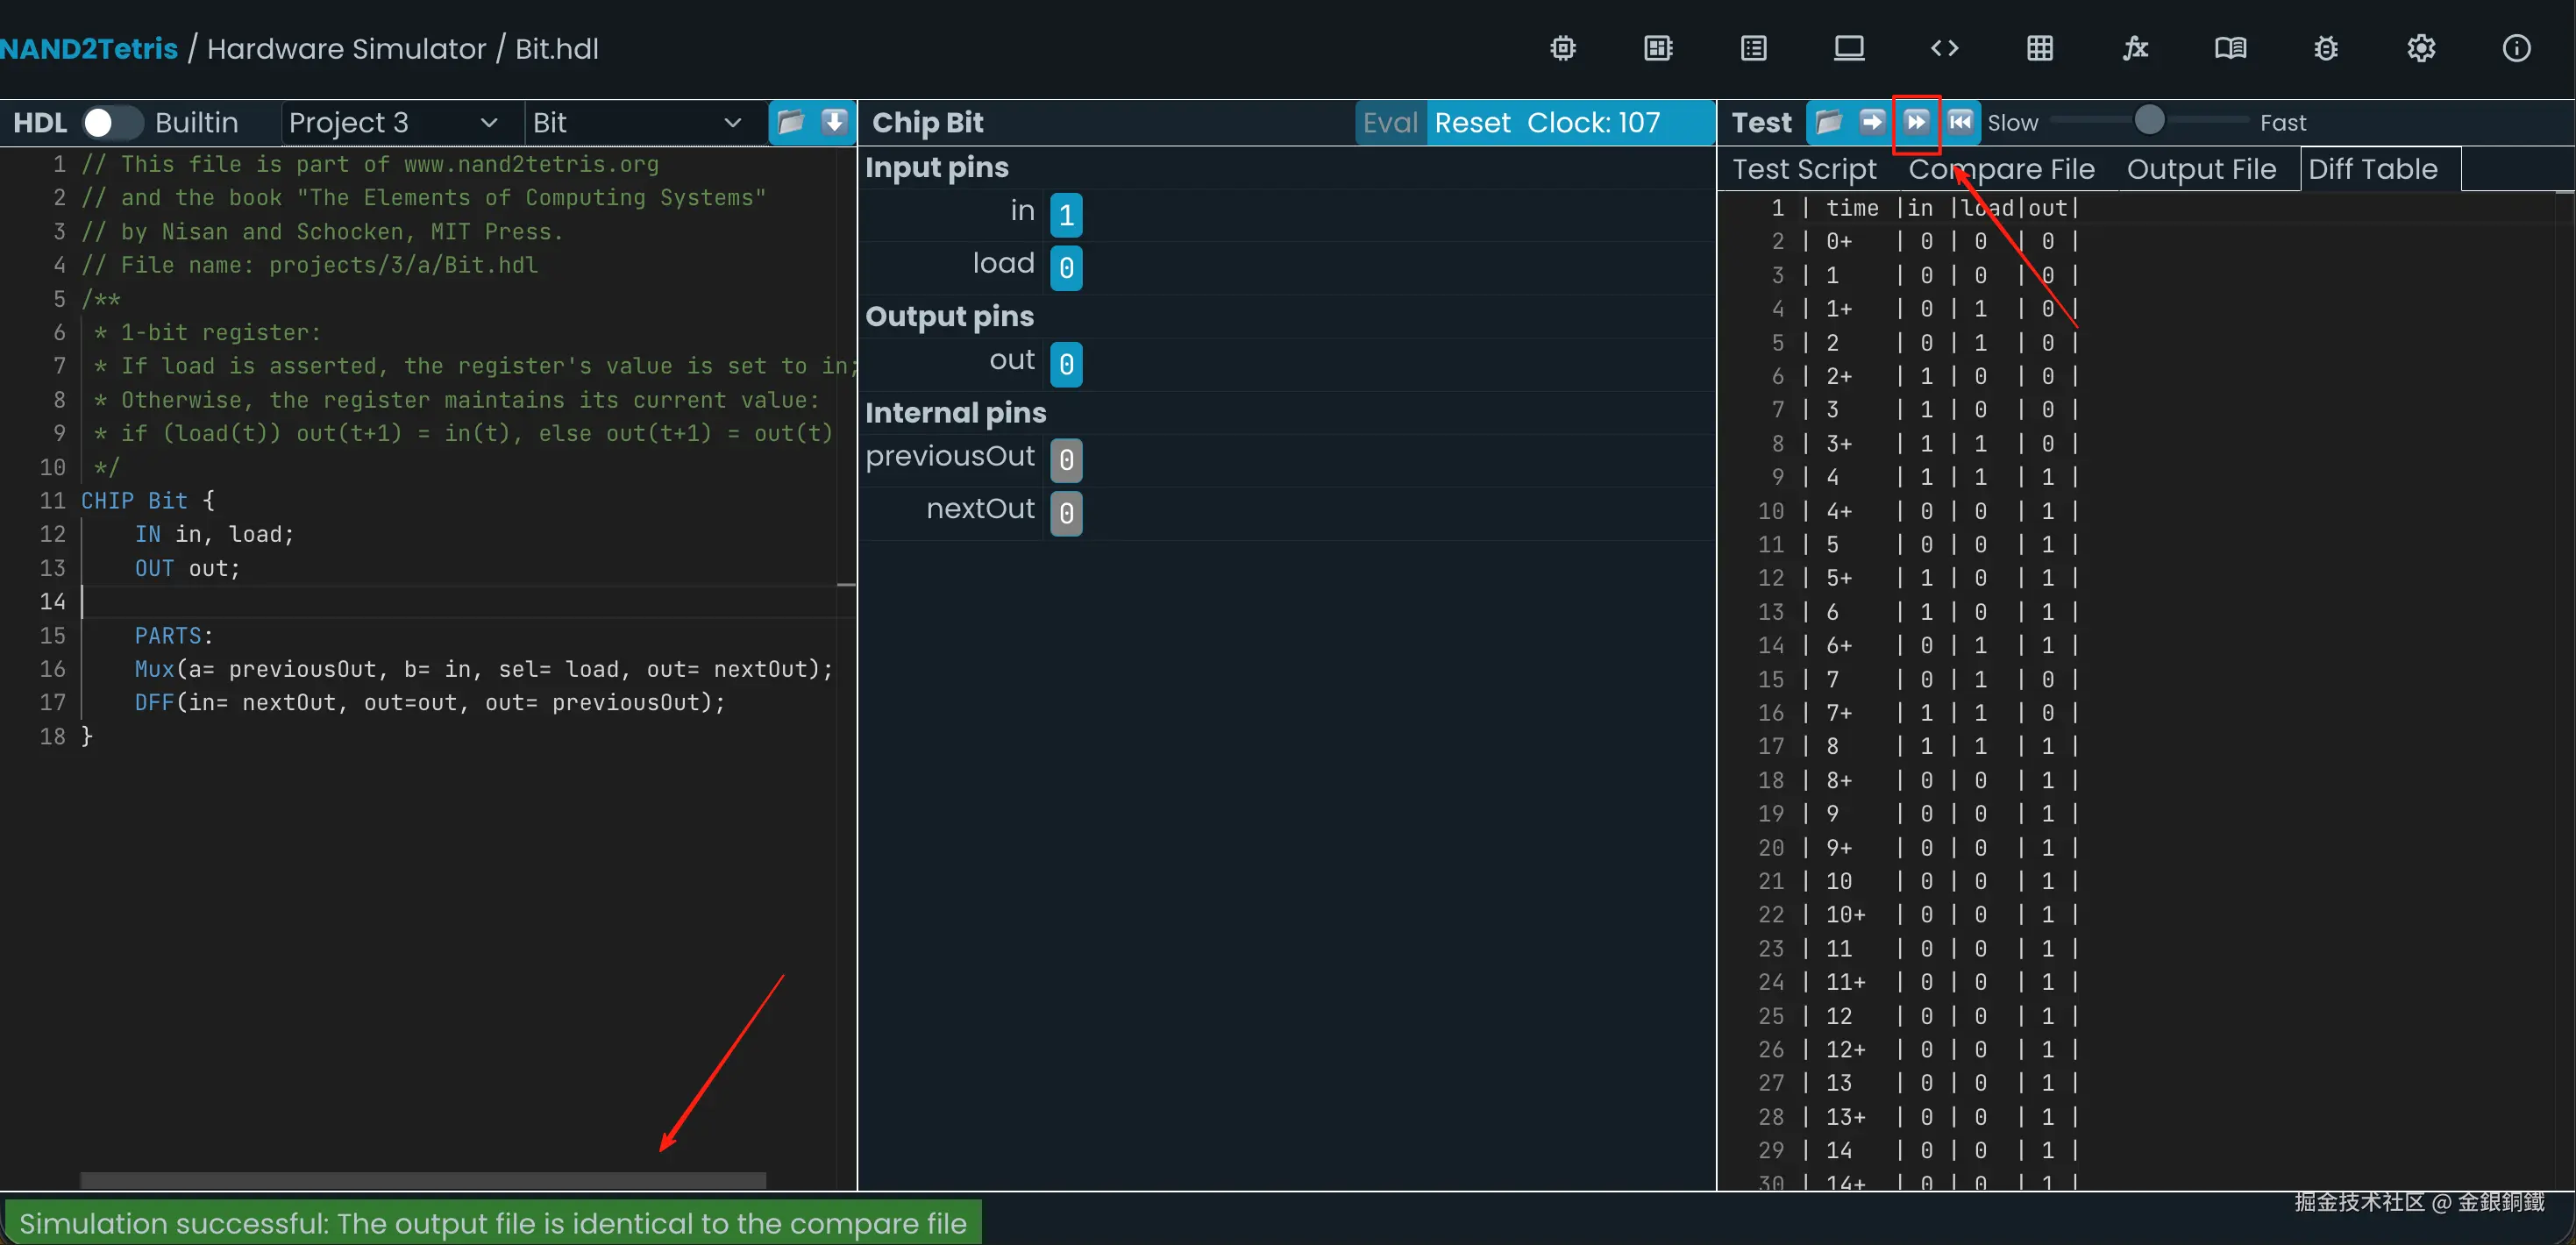
}这样的代码可以通过仿真测试,效果如下图所示 ⬇️
2. 实现 Register
前往 Nand to Tetris Online IDE,选择 Project 3 里的 Register,效果如下图所示 ⬇️
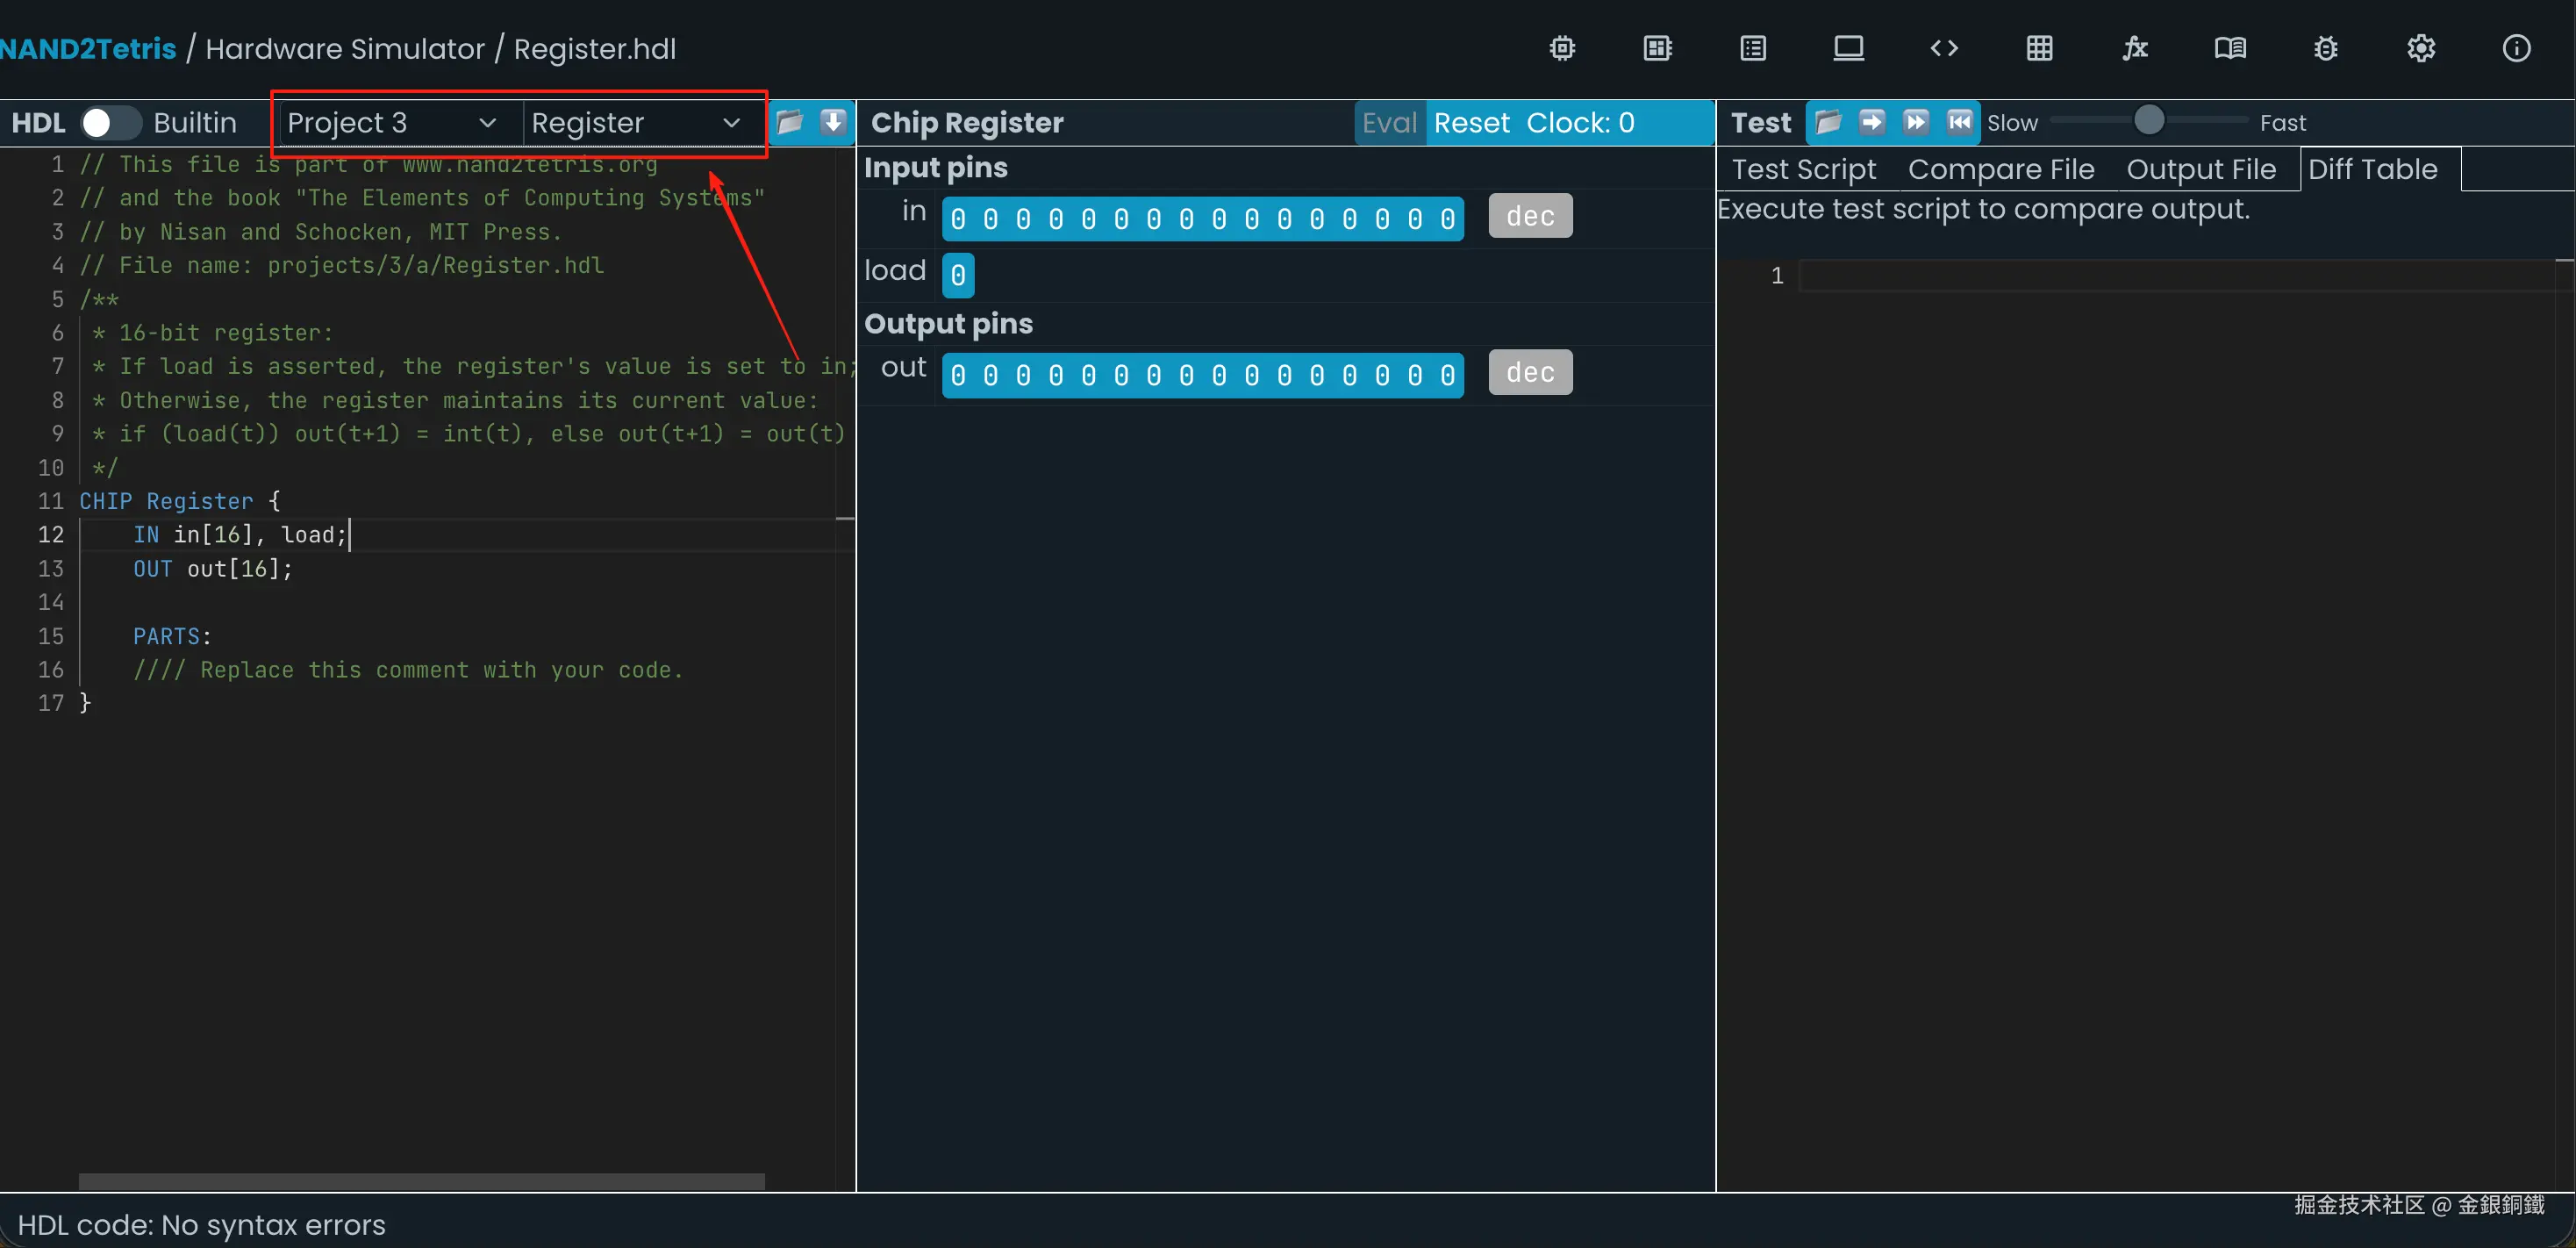
我们的目标是用 Bit(一位寄存器) 以及 Project 1/Project 2 里已经实现的各种 chip 实现一个 Register(即, 16 位寄存器)。
注释中的相关描述如下 ⬇️
text
/**
 * 16-bit register:
 * If load is asserted, the register's value is set to in;
 * Otherwise, the register maintains its current value:
 * if (load(t)) out(t+1) = int(t), else out(t+1) = out(t)
*/- 输入是
- in16
- load
- 输出是
- out16
我们在上一步里已经实现了 Bit(一位寄存器),既然 Register 是 16 位寄存器,那么可以把 Register 当作 16 个一位寄存器的组合。
代码的大意如下 ⬇️
hdl
CHIP Register {
    IN in[16], load;
    OUT out[16];

    PARTS:
    Bit(in= in[0], load= load, out= out[0]);
    Bit(in= in[1], load= load, out= out[1]);
    ...
    Bit(in= in[15], load= load, out= out[15]);
}
由于这里有很多行类似的代码,自己复制粘贴加修改感觉有点浪费时间,不如用 java 代码来生成它吧。 请将以下代码保存为 RegisterHdlCodeGenerator.java。
java
import java.util.StringJoiner;

public class RegisterHdlCodeGenerator {

    public static void main(String[] args) {
        String template = """
                CHIP Register {
                    IN in[16], load;
                    OUT out[16];

                    PARTS:
                %s
                }
                """;

        StringJoiner joiner = new StringJoiner(System.lineSeparator());
        for (int i = 0; i < 16; i++) {
            String line = String.format("    Bit(in= in[%s], load= load, out= out[%s]);", i, i);
            joiner.add(line);
        }
        System.out.printf(template, joiner);
    }
}
使用如下的命令可以编译 RegisterHdlCodeGenerator.java 并运行其中的 main 方法。
bash
javac RegisterHdlCodeGenerator.java
java RegisterHdlCodeGenerator
运行结果如下
text
CHIP Register {
IN in[16], load;
OUT out[16];
PARTS:
Bit(in= in[0], load= load, out= out[0]);
Bit(in= in[1], load= load, out= out[1]);
Bit(in= in[2], load= load, out= out[2]);
Bit(in= in[3], load= load, out= out[3]);
Bit(in= in[4], load= load, out= out[4]);
Bit(in= in[5], load= load, out= out[5]);
Bit(in= in[6], load= load, out= out[6]);
Bit(in= in[7], load= load, out= out[7]);
Bit(in= in[8], load= load, out= out[8]);
Bit(in= in[9], load= load, out= out[9]);
Bit(in= in[10], load= load, out= out[10]);
Bit(in= in[11], load= load, out= out[11]);
Bit(in= in[12], load= load, out= out[12]);
Bit(in= in[13], load= load, out= out[13]);
Bit(in= in[14], load= load, out= out[14]);
Bit(in= in[15], load= load, out= out[15]);
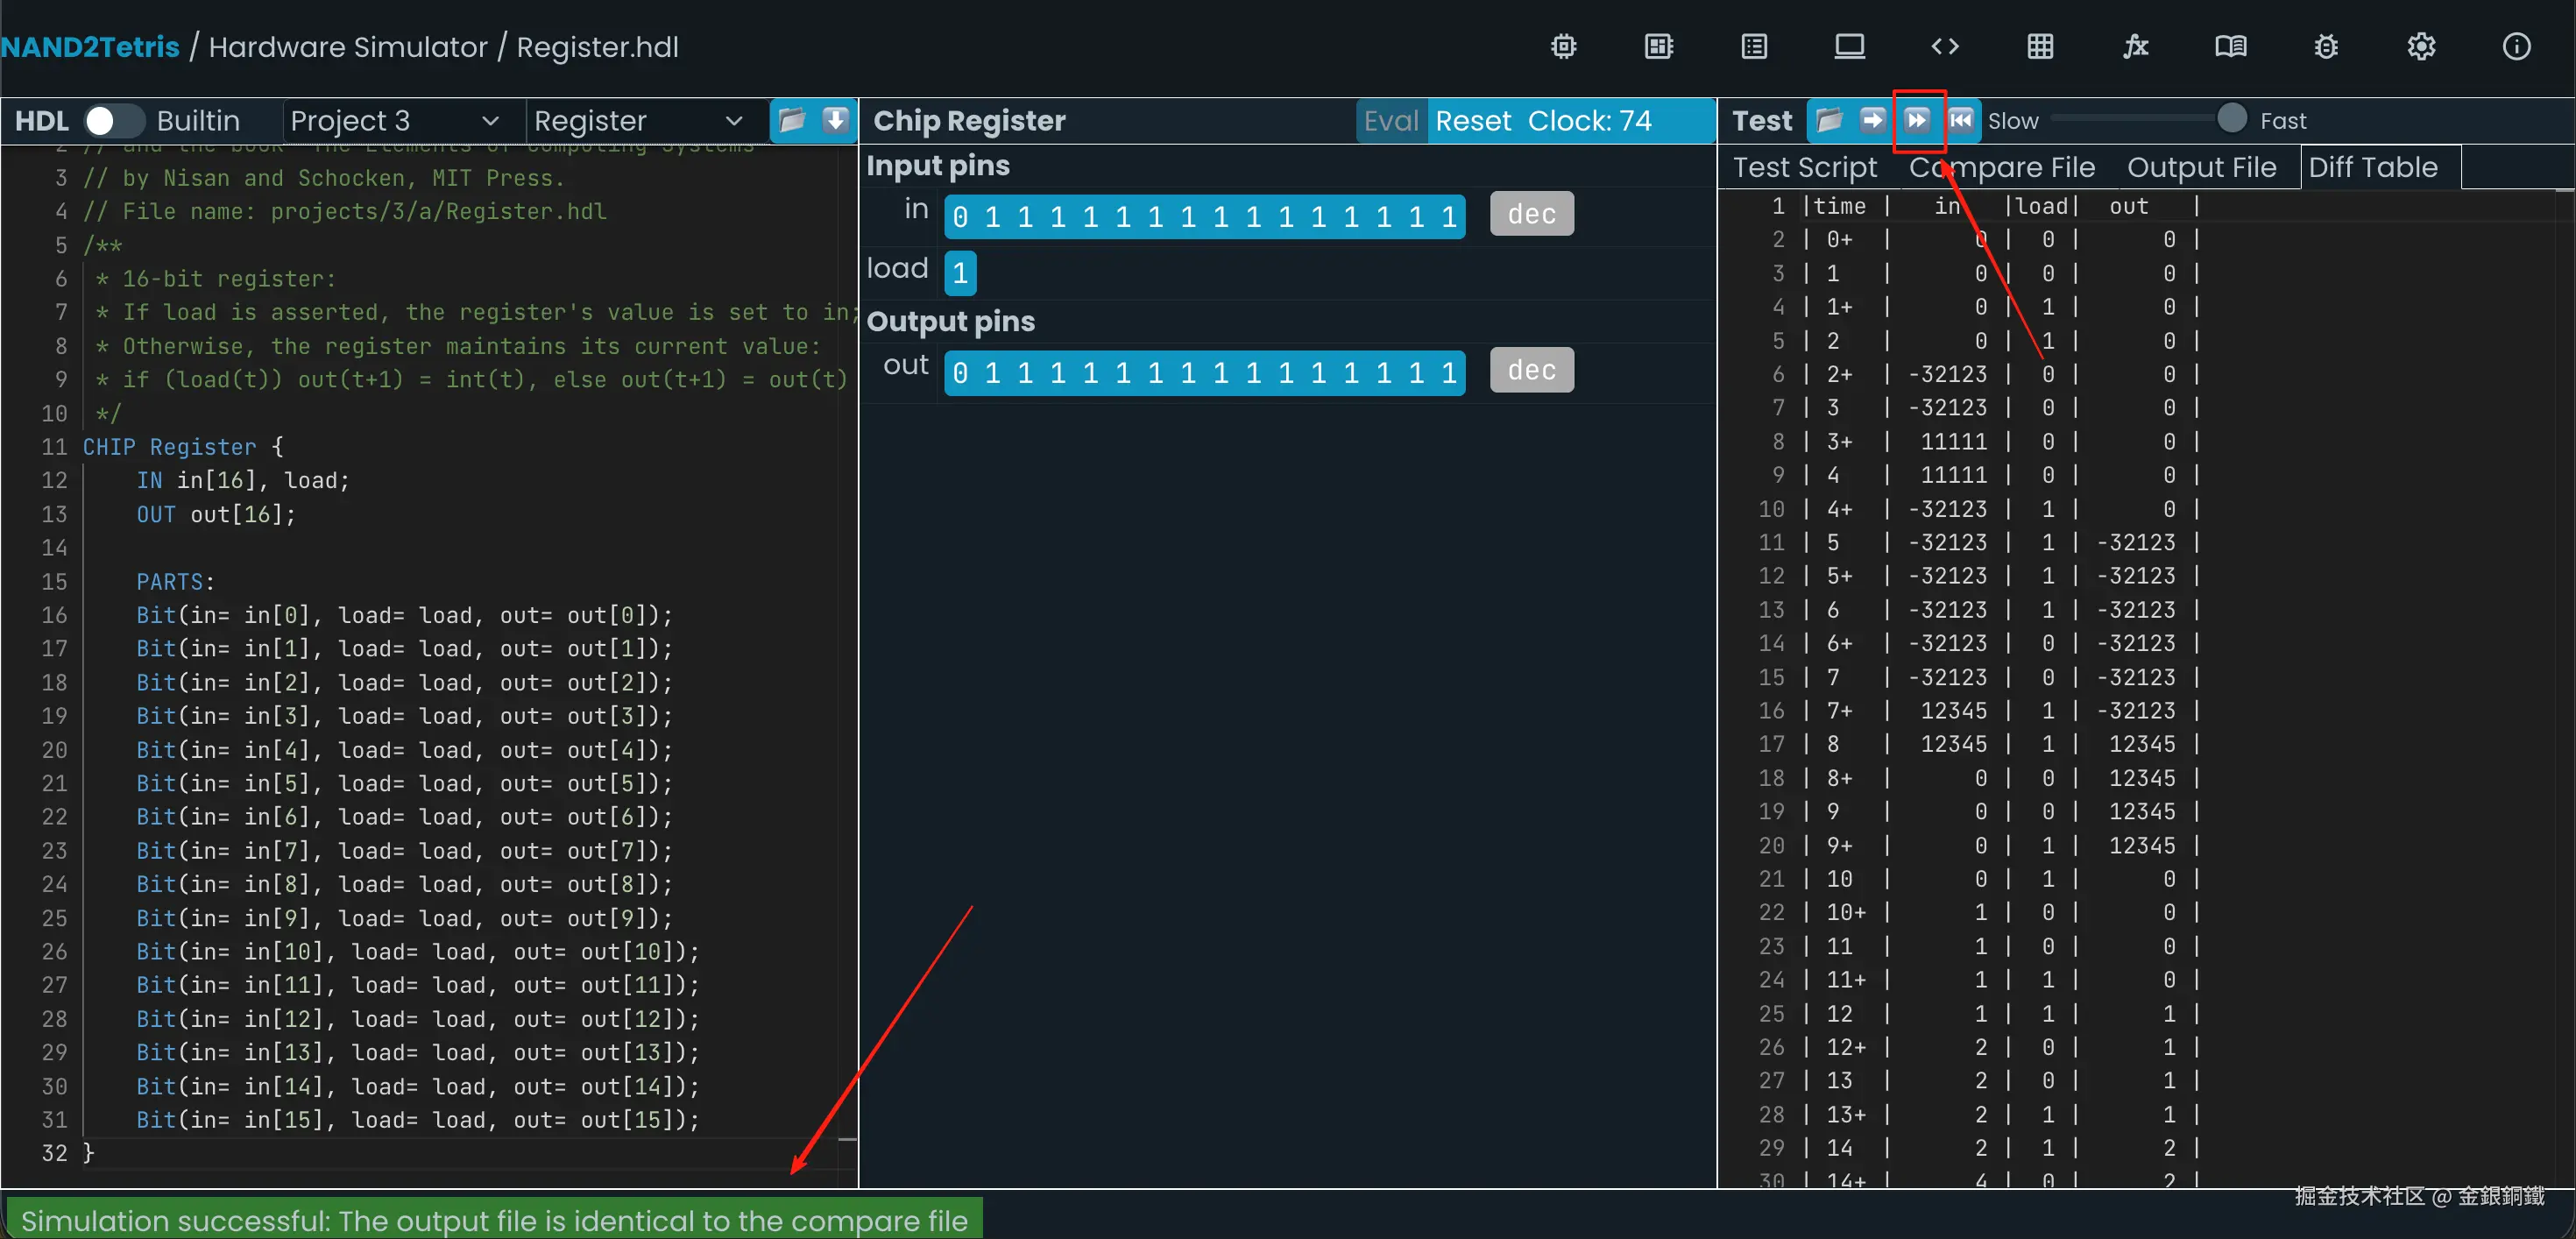
}这样的代码可以通过仿真测试,效果如下图所示 ⬇️
3. 实现 RAM8
前往 Nand to Tetris Online IDE,选择 Project 3 里的 RAM8,效果如下图所示 ⬇️
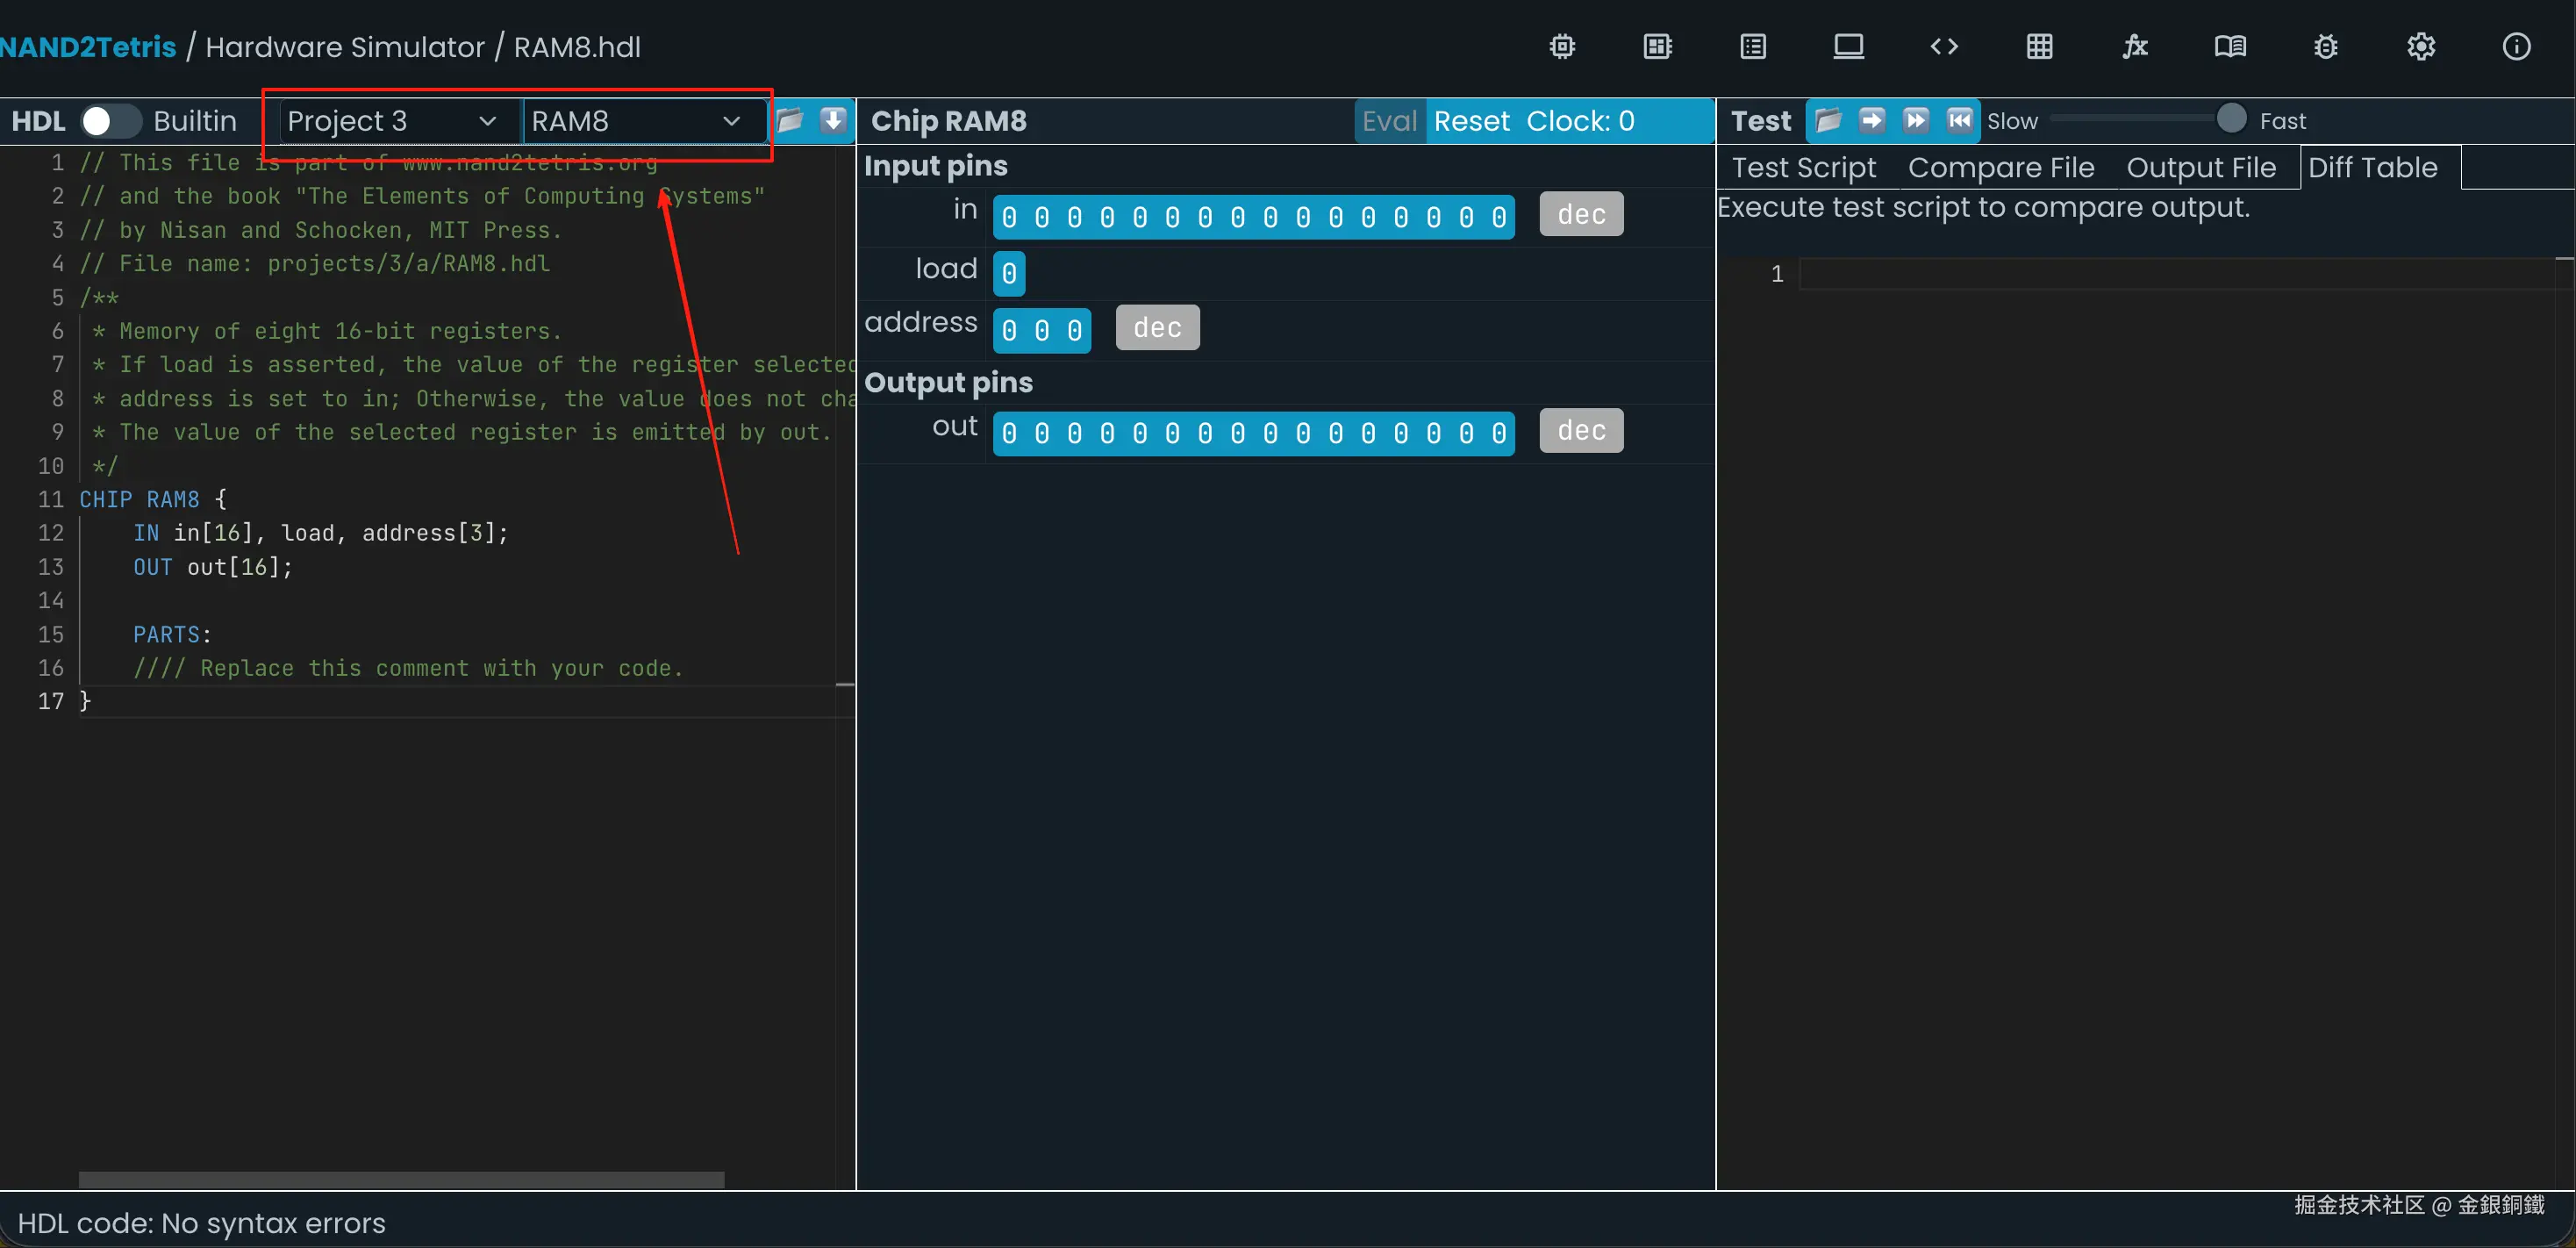
我们的目标是用 Register( 8 位寄存器) 以及 Project 1/Project 2 里已经实现的各种 chip 实现一个 RAM8(即, 8 个 16 位寄存器的存储器)。
注释中的相关描述如下 ⬇️
text
/**
 * Memory of eight 16-bit registers.
 * If load is asserted, the value of the register selected by
 * address is set to in; Otherwise, the value does not change.
 * The value of the selected register is emitted by out.
*/- 输入是
- in16
- load
- address3
- 输出是
- out16
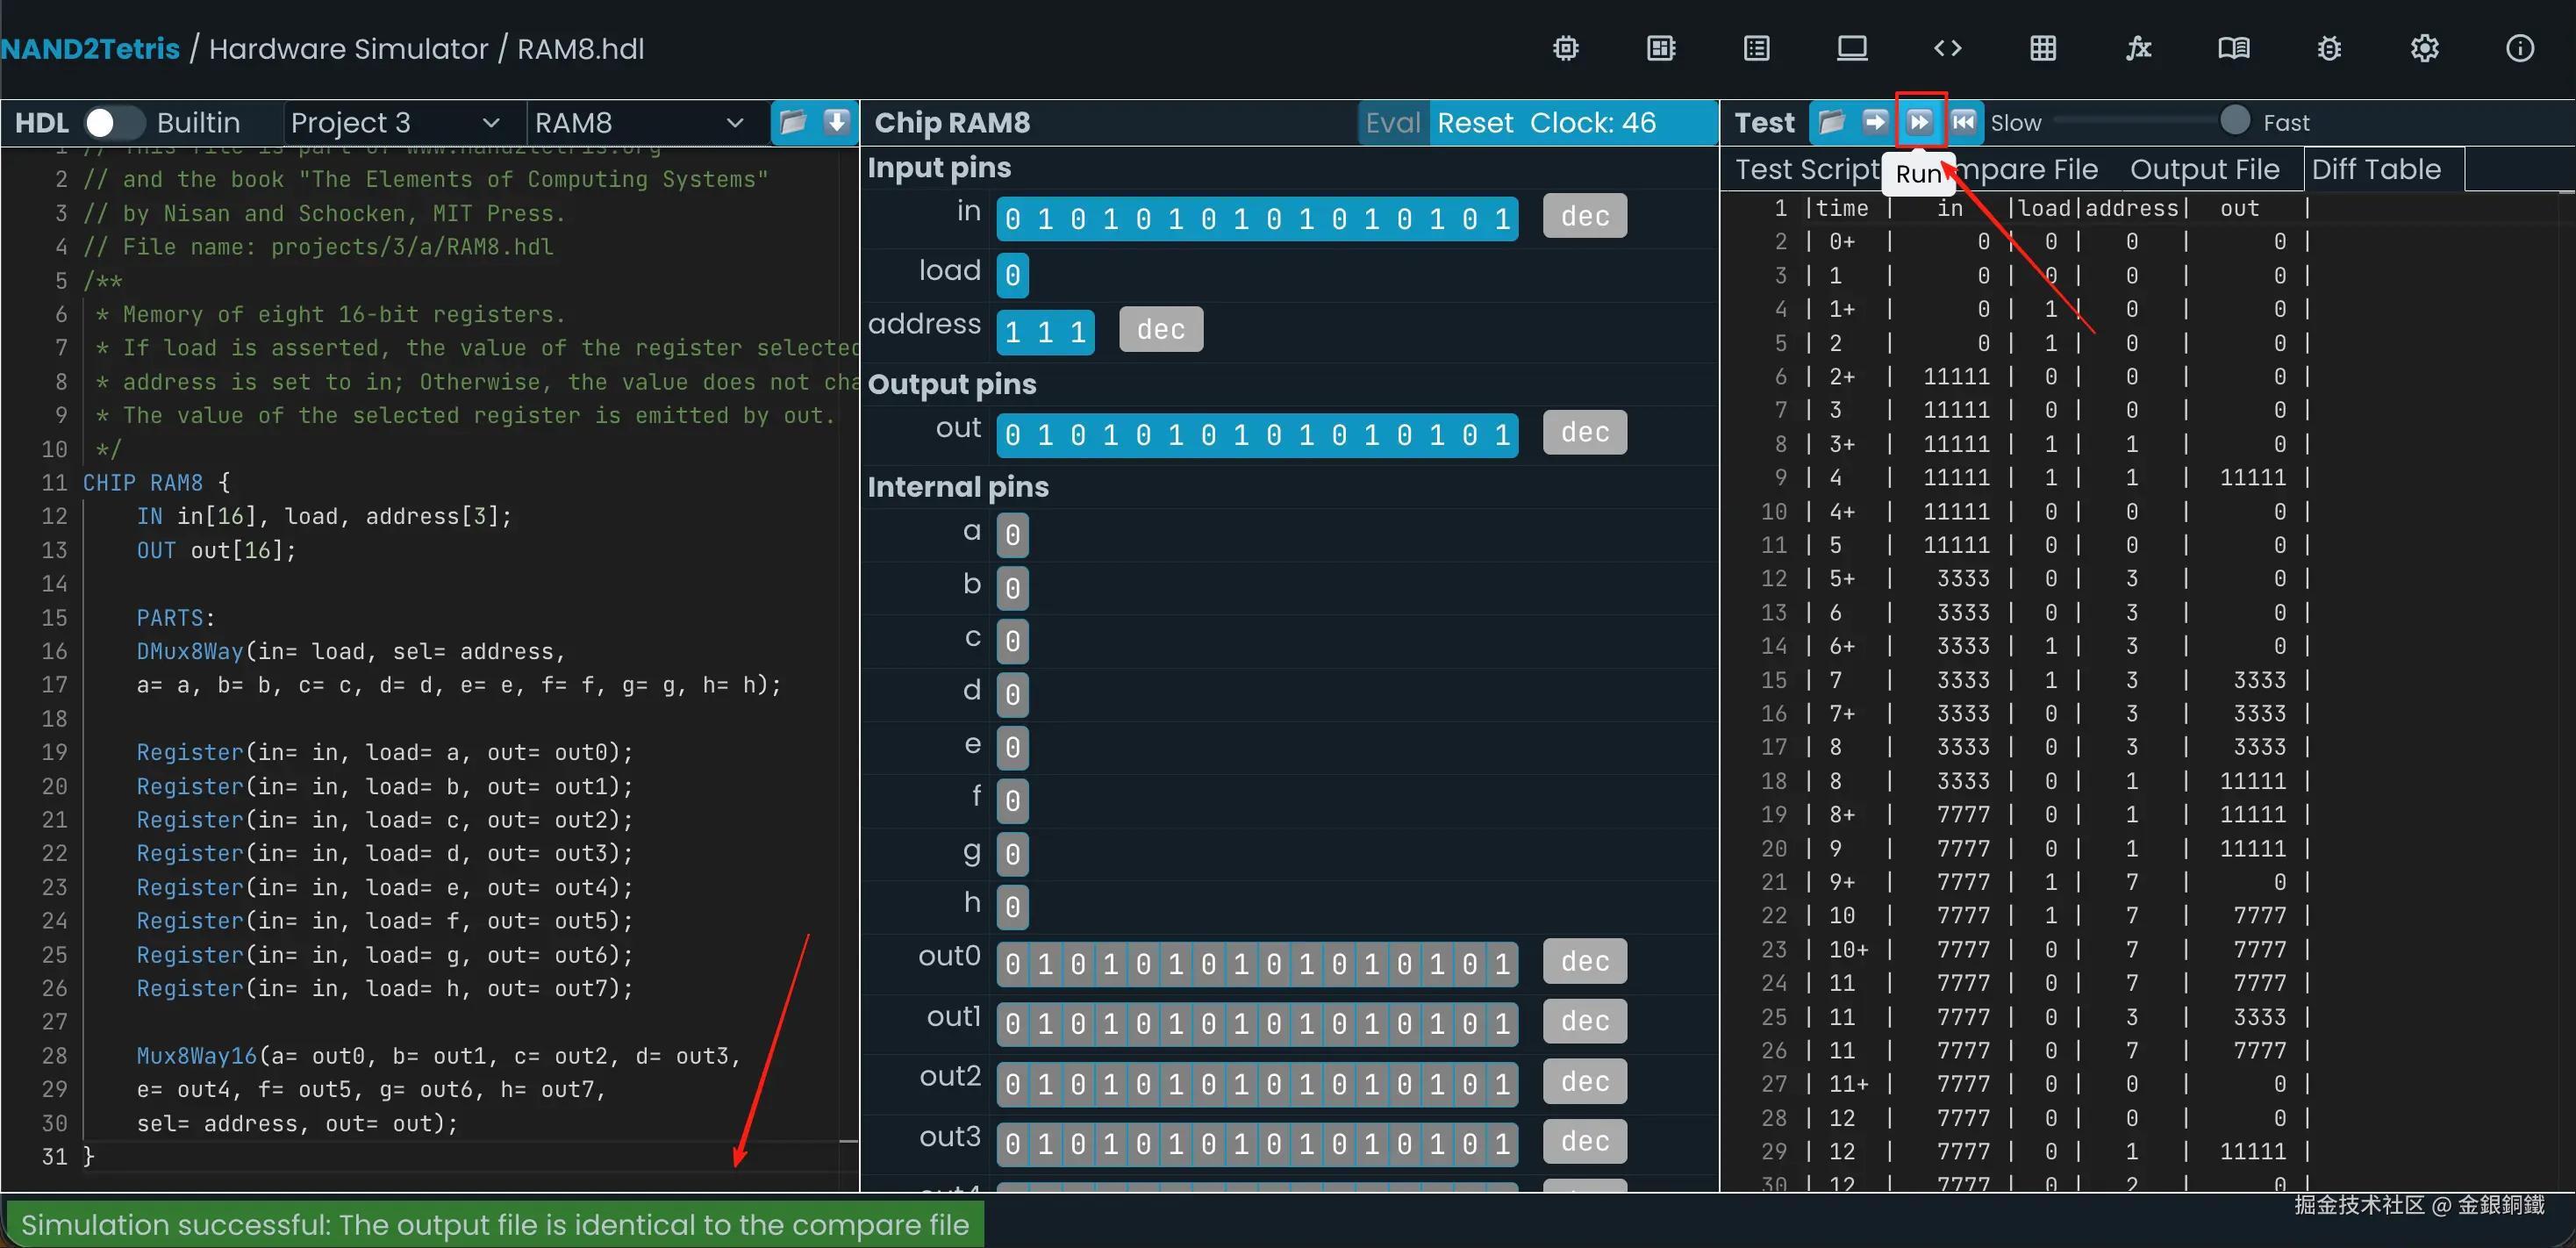
我们在上一步里已经实现了 Register( 16 位寄存器)。现在需要选择将 in16 输入 8 个 Register 中的哪一个,可以使用 Project 1 里的 DMux8Way,对 out16 而言,我们可以借助 Project 1 里的 Mux8Way16 从 8 个 Register 的输出中进行选择。
代码的大意如下 ⬇️
hdl
CHIP RAM8 {
    IN in[16], load, address[3];
    OUT out[16];

    PARTS:
    DMux8Way(in= load, sel= address,
    a= a, b= b, c= c, d= d, e= e, f= f, g= g, h= h);

    Register(in= in, load= a, out= out0);
    Register(in= in, load= b, out= out1);
    ...
    Register(in= in, load= h, out= out7);

    Mux8Way16(a= out0, b= out1, c= out2, d= out3,
    e= out4, f= out5, g= out6, h= out7,
    sel= address, out= out);
}
由于这里有很多行类似的代码,自己复制粘贴加修改感觉有点浪费时间,不如用 java 代码来生成它吧。 请将以下代码保存为 RAM8HdlCodeGenerator.java。
bash
javac RAM8HdlCodeGenerator.java
java RAM8HdlCodeGenerator
运行结果如下
hdl
CHIP RAM8 {
    IN in[16], load, address[3];
    OUT out[16];

    PARTS:
    DMux8Way(in= load, sel= address,
    a= a, b= b, c= c, d= d, e= e, f= f, g= g, h= h);

    Register(in= in, load= a, out= out0);
    Register(in= in, load= b, out= out1);
    Register(in= in, load= c, out= out2);
    Register(in= in, load= d, out= out3);
    Register(in= in, load= e, out= out4);
    Register(in= in, load= f, out= out5);
    Register(in= in, load= g, out= out6);
    Register(in= in, load= h, out= out7);

    Mux8Way16(a= out0, b= out1, c= out2, d= out3,
    e= out4, f= out5, g= out6, h= out7,
    sel= address, out= out);
}
这样的代码可以通过仿真测试,效果如下图所示 ⬇️
4. 实现 RAM64
前往 Nand to Tetris Online IDE,选择 Project 3 里的 RAM64,效果如下图所示 ⬇️

我们的目标是用 RAM8(即, 8 个 16 位寄存器的存储器) 以及 Project 1/Project 2 里已经实现的各种 chip 实现一个 RAM64(即, 64 个 16 位寄存器的存储器)。
注释中的相关描述如下 ⬇️
text
/**
 * Memory of sixty four 16-bit registers.
 * If load is asserted, the value of the register selected by
 * address is set to in; Otherwise, the value does not change.
 * The value of the selected register is emitted by out.
*/- 输入是
- in16
- load
- address6
- 输出是
- out16
我们在上一步里已经实现了 RAM8,可以用类似的思路来实现 RAM64。