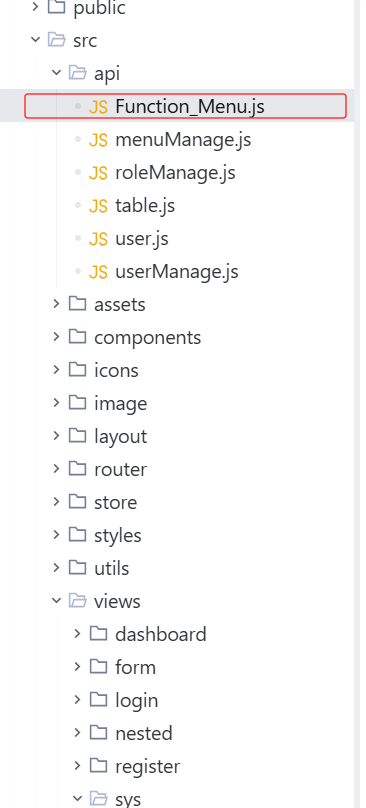
创建项目
下载了 PanJiaChen 大神写的 vue-admin-template (这是一个在 GitHub 上非常火的后台管理系统模板)
- 这个模板自带了: 登录页、侧边栏、顶部导航、权限控制 等基础功能
git clone https://github.com/PanJiaChen/vue-admin-template.git health-web
-
安装依赖 : npm install
-
启动 : npm run dev
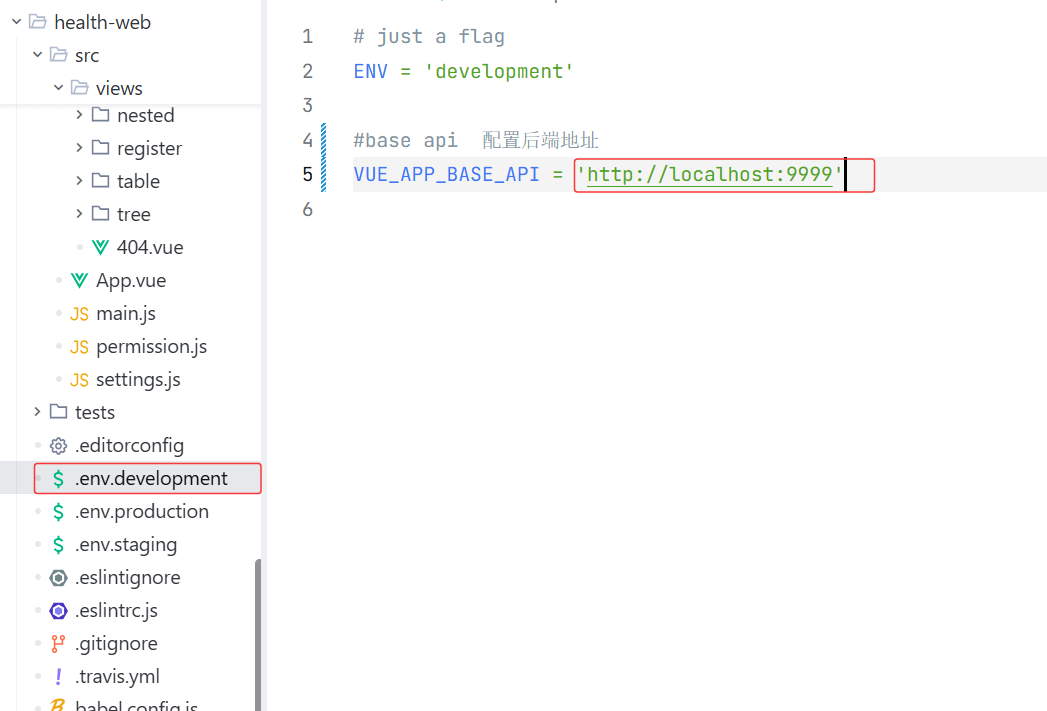
连接后端
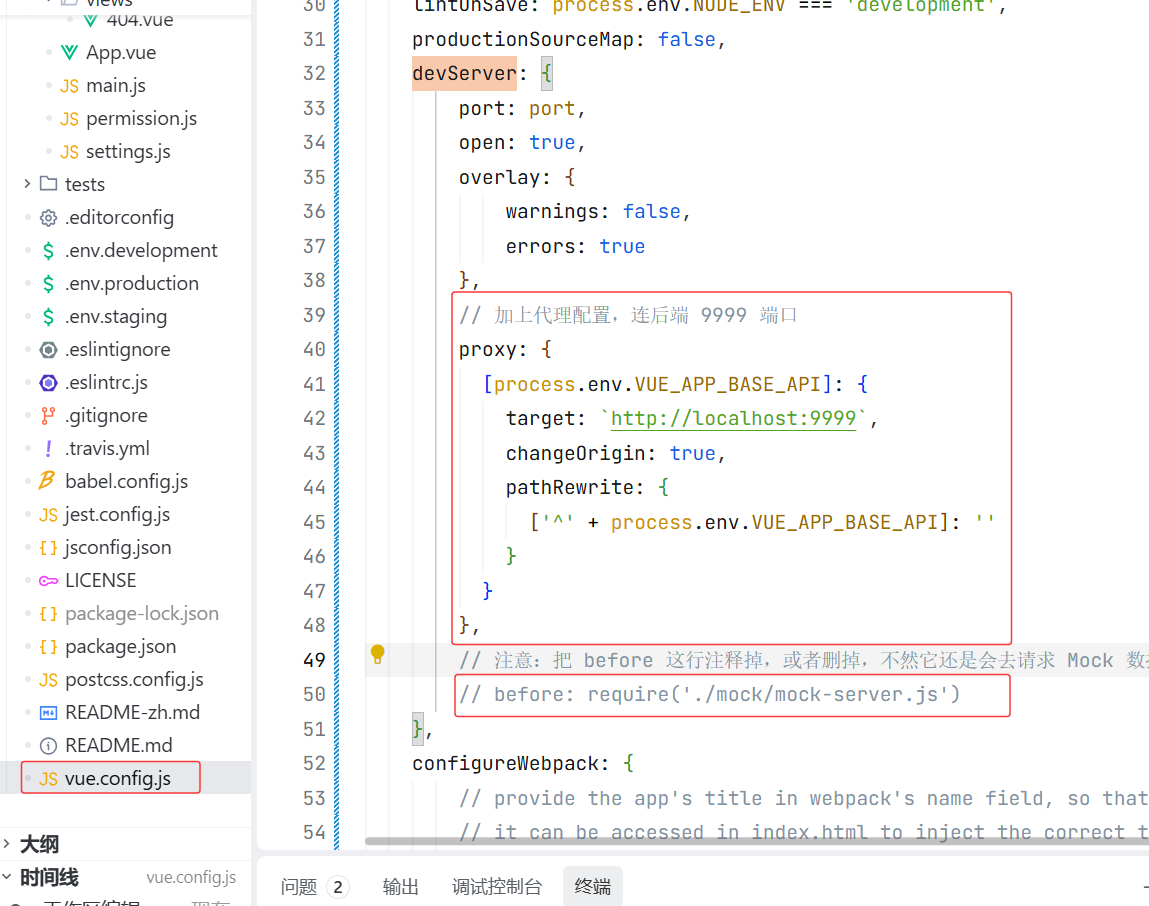
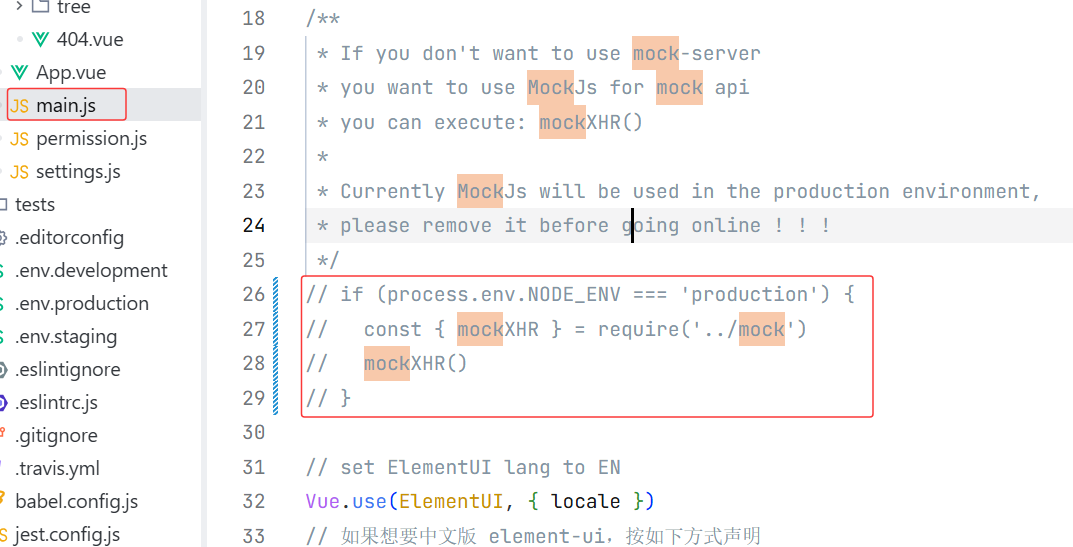
先取消Mock 数据(假数据)
在vue.config.js里面搜索devServer
在main.js里面搜索mock 注释掉
完成登录页面
先完成样式 element ui一开始就有不用再配置
<template>
<div class="login-container">
<!-- 外层大框:圆角半透明背景 -->
<div style="width: 500px; display: flex;background-color: rgba(0, 0, 0, 0); border-radius: 10px;">
<!-- 内层表单区域 -->
<div style="flex: 1;width: 50%;padding: 20px;display: flex;flex-direction: column;justify-content: center;" >
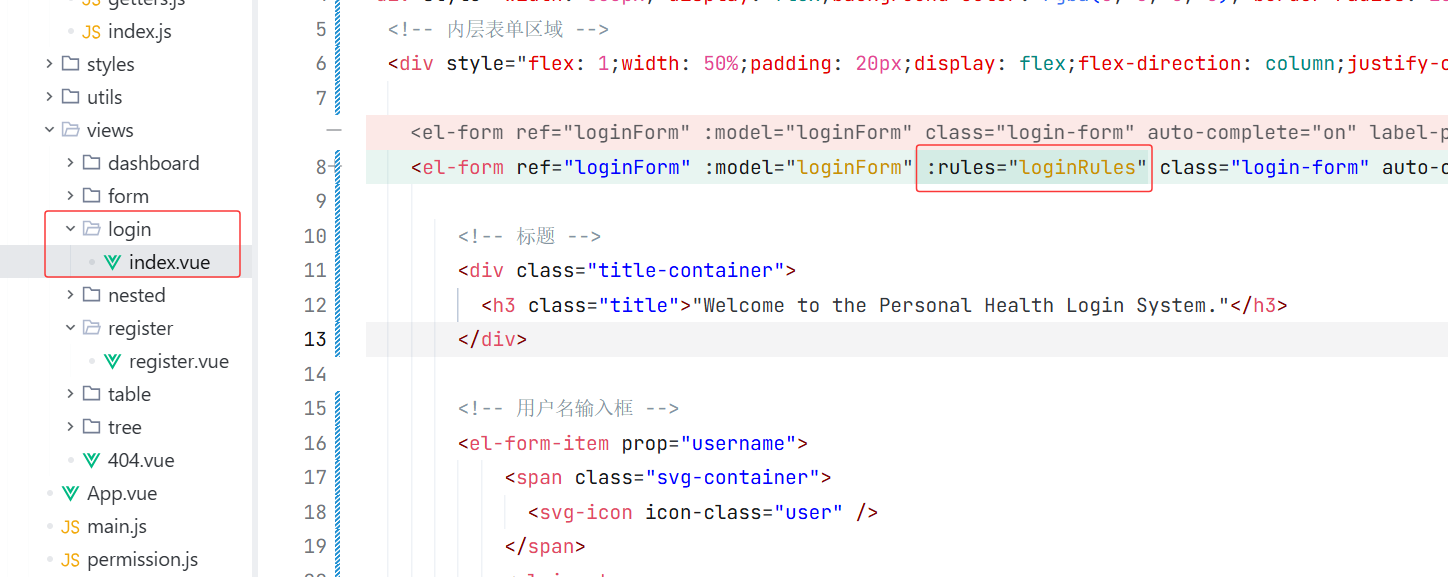
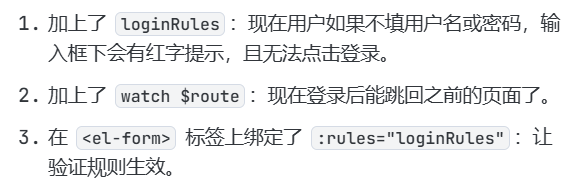
<el-form ref="loginForm" :model="loginForm" class="login-form" auto-complete="on" label-position="top">
<!-- 标题 -->
<div class="title-container">
<h3 class="title">"Welcome to the Personal Health Login System."</h3>
</div>
<!-- 用户名输入框 -->
<el-form-item prop="username">
<span class="svg-container">
<svg-icon icon-class="user" />
</span>
<el-input
v-model="loginForm.username"
placeholder="用户名"
name="username"
type="text"
tabindex="1"
auto-complete="on"
style="width: 80%;margin-left: 20px"
/>
</el-form-item>
<!-- 密码输入框 -->
<el-form-item prop="password">
<span class="svg-container">
<svg-icon icon-class="password" />
</span>
<el-input
:key="passwordType"
ref="password"
v-model="loginForm.password"
:type="passwordType"
placeholder="密码"
name="password"
tabindex="2"
auto-complete="on"
style="width: 80%;margin-left: 20px;"/>
<span class="show-pwd" @click="showPwd">
<svg-icon :icon-class="passwordType === 'password' ? 'eye' : 'eye-open'" />
</span>
</el-form-item>
<!-- 登录按钮 -->
<el-button
type="primary"
style="width: 30%;margin-left: 20px;margin-bottom: -50px"
@click.native.prevent="handleLogin">登 陆</el-button>
<!-- 注册按钮 -->
<el-button
type="primary"
style="width: 30%; margin-left: 120px;"
@click.native.prevent="handleRegister">注 册</el-button>
</el-form>
</div>
</div>
</div>
</template>
<script>
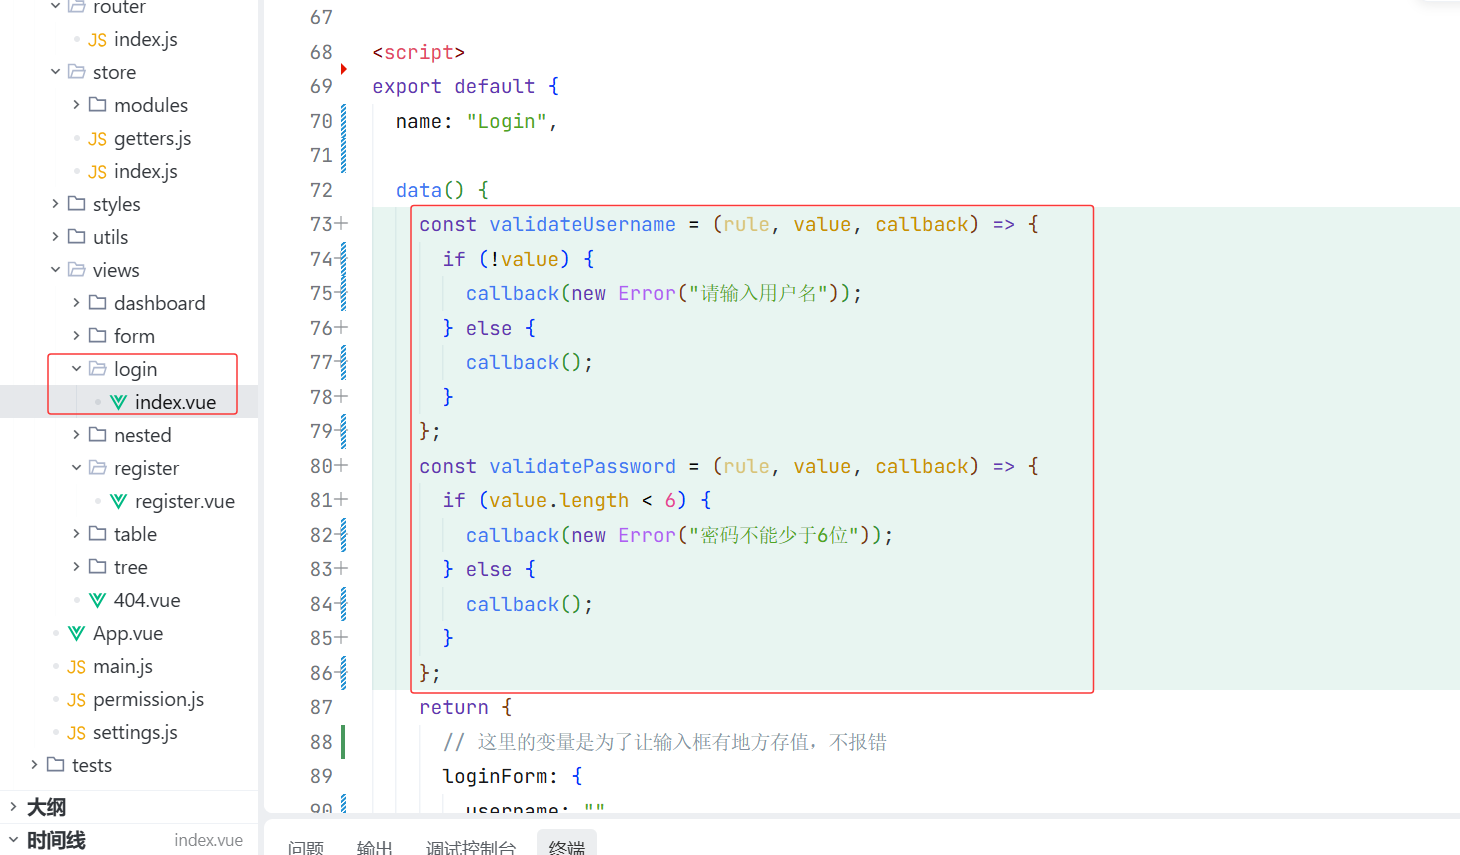
export default {
name: "Login",
data() {
return {
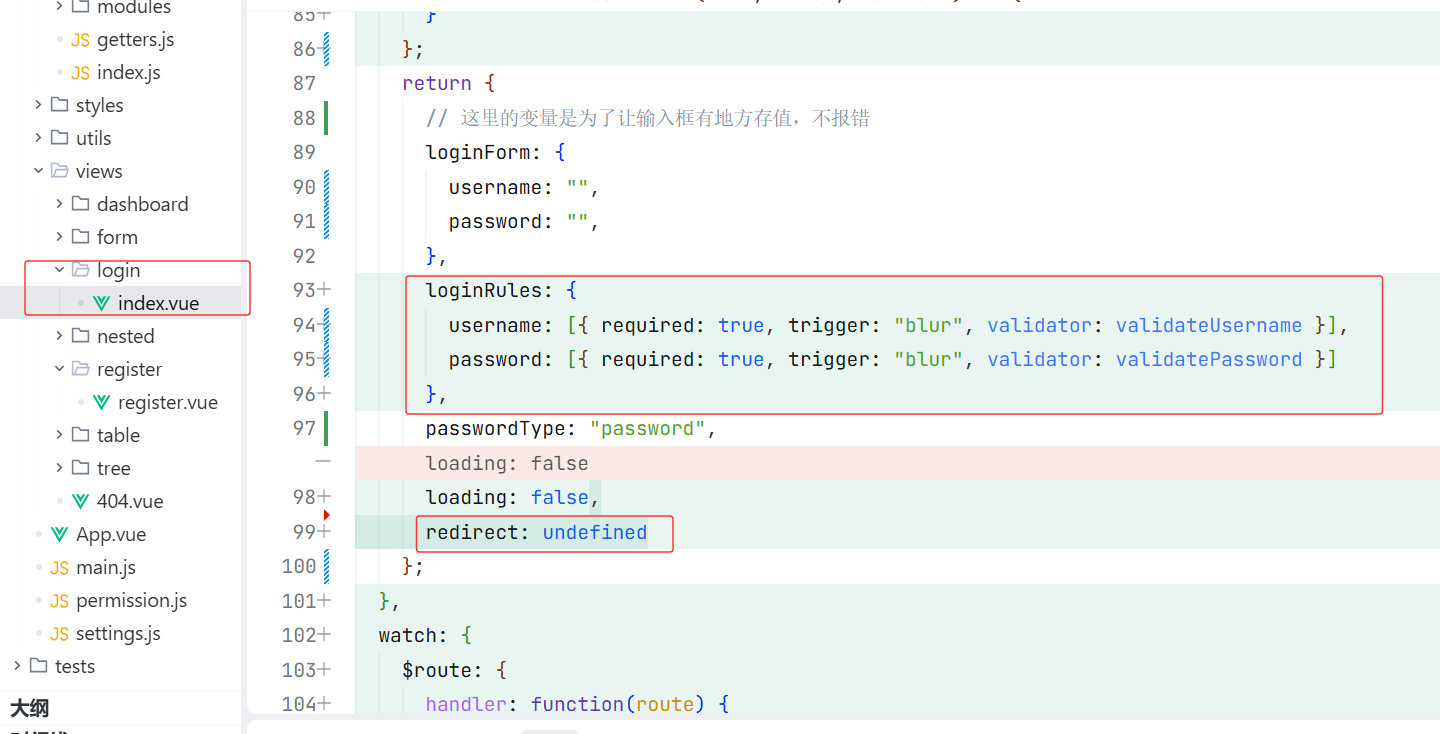
// 这里的变量是为了让输入框有地方存值,不报错
loginForm: {
username: "",
password: "",
},
passwordType: "password",
loading: false
};
},
methods: {
// 切换密码显示/隐藏的小眼睛功能(保留了这个,不然点小眼睛没反应)
showPwd() {
if (this.passwordType === "password") {
this.passwordType = "";
} else {
this.passwordType = "password";
}
this.$nextTick(() => {
this.$refs.password.focus();
});
},
// 暂时只是打印一下,不发请求
handleLogin() {
console.log("点击了登录按钮,但现在只是个空壳子");
},
handleRegister() {
console.log("点击了注册按钮");
},
},
};
</script>
<style lang="scss">
/* 修复input 背景不协调 和光标变色 */
$bg: #2d3a4b;
$dark_gray: #000000;
$light_gray: #eee;
.login-container {
min-height: 100vh;
width: 100%;
background-color: $bg;
display: flex;
justify-content: center;
align-items: center;
// 背景图路径
background-image: url("../../image/登录封面.png");
background-size: 100%;
.tips {
font-size: 14px;
color: #fff;
margin-bottom: 10px;
span {
&:first-of-type {
margin-right: 16px;
}
}
}
.svg-container {
padding: 6px 5px 6px 15px;
color: $dark_gray;
vertical-align: middle;
width: 30px;
display: inline-block;
}
.title-container {
position: relative;
.title {
font-size: 19px;
color: $dark_gray;
margin: 0px auto 50px auto;
text-align: center;
font-weight: bold;
}
}
.show-pwd {
position: absolute;
right: 10px;
top: 50%;
transform: translateY(-50%);
font-size: 16px;
color: $dark_gray;
cursor: pointer;
user-select: none;
}
.el-form-item {
margin-bottom: 20px;
}
.el-input {
width: 100%;
border: none;
border-radius: 5px;
background-color: #f7f7f7;
input {
padding: 15px;
color: $dark_gray;
&::placeholder {
color: #ccc;
}
}
}
.el-button {
height: 50px;
border-radius: 25px;
font-size: 16px;
background-color: $dark_gray;
border: none;
&:hover,
&:focus {
background-color: darken($dark_gray, 10%);
}
}
}
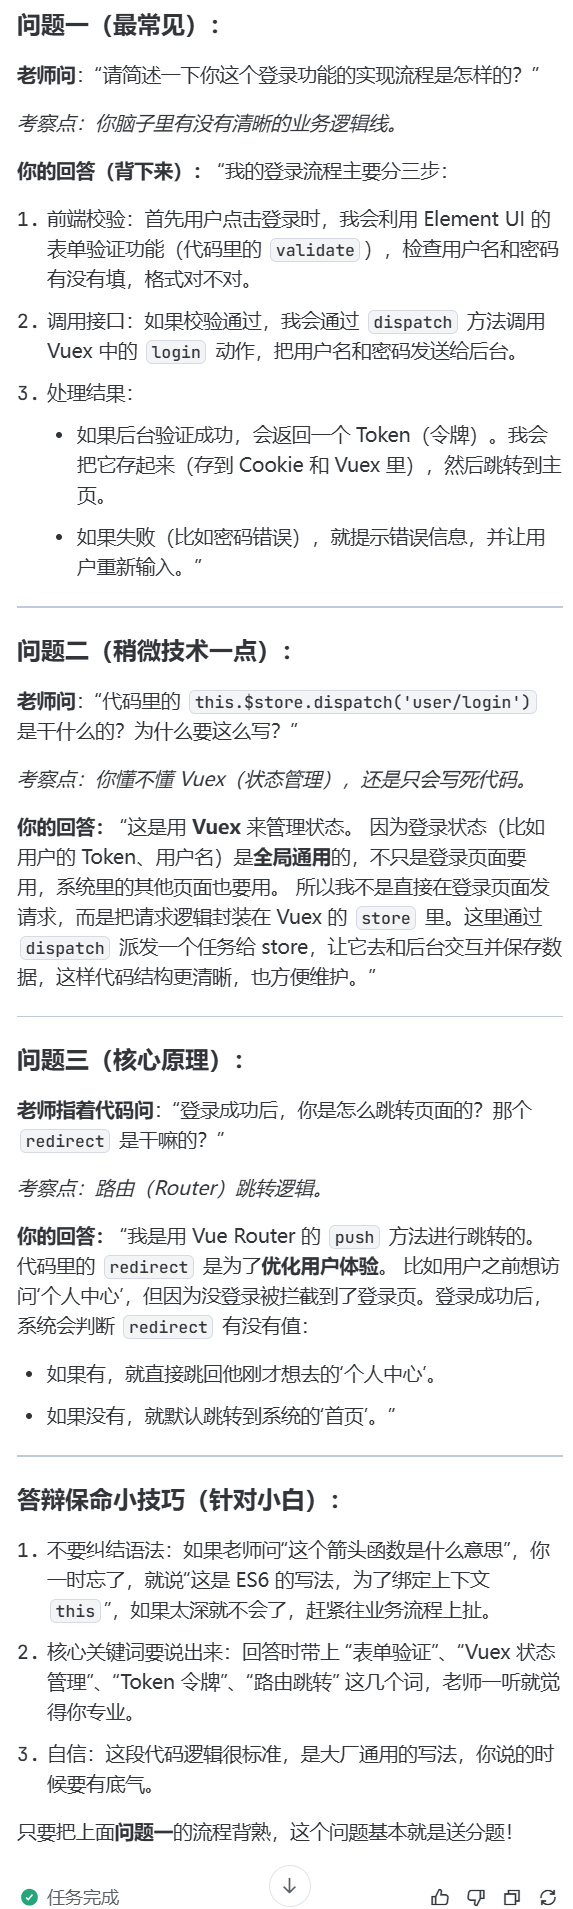
</style>发送登录请求
先写方法
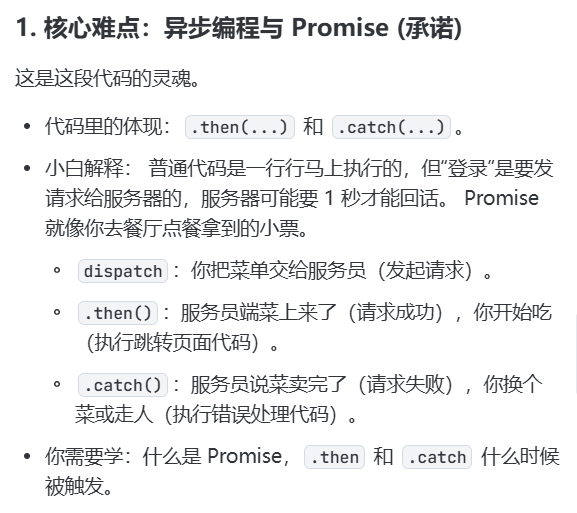
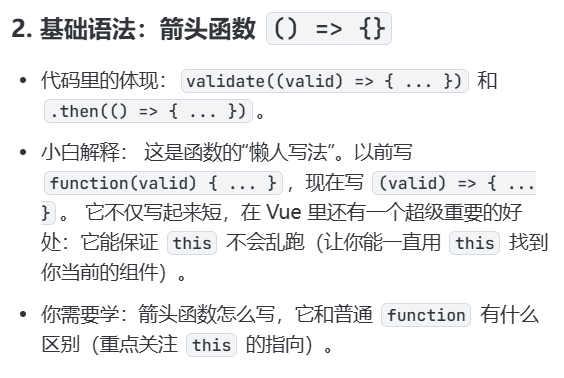
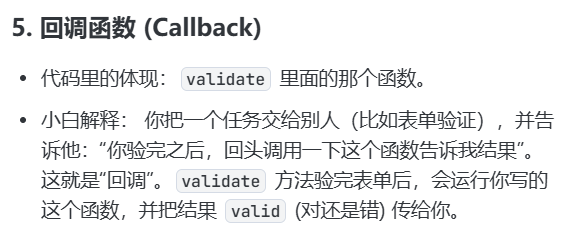
handleLogin() {
this.$refs.loginForm.validate((valid) => {
if (valid) {
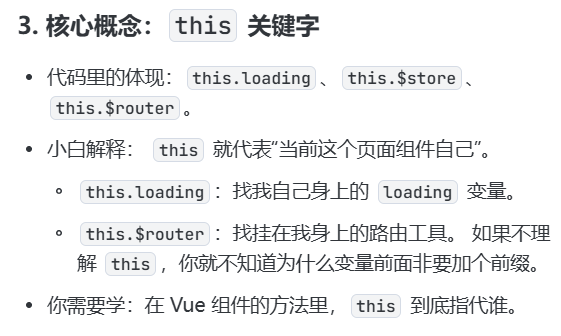
this.loading = true; // 显示 loading 状态圈
this.$store
.dispatch("user/login", this.loginForm)
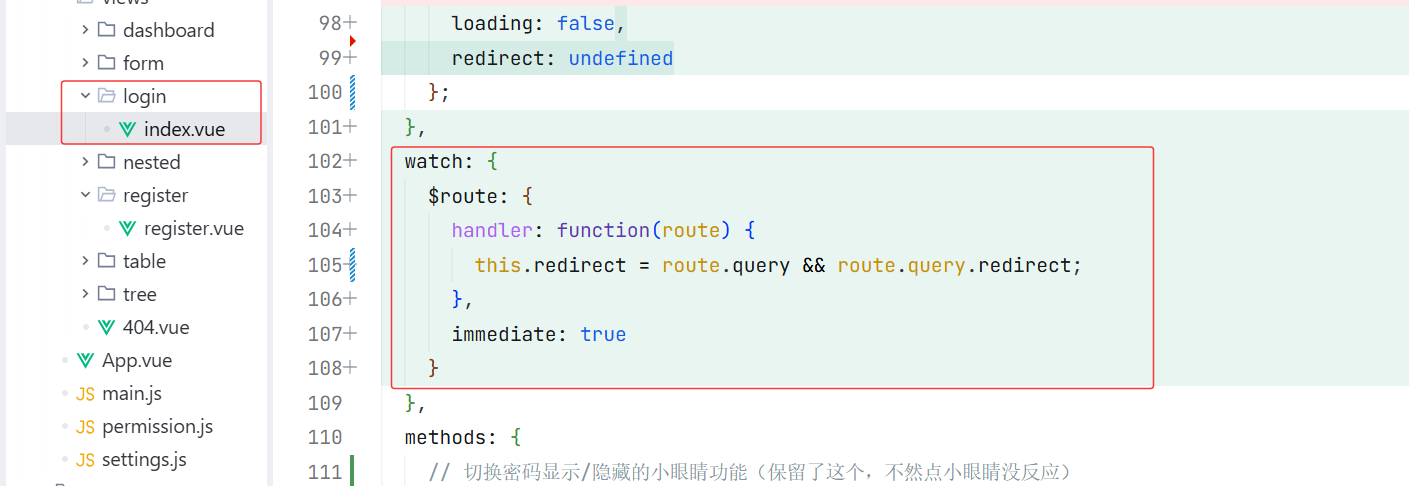
.then(() => {
// 登录成功,跳转到目标路由
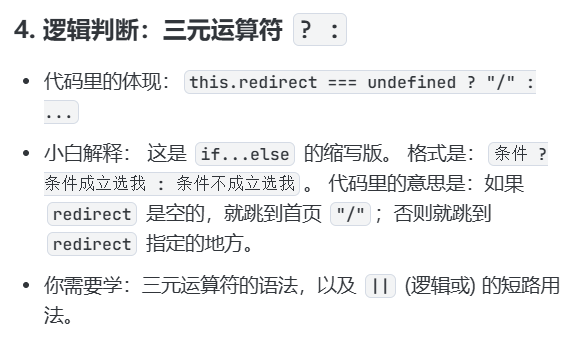
console.log("数据", this.redirect)
this.$router.push({ path: this.redirect === undefined ? "/" : this.redirect || "/" });
this.loading = false; // 隐藏 loading 状态
})
.catch(() => {
this.loading = false; // 隐藏 loading 状态
});
} else {
console.log("error submit!!");
return false;
}
});
},要实现这个功能你需要掌握
总结:学习路线建议
如果你想快速上手修改这类逻辑,建议按这个顺序补课:
ES6 箭头函数 (看懂 => 符号)
Promise 基础 (看懂 .then 是在等结果)
对象与 this (明白为什么要加 this. )
去后端完成接收请求的操作
接下来我们点击一下登录 看报错
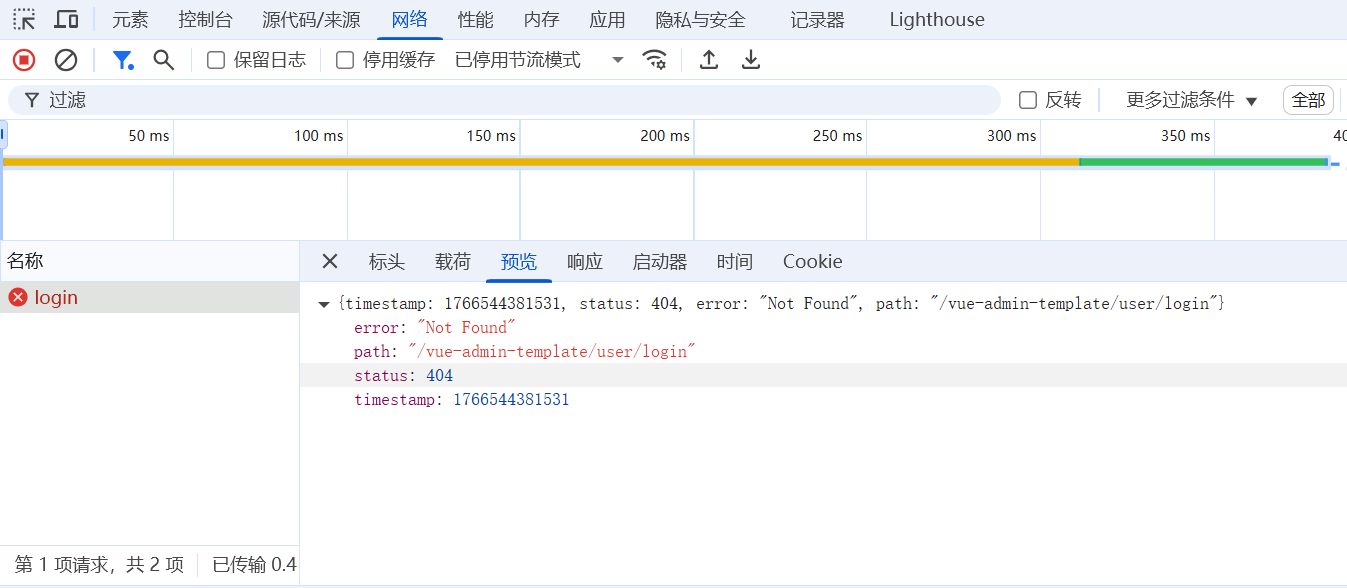
去api文件夹 axios

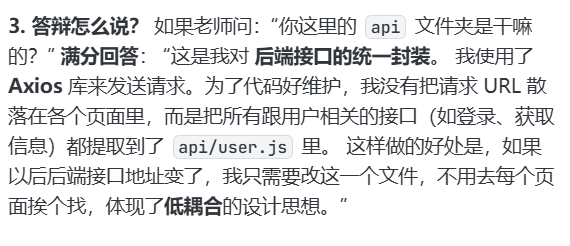
改成和后端接口一样的路径 用户登录 用户信息 用户退出
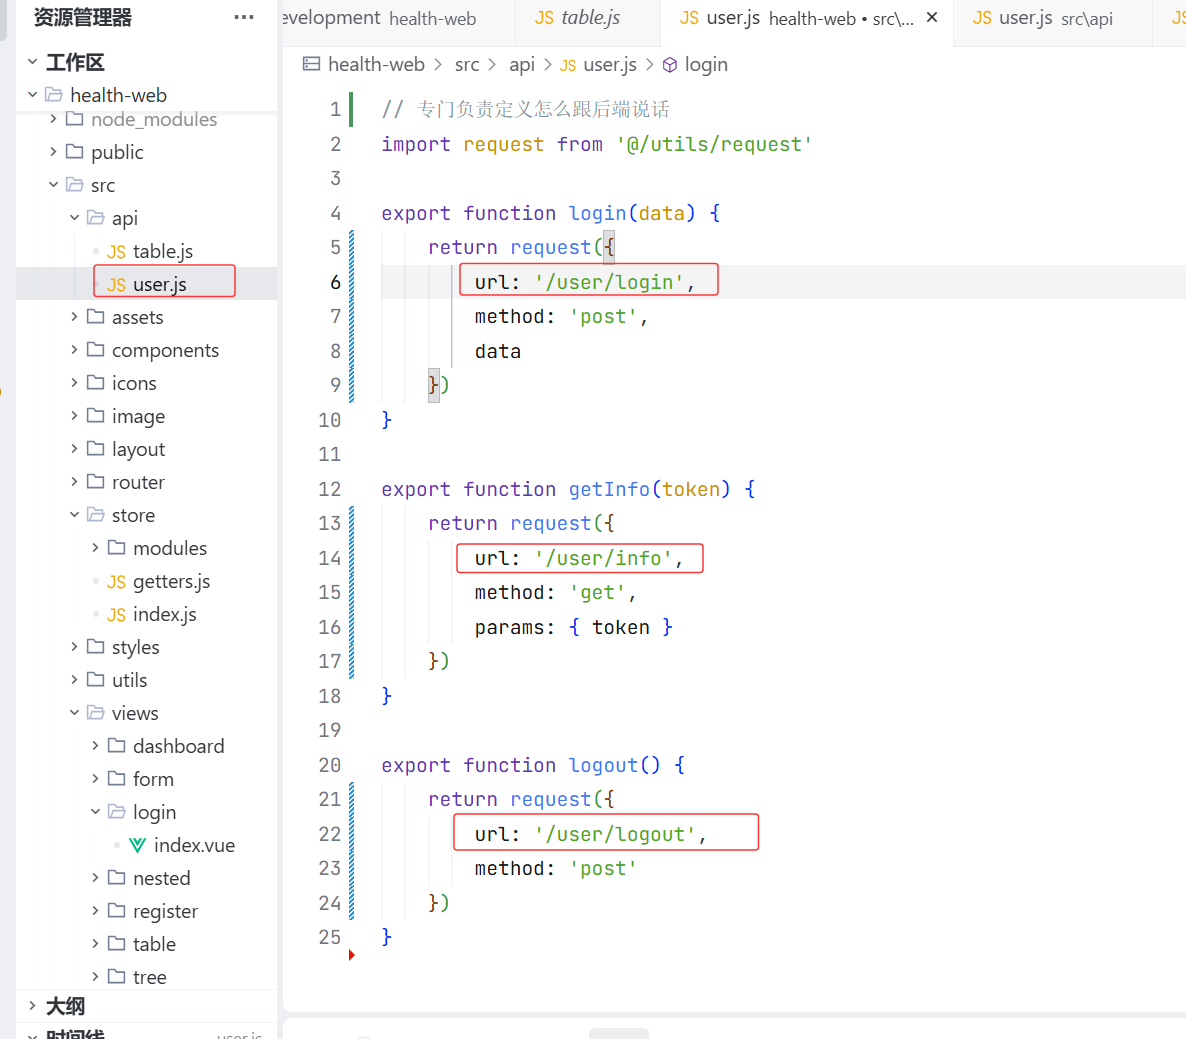
现在登录成功 但是还有一条报错
是因为后端没有写获取用户信息的接口

去后端写,写完之后 成功!!! 棒棒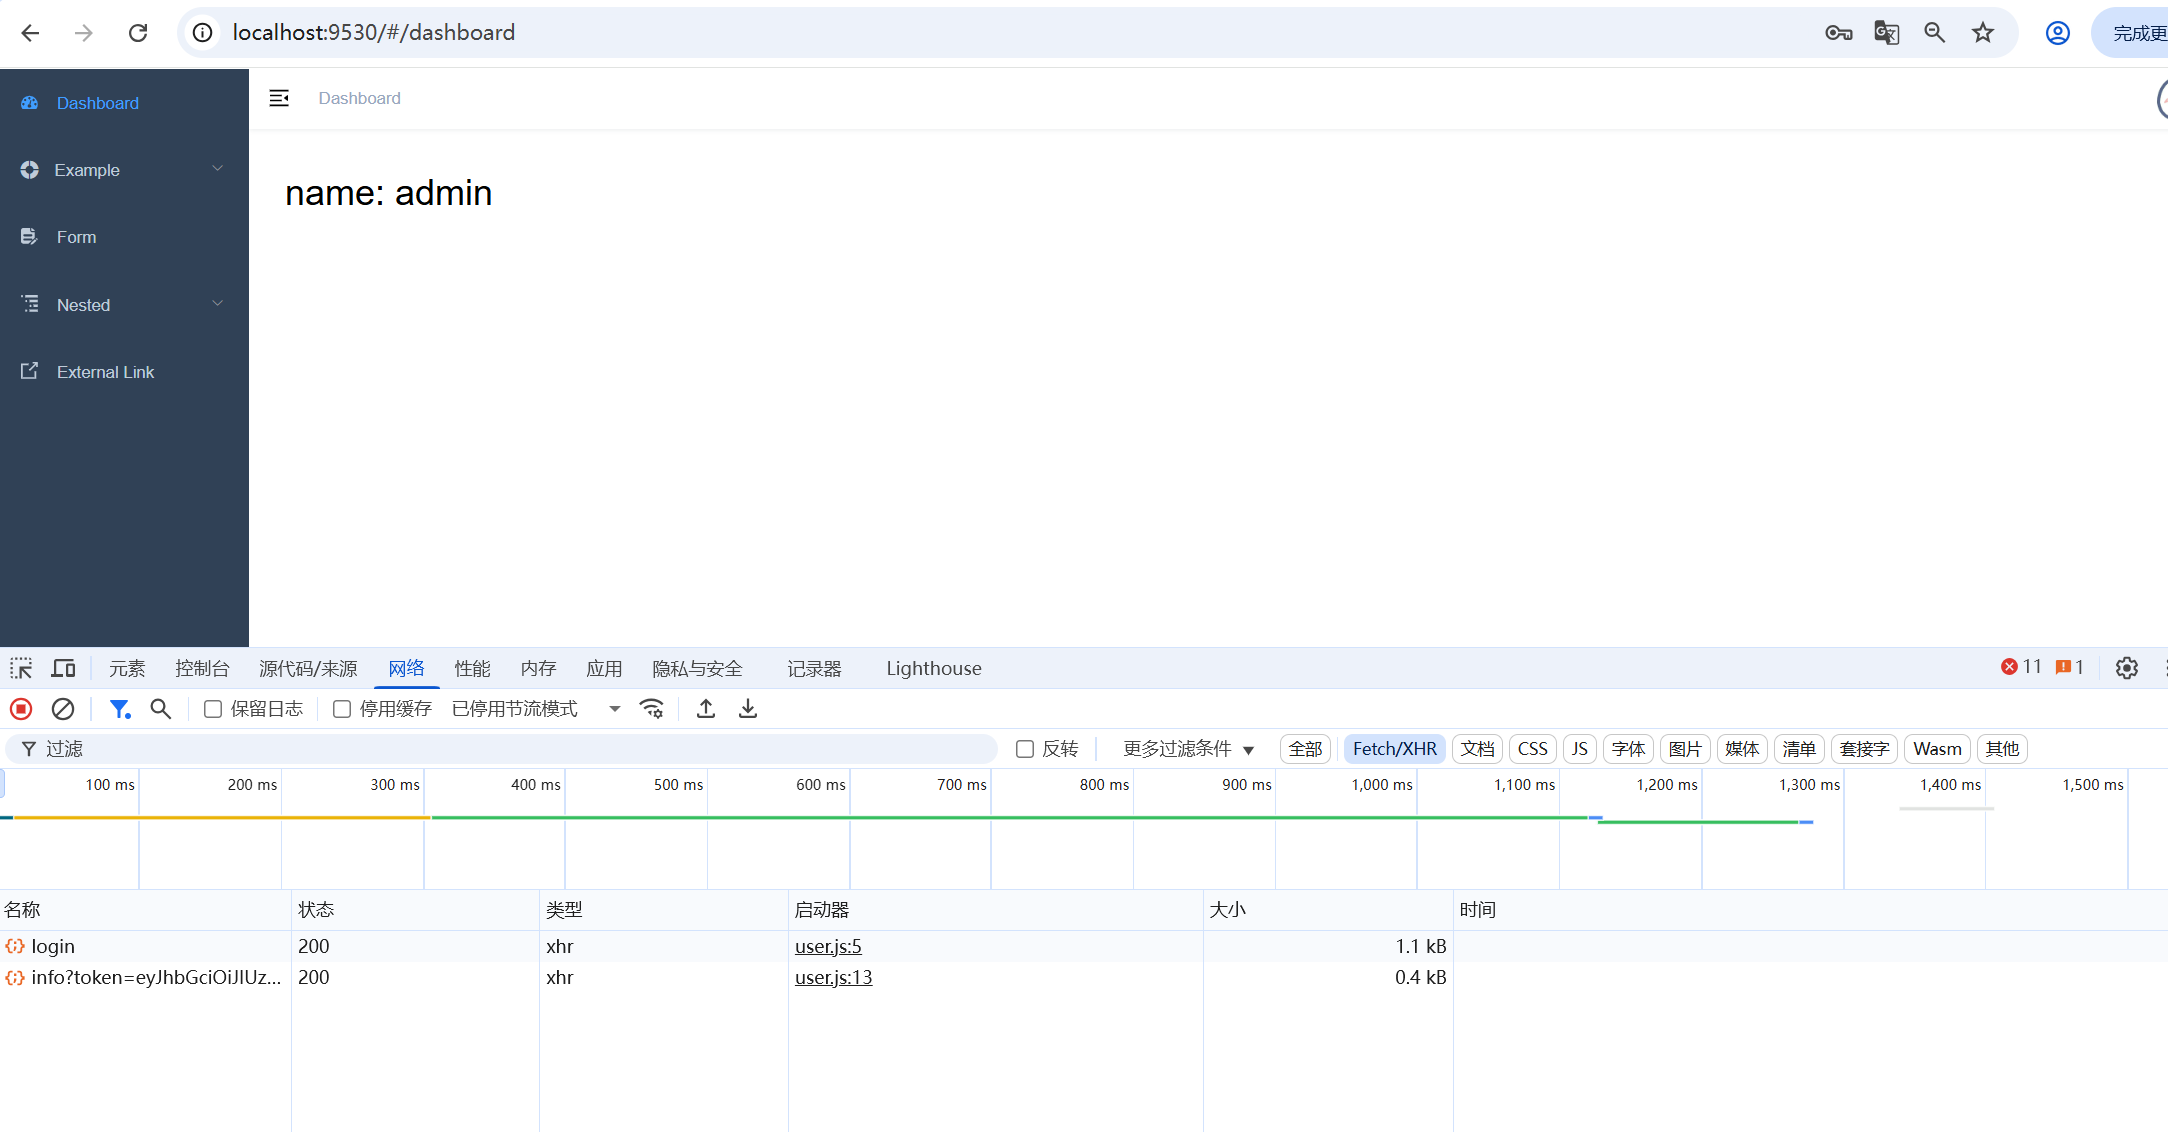
完善登录验证
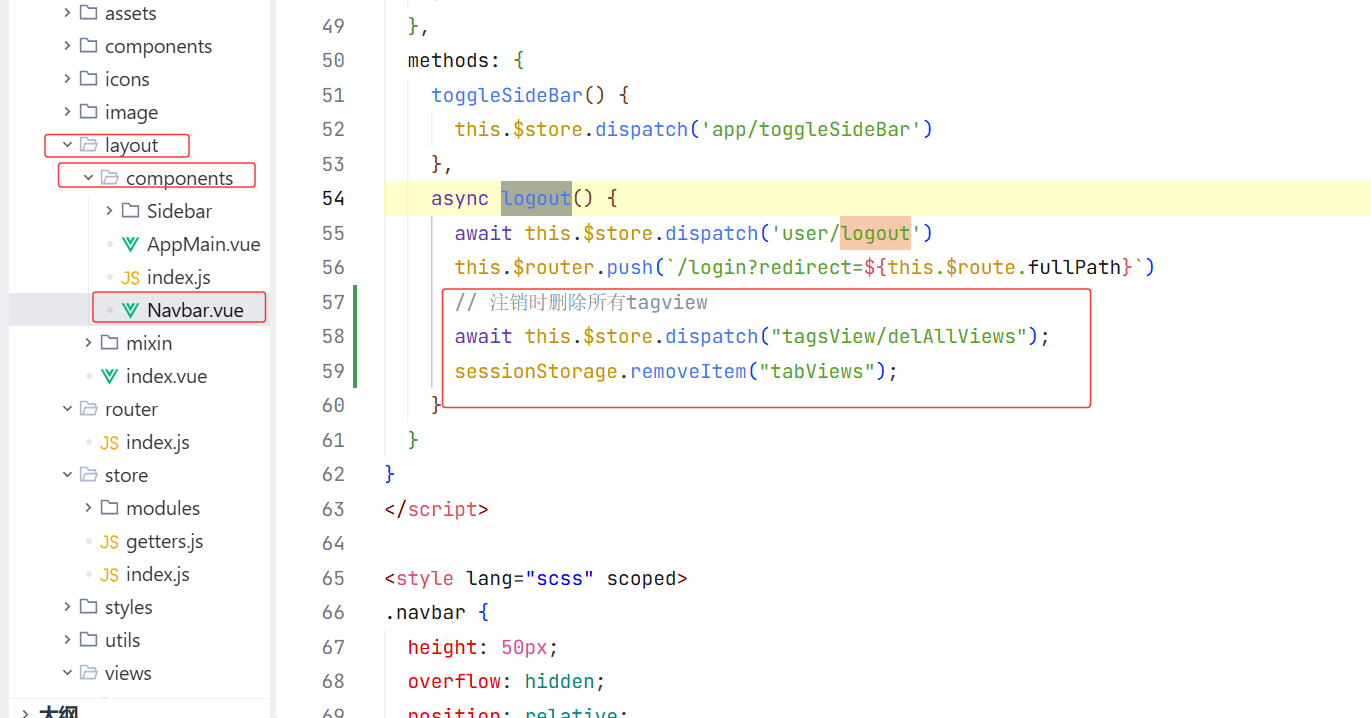
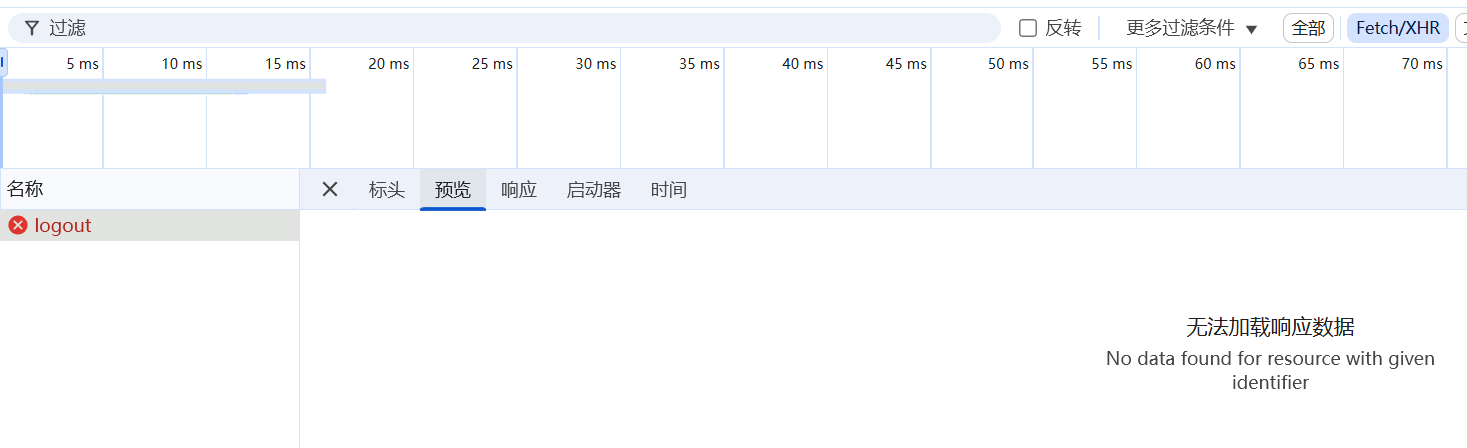
实现退出
现在去完成后端
登录页面跳转到注册页面
完成功能跳转
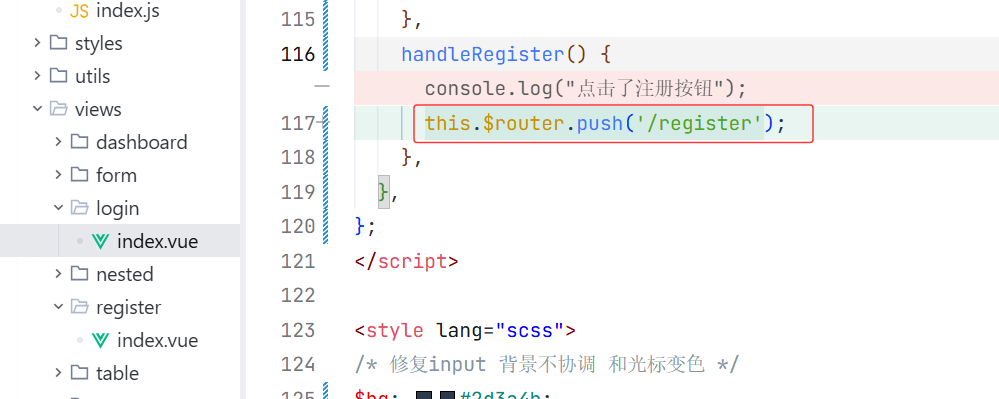
但是点击页面没有效果 我发现是因为路由我没加进去

点击注册没反应,检查了路由,发现写错
现在的问题 我点击注册不跳转 ,然后我再去点输入账号密码登录,就进入了注册页面,然后点击注册直接进首页,出现这种情况是因为
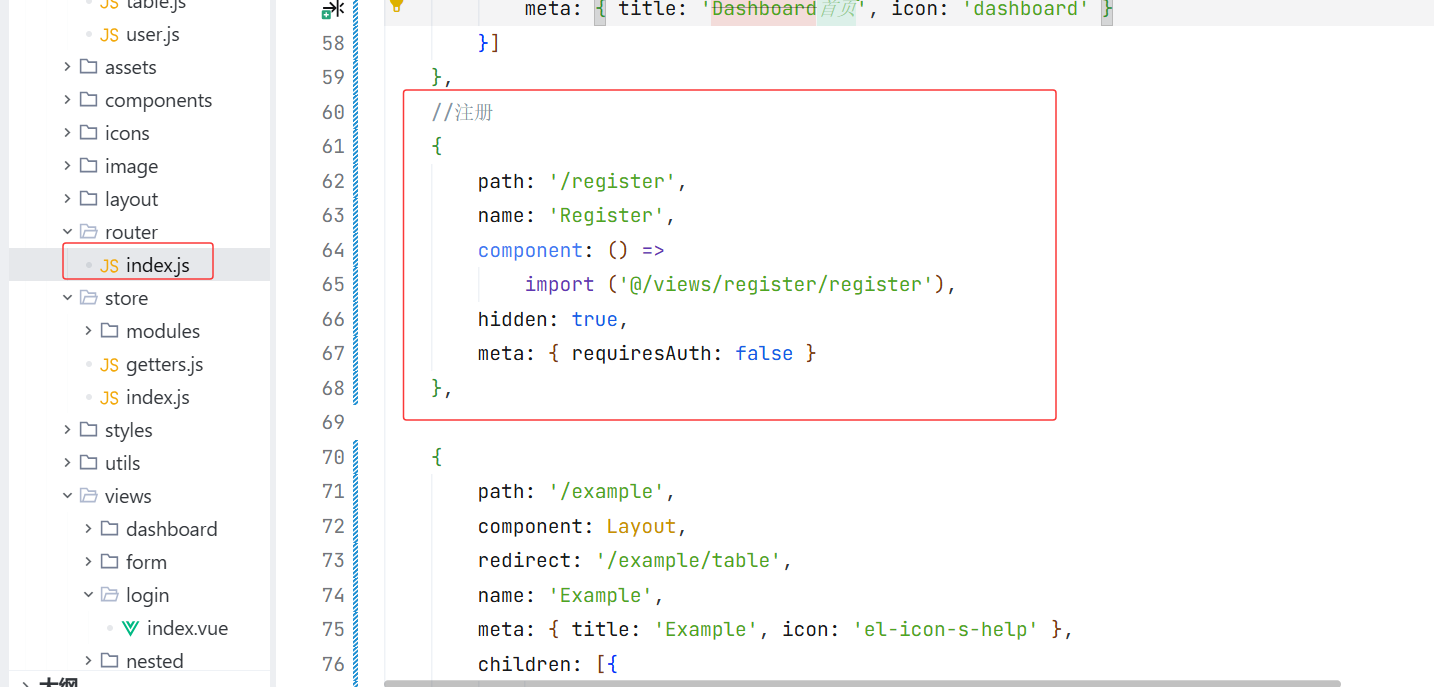
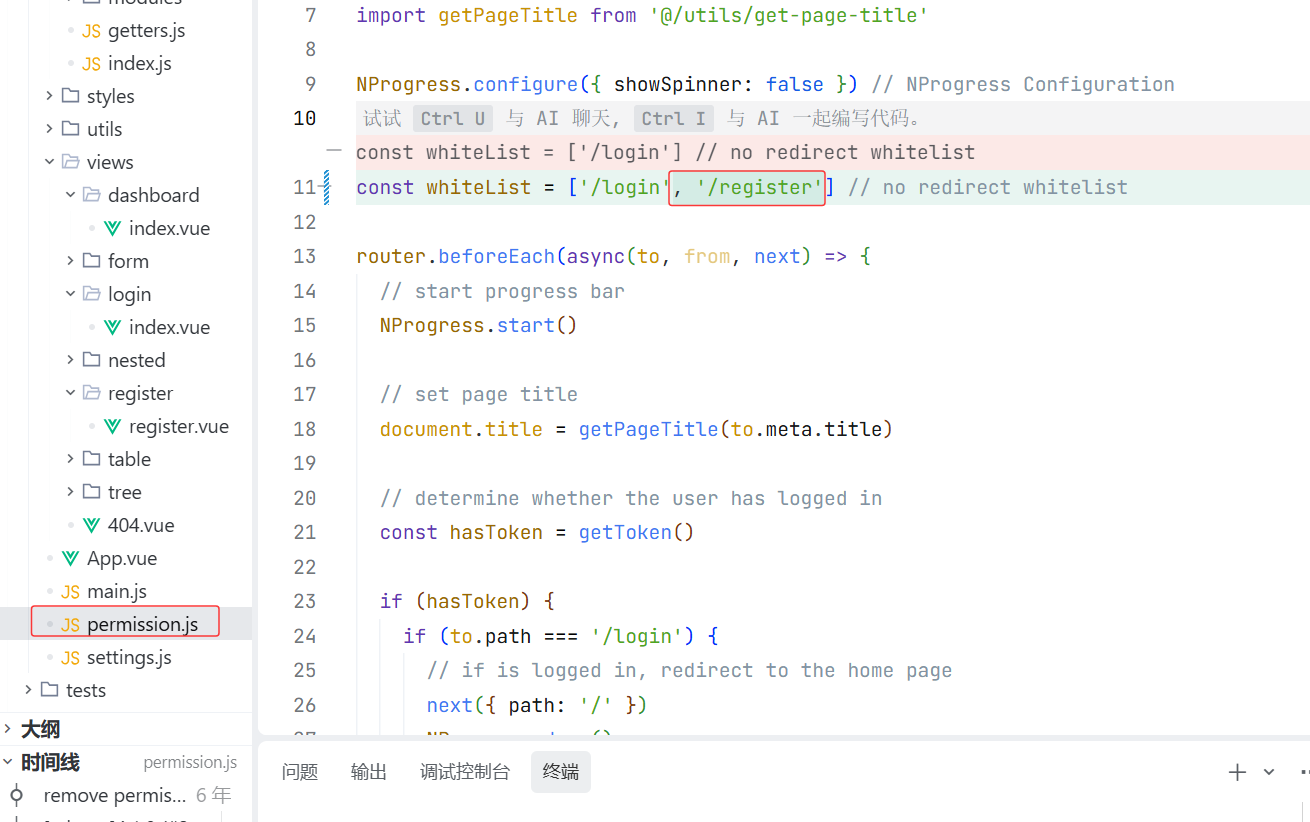
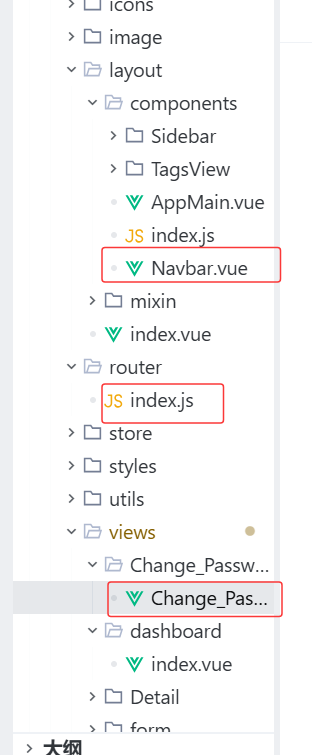
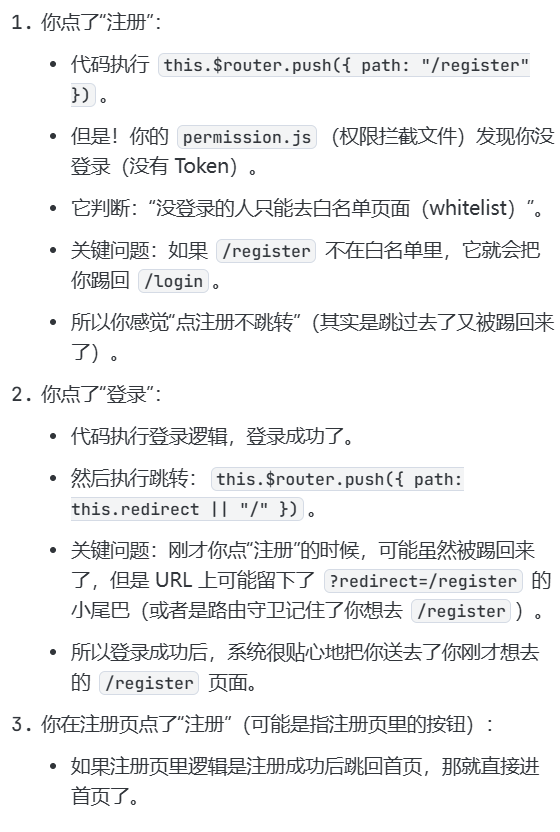 需要把 /register 加入到 路由白名单 里,告诉权限系统:"这个页面,没登录也能看!"
白名单列表里只有 /login :这意味着,除了 /login 页面,其他所有页面(包括 /register )如果没登录去访问,都会被强制踢回登录页。
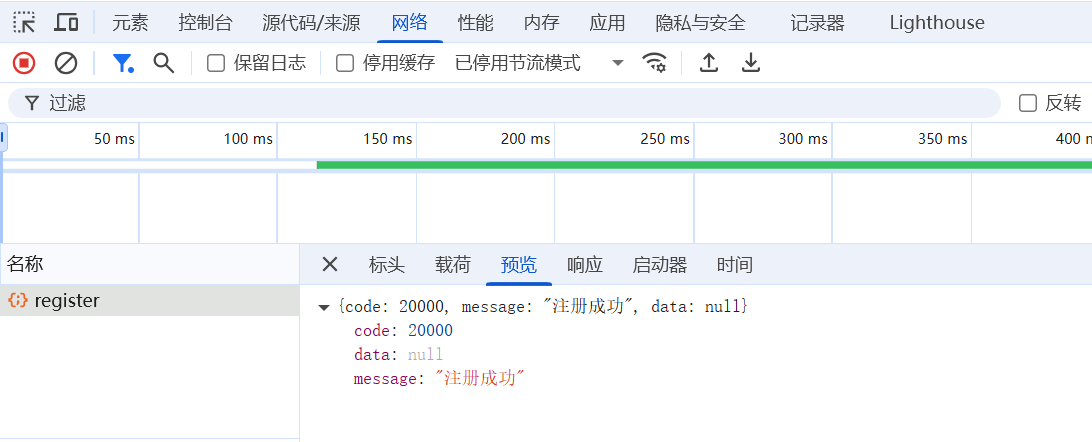
注册功能实现
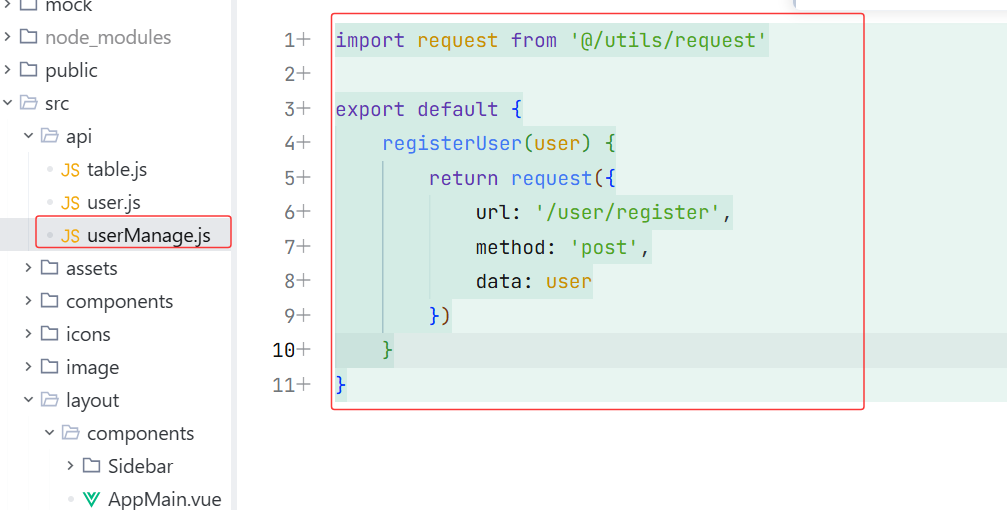
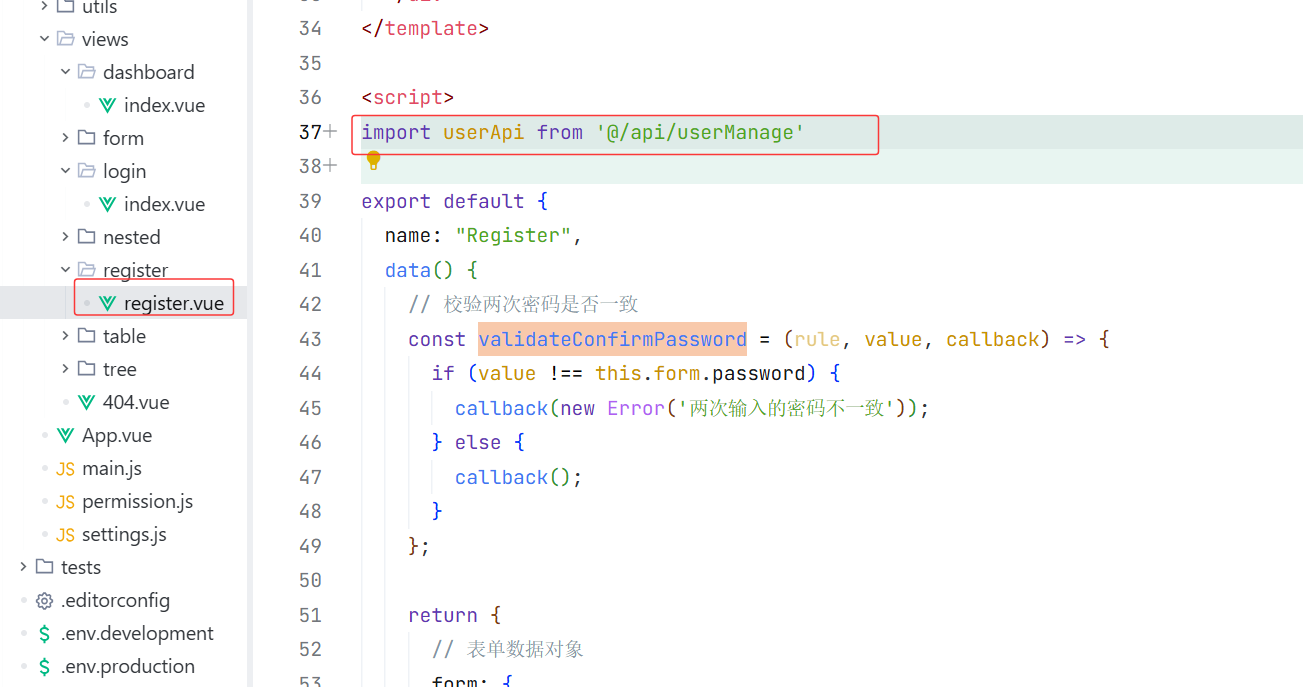
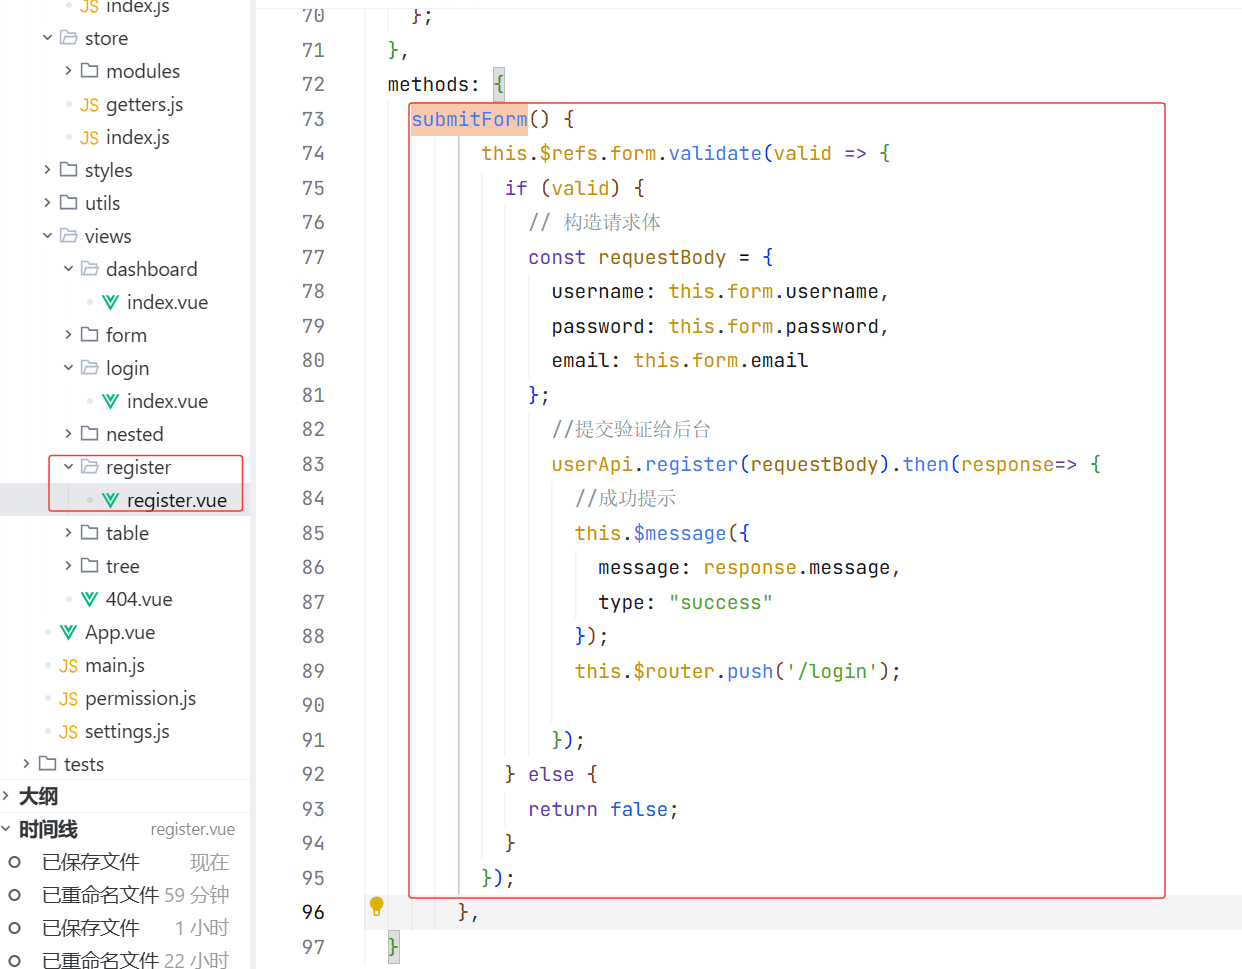
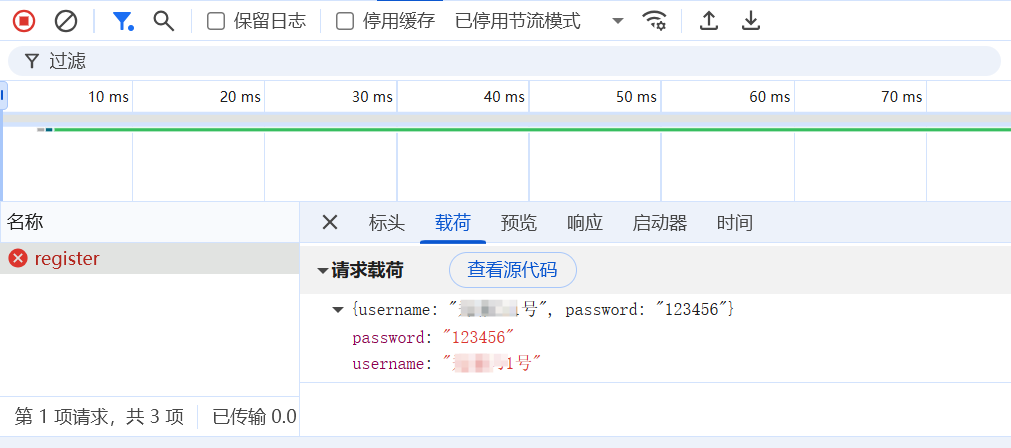
现在去完成后端
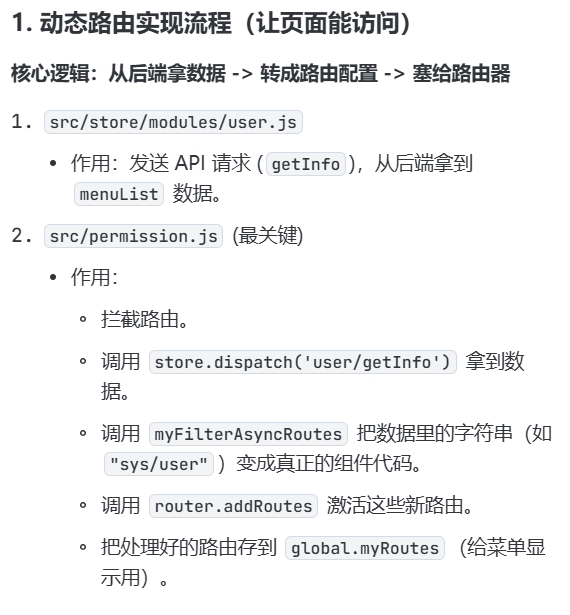
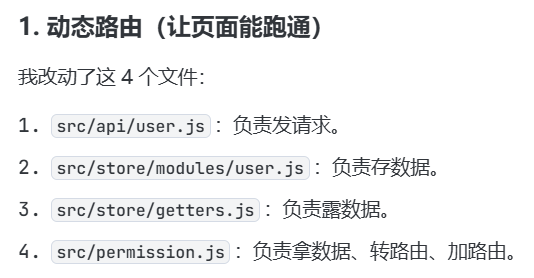
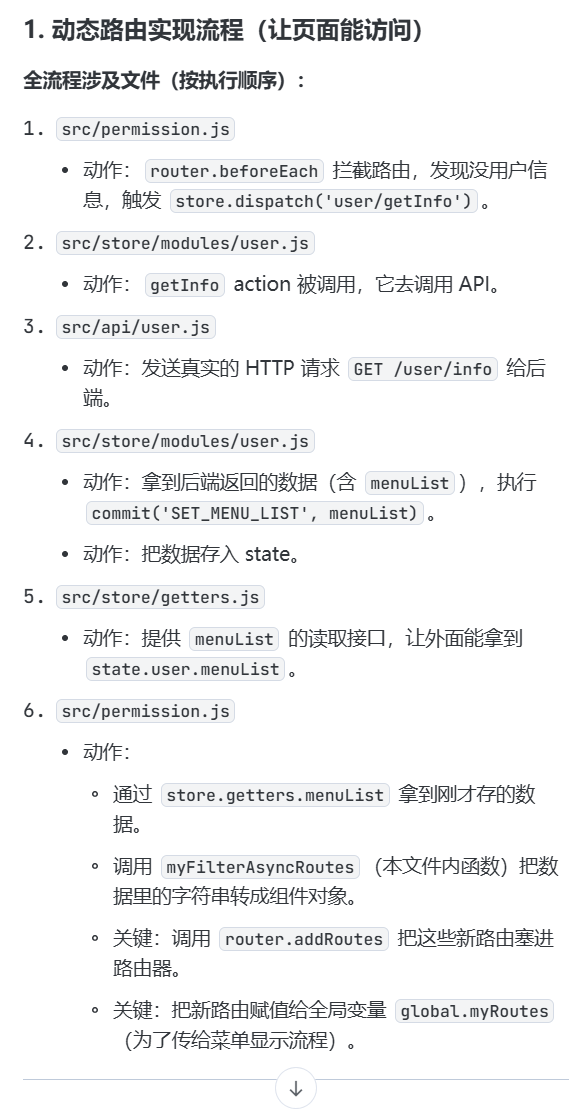
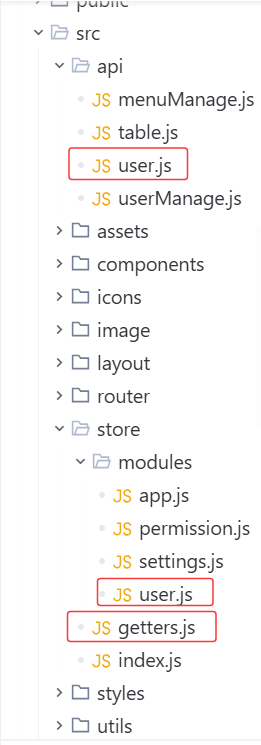
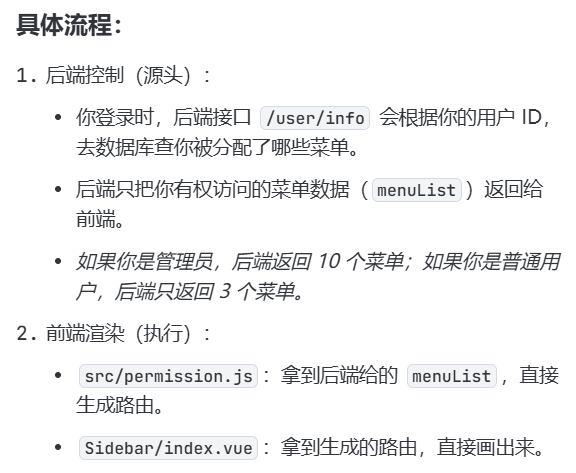
"动态路由"和"菜单显示"
采用的是 打包返回 的方式:- 逻辑 :当它请求"获取用户信息"接口( /user/info )时,后端顺便把 menuList (菜单列表)一起打包发回来了。
- 结果 :因为数据已经在"用户信息"里带过来了,所以它 不需要 再发一个单独的 /menu 请求。
getSportList: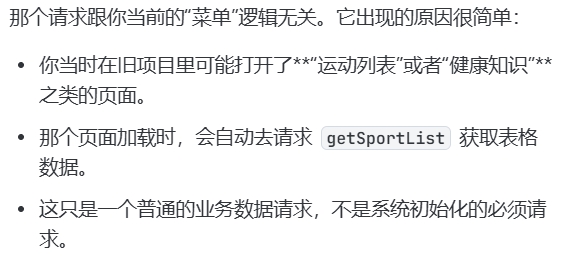
有了菜单结构之后,
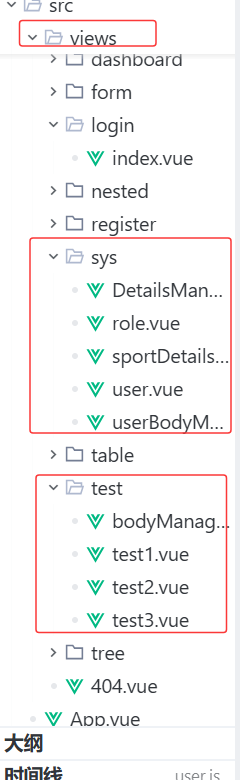
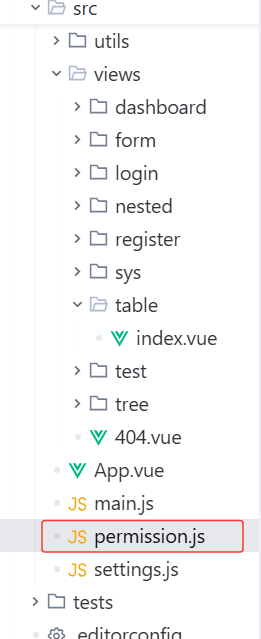
- 创建页面文件 :先在 src/views/ 下建好对应的文件夹和 .vue 文件
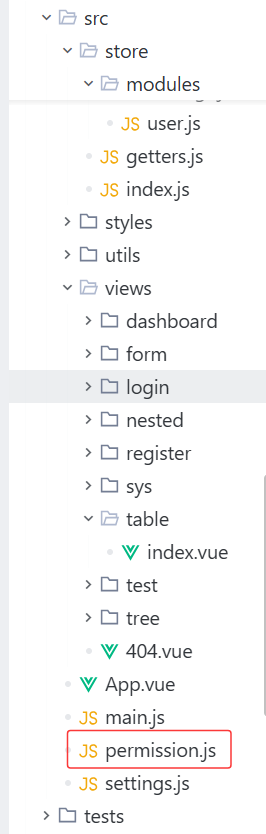
新建文件permission.js
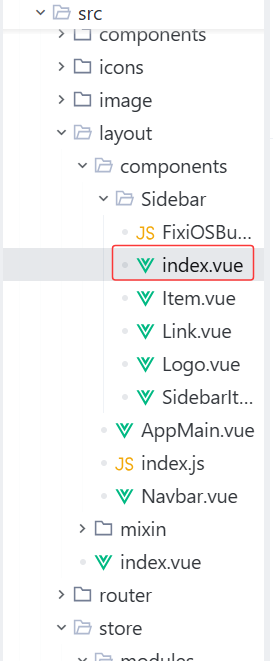
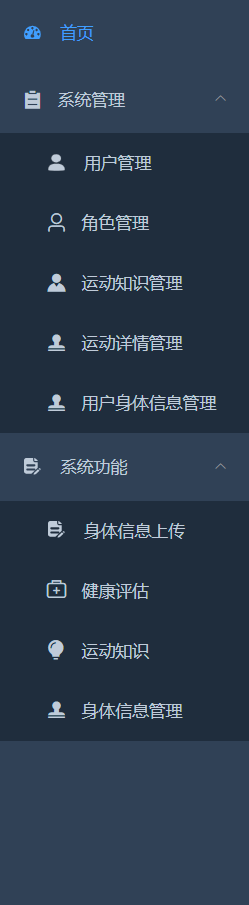
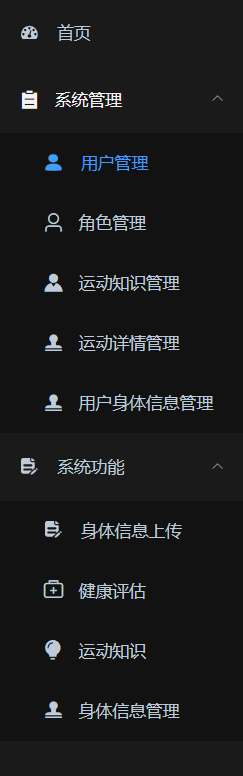
侧边栏的权限实现
后端给什么,前端就渲染什么。
完成
 接下来改一下颜色
 完成
完成
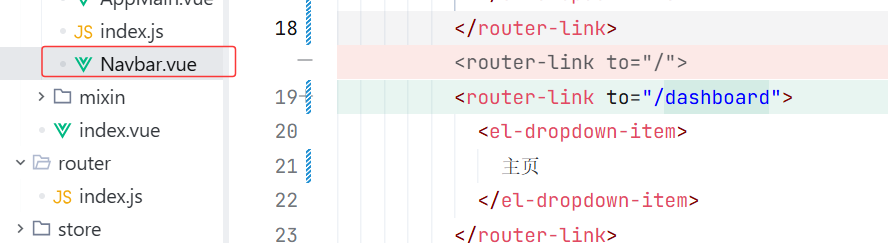
导航条
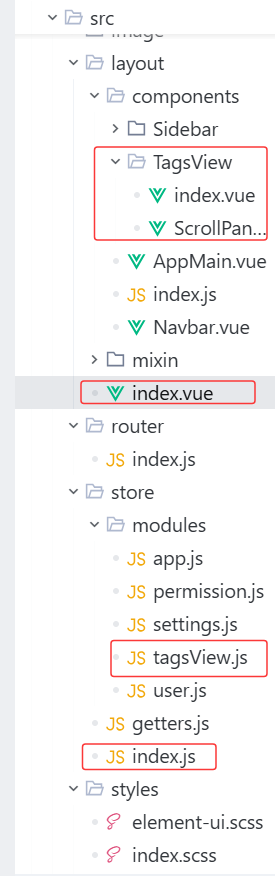
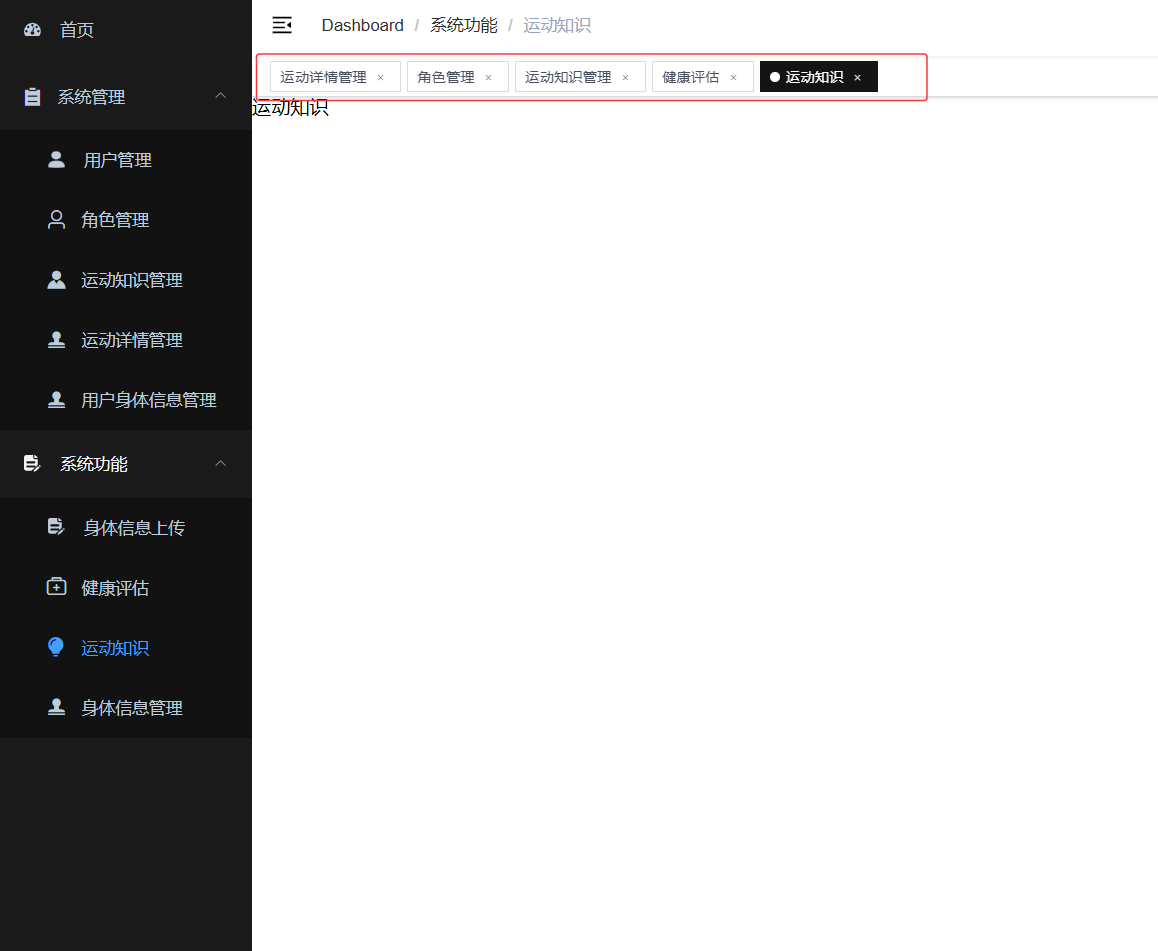
新建文件夹TagsView和文件tagsView.js,导航条不需要后端,完成代码后实现效果
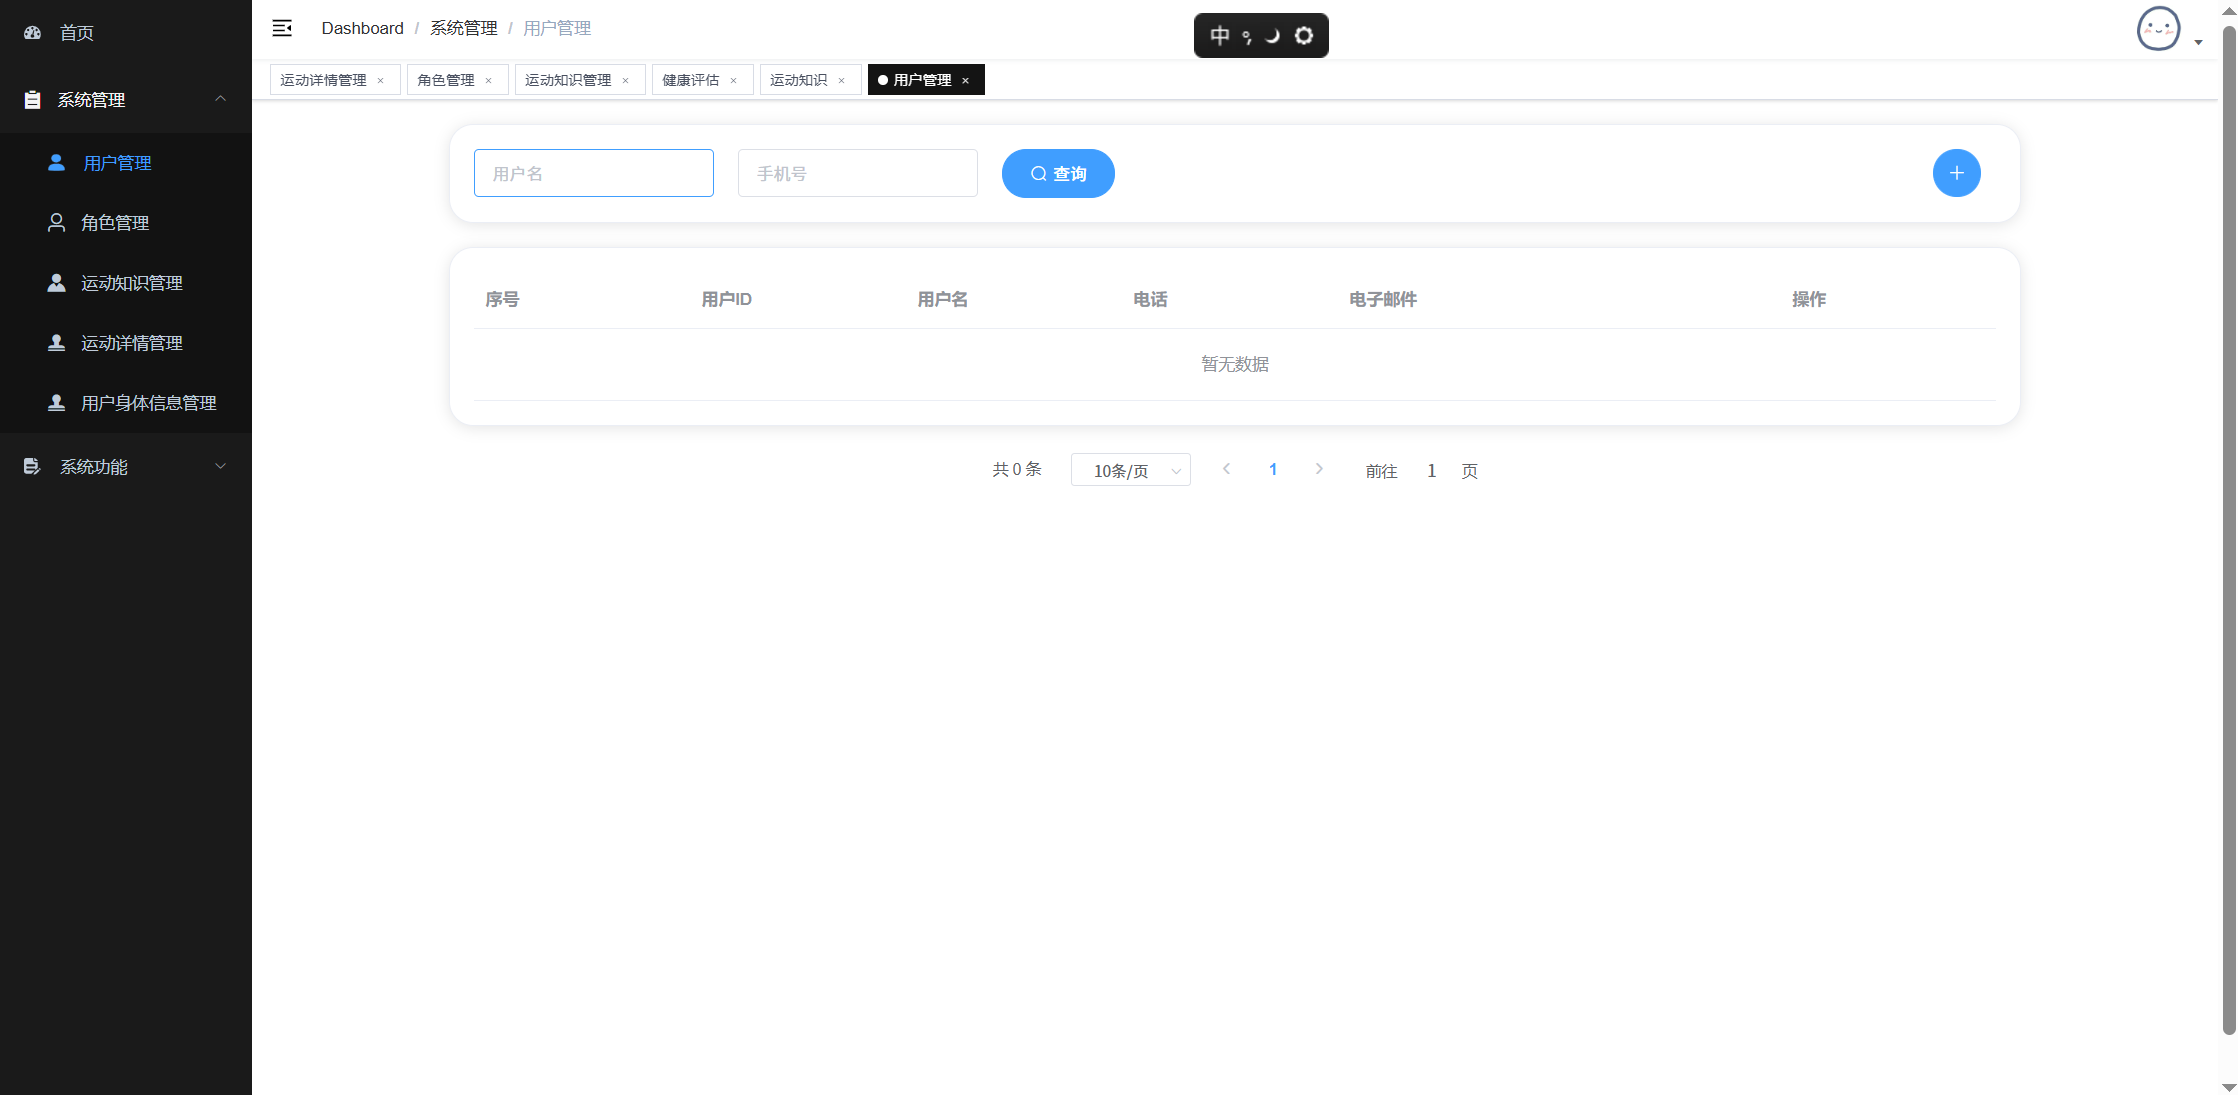
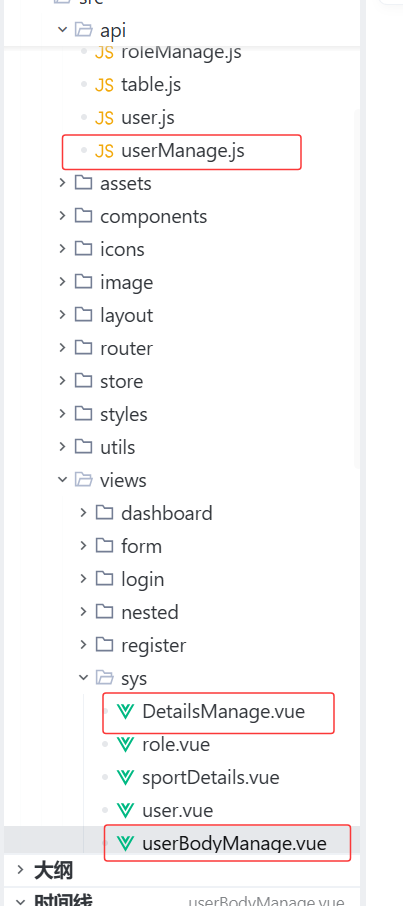
用户管理
先实现表面样式
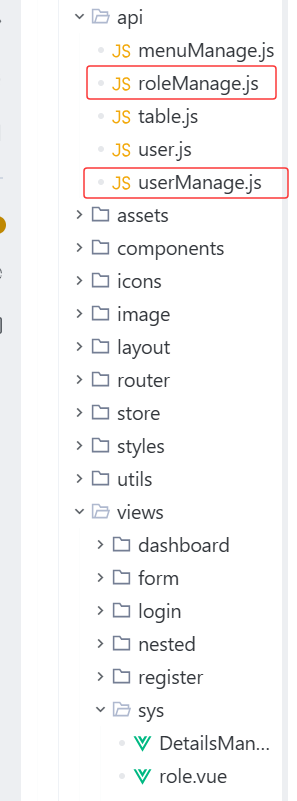
新加了roleManage.js文件
 完成
完成
再来实现功能
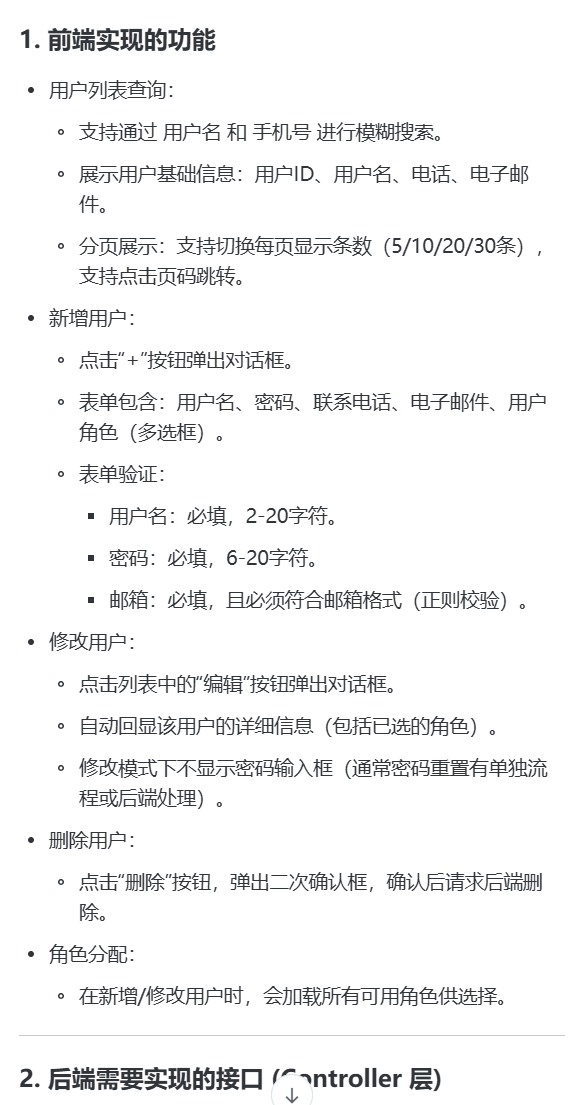
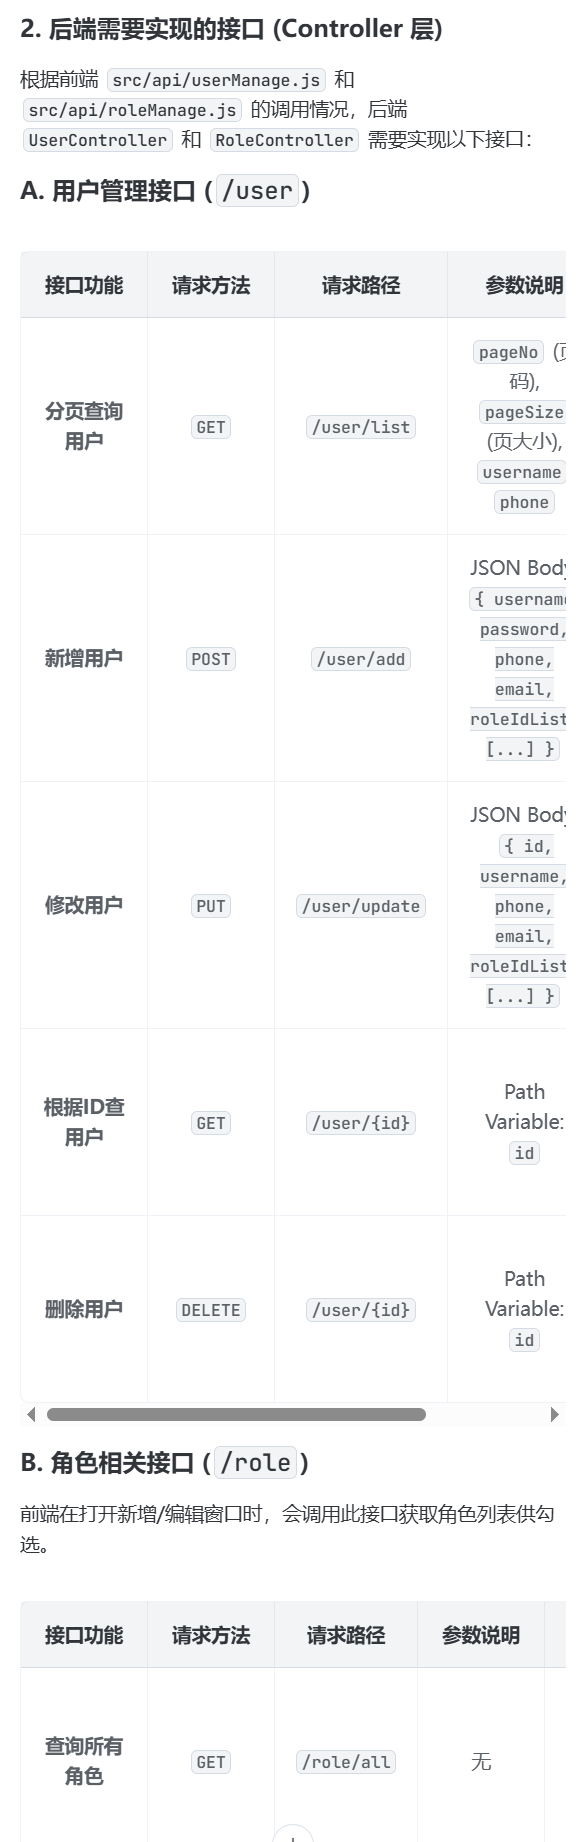
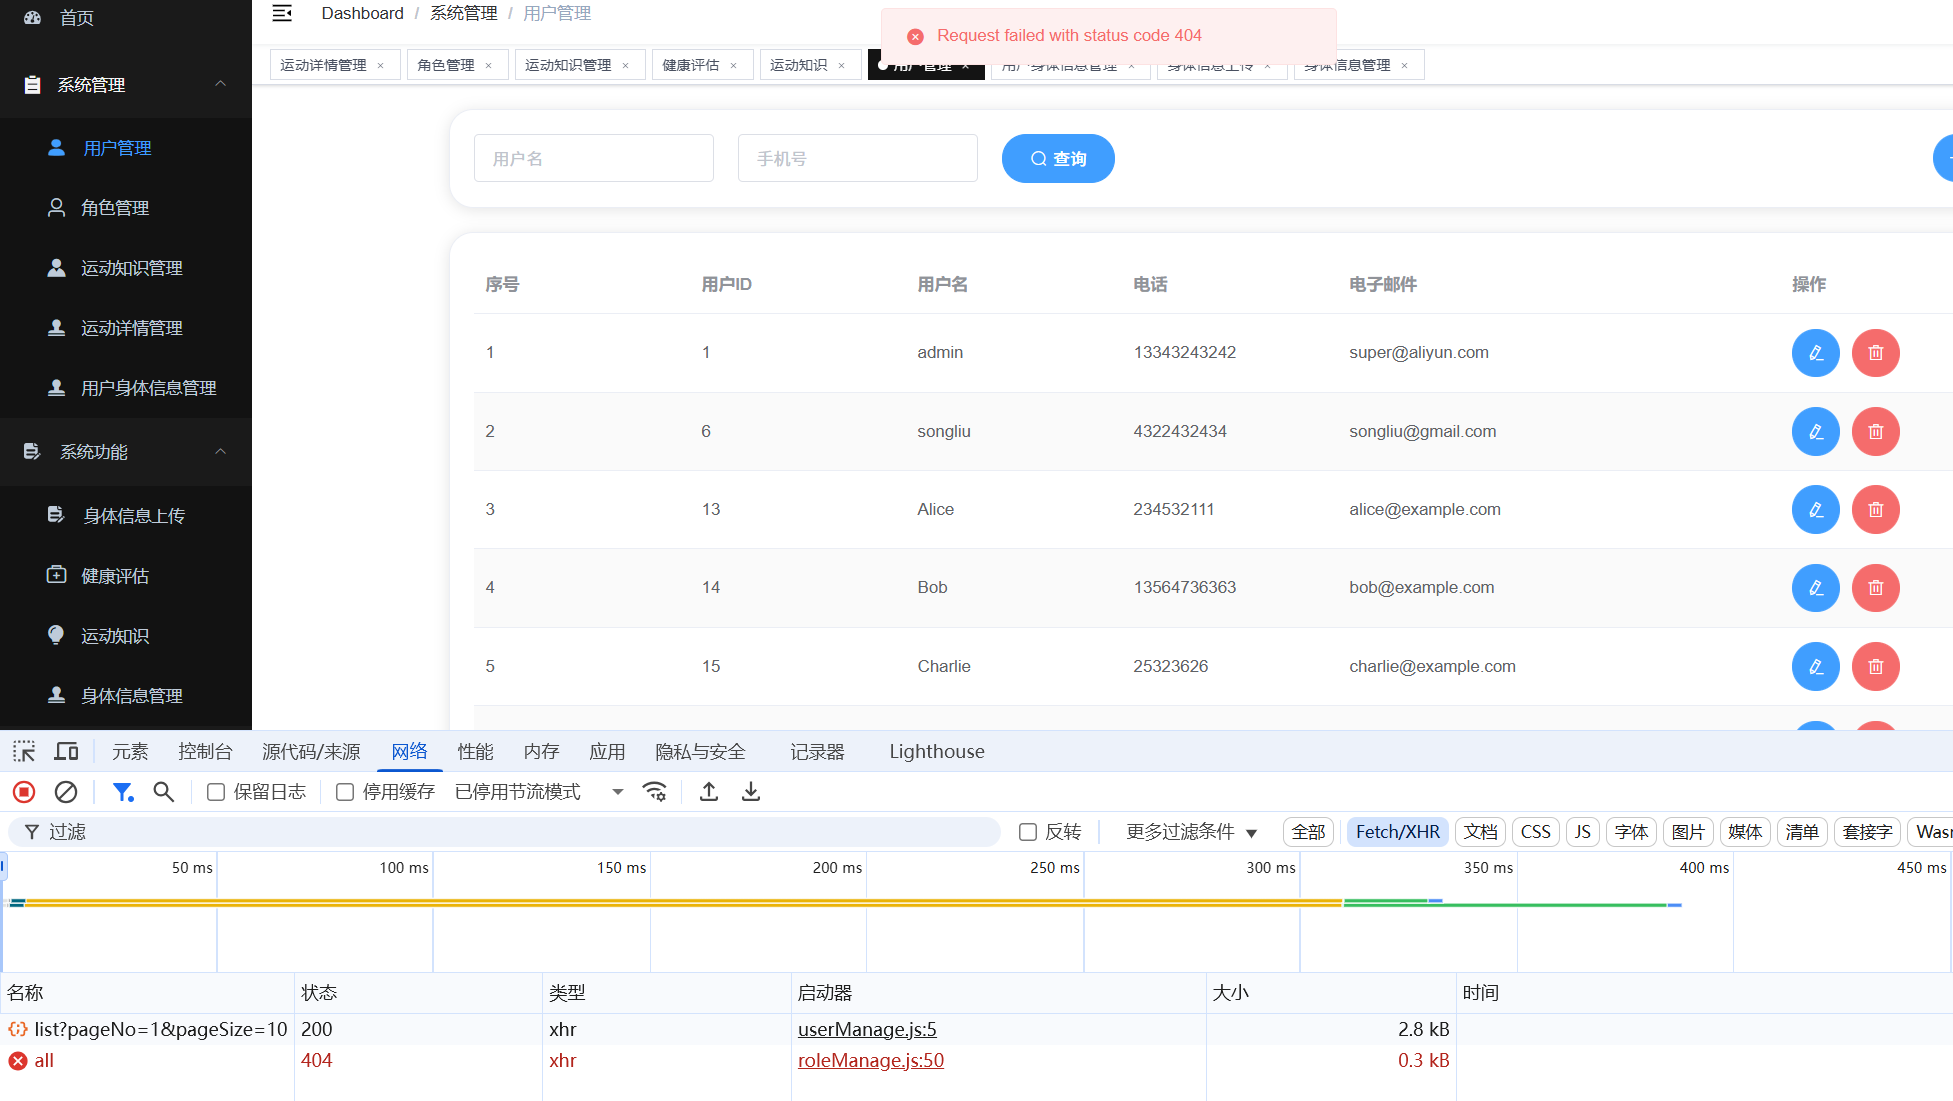
分页查询,用户列表查询
新增用户
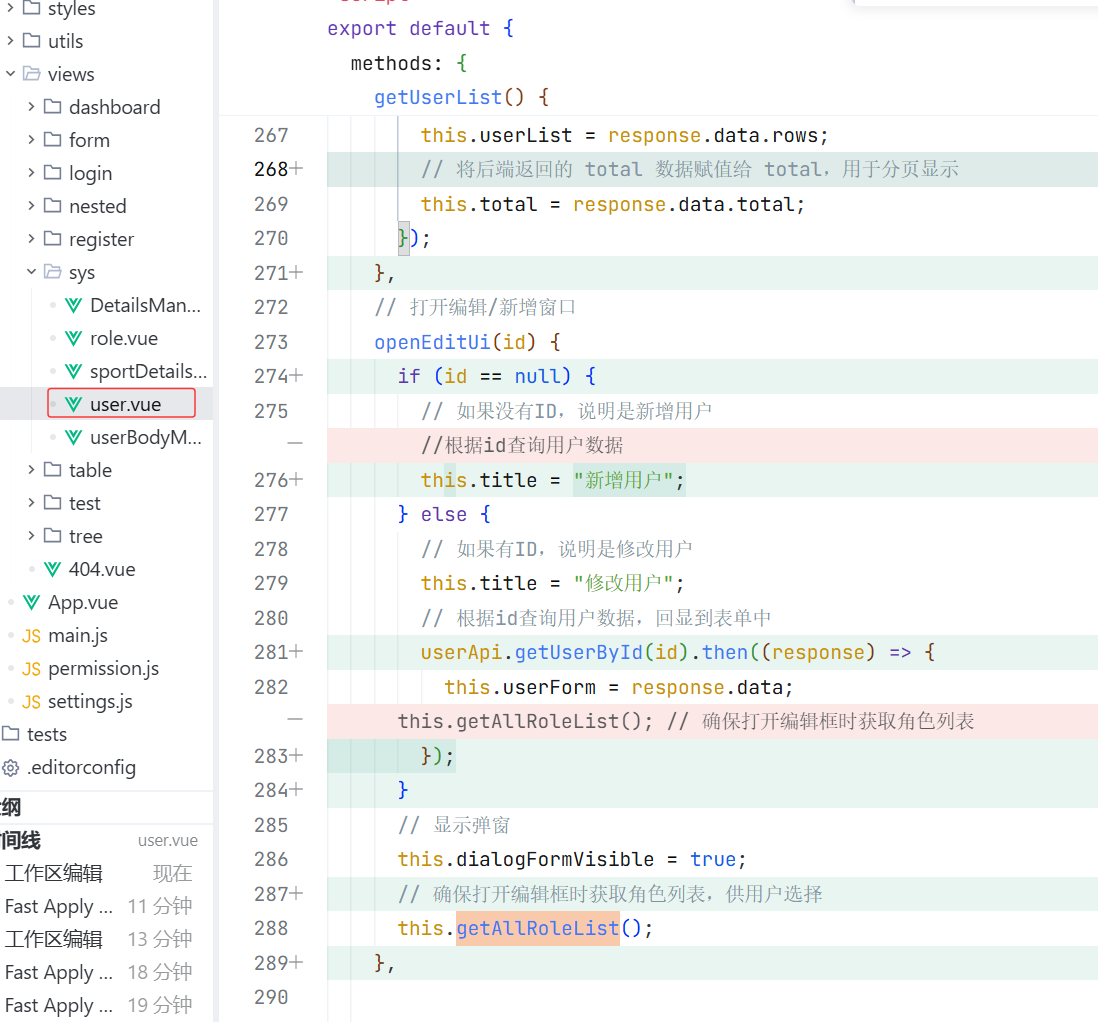
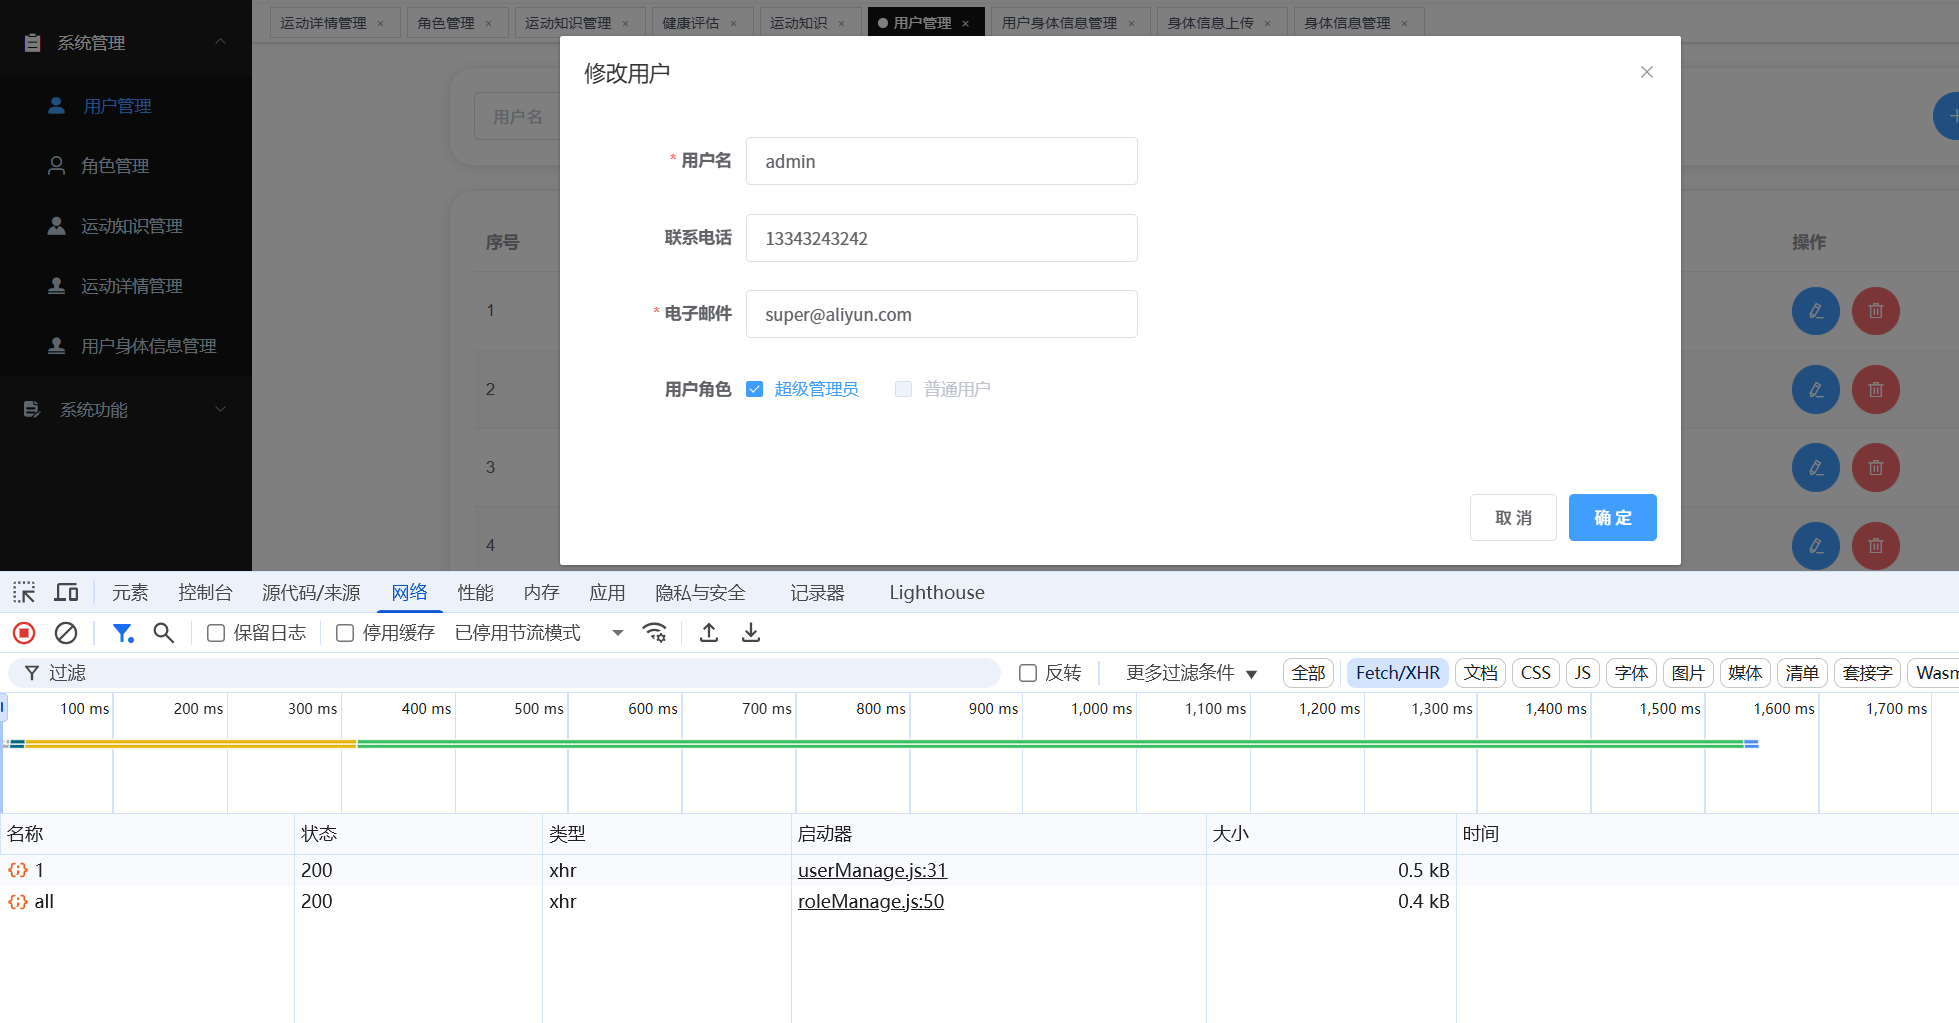
修改用户
角色分配
删除用户
先实现功能---分页查询,用户列表查询
先去后端写接口 写完之后
去前端写
新增用户,修改用户,根据ID查用户,删除用户
后端完成之后,完成前端
完成
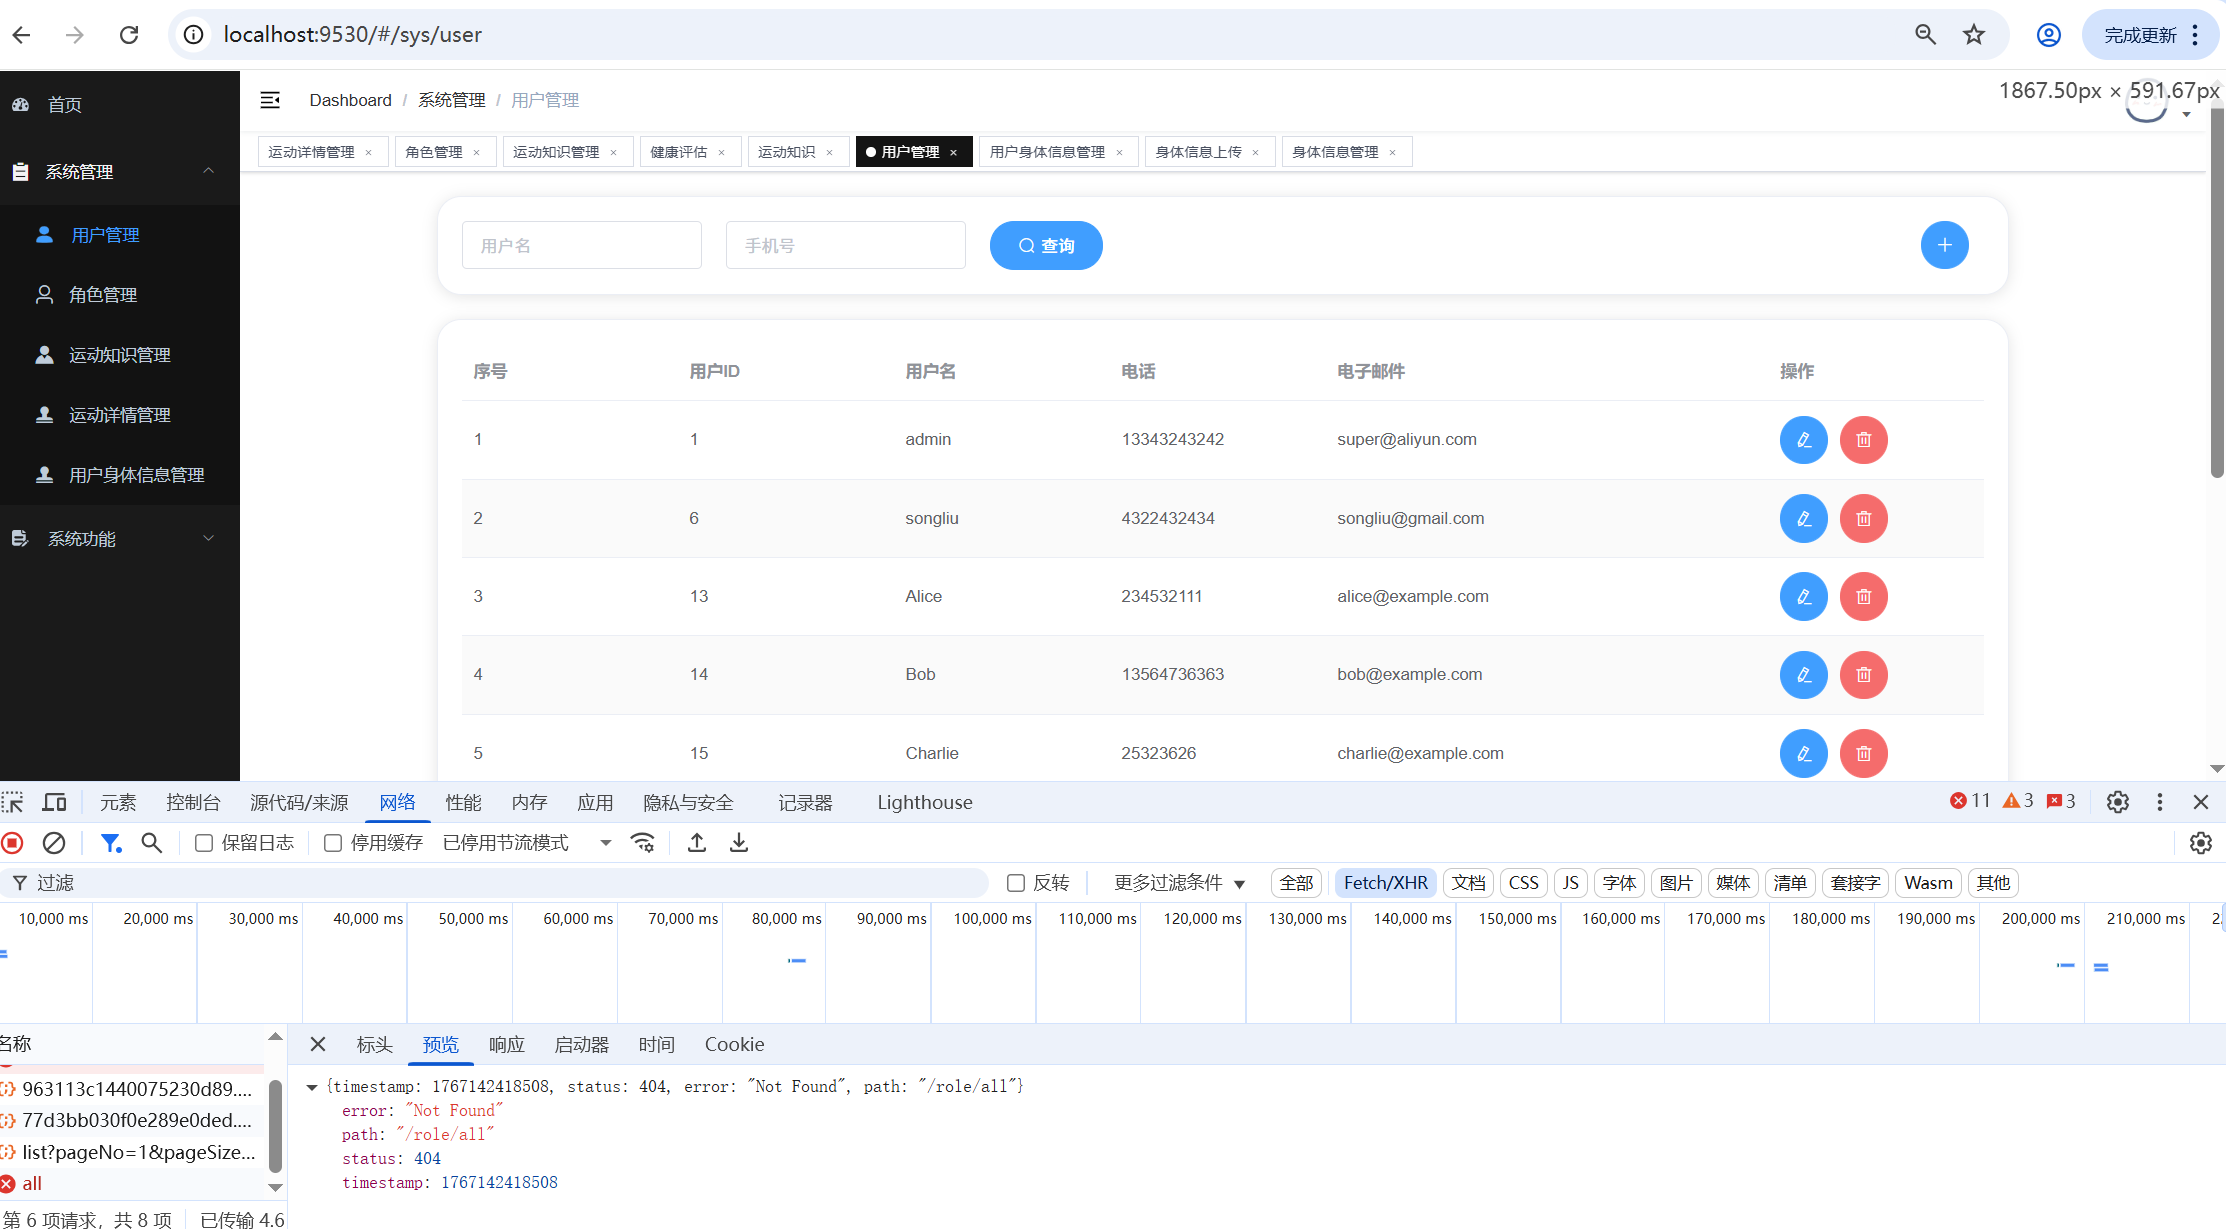
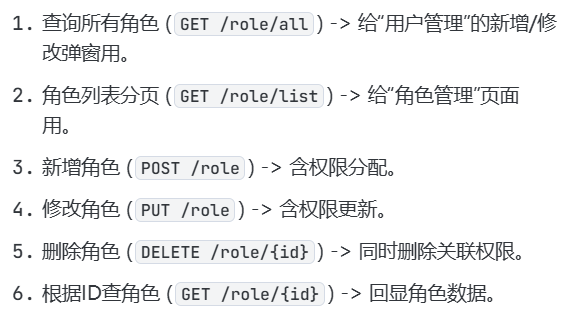
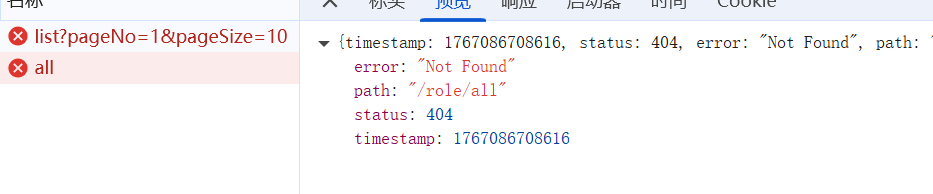
现在去后端完成 查询所有角色 ( GET /role/all ) -> 给"用户管理"的新增/修改弹窗用 。
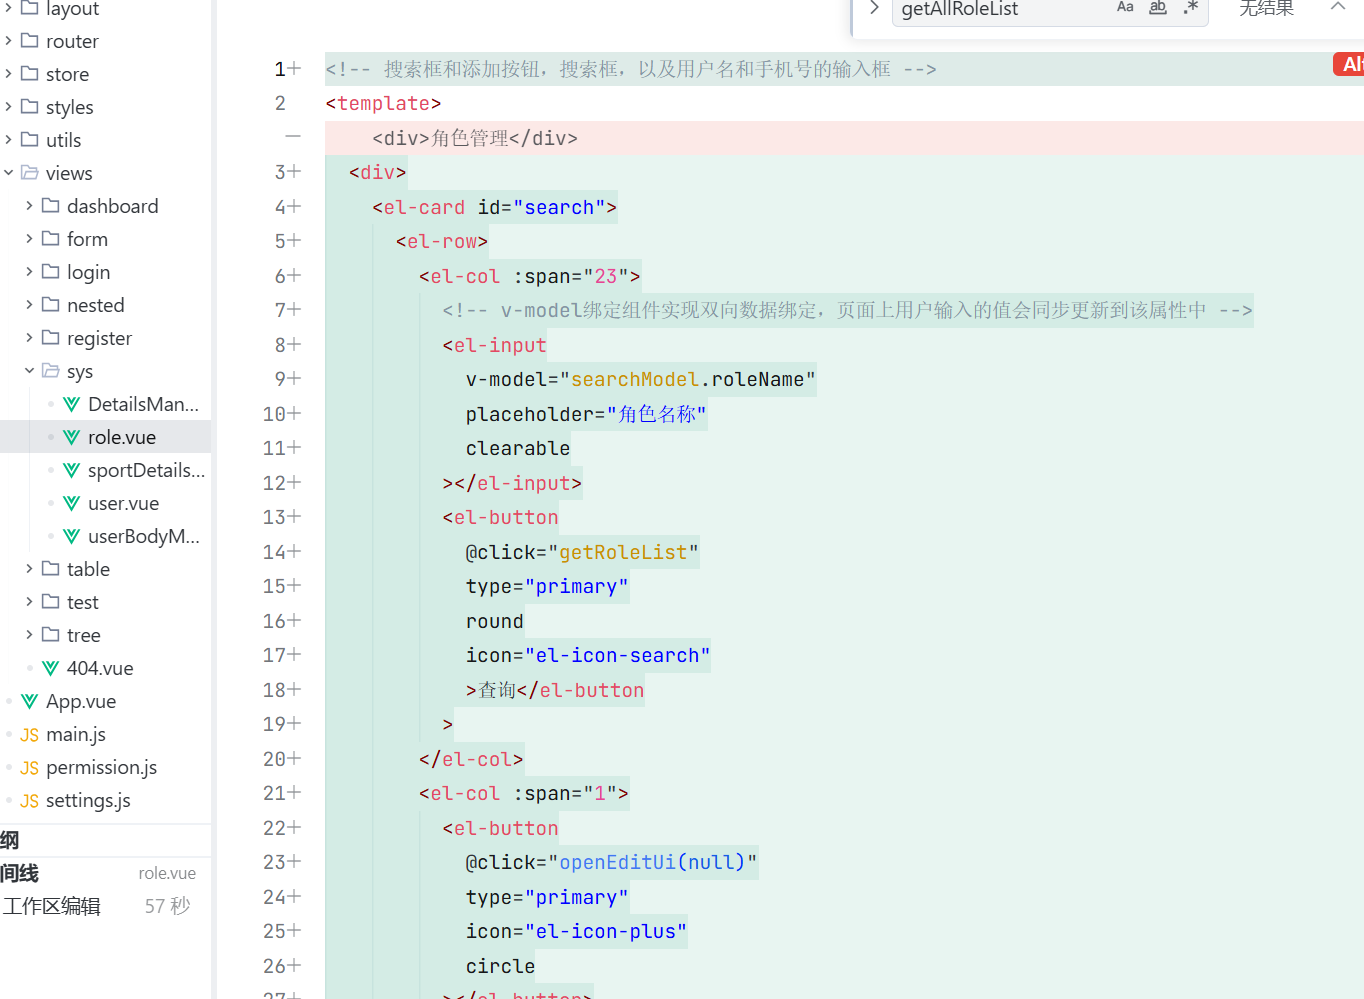
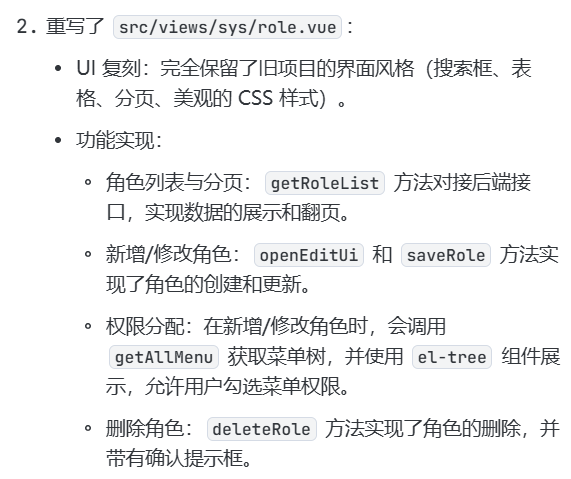
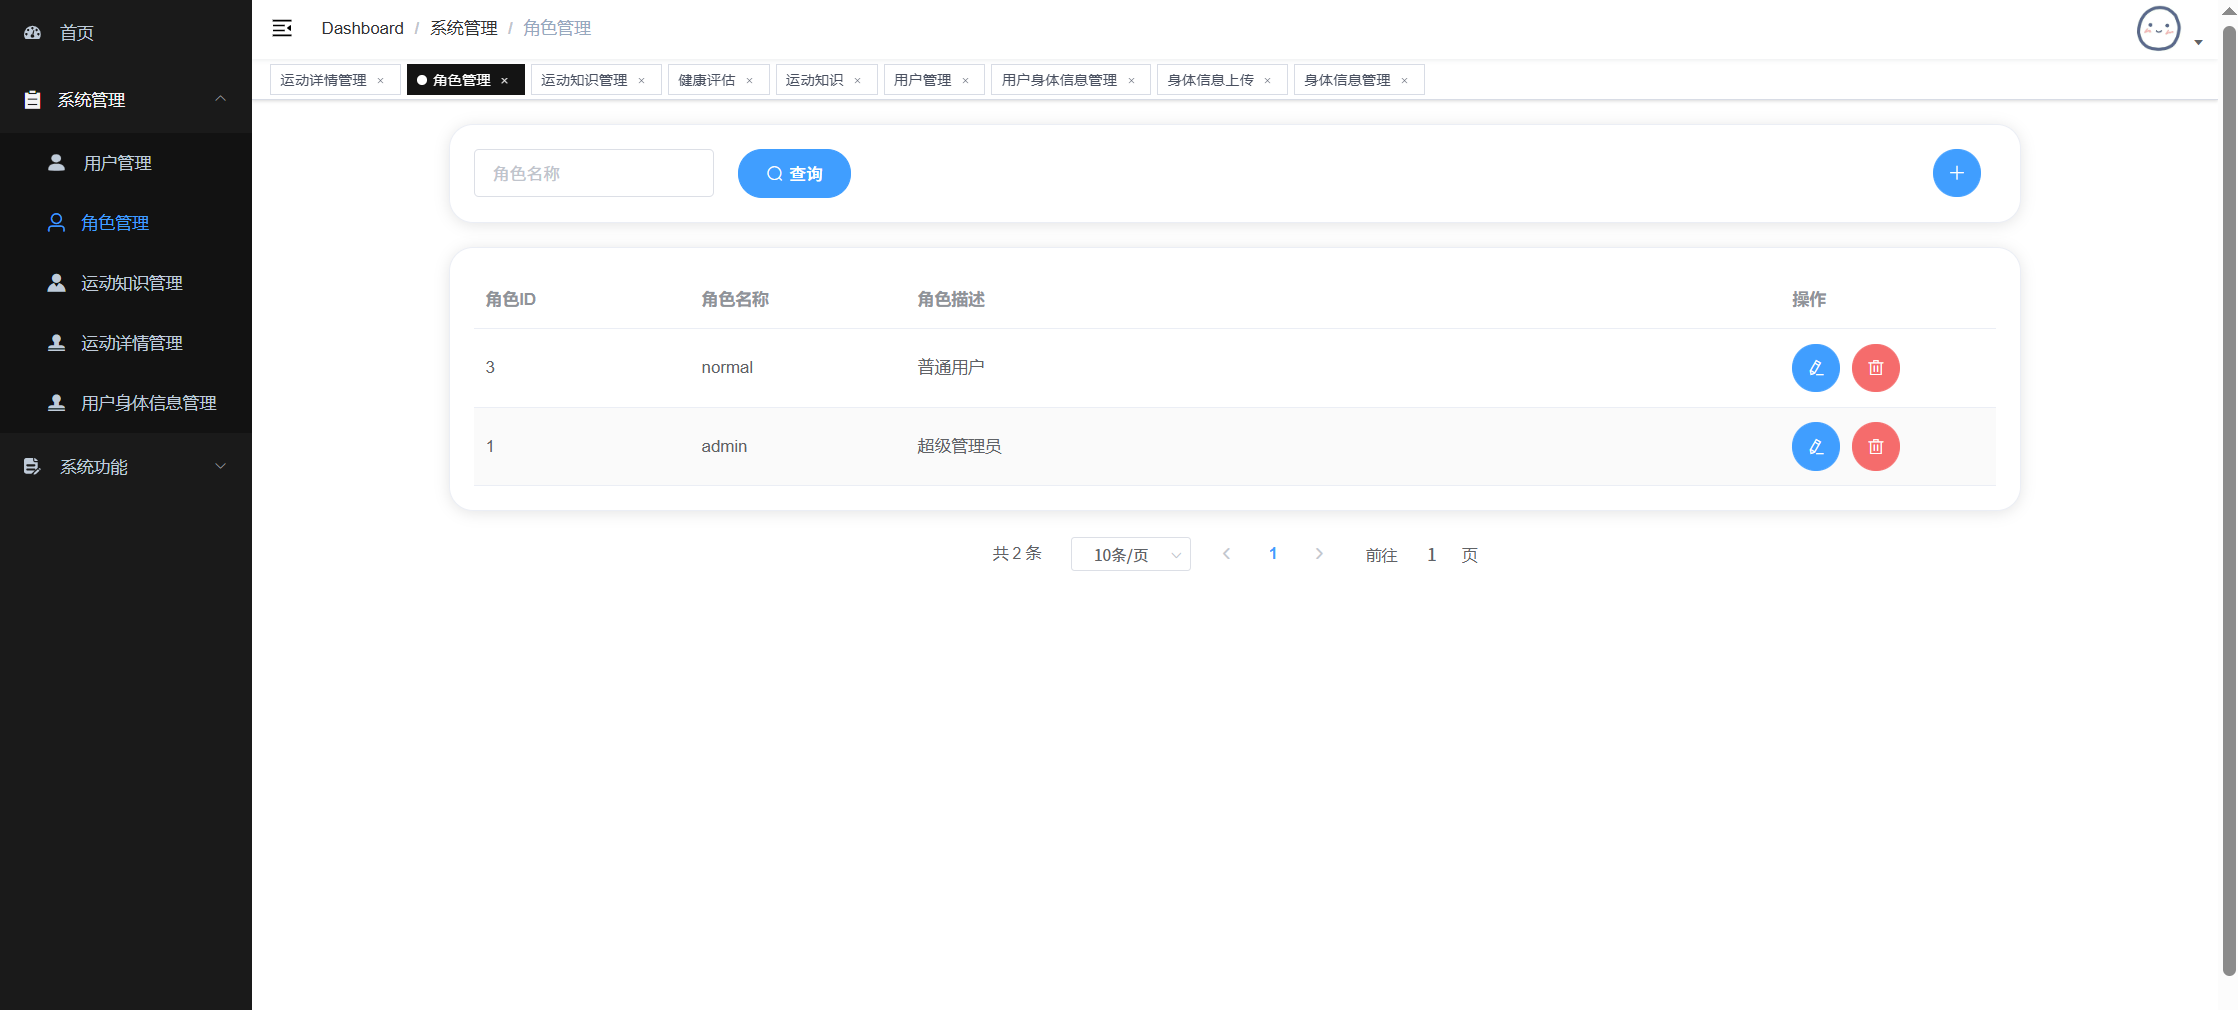
角色管理

角色列表分页 ( GET /role/list ) -> 给"角色管理"页面用 。
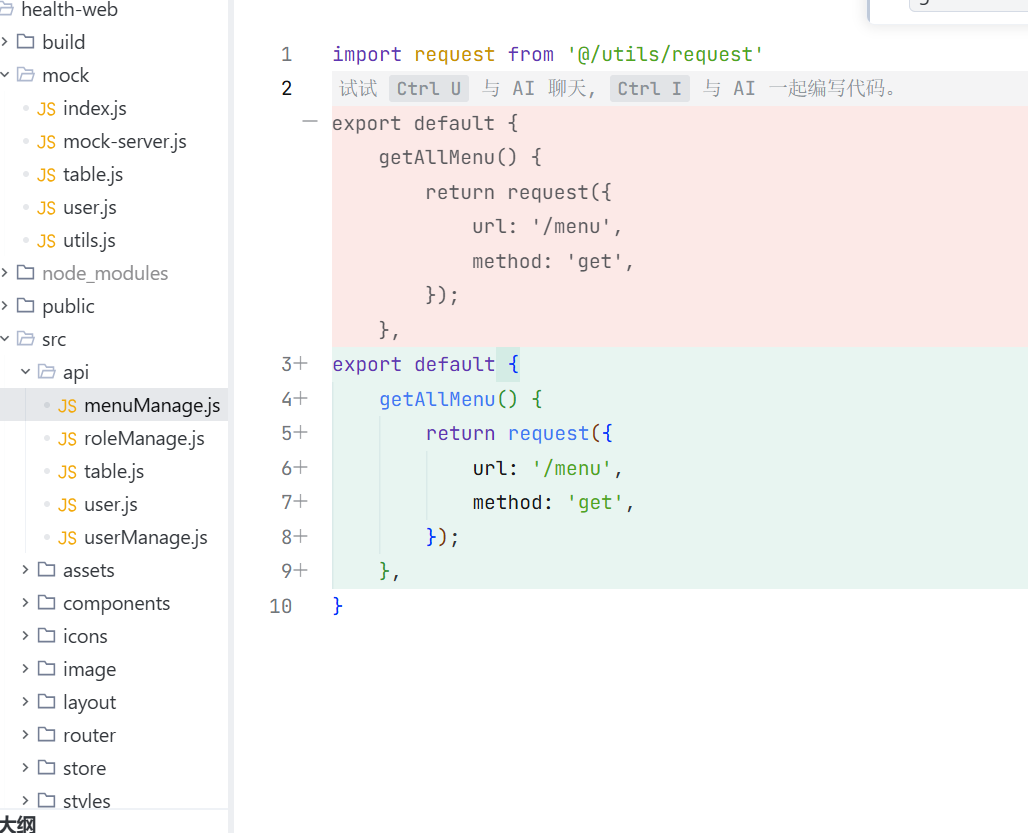
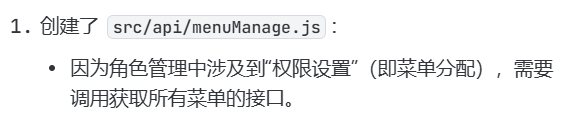
完成页面role.vue menuManage.js
完成
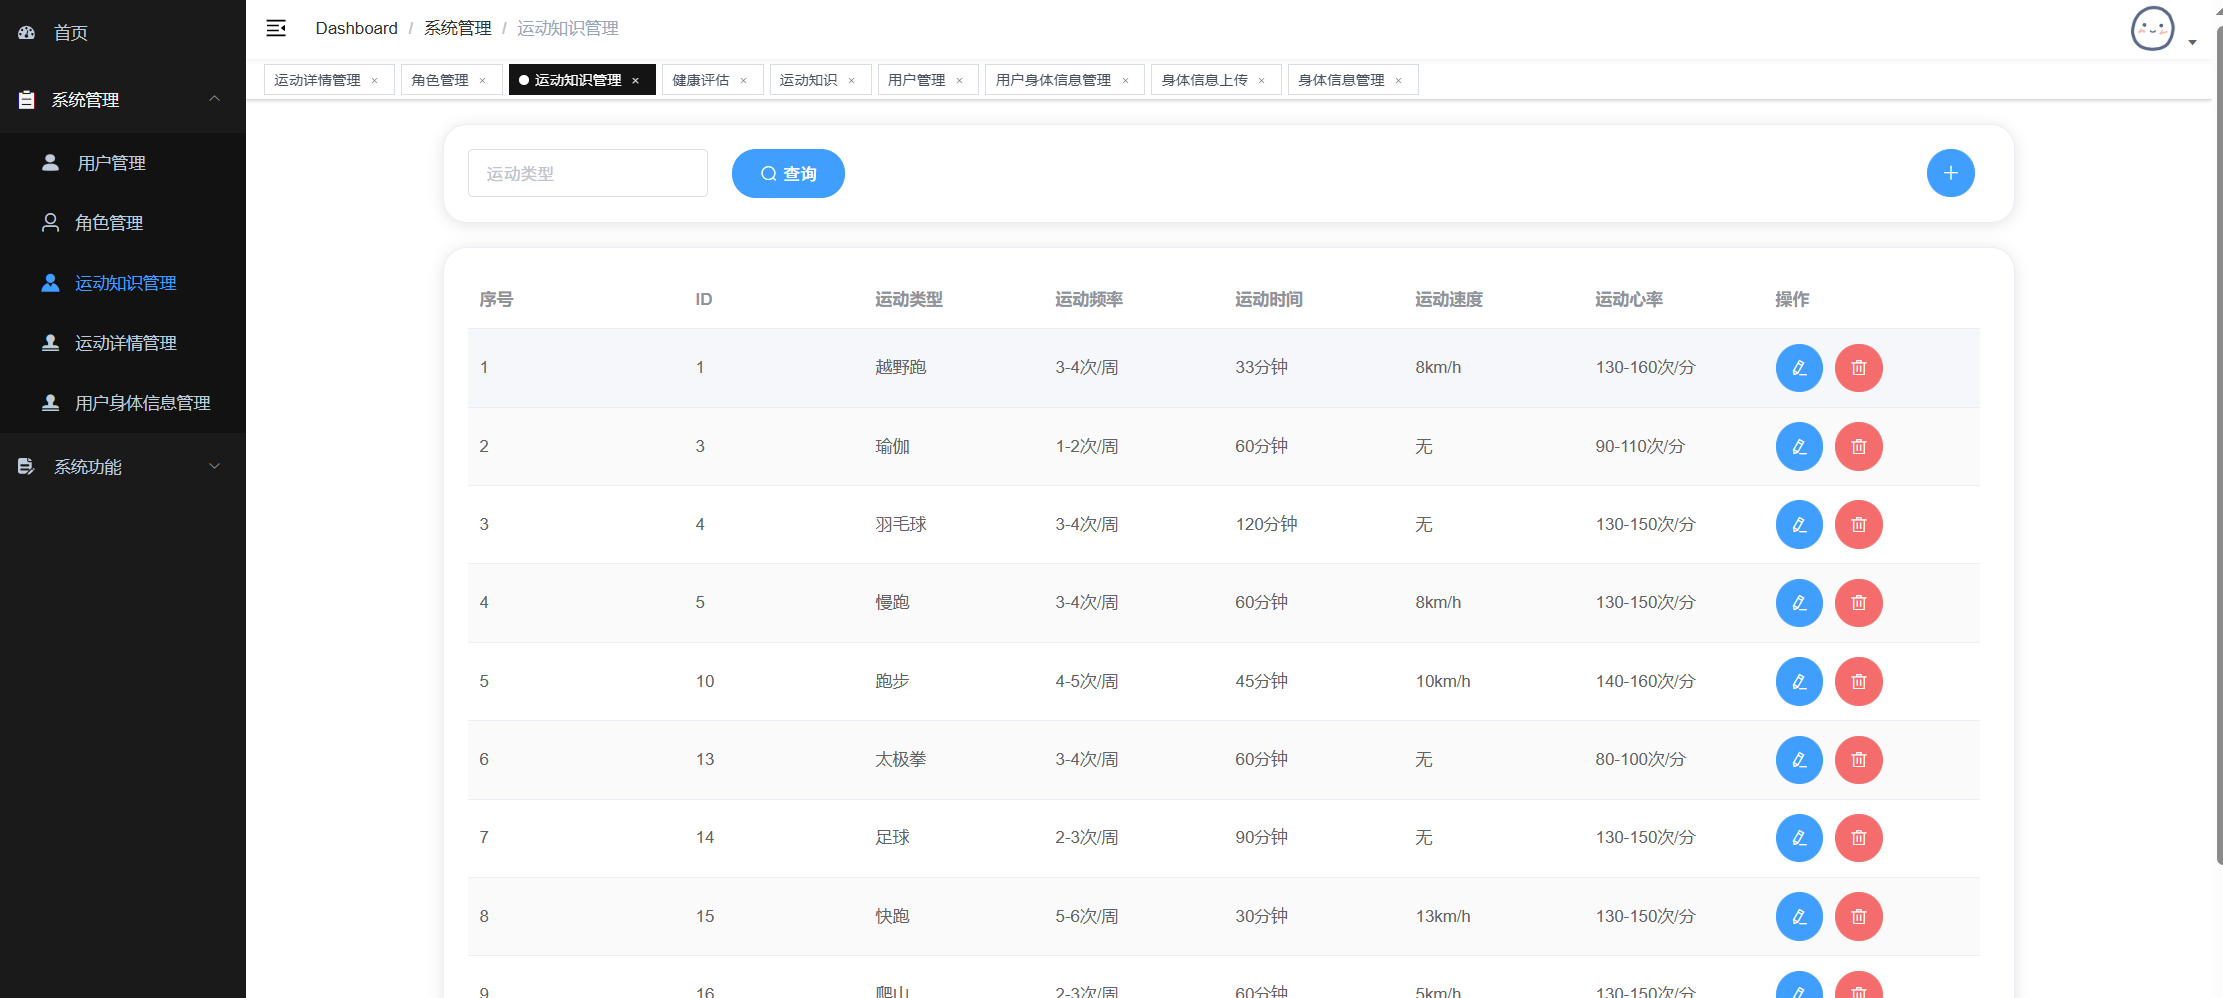
运动知识管理
去后端先完成接口
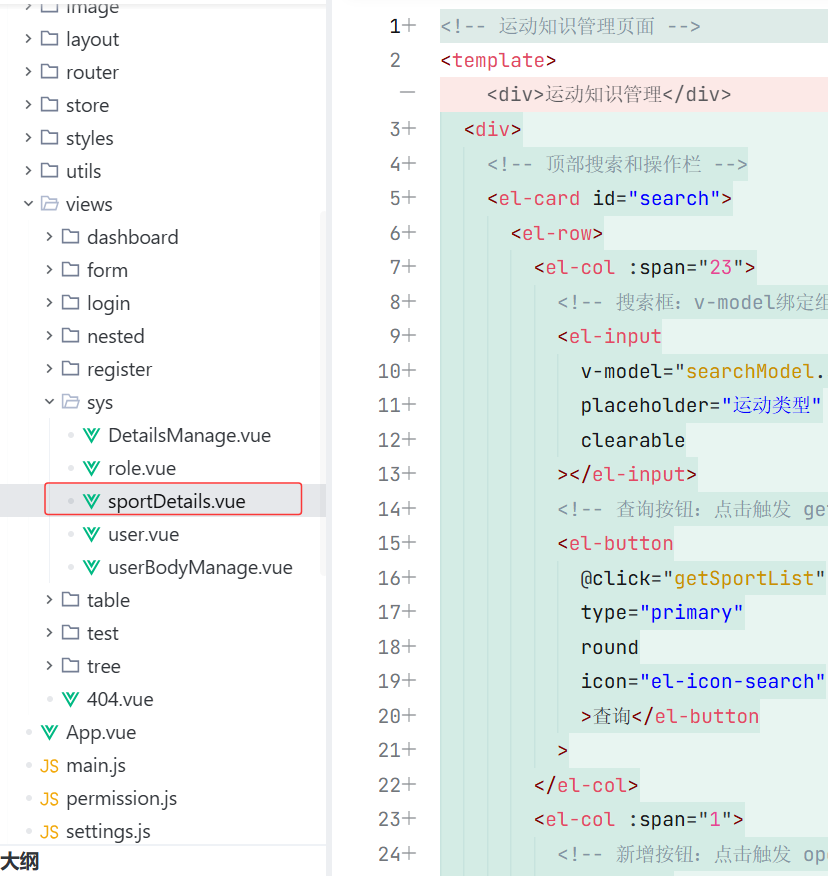
完成
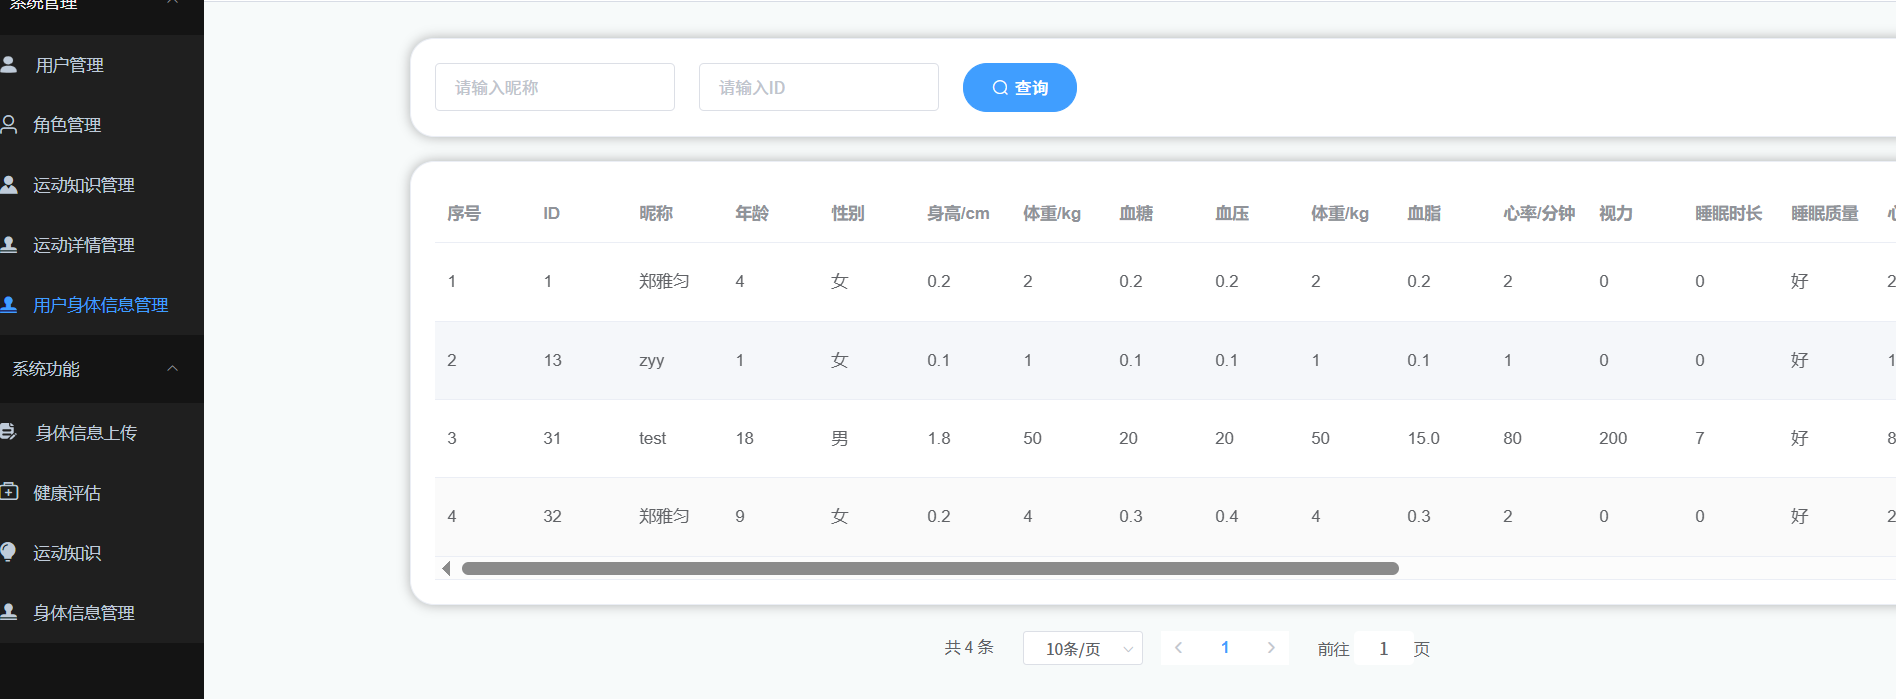
运动详情管理 用户身体信息管理
先去后端完成接口
前端完成页面实现

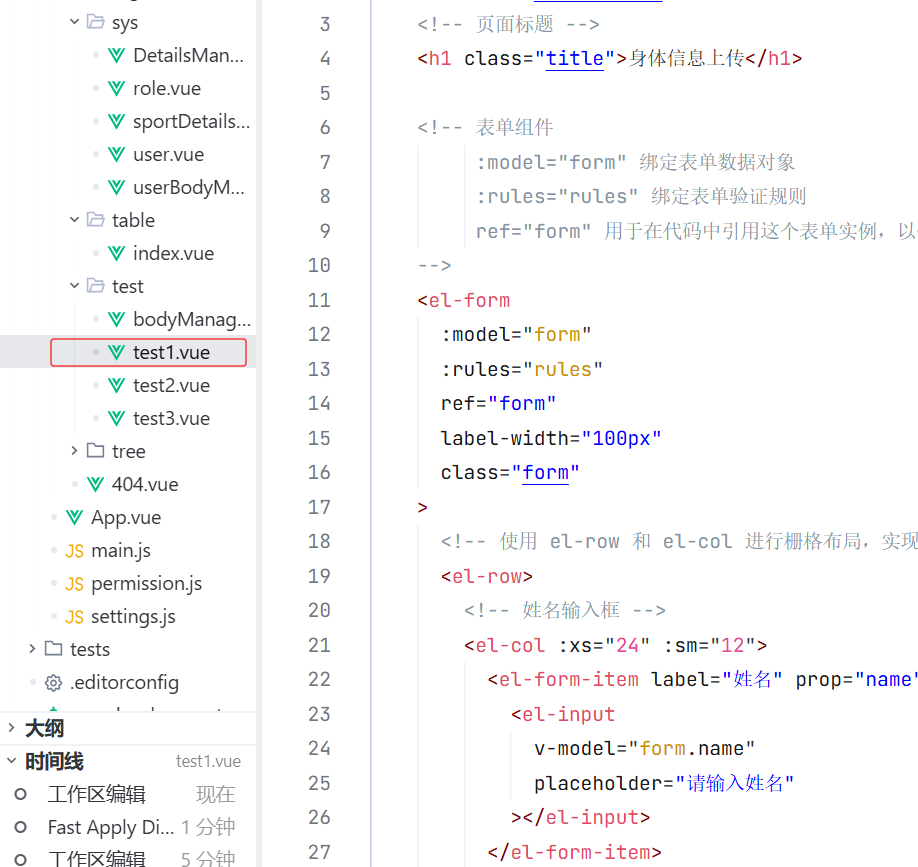
身体信息上传
后端完成接口
健康评估
后端完成接口
前端
运动知识
身体信息管理
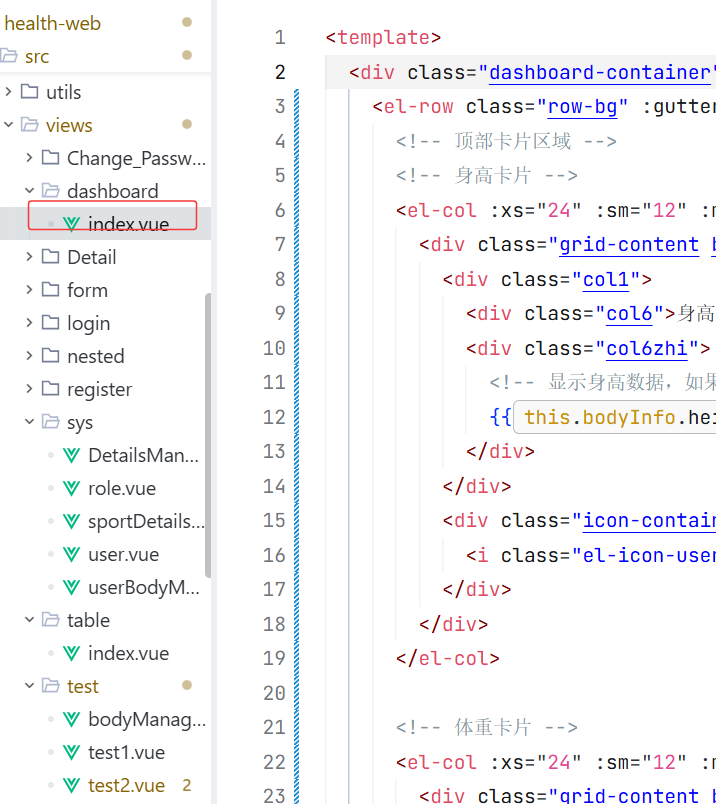
首页
修改密码
点击主页跳转首页