Spring Bean的生命周期
1.实例化对象:通过反射生成对象。
首先准备一个实体类。
java
package com.example.springdemo.pojo;

import org.springframework.beans.BeansException;
import org.springframework.beans.factory.DisposableBean;
import org.springframework.beans.factory.InitializingBean;
import org.springframework.context.ApplicationContext;
import org.springframework.context.ApplicationContextAware;
import org.springframework.context.EnvironmentAware;
import org.springframework.core.env.Environment;

public class Person implements InitializingBean, DisposableBean , ApplicationContextAware, EnvironmentAware {

    private String name;

    private  Integer age;

    private ApplicationContext applicationContext;

    private Environment environment;


    public Person() {
        System.out.println("new instance method");
    }

    public String getName() {
        return name;
    }

    public void setName(String name) {
        this.name = name;
    }

    public Integer getAge() {
        return age;
    }

    public void setAge(Integer age) {
        this.age = age;
    }

    @Override
    public void afterPropertiesSet() throws Exception {
        System.out.println("bean init method...");
    }

    @Override
    public void destroy() throws Exception {
        System.out.println("bean destroy method...");
    }

    @Override
    public void setApplicationContext(ApplicationContext applicationContext) throws BeansException {
        this.applicationContext = applicationContext;
        System.out.println("bean ApplicationContextAware method");
    }

    @Override
    public void setEnvironment(Environment environment) {
        this.environment = environment;
        System.out.println("bean EnvironmentAware method");
    }
}
在准备一个xml文件,以xml文件的形式注册bean对象。
xml
<?xml version="1.0" encoding="UTF-8"?>
<beans xmlns="http://www.springframework.org/schema/beans"
       xmlns:xsi="http://www.w3.org/2001/XMLSchema-instance"
       xsi:schemaLocation="http://www.springframework.org/schema/beans http://www.springframework.org/schema/beans/spring-beans.xsd">


    <bean id="person" class="com.example.springdemo.pojo.Person" scope="singleton">
    </bean>
    <bean id="myBeanPostProcessor" class="com.example.springdemo.postporcesser.MyBeanPostProcessor" scope="singleton">
    </bean>


</beans>
实例化bean的过程涉及到容器的刷新流程,链路比较长,这里不做深究,只带着找到在哪里实现的。
给出一个大致的链路吧 getBean doGetBean createBean doCreateBean newInstance instantiateBean
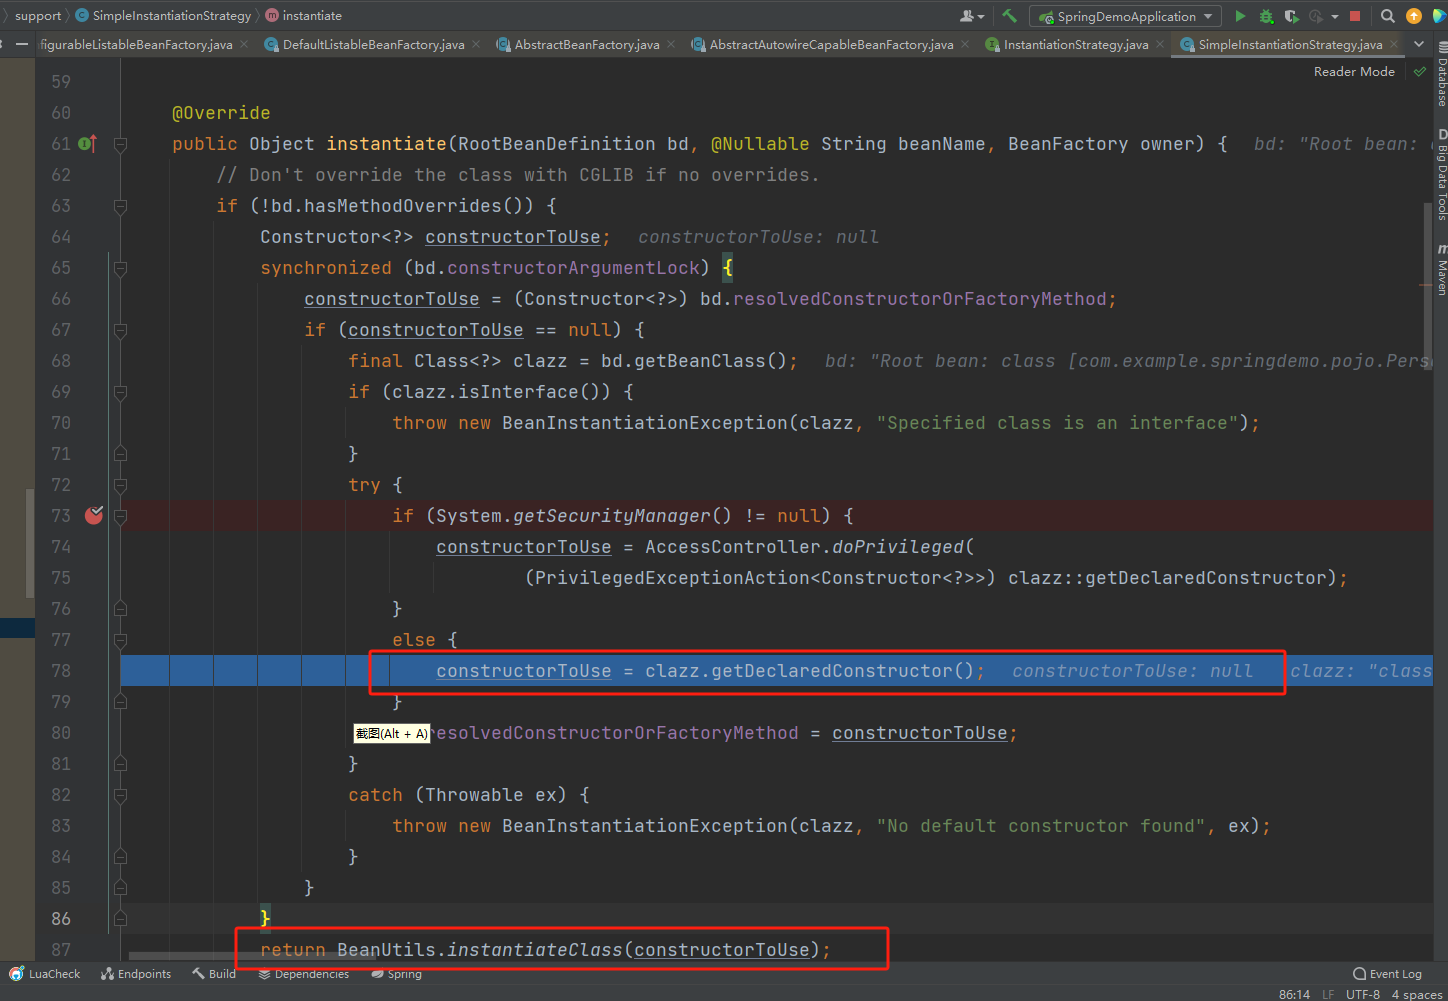
看到上图可知,实例化对象其实最终是通过反射来实现的。
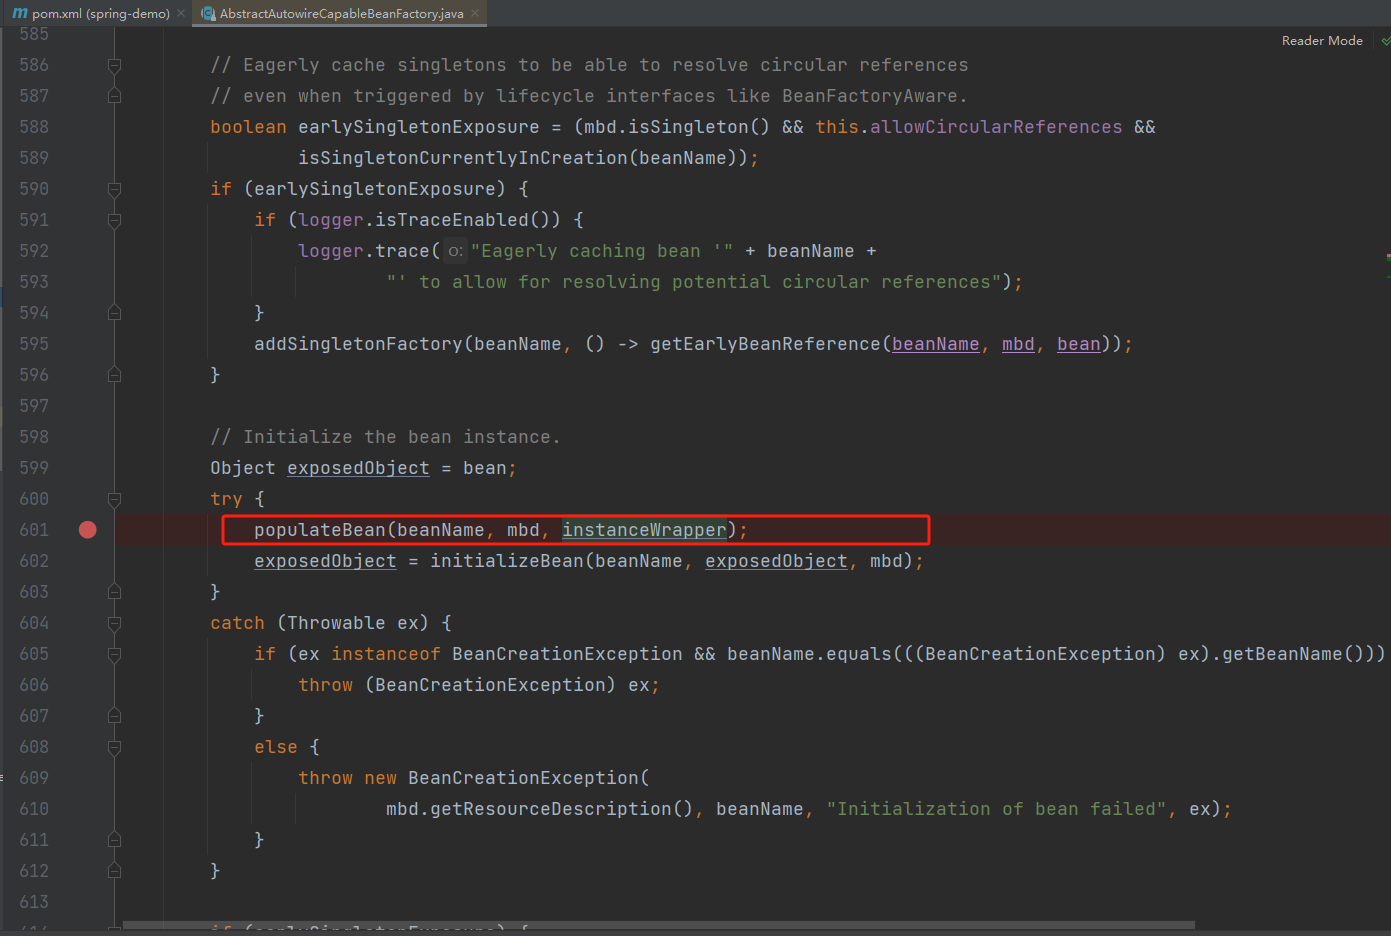
2.填充bean的属性,populateBean(循环依赖的问题可在此处扩展)。
3.调用Aware接口。invokeAwareMethods。
4.执行BeanPostProcessors 的 postProcessBeforeInitialization
5.执行bean的init method方法
6.执行BeanPostProcessors 的 postProcessAfterInitialization
java
package org.springframework.beans.factory.support;
//AbstractAutowireCapableBeanFactory类
protected Object initializeBean(String beanName, Object bean, @Nullable RootBeanDefinition mbd) {
		if (System.getSecurityManager() != null) {
			AccessController.doPrivileged((PrivilegedAction<Object>) () -> {
				invokeAwareMethods(beanName, bean);
				return null;
			}, getAccessControlContext());
		}
		else {
			invokeAwareMethods(beanName, bean);
		}

		Object wrappedBean = bean;
		if (mbd == null || !mbd.isSynthetic()) {
			//执行BeanPostProcessors 的 postProcessBeforeInitialization
			wrappedBean = applyBeanPostProcessorsBeforeInitialization(wrappedBean, beanName);
		}

		try {
		//执行bean的init method方法
			invokeInitMethods(beanName, wrappedBean, mbd);
		}
		catch (Throwable ex) {
			throw new BeanCreationException(
					(mbd != null ? mbd.getResourceDescription() : null),
					beanName, "Invocation of init method failed", ex);
		}
		if (mbd == null || !mbd.isSynthetic()) {
			//执行BeanPostProcessors 的 postProcessAfterInitialization
			wrappedBean = applyBeanPostProcessorsAfterInitialization(wrappedBean, beanName);
		}

		return wrappedBean;
	}
	//其实就是判断bean对象是否实现了Aware接口 来设置BeanName BeanClassLoader BeanFactory
	private void invokeAwareMethods(String beanName, Object bean) {
		if (bean instanceof Aware) {
			if (bean instanceof BeanNameAware) {
				((BeanNameAware) bean).setBeanName(beanName);
			}
			if (bean instanceof BeanClassLoaderAware) {
				ClassLoader bcl = getBeanClassLoader();
				if (bcl != null) {
					((BeanClassLoaderAware) bean).setBeanClassLoader(bcl);
				}
			}
			if (bean instanceof BeanFactoryAware) {
				((BeanFactoryAware) bean).setBeanFactory(AbstractAutowireCapableBeanFactory.this);
			}
		}
	}
7.获取到完整的对象。
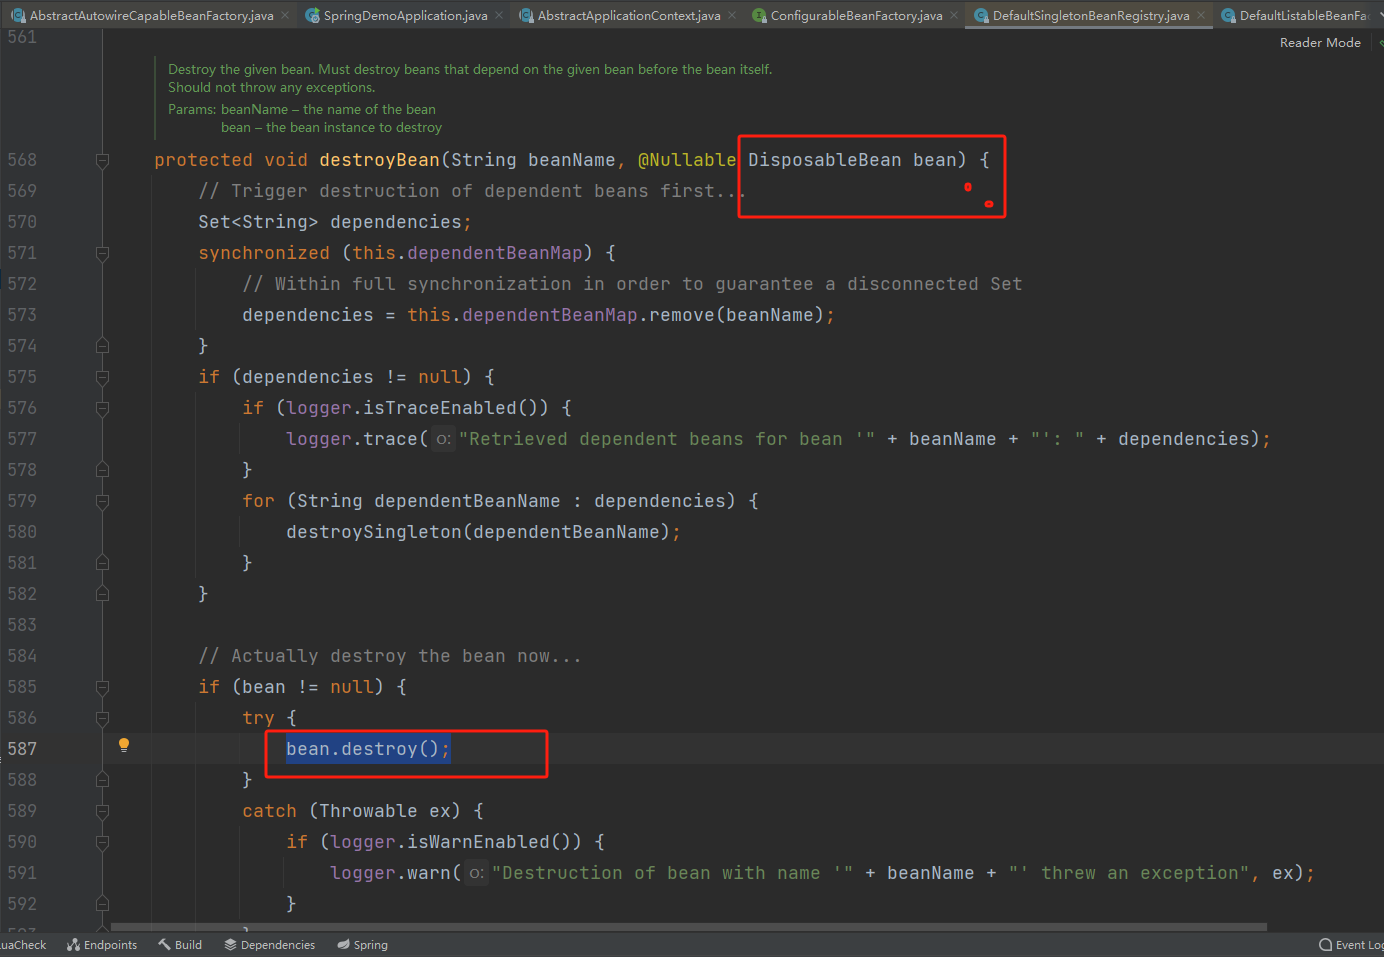
8.执行Disposable接口的destory方法。
可以看到 如果我们实现了DisposableBean接口后会执行DisposableBean.destroy()
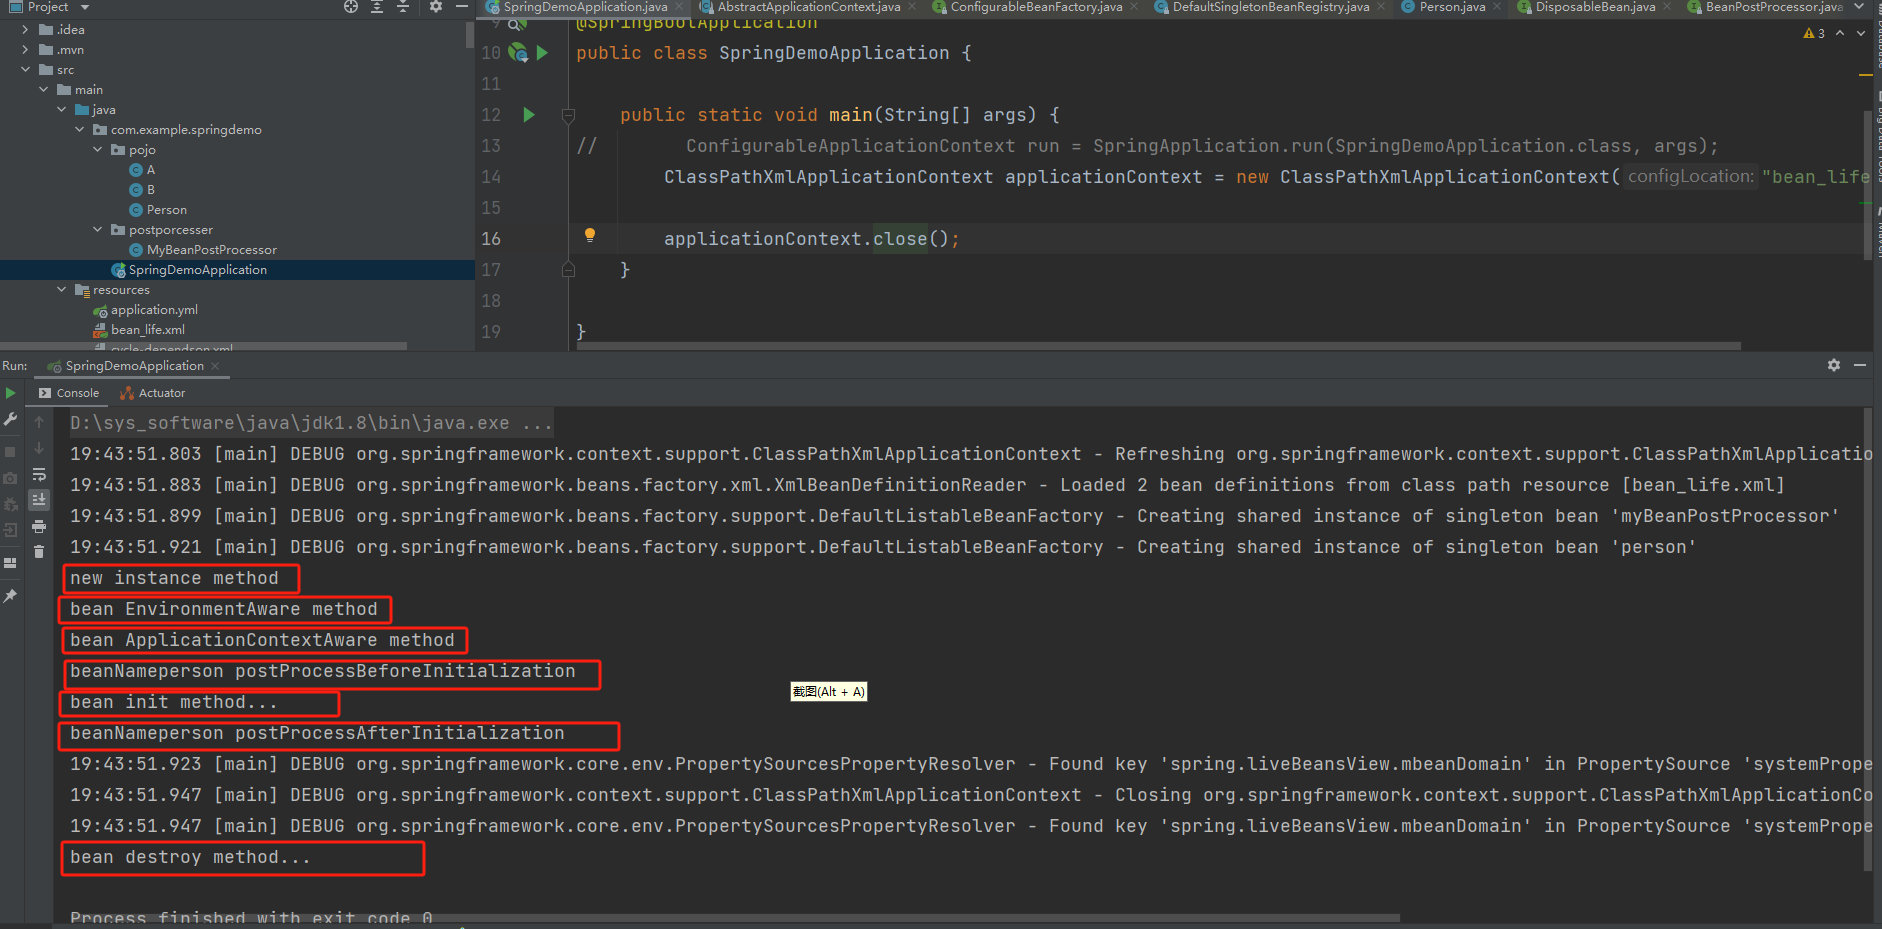
最后我们依据person类验证下实现流程
执行BeanPostProcessors 的 postProcessBeforeInitialization
以ApplicationContextAwareProcessor举例。
可以看到通过ApplicationContextAwareProcessor我们可以装配Environment、ApplicationContext,等系统对象。
java
@Override
	@Nullable
	public Object postProcessBeforeInitialization(Object bean, String beanName) throws BeansException {
		if (!(bean instanceof EnvironmentAware || bean instanceof EmbeddedValueResolverAware ||
				bean instanceof ResourceLoaderAware || bean instanceof ApplicationEventPublisherAware ||
				bean instanceof MessageSourceAware || bean instanceof ApplicationContextAware ||
				bean instanceof ApplicationStartupAware)) {
			return bean;
		}

		AccessControlContext acc = null;

		if (System.getSecurityManager() != null) {
			acc = this.applicationContext.getBeanFactory().getAccessControlContext();
		}

		if (acc != null) {
			AccessController.doPrivileged((PrivilegedAction<Object>) () -> {
				invokeAwareInterfaces(bean);
				return null;
			}, acc);
		}
		else {
			invokeAwareInterfaces(bean);
		}

		return bean;
	}
	private void invokeAwareInterfaces(Object bean) {
		if (bean instanceof EnvironmentAware) {
			((EnvironmentAware) bean).setEnvironment(this.applicationContext.getEnvironment());
		}
		if (bean instanceof EmbeddedValueResolverAware) {
			((EmbeddedValueResolverAware) bean).setEmbeddedValueResolver(this.embeddedValueResolver);
		}
		if (bean instanceof ResourceLoaderAware) {
			((ResourceLoaderAware) bean).setResourceLoader(this.applicationContext);
		}
		if (bean instanceof ApplicationEventPublisherAware) {
			((ApplicationEventPublisherAware) bean).setApplicationEventPublisher(this.applicationContext);
		}
		if (bean instanceof MessageSourceAware) {
			((MessageSourceAware) bean).setMessageSource(this.applicationContext);
		}
		if (bean instanceof ApplicationStartupAware) {
			((ApplicationStartupAware) bean).setApplicationStartup(this.applicationContext.getApplicationStartup());
		}
		if (bean instanceof ApplicationContextAware) {
			((ApplicationContextAware) bean).setApplicationContext(this.applicationContext);
		}
	}