大家好,我是加洛斯,是一名全栈工程师👨💻,这里是我的知识笔记与分享,旨在把复杂的东西讲明白。如果发现有误🔍,万分欢迎你帮我指出来!废话不多说,正文开始 👇
一、初识SpringSecurity
1.1 什么是SpringSecurity
SpringSecurity是一个Java框架,用于保护应用程序的安全性。它提供了一套全面的安全解决方案,包括身份验证、授权、防止攻击等功能。
SpringSecurity基于过滤器链 的概念,可以轻松地集成到任何基于Spring的应用程序中。它支持多种身份验证选项和授权策略,开发人员可以根据需要选择适合的方式。
1.2 SpringSecurity初体验
首先我们新建一个Spring Boot项目,选择依赖时,只需要勾选 :Spring Web 和 Spring Security。
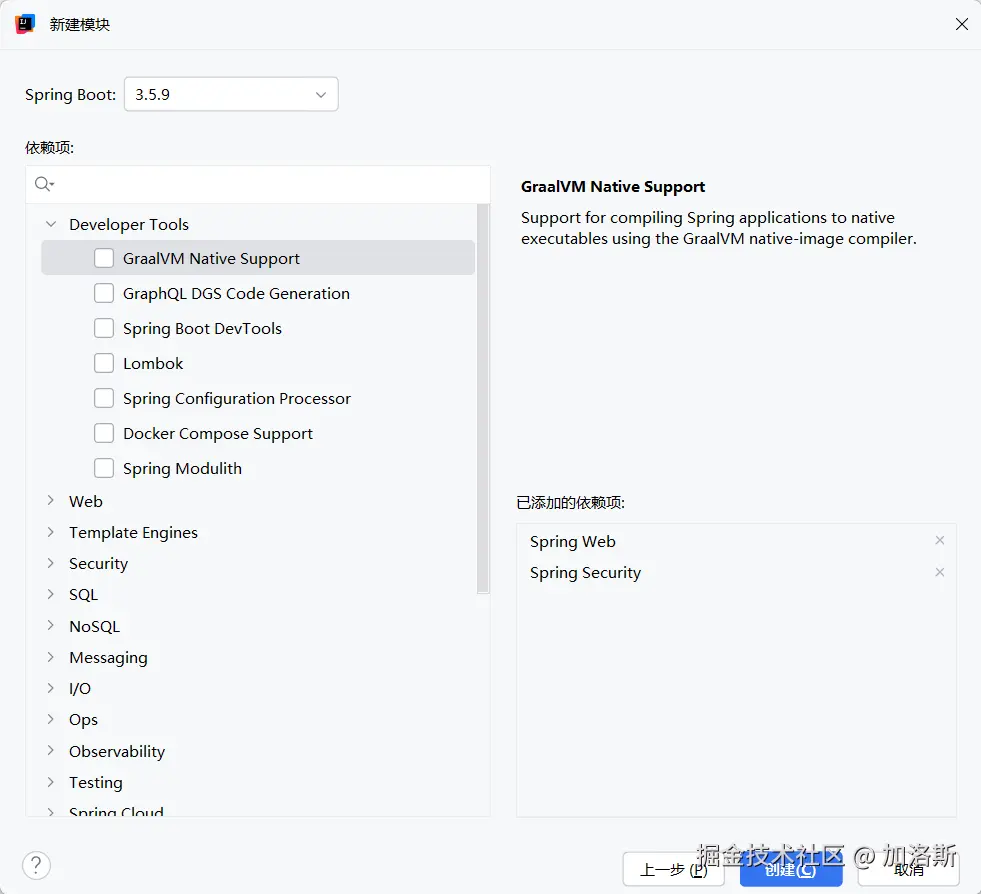
勾选后,我们可以在pom文件中看到我们的SpringSecurity依赖

接下来我们直接写一个controller
java
@RestController
public class UserController {
@RequestMapping("/user")
public String getUser() {
return "用户信息";
}
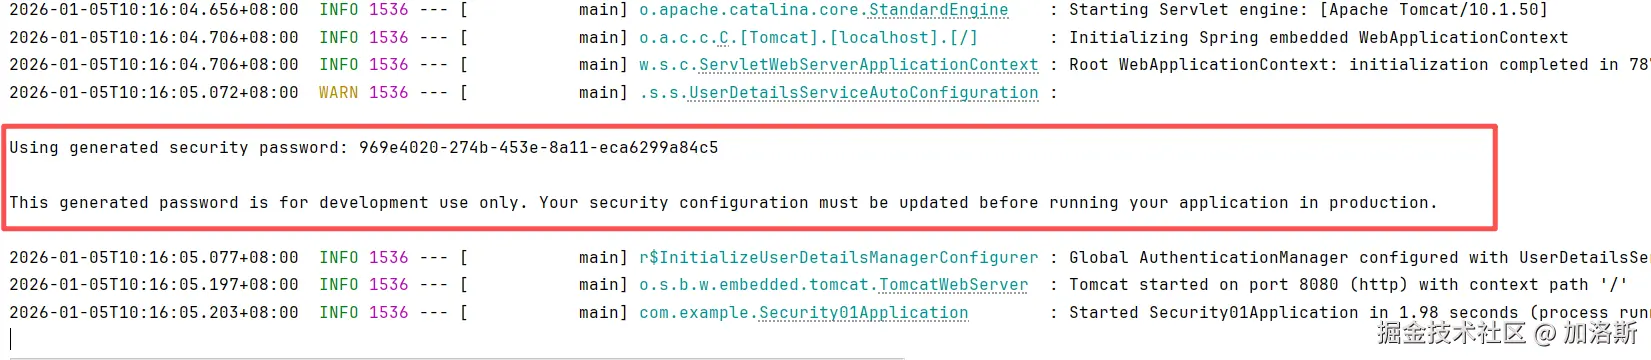
}然后启动项目,在启动日志那块,我们可以看到生成了一串莫名其妙的东西,这串东西就是SpringSecurity自动为我们生成的初始密码。
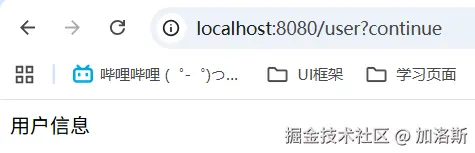
按理来说我们访问http://localhost:8080/user 应该能看到我们controller返回的结果,但是并没有,而是会看到一个登录页面 !这就是Spring Security入门的第一步:它默认保护了你的所有请求。
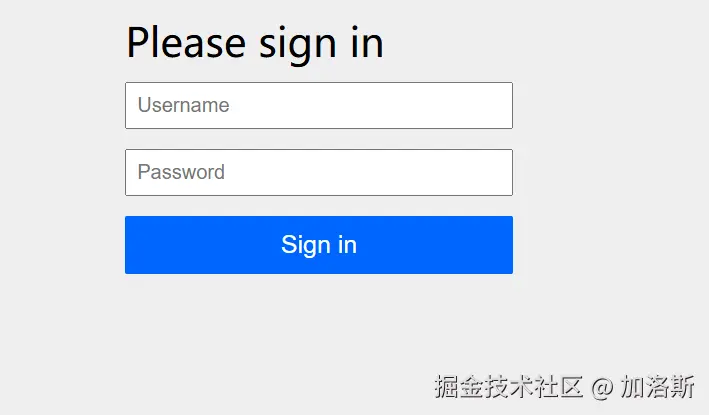 系统为你的应用**自动生成**了一个默认用户:**用户名**:`user`,**密码**:在项目启动的控制台日志中,登录后你就能看到我们所返回的信息了! 至此,一个最简单也最直观的Spring Security入门案例已经为大家展示完毕了,它能体验Spring Security最基础的 "认证" 流程。在没有任何配置的情况下,它做了三件关键事:
自动行为 说明 1. 启用安全过滤 为所有请求挂上了安全"安检"流程。 2. 生成默认用户 创建了一个临时的、内存中的用户( user)。3. 弹出登录页 对于未认证的请求,自动重定向到内置登录页。
二、过滤器链
SpringSecurity的核心工作模式,本质上是一系列串联在Web请求前的过滤器(Filter)。每个请求都要经过这些安全检查,就像进地铁前要依次经过安检门、验票闸机一样

要彻底理解Spring Security的过滤器链,我们需要先纠正一个常见的错误观念,并抓住四个最核心的组件 。很多人认为"过滤器链"就是一长串 Filter 直接排好队,但这是不准确的。
我们观看上面的那张图片,真正嵌进 Servlet 容器的只有 1 个,那就是DelegatingFilterProxy,它把请求转给 Spring 管理的 FilterChainProxy,再由后者挑选本次请求应该走哪一条SecurityFilterChain
SpringSecurity有15个默认内置过滤器,其在接收请求后执行顺序如下:
| 顺序 | 过滤器 (Filter) | 核心职责 | 是否关键 | 6.x常见配置/变化 | |
|---|---|---|---|---|---|
| 1 | ChannelProcessingFilter |
强制请求使用HTTPS等安全通道。 | 可选 | 通过 .requiresChannel() 配置。 |
|
| 2 | WebAsyncManagerIntegrationFilter |
集成Spring异步请求(如@Async)的安全上下文。 |
低 | 通常无需配置。 | |
| 3 | SecurityContextPersistenceFilter |
关键 :在每个请求的开始和结束时 ,负责从存储(如Session、JWT令牌)中恢复或清除用户认证信息 (SecurityContext),并将其绑定到当前线程(SecurityContextHolder)。 |
是 | 前后端分离项目中,可配合无Session策略自定义存储方式。 | |
| 4 | HeaderWriterFilter |
向响应写入安全相关的HTTP头,如X-Content-Type-Options。 |
可选 | 可通过 .headers() 配置自定义。 |
|
| 5 | CsrfFilter |
防护跨站请求伪造攻击,对非幂等的POST、PUT等请求校验CSRF令牌。 |
可选 | 前后端分离API项目常通过 .csrf().disable() 禁用。 |
|
| 6 | LogoutFilter |
处理注销请求(默认/logout),清理认证信息。 |
是 | 可通过 .logout() 自定义注销URL、成功处理器等。 |
|
| 7 | UsernamePasswordAuthenticationFilter |
关键 :处理表单登录 (默认/login POST请求),是核心的认证入口之一。 |
是 | 可被自定义登录过滤器(如手机验证码登录)替换或扩展。 | |
| 8 | DefaultLoginPageGeneratingFilter |
自动生成默认登录页。 | 可选 | 生产环境通常通过配置自定义登录页来间接禁用此过滤器。 | |
| 9 | BasicAuthenticationFilter |
处理HTTP Basic认证(请求头带Authorization: Basic ...)。 |
可选 | 可通过 .httpBasic() 启用或自定义。 |
|
| 10 | RequestCacheAwareFilter |
用户登录成功后,恢复因未登录而被缓存的原始请求("回到刚才想看的页面")。 | 可选 | 前后端分离项目或无状态API中作用有限。 | |
| 11 | SecurityContextHolderAwareRequestFilter |
对HttpServletRequest进行包装,增加安全相关方法(如isUserInRole)。 |
低 | 通常无需配置。 | |
| 12 | AnonymousAuthenticationFilter |
关键 :如果请求至此仍未认证,则自动注入一个"匿名用户"身份,保证SecurityContext非空。 |
是 | 可自定义匿名用户的权限细节。 | |
| 13 | SessionManagementFilter |
管理用户会话,如防止会话固定攻击、控制并发登录数量。 | 可选 | 通过 .sessionManagement() 配置会话控制策略。 |
|
| 14 | ExceptionTranslationFilter |
关键 :捕获下游过滤器(主要是AuthorizationFilter)抛出的认证和授权异常,并转化为对应的HTTP响应(如重定向到登录页、返回401/403)。 |
是 | 是"认证失败跳登录页"和"权限不足返回403"的幕后导演。 | |
| 15 | AuthorizationFilter |
最核心 :执行URL级别 的授权检查。它根据HttpSecurity中.authorizeHttpRequests()配置的规则,决定当前用户是否有权访问当前请求的URL。 |
是 | Spring Security 6.x中,取代了旧版的FilterSecurityInterceptor。 绝大多数URL权限规则在此生效。 |
三、登录认证
我们上面的登录都是基于Spring Security自带的用户与密码登录的,那实际开发中肯定是要从数据库中获取用户登录的,接下来我们讲一下如何让登录请求发送到我们定义的代码当中。
3.1 新增依赖
xml
<dependencies>
    <!-- Spring Security -->
    <dependency>
        <groupId>org.springframework.boot</groupId>
        <artifactId>spring-boot-starter-security</artifactId>
    </dependency>
    <!-- Spring Web -->
    <dependency>
        <groupId>org.springframework.boot</groupId>
        <artifactId>spring-boot-starter-web</artifactId>
    </dependency>
    <!-- MySQL -->
    <dependency>
        <groupId>com.mysql</groupId>
        <artifactId>mysql-connector-j</artifactId>
        <scope>runtime</scope>
    </dependency>
    <!-- MyBatis -->
    <dependency>
        <groupId>org.mybatis.spring.boot</groupId>
        <artifactId>mybatis-spring-boot-starter</artifactId>
        <version>3.0.3</version>
    </dependency>
    <!-- Lombok -->
    <dependency>
        <groupId>org.projectlombok</groupId>
        <artifactId>lombok</artifactId>
        <optional>true</optional>
    </dependency>

    <dependency>
        <groupId>org.springframework.boot</groupId>
        <artifactId>spring-boot-starter-test</artifactId>
        <scope>test</scope>
    </dependency>
    <dependency>
        <groupId>org.springframework.security</groupId>
        <artifactId>spring-security-test</artifactId>
        <scope>test</scope>
    </dependency>
    <dependency>
        <groupId>org.projectlombok</groupId>
        <artifactId>lombok</artifactId>
        <scope>provided</scope>
    </dependency>
</dependencies>
3.2 新增配置文件yml
yml
server:
  port: 8080
  servlet:
    context-path: /

spring:
  application:
    name: dlyk-server
  datasource:
    url: jdbc:mysql://localhost:3306/learn?useUnicode=true&characterEncoding=utf-8&zeroDateTimeBehavior=convertToNull&transformedBitIsBoolean=true&allowMultiQueries=true&useSSL=false&allowPublicKeyRetrieval=true&serverTimezone=Asia/Shanghai
    username: root
    password: root
    driver-class-name: com.mysql.cj.jdbc.Driver
    hikari:
      maximum-pool-size: 30
      minimum-idle: 30
      connection-timeout: 30000
      idle-timeout: 0
      max-lifetime: 18000000
  data:
    redis:
      host: 115.190.212.212
      port: 6379
      database: 1
      timeout: 2000ms
      lettuce:
        pool:
          max-active: 8
          max-idle: 8
          min-idle: 0
          max-wait: -1ms
mybatis:
  mapper-locations: classpath:mapper/*.xml
  type-aliases-package: com.example.entity
3.3 导入数据库
sql
create table user
(
    id                     int auto_increment comment '主键,自动增长,用户ID' primary key,
    login_act              varchar(32) null comment '登录账号',
    login_pwd              varchar(64) null comment '登录密码',
    name                   varchar(32) null comment '用户姓名',
    account_no_expired     int         null comment '账户是否没有过期,0已过期 1正常',
    credentials_no_expired int         null comment '密码是否没有过期,0已过期 1正常',
    account_no_locked      int         null comment '账号是否没有锁定,0已锁定 1正常',
    account_enabled        int         null comment '账号是否启用,0禁用 1启用'
)
    comment '用户表';
明文密码是:123456
sql
INSERT INTO learn.user (id, login_act, login_pwd, name, account_no_expired, credentials_no_expired, account_no_locked, account_enabled) VALUES (1, 'zhangsan', '$2a$10$6RI/P5q12twVyzfwxN1Un.Hc0GOXFmdfY4zUwwt8.kpjwG5.ftUS2', '张三', 1, 1, 1, 1);3.4 导入entity、service、mapper
实体类LoginUser,这个没什么好说的,与数据库保持一致就行
java
@Data
public class LoginUser {
    // 主键
    private Integer id;
    // 登录账号
    private String login_act;
    // 登录密码
    private String login_pwd;
    // 昵称
    private String name;
    // 账户是否没有过期,0已过期 1正常
    private Integer account_no_expired;
    // 密码是否没有过期,0已过期 1正常
    private Integer credentials_no_expired;
    // 账号是否没有锁定,0已锁定 1正常
    private Integer account_no_locked;
    // 账号是否启用,0禁用 1启用
    private Integer account_enabled;
}接下来是service,我们看到了它继承了UserDetailsService ,它是 Spring Security 框架里最核心的用户源 接口,根据用户名(或用户标识)把这个用户是谁、密码是什么、有哪些权限 查出来,交给Spring Security做后续认证与鉴权。
java
import org.springframework.security.core.userdetails.UserDetailsService;

public interface LoginUserService extends UserDetailsService {

}
这个接口只有一个方法: UserDetails loadUserByUsername(String username) throws UsernameNotFoundException;。他的返回值是UserDetails也是一个接口,包含:
String getPassword()String getUsername()Collection<? extends GrantedAuthority> getAuthorities()boolean isAccountNonExpired/NonLocked/CredentialsNonExpired/Enabled()
java
package com.example.service.impl;

import com.example.entity.LoginUser;
import com.example.mapper.LoginUserMapper;
import com.example.service.LoginUserService;
import jakarta.annotation.Resource;
import org.springframework.security.core.authority.AuthorityUtils;
import org.springframework.security.core.userdetails.User;
import org.springframework.security.core.userdetails.UserDetails;
import org.springframework.security.core.userdetails.UsernameNotFoundException;
import org.springframework.stereotype.Service;

@Service
public class LoginUserServiceImpl implements LoginUserService {

    @Resource
    private LoginUserMapper loginUserMapper;

    @Override
    public UserDetails loadUserByUsername(String username) throws UsernameNotFoundException {
        LoginUser user = loginUserMapper.getUserByUsername(username);
        if (user == null) {
            throw new UsernameNotFoundException("用户不存在");
        }
        return User.builder()
                .username(user.getLogin_act())
                .password(user.getLogin_pwd())
                .authorities(AuthorityUtils.NO_AUTHORITIES) // 权限为空
                .build();
    }
}注意我们返回的User是org.springframework.security.core.userdetails.User这个包下的,它实现了UserDetails 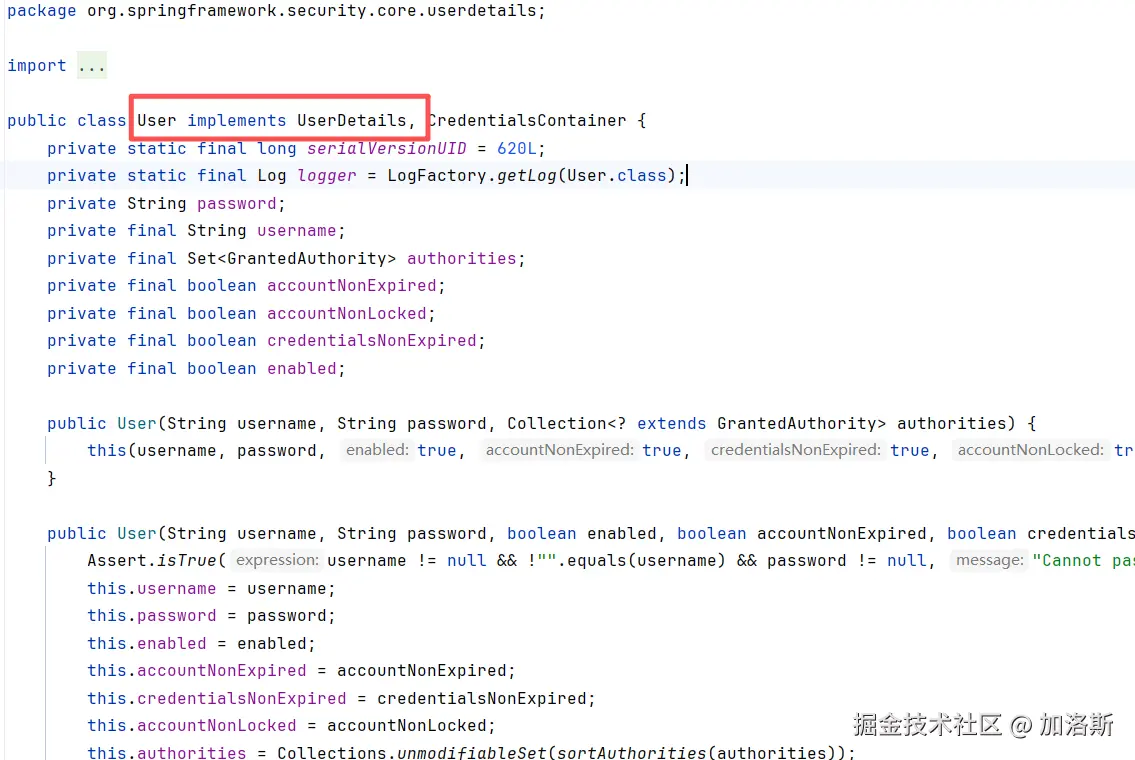
Spring Security拿到UserDetails后,会把前端传来的密码与它做比对,比对通过就登录成功,并把authorities写入Authentication,供后续鉴权使用。
配置类什么都不用做,Spring Boot 发现存在 UserDetailsService Bean 就会自动使用。
接下来是mapper,也没什么好说的了。
xml
<?xml version="1.0" encoding="UTF-8"?>
<!DOCTYPE mapper
        PUBLIC "-//mybatis.org//DTD Mapper 3.0//EN"
        "http://mybatis.org/dtd/mybatis-3-mapper.dtd">
<mapper namespace="com.example.mapper.LoginUserMapper">
    <select id="getUserByUsername" resultType="com.example.entity.LoginUser">
        SELECT
            u.id,
            u.login_act,
            u.login_pwd,
            u.name,
            u.account_no_expired,
            u.credentials_no_expired,
            u.account_no_locked,
            u.account_enabled
        FROM user u
        where u.login_act = #{username}
    </select>
</mapper>
3.5 试运行
接下来启动程序,然后在跳转到8080页面进入到默认的登录页登录,输入zhangsan,密码为:123456,我们可以看到请求已经跳转到我们刚刚重写的loadUserByUsername方法中,并且成功拿到了前台传递的zhangsan,我们也再数据库中找到了这条数据。

3.6密码加密器
在上述代码运行完毕后,我们的控制台会报一个错误:Given that there is no default password encoder configured, each password must have a password encoding prefix. Please either prefix this password with '{noop}' or set a default password encoder in DelegatingPasswordEncoder.这个异常是 Spring Security 5 以后对"密码必须显式标明编码方式"的强制要求
这个错误翻译就是:由于未配置任何默认密码编码器,每组密码都必须带有密码编码前缀。请要么将此密码前缀设为'{noop}',要么在
DelegatingPasswordEncoder中设置一个默认密码编码器。
所以我们在配置类中配置一个BCrypt算法来校验密码!PasswordEncoder 是 Spring Security 的核心接口,专门用于密码的加密和验证。
java
import org.springframework.context.annotation.Bean;
import org.springframework.context.annotation.Configuration;
import org.springframework.security.crypto.bcrypt.BCryptPasswordEncoder;
import org.springframework.security.crypto.password.PasswordEncoder;

@Configuration
public class SecurityConfig {

    /**
     * 创建一个密码编码器(加密器)供 Spring Security 使用
     */
    @Bean
    public PasswordEncoder passwordEncoder() {
        return new BCryptPasswordEncoder();
    }
}
Spring Security 5以上默认使用 DelegatingPasswordEncoder,它内部会:
- 先到容器里找有没有 id 叫 passwordEncoder 的 PasswordEncoder Bean;
- 找到就拿它当"默认编码器"(即匹配不带
{xxx}前缀的密码); - 找不到就抛异常,提示你 "no default password encoder configured"。
所以当我们成功注册这个bean之后,Spring Security就不会再抛找不到密码加密器异常了。
3.7 运行
我们重启服务器,打开网站:http://localhost:8080/user 之后他会自动跳转到http://localhost:8080/login 登录页面,然后我们输入用户zhangsan,密码123456,即可登录成功并且自动返回结果。