一、流程介绍
代码编写顺序
- 第一步 :pages.json配置tabbar并配置
custom配置项 - 第二步:编写自定义tabbar组件的静态代码(最好使用v-for去写,仿照原生tabbar逻辑)
- 第三步:各tabbar页面调用tabbar组件,并传入tabbar索引值
- 第四步:tabbar组件接受传入的值,通过传入索引值判断高亮对象,点击另外的tabbar图标时跳转到相应页面
页面执行顺序
- 第一步:跳转到新的tabbar页面,该组件中的数据重置
- 第二步:tabbar页面向组件传入索引并保存在currentIndex中
- 第三步:v-show判断相应tabbar图标高亮
- 第四步:点击新的tabbar,执行handleItemClick操作,跳转到新的tabbar页面(回到第一步)
二、代码
在page.json中定义tabbar
在page.json中定义tabbar并将custom设置为true
启用自定义tabbar的配置,可以将默认的tabbar隐藏
仍然使用uniapp默认的tabbar定义方式是为了防止跳转过程中页面栈无限增长。
bash
// 用户操作路径:
学习页 → navigateTo 情绪页 → navigateTo 研友页
// 页面栈:[学习, 情绪, 研友] ← 越来越长!

// 用户连续点击tab 10次:
// 页面栈会有10个页面!内存占用高,容易崩溃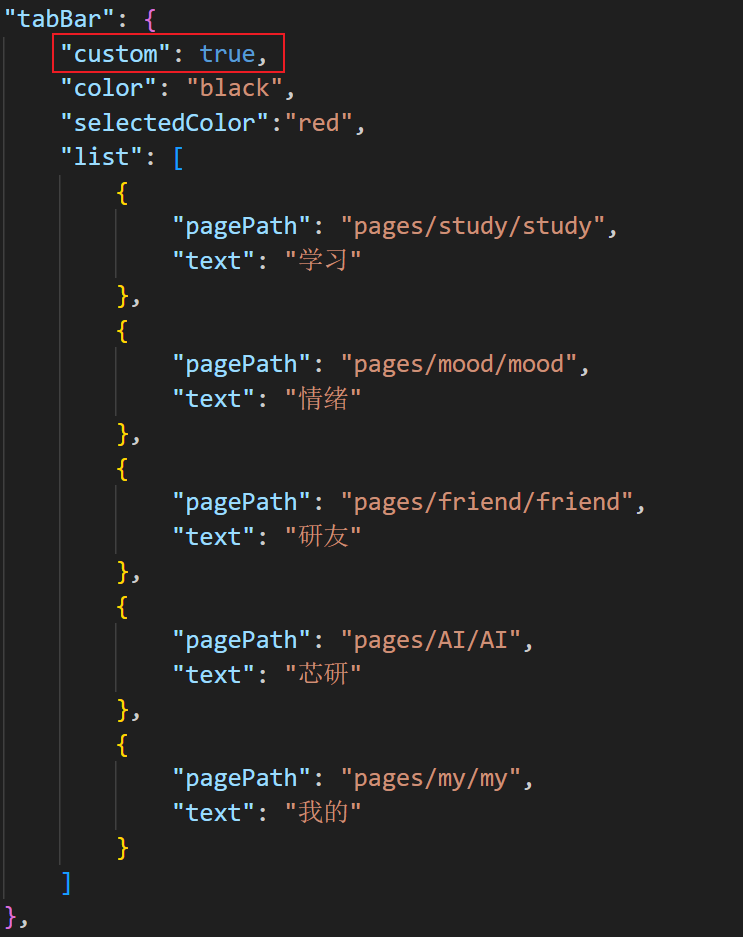
创建自定义tabbar组件
创建一个tabBarList数组(与page.json中tabBar中的list相同的结构),然后使用v-for去写更好。
本案例中选中状态是为图标加上高亮色块,且各个tabbar图标宽高都不相同,所以并没有采用这种写法
html
<script setup>
import {ref} from "vue"
const tabBarList = ref([
{
"pagePath": "pages/study/study",
"text": "学习"
},
{
"pagePath": "pages/mood/mood",
"text": "情绪"
},
{
"pagePath": "pages/friend/friend",
"text": "研友"
},
{
"pagePath": "pages/AI/AI",
"text": "芯研"
},
{
"pagePath": "pages/my/my",
"text": "我的"
}
])
</script>
<template>
<view class="container">
<view class="item" @click="handleItemClick(0)">
<image
src="@/static/tabBar/学习.png"
style="width: 62rpx;height: 52rpx;z-index:9999;"
/>
<view>学习</view>
<view class="circle"></view>
</view>
...
</view>
</template>
<style lang="scss" scoped>
.container{
width:100%;
position:fixed !important;
bottom: 0rpx;
display:flex;
justify-content: space-evenly;
padding-bottom:40rpx;
padding-top:20rpx;
background-color: white;
z-index: 99999;
.item{
display:flex;
flex-direction: column;
gap:10rpx;
align-items: center;
width: 50rpx;
font-size: 19rpx;
font-weight: 500;
position:relative;
.circle{
position:absolute;
top:-10rpx;
left:10rpx;
width: 50rpx;
height: 50rpx;
background: rgba(255, 219, 217, 0.54);
border-radius: 50%;
}
}
}
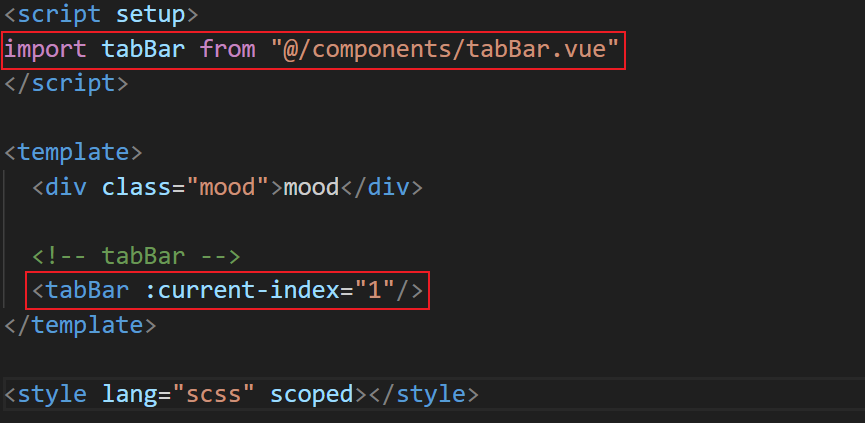
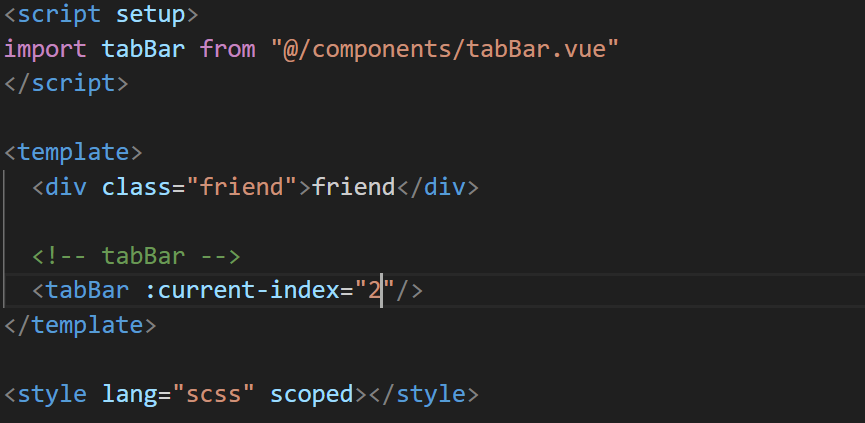
</style>在tabbar页面中使用组件
在tabbar页面中使用组件,并传入页面索引
接受传入数据以及选中后高亮、跳转
html
<script setup>
import {ref} from "vue"
const props = defineProps({
    currentIndex:Number
})
跳转相应的tabbar页面
const handleItemClick = (index)=>{
    uni.switchTab({ url: '/'+ tabBarList.value[index].pagePath })
}
const tabBarList = ...
])
</script>

<template>
    <view class="container">
        <view class="item" @click="handleItemClick(0)">
            <image
                src="@/static/tabBar/学习.png"
                style="width: 62rpx;height: 52rpx;z-index:9999;"
            />
            <view>学习</view>
            展示高亮色块
            <view class="circle" v-show="props.currentIndex === 0"></view>
        </view>
        ...
    </view>
</template>