使用ServiceBase的方式部署window后台服务很不方便,不方便调试开发,但使用Topshelf,安装服务简单,卸载服务简单,调试简单
测试环境:
visual studio 2022
win11
测试步骤如下:
1 新建名为DataSmartAgentService的.net framework控制台项目,.net framework选择.net framework 4.7,并新建服务类WindowService并编辑如下:
cs
 public class WindowService
 {
     public bool StartService()
     {
         string startTip = "service start...";
         Console.WriteLine(startTip);
         LogManager.GetInstance().WriteDebugLog(startTip);
         return true;
     }

     public bool StopService()
     {
         string stopTip = "service stop...";
         Console.WriteLine(stopTip);
         LogManager.GetInstance().WriteDebugLog(stopTip);
         return true;
     }
 }
2 利用nuget安装Topshelf,版本选择4.3.0,如下图:

3 在主程序编写代码如下:
cs
using System;
using System.Collections.Generic;
using System.Linq;
using System.Text;
using System.Threading.Tasks;
using Topshelf;

namespace DataSmartAgentService
{
    internal class Program
    {
        static void Main(string[] args)
        {
            HostFactory.Run(x =>
            {
                x.Service<WindowService>(s =>
                {
                    s.ConstructUsing(name => new WindowService());
                    s.WhenStarted(tc => tc.StartService());
                    s.WhenStopped(tc => tc.StopService());
                });
                x.RunAsLocalSystem();
                x.StartAutomatically();
                x.SetServiceName("OPASDataSmartAgentService");
                x.SetDisplayName("OPASDataSmartAgentService");
                x.SetDescription("This is OPASDataSmartAgentService.");
            });
        }
    }
}
4 安装window后台服务
利用管理员打开cmd,然后切换到运行程序的目录

然后输入命令:
cs
运行程序名称.exe install这里是DataSmartAgentService.exe install,如下图:
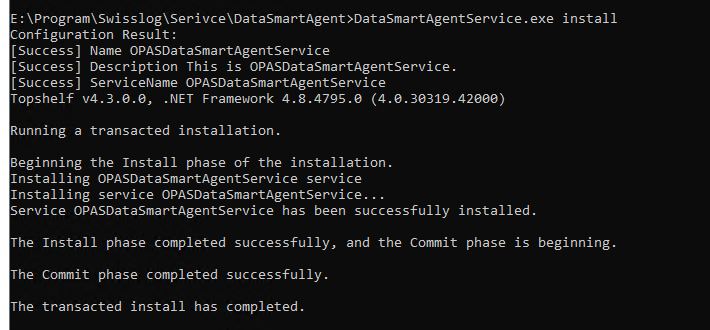
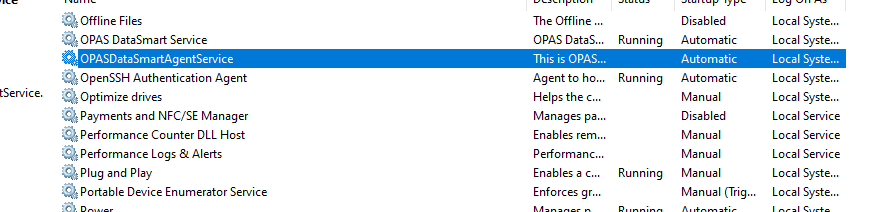
可以看到后台服务已经安装成功了,如下图:
5 有安装,肯定就有卸载,卸载也是很简单
利用管理员打开cmd,然后切换到运行程序的目录
然后输入命令:
cs
运行程序名称.exe uninstall这里是DataSmartAgentService.exe uninstall
好了,本地的内容到此结束