前言
在智慧水利、数字孪生流域等项目的建设中,一个直观、高效的地理信息可视化平台至关重要。传统的 GIS 开发往往门槛较高,而 Mars3D 作为一个基于 CesiumJS 的国产开源 WebGL 地图引擎,极大地简化了三维地球应用的开发流程。
本文将手把手带你,利用 Mars3D 插件,快速搭建一个功能丰富的水利监测 WebGIS 系统。我们将实现以下核心功能:
- 加载天地图作为底图
- 动态加载并标记多种类型的水利站点(大坝、水文站、雨量站等)
- 为关键区域(如水库)添加描边和逼真的水面水纹特效
- 实现站点搜索与定位
- 集成图例筛选功能
通过本文,你将掌握 Mars3D 在实际项目中的基本用法,并能快速复用到自己的项目中。
一、环境准备与 Mars3D 安装
我们的项目基于 Vue3 + Vite 构建。
-
创建 Vue3 项目
npm create vue@latest my-water-gis cd my-water-gis npm install -
安装 Mars3D 及其依赖 根据 Mars3D 官方文档,我们需要安装核心库和 Cesium。
# 安装 Mars3D 核心库 npm install mars3d # 安装 Mars3D 封装的 Cesium(推荐,已处理好路径等问题) npm install mars3d-cesium -
配置 Vite(可选但推荐) 为了优化打包体积和解决潜在的路径问题,可以在
vite.config.js中添加别名:// vite.config.js import { defineConfig } from 'vite' import vue from '@vitejs/plugin-vue' export default defineConfig({ plugins: [vue()], resolve: { alias: { // Mars3D 推荐配置 cesium: "mars3d-cesium/Build/Cesium", }, }, })
二、初始化 Mars3D 地图
我们创建一个 MapContainer.vue 组件来承载地图。核心在于 infoMars3d 方法。
// MapContainer.vue (script部分)
import * as mars3d from "mars3d";
import * as Cesium from "mars3d-cesium";

export default {
  data() {
    return {
      map: null, // 地图实例
      graphicLayer: null, // 图形图层,用于管理所有标记点
    };
  },
  async mounted() {
    await this.initMap();
  },
  methods: {
    async initMap() {
      // 1. 配置地图选项
      const mapOptions = {
        scene: {
          // 初始视角
          center: { lat: 33.119017, lng: 117.901056, alt: 786.8, heading: 117.2, pitch: -16.1 },
          sceneMode: 3, // 3D模式
        },
        control: {
          // 显示控件
          baseLayerPicker: true, // 底图切换
          homeButton: true, // 复位
          fullscreenButton: true, // 全屏
        },
        // 2. 配置底图(天地图)
        basemaps: [
          {
            name: "天地图影像",
            type: "group",
            show: true,
            layers: [
              { name: "底图", type: "tdt", layer: "img_d", crs: "EPSG:4326" },
              { name: "注记", type: "tdt", layer: "img_z", crs: "EPSG:4326" },
            ],
          },
          // ...可以添加更多底图
        ],
      };

      // 3. 创建地图实例
      this.map = new mars3d.Map("mapContainer", mapOptions);

      // 4. 创建一个图形图层,用于后续添加所有标记点
      this.graphicLayer = new mars3d.layer.GraphicLayer();
      this.map.addLayer(this.graphicLayer);
    }
  }
}
对应的模板非常简单:
<!-- MapContainer.vue (template部分) -->
<template>
  <div id="mapContainer" style="width: 100vw; height: 100vh;"></div>
</template>
至此,一个带有天地图底图的 3D 地球就成功加载了!
三、动态加载并标记水利站点
假设我们有一个后端 API /api/points,返回如下格式的站点数据:
[
  { "id": 1, "pointName": "主坝", "pointType": "PSK", "lng": 117.9, "lat": 33.12, "warnSatus": false },
  { "id": 2, "pointName": "五河站", "pointType": "PSW", "lng": 117.91, "lat": 33.13, "warnSatus": true },
  // ...
]
我们需要根据 pointType 显示不同的图标,并处理报警状态。
// 在 MapContainer.vue 中添加方法
methods: {
  // ... initMap

  // 加载并渲染站点
  async loadAndRenderPoints(pointList) {
    // 清空旧的标记
    this.graphicLayer.clear();

    pointList.forEach((item) => {
      // 1. 根据类型选择图标
      const getImageByType = (type) => {
        const iconMap = {
          PSK: "@/assets/img/map/icon-dam.png",
          PSW: "@/assets/img/map/icon-sw.png",
          PYL: "@/assets/img/map/icon-yl.png",
          // ...其他类型映射
        };
        return require(iconMap[type] || "@/assets/img/map/default.png");
      };

      // 2. 创建标记点实体 (BillboardEntity)
      const billboardEntity = new mars3d.graphic.BillboardEntity({
        position: [item.lng, item.lat],
        style: {
          image: getImageByType(item.pointType),
          scale: 1,
          horizontalOrigin: Cesium.HorizontalOrigin.CENTER,
          verticalOrigin: Cesium.VerticalOrigin.BOTTOM,
          // 3. 添加站点名称标签
          label: {
            text: item.pointName,
            font_size: 20,
            color: "#ffffff",
            outline: true,
            outlineColor: Cesium.Color.BLACK,
            // ...其他样式
          },
        },
      });

      // 4. 如果是报警状态,启动弹跳动画
      if (item.warnSatus) {
        billboardEntity.startBounce({ autoStop: false, step: 0.3, maxHeight: 20 });
      }

      // 5. 绑定鼠标事件
      billboardEntity.on("mouseOver", () => {
        if (item.warnSatus) billboardEntity.stopBounce(); // 悬停停止弹跳
        // 这里可以绑定自定义信息弹窗
      });

      billboardEntity.on("mouseOut", () => {
        if (item.warnSatus) billboardEntity.startBounce(); // 移出恢复弹跳
      });

      // 6. 绑定点击事件,打开详情
      billboardEntity.on("click", () => {
        // 根据 pointType 打开不同的详情弹窗组件
        if (item.pointType === "PYL") {
          this.openRainfallDialog(item);
        } else if (item.pointType === "PSK") {
          this.showReservoirDamView(item); // 切换到大坝平面图视图
        }
        // ...其他类型处理
      });

      // 7. 将实体添加到图层
      this.graphicLayer.addGraphic(billboardEntity);
    });
  }
}
通过这个方法,我们就能将从 API 获取的数据动态渲染到地图上,并赋予丰富的交互能力。
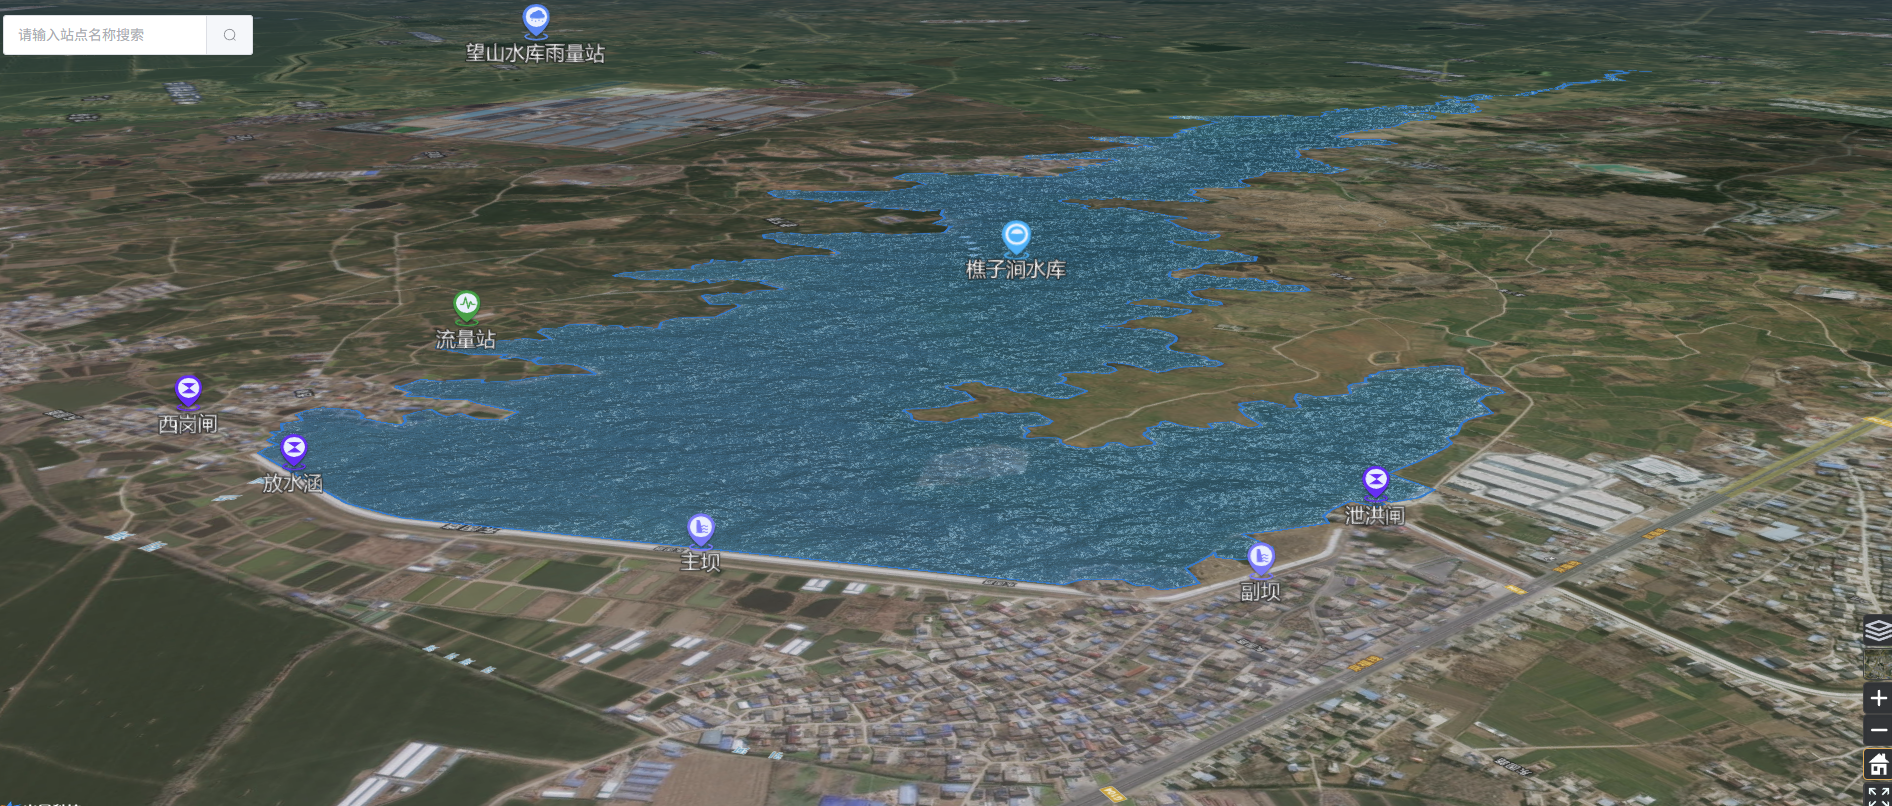
四、为水库添加描边与水纹特效
这是 Mars3D 的亮点之一,可以轻松实现非常酷炫的效果。通常,水库的范围会以 GeoJSON 格式提供。
-
准备 GeoJSON 文件 假设我们有一个
qzj.json文件,描述了"樵子涧水库"的边界。 -
加载 GeoJSON 并应用水纹材质 在
initMap方法中或单独封装一个方法:// 在 MapContainer.vue 中添加方法
addReservoirWaterEffect() {
const geoJsonLayer = new mars3d.layer.GeoJsonLayer({
url: "/public/qzj.json", // 确保文件放在 public 目录下
symbol: {
type: "waterC", // 关键!指定为水面材质
styleOptions: {
height: 17, // 水面高度(相对于地形)
normalMap: require("@/assets/img/reservoir/waterNormals.jpg"), // 水波法线贴图
frequency: 8000.0,
animationSpeed: 0.02,
amplitude: 5.0, // 波浪幅度
baseWaterColor: "#006ab4", // 水的颜色
opacity: 0.4, // 透明度
clampToGround: true, // 贴地
// 添加描边
outline: true,
outlineStyle: {
color: "#067cd3",
width: 3,
opacity: 1,
},
},
},
tooltip: "樵子涧水库", // 鼠标悬停提示
flyTo: true, // 自动飞向该区域
});
this.map.addLayer(geoJsonLayer);
}
调用 this.addReservoirWaterEffect() 后,地图上就会出现一个带有动态水纹和蓝色描边的水库,效果非常直观和专业。
五、其他实用功能
您的代码中还包含了几个非常实用的功能点:
- 站点搜索 :通过
searchByName方法,遍历pointList,使用this.map.flyToPoint([lng, lat, height])实现快速定位。 - 图例筛选 :通过
layerPop弹窗获取用户选择的pointType,然后调用loadAndRenderPoints重新渲染筛选后的点位。 - 视图切换 :
toOneMap方法实现了从"大坝详情平面图"视图切换回"全局地图"视图,通过销毁和重建地图实例完成。
总结
通过以上步骤,我们利用 Mars3D 成功构建了一个功能完备的水利监测 WebGIS 基础框架。Mars3D 的优势在于其对 CesiumJS 的深度封装和大量开箱即用的组件(如 BillboardEntity, GeoJsonLayer),让我们能够用更少的代码实现更强大的 GIS 功能。
希望这篇文章对你有帮助!