一、防火墙
1.firewalld和iptables都是防火墙的工具,用于修改防火墙的防御策略
2.netfilter:真正实施策略的防火墙主题(会自动将设置好的策略进行执行)
防火墙不能杀毒或清除木马病毒,也无法阻止来自内部LAN的攻击
3.iptables执行原则:防火墙会从上到下的顺序来读取配置的策略规则
4.iptables流量处理动作
ACCEPT:允许流量通过
REJECT:拒绝流量通过
LOG:记录日志信息
DROP:拒绝流量通过,流量丢失不响应
5.规则(四表五链)
(1)四表
Filter表(过滤):INPUT链,OUTPUT链,FORWARD链
NAT表(转发):PREROUTING链,POSTROUTING链,OUTPUT链
Mangle表:PREROUTING链,POSTROUTING链,INPUT链,OUTPUT链,FORWARD链
Raw表:PREROUTING链,OUTPUT链
(2)五链
INPUT链:数据包流入(数据包从内核空间流入到用户空间)
OUTPUT链:数据包流出(数据包从用户空间流出到内核空间)
FORWARD链:数据包转发(在内核空间,从一个网络接口进入到另一个网络接口去)
PREROUTING链:在对数据包做路由选择之前(互联网进入局域网)
POSTROUTING链:在对数据包做路由选择之后(局域网进入互联网)
6.安装iptables
root@Server \~# dnf install iptables-nft-services -y #安装iptables
root@Server \~# systemctl stop firewalld #关闭firewalld
root@Server \~# systemctl restart iptables #重启iptables
root@Server \~# systemctl status iptables.service #查看iptables状态
● iptables.service - IPv4 firewall with iptables
Loaded: loaded (/usr/lib/systemd/system/iptables.service; disabled; preset: disabl>
Active: active (exited) since Wed 2025-04-30 15:15:35 CST; 1min 21s ago
Process: 33157 ExecStart=/usr/libexec/iptables/iptables.init start (code=exited, st>
Main PID: 33157 (code=exited, status=0/SUCCESS)
CPU: 9ms
······
root@Server \~# iptables -nL -t filter #查看过滤表详情(可以不写'-t filter',默认查看filter表)
Chain INPUT (policy ACCEPT)
target prot opt source destination
ACCEPT all -- 0.0.0.0/0 0.0.0.0/0 state RELATED,ESTABLISHED #已经链接当前系统的请求
ACCEPT icmp -- 0.0.0.0/0 0.0.0.0/0 #允许任意设备去ping任意设备
ACCEPT all -- 0.0.0.0/0 0.0.0.0/0 #允许任意设备通讯到任意设备
ACCEPT tcp -- 0.0.0.0/0 0.0.0.0/0 state NEW tcp dpt:22 #允许任意设备到任意设备的ssh服务
REJECT all -- 0.0.0.0/0 0.0.0.0/0 reject-with icmp-host-prohibited #以上没有被允许的都会被拒绝,并返回信息
#行为 协议 源地址 目标地址
Chain FORWARD (policy ACCEPT)
target prot opt source destination
REJECT all -- 0.0.0.0/0 0.0.0.0/0 reject-with icmp-host-prohibited
Chain OUTPUT (policy ACCEPT)
target prot opt source destination
二、修改filter表(编辑iptables策略)
编辑iptables策略时一定要先开启iptables服务
(1)添加nginx的80端口
root@Server \~# vim /etc/nginx/nginx.conf #编辑nginx的配置文件
38 server {
39 listen 80;
40 listen :::80;
41 server_name _;
42 root /usr/share/nginx/html;
root@Server \~# systemctl restart nginx.service #重启nginx服务
root@Server \~# iptables -t filter -A INPUT -p tcp --dport 80 -j ACCEPT #'-t filter'给filter表添加(可以不写,默认filter表),'-A INPUT'给INPUT添加,'-p tcp'指定tcp协议,'--dport 80'指定80端口,'-j ACCEPT'允许(如果写REJECT就是拒绝),按顺序添加命令
root@Server \~# iptables -nL
Chain INPUT (policy ACCEPT)
target prot opt source destination
ACCEPT all -- 0.0.0.0/0 0.0.0.0/0 state RELATED,ESTABLISHED
ACCEPT icmp -- 0.0.0.0/0 0.0.0.0/0
ACCEPT all -- 0.0.0.0/0 0.0.0.0/0
ACCEPT tcp -- 0.0.0.0/0 0.0.0.0/0 state NEW tcp dpt:22
REJECT all -- 0.0.0.0/0 0.0.0.0/0 reject-with icmp-host-prohibited #在此行前没有的都拒绝
ACCEPT tcp -- 0.0.0.0/0 0.0.0.0/0 tcp dpt:80 #允许任意设备到任意设备的http服务
Chain FORWARD (policy ACCEPT)
target prot opt source destination
REJECT all -- 0.0.0.0/0 0.0.0.0/0 reject-with icmp-host-prohibited
Chain OUTPUT (policy ACCEPT)
target prot opt source destination
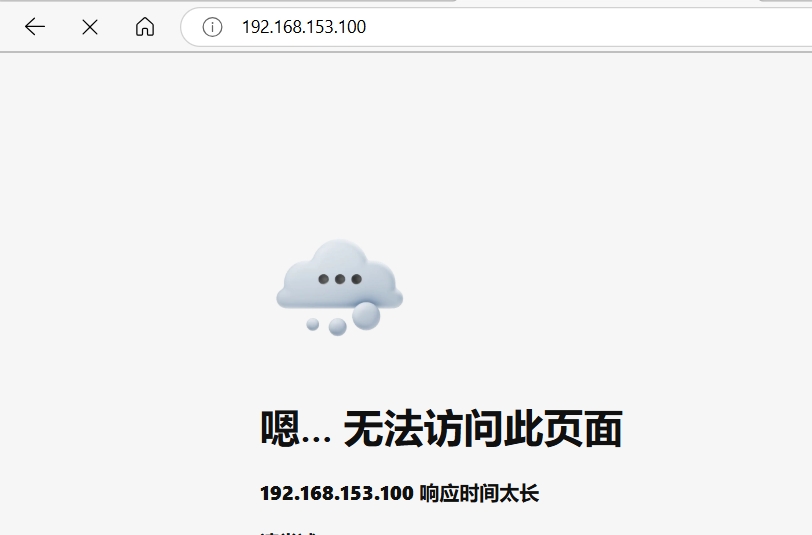
访问http://192.168.153.100,因为防火墙是按顺序执行命令,拒绝命令在允许http服务命令前,所以没有访问成功
(2)插入命令
root@Server \~# iptables -D INPUT 6 #'-D'删除;删除INPUT的第6条命令
root@Server \~# iptables -nL --line-numbers #'--line-numbres'显示行号;显示过滤表详情
Chain INPUT (policy ACCEPT)
num target prot opt source destination
1 ACCEPT all -- 0.0.0.0/0 0.0.0.0/0 state RELATED,ESTABLISHED
2 ACCEPT icmp -- 0.0.0.0/0 0.0.0.0/0
3 ACCEPT all -- 0.0.0.0/0 0.0.0.0/0
4 ACCEPT tcp -- 0.0.0.0/0 0.0.0.0/0 state NEW tcp dpt:22
5 REJECT all -- 0.0.0.0/0 0.0.0.0/0 reject-with icmp-host-prohibited
Chain FORWARD (policy ACCEPT)
num target prot opt source destination
1 REJECT all -- 0.0.0.0/0 0.0.0.0/0 reject-with icmp-host-prohibited
Chain OUTPUT (policy ACCEPT)
num target prot opt source destination
root@Server \~# iptables -I INPUT 5 -p tcp --dport 80 -j ACCEPT #'-I INPUT 5'插入INPUT链的第5条命令
root@Server \~# iptables -nL --line-numbers
Chain INPUT (policy ACCEPT)
num target prot opt source destination
1 ACCEPT all -- 0.0.0.0/0 0.0.0.0/0 state RELATED,ESTABLISHED
2 ACCEPT icmp -- 0.0.0.0/0 0.0.0.0/0
3 ACCEPT all -- 0.0.0.0/0 0.0.0.0/0
4 ACCEPT tcp -- 0.0.0.0/0 0.0.0.0/0 state NEW tcp dpt:22
5 ACCEPT tcp -- 0.0.0.0/0 0.0.0.0/0 tcp dpt:80
6 REJECT all -- 0.0.0.0/0 0.0.0.0/0 reject-with icmp-host-prohibited
Chain FORWARD (policy ACCEPT)
num target prot opt source destination
1 REJECT all -- 0.0.0.0/0 0.0.0.0/0 reject-with icmp-host-prohibited
Chain OUTPUT (policy ACCEPT)
num target prot opt source destination

(3)修改命令
root@Server \~# iptables -R INPUT 6 -p all -j ACCEPT #'-R'修改;修改INPUT链第6行允许所有设备通讯
root@Server \~# iptables -nL --line-numbers
Chain INPUT (policy ACCEPT)
num target prot opt source destination
1 ACCEPT all -- 0.0.0.0/0 0.0.0.0/0 state RELATED,ESTABLISHED
2 ACCEPT icmp -- 0.0.0.0/0 0.0.0.0/0
3 ACCEPT all -- 0.0.0.0/0 0.0.0.0/0
4 ACCEPT tcp -- 0.0.0.0/0 0.0.0.0/0 state NEW tcp dpt:22
5 ACCEPT tcp -- 0.0.0.0/0 0.0.0.0/0 tcp dpt:80
6 ACCEPT all -- 0.0.0.0/0 0.0.0.0/0
Chain FORWARD (policy ACCEPT)
num target prot opt source destination
1 REJECT all -- 0.0.0.0/0 0.0.0.0/0 reject-with icmp-host-prohibited
Chain OUTPUT (policy ACCEPT)
num target prot opt source destination
root@Server \~# iptables -nvL #'-v'显示详细信息
Chain INPUT (policy ACCEPT 0 packets, 0 bytes)
pkts bytes target prot opt in out source destination
1816 105K ACCEPT all -- * * 0.0.0.0/0 0.0.0.0/0 state RELATED,ESTABLISHED
0 0 ACCEPT icmp -- * * 0.0.0.0/0 0.0.0.0/0
0 0 ACCEPT all -- lo * 0.0.0.0/0 0.0.0.0/0
0 0 ACCEPT tcp -- * * 0.0.0.0/0 0.0.0.0/0
root@Server \~# iptables -nvxL #'-x'取消单位
Chain INPUT (policy ACCEPT 0 packets, 0 bytes)
pkts bytes target prot opt in out source destination
1846 107117 ACCEPT all -- * * 0.0.0.0/0 0.0.0.0/0 state RELATED,ESTABLISHED
0 0 ACCEPT icmp -- * * 0.0.0.0/0 0.0.0.0/0
0 0 ACCEPT all -- lo * 0.0.0.0/0 0.0.0.0/0
0 0 ACCEPT tcp -- * * 0.0.0.0/0 0.0.0.0/0
root@Server \~# iptables -F #'-F'清空所有规则
root@Server \~# iptables -nL
Chain INPUT (policy ACCEPT)
target prot opt source destination
Chain FORWARD (policy ACCEPT)
target prot opt source destination
Chain OUTPUT (policy ACCEPT)
target prot opt source destination
(4)允许192.168.153.200使用ssh远程登录
root@Server \~# iptables -A INPUT -s 192.168.153.200 -p tcp --dport 22 -j ACCEPT #'-s'指定192.168.153.200地址;允许客户端使用ssh远程登录
root@Server \~# iptables -A INPUT -p all -j REJECT #拒绝所有人登录
root@Client \~# ssh root@192.168.153.100 #从客户端登录服务器
root@Server \~#
(5)iptables的配置文件
root@Server \~# vim /etc/sysconfig/iptables #编辑iptables的规则配置文件。只有在配置文件中加入的规则才是永久的
······
4 *filter
5 :INPUT ACCEPT 0:0
6 :FORWARD ACCEPT 0:0
7 :OUTPUT ACCEPT 0:0
8 -A INPUT -m state --state RELATED,ESTABLISHED -j ACCEPT
9 -A INPUT -p icmp -j ACCEPT
10 -A INPUT -i lo -j ACCEPT
11 -A INPUT -p tcp -m state --state NEW -m tcp --dport 22 -j ACCEPT
12 -A INPUT -j REJECT --reject-with icmp-host-prohibited
13 -A FORWARD -j REJECT --reject-with icmp-host-prohibited
14 COMMIT
root@Server \~# iptables -I INPUT 5 -p tcp --dport 80 -j ACCEPT
root@Server \~# service iptables save #将当前iptables的配置信息保存到配置文件中
root@Server \~# vim /etc/sysconfig/iptables
17 *filter
18 :INPUT ACCEPT 0:0
19 :FORWARD ACCEPT 0:0
20 :OUTPUT ACCEPT 202:27474
21 -A INPUT -m state --state RELATED,ESTABLISHED -j ACCEPT
22 -A INPUT -p icmp -j ACCEPT
23 -A INPUT -i lo -j ACCEPT
24 -A INPUT -p tcp -m state --state NEW -m tcp --dport 22 -j ACCEPT
25 -A INPUT -p tcp -m tcp --dport 80 -j ACCEPT #插入http服务的命令以保存到配置文件中
26 -A INPUT -j REJECT --reject-with icmp-host-prohibited
27 -A FORWARD -j REJECT --reject-with icmp-host-prohibited
28 COMMIT
三、NAT(地址转换)
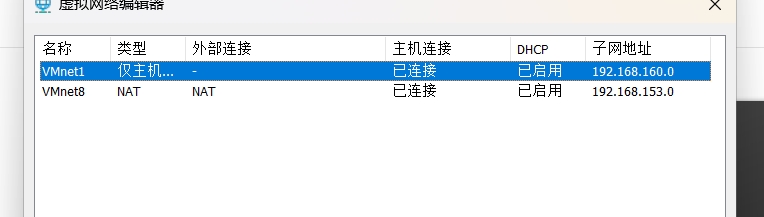
1.创建3个主机------client_nat(NAT模式),client_hostonly(仅主机模式),server_nat_hostonly(拥有NAT和仅主机网卡的服务器)
然后可自由修改网段
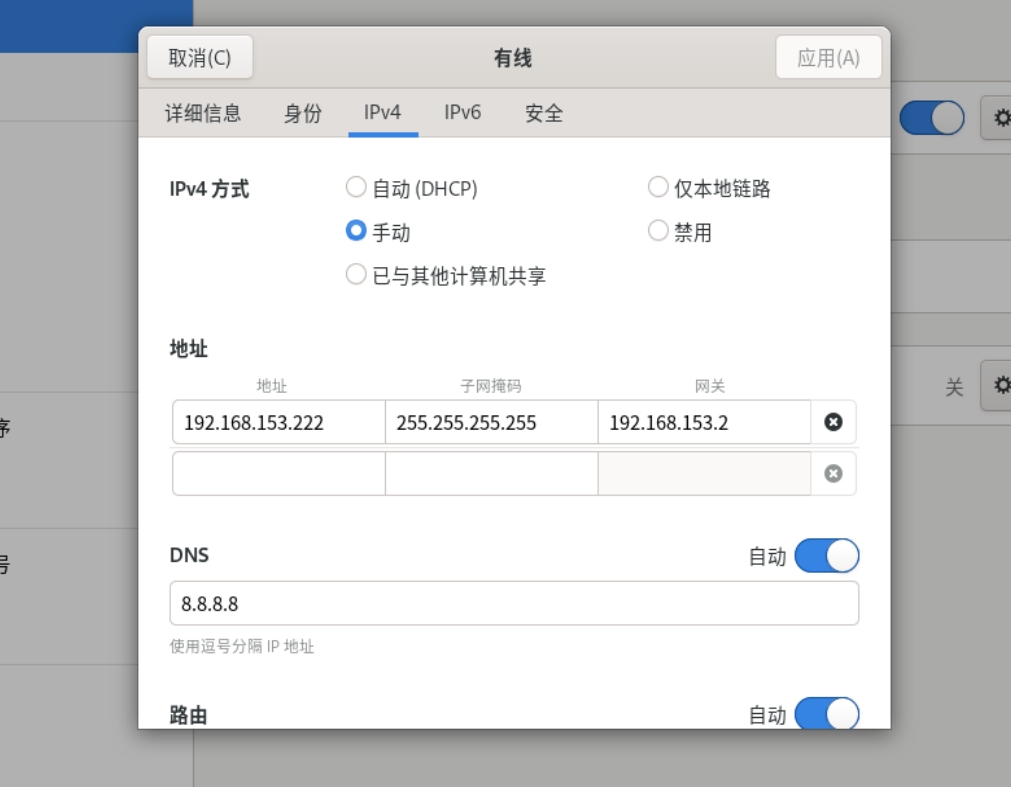
(1)配置client_nat
root@clientnat \~# nmcli connection modify ens160 ipv4.addresses 192.168.153.222 ipv4.gateway 192.168.153.2 ipv4.dns 8.8.8.8 #设置client_nat的ip、掩码、网关和dns
root@clientnat \~# nmcli connection reload
root@clientnat \~# nmcli connection up ens160
(2)配置client_hostonly
root@clienthostonly \~# nmcli connection modify ens160 ipv4.addresses 192.168.160.222 ipv4.gateway 192.168.160.2 ipv4.dns 8.8.8.8 #设置client_hostonly的ip、掩码、网关和dns
root@clienthostonly \~# nmcli connection reload
root@clienthostonly \~# nmcli connection up ens160

(3)配置server_nat_hostonly


root@servernathost \~# nmcli device disconnect ens224 #断开网卡
成功断开设备 "ens224"。
root@servernathost \~# nmcli device #查看网卡
DEVICE TYPE STATE CONNECTION
ens160 ethernet 已连接 ens160
lo loopback 连接(外部) lo
ens224 ethernet 已断开 --
root@servernathost \~# nmcli device up ens224 #激活网卡
设备 "ens224" 成功以 "886fb7e3-07a0-47d2-885d-90298c6aadd2" 激活。
root@servernathost \~# nmcli device
DEVICE TYPE STATE CONNECTION
ens160 ethernet 已连接 ens160
ens224 ethernet 已连接 有线连接 1
lo loopback 连接(外部) lo
2.在服务器上开启路由转发
root@servernathost \~# sysctl -a |grep ip_forward #查看ip_forward(转发)的内核功能
net.ipv4.ip_forward = 0 #转发功能关闭
net.ipv4.ip_forward_update_priority = 1
net.ipv4.ip_forward_use_pmtu = 0
root@servernathost \~# vim /etc/sysctl.conf #编辑sysctl的配置文件
11 net.ipv4.ip_forward=1 #开启转发
root@servernathost \~# sysctl -p #重新加载
net.ipv4.ip_forward = 1
root@servernathost \~# sysctl -a |grep ip_forward
net.ipv4.ip_forward = 1 #转发已开启
net.ipv4.ip_forward_update_priority = 1
net.ipv4.ip_forward_use_pmtu = 0
3.源地址修改
源地址修改的是主动连接的地址,在路由后(POSTROUTING链)修改
(1)
root@servernathost \~# dnf install iptables-nft-services -y #安装iptables服务
root@servernathost \~# systemctl stop firewalld.service #关闭firewalld
root@servernathost \~# systemctl mask firewalld.service #掩住
Created symlink /etc/systemd/system/firewalld.service → /dev/null.
root@servernathost \~# systemctl restart iptables.service #重启iptables
root@servernathost \~# iptables -nL #查看filter表
Chain INPUT (policy ACCEPT)
target prot opt source destination
ACCEPT all -- 0.0.0.0/0 0.0.0.0/0 state RELATED,ESTABLISHED
ACCEPT icmp -- 0.0.0.0/0 0.0.0.0/0
ACCEPT all -- 0.0.0.0/0 0.0.0.0/0
ACCEPT tcp -- 0.0.0.0/0 0.0.0.0/0 state NEW tcp dpt:22
REJECT all -- 0.0.0.0/0 0.0.0.0/0 reject-with icmp-host-prohibited
Chain FORWARD (policy ACCEPT)
target prot opt source destination
REJECT all -- 0.0.0.0/0 0.0.0.0/0 reject-with icmp-host-prohibited #禁止路由转发
Chain OUTPUT (policy ACCEPT)
target prot opt source destination
root@servernathost \~# iptables -t nat -A POSTROUTING -o ens160 -j SNAT --to-source 192.168.160.111
#'-A POSTROUTING'向POSTROUTING链添加,'-o ens160'POSTROUTING链指定连接的网卡,'SNAT'源地址,'--to-source'修改POSTROUTING链的源地址
root@servernathost \~# iptables -t nat -nL
Chain PREROUTING (policy ACCEPT)
target prot opt source destination
Chain INPUT (policy ACCEPT)
target prot opt source destination
Chain OUTPUT (policy ACCEPT)
target prot opt source destination
Chain POSTROUTING (policy ACCEPT)
target prot opt source destination
SNAT all -- 0.0.0.0/0 0.0.0.0/0 to:192.168.160.111
root@servernathost \~# iptables (-t filter) -F #清空filter表,即删除filter表中禁止路由转发
(2)
root@clientnat \~# nmcli connection modify ens160 ipv4.gateway 192.168.153.111 #修改网关为服务器地址,使能连接到路由器(服务器)
root@clientnat \~# nmcli connection reload
root@clientnat \~# nmcli connection up ens160
连接已成功激活(D-Bus 活动路径:/org/freedesktop/NetworkManager/ActiveConnection/4)
root@clientnat \~# route -n #查看网关配置信息
Kernel IP routing table
Destination Gateway Genmask Flags Metric Ref Use Iface
0.0.0.0 192.168.153.111 0.0.0.0 UG 100 0 0 ens160
192.168.153.0 0.0.0.0 255.255.255.0 U 100 0 0 ens160
client_nat ping client_host
root@clientnat \~# ssh root@192.168.160.222 #连接client_host
root@clienthost \~# w -i #查看连接线路
17:10:22 up 1:51, 2 users, load average: 0.00, 0.00, 0.00
USER TTY FROM LOGIN@ IDLE JCPU PCPU WHAT
root pts/0 192.168.160.1 15:55 9:56 0.14s 0.14s -bash
root pts/1 192.168.160.111 17:10 4.00s 0.01s 0.01s w -i #client_nat以192.168.160.111身份连接进来
4.修改目标地址
目标地址修改的是被连接的地址,在路由前(PREROUTING链)修改
root@servernathost \~# iptables -t nat -A PREROUTING -i ens224 -j DNAT --to-dest 192.168.153.222
#'-A PREROUTING'向PREROUTING链添加,'-i ens224'指定PREROUTING链的网卡,'DNAT'目标地址,'--to-dest'修改PREROUTING链的目标地址
root@servernathost \~# iptables -t nat -nL
Chain PREROUTING (policy ACCEPT)
target prot opt source destination
DNAT all -- 0.0.0.0/0 0.0.0.0/0 to:192.168.153.222
Chain INPUT (policy ACCEPT)
target prot opt source destination
Chain OUTPUT (policy ACCEPT)
target prot opt source destination
Chain POSTROUTING (policy ACCEPT)
target prot opt source destination
SNAT all -- 0.0.0.0/0 0.0.0.0/0 to:192.168.160.111
#client_host ping client_nat

root@clienthost \~# ssh root@192.168.160.111 #连接服务器
root@clientnat \~# ip a #因为目标地址改为192.168.153.222,所以连到client_nat
1: lo: <LOOPBACK,UP,LOWER_UP> mtu 65536 qdisc noqueue state UNKNOWN group default qlen 1000
link/loopback 00:00:00:00:00:00 brd 00:00:00:00:00:00
inet 127.0.0.1/8 scope host lo
valid_lft forever preferred_lft forever
inet6 ::1/128 scope host
valid_lft forever preferred_lft forever
2: ens160: <BROADCAST,MULTICAST,UP,LOWER_UP> mtu 1500 qdisc mq state UP group default qlen 1000
link/ether 00:0c:29:4c:0b:69 brd ff:ff:ff:ff:ff:ff
altname enp3s0
inet 192.168.153.222/24 brd 192.168.153.255 scope global noprefixroute ens160 #被连到192.168.153.222
valid_lft forever preferred_lft forever
inet6 fe80::20c:29ff:fe4c:b69/64 scope link noprefixroute
valid_lft forever preferred_lft forever
四、firewalld
/etc/firewall:配置文件主区
/lib/firewall:预先定义好的服务文件
1.区域 zone
(1)区域类型
trusted(信任区域):允许所有的传入流量
home(家庭区域):允许SSH、MDNS(多播DNS)、IPP客户端、samba-客户端、DHCPv6客户端、cockpit(服务器管理工具)服务匹配的流量传入,其余拒绝
internal(内部区域):默认值时与home区域相同
work(工作区域):允许SSH、DHCPv6客户端、cockpit服务匹配的流量传入
public(公共区域):允许SSH或DHCPv6客户端、cockpit服务匹配的流量传入;默认区域
external(外部区域):允许SSH服务匹配的流量传入
dmz(隔离区域):允许SSH服务匹配的流量传入;也称非军事区域,内部网络之间增加的一层网络,起到缓冲作用
block(阻塞区域):拒绝所有传入流量
drop(丢弃区域):丢弃所有传入流量
root@serverNH \~# firewall-cmd --get-zones #查看区域类型
block dmz drop external home internal nm-shared public trusted work
(2)zone文件的过滤规则
scource:源地址过滤(常用)
interface:网卡过滤
service:服务名过滤
port:端口过滤
icmp-block:ICMP报文过滤
masquerade:IP地址伪装
forward-port:端口转发过滤
rule:自定义规则
优先级:source(最高)> interface > zone(默认)
2.修改防火墙区域
root@serverNH \~# systemctl start firewalld.service #开启firewall服务
root@serverNH \~# firewall-cmd --list-all #查看当前防火墙状态
public (active)
target: default #行为
icmp-block-inversion: no
interfaces: ens160 ens224 #使用网卡
sources: #源;设置ip是否能访问
services: cockpit dhcpv6-client ssh #允许的服务匹配(区域)
ports: #端口
protocols: #协议
forward: yes #转发是否开启
masquerade: no
forward-ports: #转发端口
source-ports: #源端口
icmp-blocks: #icmp的包
rich rules: #负规则
root@serverNH \~# systemctl start nginx.service #开启nginx服务
访问http://192.168.153.100,当前public区域,没有允许http服务匹配

root@serverNH \~# firewall-cmd --set-default-zone=trusted #修改区域为trusted
success
再次访问http://192.168.153.100,因为修改区域为trusted信任区域,允许所有流量传入

root@serverNH \~# firewall-cmd --get-default-zone #查看防火墙当前区域
trusted
root@serverNH \~# vim /etc/nginx/nginx.conf
22 access_log /var/log/nginx/access.log main;
23
24 sendfile on;
25 tcp_nopush on;
26 tcp_nodelay on;
27 keepalive_timeout 65; #任何链接访问到nginx至少会保存65秒
28 types_hash_max_size 4096;
3.添加服务
(1)添加或删除服务
root@serverNH \~# firewall-cmd --get-services #查看防火墙中的服务
RH-Satellite-6 RH-Satellite-6-capsule afp amanda-client amanda-k5-client amqp amqps apcupsd audit ausweisapp2 bacula bacula-client bb bgp bitcoin bitcoin-rpc ······
root@serverNH \~# ls /lib/firewalld/services/ | grep http #查看http的服务类型
http3.xml
https.xml
http.xml
wbem-https.xml
wbem-http.xml
root@serverNH \~# vim /lib/firewalld//services/http.xml #查看或编辑http服务
1 <?xml version="1.0" encoding="utf-8"?>
2 <service>
3 <short>WWW (HTTP)</short>
4 <description>HTTP is the protocol used to serve Web pages. If you plan to make you r Web server publicly available, enable this option. This option is not required for viewing pages locally or developing Web pages.</description>
5 <port protocol="tcp" port="80"/>
6 </service>
root@serverNH \~# firewall-cmd --set-default-zone=public #修改区域为public
success
root@serverNH \~# firewall-cmd --list-all
public (active)
······
services: cockpit dhcpv6-client ssh #允许访问的服务
······
root@serverNH \~# firewall-cmd --add-service=http #添加http服务
success
root@serverNH \~# firewall-cmd --list-all
public (active)
······
services: cockpit dhcpv6-client http ssh #已添加http服务
······
root@serverNH \~# firewall-cmd --remove-service=http #删除http服务
success
root@serverNH \~# firewall-cmd --list-all
public (active)
······
services: cockpit dhcpv6-client ssh #已删除http服务
······
(2)添加一个自建nginx服务
root@serverNH \~# cd /lib/firewalld/services/
root@serverNH services# cp http.xml nginx.xml #复制http服务,自建一个nginx服务
root@serverNH services# vim nginx.xml #编辑nginx服务
1 <?xml version="1.0" encoding="utf-8"?>
2 <service>
3 <short>Nginx</short>
4 <description>this is a russain httpd</description>
5 <port protocol="tcp" port="80"/>
6 <port protocol="tcp" port="443"/>
7 <port protocol="tcp" port="7777"/>
8 </service>
root@serverNH services# systemctl restart firewalld.service #重启firewall服务
root@serverNH services# firewall-cmd --add-service=nginx #添加nginx服务
success
root@serverNH services# firewall-cmd --list-all
public (active)
······
services: cockpit dhcpv6-client nginx ssh #已添加nginx服务
······
root@serverNH services# semanage port -a -t http_port_t -p tcp 7777 #给http添加7777端口号
root@serverNH services# semanage port -l |grep http
http_cache_port_t tcp 8080, 8118, 8123, 10001-10010
http_cache_port_t udp 3130
http_port_t tcp 7777, 80, 81, 443, 488, 8008, 8009, 8443, 9000 #已添加7777端口号
pegasus_http_port_t tcp 5988
pegasus_https_port_t tcp 5989
root@serverNH services# vim /etc/nginx/nginx.conf #编辑nginx配置文件
38 server {
39 listen 7777; #修改端口号
40 listen :::80;
41 server_name _;
42 root /usr/share/nginx/html;
root@serverNH services# systemctl restart nginx.service #重启nginx服务
访问http://192.168.153.100:7777地址

(3)禁用ip
root@clientN \~# curl 192.168.153.100:7777 #查看客户端能否访问服务器
······
<div class="row">
<section class="copyright">
<p>Copyright © 2021 The CentOS Project | <a href="/legal">Legal</a> | <a href="/legal/privacy">Privacy</a> | <a href="https://git.centos.org/centos/centos.org">Site source</a></p>
</section>
</div>
</div>
</footer>
</body>
root@serverNH \~# firewall-cmd --add-source=192.168.153.200 --zone=dmz #"--add-source"指定IP地址,"--zone"指定区域;禁用客户端ip
success
root@clientN \~# curl 192.168.153.100:7777 #再次访问
curl: (7) Failed to connect to 192.168.153.100 port 7777: 没有到主机的路由 #已被拒绝
root@serverNH \~# firewall-cmd --get-active-zones #查看激活区域
dmz
sources: 192.168.153.200
public
interfaces: ens160 ens224
root@serverNH \~# firewall-cmd --remove-source=192.168.153.200 #删除指定ip权限(取消禁用ip)
success
root@serverNH \~# firewall-cmd --get-active-zones #再次查看激活区域
public
interfaces: ens160 ens224
(4)修改网卡
root@serverNH \~# firewall-cmd --remove-interface=ens160 #删除网卡
success
root@serverNH \~# firewall-cmd --add-interface=ens160 --zone=dmz #添加网卡到禁用区域
success
root@serverNH \~# firewall-cmd --get-active-zones #查看激活区域
dmz
interfaces: ens160 #如果此时重启,用ens160远程访问不了虚拟主机
public
interfaces: ens224
root@serverNH \~# firewall-cmd --change-interface=ens160 --zone=public #修改网卡区域
success
root@serverNH \~# firewall-cmd --get-active-zones #再次查看激活区域
public
interfaces: ens224 ens160
(5)修改端口号
root@serverNH \~# firewall-cmd --remove-service=nginx #删除nginx服务(有7777端口号)
success
root@serverNH \~# firewall-cmd --add-port=7777/tcp #添加端口号(样式:端口号/协议)
success
root@serverNH \~# firewall-cmd --list-all
public (active)
target: default
icmp-block-inversion: no
interfaces: ens160 ens224
sources:
services: cockpit dhcpv6-client ssh #已删除nginx服务
ports: 7777/tcp #已添加端口号
protocols:
forward: yes
masquerade: no
forward-ports:
source-ports:
icmp-blocks:
rich rules:

root@serverNH \~# firewall-cmd --remove-port=7777/tcp #删除7777端口号
success
########
删除端口号后,立马访问,网页并没有断开的原因是因为:nginx配置文件中的 keepalive_timeout 命令,每访问一个网页的缓存时间有65秒;过了上一次访问成功65秒后就会断开网页
########