目录
[什么是 Cookie?](#什么是 Cookie?)

如果您喜欢此文章,请收藏、点赞、评论,谢谢,祝您快乐每一天。
示例代码:https://download.csdn.net/download/hefeng_aspnet/92599924
什么是 Cookie?
在网络环境中,Cookie是存储用户信息的对象,用于根据用户在网站上的操作来识别、跟踪和个性化用户体验。
它是如何运作的?
当您登录网站时,处理您请求的服务器会在登录成功后创建一个包含 ID、用户数据以及一些信息(例如 cookie 类型、过期时间、刷新策略等)的 cookie。浏览器收到 cookie 后,会负责存储该 cookie 并将其在每次请求中发送给服务器。服务器会在每次请求时检查 cookie 的属性。
如何在.NET8中实现?
本教程需要您创建一个 ASP.NET Core Web API 并安装以下软件包:
<PackageReference Include="Microsoft.AspNetCore.Authentication.Cookies" Version="2.3.0" />
<PackageReference Include="Microsoft.EntityFrameworkCore.Sqlite" Version="8.0.16" />
我创建了一个简单的实体来表示用户,包含姓名、邮箱、密码和角色。您可以通过此链接查看。
对于表映射,请使用以下配置:
public class UserConfiguration : IEntityTypeConfiguration<User>
{
public void Configure(EntityTypeBuilder<User> builder)
{
builder.HasKey(x => x.Id);
builder.HasIndex(x => x.Email).IsUnique();
builder.Property(x => x.Name).HasMaxLength(100).IsRequired();
builder.Property(x => x.Email).HasMaxLength(100).IsRequired();
builder.Property(x => x.Password).HasMaxLength(250).IsRequired();
}
}
我将Email属性设置为索引,并将其标记为唯一,以确保不同用户无法使用相同的电子邮件地址注册。这样,它还可以有效地用作登录时的筛选参数。
在 DbContext 中,请确保按如下方式配置 UserRoles 关系:
public class AppDbContext : DbContext
{
public DbSet<User> Users { get; set; }
public DbSet<Role> Roles { get; set; }
public AppDbContext(DbContextOptions<AppDbContext> options) : base(options)
{
}
protected override void OnModelCreating(ModelBuilder modelBuilder)
{
base.OnModelCreating(modelBuilder);
modelBuilder.Entity<User>()
.HasMany(u => u.Roles)
.WithMany(r => r.Users)
.UsingEntity<Dictionary<string, object>>(
"UserRoles",
j => j.HasOne<Role>().WithMany().HasForeignKey("RoleId"),
j => j.HasOne<User>().WithMany().HasForeignKey("UserId"),
j =>
{
j.HasKey("UserId", "RoleId");
j.ToTable("UserRoles");
});
}
}
在代码仓库中,我们只需要通过用户的电子邮件地址进行搜索:
public class UserRepository : IUserRespository
{
private readonly AppDbContext _context;
private readonly DbSet<User> _users;
public UserRepository(AppDbContext context)
{
_context = context;
_users = _context.Set<User>();
}
public async Task<User?> GetByEmail(string email)
{
return await _users
.Where(x => x.Email == email)
.Include(x => x.Roles)
.FirstOrDefaultAsync();
}
}
现在我们可以专注于登录服务了,它非常简单:它接收用户输入,根据电子邮件地址在数据库中查找用户,验证密码,然后返回该用户。以下是实现代码:
public class LoginService : ILoginService
{
protected readonly IUserRespository _respository;
public LoginService(IUserRespository respository)
{
_respository = respository;
}
public async Task<TResult<User>> Login(LoginDto dto)
{
var result = new TResult<User>();
var user = await _respository.GetByEmail(dto.Email);
if (user == null)
{
result.AddError($"User {dto.Email} not found!");
return result;
}
if (!user.IsPasswordMatch(dto.Password))
{
result.AddError($"Password Incorrect!");
return result;
}
result.Success(user);
return result;
}
}
现在需要配置Cookie 身份验证,请打开Program.cs文件并添加以下配置:
builder.Services.AddAuthentication(CookieAuthenticationDefaults.AuthenticationScheme)
.AddCookie(options =>
{
options.Cookie.Name = "CookieAuthSystem";
options.Cookie.HttpOnly = true;
options.Cookie.SecurePolicy = CookieSecurePolicy.Always;
options.Cookie.SameSite = SameSiteMode.Strict;
options.ExpireTimeSpan = TimeSpan.FromMinutes(5);
options.SlidingExpiration = true;
options.LoginPath = "/auth/login";
options.AccessDeniedPath = "/auth/access-denied";
// Hanlder the unauthorized access
options.Events.OnRedirectToLogin = context =>
{
context.Response.StatusCode = 401;
return Task.CompletedTask;
};
})
配置说明:
Cookie.HttpOnly = true >> 确保客户端 JavaScript 无法访问身份验证 cookie,从而有助于防止 XSS(跨站脚本)攻击。
Cookie.SecurePolicy = CookieSecurePolicy.Always >> Cookie 将仅通过 HTTPS 请求发送。
Cookie.SameSite = SameSiteMode.Strict >> 防止 cookie 随跨域请求发送,有助于防止 CSRF(跨站请求伪造)攻击。
ExpireTimeSpan = TimeSpan.FromMinutes(5) >> 设置 Cookie 生命周期为 5 分钟。
SlidingExpiration = true >> 如果当前 cookie 即将过期(剩余时间过半),则请求新的 cookie。这可以防止用户在连续访问网站期间重复登录,从而改善用户体验。
配置好Cookie 身份验证后,我们就可以实现生成 Cookie 的服务了:
public class CookieService : ICookieService
{
public CookieDto GenerateCookie(User user)
{
var claims = new List<Claim>
{
new Claim(ClaimTypes.Name, user.Name),
new Claim(ClaimTypes.Email, user.Email),
};
foreach (var role in user.Roles)
{
claims.Add(new Claim(ClaimTypes.Role, role.Name));
}
var claimsIdentity = new ClaimsIdentity(claims, CookieAuthenticationDefaults.AuthenticationScheme);
var authProperties = new AuthenticationProperties
{
IsPersistent = true,
AllowRefresh = true,
ExpiresUtc = DateTimeOffset.UtcNow.AddMinutes(5),
};
return new CookieDto(claimsIdentity, authProperties);
}
在声明身份中,我们提供用户名、电子邮件及其角色,并定义身份验证类型,即基于 cookie 的身份验证。
在 Cookie 属性中,我们设置了持久性、允许请求新 cookie 以及定义过期时间。
现在我们来看身份验证控制器:
ApiController
Route("auth")
public class AuthController : Controller
{
protected readonly ILoginService _loginService;
protected readonly ICookieService _cookieService;
public AuthController(ILoginService loginService, ICookieService cookieService)
{
_loginService = loginService;
_cookieService = cookieService;
}
HttpPost("login")
public async Task<IActionResult> Login(FromBody LoginDto request)
{
var userResult = await _loginService.Login(request);
// Check if login is successful
if (!userResult.IsSuccess || userResult.Value == null)
{
return BadRequest(userResult.ErrorMessage);
}
var cookie = _cookieService.GenerateCookie(userResult.Value);
await HttpContext.SignInAsync(
CookieAuthenticationDefaults.AuthenticationScheme,
new ClaimsPrincipal(cookie.Claims),
cookie.Properties);
return LocalRedirect("/auth/logged");
}
HttpPost("logout")
public async Task<IActionResult> Logout()
{
await HttpContext.SignOutAsync(CookieAuthenticationDefaults.AuthenticationScheme);
return Ok("User Logout Successful");
}
HttpGet("access-denied")
public IActionResult NotAllowed()
{
return Unauthorized("You not allowed to access this resource");
}
Authorize
HttpGet("logged")
public IActionResult Logged()
{
var userName = User.FindFirst(ClaimTypes.Name)?.Value;
return Ok($"Hello {userName}");
}
}
登录: 创建一个包含用户信息的 cookie,并将用户重定向到*/logged*页面,该页面包含存储在 brownser 中的 cookie。
**注销:**将 Cookie 变为无效并从浏览器中删除。
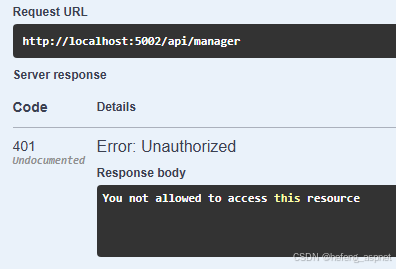
**访问被拒绝:**每当有人尝试访问未经授权的资源时,他们都会被重定向到此路径。
受保护的端点:
ApiController
Route("api")
public class ApiController : Controller
{
Authorize(Roles = "User")
HttpGet("user")
public ActionResult UserController()
{
return Ok("Hello User");
}
Authorize(Roles = "Manager")
HttpGet("manager")
public ActionResult ManagerController()
{
return Ok("Hello Manager");
}
Authorize(Roles = "Admin")
HttpGet("admin")
public ActionResult AdminController()
{
return Ok("Hello Admin");
}
}
项目运行
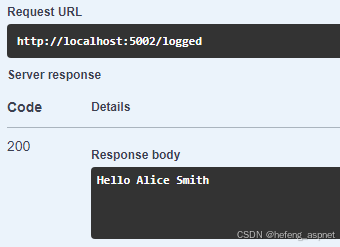
使用 Swagger 登录成功后,用户将收到以下内容:
您可以在浏览器中检查 cookie,打开浏览器的检查工具,进入应用程序,然后选择 cookie,您会看到类似这样的内容:

但是,如果您尝试使用以下 JavaScript 代码在浏览器控制台中访问 cookie:
document.cookie
你可能会收到一个空字符串,因为我们在 program.cs 文件中配置了 cookie,Cookie.HttpOnly = true。
如果用户尝试访问无权访问的资源,将被重定向到以下路径:
在本教程中,您注意到我们配置 cookie 以使其在 https 环境中工作,但我运行在 http 环境中,这是因为浏览器将 localhost 视为特殊情况。
如果您喜欢此文章,请收藏、点赞、评论,谢谢,祝您快乐每一天。