解读:
- 使用haproxy的ACL访问控制实现调度后端服务的动静分离
- 每个RS上都部署相同业务实现负载均衡
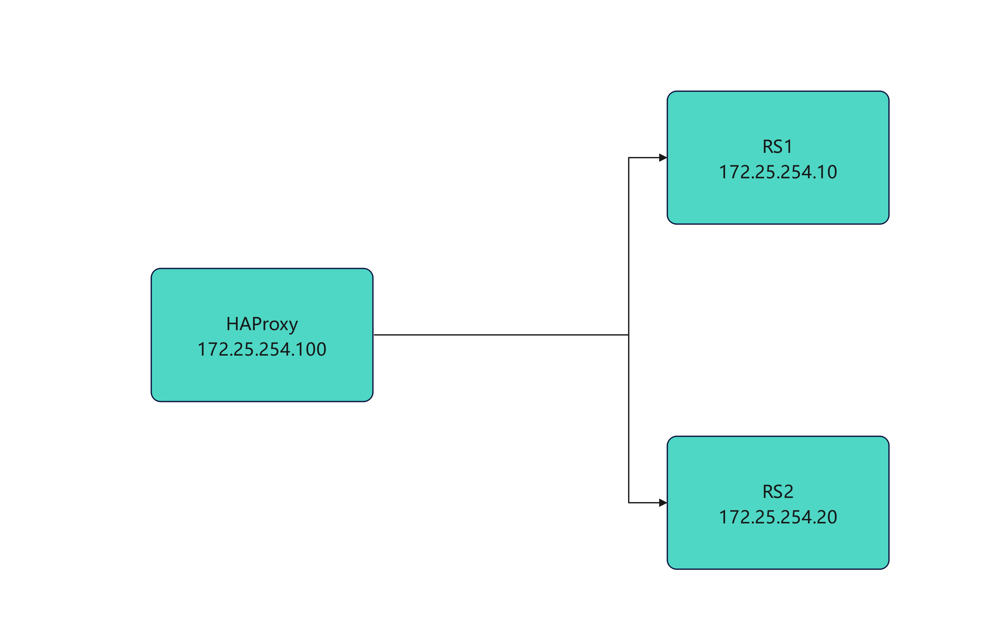
实验环境
| 主机名 | IP | OS |
|---|---|---|
| haproxy | eth0:172.25.254.100 | Rocky Linux9.6 |
| rs1 | eth0:172.25.254.10 | Rocky Linux9.6 |
| rs2 | eth0:172.25.254.20 | Rocky Linux8.6 |
流程图
网络配置
网络配置使用自定义脚本来快速设置IP网关DNS主机名等
bash
[root@haproxy ~]# vmset.sh eth0 172.25.254.100 haproxy
[root@rs1 ~]# vmset.sh eth0 172.25.254.10 rs1
[root@rs2 ~]# vmset.sh eth0 172.25.254.20 rs2
业务部署
RS部署web服务
bash
[root@rs1 ~]# dnf install nginx -y
[root@rs2 ~]# dnf install nginx -y
[root@rs1 ~]# systemctl enable --now nginx
[root@rs2 ~]# systemctl enable --now nginx
[root@rs1 ~]# echo rs1 - webserver1 > /usr/share/nginx/html/index.html
[root@rs1 ~]# curl localhost
rs1 - webserver1
[root@rs2 ~]# echo rs2 - webserver2 > /usr/share/nginx/html/index.html
[root@rs2 ~]# curl localhost
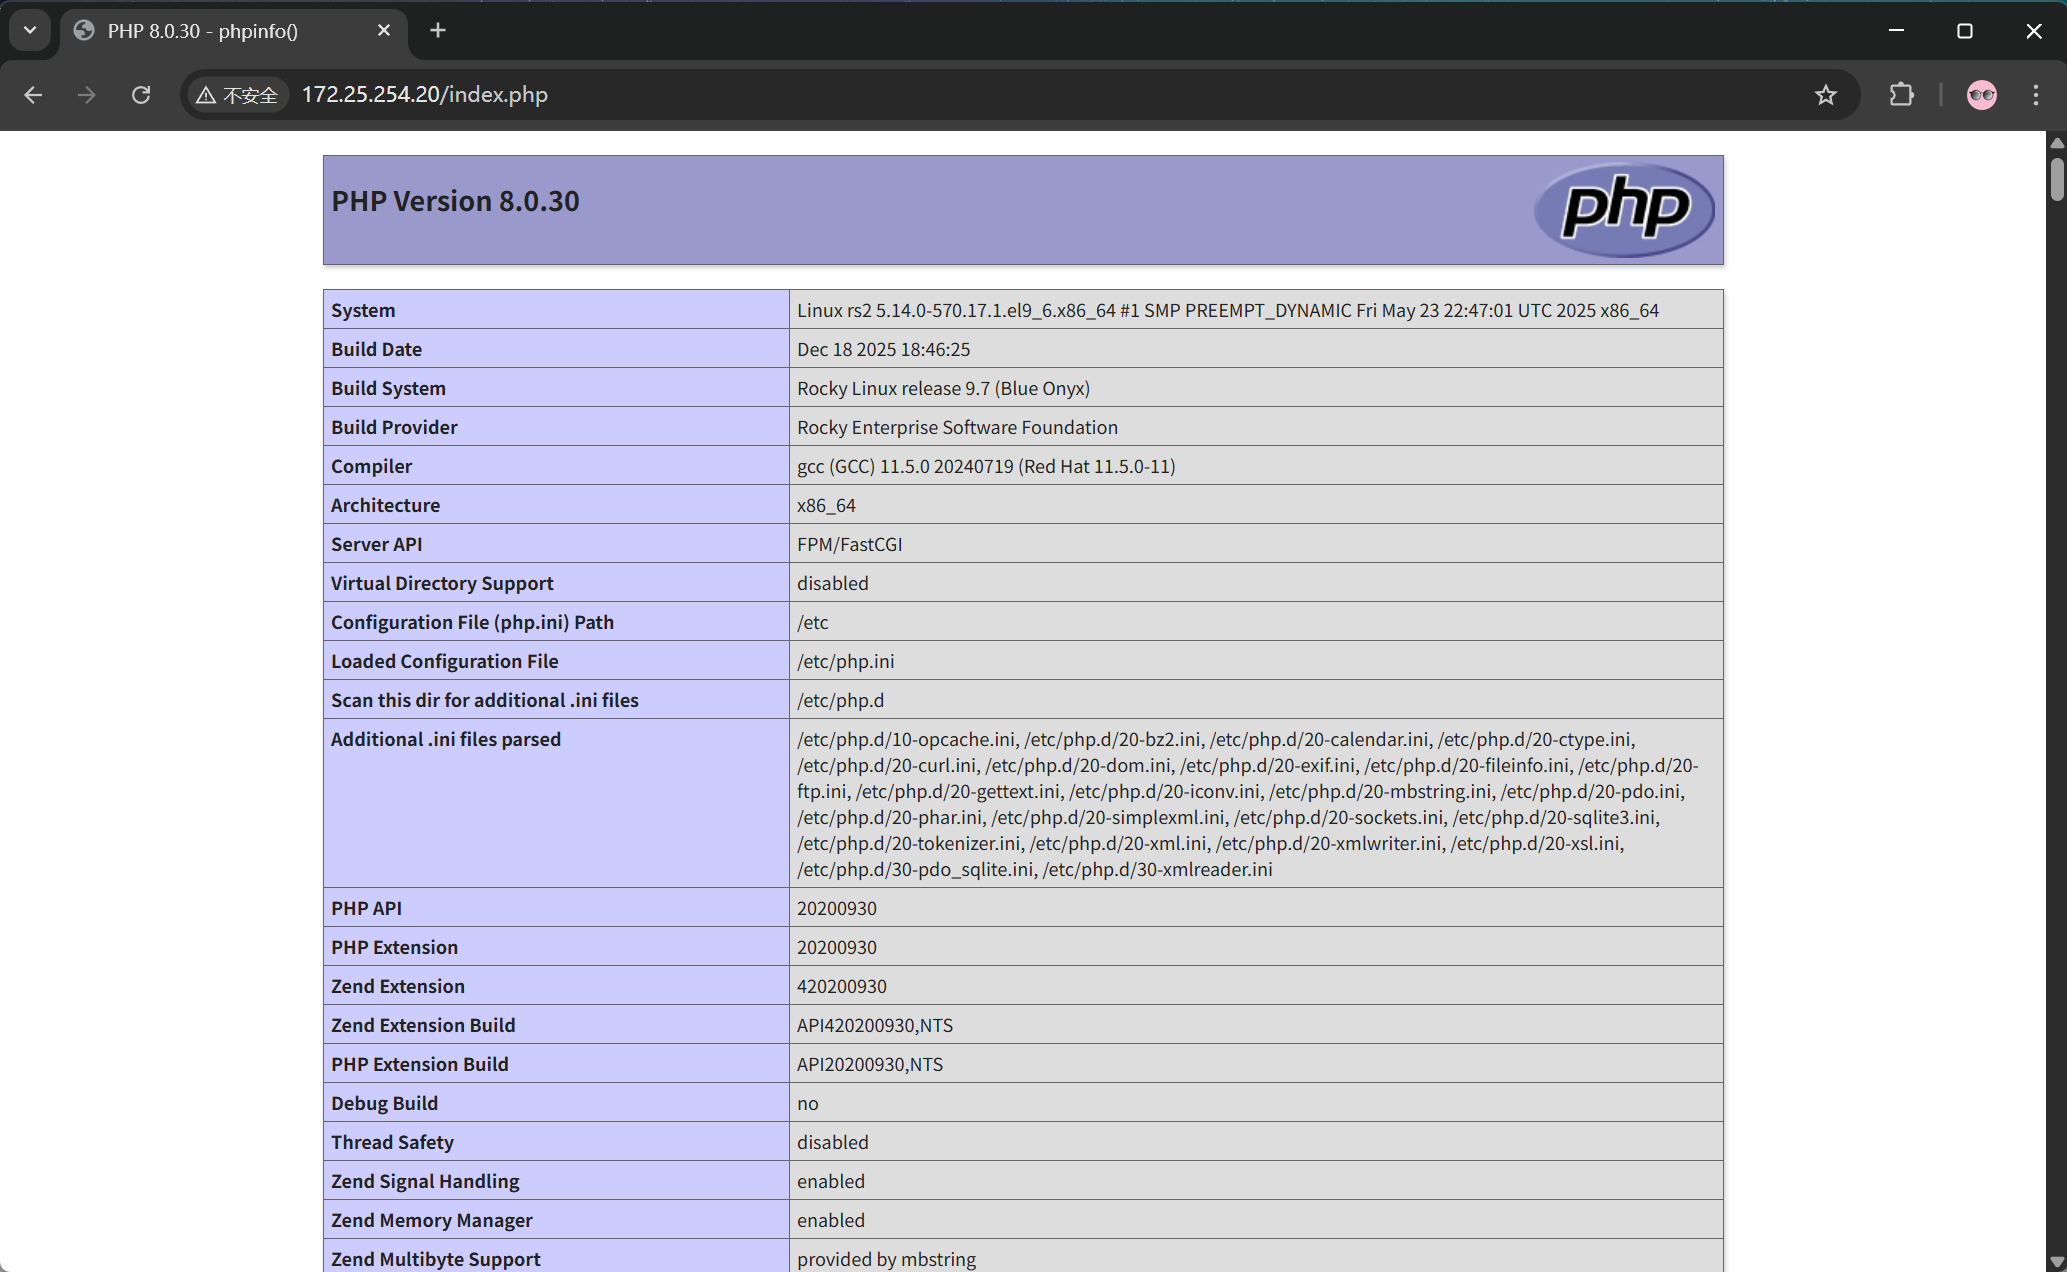
rs2 - webserver2RS2部署php
bash
[root@rs2 ~]# dnf install php -y
[root@rs2 ~]# systemctl enable --now php-fpm
nginx添加php解析
bash
[root@rs1+2 ~]# vim /etc/nginx/nginx.conf
server {
......
	location ~ \.php$ {
            root /usr/share/nginx/html;
            fastcgi_pass   127.0.0.1:9000;
            fastcgi_index  index.php;
            fastcgi_param  SCRIPT_FILENAME
            $document_root$fastcgi_script_name;
            include        fastcgi_params;
        }
    }
[root@rs1+2 ~]# systemctl restart nginx.service
测试是否能访问
haproxy部署
安装haproxy
bash
[root@haproxy ~]# dnf install haproxy -y编写haproxy规则
bash
[root@haproxy ~]# vim /etc/haproxy/haproxy.cfg
......
frontend webcluster
bind 172.25.254.100:80
acl url_static path_end -i .jpg .png .css .js .html
acl url_php path_end -i .php
use_backend webservera if url_static
use_backend webserverb if url_php
backend webservera
server web1 172.25.254.10:80 check
server web2 172.25.254.20:80 check
backend webserverb
server web1 172.25.254.10:80 check
server web2 172.25.254.20:80 check
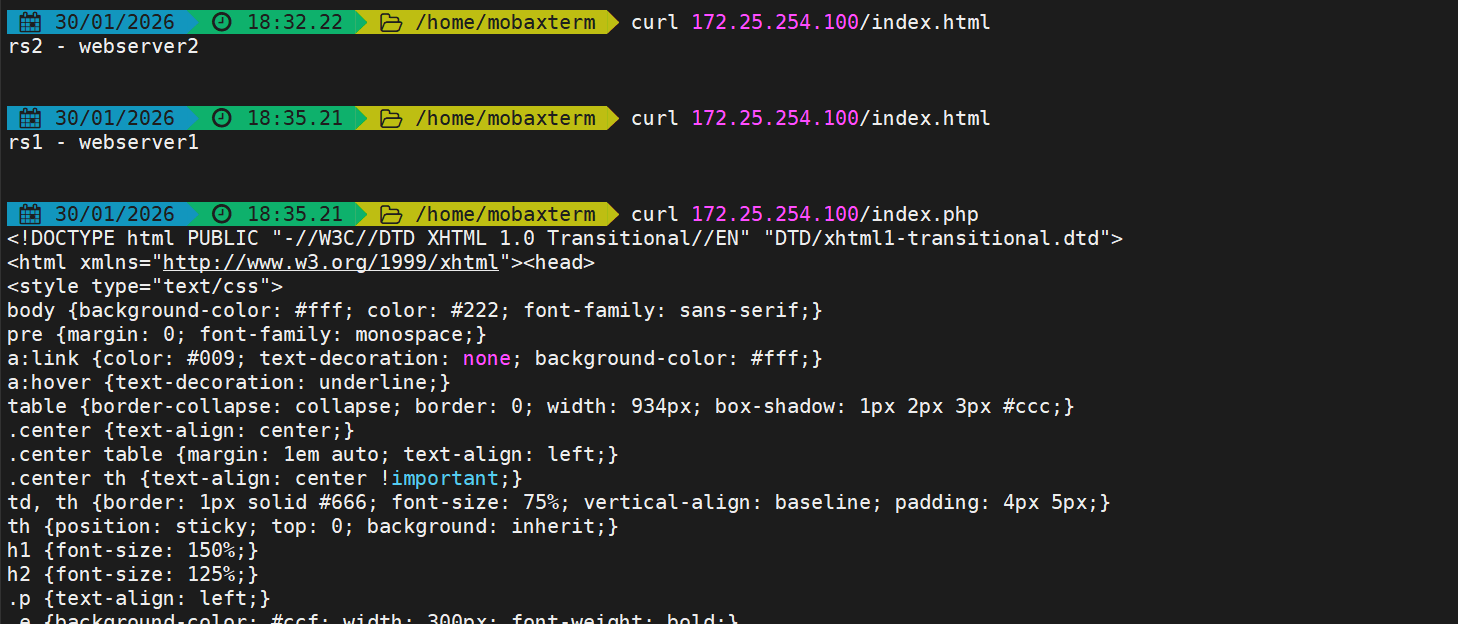
[root@haproxy ~]# systemctl enable --now haproxy.service测试
k
server web2 172.25.254.20:80 check
root@haproxy \~# systemctl enable --now haproxy.service
**测试**