XML
<Window x:Class="LightingButton.MainWindow"
xmlns="http://schemas.microsoft.com/winfx/2006/xaml/presentation"
xmlns:x="http://schemas.microsoft.com/winfx/2006/xaml"
xmlns:d="http://schemas.microsoft.com/expression/blend/2008"
xmlns:mc="http://schemas.openxmlformats.org/markup-compatibility/2006"
mc:Ignorable="d"
Title="MainWindow"
Height="450"
Width="800">
<Grid>
<Grid Margin="10">
<!-- 把按钮和光效放在同一个 Grid 里,共享尺寸 -->
<Grid x:Name="ButtonContainer"
Width="160"
Height="50">
<!-- 按钮 -->
<Button Content="AOI检测"
Foreground="White"
FontSize="16"
HorizontalAlignment="Stretch"
VerticalAlignment="Stretch">
<Button.Style>
<Style TargetType="Button">
<Setter Property="Template">
<Setter.Value>
<ControlTemplate TargetType="Button">
<Border x:Name="border"
Background="{TemplateBinding Background}"
CornerRadius="12">
<ContentPresenter HorizontalAlignment="Center"
VerticalAlignment="Center" />
</Border>
<ControlTemplate.Triggers>
<Trigger Property="IsMouseOver"
Value="True">
<Setter TargetName="border"
Property="Background"
Value="#1976D2" />
</Trigger>
</ControlTemplate.Triggers>
</ControlTemplate>
</Setter.Value>
</Setter>
<Setter Property="Background"
Value="#2196F3" />
<Setter Property="BorderThickness"
Value="0" />
</Style>
</Button.Style>
</Button>
<!-- 光效层:直接覆盖在按钮上 -->
<Path x:Name="MovingGlow"
Stroke="#FF4081"
StrokeThickness="3"
StrokeLineJoin="Round"
StrokeStartLineCap="Round"
StrokeEndLineCap="Round"
Opacity="0">
<!-- 动态生成与按钮相同尺寸的圆角矩形 -->
<Path.Data>
<RectangleGeometry Rect="1.5,1.5,157,47"
RadiusX="12"
RadiusY="12" />
</Path.Data>
<Path.StrokeDashArray>
20, 80
</Path.StrokeDashArray>
</Path>
</Grid>
<!-- 触发动画:监听整个容器 -->
<Grid.Triggers>
<EventTrigger RoutedEvent="Mouse.MouseEnter"
SourceName="ButtonContainer">
<BeginStoryboard x:Name="hoverGlowStoryboard">
<Storyboard>
<DoubleAnimation Storyboard.TargetName="MovingGlow"
Storyboard.TargetProperty="Opacity"
To="1"
Duration="0:0:0.2" />
<DoubleAnimation Storyboard.TargetName="MovingGlow"
Storyboard.TargetProperty="StrokeDashOffset"
From="100"
To="0"
Duration="0:0:2"
RepeatBehavior="Forever" />
</Storyboard>
</BeginStoryboard>
</EventTrigger>
<EventTrigger RoutedEvent="Mouse.MouseLeave"
SourceName="ButtonContainer">
<StopStoryboard BeginStoryboardName="hoverGlowStoryboard" />
<BeginStoryboard>
<Storyboard>
<DoubleAnimation Storyboard.TargetName="MovingGlow"
Storyboard.TargetProperty="Opacity"
To="0"
Duration="0:0:0.3" />
</Storyboard>
</BeginStoryboard>
</EventTrigger>
</Grid.Triggers>
</Grid>
</Grid>
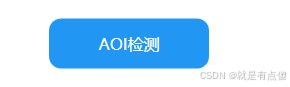
</Window>效果如下:
当还没有选中时
选中时