快速入门
先决条件
CUTLASS 需要:
-
NVIDIA CUDA 工具包(最低要求 11.4,建议 12.0)
-
CMake 3.18+
-
支持 C++17 或更高版本的主机编译器(最低要求 g++ 7.5.0)
-
Python 3.6+
CUTLASS 可选择性地编译并链接到:
-
cuBLAS
-
cuDNN v7.6 或更高版本
初始构建步骤
创建一个构建目录并运行 CMake。
bash
$ export CUDACXX=${CUDA_INSTALL_PATH}/bin/nvcc

$ mkdir build && cd build

# 为 NVIDIA Hopper GPU 架构编译
$ cmake .. -DCUTLASS_NVCC_ARCHS=90a
# 为 NVIDIA Blackwell SM100 GPU 架构编译
$ cmake .. -DCUTLASS_NVCC_ARCHS=100a
如果您的目标仅仅是构建 CUTLASS Profiler 并最小化编译时间,我们建议在空的 build/ 目录中执行以下 CMake 命令:
bash
$ cmake .. -DCUTLASS_NVCC_ARCHS=90a -DCUTLASS_ENABLE_TESTS=OFF -DCUTLASS_UNITY_BUILD_ENABLED=ON这通过排除单元测试和启用统一构建来减少总体编译时间。
您可以通过设置 CUTLASS_LIBRARY_OPERATIONS 标志来仅编译特定操作以减少构建时间,如下所示(在空的 build/ 目录中执行)。这仅编译 2-D 卷积内核。
bash
$ cmake .. -DCUTLASS_NVCC_ARCHS=90a -DCUTLASS_LIBRARY_OPERATIONS=conv2d您还可以通过使用 CUTLASS_LIBRARY_KERNELS 标志提供过滤字符串来按名称过滤内核。例如,以下命令仅选择 CUTLASS-3 内核。
bash
$ cmake .. -DCUTLASS_NVCC_ARCHS=90a -DCUTLASS_LIBRARY_KERNELS=cutlass3x*在此处 查看更多关于选择性编译 CUTLASS GEMM 和卷积内核的示例。
您可以使用以下 CMake 标志显式排除 cuBLAS 和 cuDNN 作为依赖项:
-
-DCUTLASS_ENABLE_CUBLAS=OFF -
-DCUTLASS_ENABLE_CUDNN=OFF
构建并运行 CUTLASS Profiler
从上面创建的 build/ 目录中,编译 CUTLASS Profiler:
bash
$ make cutlass_profiler -j12要执行 CUTLASS Profiler 计算 GEMM,运行以下命令:
bash
$ ./tools/profiler/cutlass_profiler --kernels=sgemm --m=4352 --n=4096 --k=4096=============================
Problem ID: 1
Provider: CUTLASS
Operation: cutlass_simt_sgemm_128x128_nn
Disposition: Passed
Status: Success
Arguments: --m=4352 --n=4096 --k=4096 --A=f32:column --B=f32:column --C=f32:column --alpha=1 --beta=0 \
--split_k_slices=1 --batch_count=1 --op_class=simt --accum=f32 --cta_m=128 --cta_n=128 --cta_k=8 \
--stages=2 --warps_m=2 --warps_n=2 --warps_k=1 --inst_m=1 --inst_n=1 --inst_k=1 --min_cc=50 \
--max_cc=1024
Bytes: 52428800 bytes
FLOPs: 146064539648 flops
Runtime: 10.5424 ms
Memory: 4.63158 GiB/s
Math: 13854.9 GFLOP/s要为卷积执行 CUTLASS Profiler,运行以下示例:
$ ./tools/profiler/cutlass_profiler --kernels=s1688fprop --n=8 --h=224 --w=224 --c=128 --k=128 --r=3 --s=3 --pad_h=1 --pad_w=1要执行所有 CUTLASS 2-D 卷积算子,运行以下命令:
$ ./tools/profiler/cutlass_profiler --operation=conv2d --n=8 --h=224 --w=224 --c=128 --k=128 --r=3 --s=3

=============================
  Problem ID: 1

        Provider: CUTLASS
   OperationKind: conv2d
       Operation: cutlass_simt_sfprop_optimized_128x128_8x2_nhwc

          Status: Success
    Verification: ON
     Disposition: Passed

reference_device: Passed

       Arguments: --conv_kind=fprop --n=8 --h=224 --w=224 --c=128 --k=128 --r=3 --s=3 --p=224 --q=224 --pad_h=1 --pad_w=1  \
                  --stride_h=1 --stride_w=1 --dilation_h=1 --dilation_w=1 --Activation=f32:nhwc --Filter=f32:nhwc --Output=f32:nhwc  \
                  --conv_mode=cross --iterator_algorithm=optimized --alpha=1 --beta=0 --split_k_mode=serial --split_k_slices=1  \
                  --eq_gemm_provider=none --op_class=simt --accum=f32 --cta_m=128 --cta_n=128 --cta_k=8 --stages=2 --warps_m=4  \
                  --warps_n=2 --warps_k=1 --inst_m=1 --inst_n=1 --inst_k=1 --min_cc=50 --max_cc=1024

           Bytes: 2055798784  bytes
           FLOPs: 118482796544  flops

         Runtime: 8.13237  ms
          Memory: 235.431 GiB/s

            Math: 14569.3 GFLOP/s
有关 CUTLASS Profiler 的更多详情,请参阅文档。
构建并运行 CUTLASS 单元测试
从上面创建的 build/ 目录中,只需构建目标 test_unit 即可编译和运行所有单元测试:
$ make test_unit -j
...
...
...
[----------] Global test environment tear-down
[==========] 946 tests from 57 test cases ran. (10812 ms total)
[  PASSED  ] 946 tests.
$
运行的测试确切数量可能会随着我们添加更多功能而变化。
所有测试都应通过。单元测试会自动构建适当的运行时过滤器,以避免在不支持所有测试特性的架构上执行。
单元测试按层次结构组织,以镜像 CUTLASS 模板库。这使得构建和运行测试可以并行化,并且在只需要特定测试集时减少编译时间。
例如,以下命令严格执行 Warp 级别的 GEMM 测试:
$ make test_unit_gemm_warp -j
...
...
[----------] 3 tests from SM75_warp_gemm_tensor_op_congruous_f16
[ RUN      ] SM75_warp_gemm_tensor_op_congruous_f16.128x128x8_32x128x8_16x8x8
[       OK ] SM75_warp_gemm_tensor_op_congruous_f16.128x128x8_32x128x8_16x8x8 (0 ms)
[ RUN      ] SM75_warp_gemm_tensor_op_congruous_f16.128x128x32_64x64x32_16x8x8
[       OK ] SM75_warp_gemm_tensor_op_congruous_f16.128x128x32_64x64x32_16x8x8 (2 ms)
[ RUN      ] SM75_warp_gemm_tensor_op_congruous_f16.128x128x32_32x32x32_16x8x8
[       OK ] SM75_warp_gemm_tensor_op_congruous_f16.128x128x32_32x32x32_16x8x8 (1 ms)
[----------] 3 tests from SM75_warp_gemm_tensor_op_congruous_f16 (3 ms total)
...
...
[----------] Global test environment tear-down
[==========] 104 tests from 32 test cases ran. (294 ms total)
[  PASSED  ] 104 tests.
[100%] Built target test_unit_gemm_warp
为多个架构构建
为了最小化编译时间,可以通过 CMake 命令启用特定的 GPU 架构,这些架构由 CUDA 计算能力选择。
-
NVIDIA Blackwell 架构
$ cmake .. -DCUTLASS_NVCC_ARCHS=100a # 为 NVIDIA Blackwell GPU 架构编译 -
NVIDIA Hopper 架构
$ cmake .. -DCUTLASS_NVCC_ARCHS=90a # 为 NVIDIA Hopper GPU 架构编译 -
NVIDIA Ampere 架构
$ cmake .. -DCUTLASS_NVCC_ARCHS=80 # 为 NVIDIA Ampere GPU 架构编译 -
NVIDIA Turing 架构
$ cmake .. -DCUTLASS_NVCC_ARCHS=75 # 为 NVIDIA Turing GPU 架构编译 -
NVIDIA Volta 架构
$ cmake .. -DCUTLASS_NVCC_ARCHS=70 # 为 NVIDIA Volta GPU 架构编译 -
NVIDIA Pascal 架构
$ cmake .. -DCUTLASS_NVCC_ARCHS="60;61" # 为 NVIDIA Pascal GPU 架构编译 -
NVIDIA Maxwell 架构
$ cmake .. -DCUTLASS_NVCC_ARCHS="50;53" # 为 NVIDIA Maxwell GPU 架构编译
在其他应用程序中使用 CUTLASS
应用程序应在其包含路径中列出 /include。它们必须作为 C++17 或更高版本编译。
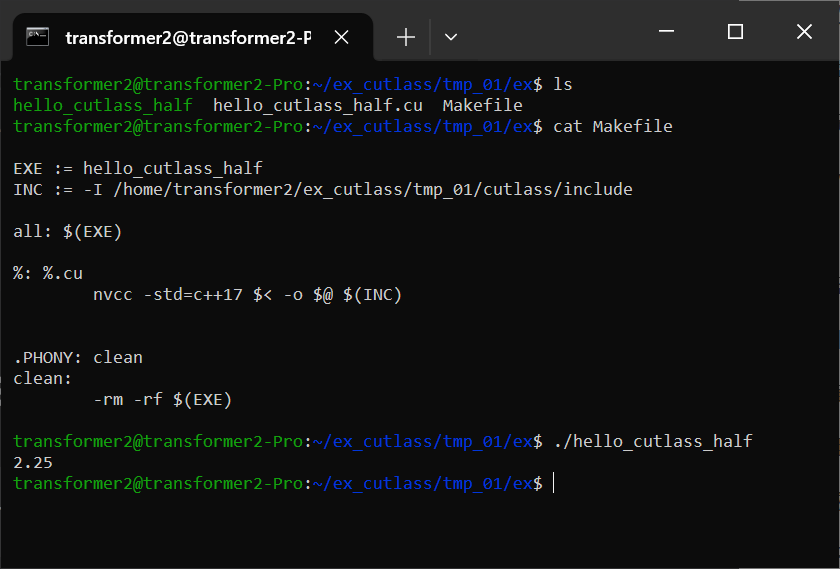
示例:打印存储半精度数据的变量内容。
#include <iostream>
#include <cutlass/cutlass.h>
#include <cutlass/numeric_types.h>
#include <cutlass/core_io.h>

int main() {
    cutlass::half_t x = 2.25_hf;
    std::cout << x << std::endl;
    return 0;
}
效果:
在 CUDA 中启动 GEMM 内核
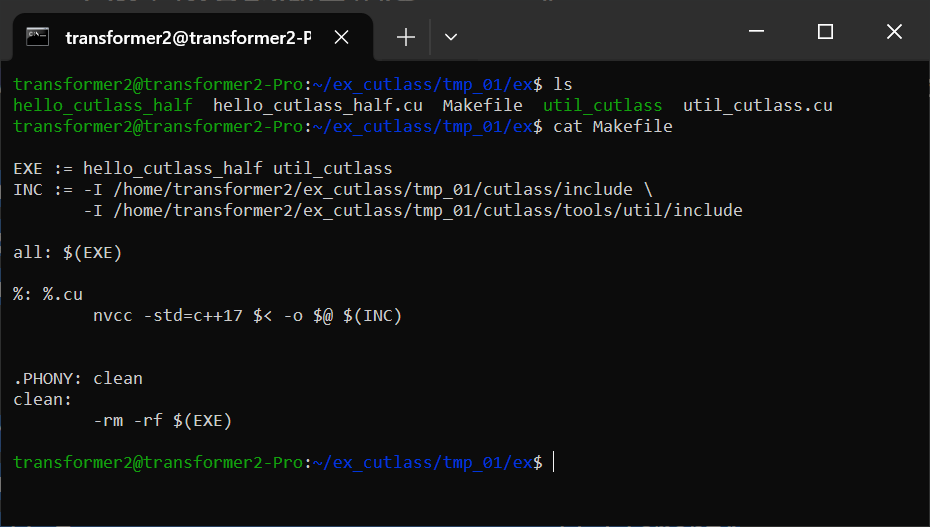
示例:启动一个针对 Turing 张量核心的混合精度 GEMM。
注意,此示例使用 CUTLASS 实用工具。请确保 tools/util/include 在包含路径中。
#include <cutlass/numeric_types.h>
#include <cutlass/gemm/device/gemm.h>
#include <cutlass/util/host_tensor.h>

int main() {
    // 定义 GEMM 操作
    using Gemm = cutlass::gemm::device::Gemm<
        cutlass::half_t,                           // ElementA
        cutlass::layout::ColumnMajor,              // LayoutA
        cutlass::half_t,                           // ElementB
        cutlass::layout::ColumnMajor,              // LayoutB
        cutlass::half_t,                           // ElementOutput
        cutlass::layout::ColumnMajor,              // LayoutOutput
        float,                                     // ElementAccumulator
        cutlass::arch::OpClassTensorOp,            // 指示张量核心的标签
        cutlass::arch::Sm75                        // 指示目标 GPU 计算架构的标签
    >;

    Gemm gemm_op;
    cutlass::Status status;

    // 定义问题尺寸
    int M = 512;
    int N = 256;
    int K = 128;
    float alpha = 1.25f;
    float beta = -1.25f;

    // 分配设备内存
    cutlass::HostTensor<cutlass::half_t, cutlass::layout::ColumnMajor> A({M, K});
    cutlass::HostTensor<cutlass::half_t, cutlass::layout::ColumnMajor> B({K, N});
    cutlass::HostTensor<cutlass::half_t, cutlass::layout::ColumnMajor> C({M, N});

    // 获取设备数据指针和步长
    cutlass::half_t const *ptrA = A.device_data();
    cutlass::half_t const *ptrB = B.device_data();
    cutlass::half_t const *ptrC = C.device_data();
    cutlass::half_t       *ptrD = C.device_data();

    int lda = A.device_ref().stride(0);
    int ldb = B.device_ref().stride(0);
    int ldc = C.device_ref().stride(0);
    int ldd = C.device_ref().stride(0);

    // 在设备上启动 GEMM
    status = gemm_op({
        {M, N, K},
        {ptrA, lda},            // 设备张量 A 的 TensorRef
        {ptrB, ldb},            // 设备张量 B 的 TensorRef
        {ptrC, ldc},            // 设备张量 C 的 TensorRef
        {ptrD, ldd},            // 设备张量 D 的 TensorRef - 可以与 C 相同
        {alpha, beta}           // 收尾操作参数
    });

    if (status != cutlass::Status::kSuccess) {
        return -1;
    }
    return 0;
}
效果:
注意,上面的代码可以使用 HostTensor 中定义的辅助方法简化如下:
    cutlass::HostTensor<cutlass::half_t, cutlass::layout::ColumnMajor> A({M, K});
    cutlass::HostTensor<cutlass::half_t, cutlass::layout::ColumnMajor> B({K, N});
    cutlass::HostTensor<cutlass::half_t, cutlass::layout::ColumnMajor> C({M, N});

    // 使用 HostTensor::device_ref() 返回的 TensorRef
    status = gemm_op({
        {M, N, K},
        A.device_ref(),            // 设备张量 A 的 TensorRef
        B.device_ref(),            // 设备张量 B 的 TensorRef
        C.device_ref(),            // 设备张量 C 的 TensorRef
        C.device_ref(),            // 设备张量 D 的 TensorRef - 可以与 C 相同
        {alpha, beta}              // 收尾操作参数
    });
使用 CUTLASS 3.0 或更高版本启动 GEMM 内核
示例:启动一个针对 Hopper 张量核心的混合精度 GEMM。
#include "cutlass/cutlass.h"
#include "cutlass/epilogue/collective/default_epilogue.hpp"
#include "cutlass/epilogue/thread/linear_combination.h"
#include "cutlass/gemm/collective/collective_builder.hpp"
#include "cutlass/gemm/device/gemm_universal_adapter.h"
#include "cutlass/gemm/kernel/gemm_universal.hpp"
#include "cutlass/util/host_tensor.h"
#include "cutlass/util/packed_stride.hpp"

using namespace cute;

int main(int argc, char const **args) {
    // A 矩阵配置
    using         ElementA    = cutlass::half_t;                                // A 矩阵操作数的元素类型
    using         LayoutA     = cutlass::layout::RowMajor;                      // A 矩阵操作数的布局类型
    constexpr int AlignmentA  = 128 / cutlass::sizeof_bits<ElementA>::value;    // A 矩阵的内存访问粒度/对齐(以元素为单位,最多16字节)

    // B 矩阵配置
    using         ElementB    = cutlass::half_t;                                // B 矩阵操作数的元素类型
    using         LayoutB     = cutlass::layout::ColumnMajor;                   // B 矩阵操作数的布局类型
    constexpr int AlignmentB  = 128 / cutlass::sizeof_bits<ElementB>::value;    // B 矩阵的内存访问粒度/对齐(以元素为单位,最多16字节)

    // C/D 矩阵配置
    using         ElementC    = cutlass::half_t;                                // C 和 D 矩阵操作数的元素类型
    using         LayoutC     = cutlass::layout::ColumnMajor;                   // C 和 D 矩阵操作数的布局类型

    // 核心内核配置
    using ElementAccumulator  = float;                                          // 内部累加的元素类型
    using ArchTag             = cutlass::arch::Sm90;                            // 指示支持预期特性的最低 SM 的标签
    using OperatorClass       = cutlass::arch::OpClassTensorOp;                 // 算子类标签
    using TilesShape          = Shape<_128,_128,_64>;                           // 线程块级别分块大小
    using ClusterShape        = Shape<_1,_2,_1>;                                // 集群中线程块的形状
    using StageCountType = cutlass::gemm::collective::StageCountAuto;           // 根据分块大小最大化的阶段数
    using KernelSchedule = cutlass::gemm::collective::KernelScheduleAuto;       // 基于集体构建器中默认设置要启动的内核

    using CollectiveMainloop = typename cutlass::gemm::collective::CollectiveBuilder<
        ArchTag, OperatorClass,
        ElementA, LayoutA, AlignmentA,
        ElementB, LayoutB, AlignmentB,
        ElementAccumulator,
        TilesShape, ClusterShape,
        cutlass::gemm::collective::StageCountAuto,
        cutlass::gemm::collective::KernelScheduleAuto
    >::CollectiveOp;

    using CollectiveEpilogue = cutlass::epilogue::collective::DefaultEpilogue<
        cutlass::gemm::TagToStrideC_t<LayoutC>,
        cutlass::gemm::TagToStrideC_t<LayoutC>,
        cutlass::epilogue::thread::LinearCombination<ElementC, 1, ElementAccumulator, ElementAccumulator>>;

    using GemmKernel = cutlass::gemm::kernel::GemmUniversal<
        Shape<int,int,int>, // 指示 ProblemShape
        CollectiveMainloop,
        CollectiveEpilogue
    >;

    using Gemm = cutlass::gemm::device::GemmUniversalAdapter<GemmKernel>;

    Gemm gemm_op;
    cutlass::Status status;

    // 定义问题尺寸
    int M = 512;
    int N = 256;
    int K = 128;
    float alpha = 1.25f;
    float beta = -1.25f;

    // 分配设备内存
    cutlass::DeviceAllocation<typename Gemm::ElementA> block_A;
    cutlass::DeviceAllocation<typename Gemm::ElementB> block_B;
    cutlass::DeviceAllocation<typename Gemm::ElementC> block_C;
    cutlass::DeviceAllocation<typename Gemm::EpilogueOutputOp::ElementOutput> block_D;

    using StrideA = typename Gemm::GemmKernel::StrideA;
    using StrideB = typename Gemm::GemmKernel::StrideB;
    using StrideC = typename Gemm::GemmKernel::StrideC;
    using StrideD = typename Gemm::GemmKernel::StrideD;

    StrideA stride_A;
    StrideB stride_B;
    StrideC stride_C;
    StrideD stride_D;

    stride_A = cutlass::make_cute_packed_stride(StrideA{}, {M, K, 1});
    stride_B = cutlass::make_cute_packed_stride(StrideB{}, {N, K, 1});
    stride_C = cutlass::make_cute_packed_stride(StrideC{}, {M, N, 1});
    stride_D = cutlass::make_cute_packed_stride(StrideD{}, {M, N, 1});

    block_A.reset(M * K);
    block_B.reset(K * N);
    block_C.reset(M * N);
    block_D.reset(M * N);

    // 在设备上启动 GEMM
    status = gemm_op({
        cutlass::gemm::GemmUniversalMode::kGemm,
        {M, N, K},
        block_A.get(),
        stride_A,
        block_B.get(),
        stride_B,
        {block_C.get(), stride_C, block_D.get(), stride_D, {alpha, beta}}
    });

    if (status != cutlass::Status::kSuccess) {
        return -1;
    }
    return 0;
}
CUTLASS 库
CUTLASS 库定义了一个 API,用于管理和执行已编译内核实例的集合,并从主机代码启动它们,而无需在客户端代码中进行模板实例化。
为了便于使用,主机端启动 API 设计为类似于 BLAS 实现,但其内核选择过程仅旨在功能上足够。它可能不会为给定问题启动最优的分块大小。它选择第一个可用内核,其数据类型、布局和对齐约束满足给定问题。内核实例和描述它们的数据结构完全可供客户端应用程序使用,这些应用程序可以选择实现自己的选择逻辑。
cuBLAS 为 NVIDIA GPU 上的稠密矩阵计算提供了最佳性能和功能覆盖。
CUTLASS 库被 CUTLASS Profiler 用于管理内核实例,也被几个 SDK 示例使用:
-
10_planar_complex -
11_planar_complex_array
CUTLASS 库定义了描述数值数据类型、矩阵和张量布局、数学操作类、复数变换等的枚举类型。
客户端应用程序应在其包含路径中指定 tools/library/include,并链接到 libcutlas_lib.so。
CUTLASS SDK 示例 10_planar_complex 使用以下 CMake 命令指定其对 CUTLASS 库的依赖:
target_link_libraries(
    10_planar_complex
    PRIVATE
    cutlass_lib
    cutlass_tools_util_includes
)
以下是从主机端 C++ 启动内核的示例:
#include "cutlass/library/library.h"
#include "cutlass/library/handle.h"

int main() {
    // 定义问题尺寸
    int M = 512;
    int N = 256;
    int K = 128;
    float alpha = 1.25f;
    float beta = -1.25f;

    // 分配设备内存
    cutlass::HostTensor<float, cutlass::layout::ColumnMajor> A({M, K});
    cutlass::HostTensor<float, cutlass::layout::ColumnMajor> B({K, N});
    cutlass::HostTensor<float, cutlass::layout::ColumnMajor> C({M, N});

    float const *ptrA = A.device_data();
    float const *ptrB = B.device_data();
    float const *ptrC = C.device_data();
    float       *ptrD = C.device_data(); // 假设 D 与 C 相同或已分配

    int lda = A.device_ref().stride(0);
    int ldb = B.device_ref().stride(0);
    int ldc = C.device_ref().stride(0);
    int ldd = C.device_ref().stride(0); // D 的步长

    // CUTLASS 库调用以执行设备 GEMM
    cutlass::library::Handle handle;

    // 在 CUDA 设备上启动 GEMM
    cutlass::Status status = handle.gemm(
        M, N, K,
        cutlass::library::NumericTypeID::kF32,          // 内部累加的数据类型
        cutlass::library::NumericTypeID::kF32,          // alpha/beta 标量的数据类型
        &alpha,                                         // 指向 alpha 标量的指针
        cutlass::library::NumericTypeID::kF32,          // A 矩阵的数据类型
        cutlass::library::LayoutTypeID::kColumnMajor,   // A 矩阵的布局
        ptrA,                                           // 指向设备内存中 A 矩阵的指针
        lda,                                            // A 矩阵的前导维度
        cutlass::library::NumericTypeID::kF32,          // B 矩阵的数据类型
        cutlass::library::LayoutTypeID::kColumnMajor,   // B 矩阵的布局
        ptrB,                                           // 指向设备内存中 B 矩阵的指针
        ldb,                                            // B 矩阵的前导维度
        &beta,                                          // 指向 beta 标量的指针
        cutlass::library::NumericTypeID::kF32,          // C 和 D 矩阵的数据类型
        ptrC,                                           // 指向设备内存中 C 矩阵的指针
        ldc,                                            // C 矩阵的前导维度
        ptrD,                                           // 指向设备内存中 D 矩阵的指针
        ldd                                             // D 矩阵的前导维度
    );

    if (status != cutlass::Status::kSuccess) {
        return -1;
    }
    return 0;
}
示例 CMake 命令
要实例化支持所有分块大小、数据类型和对齐约束的所有操作,请在运行 cmake 时指定 -DCUTLASS_LIBRARY_KERNELS=all。
$ cmake .. -DCUTLASS_NVCC_ARCHS='70;75;80' -DCUTLASS_LIBRARY_KERNELS=all上面的命令行为 NVIDIA Ampere、Turing 和 Volta 架构生成了大约两万个内核。为三种不同架构编译数千个内核非常耗时。此外,这还会导致二进制文件过大,并且在某些平台上链接器无法构建该库。
启用"统一构建"可以在每个编译单元中实例化多个内核实例,从而减少二进制大小并避免在某些平台上的链接器限制。
$ cmake .. -DCUTLASS_NVCC_ARCHS="70;75;80" -DCUTLASS_LIBRARY_KERNELS=all -DCUTLASS_UNITY_BUILD_ENABLED=ON建议仅编译计划运行的 NVIDIA 架构的 CUTLASS 内核。此外,可以通过在执行 CMake 时指定过滤字符串和通配符来将内核选择性地包含在 CUTLASS 库中。
为了方便起见,下面定义了几个示例。它们可以作为逗号分隔的列表组合。仅编译所需的内核可以减少编译时间。
GEMM CMake 示例
-
针对 NVIDIA Ampere 张量核心的所有 GEMM 内核
$ cmake .. -DCUTLASS_NVCC_ARCHS=80 -DCUTLASS_LIBRARY_KERNELS=tensorop*gemm -
针对 NVIDIA Turing 张量核心的所有 GEMM 内核
$ cmake .. -DCUTLASS_NVCC_ARCHS=75 -DCUTLASS_LIBRARY_KERNELS=tensorop*gemm -
针对 NVIDIA Ampere、Turing 和 Volta 架构的所有具有 FP32 累加的 GEMM 内核
$ cmake .. -DCUTLASS_NVCC_ARCHS="70;75;80" -DCUTLASS_LIBRARY_KERNELS=s*gemm -
针对 NVIDIA Ampere、Turing 和 Volta 架构的所有期望 A 和 B 为列主序或行主序的内核
$ cmake .. -DCUTLASS_NVCC_ARCHS="70;75;80" -DCUTLASS_LIBRARY_KERNELS=gemm*nn,gemm*tt -
针对 NVIDIA Ampere、Turing 和 Volta 架构的所有平面复数 GEMM 变体
$ cmake .. -DCUTLASS_NVCC_ARCHS="70;75;80" -DCUTLASS_LIBRARY_KERNELS=planar_complex
卷积 CMake 示例
-
针对 NVIDIA Ampere 的 16816 张量核心操作的所有卷积内核
$ cmake .. -DCUTLASS_NVCC_ARCHS='80' -DCUTLASS_LIBRARY_KERNELS=s16816fprop,s16816dgrad,s16816wgrad -
针对多个 NVIDIA 架构的 CUDA 核心的所有前向传播 (fprop) 卷积内核
$ cmake .. -DCUTLASS_NVCC_ARCHS='50;60;61;70;75;80' -DCUTLASS_LIBRARY_KERNELS=sfprop -
针对 NVIDIA Ampere 的 16816 张量核心操作的、具有 FP32 累加和 FP16 输入的所有前向传播 (fprop) 卷积内核
$ cmake .. -DCUTLASS_NVCC_ARCHS='80' -DCUTLASS_LIBRARY_KERNELS=s16816fprop_*_f16 -
针对 NVIDIA Ampere、Turing 和 Volta 张量核心操作的、具有 FP32 累加、FP16 输入和优化全局内存迭代器的所有权重梯度 (wgrad) 卷积内核
$ cmake .. -DCUTLASS_NVCC_ARCHS='70;75;80' -DCUTLASS_LIBRARY_KERNELS=tensorop*s*wgrad_optimized_f16
实例化一个 Blackwell SM100 GEMM 内核
Blackwell SM100 内核的实例化与 Hopper 内核非常相似。让我们以一个没有块缩放的 FP8 GEMM 为例。
内核首先设置数据类型和集群形状:
using LayoutA = cutlass::layout::RowMajor;
using LayoutB = cutlass::layout::ColumnMajor;
using LayoutC = cutlass::layout::ColumnMajor;
using ElementA = cutlass::float_e4m3_t;
using ElementB = cutlass::float_e4m3_t;
using ElementC = cutlass::float_e4m3_t;
using ElementD = cutlass::float_e4m3_t;
using ElementAccumulator = float;
using ElementCompute = float;
using ElementBias = cutlass::half_t;
using MmaTileShape = cute::Shape<_128,_64,Int<128 / sizeof(ElementA)>>;
using ClusterShape = cute::Shape<_1,_1,_1>;
首先需要实例化收尾部分,因为主循环集体构建器在其模板参数列表中接收收尾部分的共享内存预算。3.x 版本的收尾集体构建器 API 对于 Blackwell 没有变化,因此收尾融合的构建方式与 SM90 收尾相同:
using EpilogueSchedule = cutlass::epilogue::TmaWarpSpecialized1Sm;

using FusionOperation = cutlass::epilogue::fusion::LinearCombination<
    ElementD,
    ElementCompute,
    ElementC
>;

using CollectiveEpilogue = typename cutlass::epilogue::collective::CollectiveBuilder<
    cutlass::arch::Sm100, cutlass::arch::OpClassTensorOp,
    MmaTileShape, ClusterShape,
    cutlass::epilogue::collective::EpilogueTileAuto,
    ElementAccumulator, ElementCompute,
    ElementC, LayoutC, 16 / sizeof(ElementC),
    ElementD, LayoutC, 16 / sizeof(ElementD),
    EpilogueSchedule,
    FusionOperation
>::CollectiveOp;
可以参考我们的 Sm100 单元测试作为如何正确选择主循环调度的示例。我们所有的调度策略都可以在 dispatch_policy.hpp 中找到,更全面的 Blackwell 特定文档关于有效调度策略可以在 blackwell_functionality.md 中找到:
using MainloopSchedule = cutlass::gemm::KernelTmaWarpSpecialized1SmSm100;
using CollectiveMainloop = typename cutlass::gemm::collective::CollectiveBuilder<
    cutlass::arch::Sm100, cutlass::arch::OpClassTensorOp,
    ElementA, LayoutA, 16 / sizeof(ElementA),
    ElementB, LayoutB, 16 / sizeof(ElementB),
    ElementAccumulator,
    MmaTileShape, ClusterShape,
    cutlass::gemm::collective::StageCountAutoCarveout<static_cast<int>(sizeof(typename CollectiveEpilogue::SharedStorage))>,
    MainloopSchedule
>::CollectiveOp;

using GemmKernel = cutlass::gemm::kernel::GemmUniversal<
    Shape<int,int,int,int>,
    CollectiveMainloop,
    CollectiveEpilogue
>;
实例化块缩放 GEMM 内核略有不同。参考 MXFP8 GEMM 示例单元测试,它采用不同的张量操作类:
using ElementA = cutlass::mx_float8_t<cutlass::float_e4m3_t>;
using ElementB = cutlass::mx_float8_t<cutlass::float_e4m3_t>;
在 mainloop builder 中是必需的:
using CollectiveMainloop = typename cutlass::gemm::collective::CollectiveBuilder<
    cutlass::arch::Sm100, cutlass::arch::OpClassTensorOp,
    ElementA, LayoutA, 16,
    ElementB, LayoutB, 16,
    ElementAccumulator,
    MmaTileShape, ClusterShape,
    cutlass::gemm::collective::StageCountAutoCarveout<static_cast<int>(sizeof(typename CollectiveEpilogue::SharedStorage))>,
    cutlass::gemm::KernelScheduleAuto
>::CollectiveOp;
我们鼓励用户参考 Sm100 单元测试和基于 profiler 生成的更全面的示例内核。