不再只是"连接数据库"------本文带你用 Go + Gin + MongoDB 从零搭建一个完整 CRUD 博客应用,代码清晰、结构规范、即拿即用!
在现代后端开发中,MongoDB 凭借其灵活的文档模型和高扩展性,成为许多 Go 开发者的首选 NoSQL 数据库。
而 Go 官方提供的 go.mongodb.org/mongo-driver 驱动,让操作 MongoDB 变得既安全又高效。
本文将手把手教你:
- 连接 MongoDB
- 实现完整的 CRUD(增删改查)
- 构建一个带 Web 界面的博客系统(使用 Gin 框架)
🛠️ 前置准备
确保你已安装:
- Go 1.25+
- MongoDB (本地运行于
localhost:27017) - 基础 Go 和 NoSQL 知识
💡 提示:可用 Docker 快速启动 MongoDB:
bashdocker run -d -p 27017:27017 --name mongo mongo:latest
🔌 第一步:初始化项目 & 安装依赖
bash
mkdir go-blog && cd go-blog
go mod init blog
go get github.com/gin-gonic/gin
go get go.mongodb.org/mongo-driver/mongo
go get go.mongodb.org/mongo-driver/bson
📦 第二步:定义数据模型
MongoDB 存储的是 BSON(Binary JSON),Go 通过 struct + tag 映射:
go
// models/post.go
package models

import (
	"time"
	"go.mongodb.org/mongo-driver/bson/primitive"
)

type Post struct {
	ID        primitive.ObjectID `bson:"_id,omitempty" json:"id"`
	Title     string             `bson:"title" json:"title"`
	Content   string             `bson:"content" json:"content"`
	CreatedAt time.Time          `bson:"created_at" json:"created_at"`
	UpdatedAt time.Time          `bson:"updated_at" json:"updated_at"`
}
✅
omitempty:插入时若_id为空,MongoDB 会自动生成✅
primitive.ObjectID:MongoDB 的唯一 ID 类型
🌐 第三步:建立 MongoDB 连接
go
// main.go
package main

import (
	"context"
	"log"
	"time"
	"blog/handlers"

	"github.com/gin-gonic/gin"
	"go.mongodb.org/mongo-driver/mongo"
	"go.mongodb.org/mongo-driver/mongo/options"
)

func main() {
	// 创建带超时的上下文
	ctx, cancel := context.WithTimeout(context.Background(), 10*time.Second)
	defer cancel()

	// 连接 MongoDB
	client, err := mongo.Connect(ctx, options.Client().ApplyURI("mongodb://localhost:27017"))
	if err != nil {
		log.Fatal(err)
	}
	defer client.Disconnect(ctx)

	// 测试连接
	if err = client.Ping(ctx, nil); err != nil {
		log.Fatal(err)
	}
	log.Println("✅ 成功连接 MongoDB!")

	// 获取数据库实例
	db := client.Database("blog_db")

	// 初始化 Gin 路由
	router := gin.Default()
	router.LoadHTMLGlob("templates/*")

	// 注册处理器
	h := handlers.NewHandler(db)
	router.GET("/", h.HomePage)
	router.GET("/post/:id", h.ViewPost)
	router.GET("/create", h.CreatePost)
	router.POST("/save", h.SavePost)
	router.GET("/edit/:id", h.EditPost)
	router.GET("/delete/:id", h.DeletePost)

	log.Println("🚀 服务启动于 http://localhost:8080")
	router.Run(":8080")
}
⚠️ 注意:MongoDB 不会预先创建数据库或集合,首次插入文档时自动创建。
🧠 第四步:实现核心 Handler(CRUD 逻辑)
go
// handlers/main.go
package handlers

import (
	"context"
	"log"
	"net/http"
	"time"

	"github.com/gin-gonic/gin"
	"go.mongodb.org/mongo-driver/bson"
	"go.mongodb.org/mongo-driver/bson/primitive"
	"go.mongodb.org/mongo-driver/mongo"
	"blog/models"
)

type Handler struct {
	collection *mongo.Collection
}

func NewHandler(db *mongo.Database) *Handler {
	return &Handler{
		collection: db.Collection("posts"),
	}
}

// 首页:列出所有文章
func (h *Handler) HomePage(c *gin.Context) {
	ctx, cancel := context.WithTimeout(context.Background(), 5*time.Second)
	defer cancel()

	cursor, err := h.collection.Find(ctx, bson.M{})
	if err != nil {
		c.JSON(http.StatusInternalServerError, gin.H{"error": err.Error()})
		return
	}
	defer cursor.Close(ctx)

	var posts []models.Post
	if err = cursor.All(ctx, &posts); err != nil {
		c.JSON(http.StatusInternalServerError, gin.H{"error": err.Error()})
		return
	}
	c.HTML(http.StatusOK, "index.html", posts)
}

// 查看单篇文章
func (h *Handler) ViewPost(c *gin.Context) {
	id, _ := primitive.ObjectIDFromHex(c.Param("id"))
	var post models.Post
	err := h.collection.FindOne(context.TODO(), bson.M{"_id": id}).Decode(&post)
	if err != nil {
		c.AbortWithStatus(http.StatusNotFound)
		return
	}
	c.HTML(http.StatusOK, "post.html", post)
}

// 保存文章(创建 or 更新)
func (h *Handler) SavePost(c *gin.Context) {
	now := time.Now()
	id := c.PostForm("id")
	title := c.PostForm("title")
	content := c.PostForm("content")

	ctx, cancel := context.WithTimeout(context.Background(), 5*time.Second)
	defer cancel()

	if id == "" {
		// 创建新文章
		post := models.Post{
			Title:     title,
			Content:   content,
			CreatedAt: now,
			UpdatedAt: now,
		}
		result, err := h.collection.InsertOne(ctx, post)
		if err != nil {
			c.JSON(http.StatusInternalServerError, gin.H{"error": err.Error()})
			return
		}
		log.Printf("📝 创建文章 ID: %v", result.InsertedID)
	} else {
		// 更新现有文章
		objID, _ := primitive.ObjectIDFromHex(id)
		update := bson.M{
			"$set": bson.M{
				"title":      title,
				"content":    content,
				"updated_at": now,
			},
		}
		h.collection.UpdateOne(ctx, bson.M{"_id": objID}, update)
		log.Printf("✏️ 更新文章 ID: %s", id)
	}
	c.Redirect(http.StatusSeeOther, "/")
}

// 删除文章
func (h *Handler) DeletePost(c *gin.Context) {
	id, _ := primitive.ObjectIDFromHex(c.Param("id"))
	h.collection.DeleteOne(context.TODO(), bson.M{"_id": id})
	log.Printf("🗑️ 删除文章 ID: %s", id)
	c.Redirect(http.StatusSeeOther, "/")
}

// 渲染表单
func (h *Handler) CreatePost(c *gin.Context) { c.HTML(http.StatusOK, "create.html", nil) }
func (h *Handler) EditPost(c *gin.Context) {
	id, _ := primitive.ObjectIDFromHex(c.Param("id"))
	var post models.Post
	h.collection.FindOne(context.TODO(), bson.M{"_id": id}).Decode(&post)
	c.HTML(http.StatusOK, "edit.html", post)
}
🎨 第五步:前端模板(Tailwind CSS)
项目结构:
go
go-blog/
├── main.go
├── models/
│   └── post.go
├── handlers/
│   └── main.go
└── templates/
    ├── index.html
    ├── post.html
    ├── create.html
    └── edit.html
每个模板均使用 Tailwind CDN,无需构建步骤。
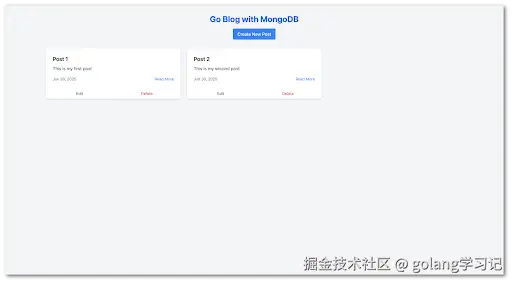
例如 index.html 展示文章列表,并支持"创建/编辑/删除":
html
<!-- templates/index.html 片段 -->
{{range .}}
<div class="bg-white rounded shadow p-4">
  <h2 class="text-xl font-bold">{{.Title}}</h2>
  <p>{{slice .Content 0 100}}...</p>
  <a href="/edit/{{.ID.Hex}}">编辑</a>
  <a href="/delete/{{.ID.Hex}}" onclick="return confirm('确定删除?')">删除</a>
</div>
{{end}}
💡 完整模板代码可参考 freeCodeCamp 原文。
▶️ 启动并测试
bash
go mod tidy
go run main.go
访问 http://localhost:8080,即可看到你的博客系统!
- 点击 "Create New Post" 发布文章
- 编辑、删除、查看详情全部支持
🔒 安全与最佳实践
| 问题 | 建议 |
|---|---|
| ID 注入攻击 | 使用 primitive.ObjectIDFromHex() 校验 ID 格式 |
| XSS 风险 | 模板中避免直接输出用户输入(本例用 whitespace-pre-line 限制) |
| 连接泄漏 | 始终使用 defer client.Disconnect(ctx) |
| 超时控制 | 所有 DB 操作都应带 context.WithTimeout |
🔚 结语
Go 与 MongoDB 的组合,兼具高性能 与开发效率 。
通过本文的完整示例,你不仅学会了如何操作数据库,更掌握了一个生产级 Web 应用的基本架构。
📌 记住 :
MongoDB 的"无模式"不是"无设计",合理的 struct 定义和索引策略,才是高性能的关键。