1. 概述
本文档详细介绍了在 openGauss 6.0 环境下,如何利用 gs_probackup 工具进行数据库的全量备份、增量备份以及在模拟故障后的集群数据恢复操作。
2. 前提条件
在开始备份操作前,请确保满足以下环境要求:
- 数据库状态:能够正常连接 openGauss 数据库 。
- 增量备份配置:若需使用 PTRACK 增量备份,必须在 postgresql.conf 中设置 enable_cbm_tracking = on 。
gs_guc reload -D /opengauss/install/data/dn1/ -c "enable_cbm_tracking = on"
- 日志保留设置:为防止传输过程中 xlog 被清理,建议适当调高 postgresql.conf 中的 wal_keep_segments 参数值 。
3. 备份环境初始化
主备集群环境:
|----|---------|----------------|-----------|--------|----------------|
| 序号 | 主机名 | IP地址 | 操作系统版本 | 网卡 | 数据库版本 |
| 1 | gauss61 | 192.192.103.61 | Centos7.9 | ens192 | openGauss6.0.2 |
| 2 | gauss62 | 192.192.103.62 | Centos7.9 | ens192 | openGauss6.0.2 |
3.1 查看版本信息
确认工具版本与数据库版本匹配。
[omm@gauss61 backup]$ gs_probackup version
# 输出示例:gs_probackup (openGauss 6.0.2 build 6285c0ef)
3.2 创建并初始化备份目录
创建物理存储路径并进行初始化。
# 创建物理目录omm@gauss61$ mkdir -p /opengauss/pbackup
# 初始化备份路径(目录必须为空)omm@gauss61$ gs_probackup init -B /opengauss/pbackup/
初始化后,目录下将生成 backups 和 wal 两个核心子目录 。
3.3 初始化备份实例
将特定的数据目录关联到备份实例中,并生成配置文件 pg_probackup.conf 。
omm@gauss61 backup$ gs_probackup add-instance -B /opengauss/pbackup/ -D /opengauss/install/data/dn1 --instance instance_local
4. 实施备份操作
4.1 执行全量备份 (FULL)
全量备份是增量备份的基础。
omm@gauss61 backup$ gs_probackup backup -B /opengauss/pbackup/ --instance instance_local -d postgres -b FULL
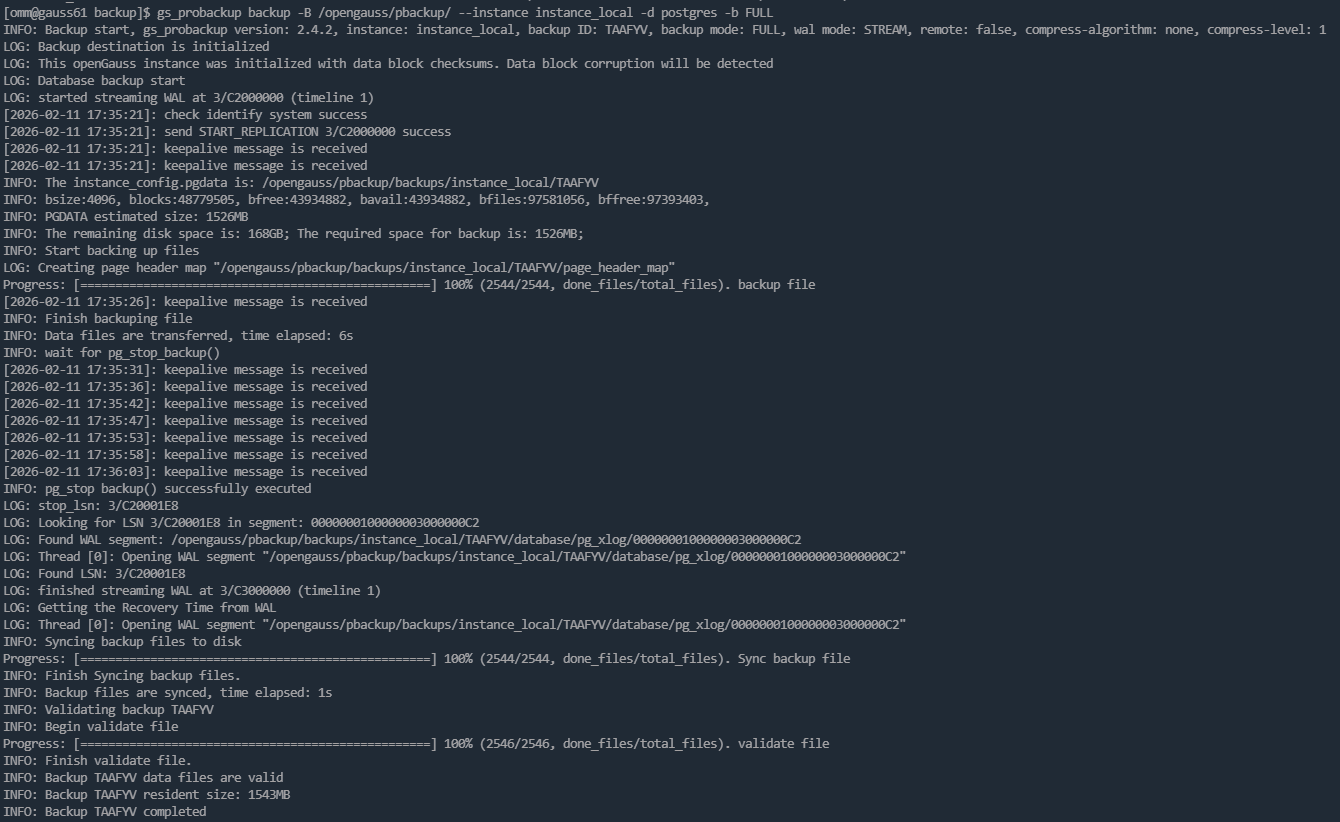
注:系统会自动校验数据块校验和(checksums),并估算所需磁盘空间 。
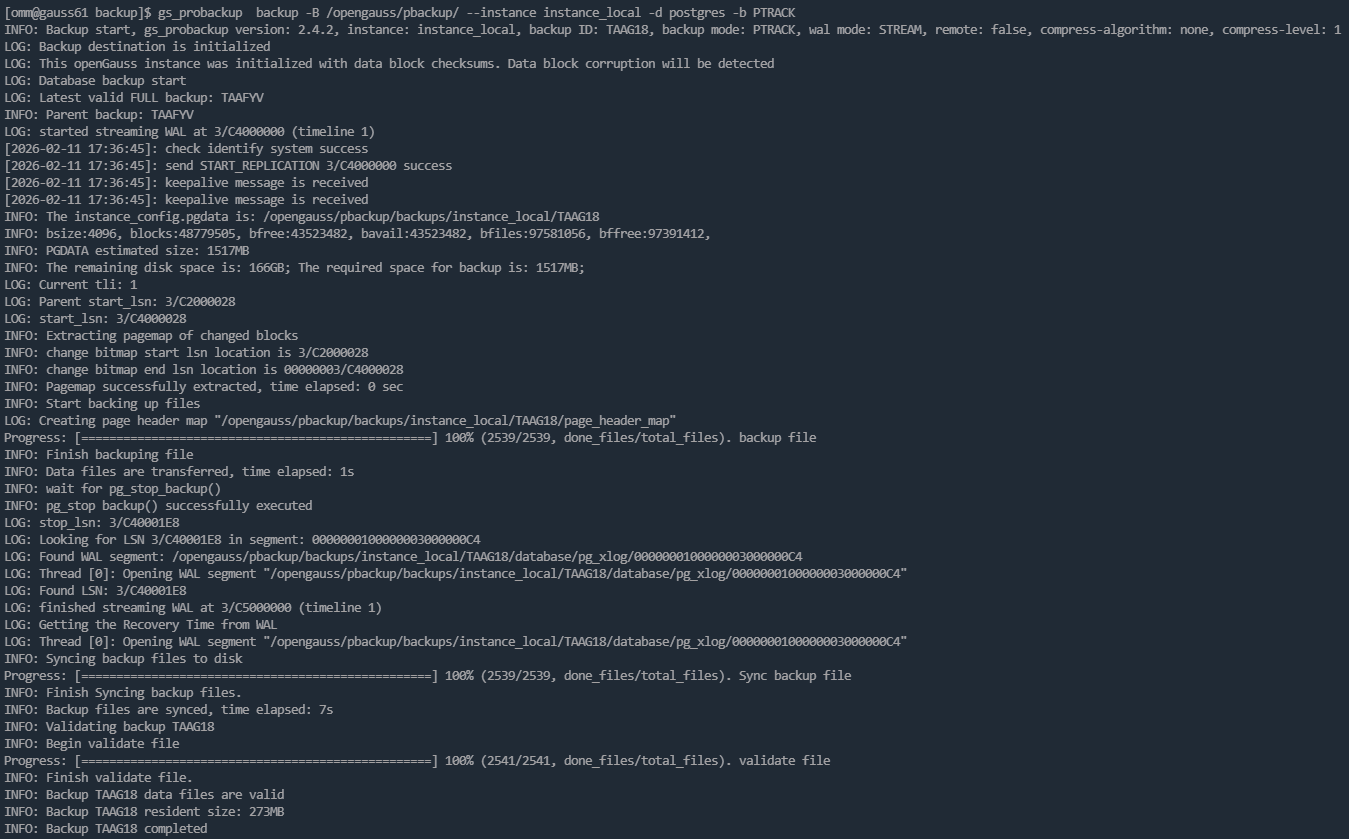
4.2 执行增量备份 (PTRACK)
基于 PTRACK 模式进行增量备份,仅记录自上次备份以来发生变化的数据块 。
omm@gauss61 backup$ gs_probackup backup -B /opengauss/pbackup/ --instance instance_local -d postgres -b PTRACK
4.3 查看备份列表
通过 show 命令验证备份状态,确保 Status 为 OK 。
omm@gauss61 backup$ gs_probackup show -B /opengauss/pbackup/

5. 灾难恢复演练
5.1 模拟故障
- 停止集群:gs_om -t stop 。
- 模拟损坏:重命名(删除)主备节点的数据目录 dn1 。
5.2 恢复主节点数据
使用 RESTORE 命令将数据恢复至模拟损坏前的状态。
omm@gauss61 \~$ gs_probackup restore -B /opengauss/pbackup/ --instance instance_local -D /opengauss/install/data/dn1

系统会自动验证备份链的完整性并执行恢复 。
5.3 启动集群与备节点修复
1.启动集群:执行 gs_om -t start 。
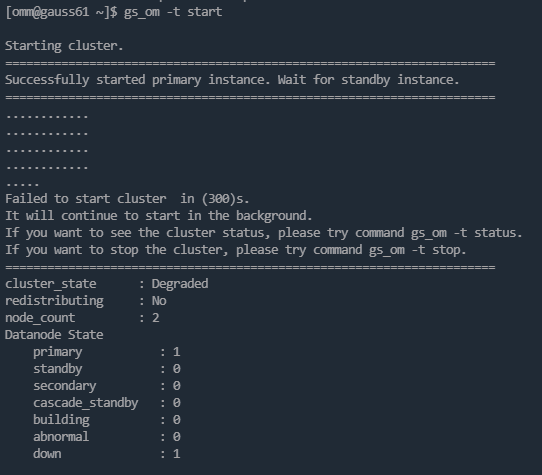
2.查看状态:若发现备节点处于 Down 或 Disk damaged 状态,需手动重建 。
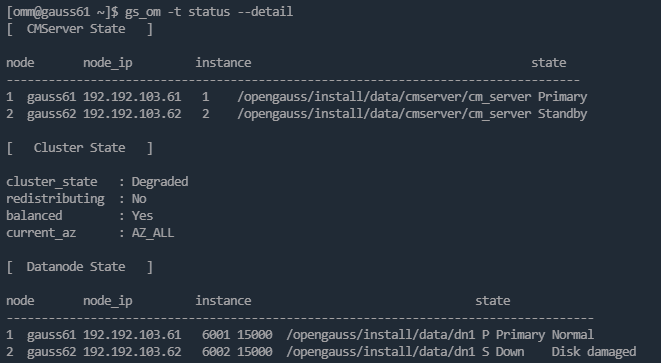
- 修复配置:
- 从主节点拷贝 postgresql.conf 到备节点 。
- 修改备节点的 local_bind_address 和 replconninfo1(将 IP 指向对应的本地和对端地址) 。
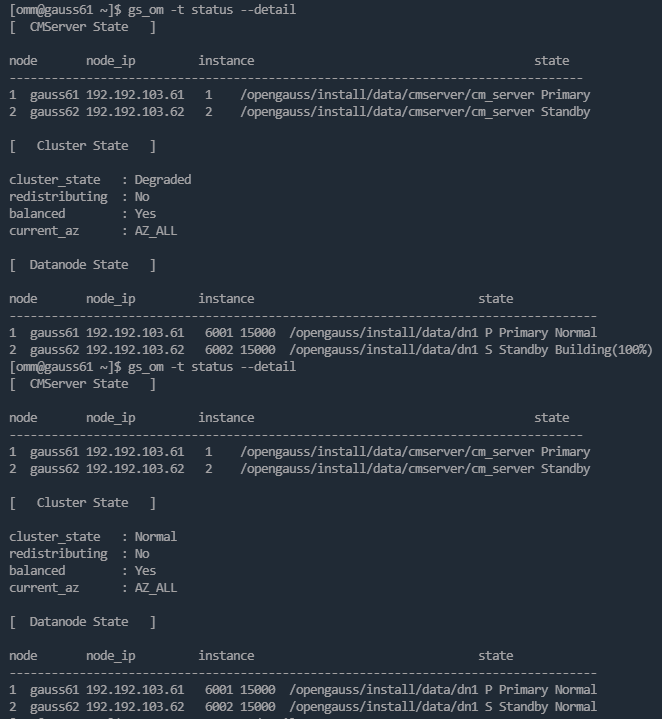
- 执行备节点重建:
omm@gauss62 \~$ gs_ctl build -D /opengauss/install/data/dn1 -b full
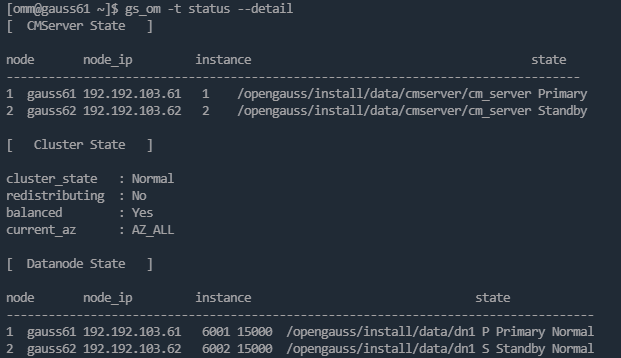
6. 验证恢复结果
待集群状态恢复为 Normal 后 ,登录数据库查看主备同步状态:
openGauss=# select * from pg_stat_replication;
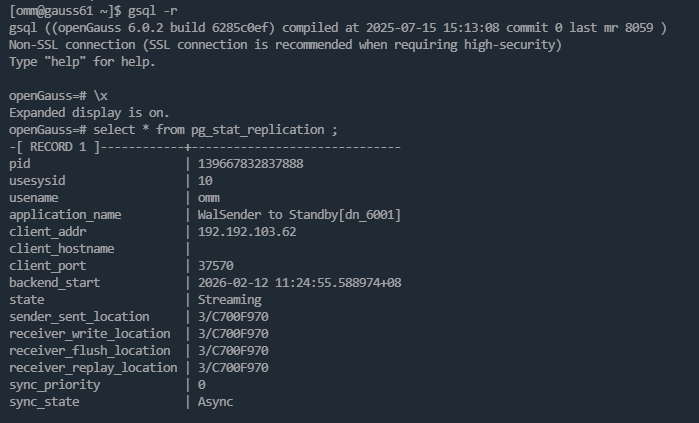
当 state 显示为 Streaming 且 sync_state 符合预期(如 Async/Sync)时,表示数据库恢复成功 。