测试环境:Windows 11 专业版 + Git 2.45.1
下载Hugo
点击进入以下网页:github.com/gohugoio/hu...
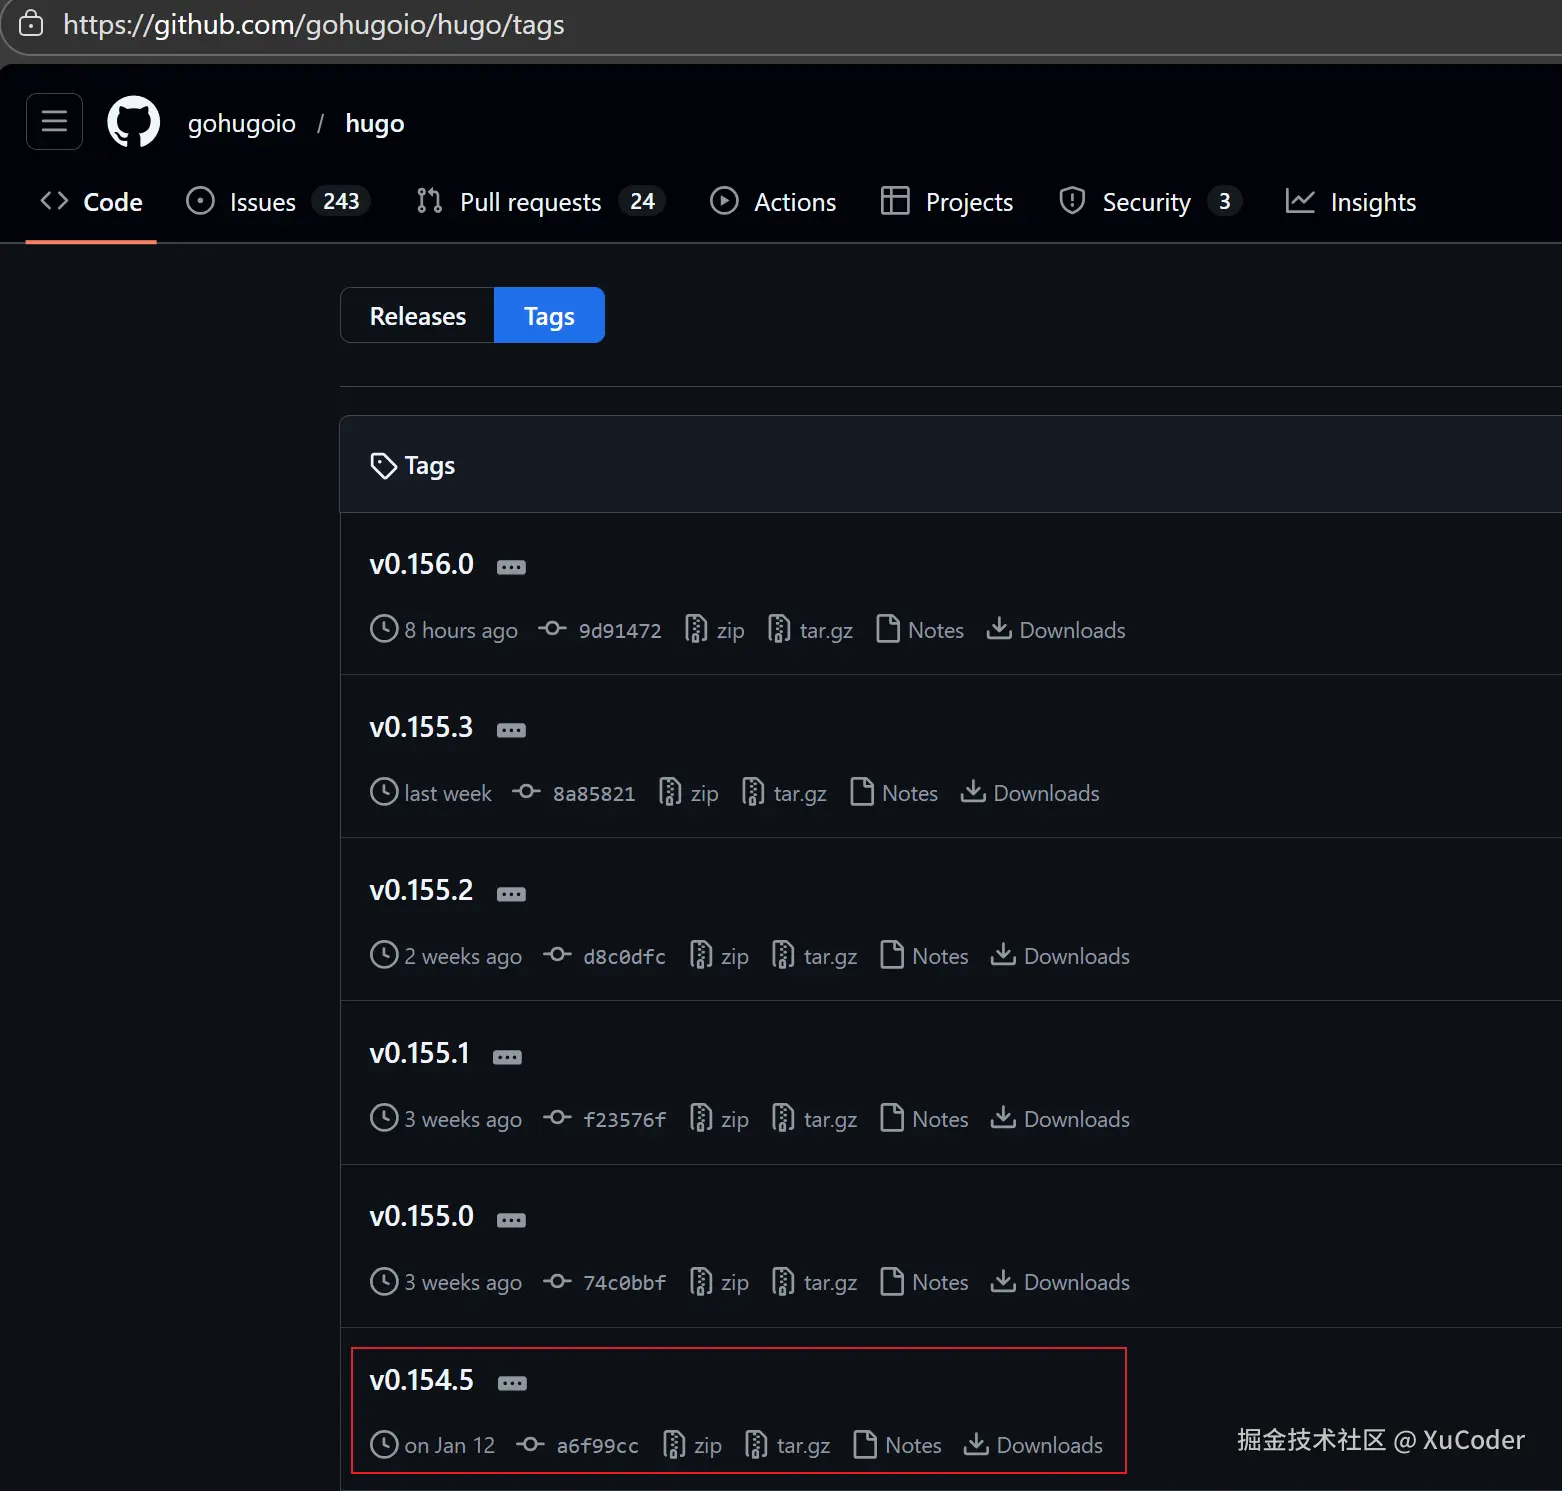
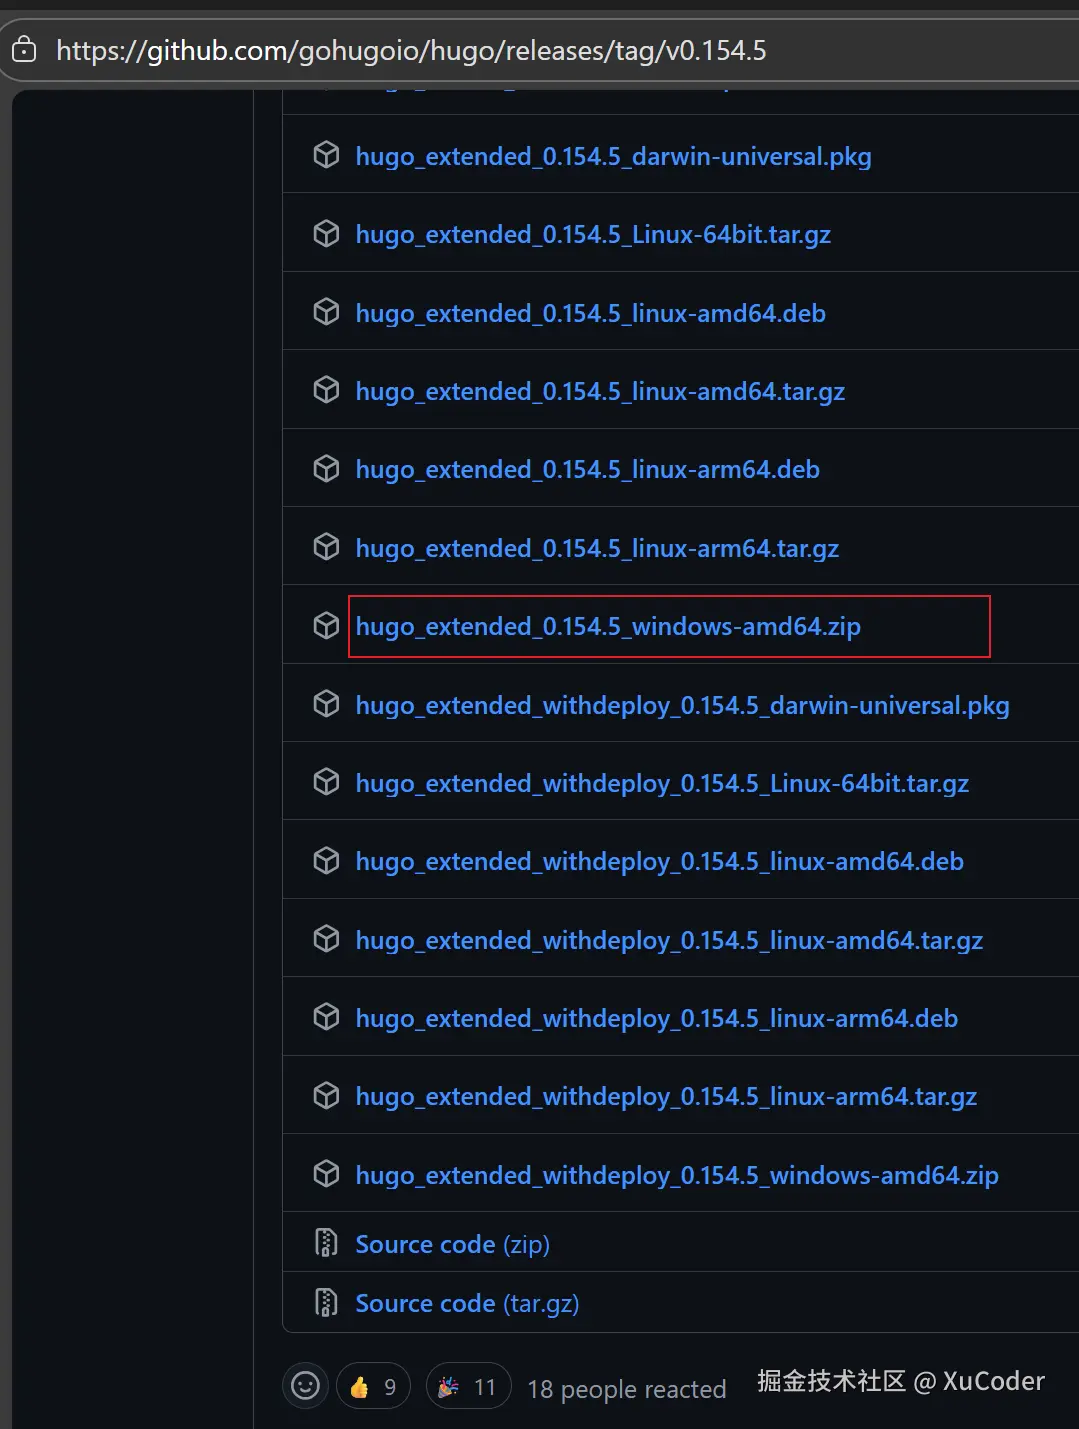
可按需选择版本,如v0.154.5。
创建个人博客
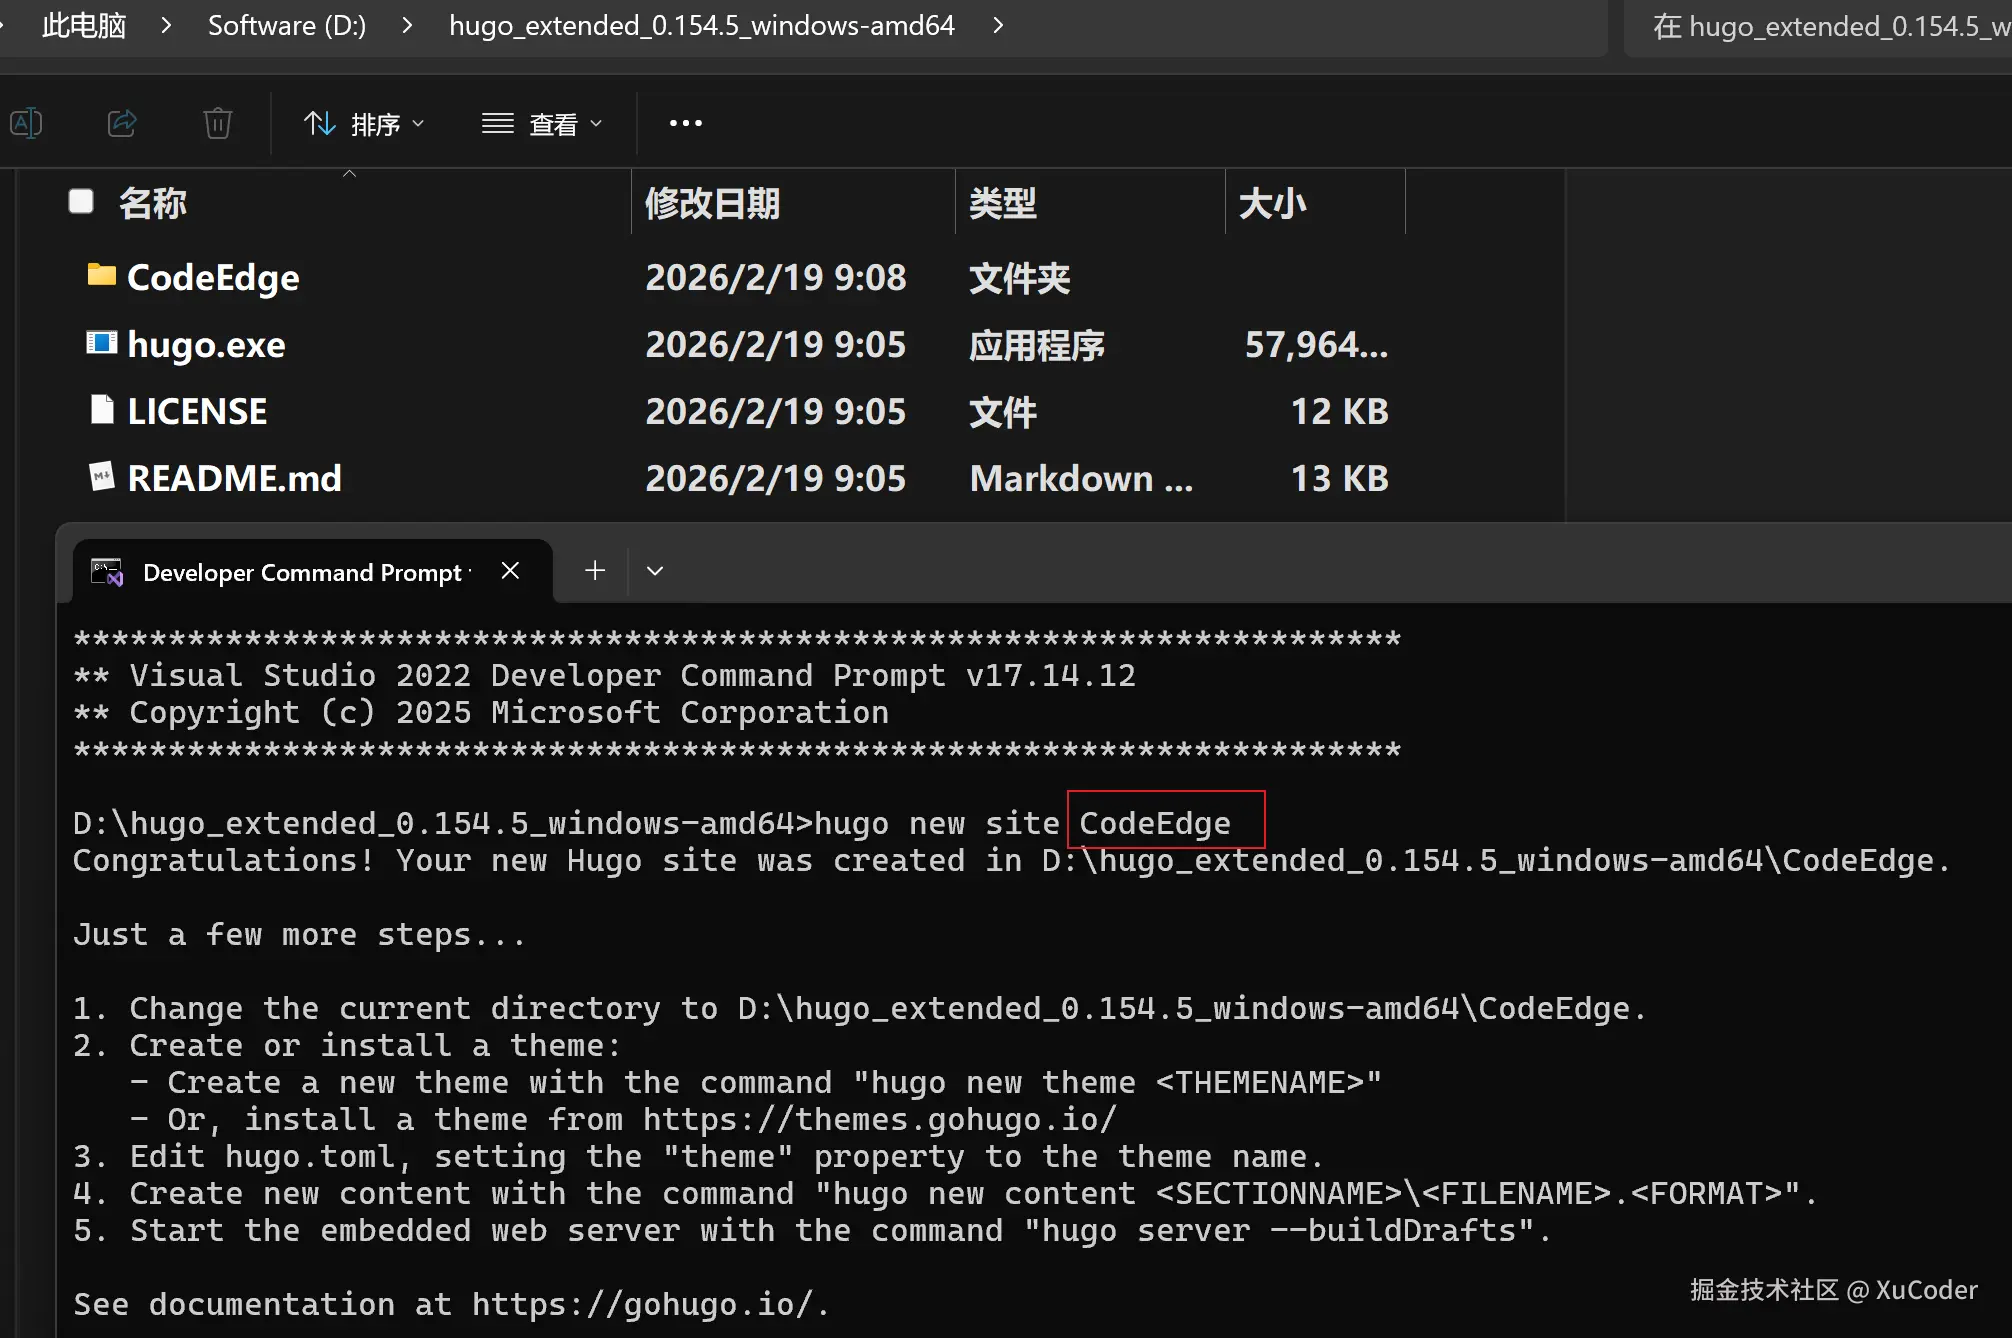
解压这个压缩包,进入到解压后的文件夹,右键进入命令行界面,输入以下命令【hugo new site CodeEdge】,其中【CodeEdge】名字可任意取。
将【hugo.exe】文件复制到【CodeEdge】文件夹中,再cd到CodeEdge目录,执行以下命令启动服务【hugo server -D】

配置个人博客的主题
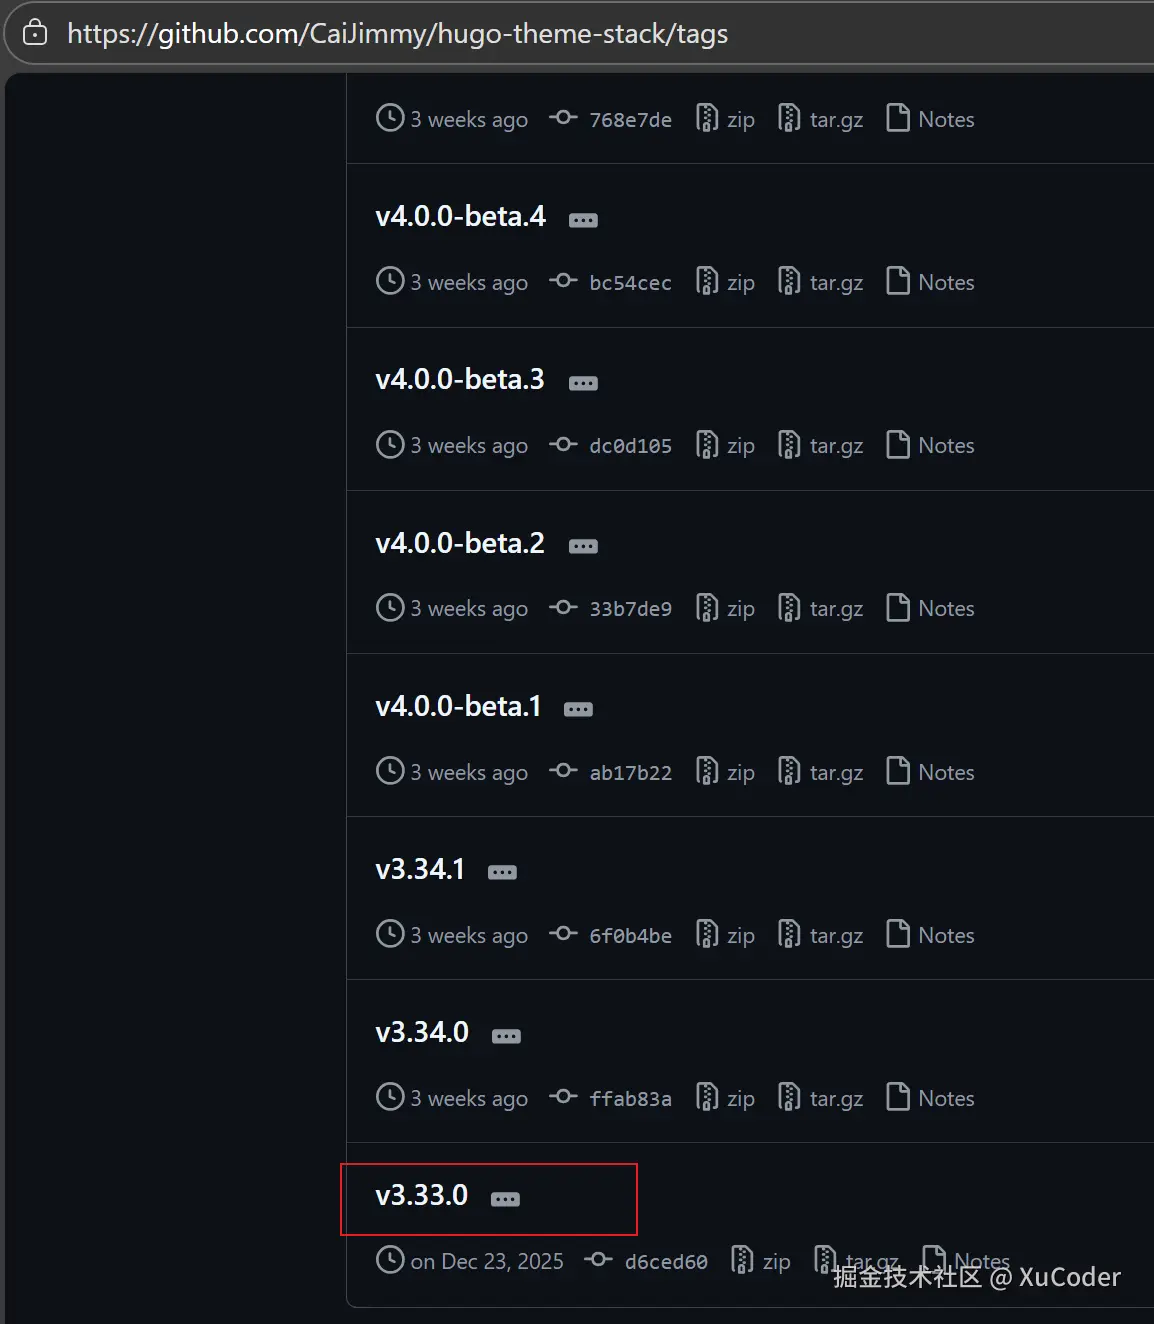
点击进入以下网页github.com/CaiJimmy/hu...,这里选择的是【Stack】主题,可按需选择版本,如v3.33.0。
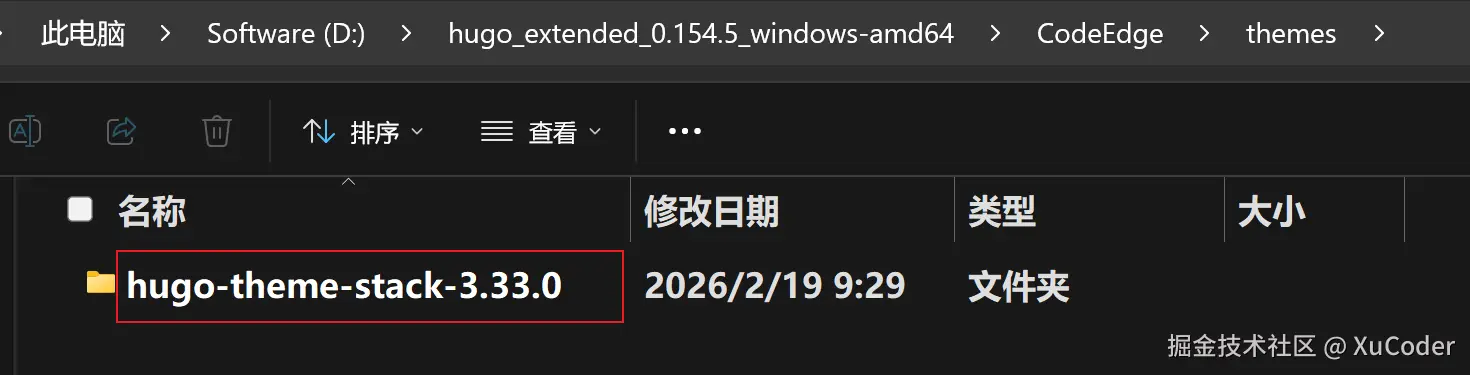
将这个压缩包解压到CodeEdge的themes文件夹下:

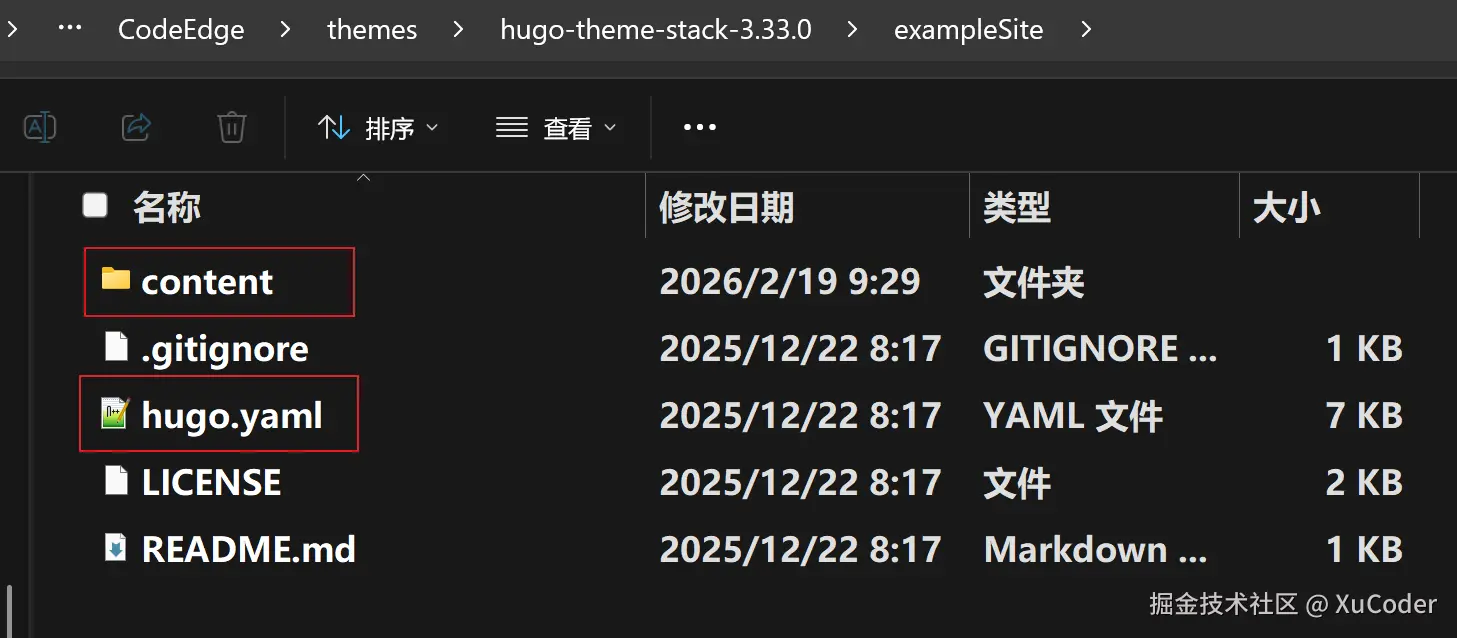
将【exampleSite】文件夹下的【content】文件夹和【hugo.yaml】文件复制到【CodeEdge】文件夹下:
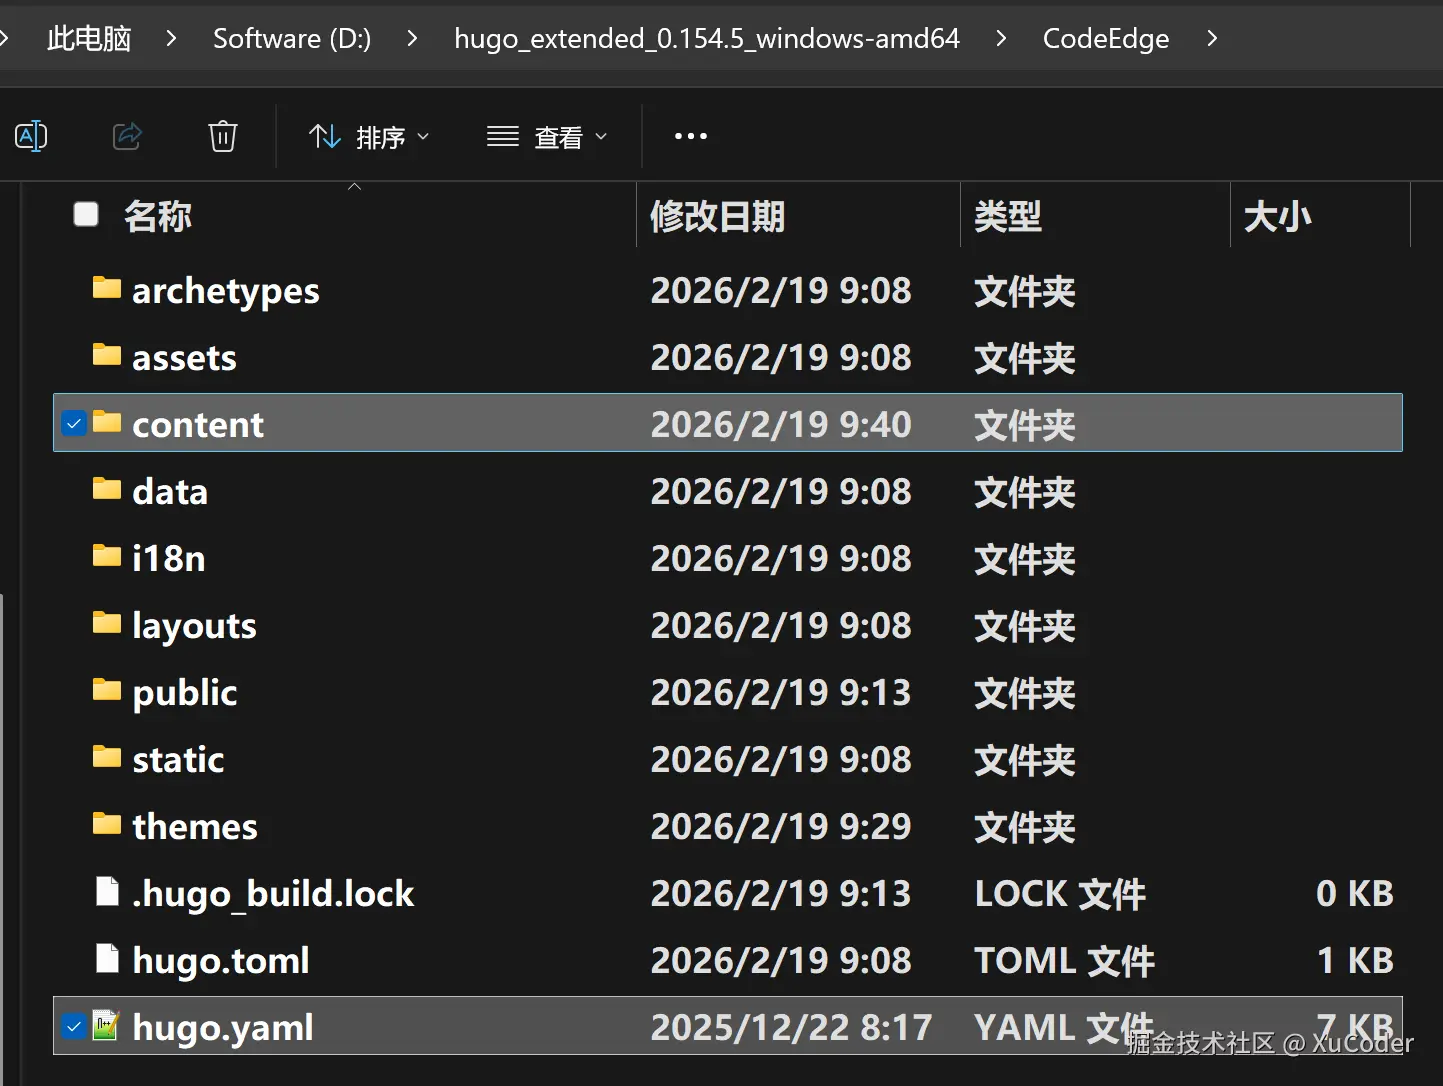
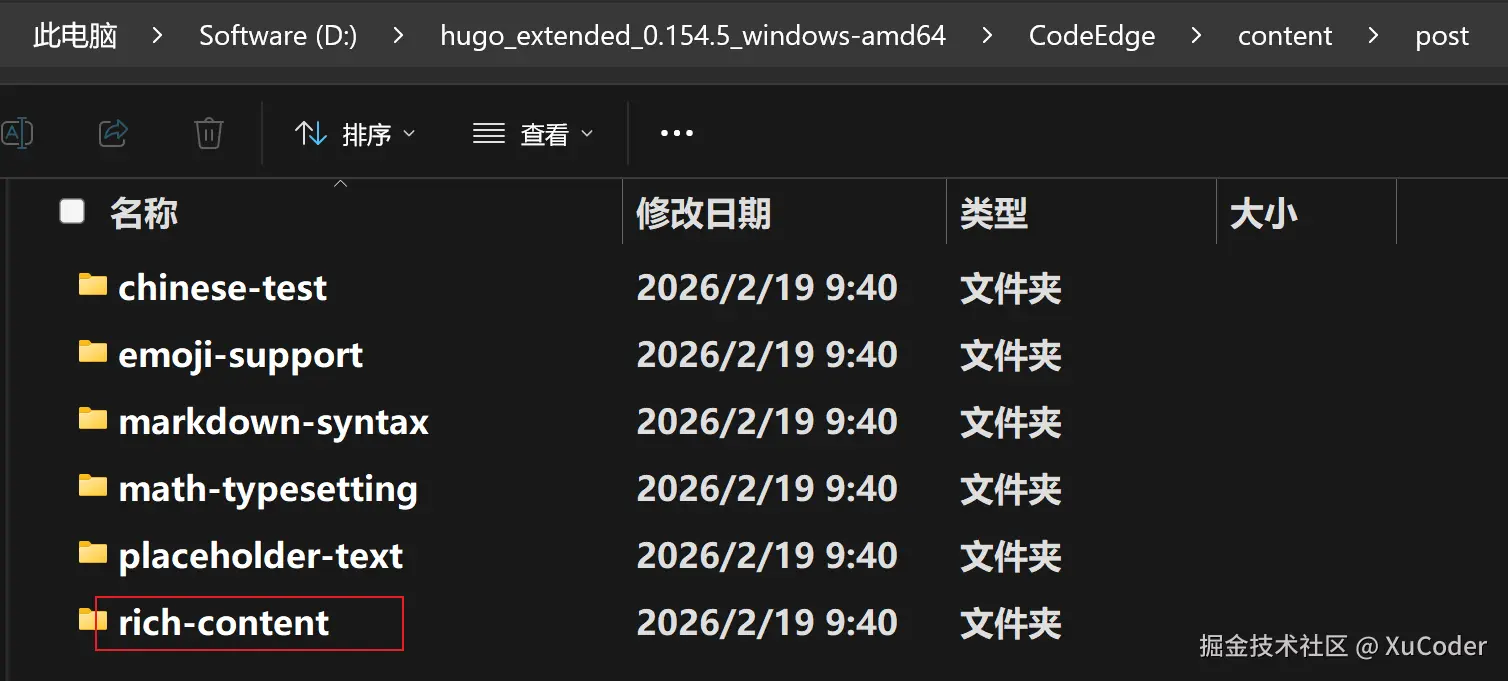
接下来,将【CodeEdge】文件夹下的【hugo.toml】文件以及【content/post】路径下的【rich-content】文件夹一并删除:
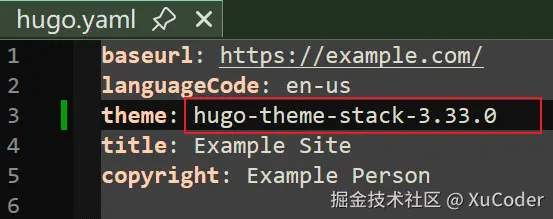
编辑【hugo.yaml】文件,将theme修改为themes文件夹下的主题文件夹同名:
在命令行中再次执行【hugo server -D】

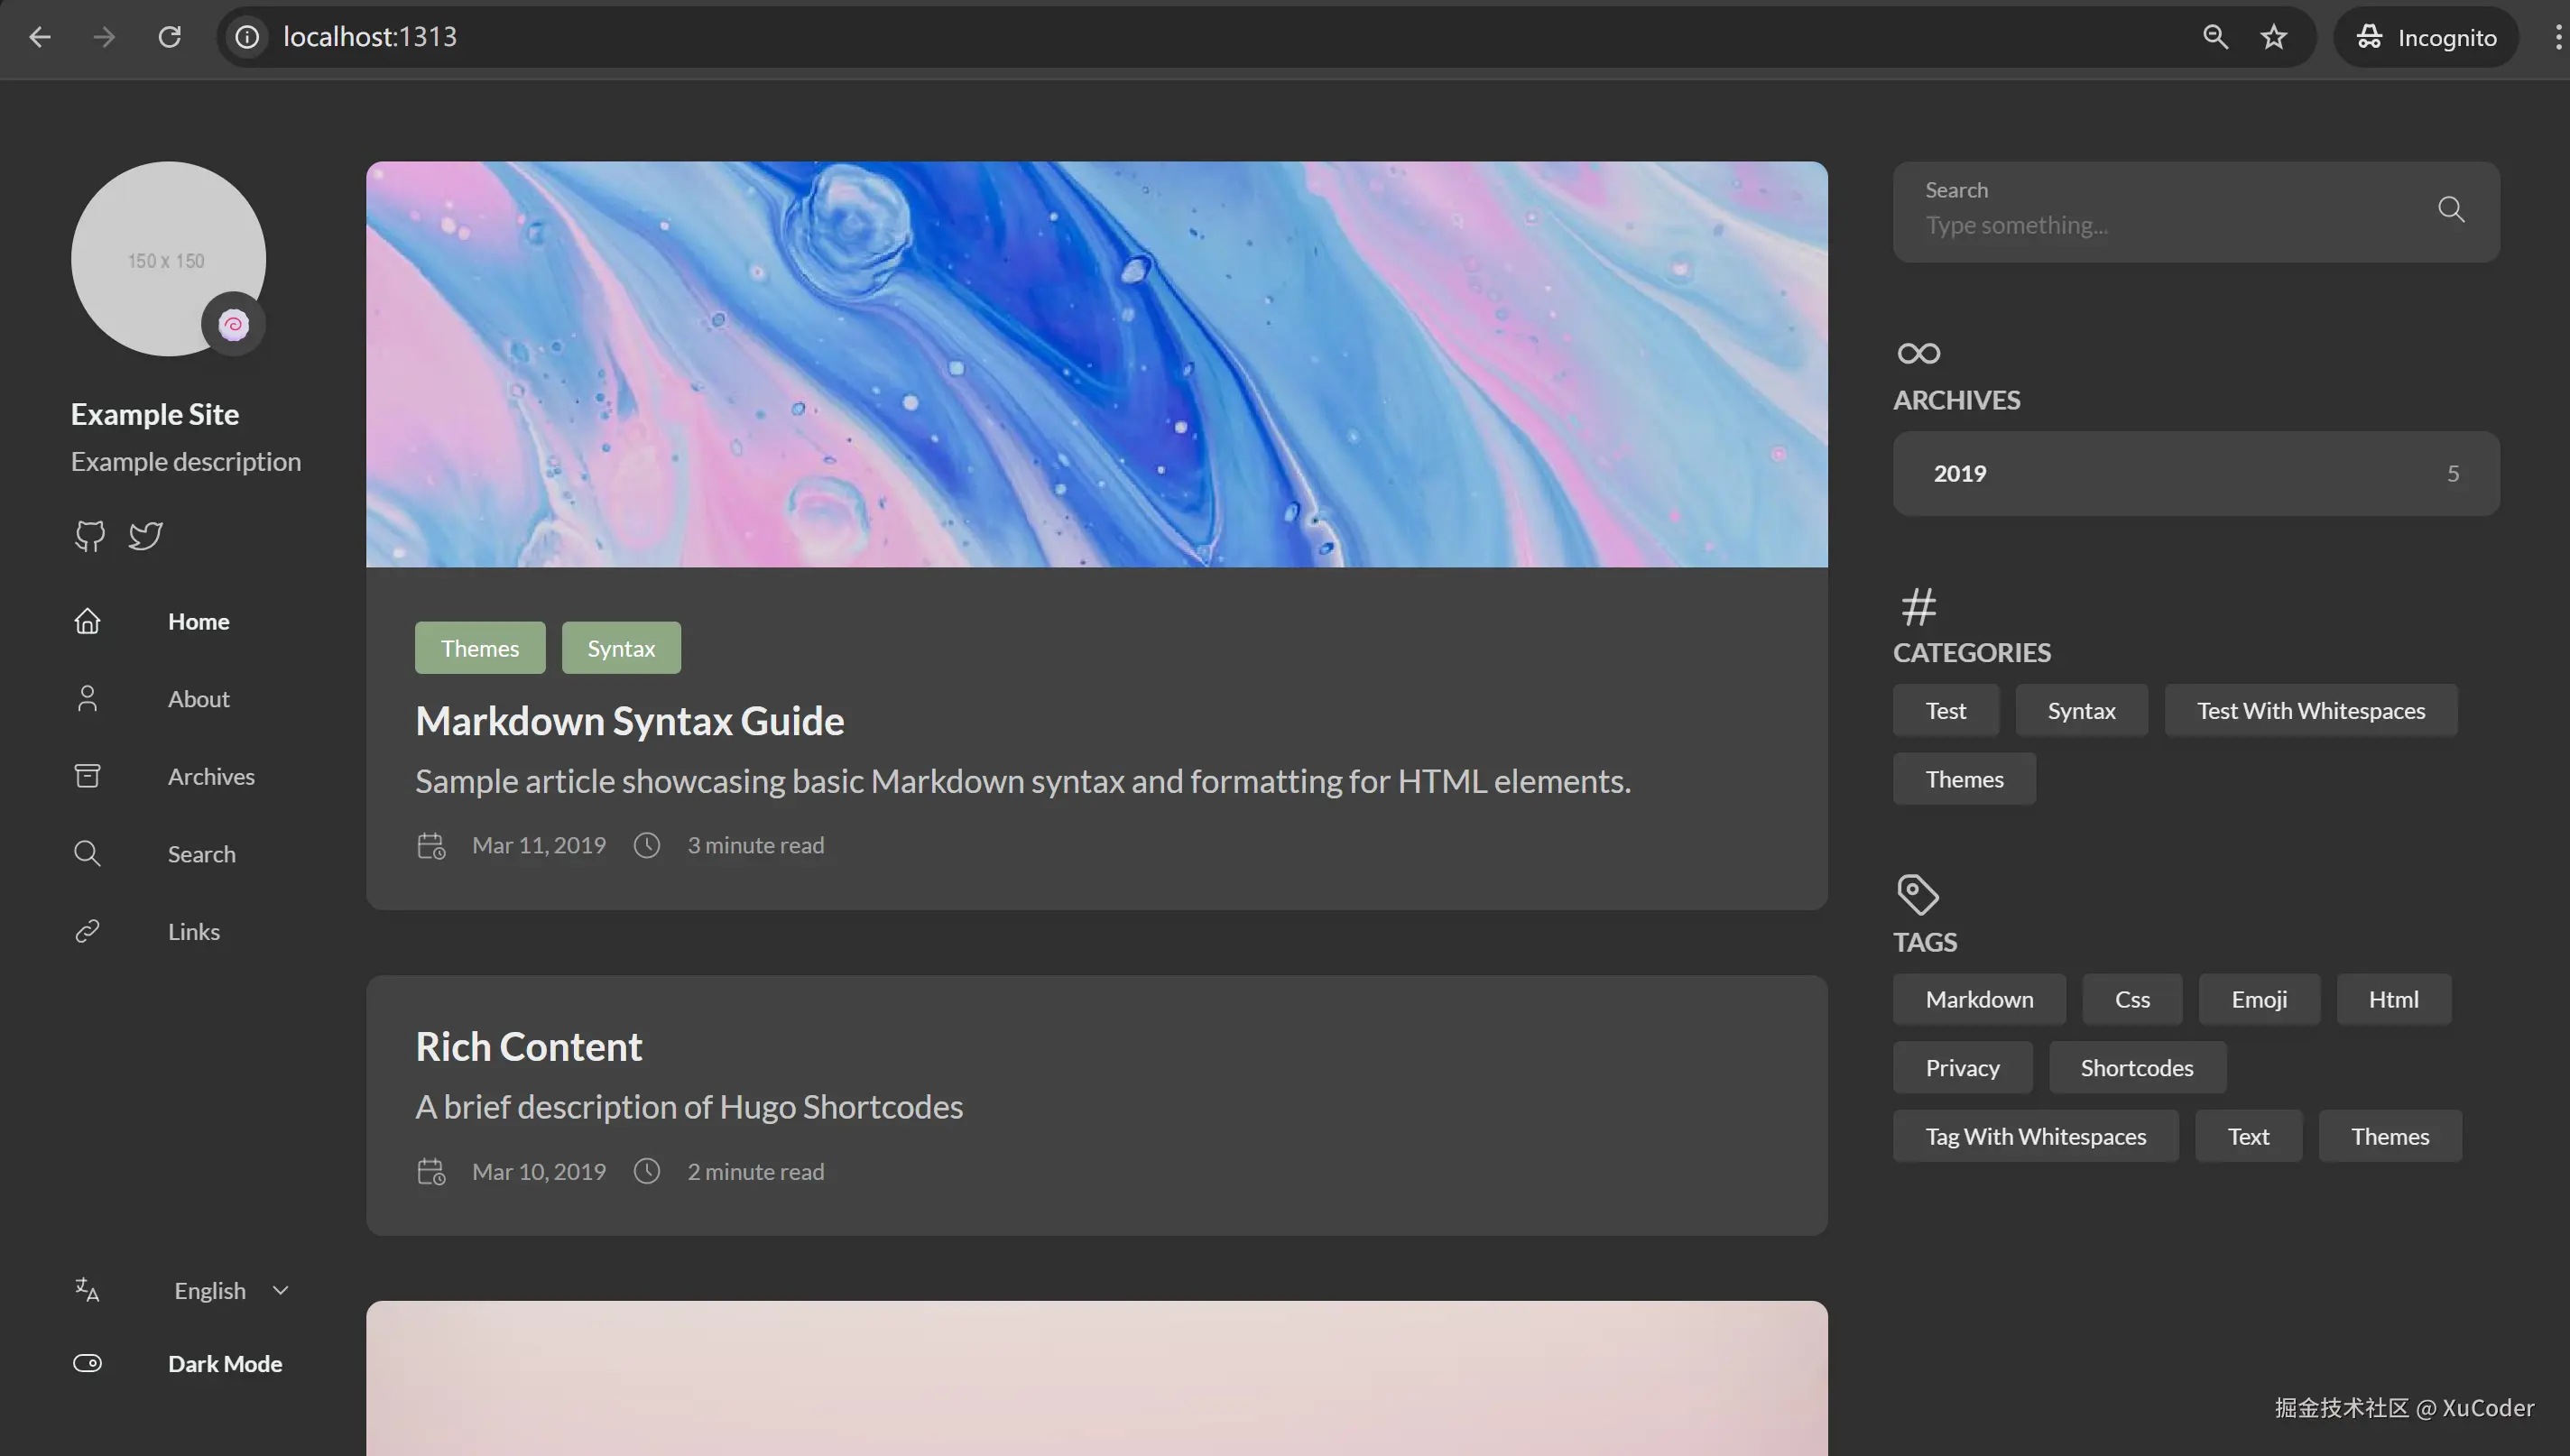
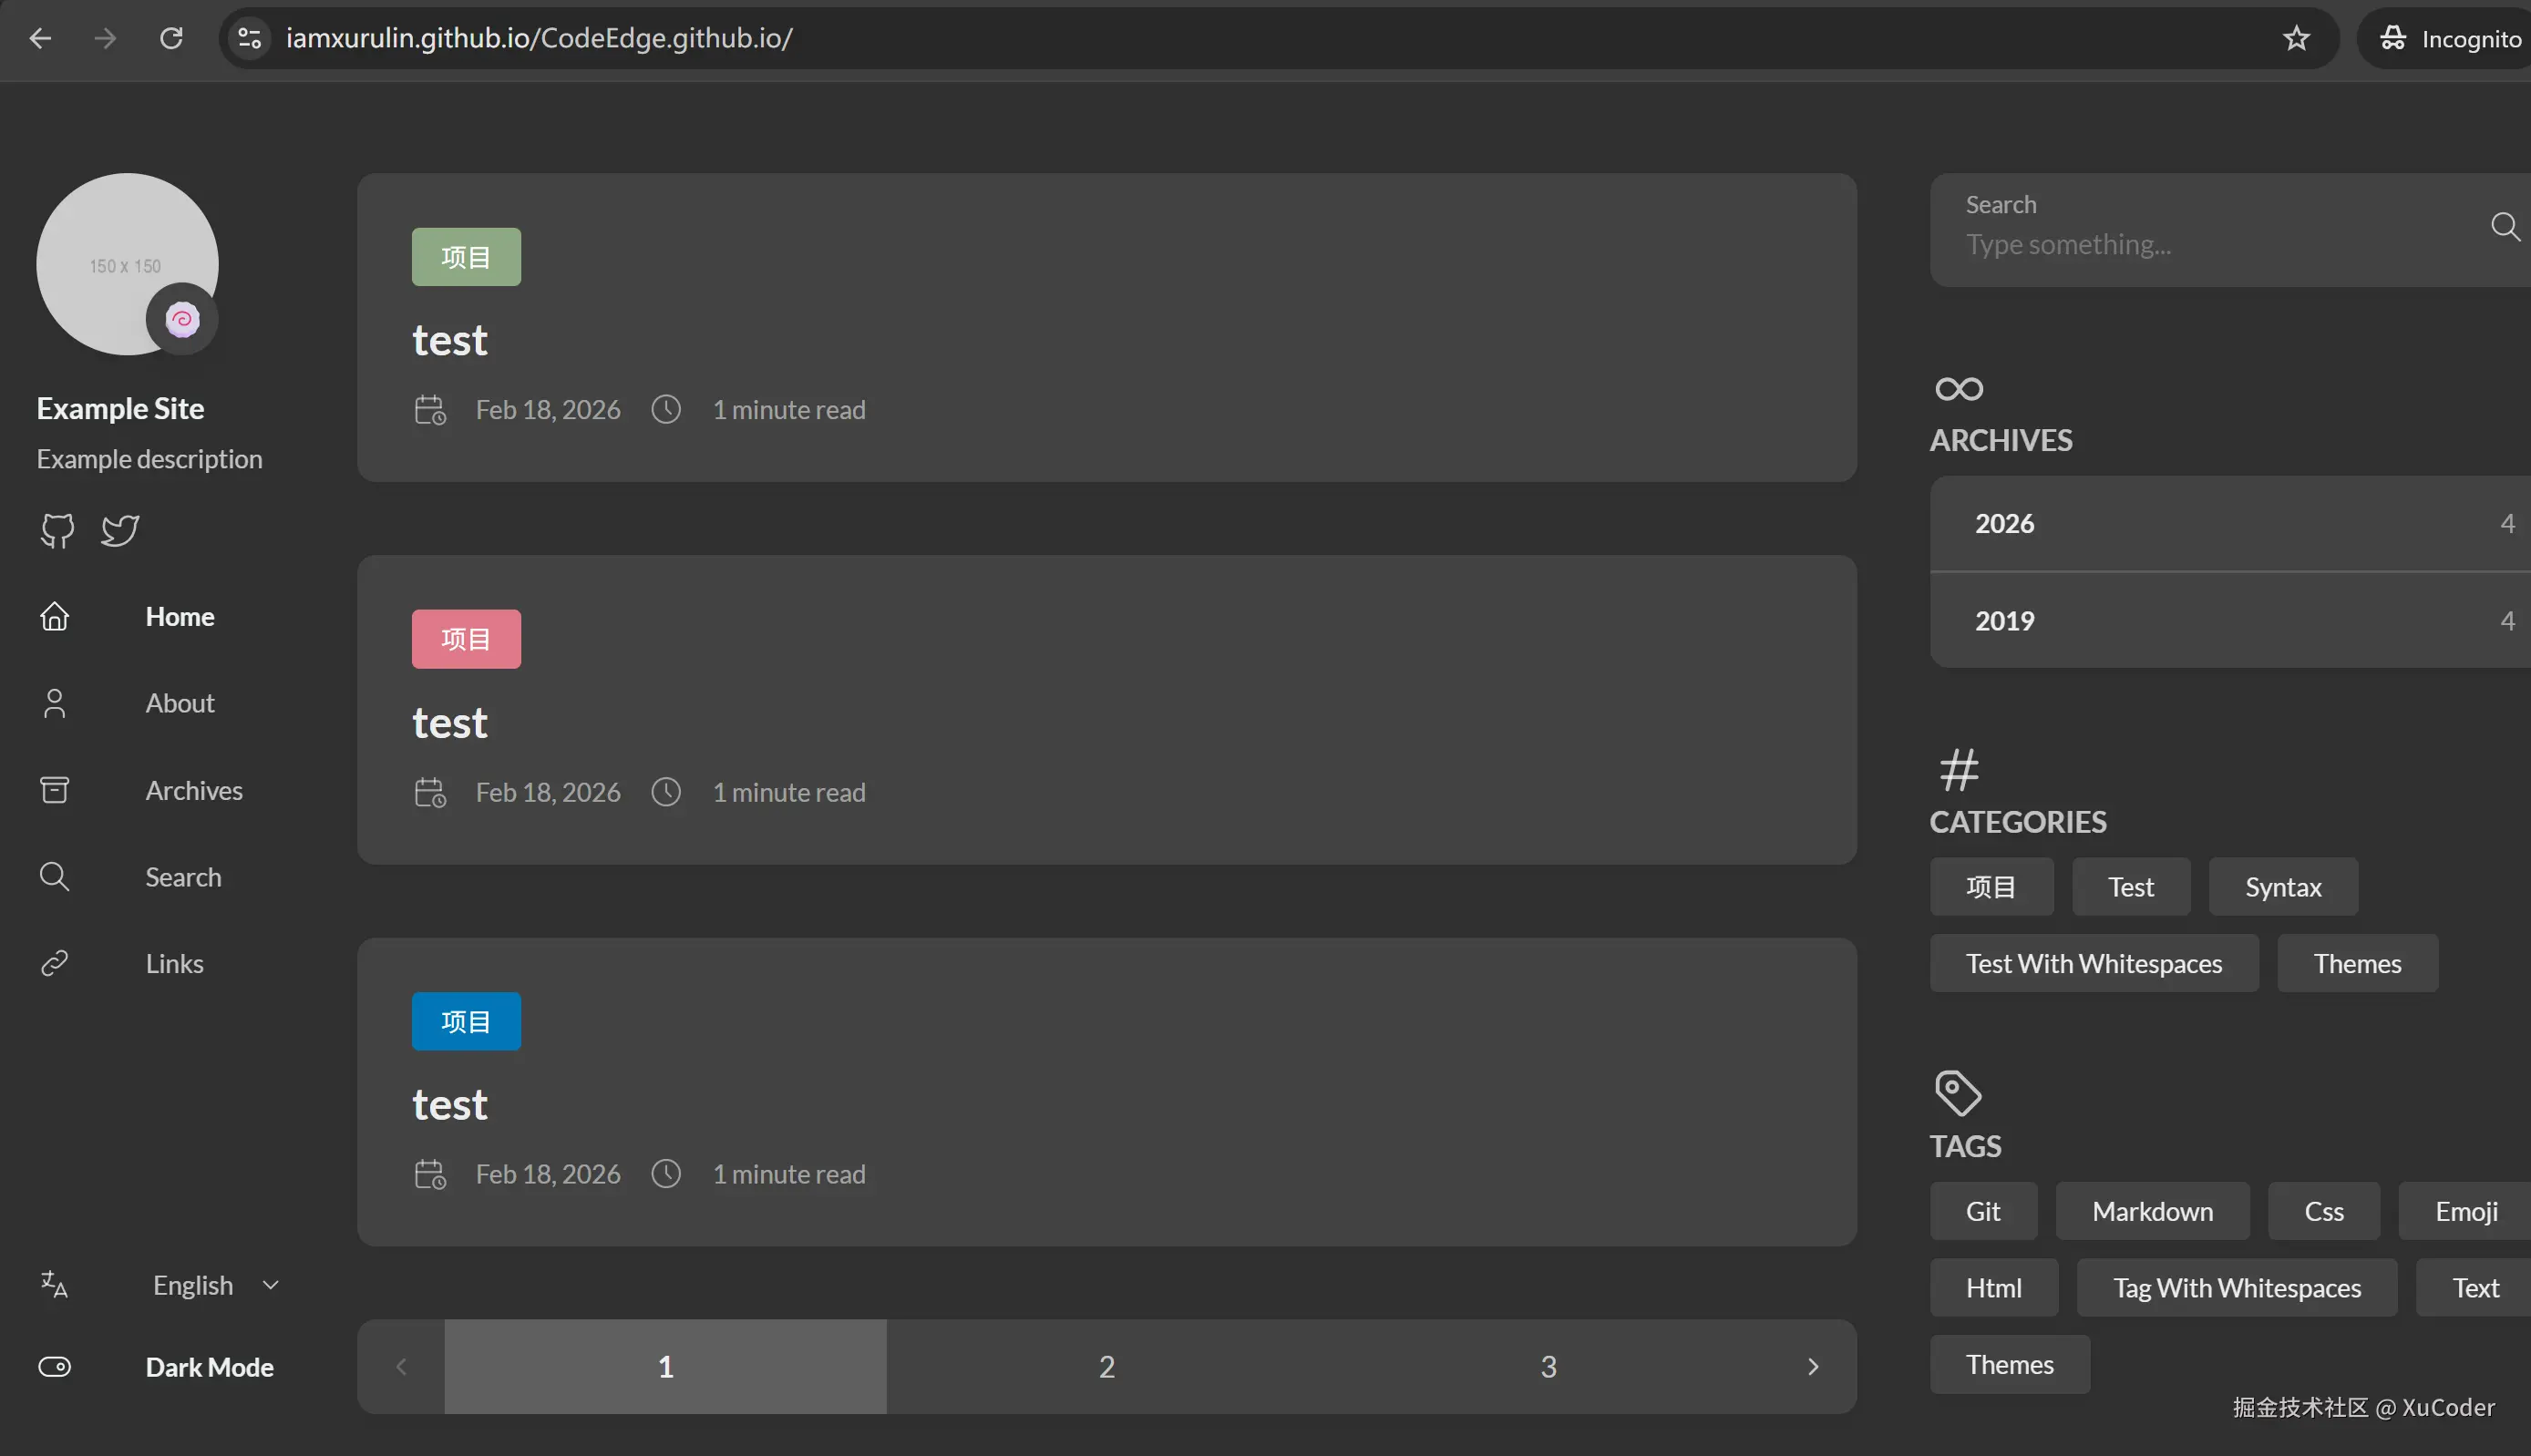
访问【http://localhost:1313】就能加载添加的主题:
新建Github博客网站仓库
在Github上新建一个博客网站仓库,如【CodeEdge.github.io】
 。
。
为了连接的稳定性,github上最好选择ssh:
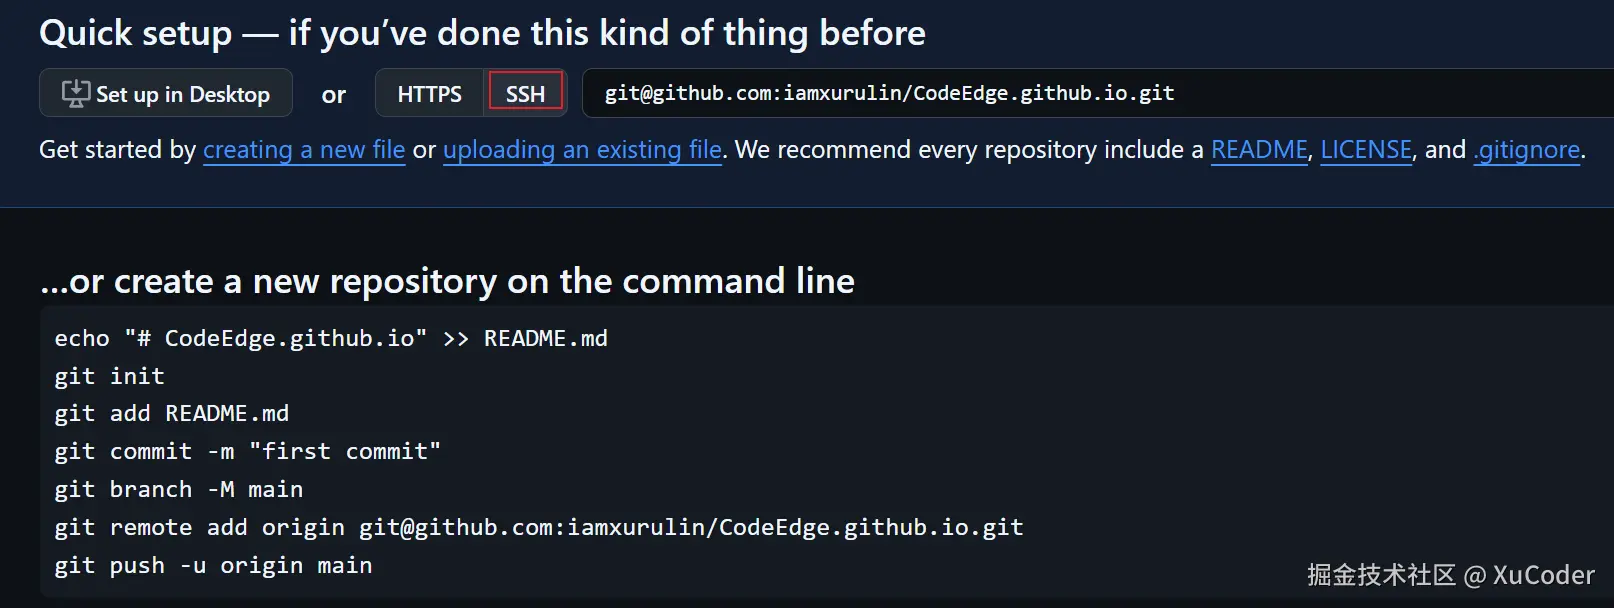
在github的博客网站仓库依次执行以下步骤:
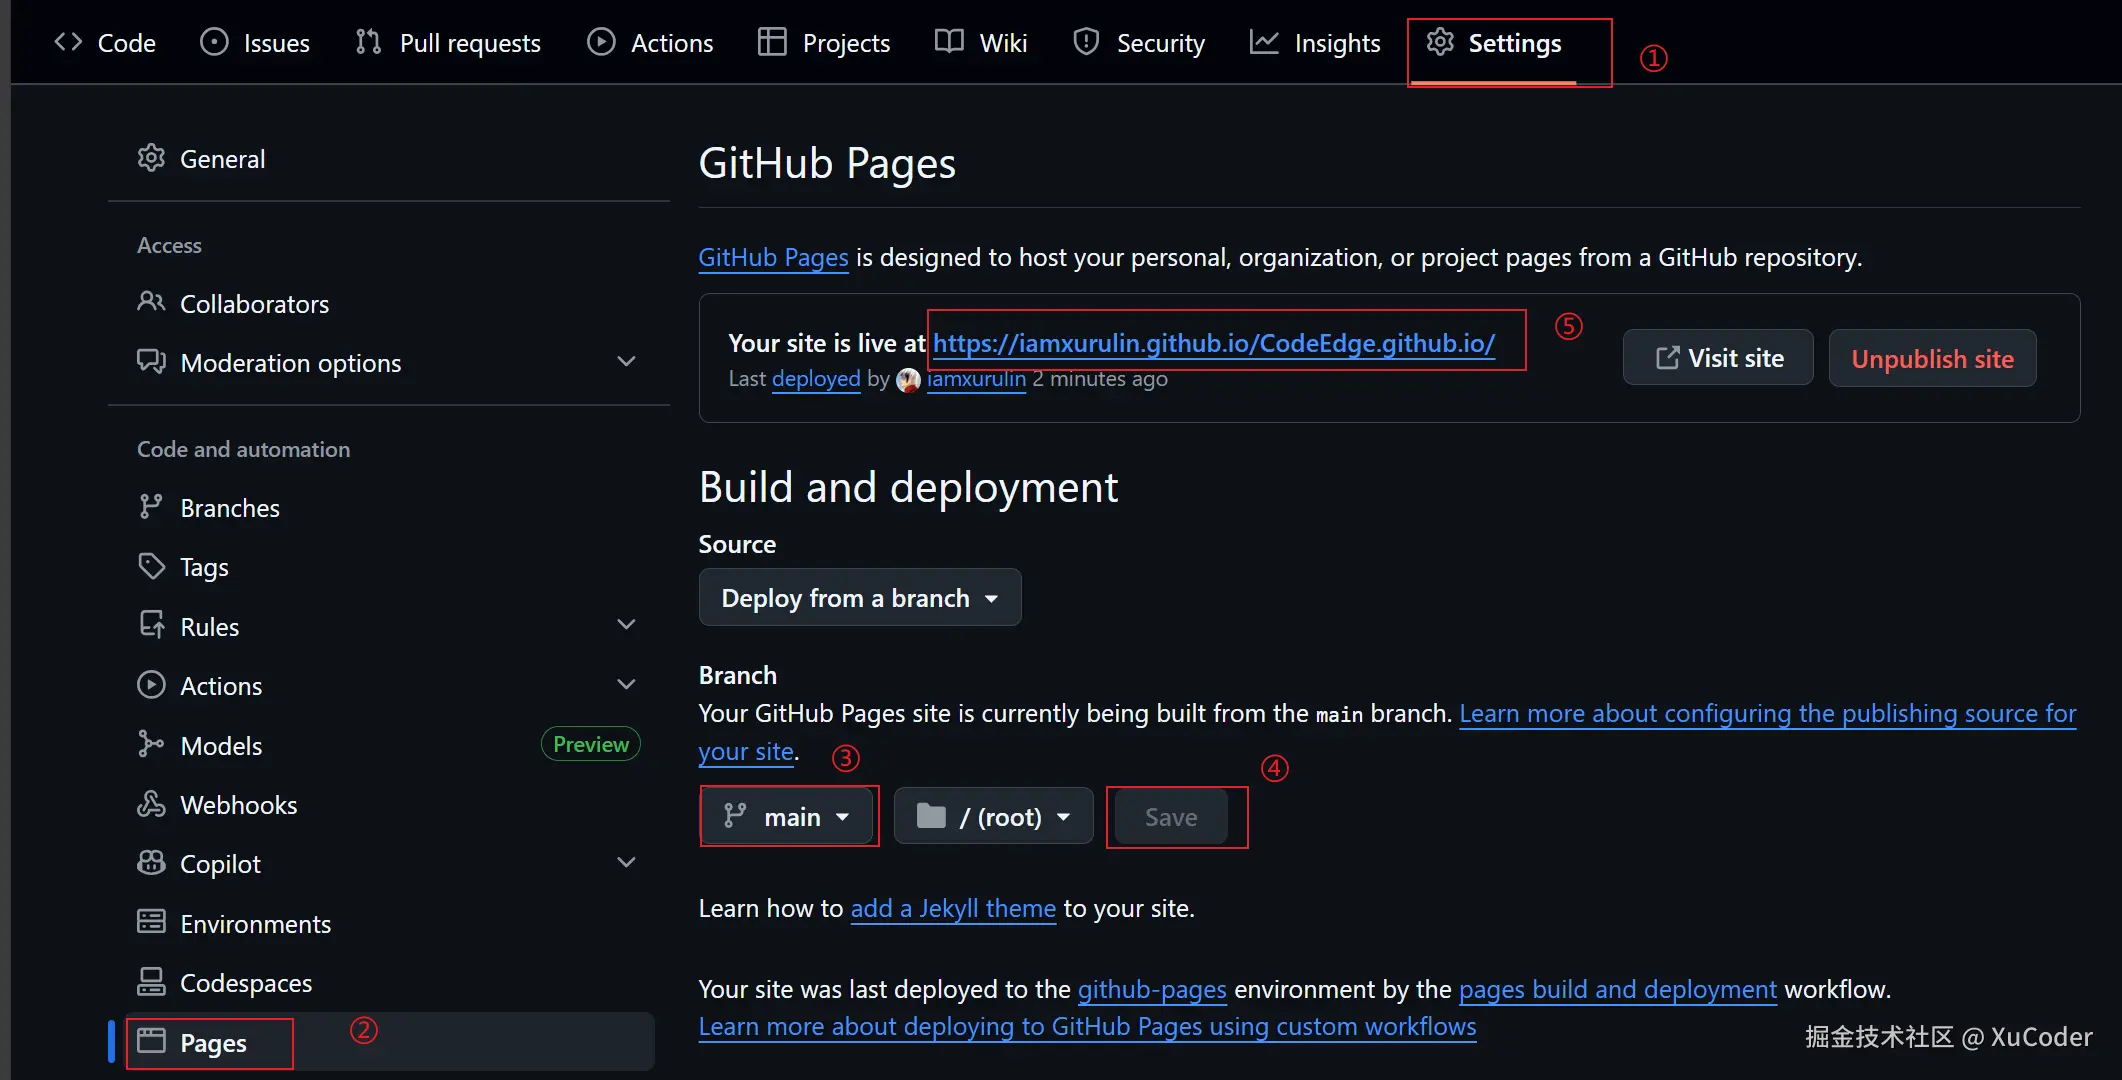
编辑【hugo.yaml】文件,将baseurl修改为如下网站名称,与上面的步骤⑤保持一致:
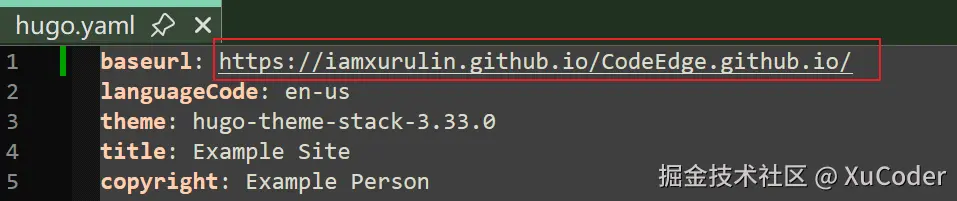
之后即可通过访问这个baseurl来查看部署的博客了。
在命令行cd到public文件夹:

依次执行以下命令:
bash
echo "# CodeEdge.github.io" >> README.md
git init
git add .
git commit -m "first commit"
git branch -M main
git remote add origin git@github.com:github用户名/CodeEdge.github.io.git
git push -u origin main
新建Github博客源代码仓库
在Github上新建一个博客源代码仓库,如【CodeEdge.github.io】
 。
。
在命令行cd到CodeEdge文件夹:

依次执行以下命令:
bash
echo "# CodeEdgeSource" >> README.md
git init
git add README.md
git commit -m "first commit"
git branch -M main
git remote add origin git@github.com:github用户名/源代码仓库.git
git push -u origin main
实现Github Action自动部署
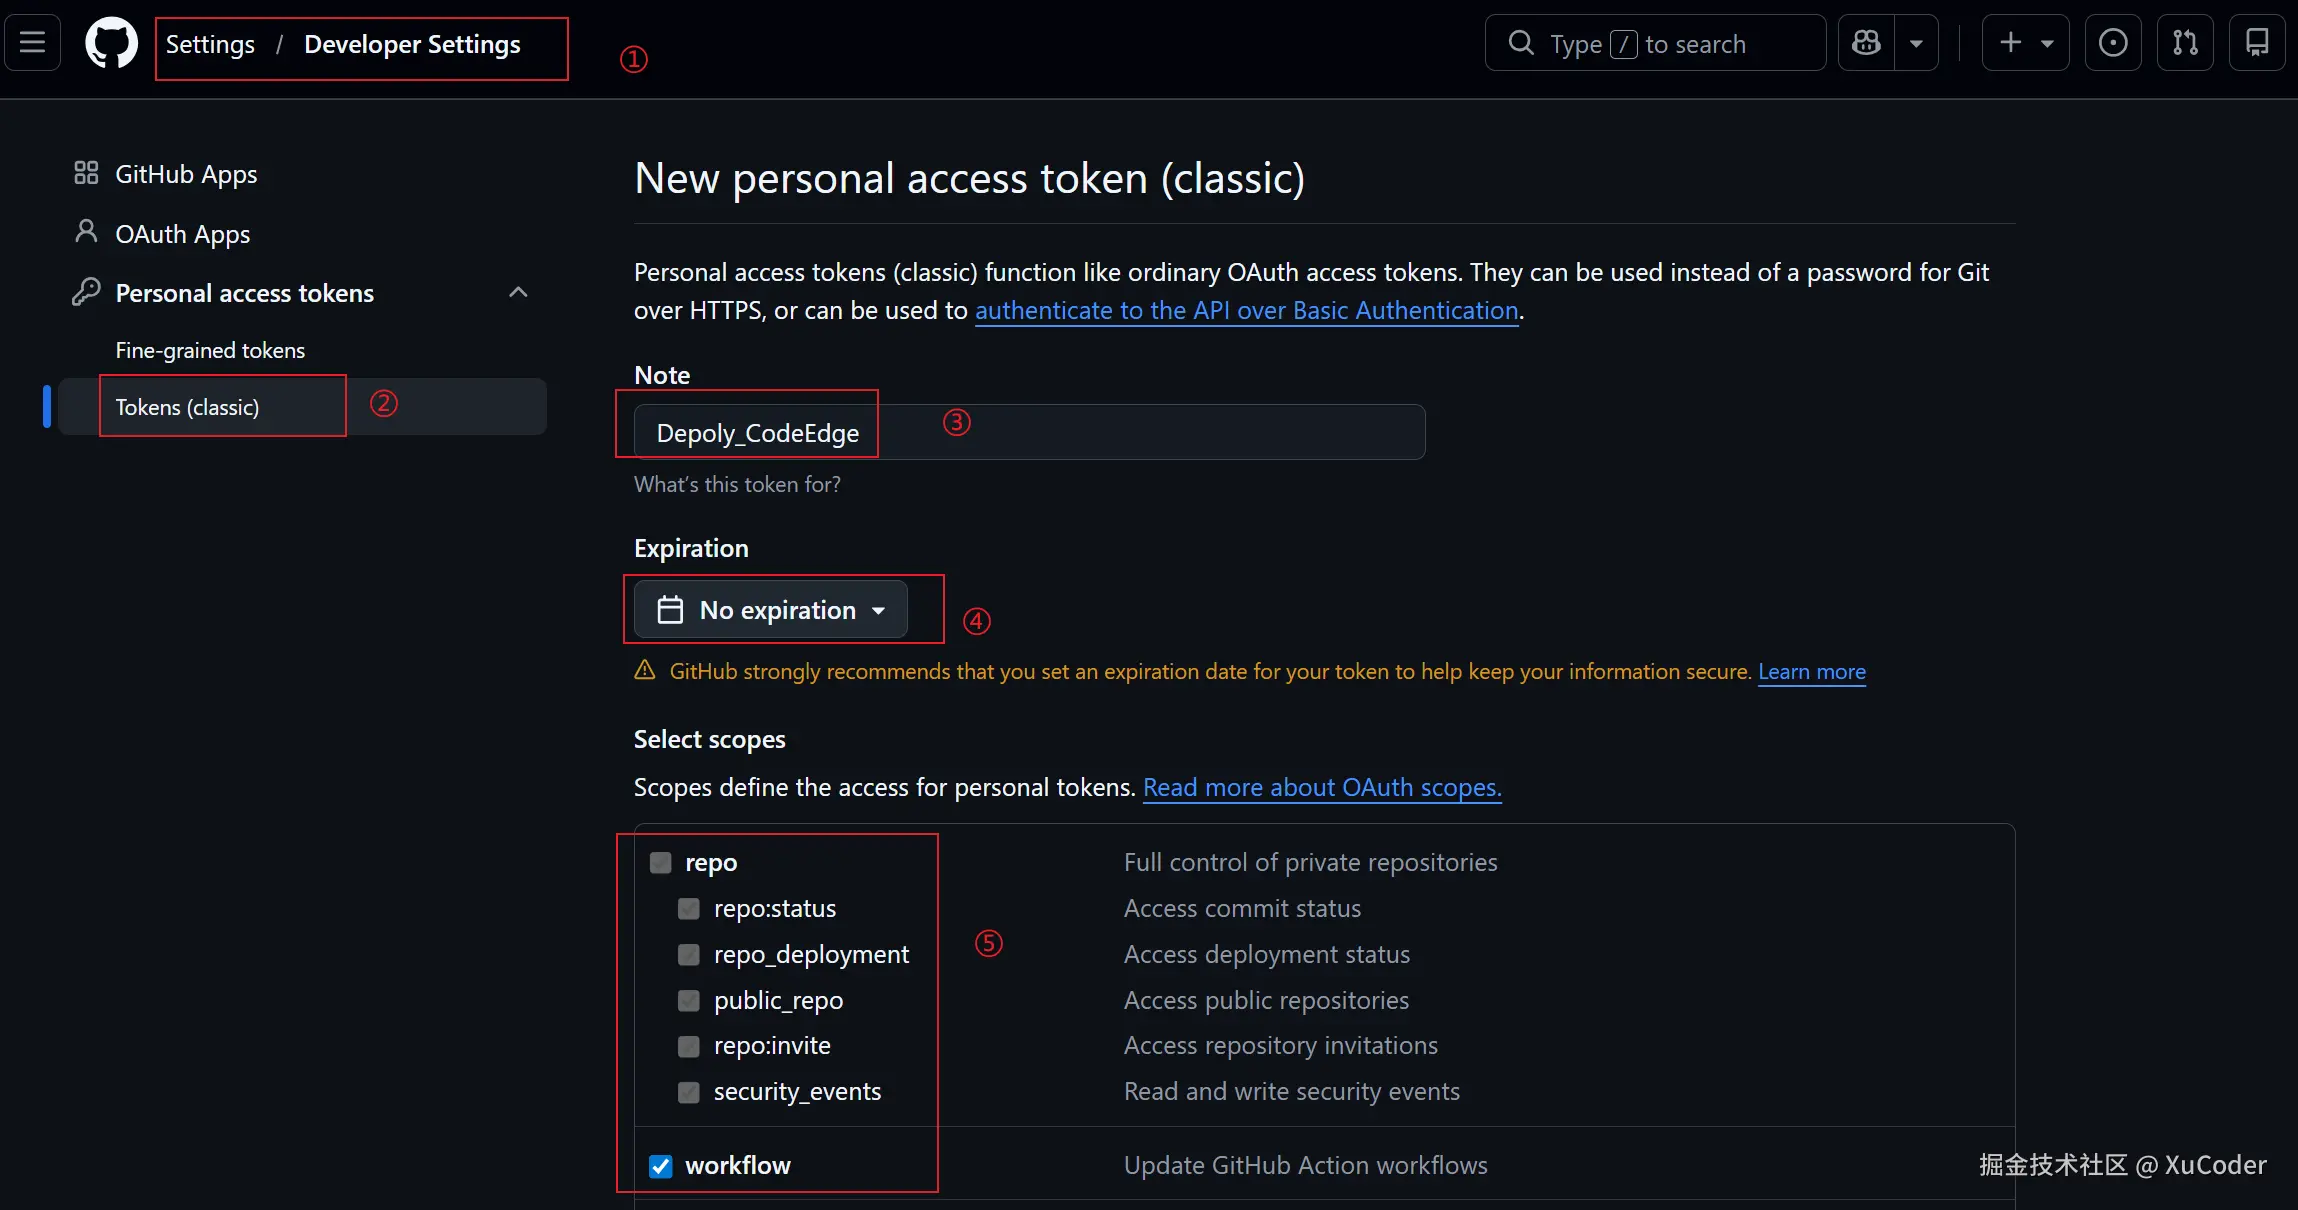
在github上依次进行以下操作,创建token,需要勾选【repo】和【workflow】:
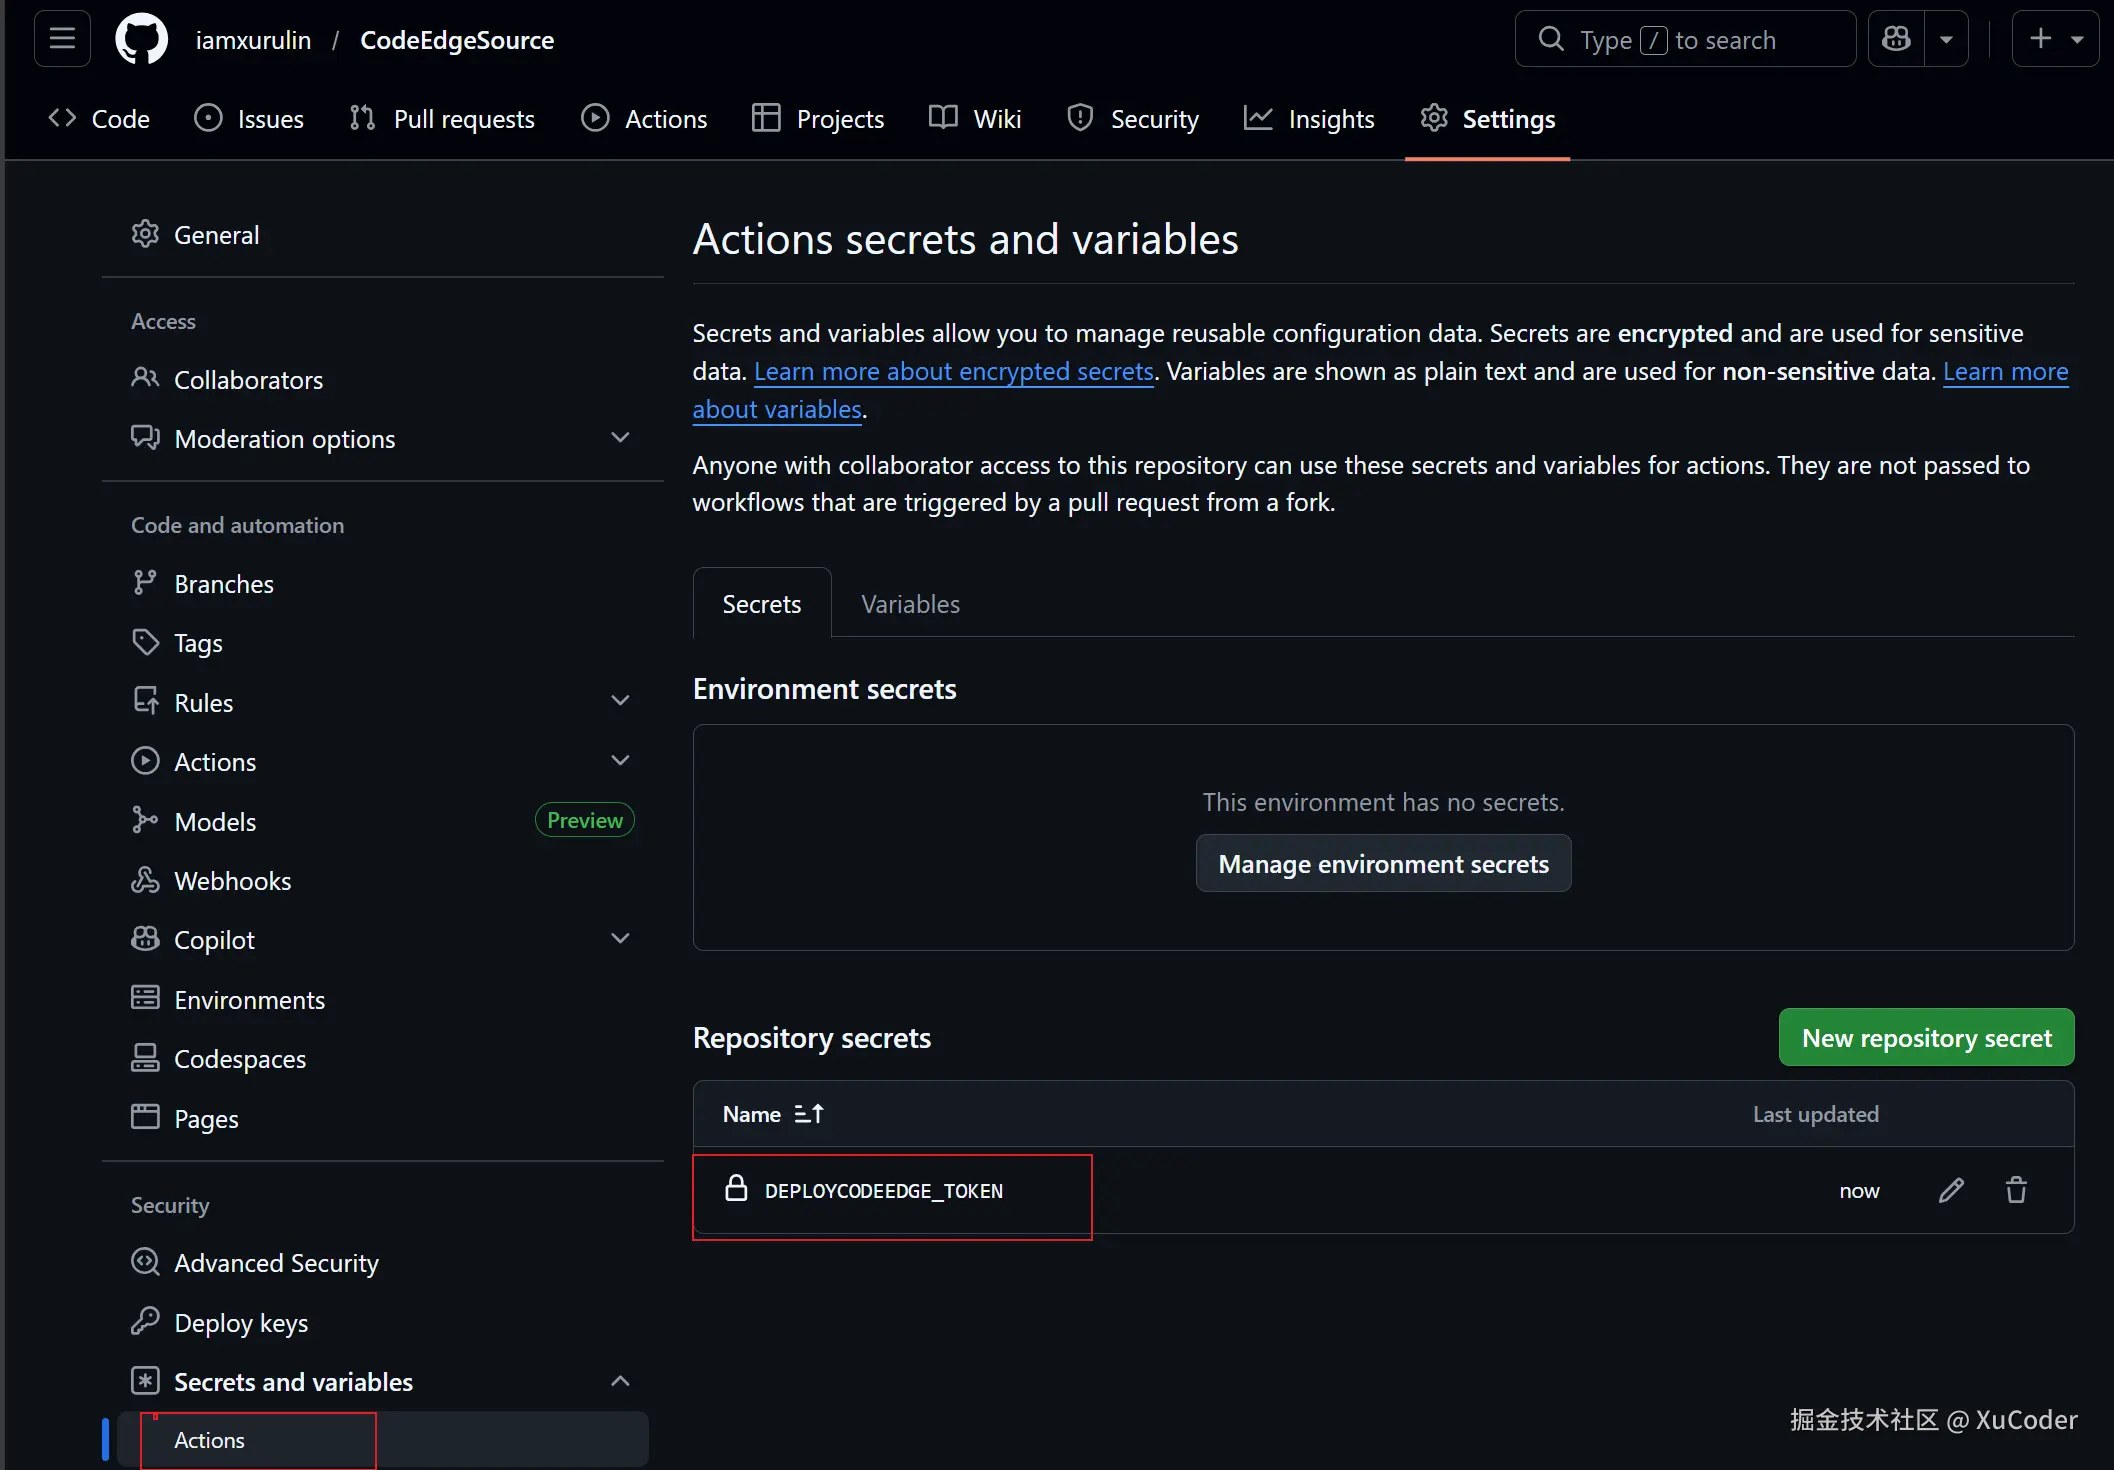
将这个token保存到源代码仓库【CodeEdgeSource】中:
在【CodeEdge】文件夹下新建以下文件:
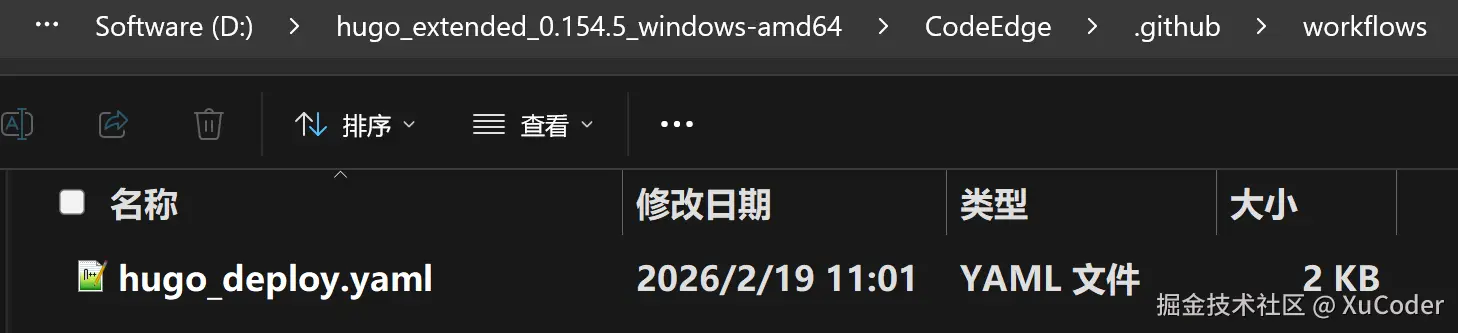
hugo_deploy文件的主要内容如下:
yaml
name: Build and Deploy Hugo Site

on:
  push:
    branches:
      - main
    paths:
      - "content/**/*.md"
      - "static/**"
      - "layouts/**"
      - "assets/**"
  workflow_dispatch: # 支持手动触发

concurrency:
  group: deploy-pages
  cancel-in-progress: true

jobs:
  build-and-deploy:
    runs-on: ubuntu-latest
    permissions:
      contents: write
    steps:
      - name: Checkout source repository
        uses: actions/checkout@v4
        with:
          fetch-depth: 0
          token: ${{ secrets.DEPLOYCODEEDGE_TOKEN }} # 用于图片上传需要推送权限

      - name: Git Configuration
        run: |
          git config --global core.quotePath false
          git config --global core.autocrlf false
          git config --global core.safecrlf true
          git config --global core.ignorecase false

      # ============ 构建 Hugo 站点 ============
      - name: Setup Hugo
        uses: peaceiris/actions-hugo@v3
        with:
          hugo-version: "latest"
          extended: true

      - name: Build site
        run: hugo -D # 包含 draft 文章

      # ============ 部署到 GitHub Pages ============
      - name: Deploy to GitHub Pages
        uses: peaceiris/actions-gh-pages@v4
        with:
          personal_token: ${{ secrets.DEPLOYCODEEDGE_TOKEN }}
          external_repository: github用户名/博客网站仓库
          publish_branch: main
          publish_dir: ./public
          force_orphan: true
          commit_message: "auto deploy: ${{ github.event.head_commit.message }}"
          user_name: "github-actions[bot]"
          user_email: "github-actions[bot]@users.noreply.github.com"
在【CodeEdge】文件夹下新建【.gitignore】文件,避免提交以下非必要的文件:
bash
public
resources
.hugo_build.lock
hugo.exe

*.lock
.DS_Store
Thumbs.db
*.tmp
*.log
.idea/
.vscode/
博客部署步骤
markdown
#新建博客
hugo new content post/XXX.md

#本地查看
hugo server -D

#部署
git add .

git commit -m "xxx"

git push origin main
当新增的博客推送到源代码仓库后,GitHub Actions 会自动执行以下步骤:
- 检测到推送
- 触发
.github/workflows/hugo_deploy.yaml工作流 - 运行
hugo -D构建网站 - 将生成的静态文件部署到博客网站仓库
- 等待一定的时间后,博客网站会自动更新
小贴士
1.Hugo 需要 Front Matter 才能识别文章。也就是在文件最开头需要有以下这些代码:
markdown
+++
title = '配置ssh解决https不稳定的问题'
date = '2026-01-13T14:20:00+08:00'
draft = false
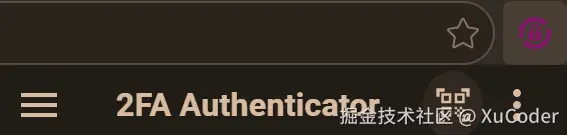
+++2.github账号现在有一个输入验证码的步骤,可在浏览器上安装【2FA Authenticator】插件获取。
3.一些搭建博客可能用到的网站
| 免费图标网站 | icon-icons.com/ |
|---|---|
| emoji词典 | www.emojiall.com/ |
| 在线PS工具 | ps.pic.net/ |
| ANI 鼠标样式转 PNG 文件 在线工具 | ezgif.com/ani-to-apng |
| PNG转ICO在线工具 | www.png2ico.com/ |
| 免费的商用字体 | www.100font.com/ |