030_路由-对路由的理解
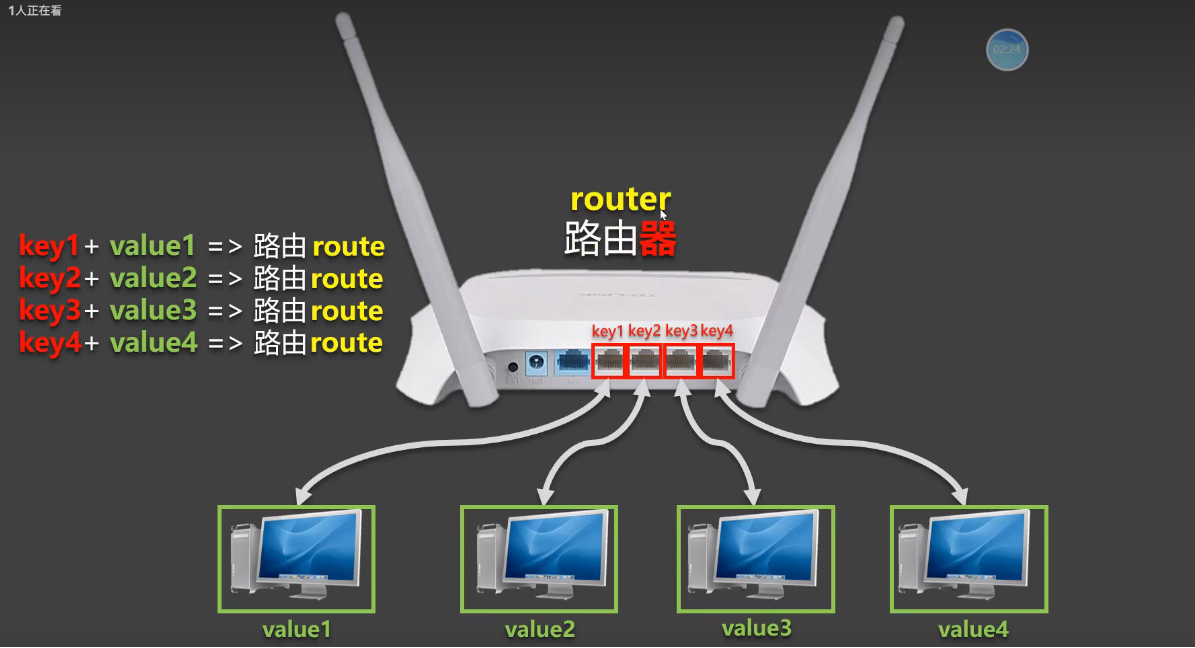
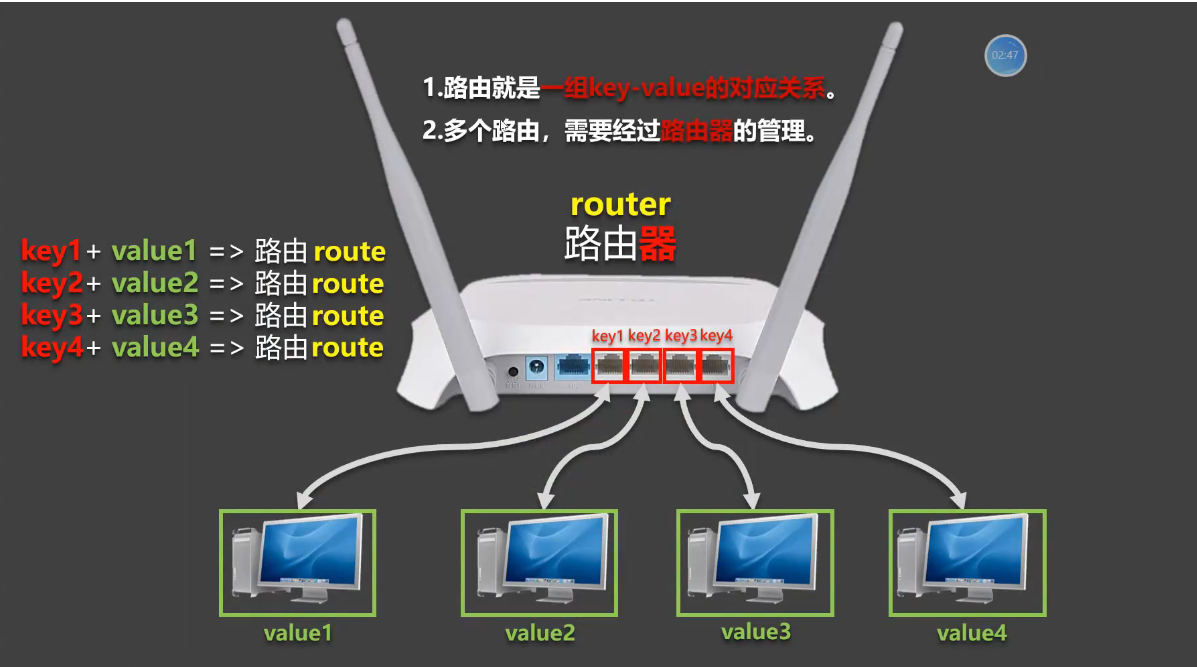
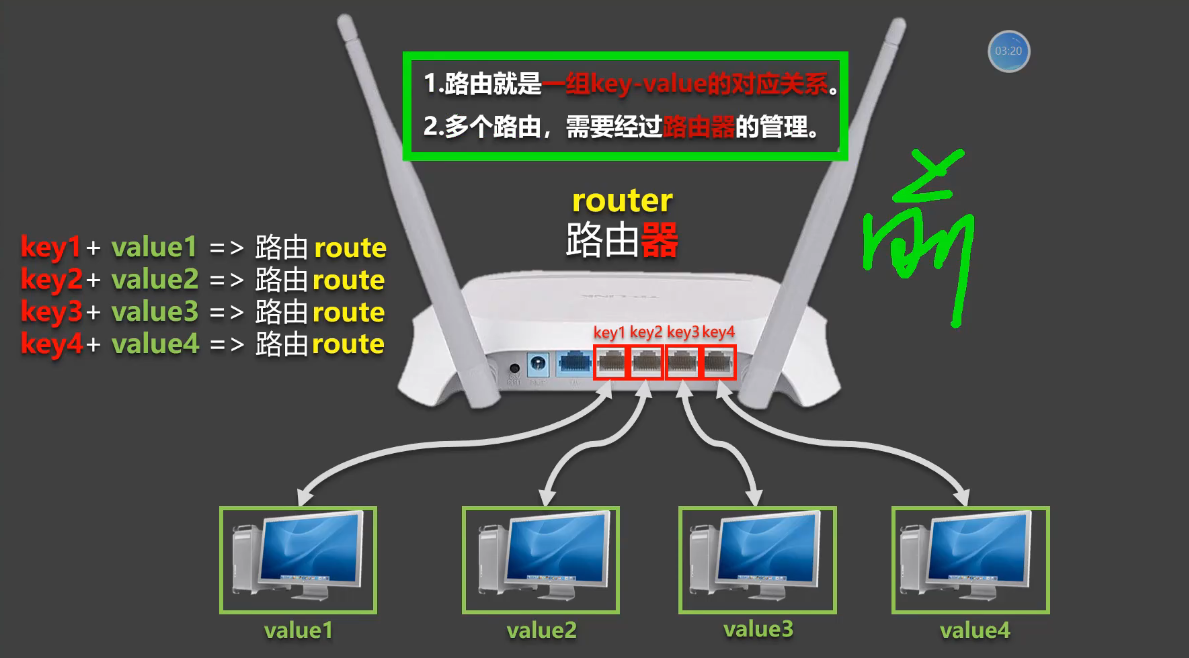
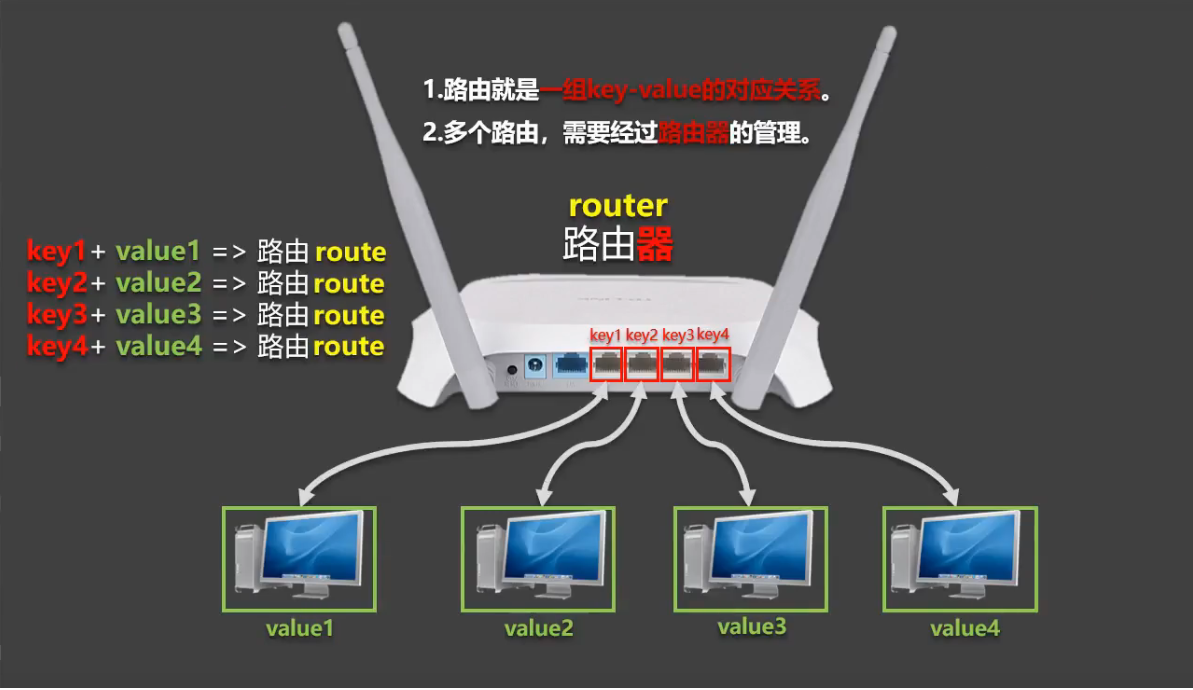
路由和路由器是两回事
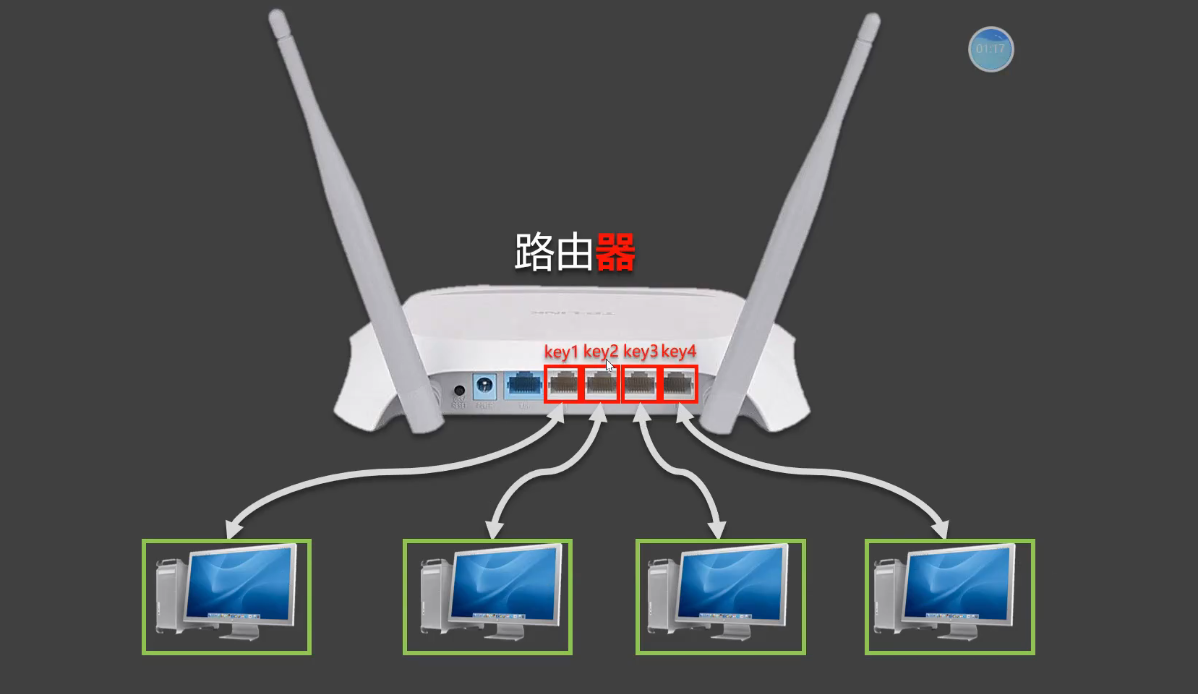
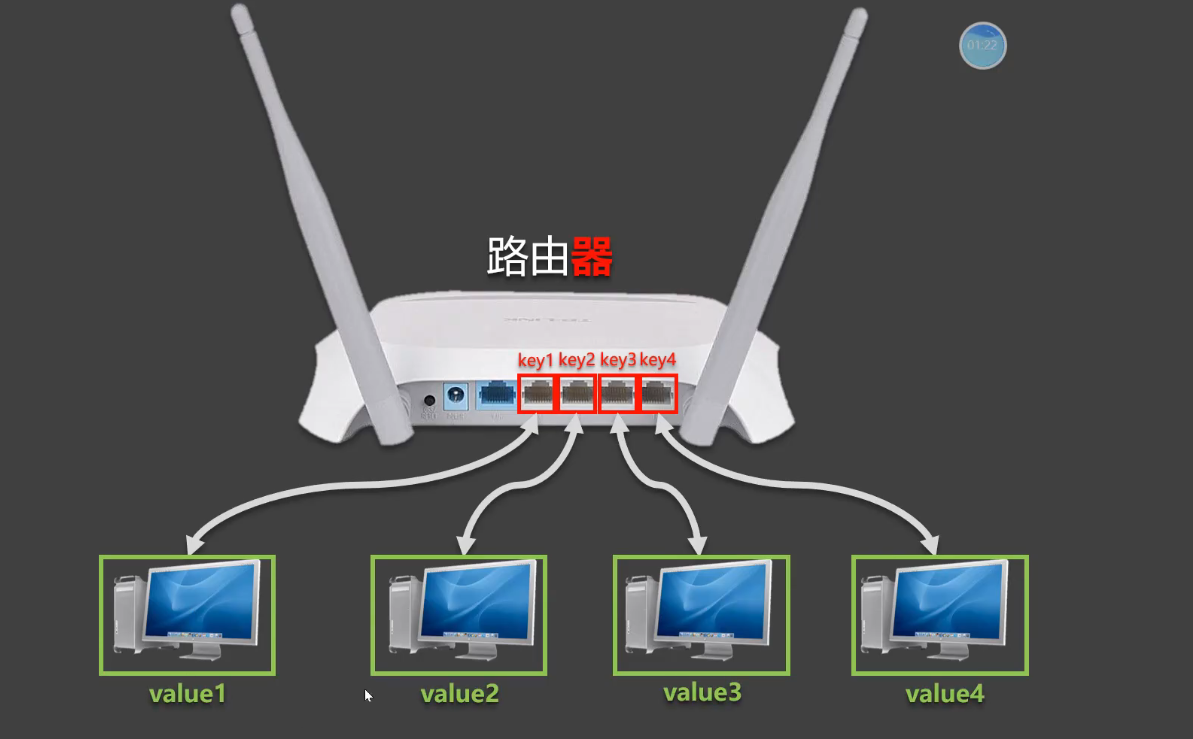
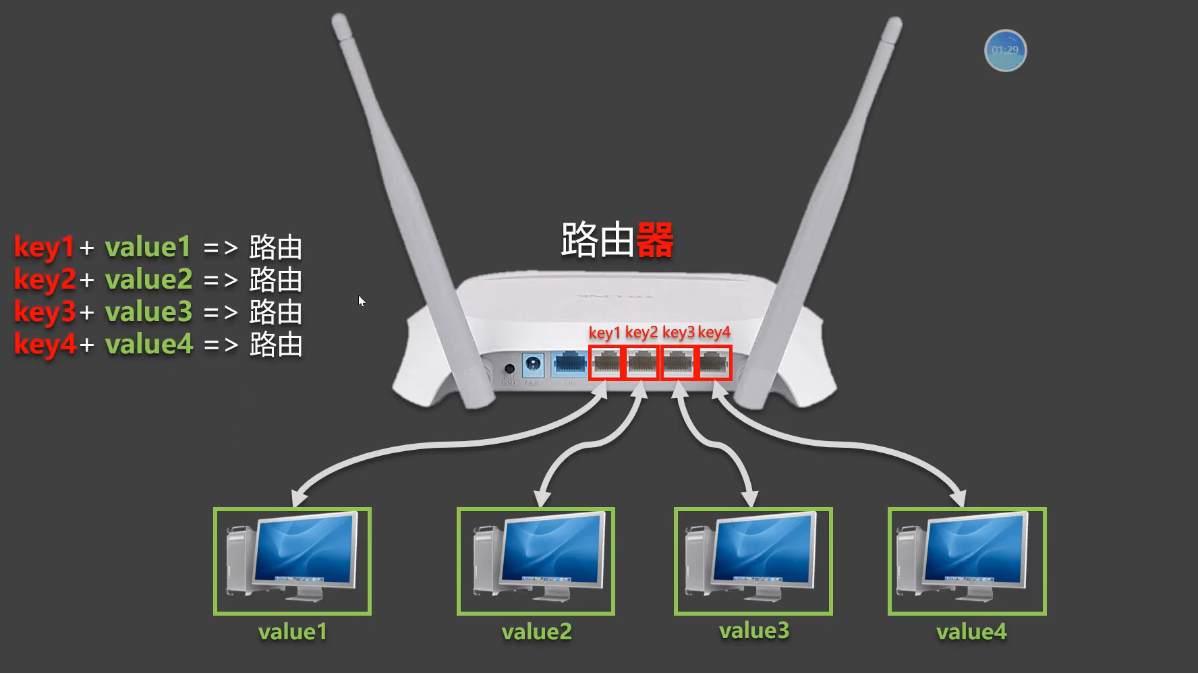
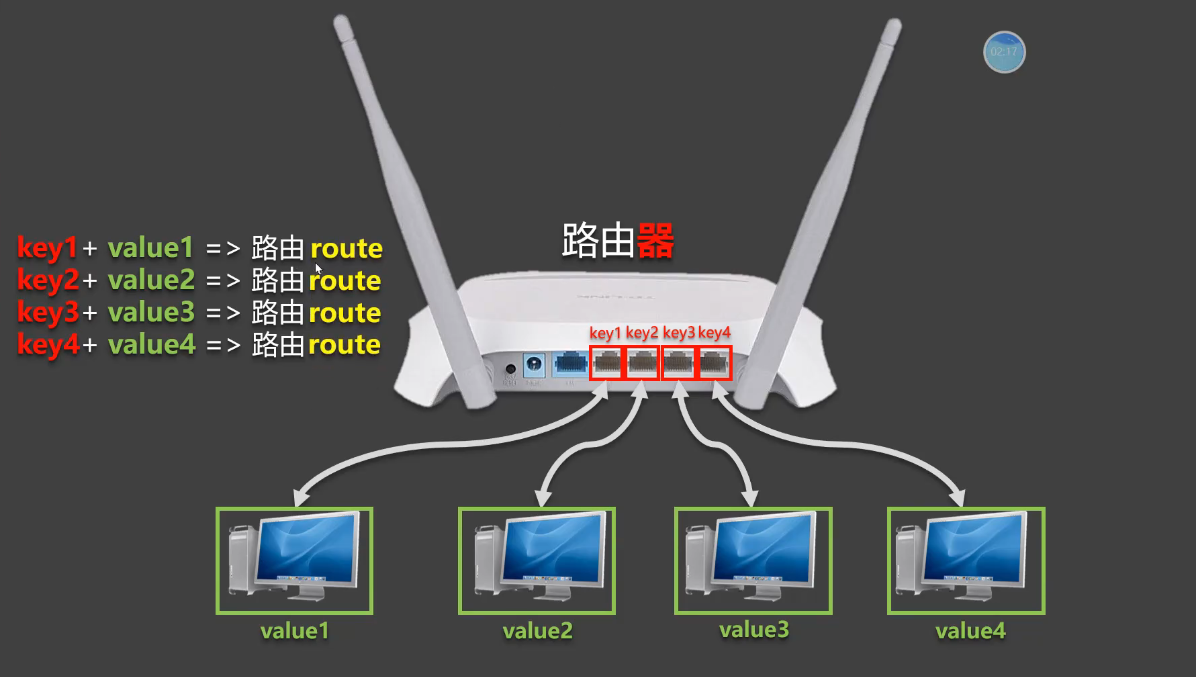
我们这里讲的路由是针对前后端的路由,而非网络路由,后端路由你什么都可以进,然后我就跟你对应什么样的处理函数。你什么样的请求过来我就对应什么样的逻辑。路由就是一种对应关系。所谓的路由就是对应关系.
SPA (single page web application) 应用->单页面应用,所谓的单页面应用,至始至终我们只有一个xxx.html页面的应用,我还想实现炫酷的切换,此时就需要路由了。

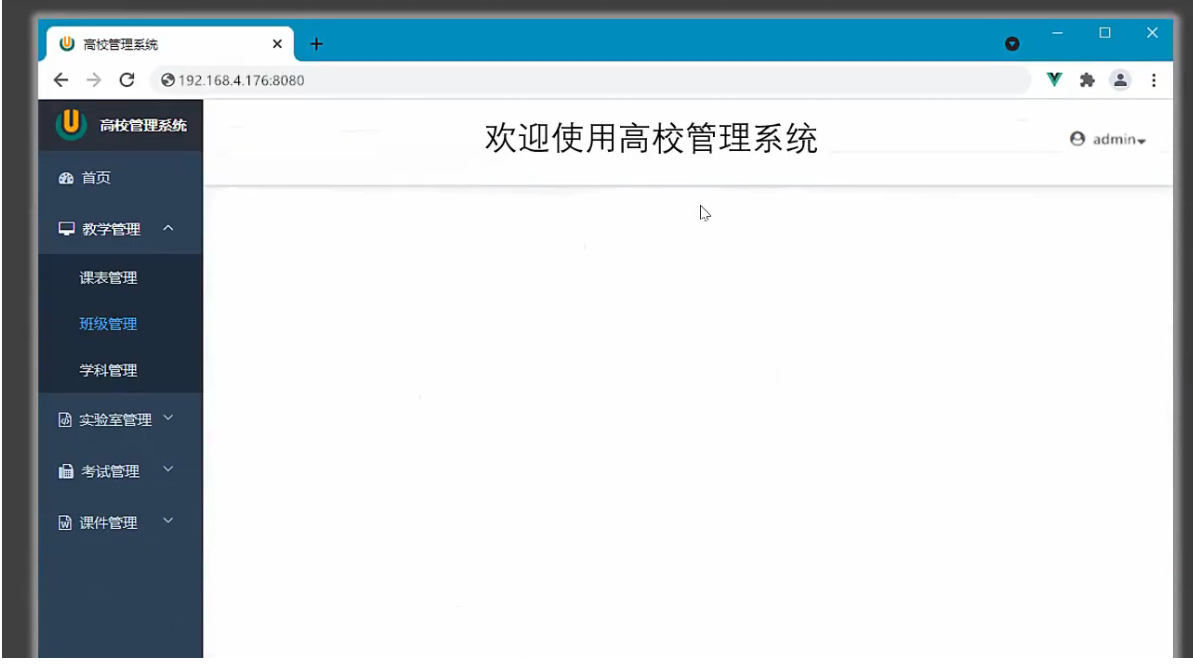
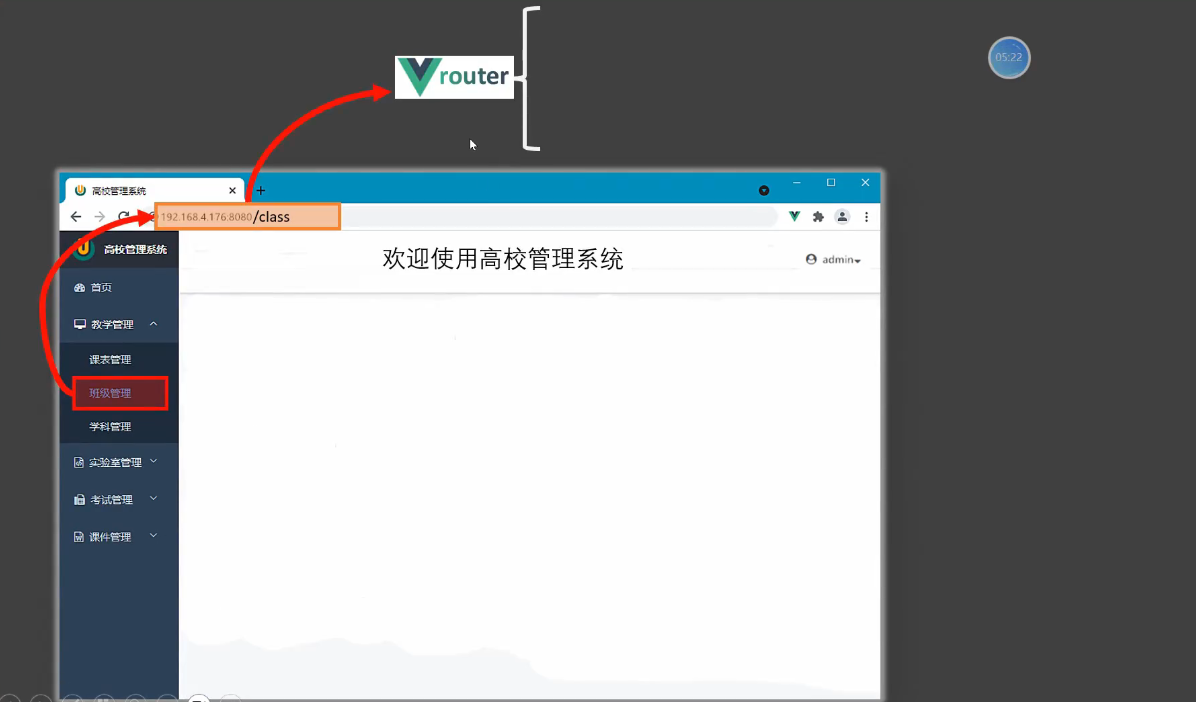
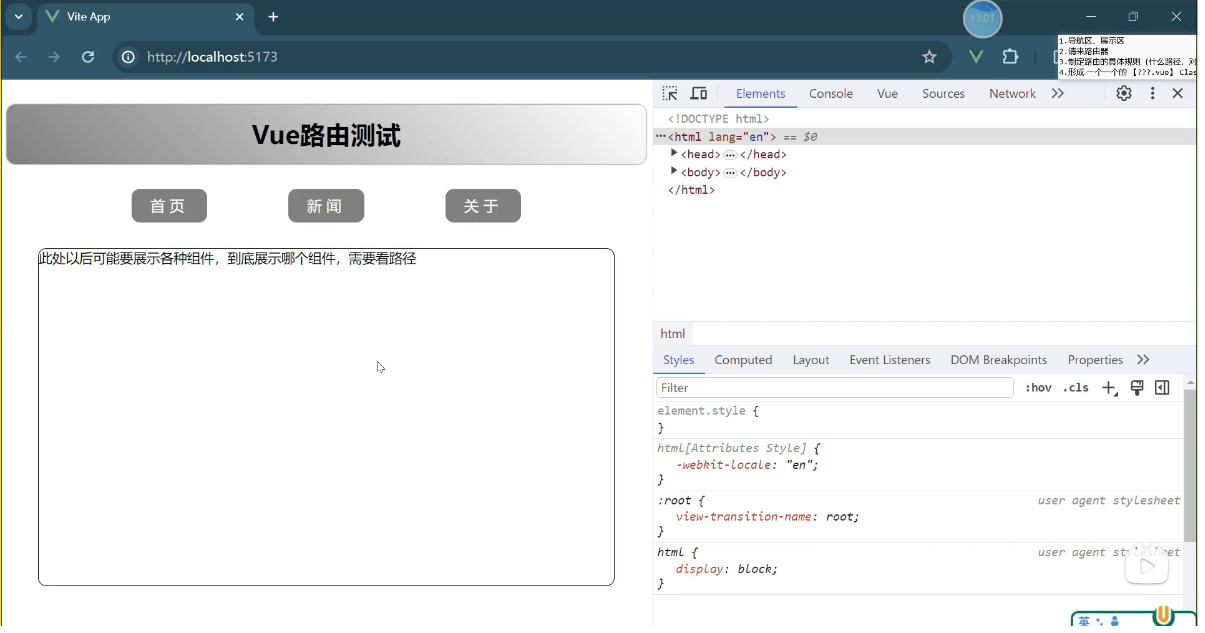
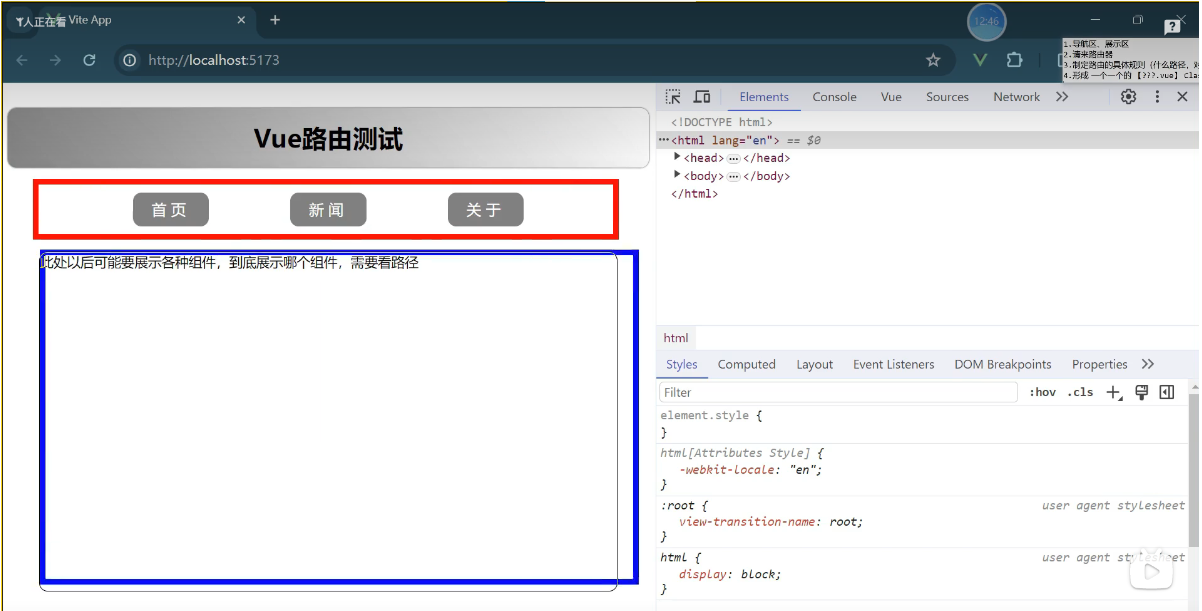
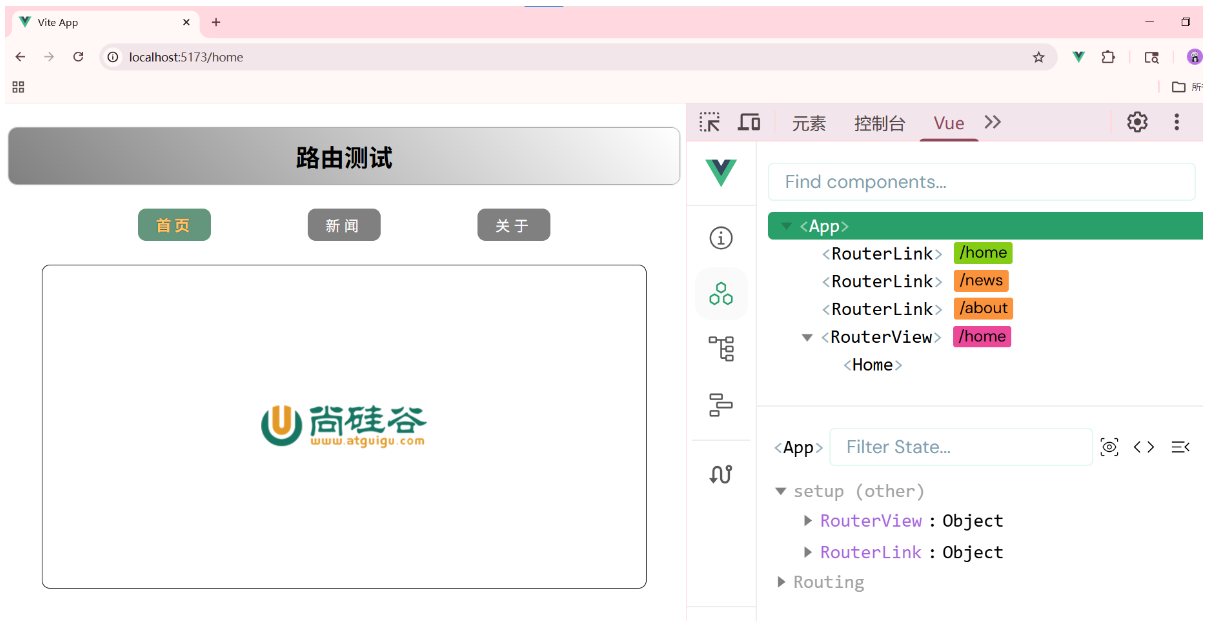
导航区和展示区
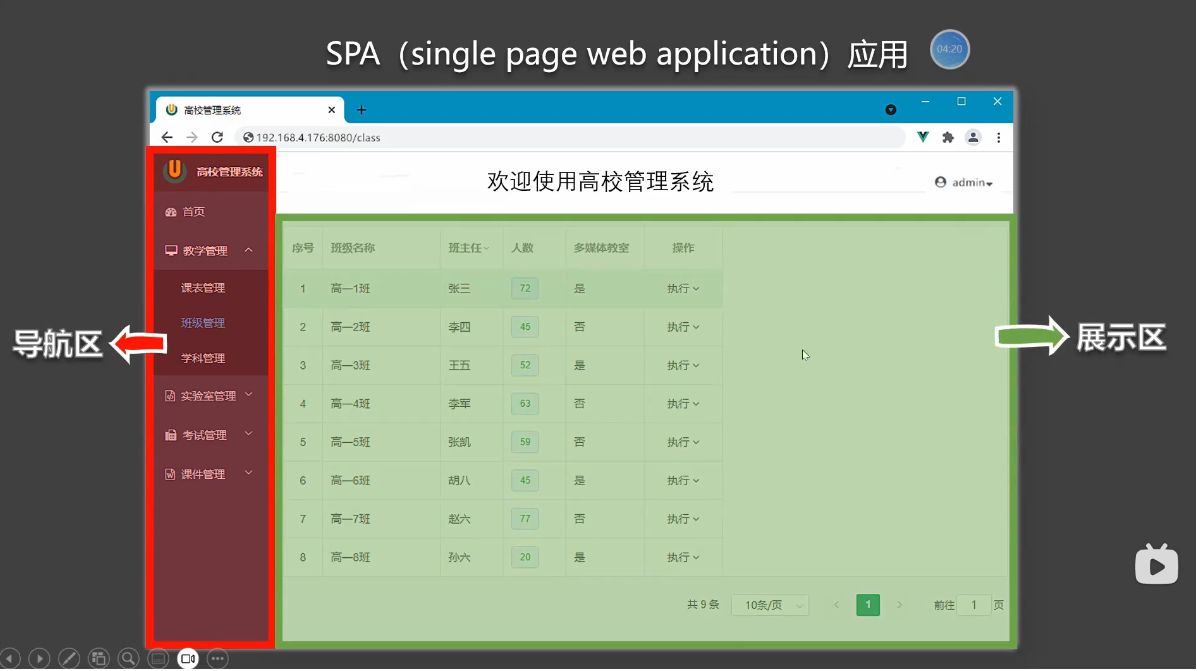
你在导航区点击不同的导航,展示区就给你呈现不同的内容,而且你发现这个过程当中,你的页面是不抖动的,因为他只有一个页面,没有进行页面的跳转。这就是SPA应用。
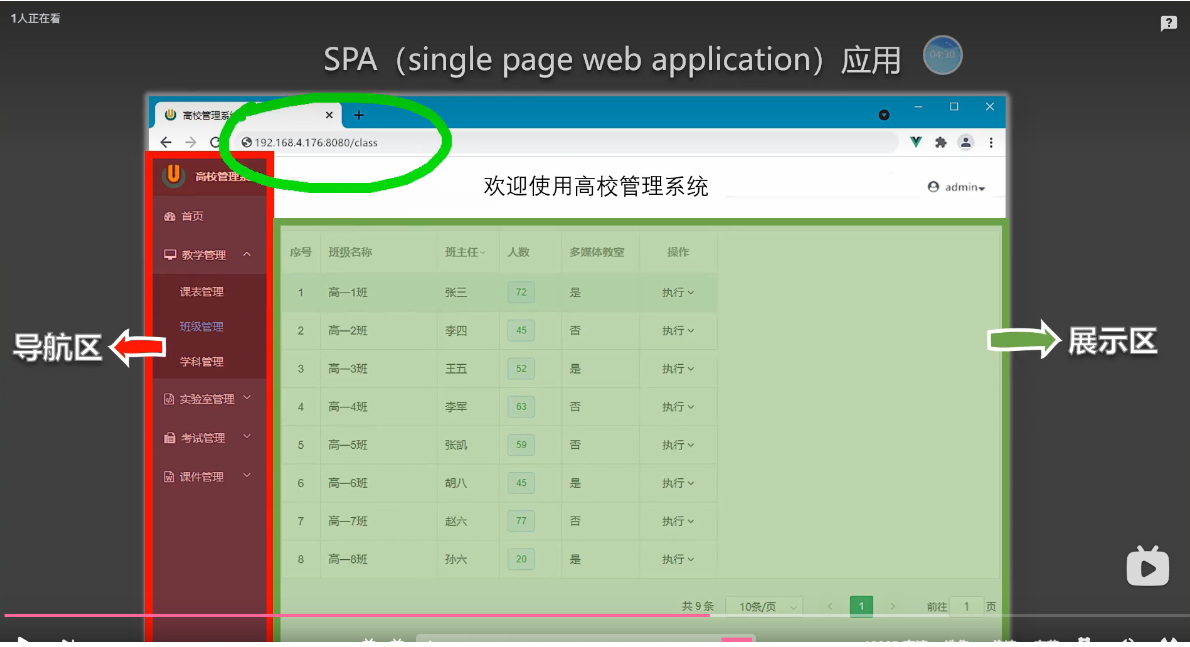
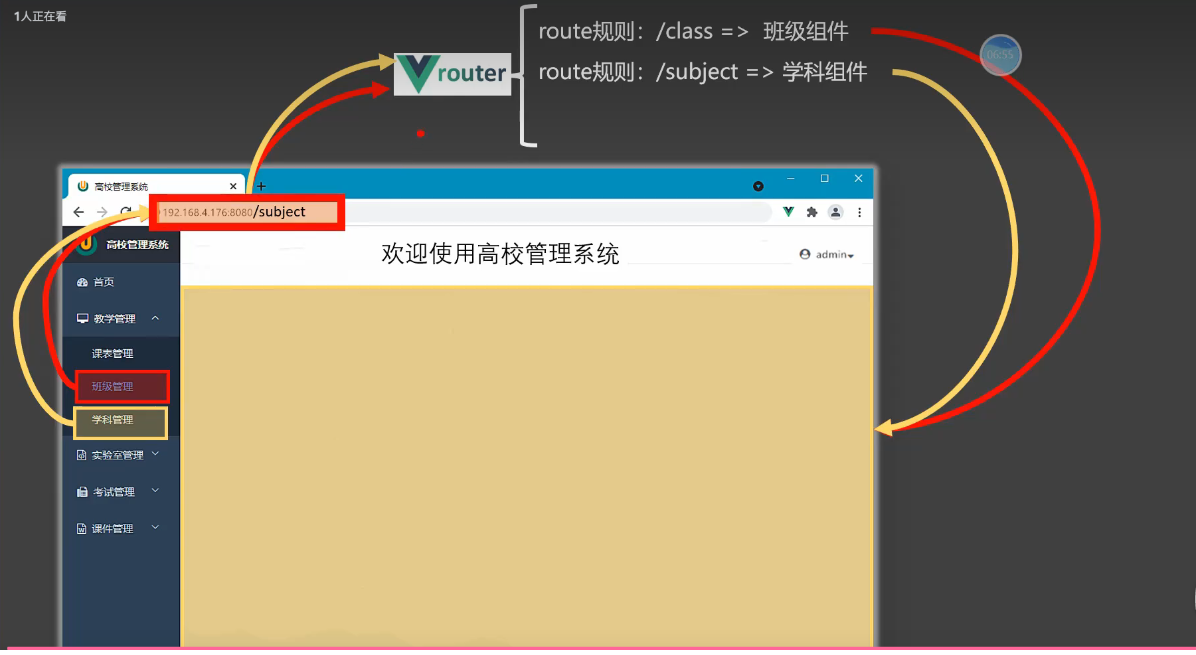
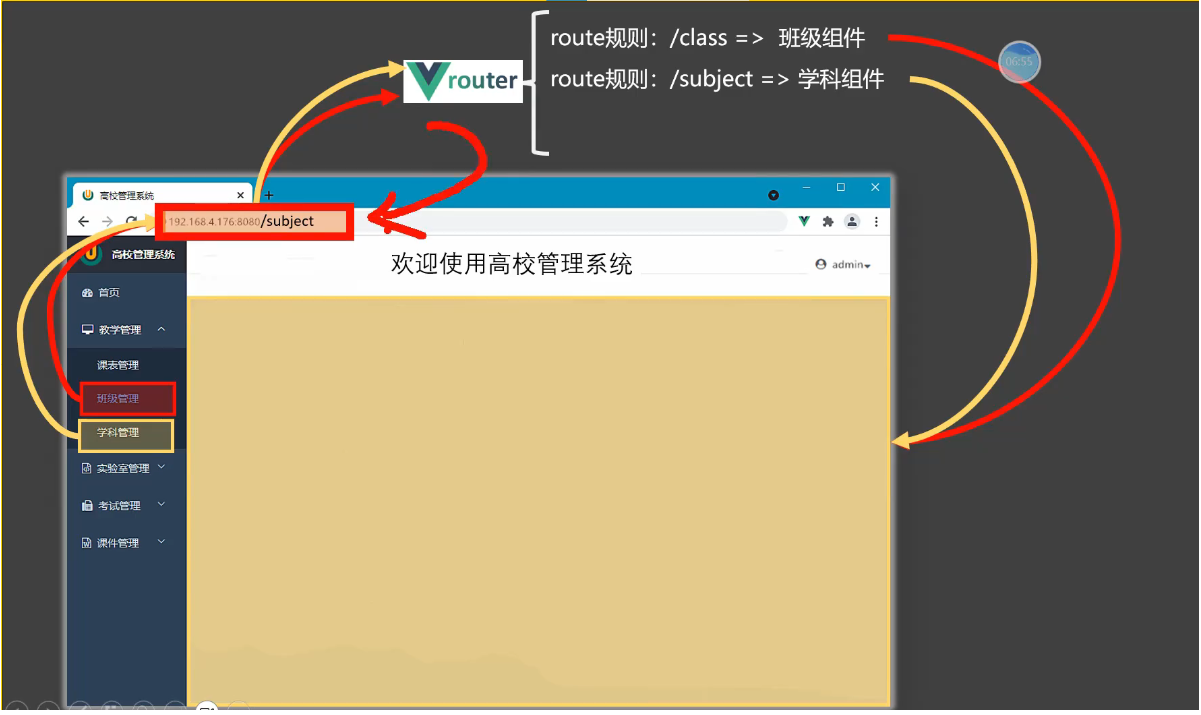
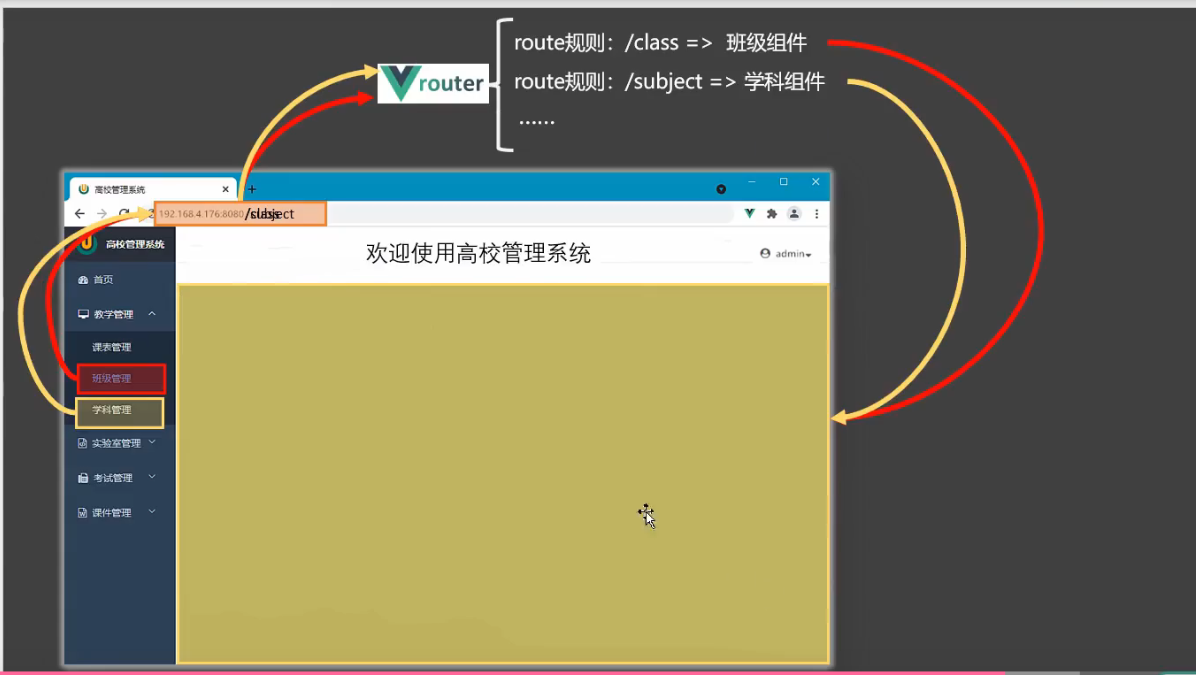
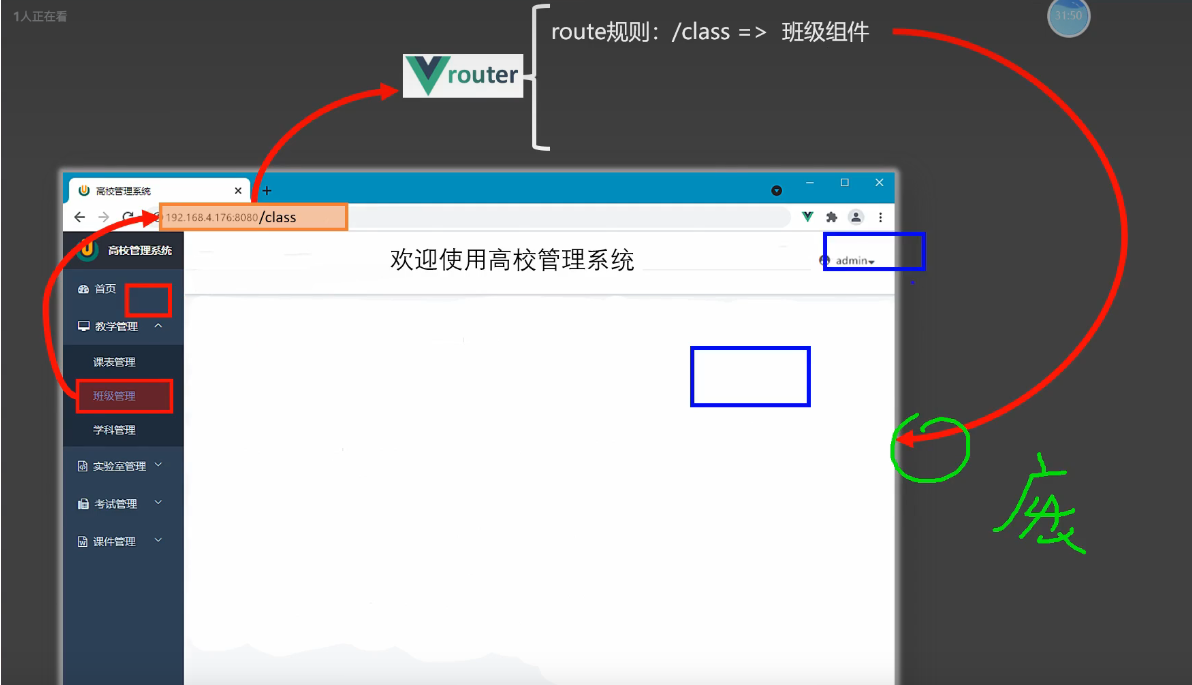
原理是怎样的呢?当你点击导航区的导航栏时,首先是红色指向的顶部区域在变,变化的是浏览器里面的路径,
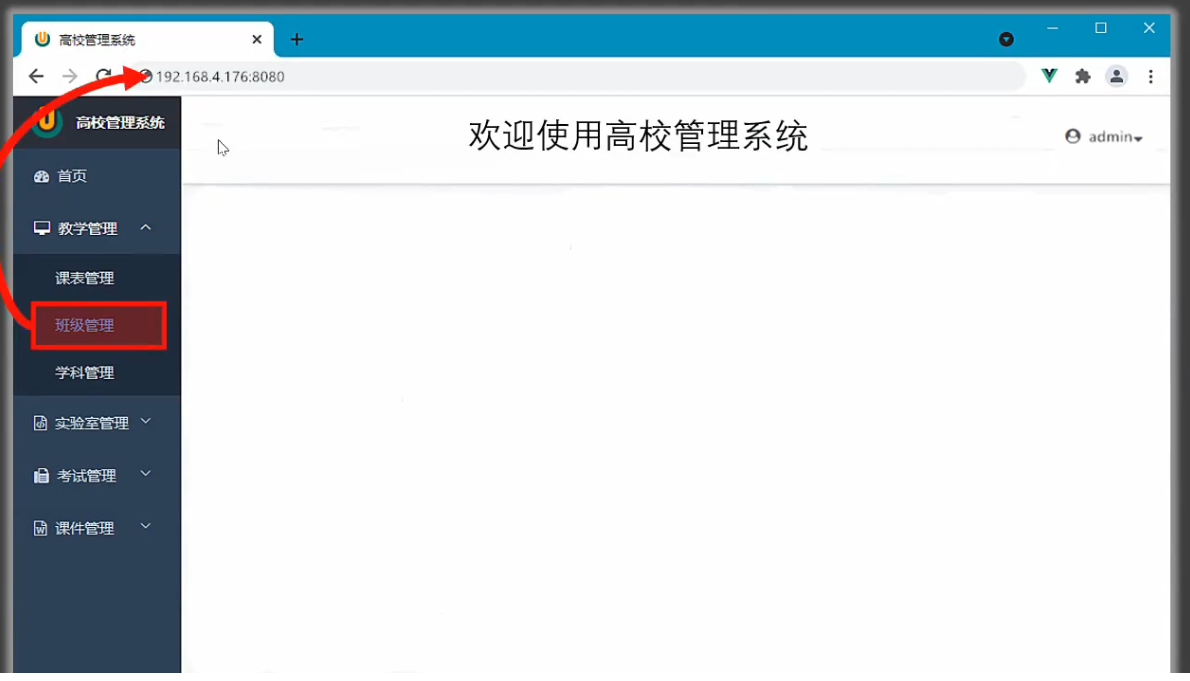
当你点击 '班级管理',变化的是 '/class',点击导航区路径发生变化
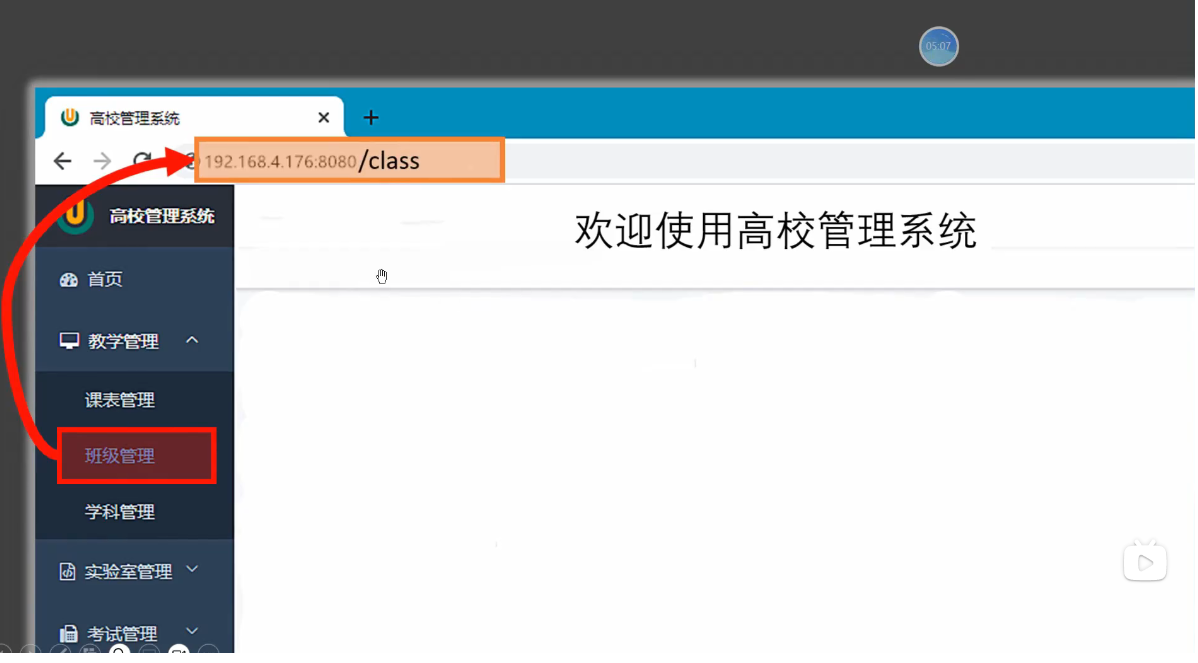
路径发生变化会被路由器监测到,路由器监视到路径的变化,发现原来路径是 '/' 现在变成了 '/class',然后路由器进行规则的匹配。
什么路径配什么组件
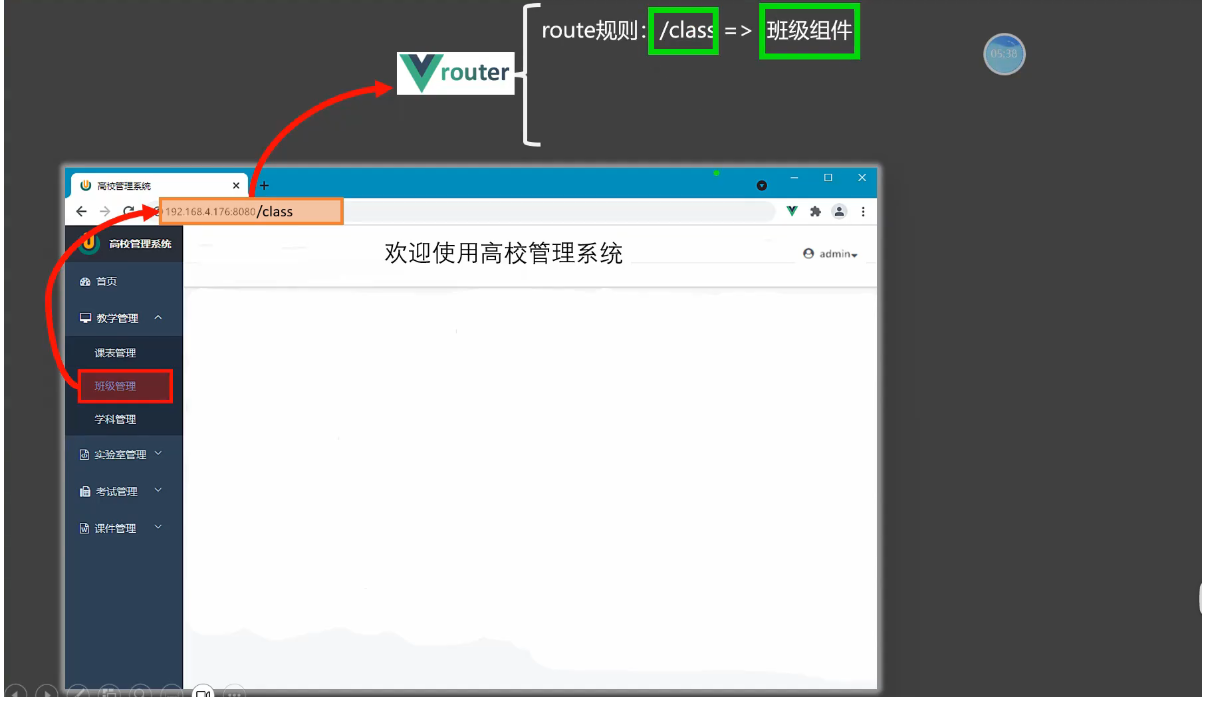
路径是真正可以寻找到匹配的
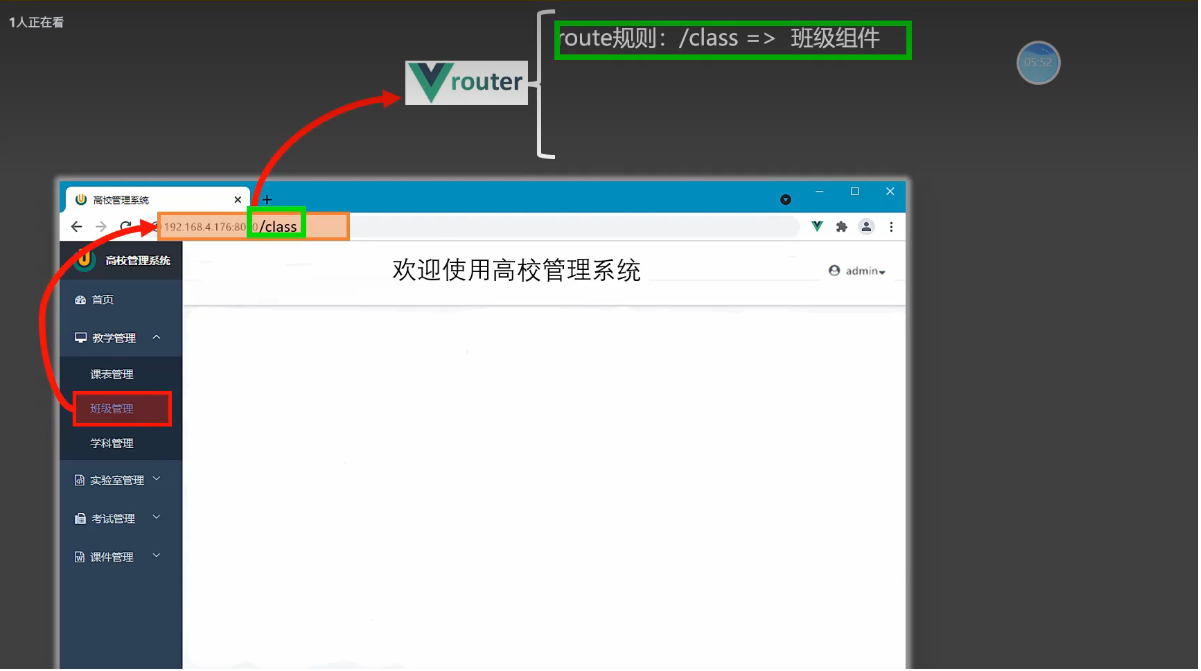
此时班级组件就会出现在绿色区域

点击 '学科管理' 路由器监视到路径的变化,发现原来路径是 '/class' 现在变成了 '/subject',然后路由器进行规则的匹配。然后将'班级组件'进行卸载,再将'学科组件'进行挂载。这就是路由的工作流程,路由他有一个核心的东西在变就是路径
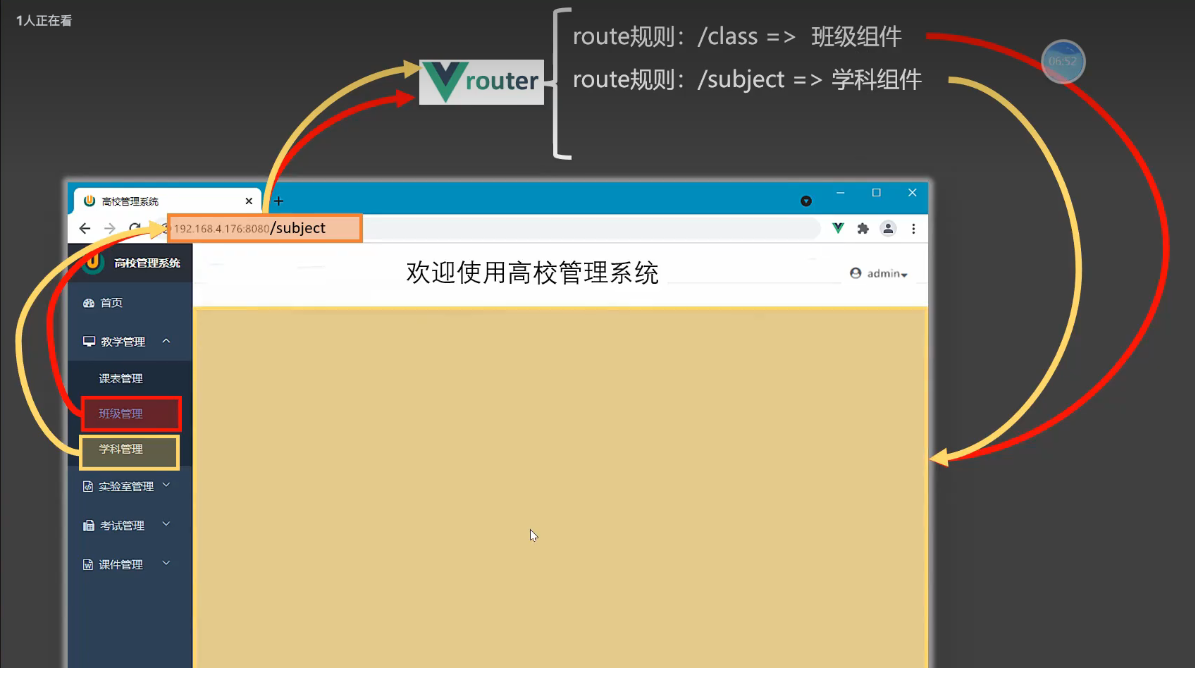
对于react,vue里面的路由,路径是至关重要的
如果你不能引起红色路径的变化,路由器是没法工作的
031_路由-基本切换效果
Vue3中要使用 vue-router 的最新版本,目前是4版本
笔记
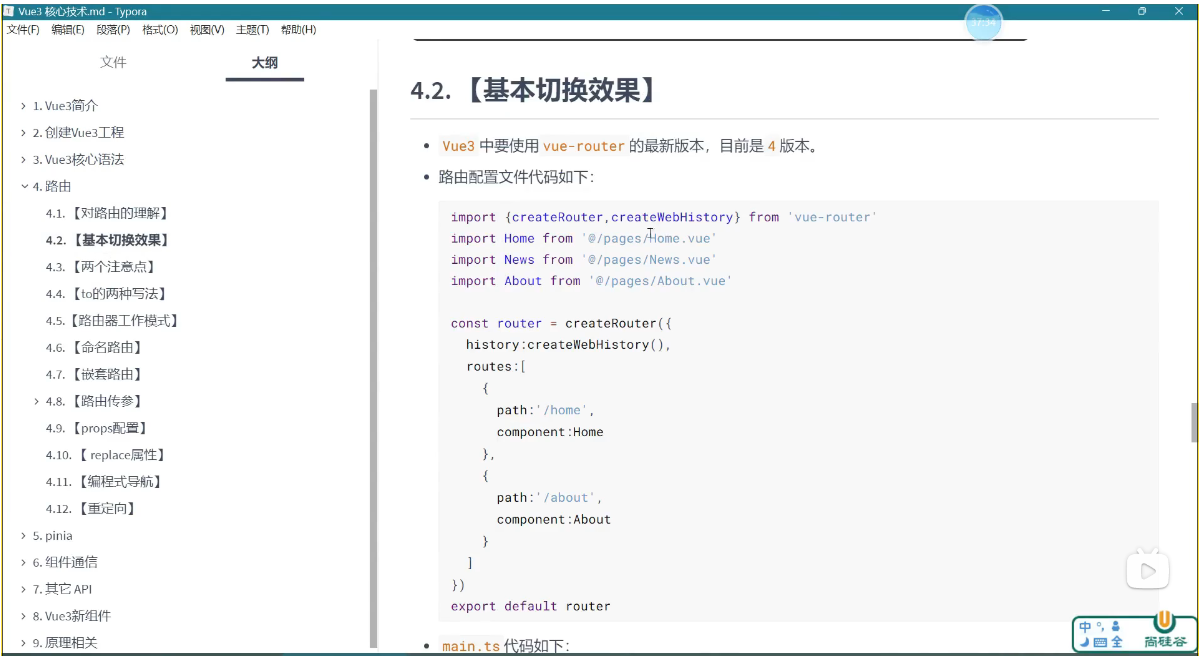
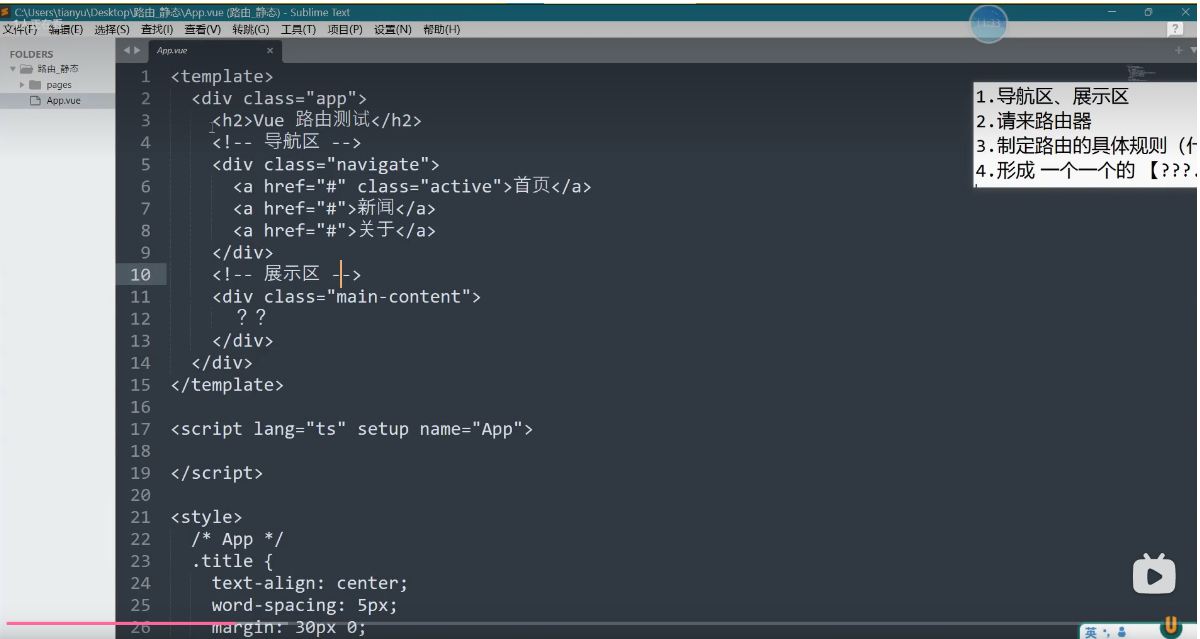
我们要实现路由,一定要确定以下几件事情:
1, 导航区,展示区
2, 请来路由器
3, 制定路由的具体规则 (什么路径,对应着什么组件)
4, 形成一个一个的 [???.vue] 比如班级组件=>Class.vue 学科组件=>Subject.vue
老师的路由静态文件
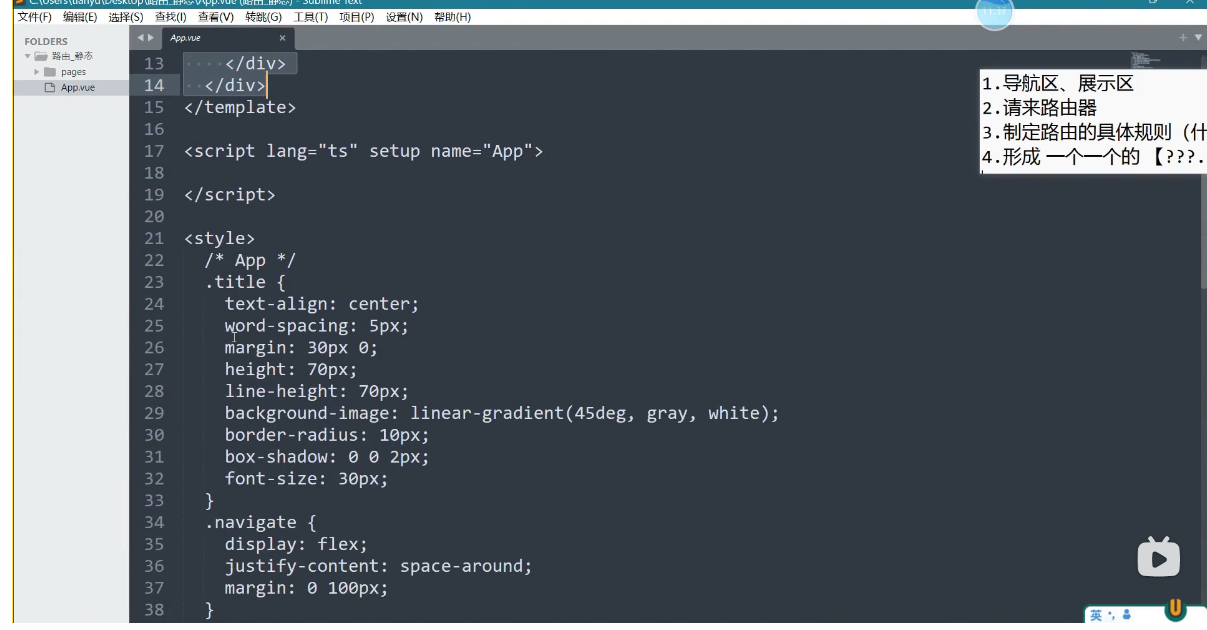
App.vue的样式
安装路由
npm i vue-router在前端项目里面,只要涉及到路由,必有 router文件夹 存放各种路由的文件,你只要去做项目,一定会有标准化文件夹划分,不论是前端项目还是后端项目都是一致的, 在比如 utils 文件夹是存放各种工具的,api文件夹是存放各种接口文件或者是统一管理接口.
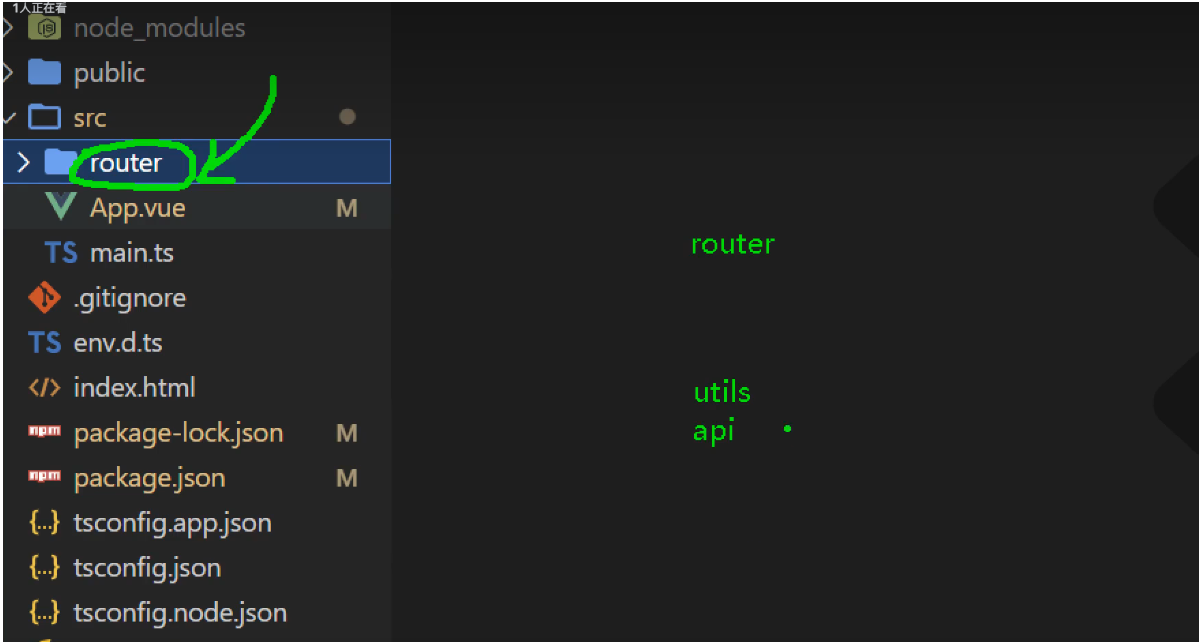
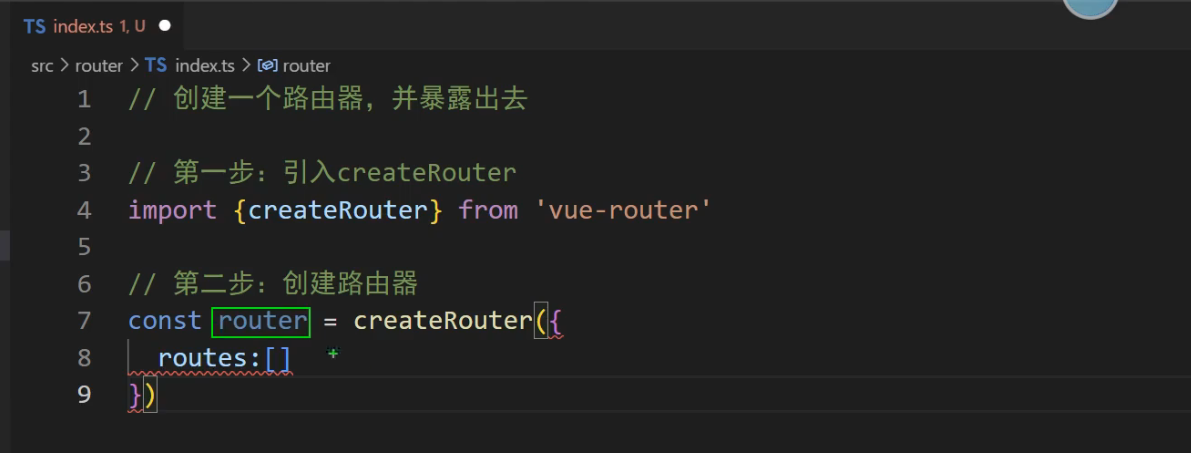
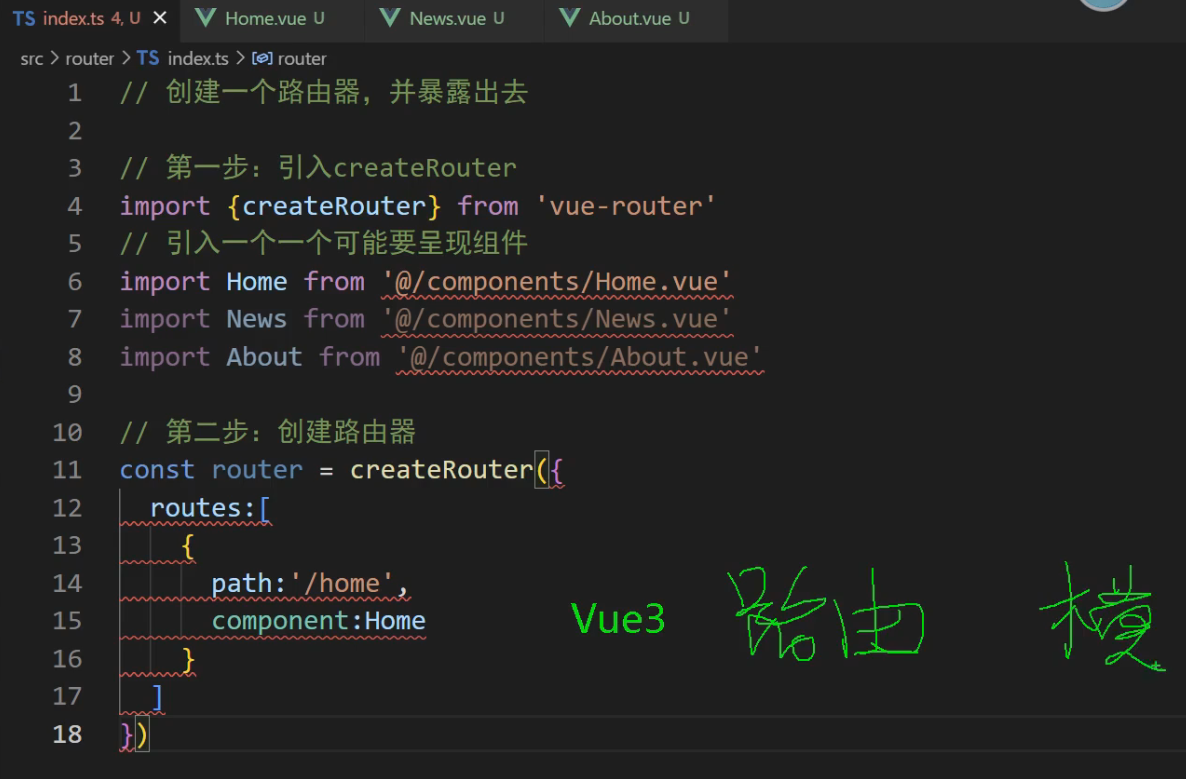
创建 src/router/index.ts 文件,用于存放各种路由
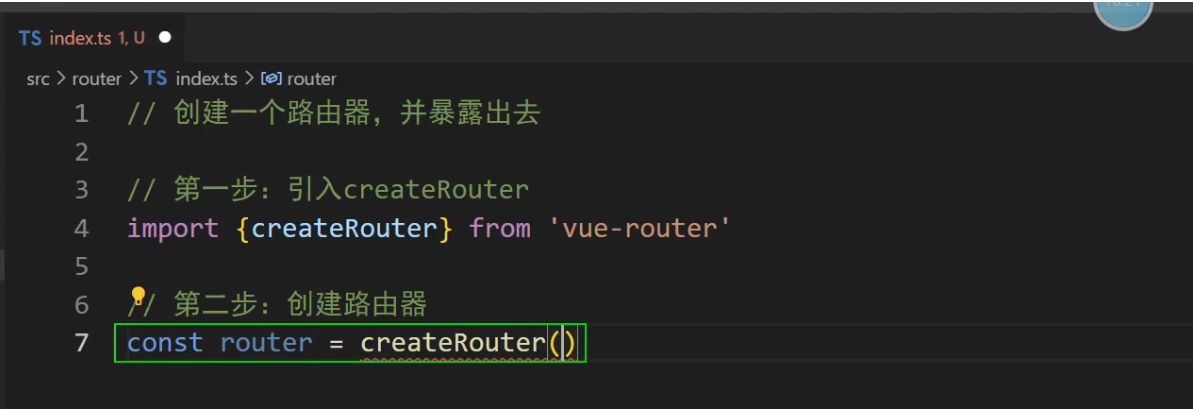
// 创建一个路由器,并暴露出去
// 第一步: 引入vue-router模块的createRouter方法
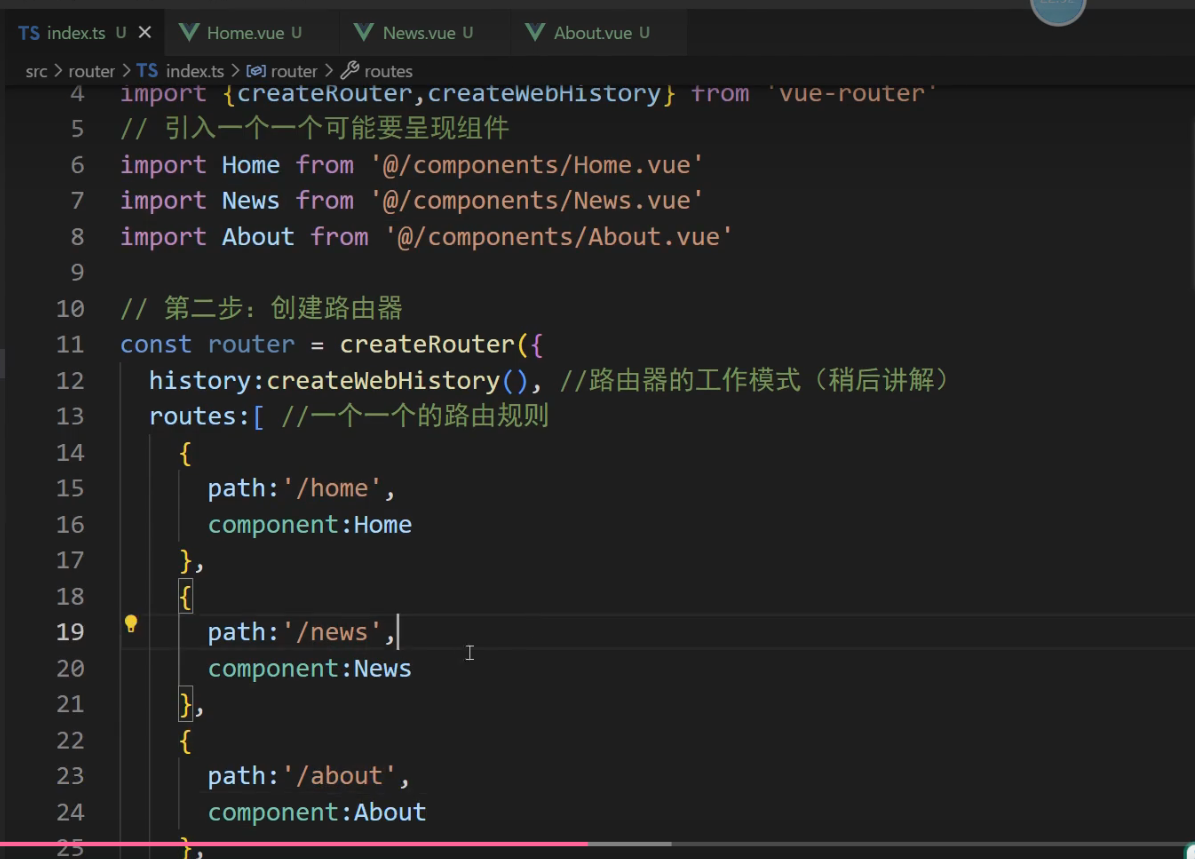
import {createRouter,createWebHistory} from 'vue-router'
// 第三步:引入一个一个可能要呈现的组件,也就是页面组件
import Home from '@/components/Home.vue'
import News from '@/components/News.vue'
import About from '@/components/About.vue'
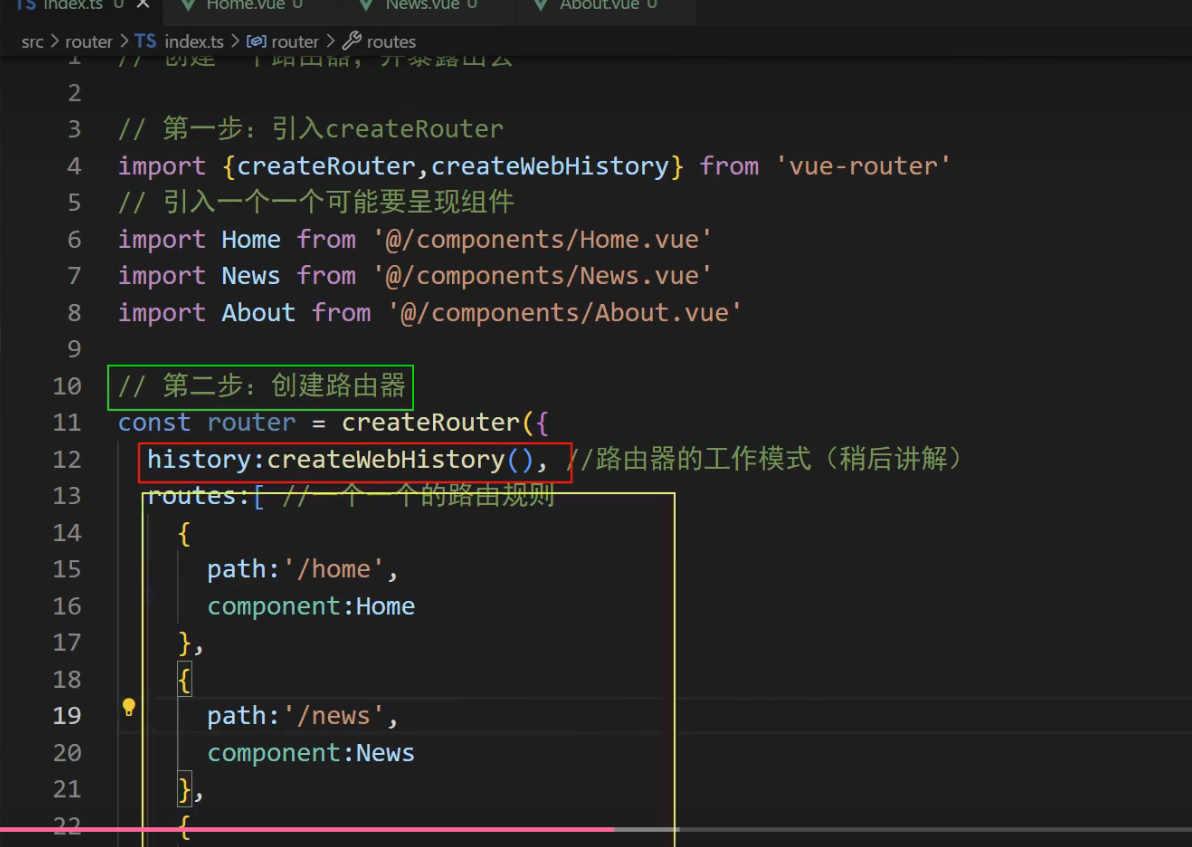
// 第二步: 创建路由器
const router = createRouter({
history:createWebHistory(), // 路由器的工作模式
routes:[ // 一个一个路由规则 路由规则数组
{path:'/home',component:Home},
{path:'/about',component:About},
{path:'/news',component:News}
]
})
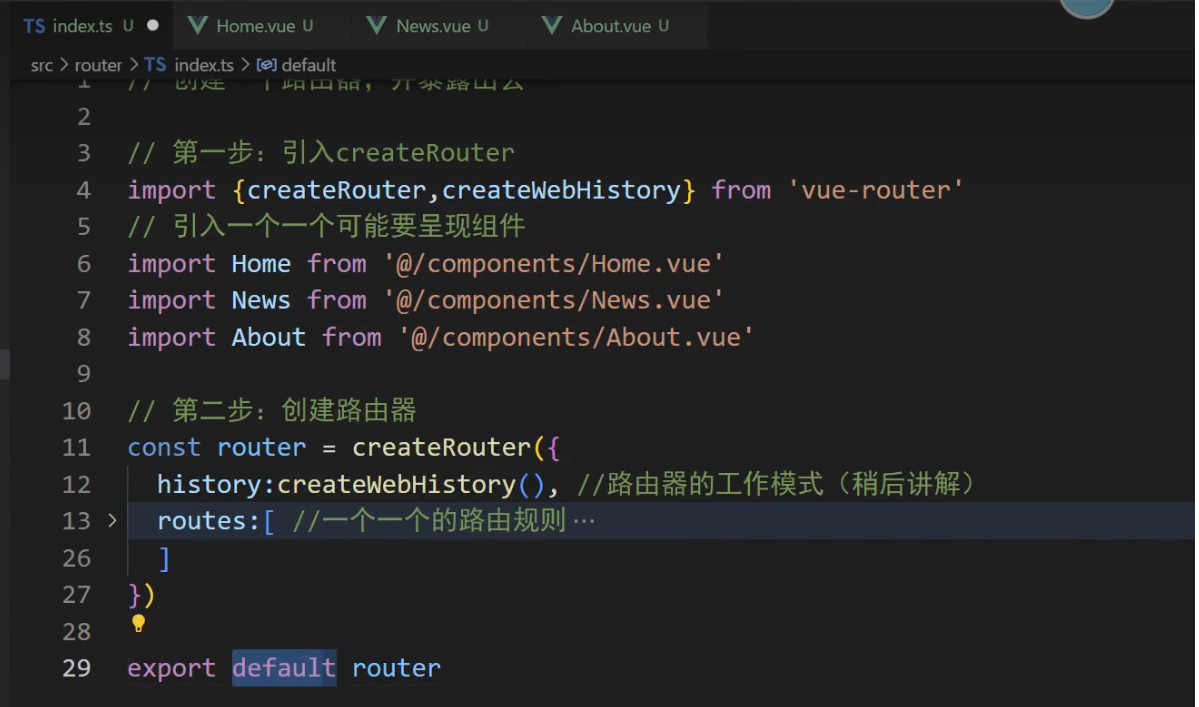
export default router;
// 引入路由配置文件路由器是管理一个一个路由的
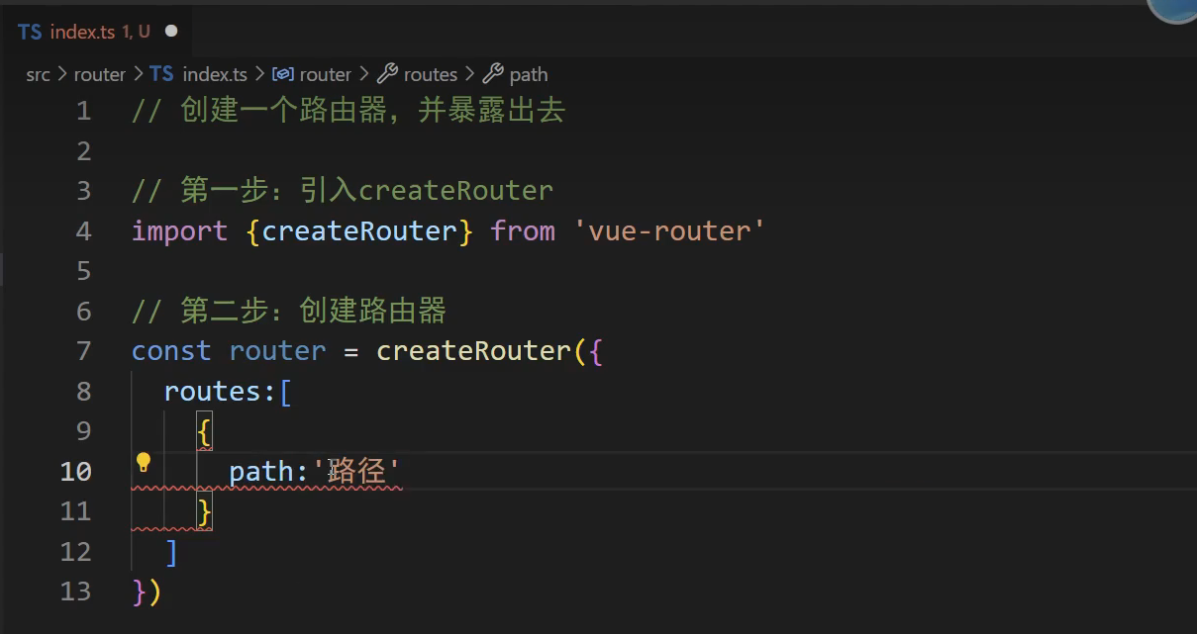
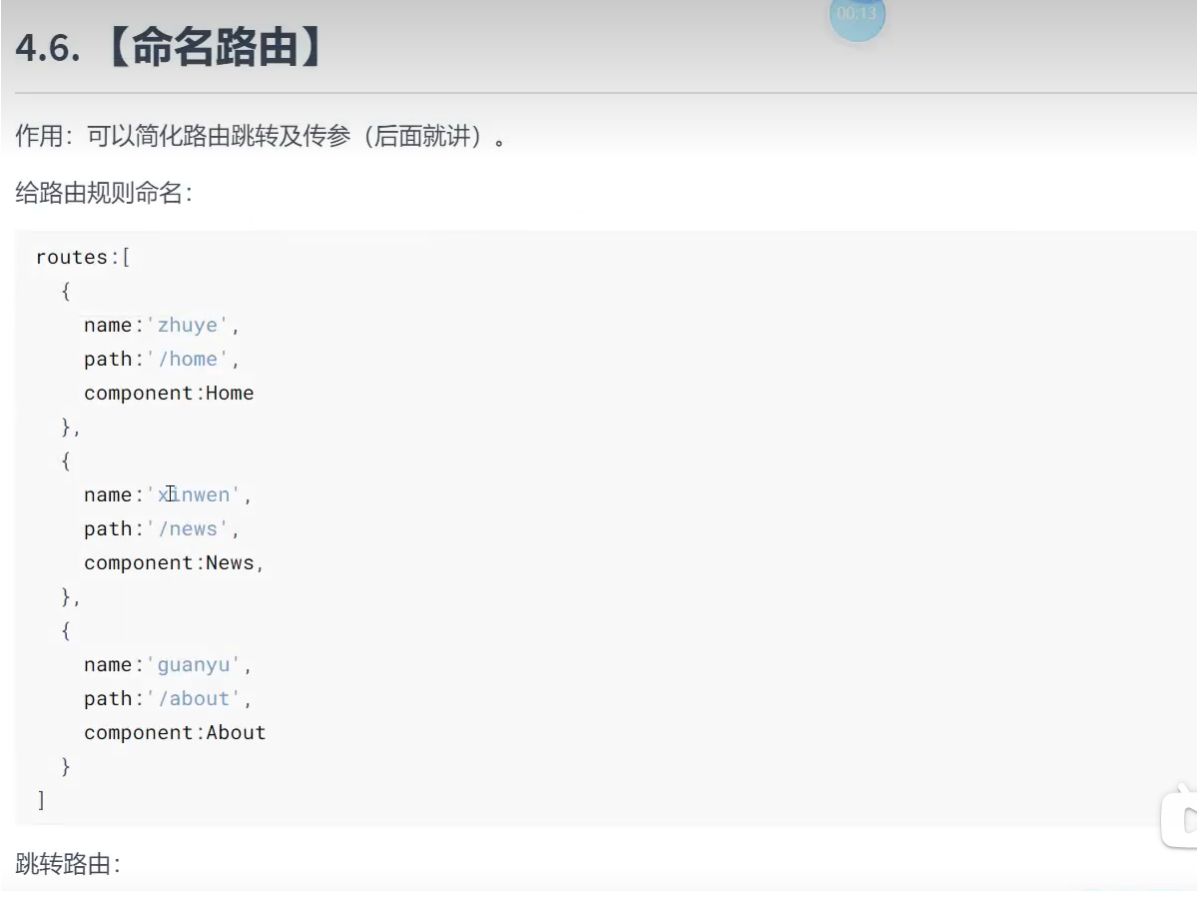
创建路由器,需要传入一个配置对象,一定要写一个配置项 routes,routes是一个数组
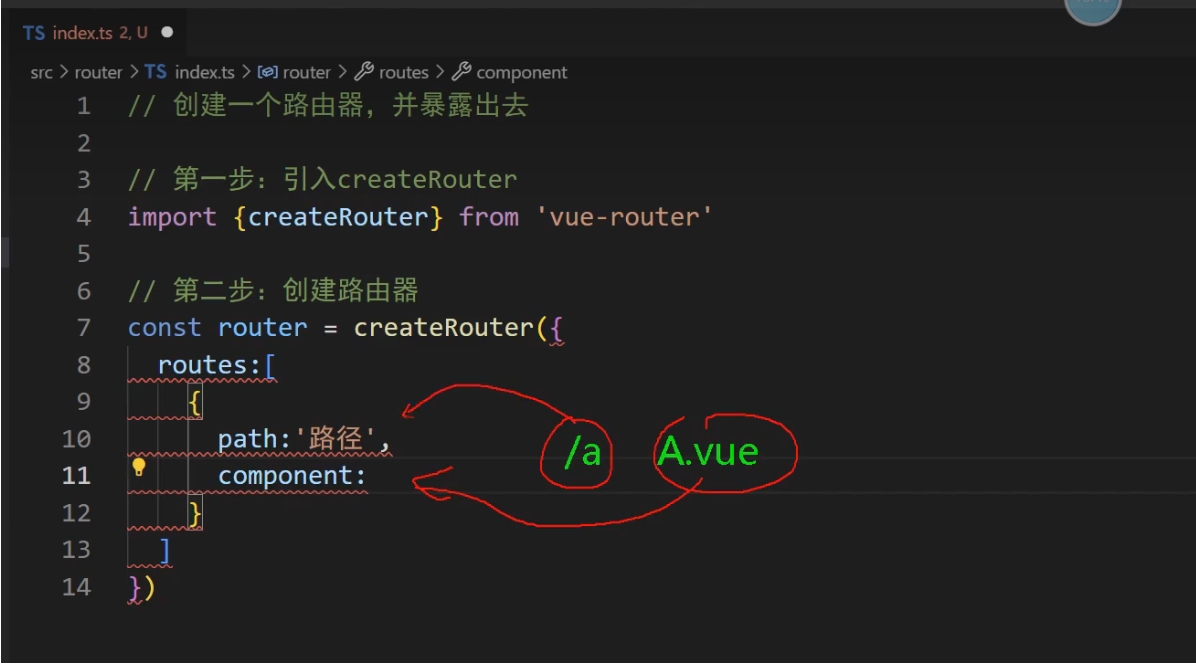
router 是路由器,一个项目只需要一个路由器就够了.路由器要管理路由,一个路由器可能管理一个路由,也可能管理10个路由,或者管理几十个路由,所以既然是一堆路由,很多路由,所以路由单词routes需要加一个s,表示有很多路由。路由对应的是一种关系key-value,所以他是一个对象,对象里面要写{path: '路径' },第二个参数是component要写路径对应的组件名
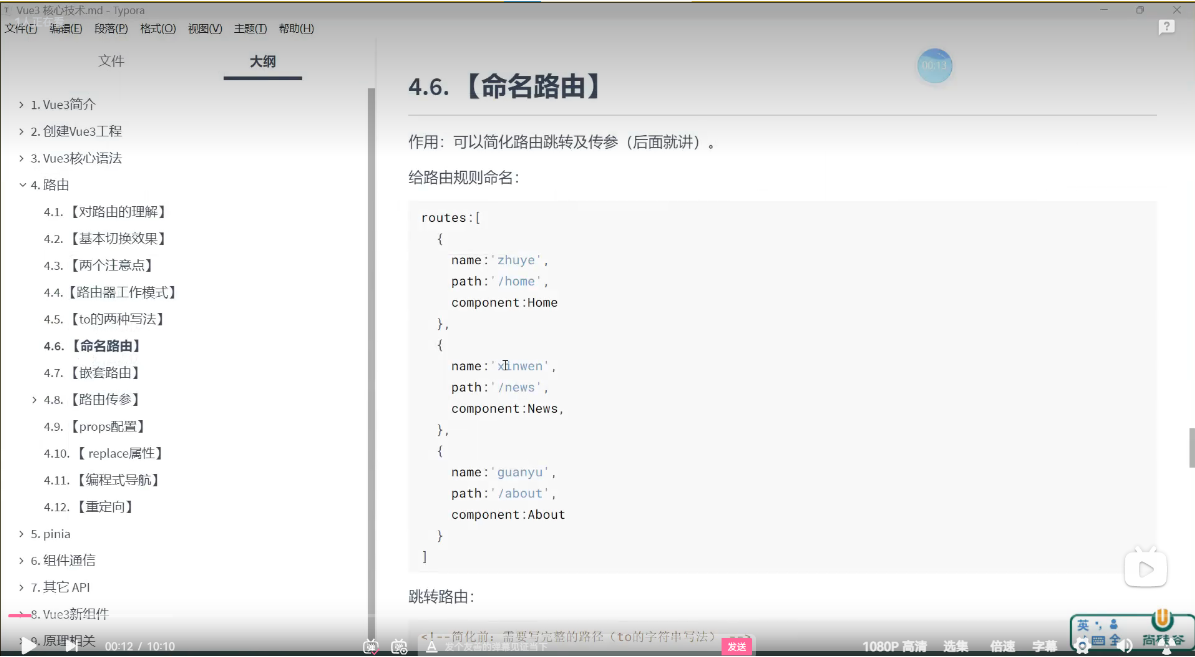
路由的具体写法如下图所示
路由创建模式: 在 vue3 中 , 他有一个要求,你必须在制定路由的时候,一定一定要想好路由器的工作模式,在这里我们不深入探讨路由器的工作模式,
1, 第二步: 先引入 createWebHistory
import {createRouter,createWebHistory} from 'vue-router'


2, 第二步: 创建路由器
const router = createRouter({
    history:createWebHistory(), // 创建路由模式
    routes:[
        {path:'/home',component:Home},
        {path:'/about',component:About},
        {path:'/news',component:News}
    ]
})

3,第三步: 将创建好的路由暴露出去
export default router;


4,第四部,路由器创建好了,还得使用啊
我们去 src/main.ts 去操作路由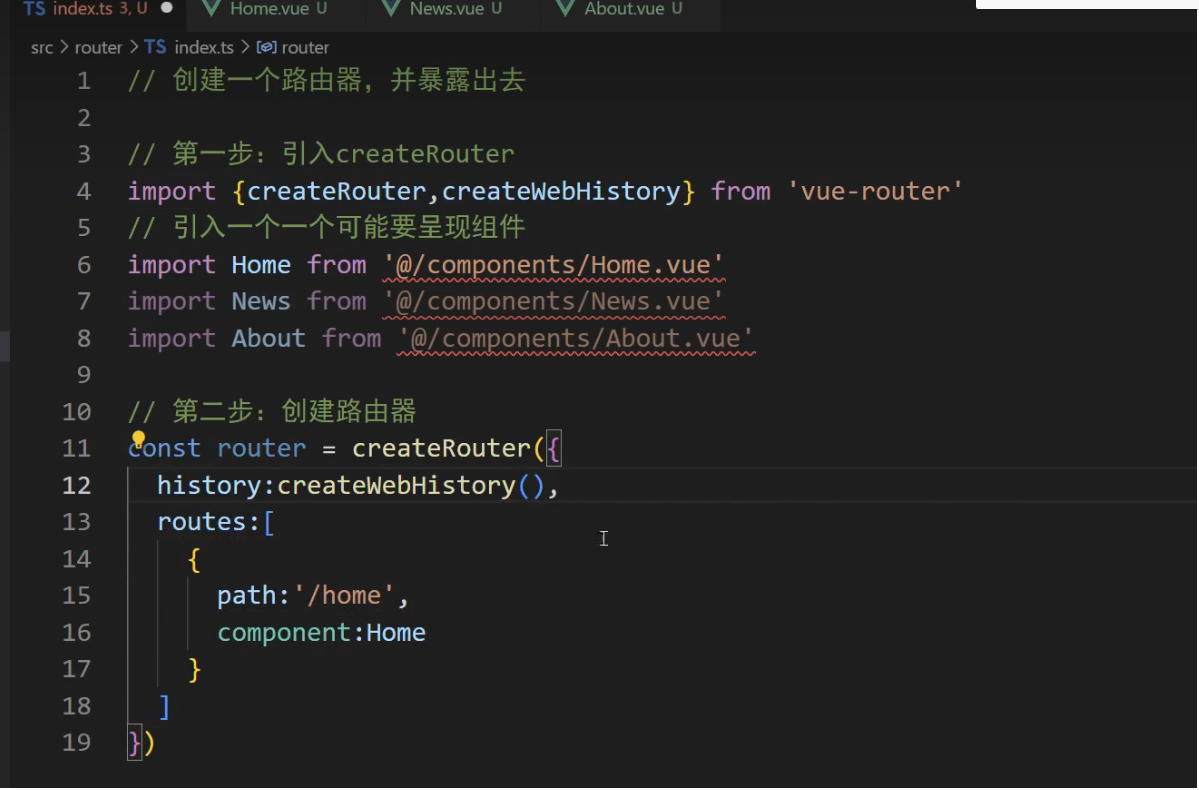
创建一个路由器,指定路由器的工作模式,然后管理一个一个路由 ,最后把写好的路由器暴露出去,给大家使用,分别暴露,统一暴露度可以,只要别人可以引入进来使用就OK,如下图所示
引入router以后,如何使用router
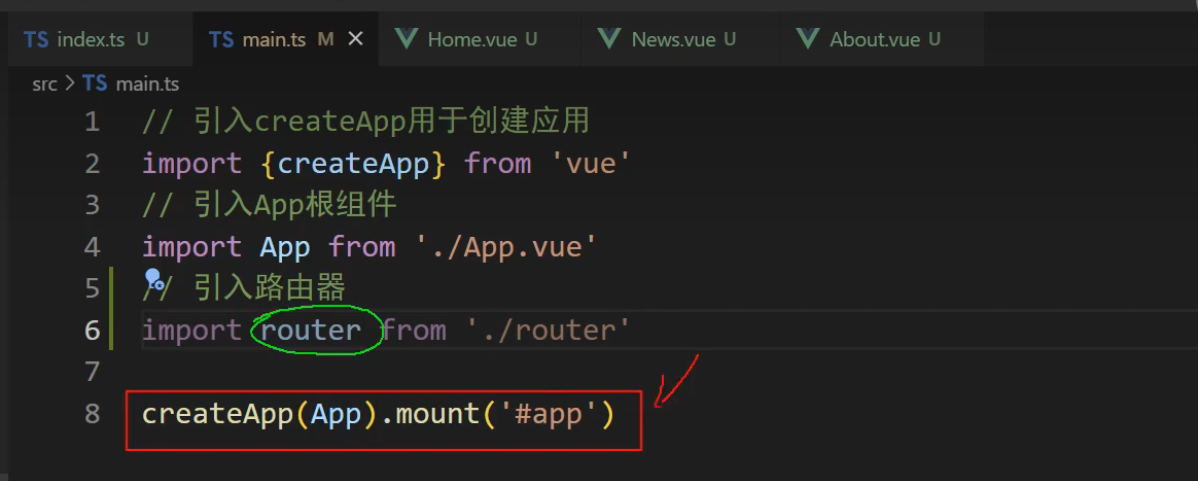
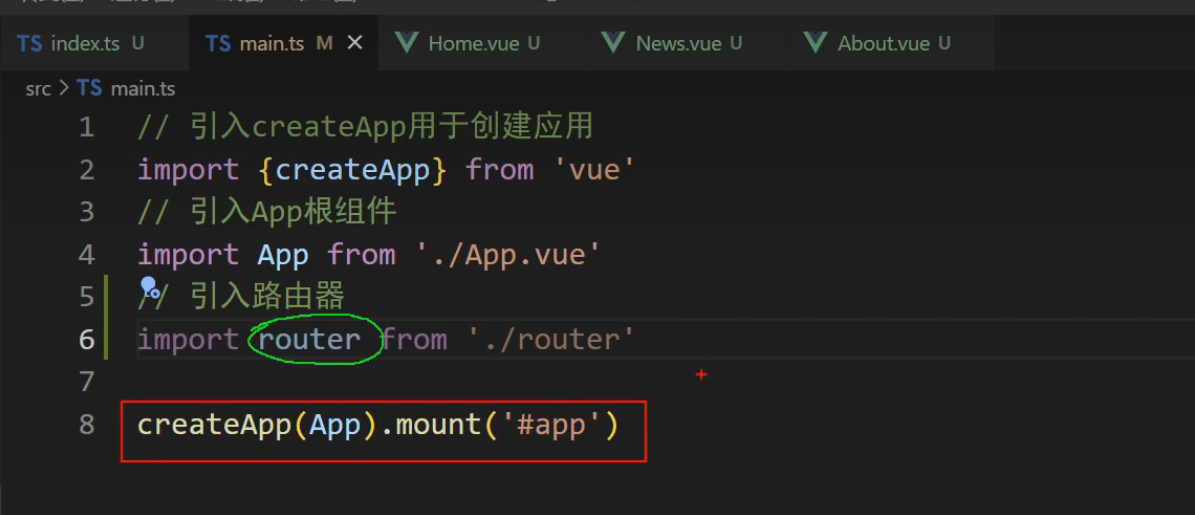
首先要将 createApp(App)坼出去,这里在创建整个应用,你要写项目,你必须要调用 createApp(App)
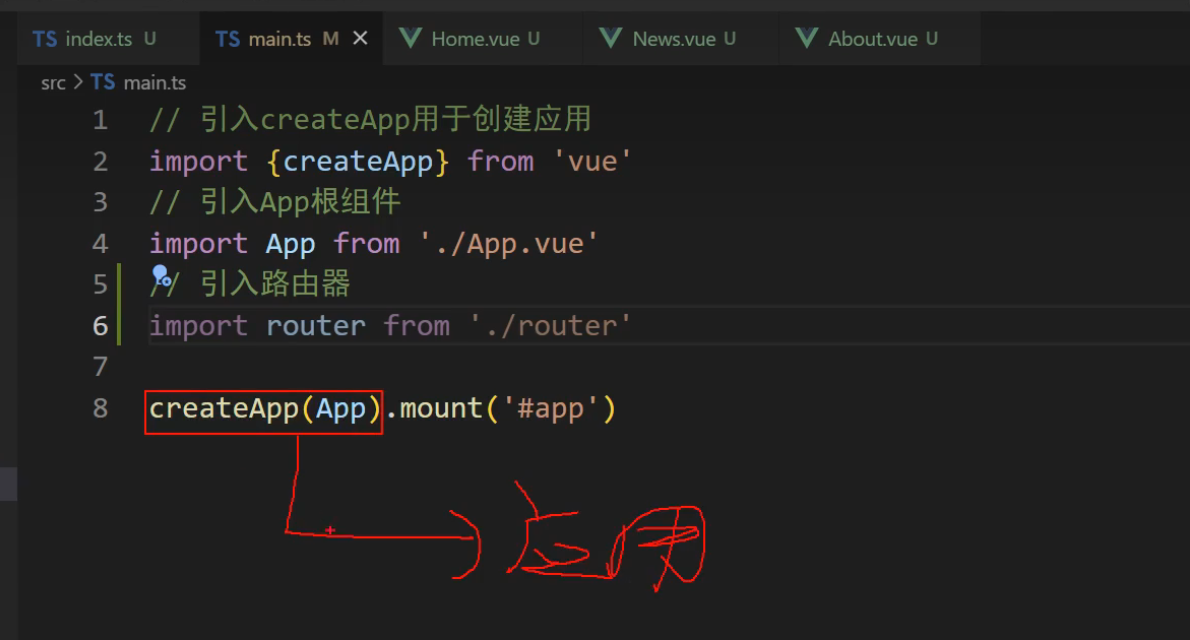
createApp(App) 坼解如下其实就是少一个中专变量app而与

const app = createApp(App)
app.mount('#app')
Home组件 Home.vue
<script setup lang="ts">
/*! @file
*******************************************************
<PRE>
文件实现功能      : 首页组件
作 者            : mary
版本             : 1.0
-------------------------------------------------------
备注             : -
-------------------------------------------------------
修改记录  :
日期           版本         修改人      修改内容
2025/6/18      1.0          mary         创建
</PRE>
******************************************************/
// defineOptions({name: ''})
//====================================================
// == 类型定义


//====================================================
// == 初始化


//====================================================
//== 事件处理
</script>

<template>
    <div class="home">
        <img src="http://www.atguigu.com/images/index_new/logo.png" alt="">
    </div>
</template>

<style scoped>
    .home {
        display: flex;
        justify-content: center;
        align-items: center;
        height: 100%;
    }
</style>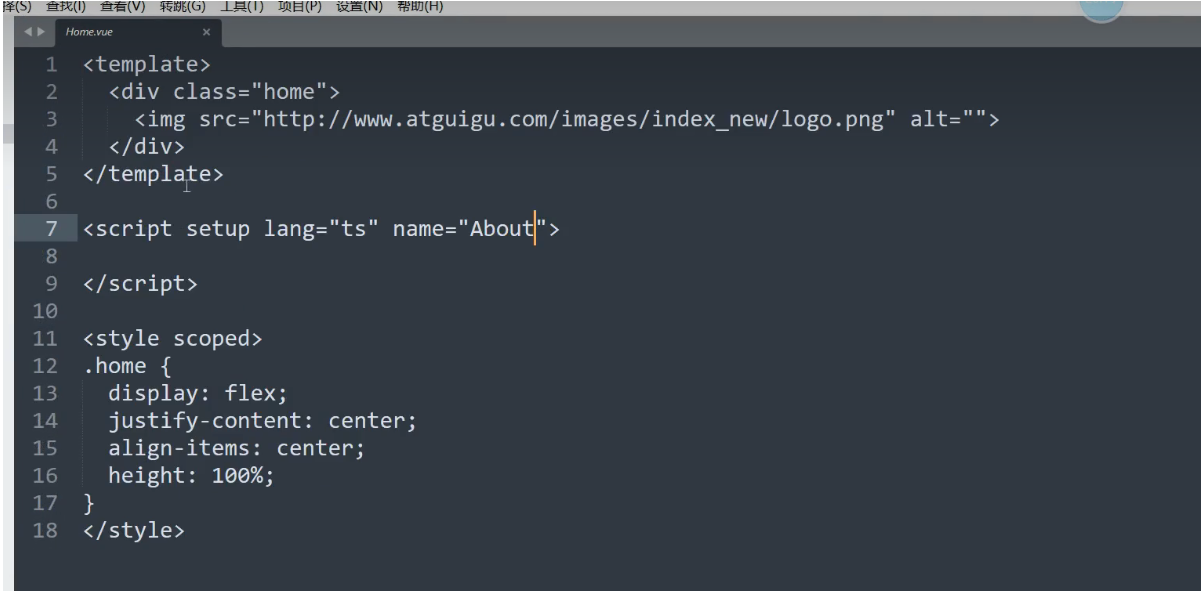
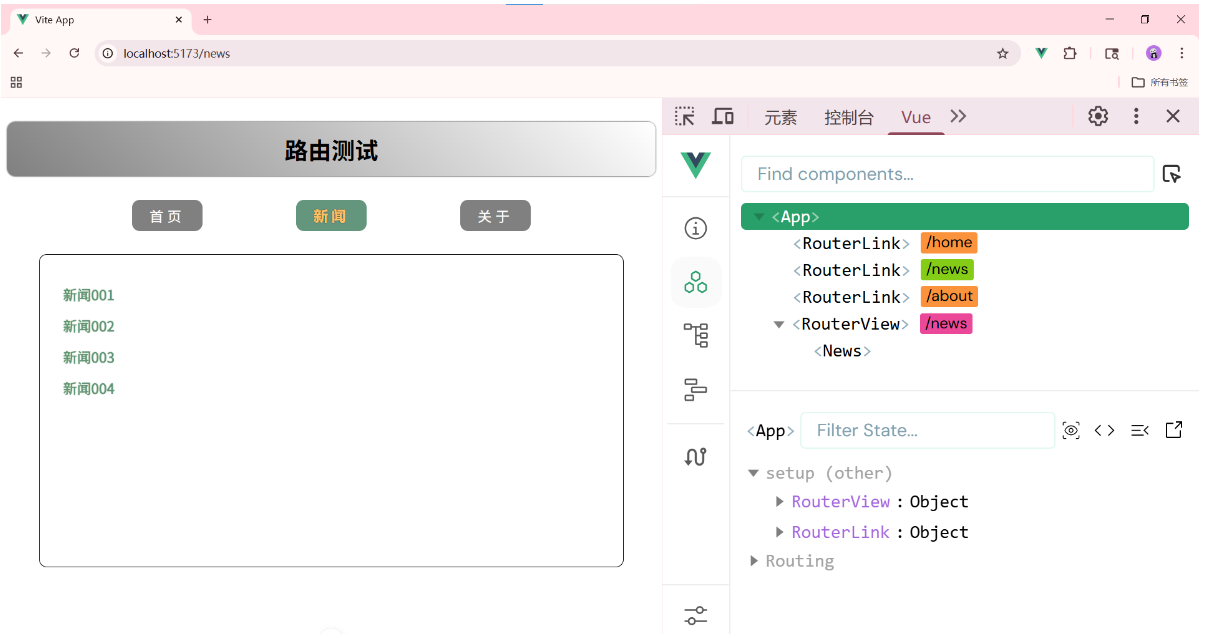
News.vue
<script setup lang="ts" name="News">
/*! @file
*******************************************************
<PRE>
文件实现功能 : 新闻详情页面
作 者 : mary
版本 : 1.0
-------------------------------------------------------
备注 : -
-------------------------------------------------------
修改记录 :
日期 版本 修改人 修改内容
2025/6/18 1.0 mary 创建
</PRE>
******************************************************/
// defineOptions({name: ''})
//====================================================
// == 类型定义
//====================================================
// == 初始化
//====================================================
//== 事件处理
</script>
<template>
<div class="news">
<ul>
<li><a href="#">新闻001</a></li>
<li><a href="#">新闻002</a></li>
<li><a href="#">新闻003</a></li>
<li><a href="#">新闻004</a></li>
</ul>
</div>
</template>
<style scoped>
/*新闻*/
.news {
padding: 0 20px;
display: flex;
justify-content: space-between;
height: 100%;
}
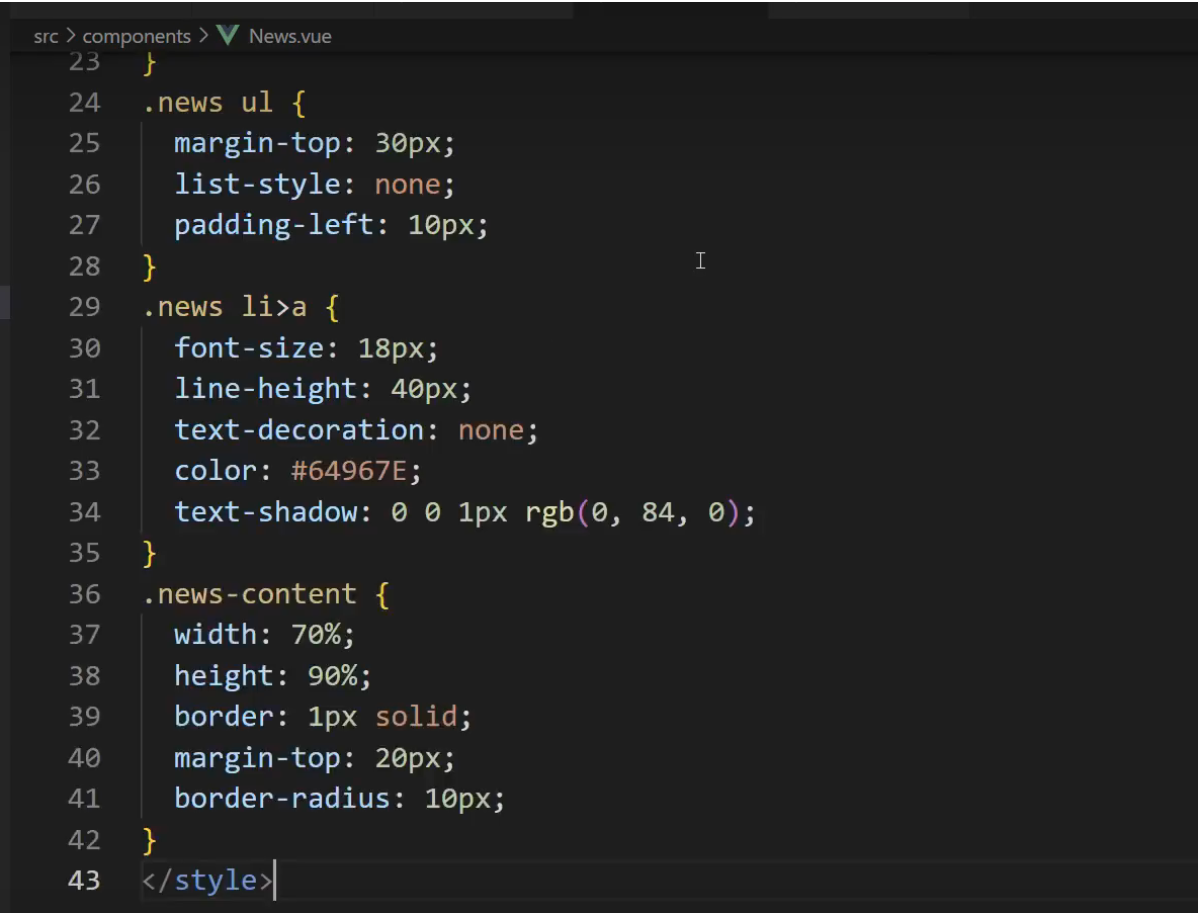
.news ul {
margin-top: 30px;
list-style: none;
padding-left: 10px;
}
.news li>a {
font-size: 18px;
line-height: 40px;
text-decoration: none;
color: #64967E;
text-shadow: 0 0 1px rgb(0, 84, 0);
}
.news-content {
width: 70%;
height: 90%;
border: 1px solid;
margin-top: 20px;
border-radius: 10px;
}
</style>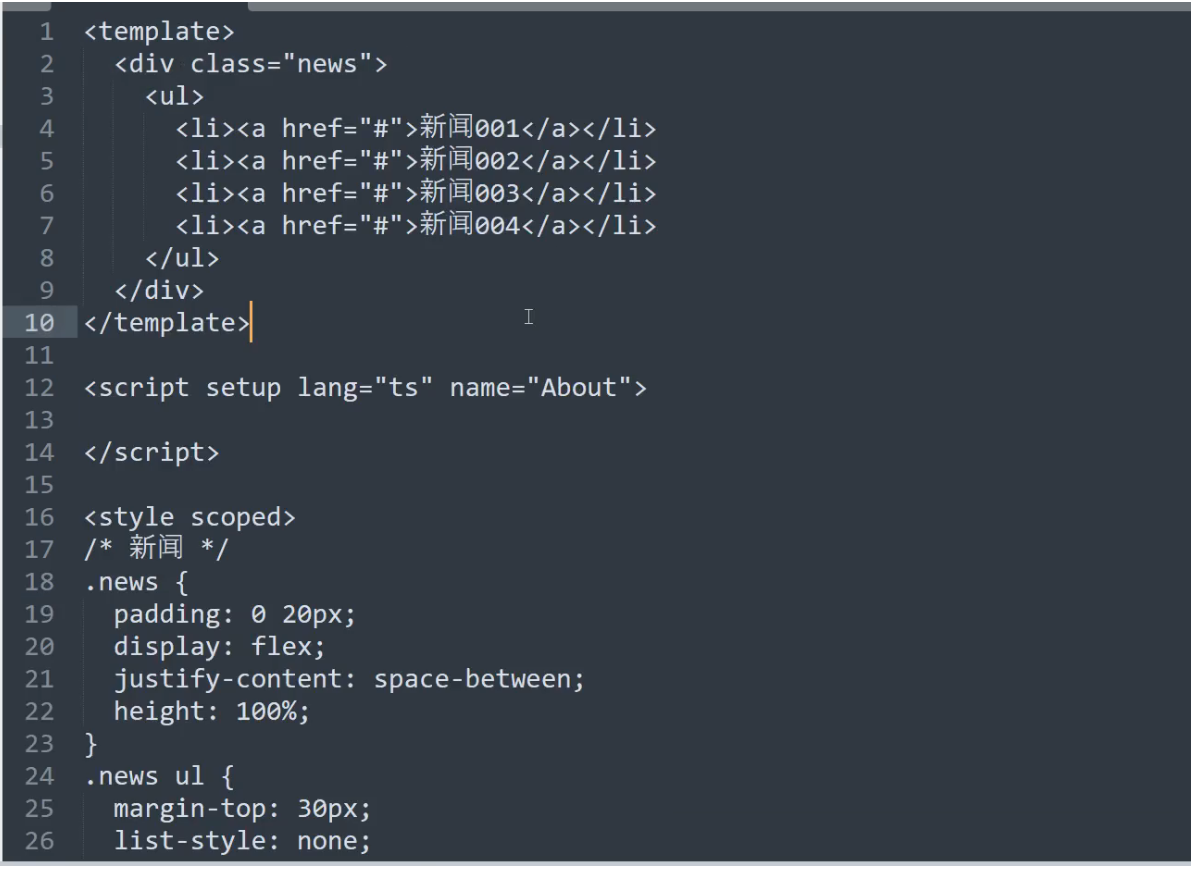
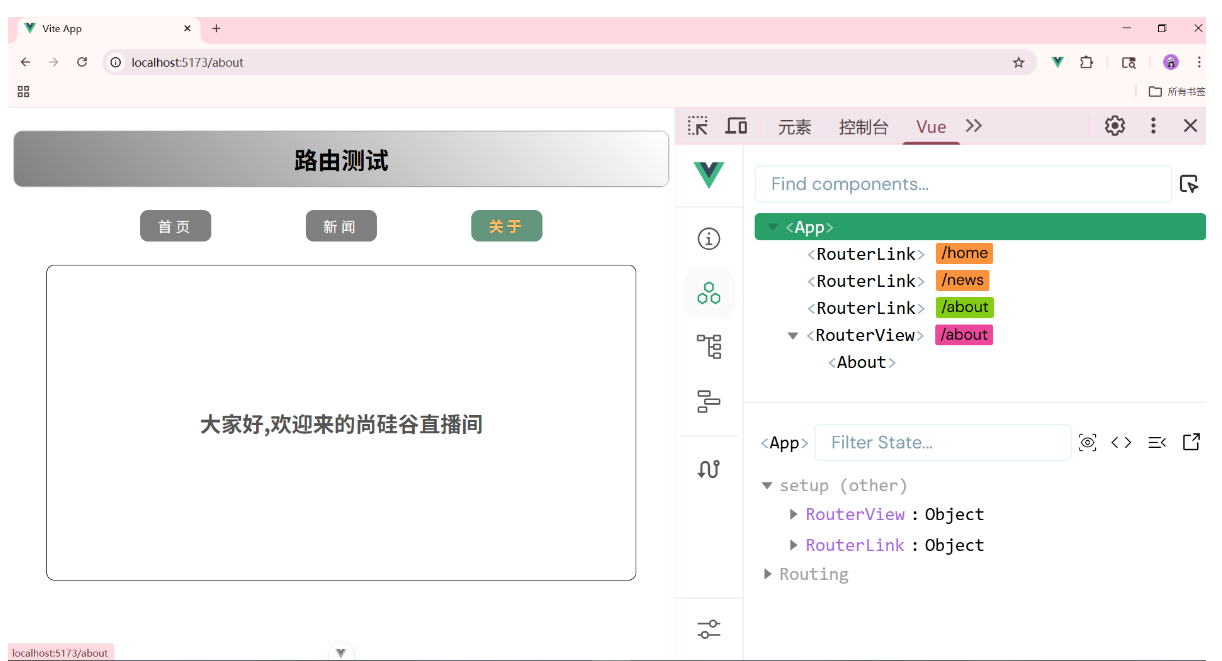
About.vue
<script setup lang="ts" name="About">
/*! @file
*******************************************************
<PRE>
文件实现功能      : 关于页面的脚本文件。
作 者            : mary
版本             : 1.0
-------------------------------------------------------
备注             : -
-------------------------------------------------------
修改记录  :
日期           版本         修改人      修改内容
2025/6/18      1.0          mary         创建
</PRE>
******************************************************/
// defineOptions({name: ''})
//====================================================
// == 类型定义


//====================================================
// == 初始化


//====================================================
//== 事件处理
</script>

<template>
    <div class="about">
        <h2>大家好,欢迎来的尚硅谷直播间</h2>
    </div>
</template>

<style scoped>
    .about {
        display: flex;
        align-items: center;
        justify-content: center;
        height: 100%;
        color: rgb(85, 84, 84);
        font-size: 18px;
    }
</style>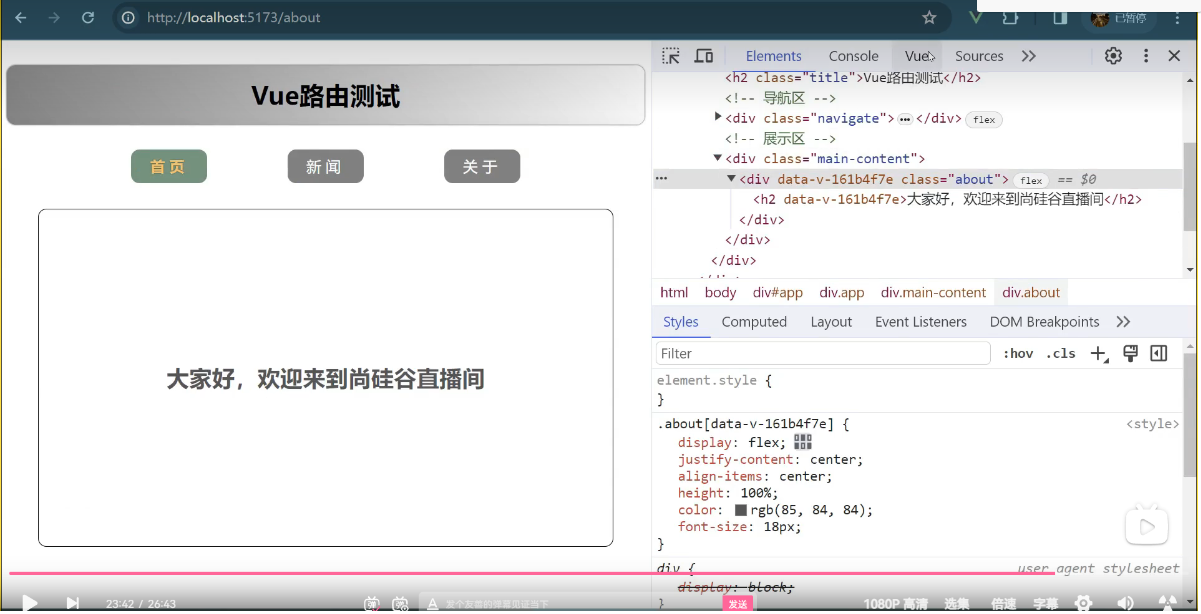
src/main.ts
// 引入 createApp 用于创建应用
import {createApp} from 'vue'

// 引入 App根组件
import App from './App.vue'

// 引入路由器
import router from './router'


// 调用createApp()方法创建应用并放在id为app的容器里面
// createApp(App).mount('#app')

// 创建一个应用
const app = createApp(App)

// 使用路由器
app.use(router)

// 挂载整个应用到 app 容器中
app.mount('#app')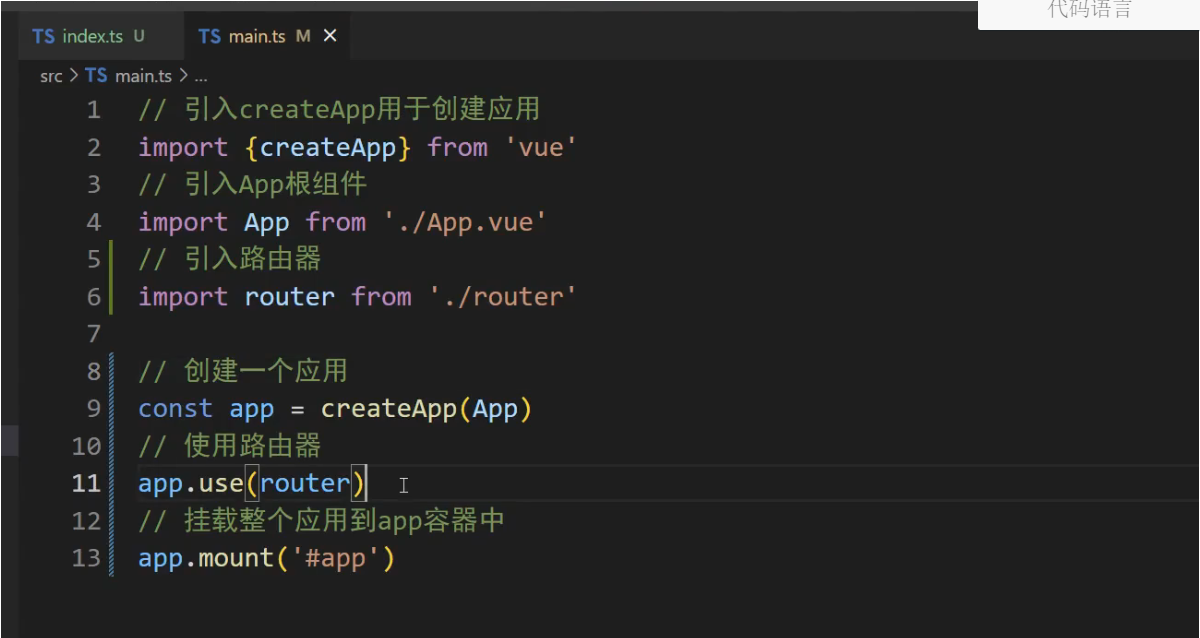
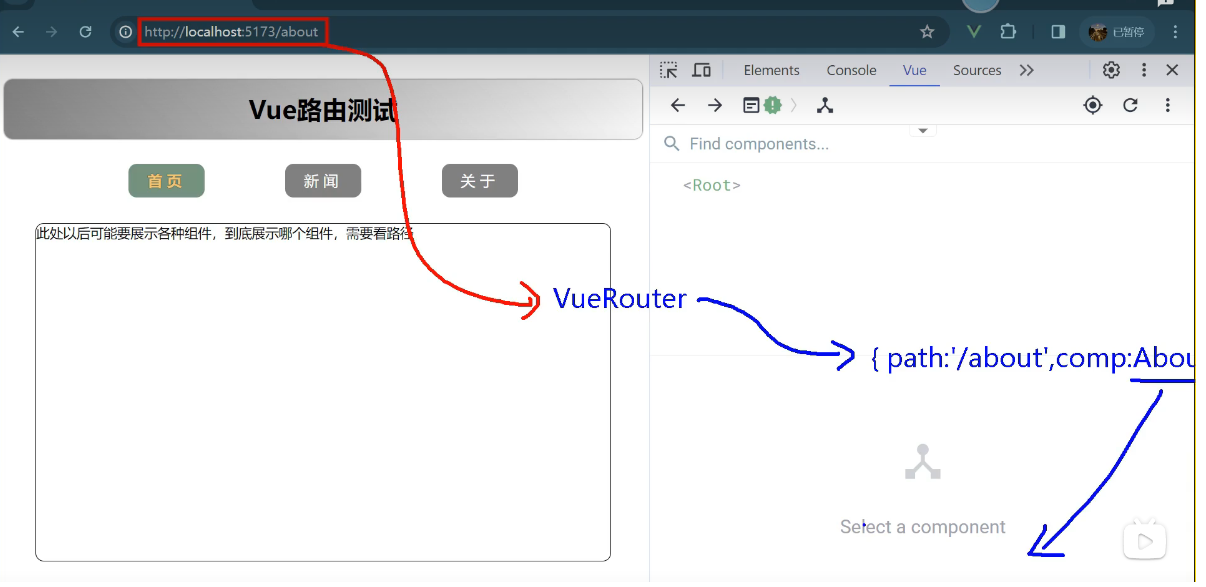
1,能监测的路径'/home,/news,/about'
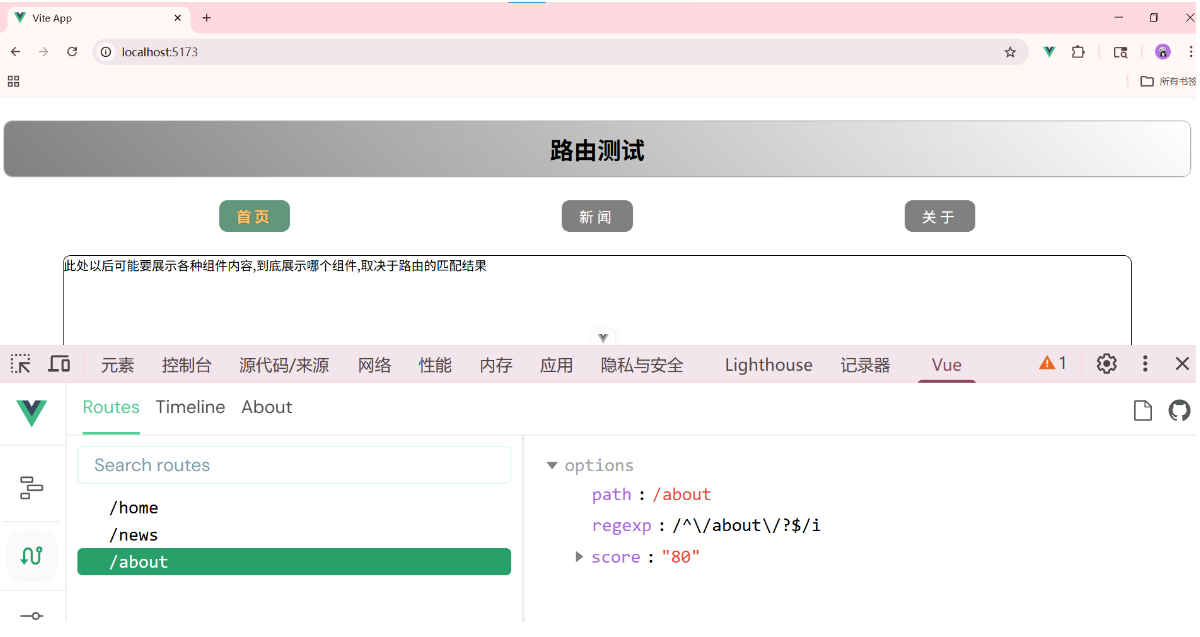
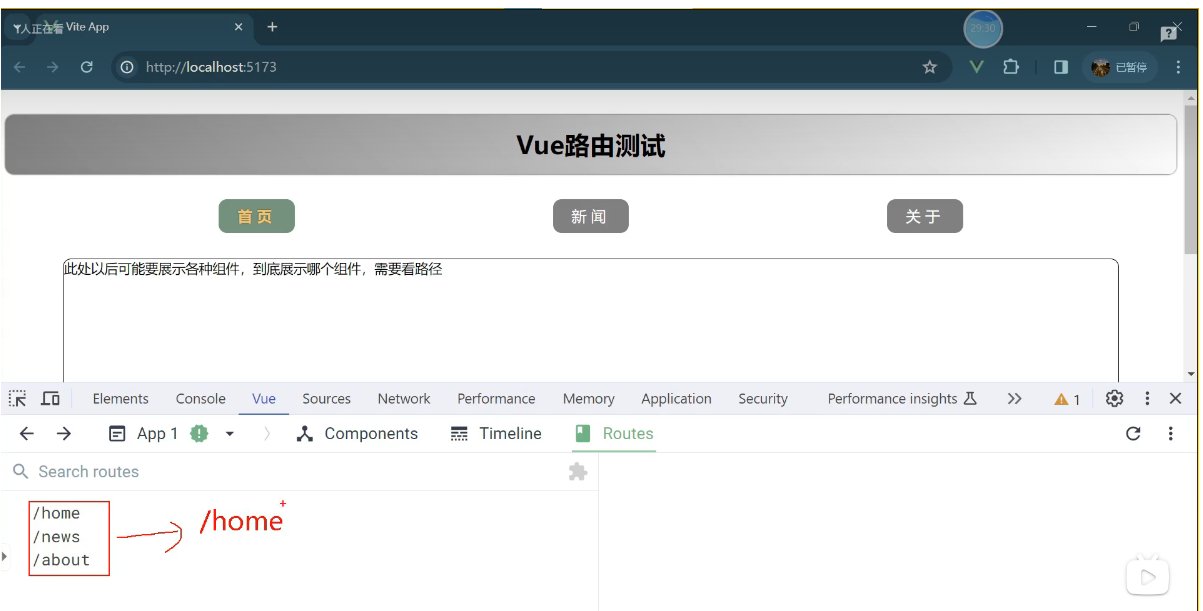
2, '/home,/news,/about' 都不呈现数据 为什么呢?
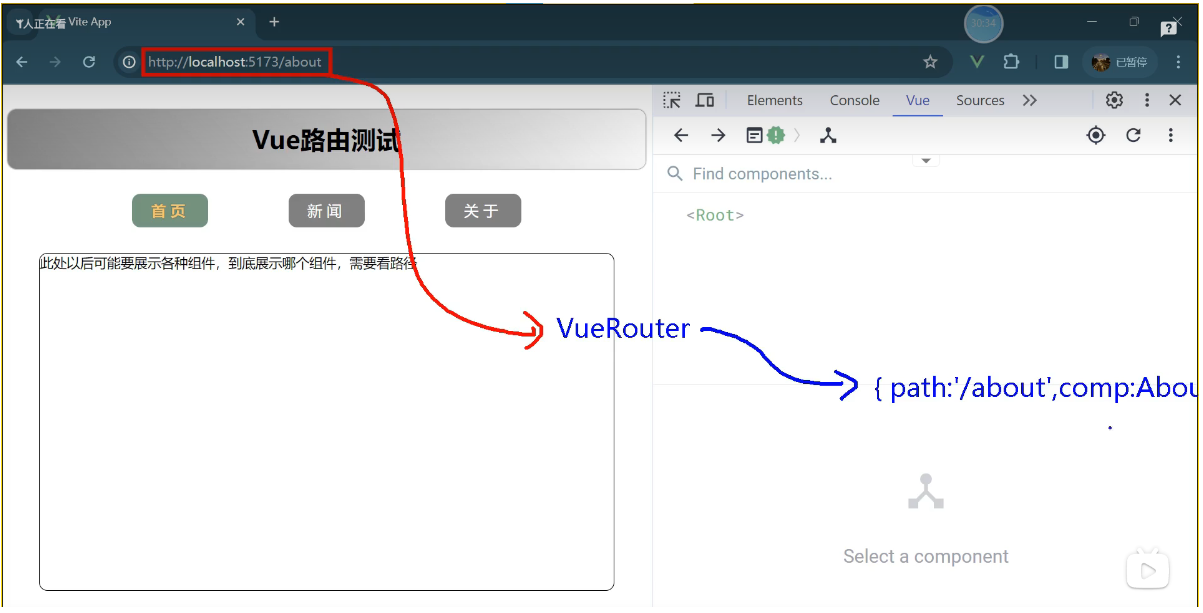
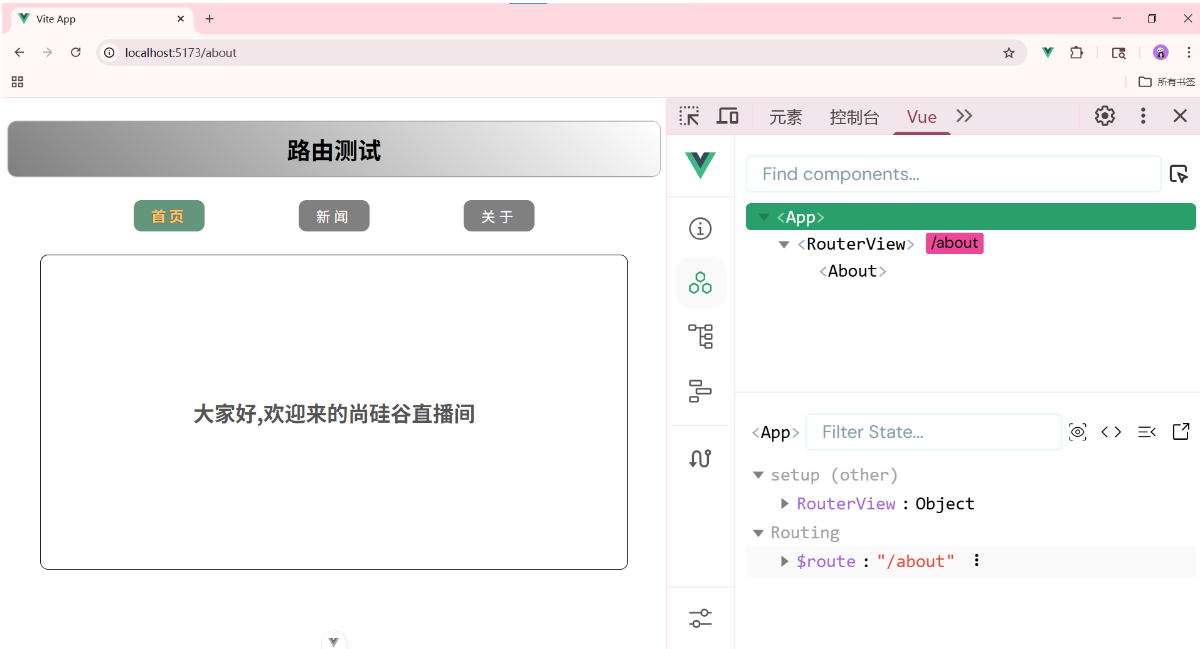
3, 刚才在你输入'/about'的时候,你把路径改成'/about',其实路由器VueRouter已经监测到了路径的变化,路由器去找规则,还真找到了{path:'/about',component: About }接下来他要琢磨把About放在哪里?
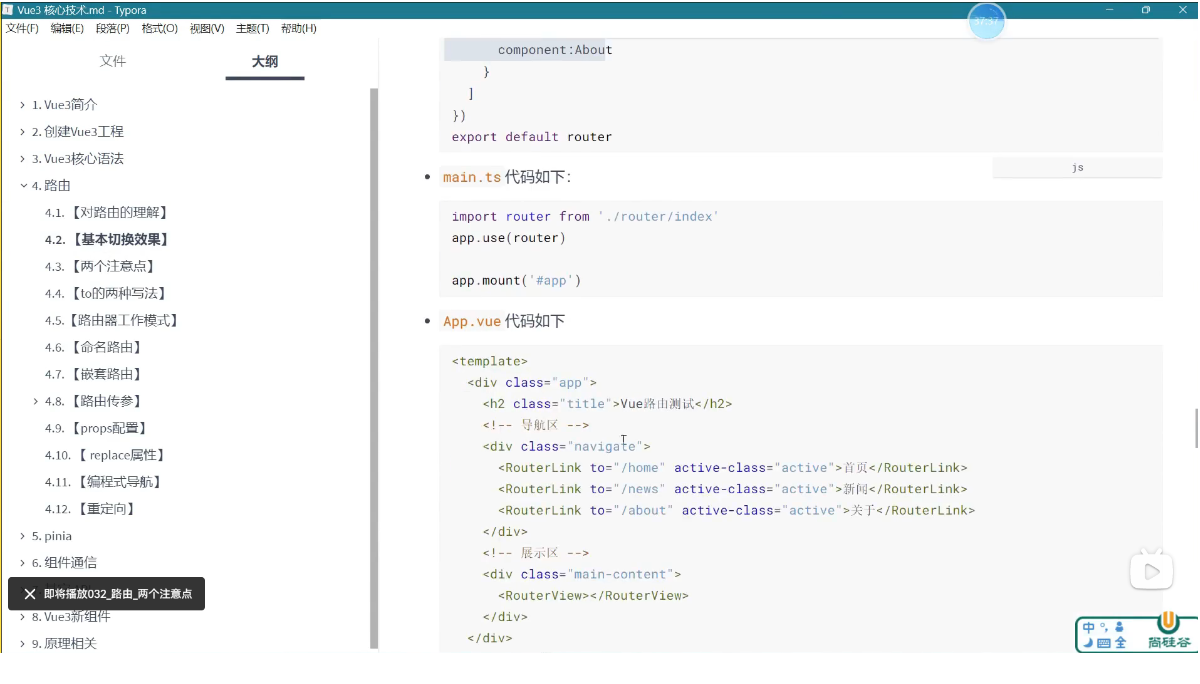
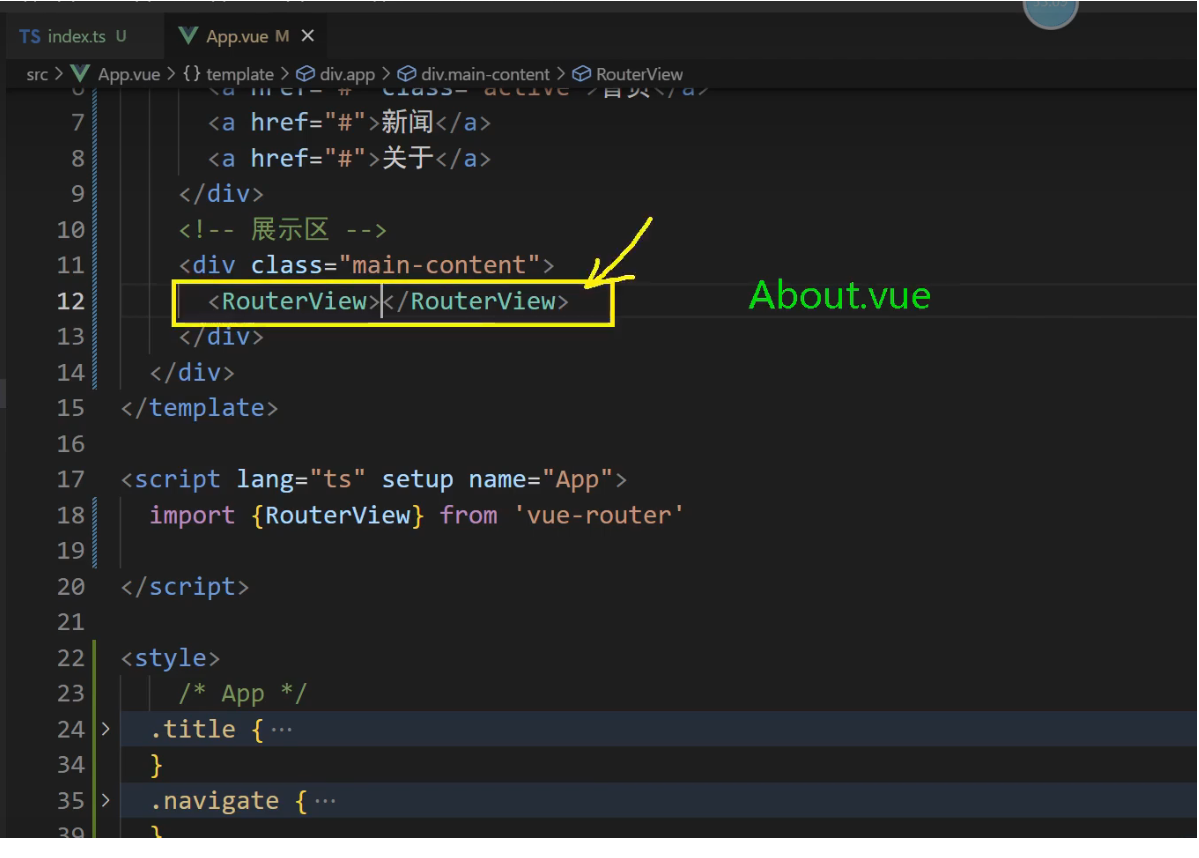
将 About 放在哪里?此时我们要通过一种手段,去告诉路由,把命中的组件摆在哪里,我们去 src/App.vue
1, 引入 RouteView
import { RouterView } from 'vue-router';
2, 然后去写一个占位符 有两种写法: <RouterView />, <RouterView></RouterView>
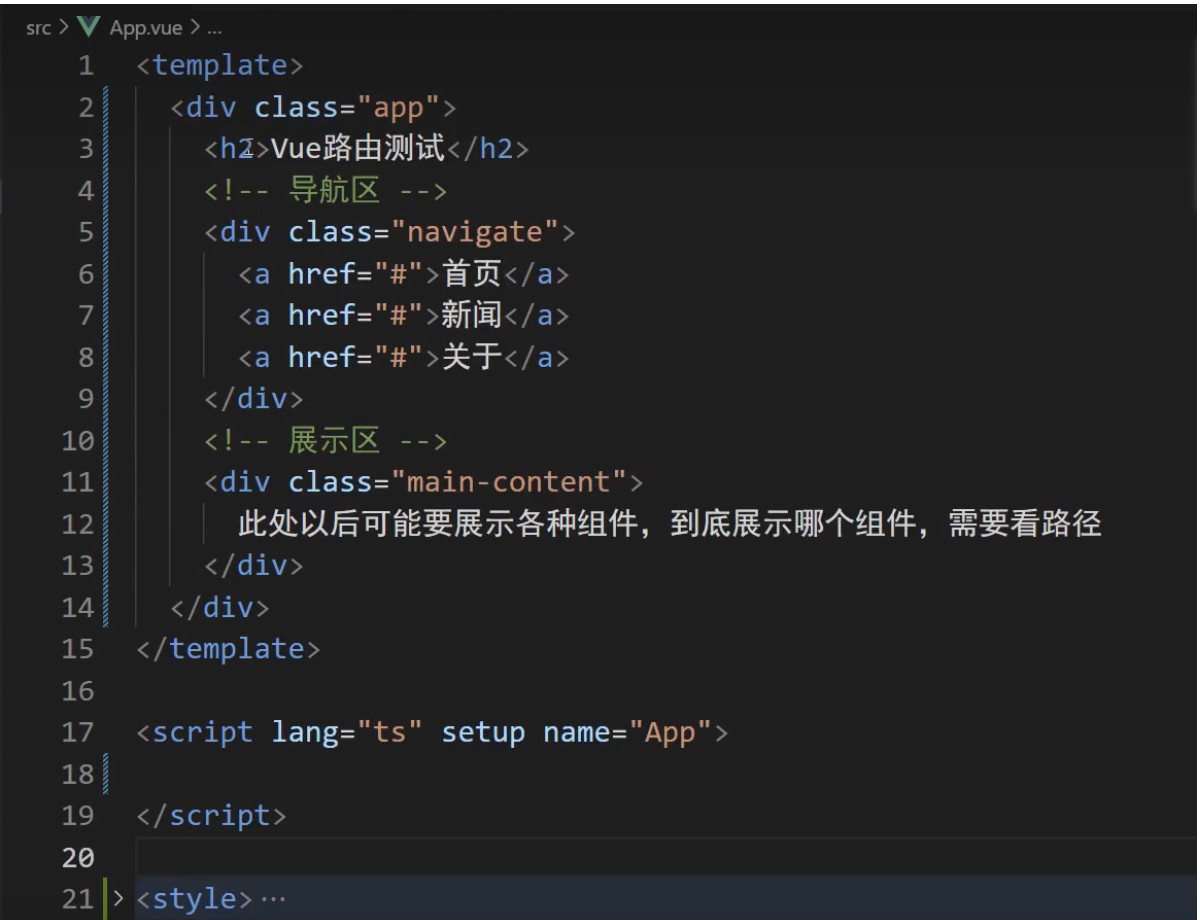
<!-- 展示区 -->
<div class="main-content">
<!-- 占位符,此处将来要展示不同的组件内容 -->
<RouterView></RouterView>
<!-- 此处以后可能要展示各种组件内容,到底展示哪个组件,取决于路由的匹配结果 -->
</div>
3, 有了占位符 路由器就知道将 About.vue 放在哪里了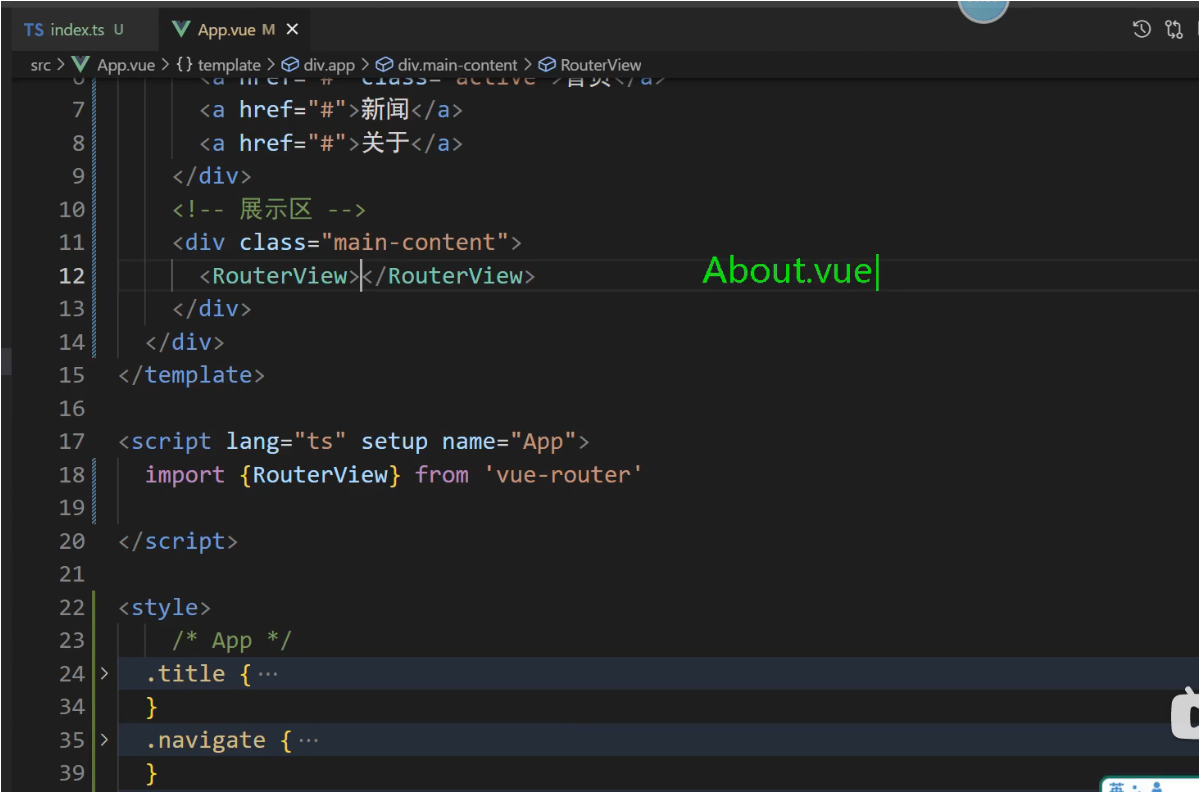
路由器找到了占位的地方了,他就知道将About.vue放在哪里了
组件摆放的位置
展示区就这绿色的地方要呈现各种不一样的组件页面,需要写一个占位符
<RouterView />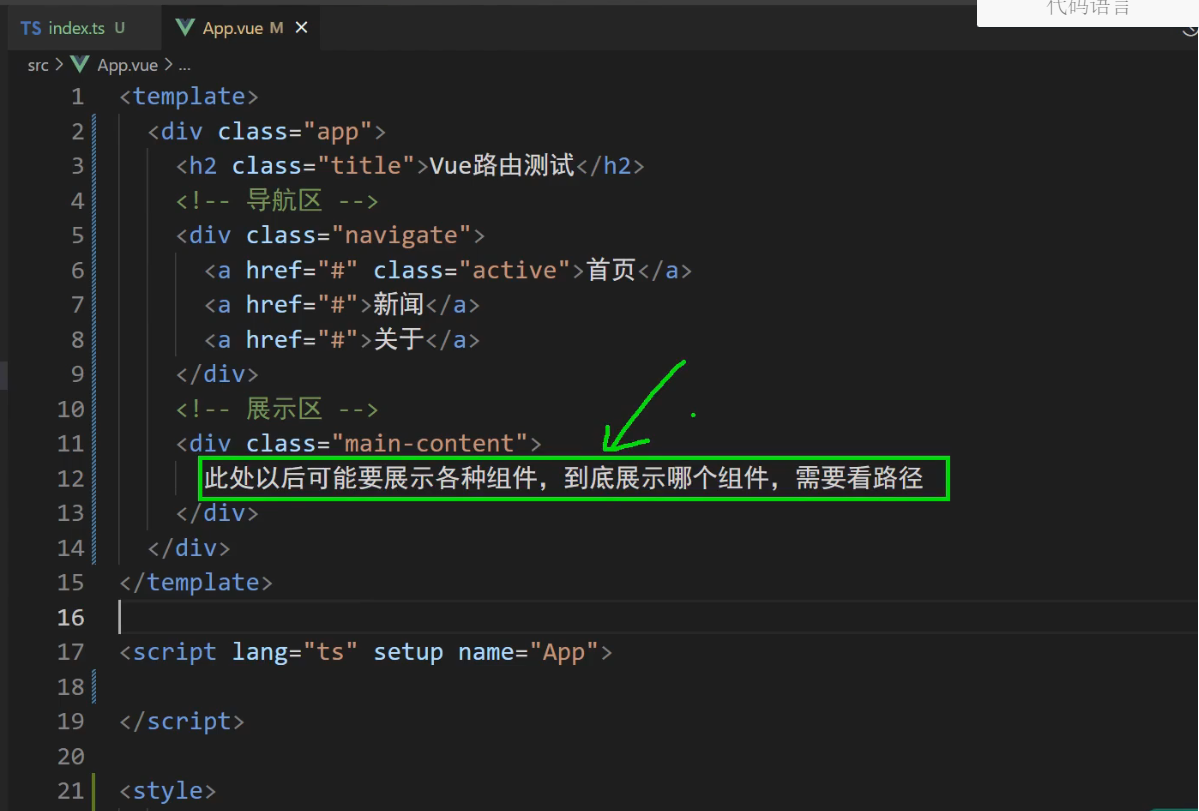
我们不能一直手动切换路径,那该如何处理?
1, 引入 RouterLink
 import { RouterView,RouterLink } from 'vue-router';

2,修改成如下代码 RouterLink 链接路由器  to: 去哪里
<!-- 导航区 -->
<div class="navigate">
  <RouterLink to="/home" class="active">首页</RouterLink>
  <RouterLink to="/news">新闻</RouterLink>
  <RouterLink to="/about">关于</RouterLink>
</div>

3, 可以点击 '首页','新闻','关于'实现路由切换-跳转,但是没有被激活 RouterLink 是一个组件,写一个RouterLink内部设置好的属性 active-class
active-class 他表示被激活的类名 类名可以随便取,比如 active-class="active"
完整导航切换代码如下:
<!-- 导航区 -->
<div class="navigate">
  <RouterLink to="/home" active-class="active">首页</RouterLink>
  <RouterLink to="/news" active-class="active">新闻</RouterLink>
  <RouterLink to="/about" active-class="active">关于</RouterLink>
</div>
我们点击 '新闻' ,新闻就该亮,现在不亮,该如何处理
RouterLink 是一个组件,写一个RouterLink内部设置好的属性 active-class
active-class 他表示被激活的类名 类名可以随便取,比如 active-class="active"
完美实现代码如下:
<!-- 导航区 -->
<div class="navigate">
  <RouterLink to="/home" active-class="active">首页</RouterLink>
  <RouterLink to="/news" active-class="active">新闻</RouterLink>
  <RouterLink to="/about" active-class="active">关于</RouterLink>
</div>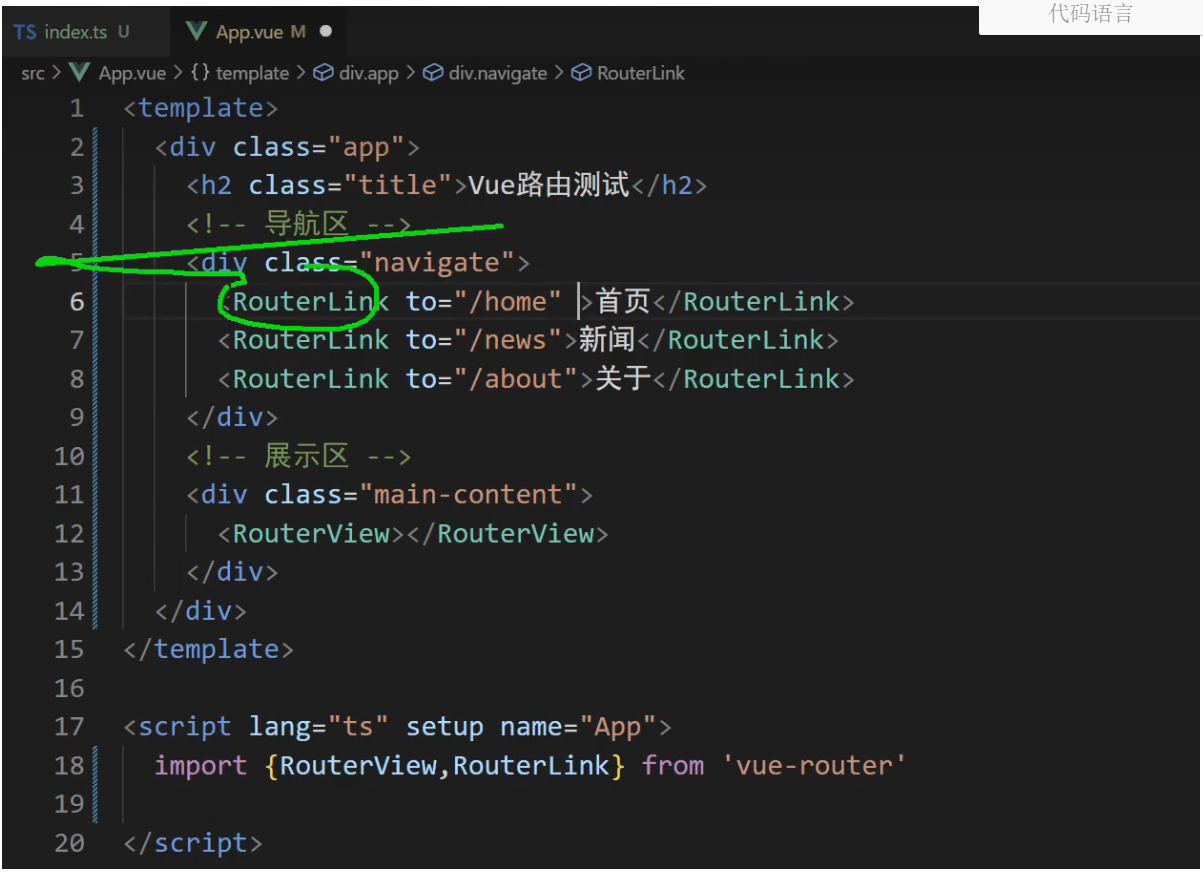
点击 '首页'
点击 '新闻'
点击 '关于'
_路由-基本切换效果 实现代码如下:
1, src/router/index.ts
// 创建一个路由器,并暴露出去
// 第一步: 引入vue-router模块的createRouter方法
import {createRouter,createWebHistory} from 'vue-router'
// 第三步:引入一个一个可能要呈现的组件,也就是页面组件
import Home from '@/components/Home.vue'
import News from '@/components/News.vue'
import About from '@/components/About.vue'
// 第二步: 创建路由器
const router = createRouter({
history:createWebHistory(), // 路由器的工作模式
routes:[ // 一个一个路由规则 路由规则数组
{path:'/home',component:Home},
{path:'/news',component:News},
{path:'/about',component:About},
]
})
export default router;
2, src/main.ts
// 引入 createApp 用于创建应用
import {createApp} from 'vue'
// 引入 App根组件
import App from './App.vue'
// 引入路由器
import router from './router'
// 创建一个应用
const app = createApp(App)
// 使用路由器
app.use(router)
// 挂载整个应用到 app 容器中
app.mount('#app')
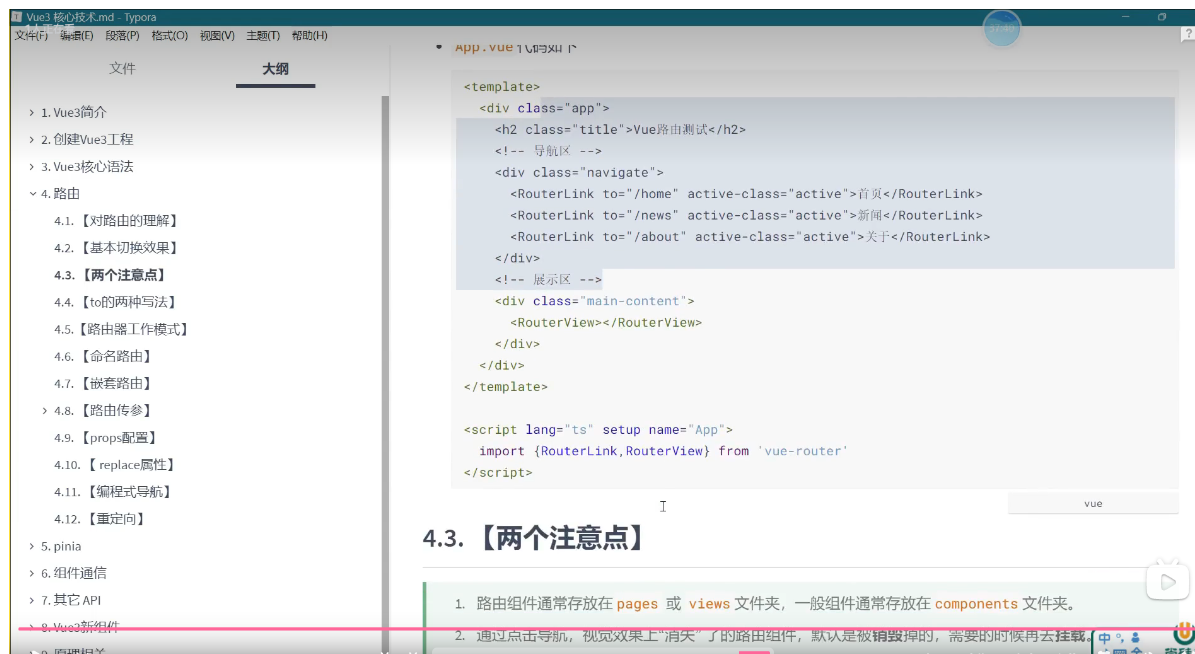
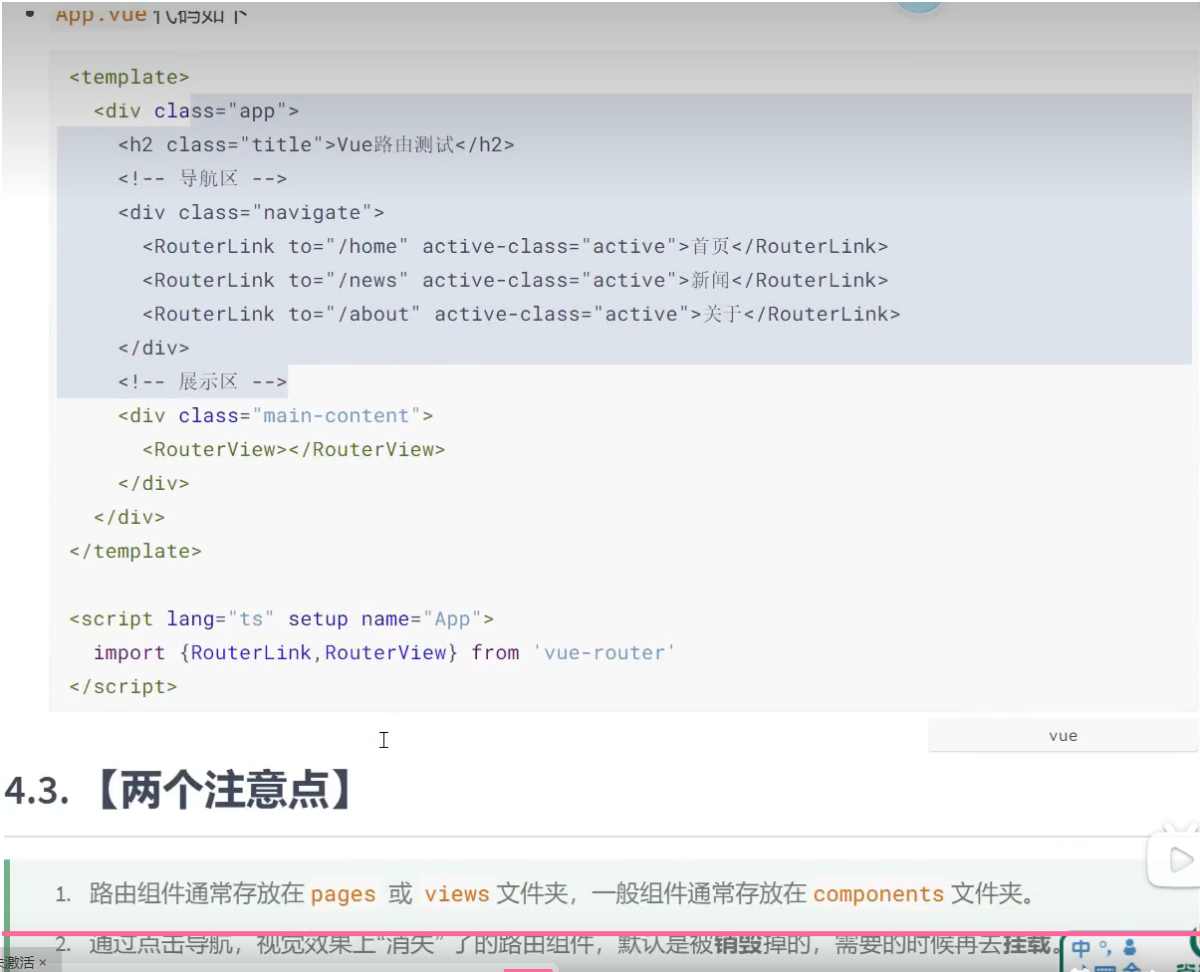
3, src/App.vue
<template>
<div class="app">
<h2 class="title">路由测试</h2>
<!-- 导航区 -->
<div class="navigate">
<RouterLink to="/home" active-class="active">首页</RouterLink>
<RouterLink to="/news" active-class="active">新闻</RouterLink>
<RouterLink to="/about" active-class="active">关于</RouterLink>
</div>
<!-- 展示区 -->
<div class="main-content">
<!-- 占位符,此处将来要展示不同的组件内容 -->
<RouterView></RouterView>
<!-- 此处以后可能要展示各种组件内容,到底展示哪个组件,取决于路由的匹配结果 -->
</div>
</div>
</template>
<script setup lang="ts" name="App">
import { RouterView,RouterLink } from 'vue-router';
</script>
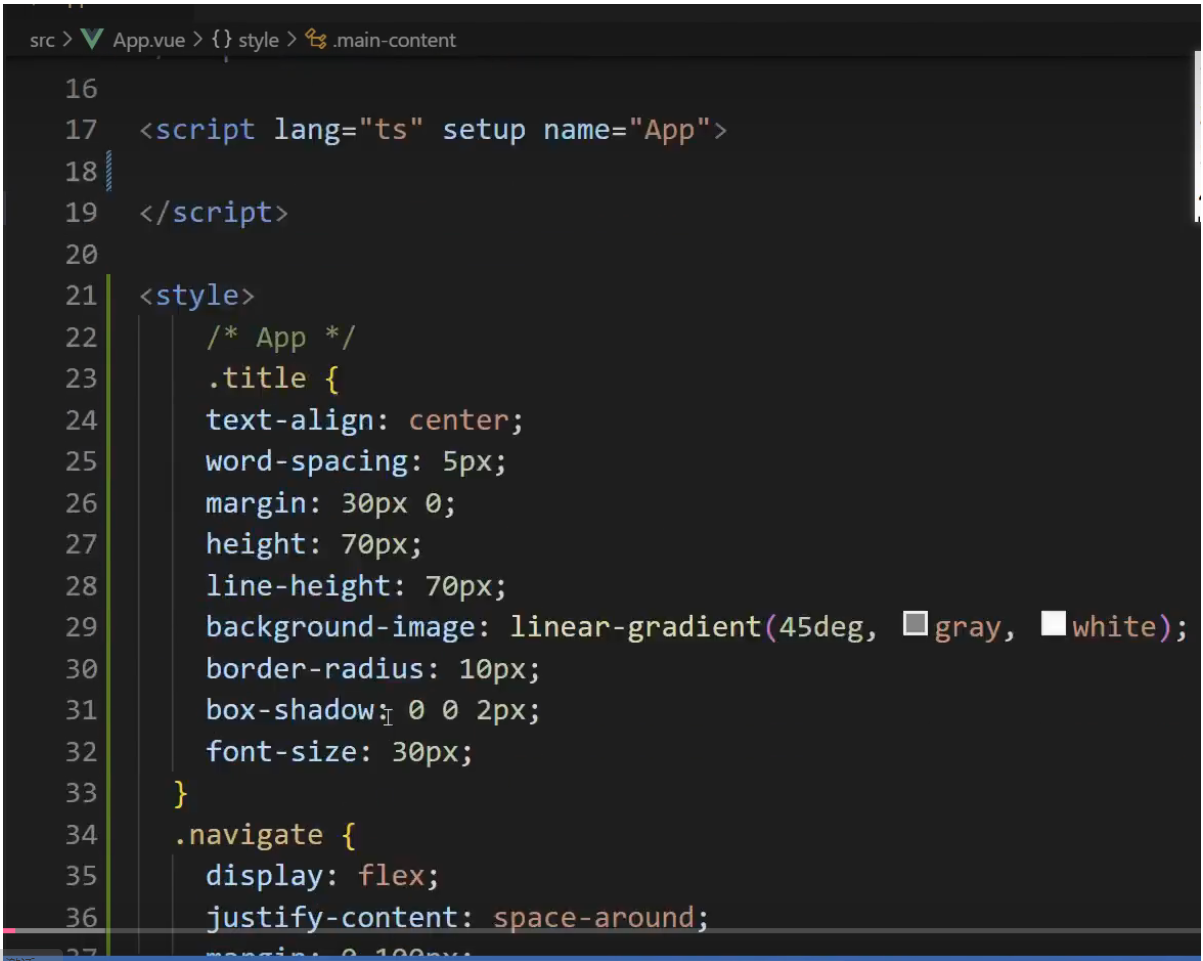
<style scoped>
/*App*/
.title {
text-align: center;
word-spacing: 5px;
margin: 30px 0;
height: 70px;
line-height: 70px;
background-image: linear-gradient(45deg, gray, white);
border-radius: 10px;
box-shadow: 0 0 2px;
font-size: 30px;
}
.navigate {
display: flex;
justify-content: space-around;
margin: 0 100px;
}
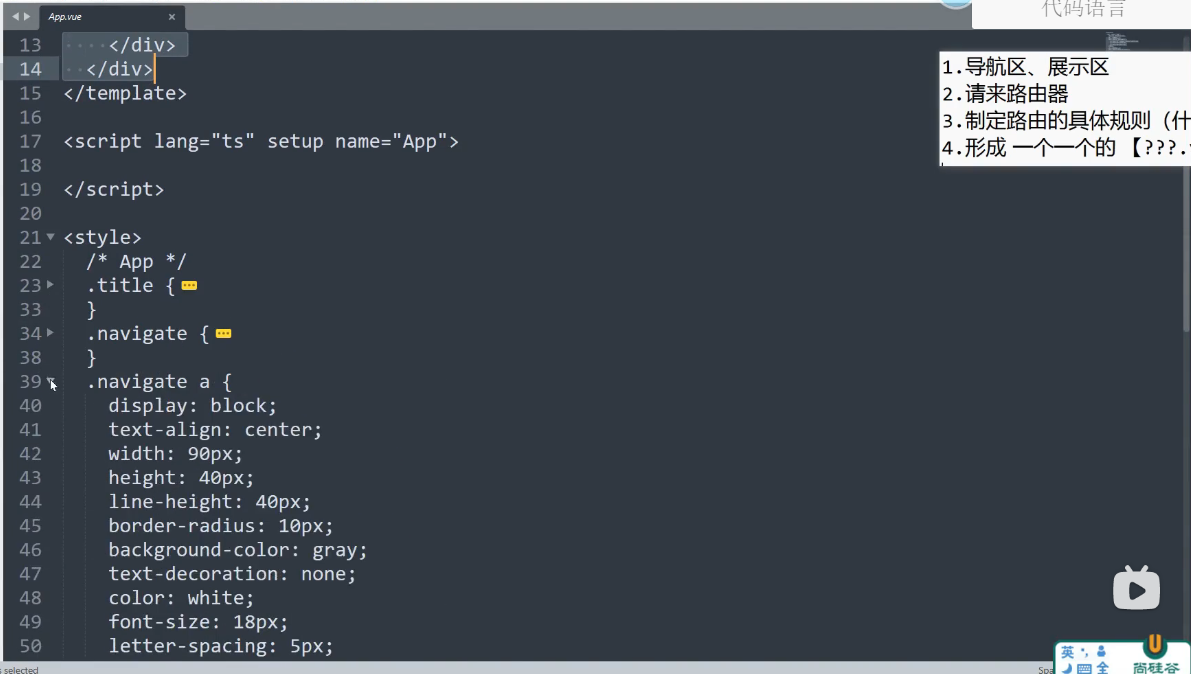
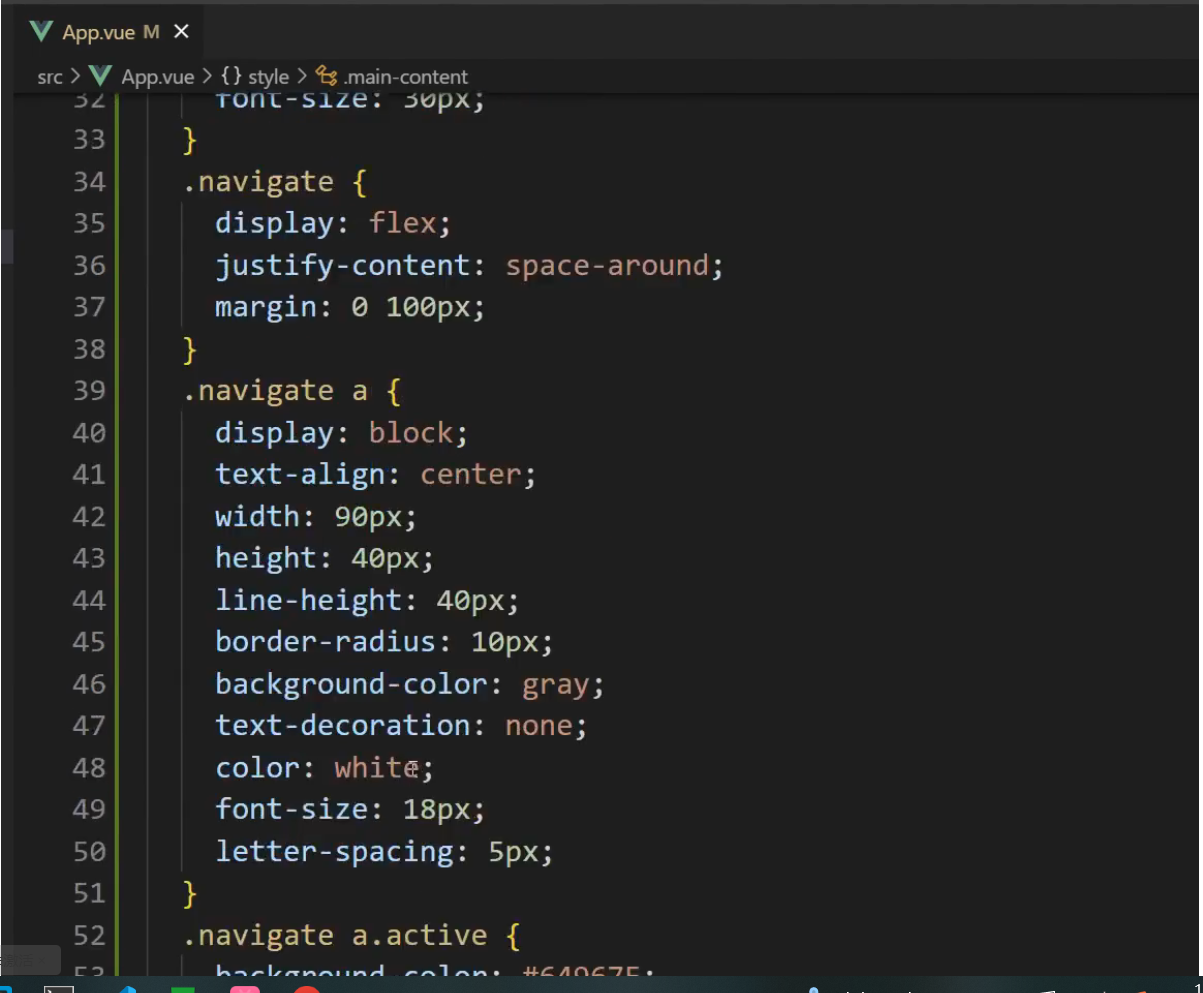
.navigate a {
display: block;
text-align: center;
width: 90px;
height: 40px;
line-height: 40px;
border-radius: 10px;
background-color: gray;
text-decoration: none;
color: white;
font-size: 18px;
letter-spacing: 5px;
}
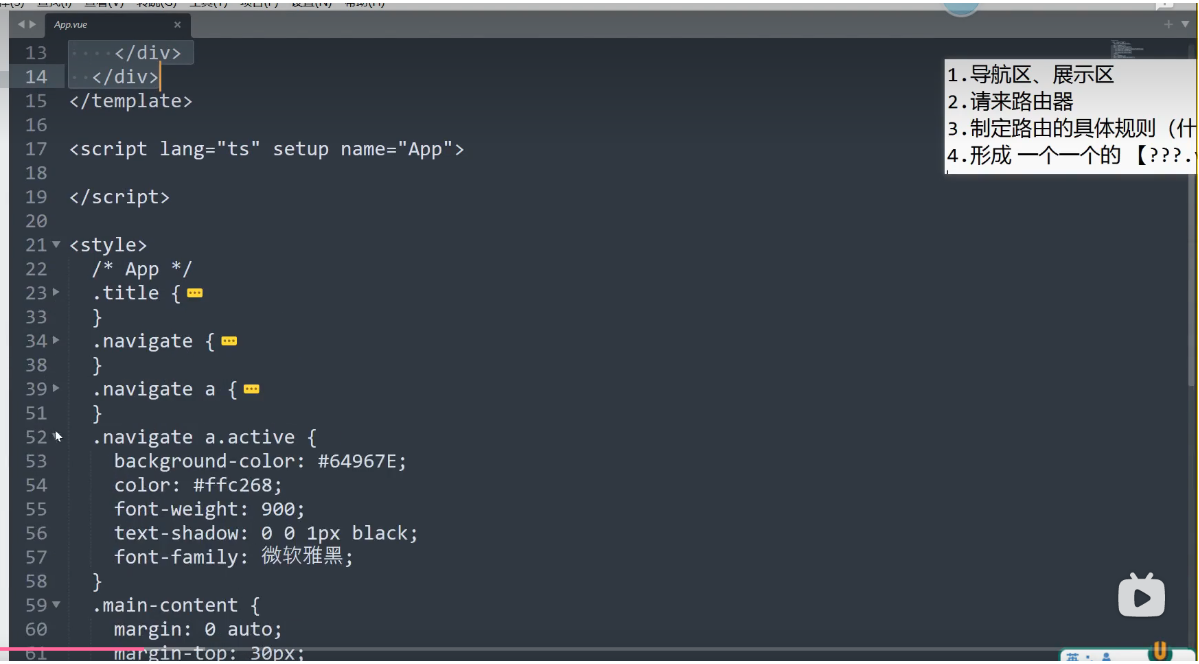
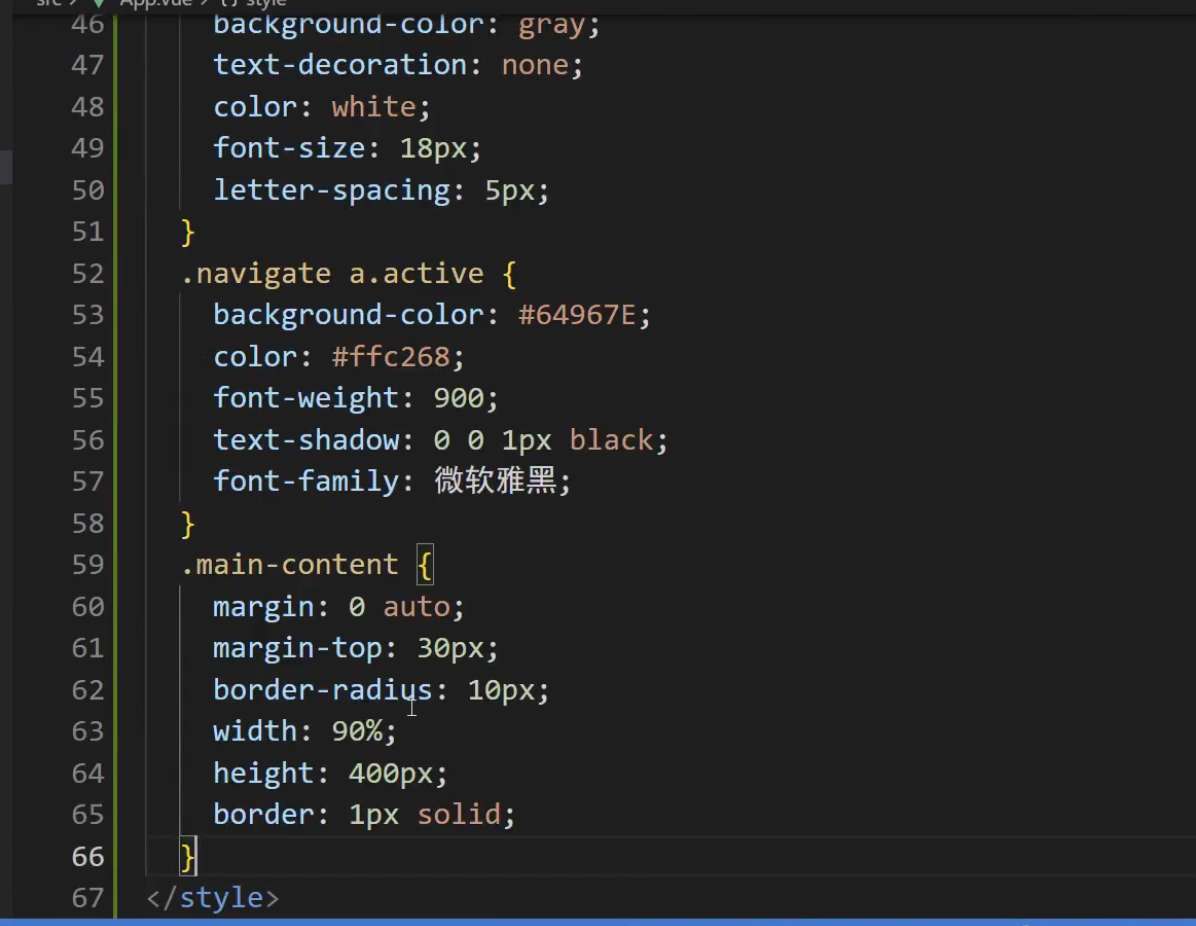
.navigate a.active {
background-color: #64967E;
color: #ffc268;
font-weight: 900;
text-shadow: 0 0 1px black;
font-family: 微软雅黑;
}
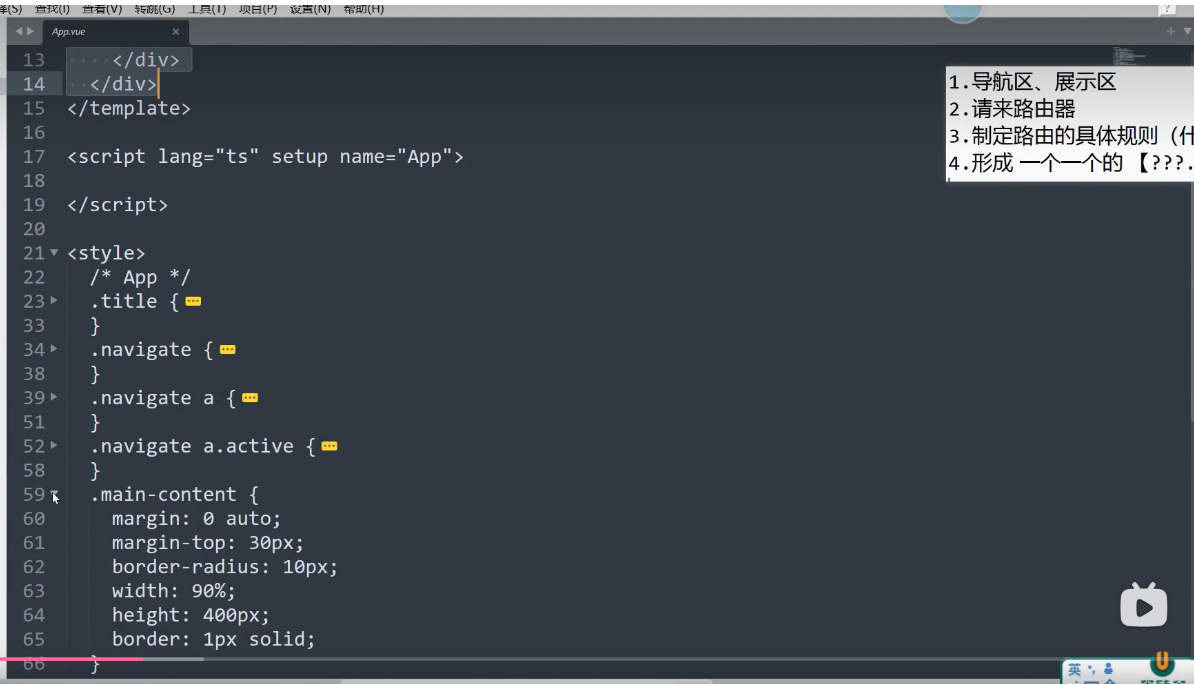
.main-content {
margin: 0 auto;
margin-top: 30px;
border-radius: 10px;
width: 90%;
height: 400px;
border: 1px solid;
}
</style>
4, src/components/Home.vue
<script setup lang="ts" name="Home">
/*! @file
*******************************************************
<PRE>
文件实现功能 : 首页组件
作 者 : mary
版本 : 1.0
-------------------------------------------------------
备注 : -
-------------------------------------------------------
修改记录 :
日期 版本 修改人 修改内容
2025/6/18 1.0 mary 创建
</PRE>
******************************************************/
// defineOptions({name: ''})
//====================================================
// == 类型定义
//====================================================
// == 初始化
//====================================================
//== 事件处理
</script>
<template>
<div class="home">
<img src="http://www.atguigu.com/images/index_new/logo.png" alt="">
</div>
</template>
<style scoped>
.home {
display: flex;
justify-content: center;
align-items: center;
height: 100%;
}
</style>
5, src/components/About.vue
<script setup lang="ts" name="About">
/*! @file
*******************************************************
<PRE>
文件实现功能 : 关于页面的脚本文件。
作 者 : mary
版本 : 1.0
-------------------------------------------------------
备注 : -
-------------------------------------------------------
修改记录 :
日期 版本 修改人 修改内容
2025/6/18 1.0 mary 创建
</PRE>
******************************************************/
// defineOptions({name: ''})
//====================================================
// == 类型定义
//====================================================
// == 初始化
//====================================================
//== 事件处理
</script>
<template>
<div class="about">
<h2>大家好,欢迎来的尚硅谷直播间</h2>
</div>
</template>
<style scoped>
.about {
display: flex;
align-items: center;
justify-content: center;
height: 100%;
color: rgb(85, 84, 84);
font-size: 18px;
}
</style>
6, src/components/News.vue
<script setup lang="ts" name="News">
/*! @file
*******************************************************
<PRE>
文件实现功能 : 新闻详情页面
作 者 : mary
版本 : 1.0
-------------------------------------------------------
备注 : -
-------------------------------------------------------
修改记录 :
日期 版本 修改人 修改内容
2025/6/18 1.0 mary 创建
</PRE>
******************************************************/
// defineOptions({name: ''})
//====================================================
// == 类型定义
//====================================================
// == 初始化
//====================================================
//== 事件处理
</script>
<template>
<div class="news">
<ul>
<li><a href="#">新闻001</a></li>
<li><a href="#">新闻002</a></li>
<li><a href="#">新闻003</a></li>
<li><a href="#">新闻004</a></li>
</ul>
</div>
</template>
<style scoped>
/*新闻*/
.news {
padding: 0 20px;
display: flex;
justify-content: space-between;
height: 100%;
}
.news ul {
margin-top: 30px;
list-style: none;
padding-left: 10px;
}
.news li>a {
font-size: 18px;
line-height: 40px;
text-decoration: none;
color: #64967E;
text-shadow: 0 0 1px rgb(0, 84, 0);
}
.news-content {
width: 70%;
height: 90%;
border: 1px solid;
margin-top: 20px;
border-radius: 10px;
}
</style>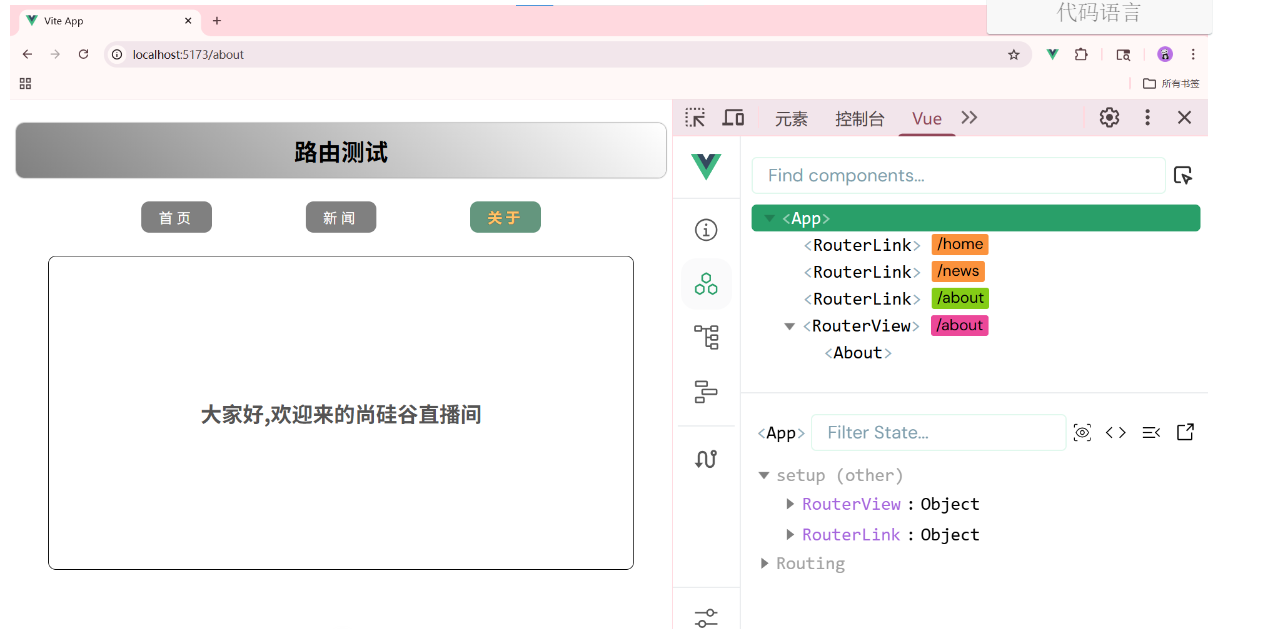
032_路由-两个注意点
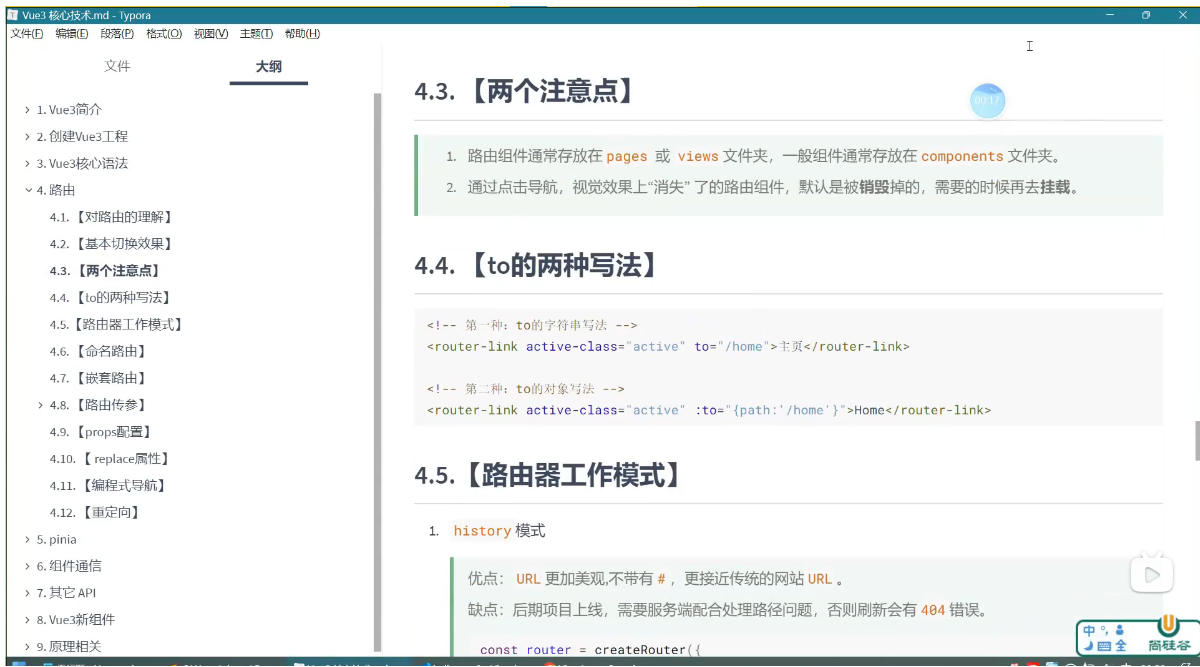
4.3 两个注意点
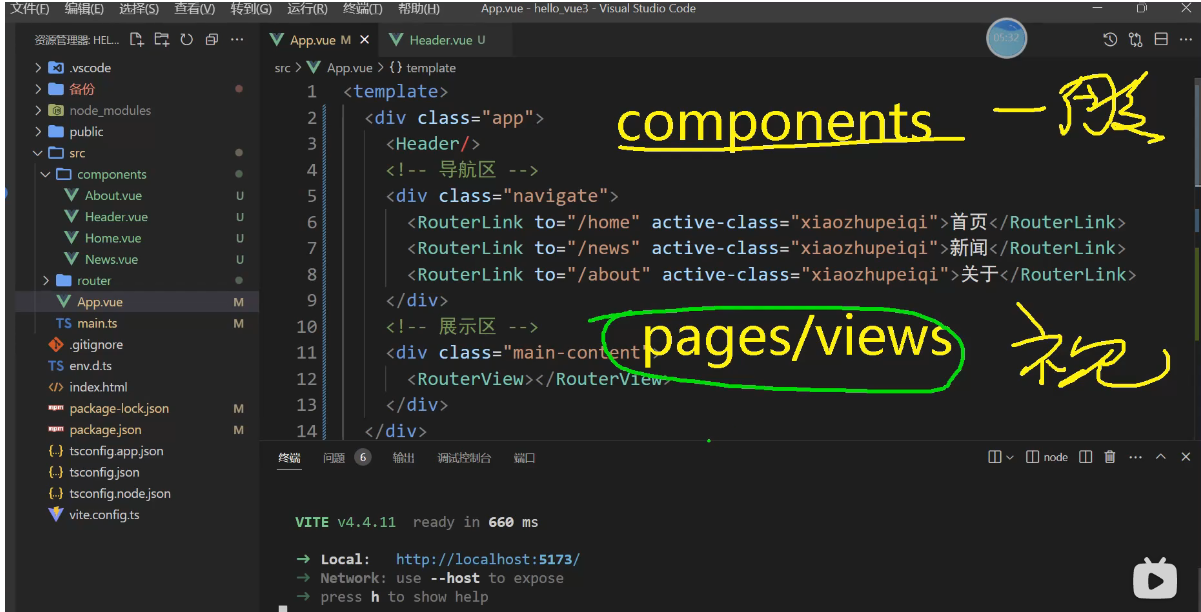
1, 路由组件通常存放在pqges或views文件夹,一般组件通常存放在components文件夹。

2,通过点击导航,视觉效果上 "消失" 了的路由组件,默认被卸载掉的,需要的时候再去挂载。


解释:
路由组件: 靠路由的规则渲染出来的 Demo1.vue  ===> Demo1是路由组件
	routes: [
		{path: '/demo1',component: Demo1}
	]

一般组件:亲手写标签出来的  比如 使用 <Demo2 /> ===> Demo2是一般组件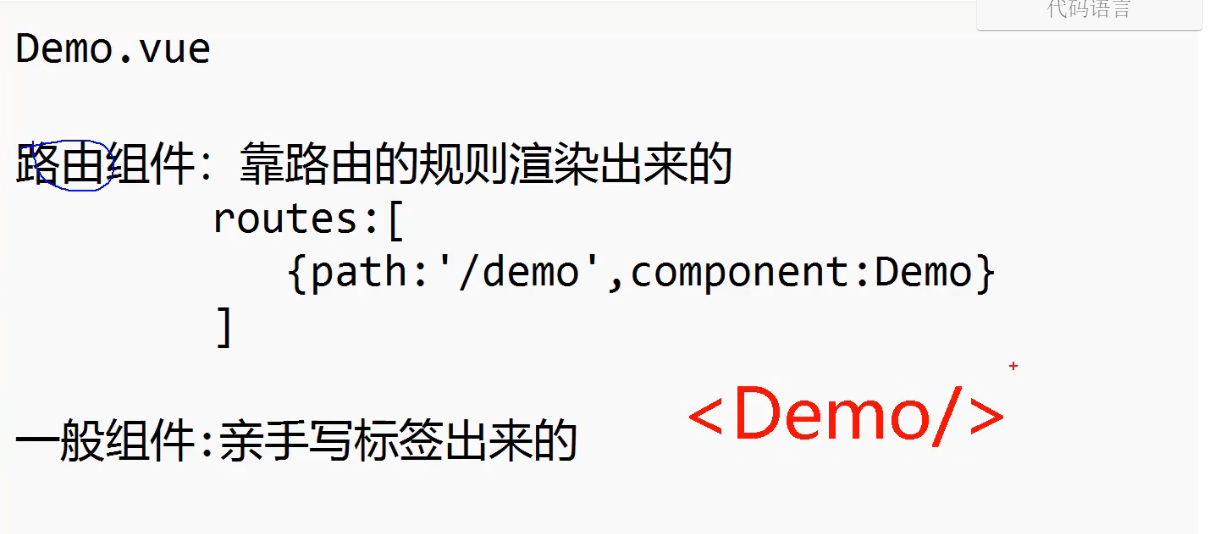
从工具可以看出 Header 是一般组件 Home,News,About是路由组件
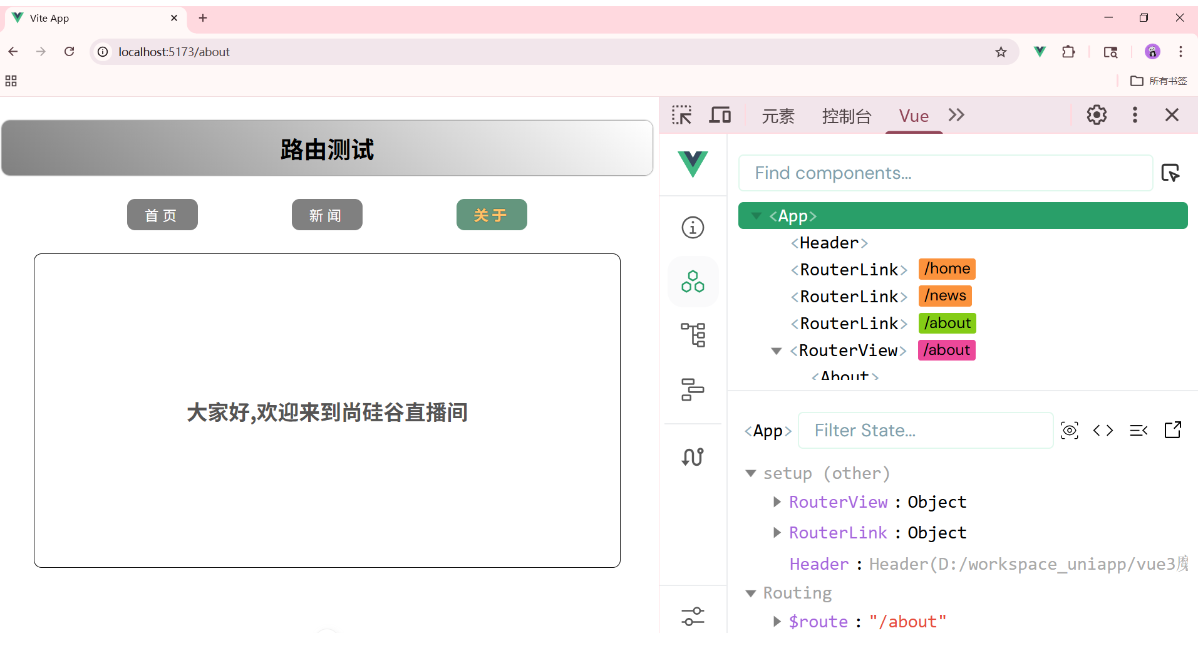
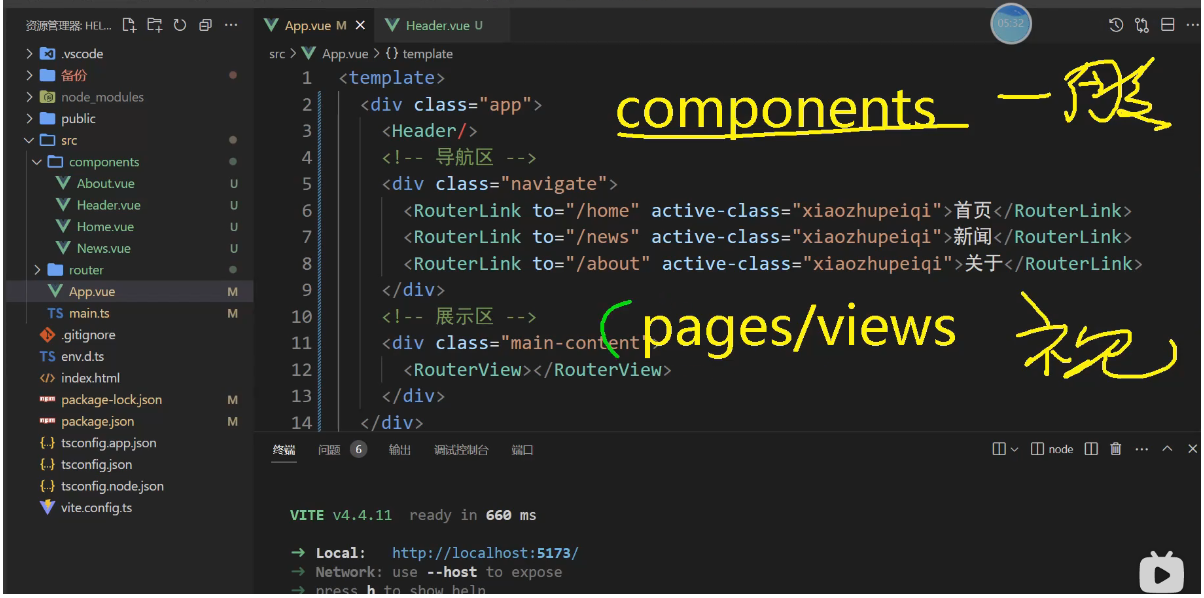
工程化开发一般组件都放在 components 文件夹里面,路由组件都放在 pages/views 文件夹,这是标准的工程化开发
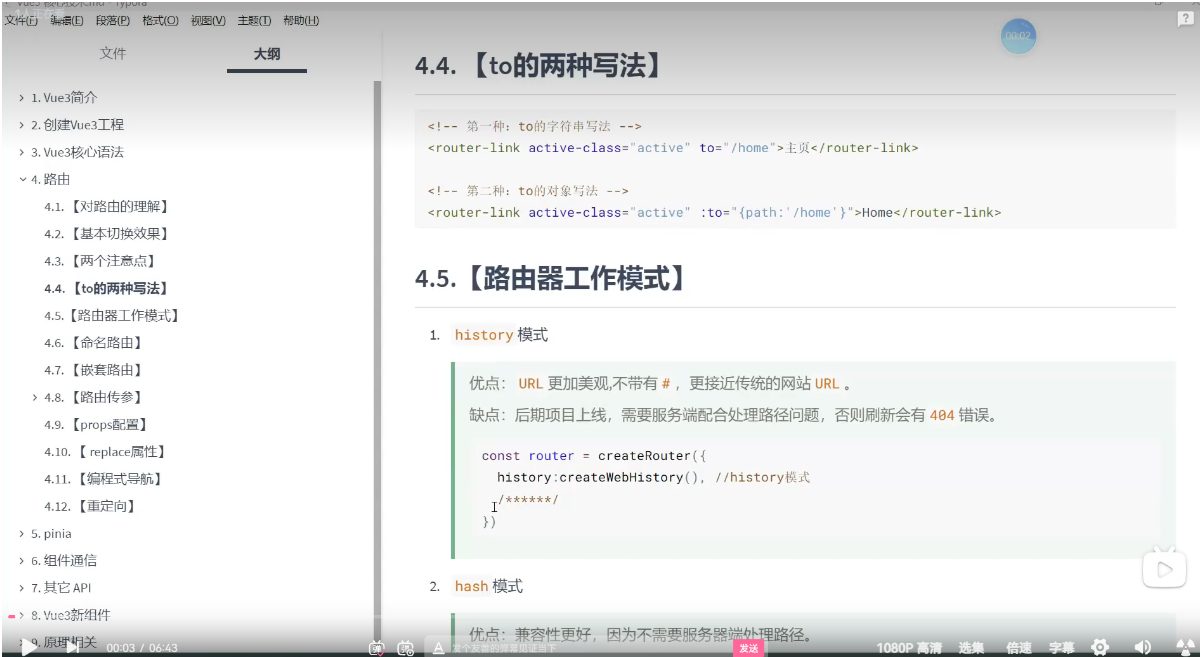
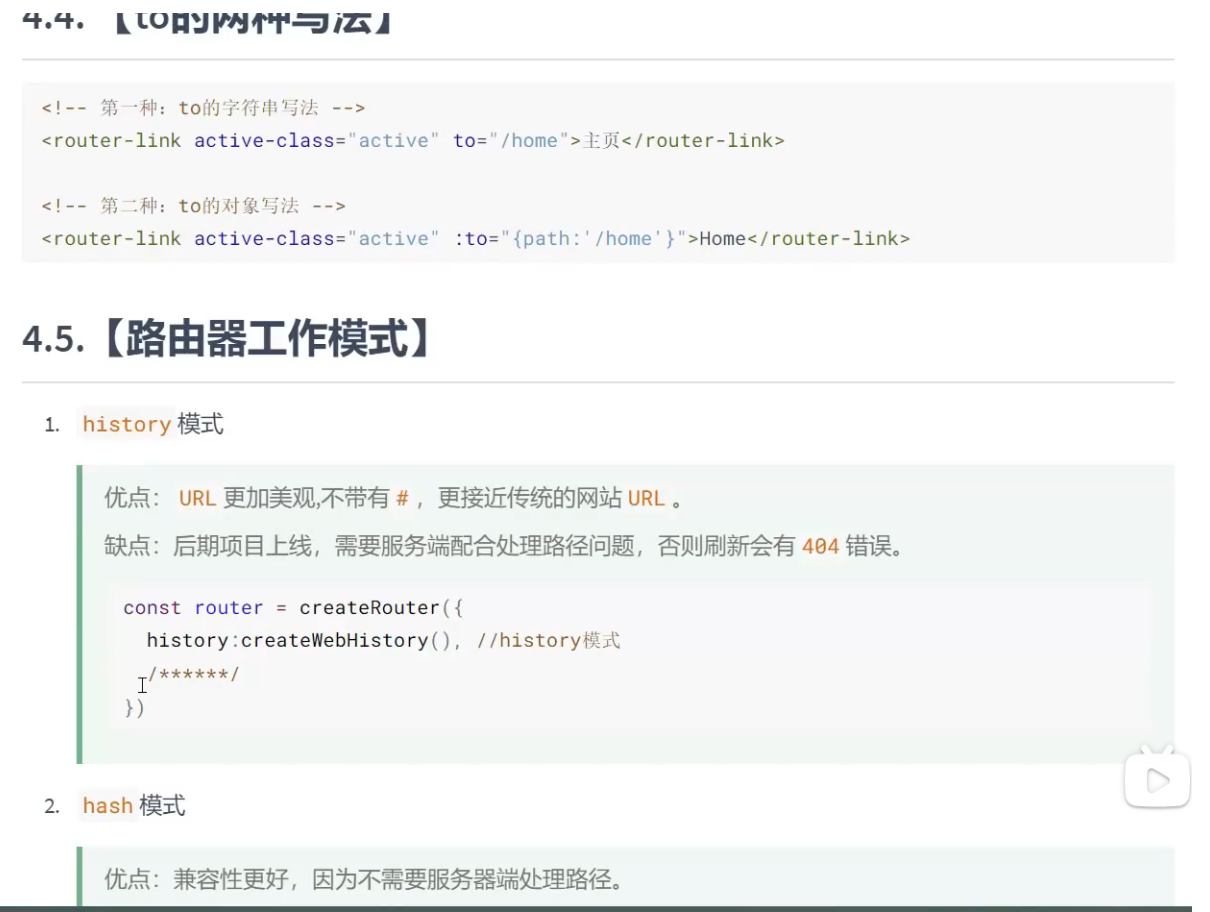
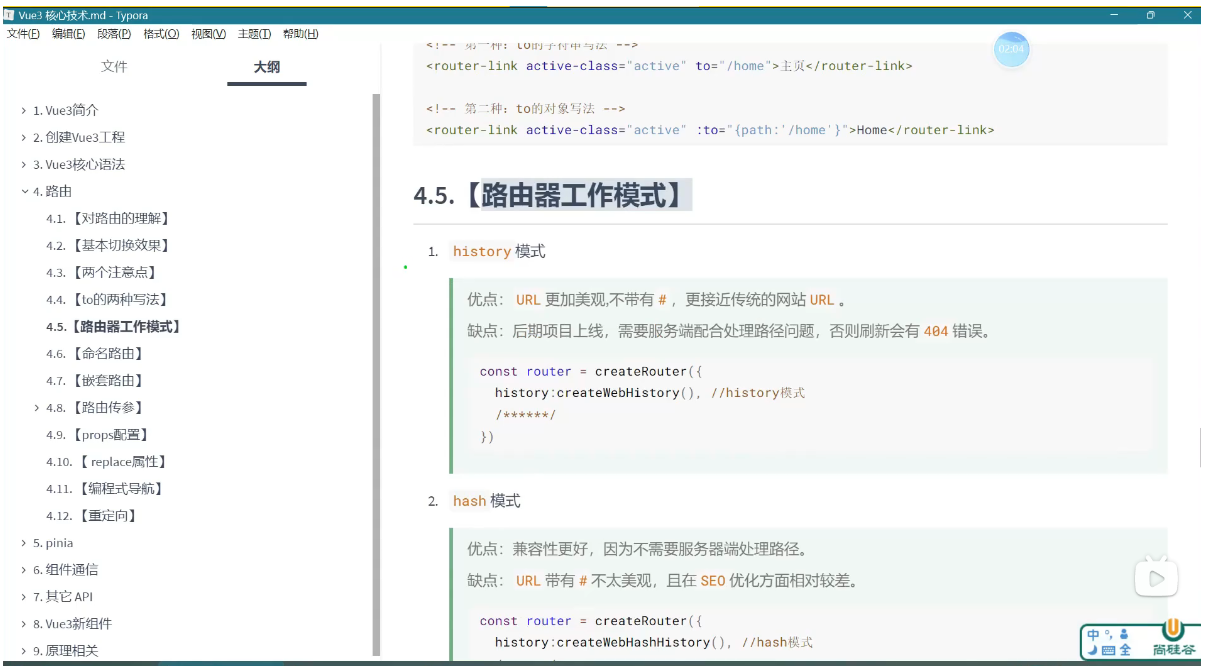
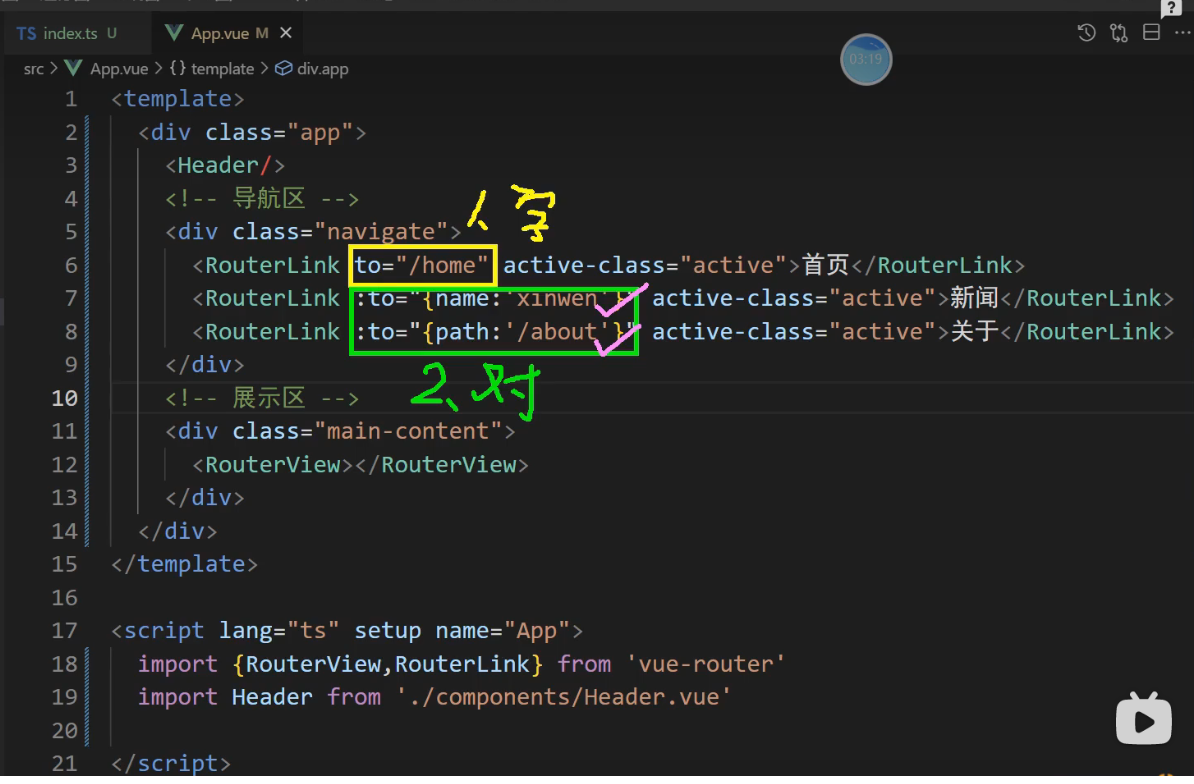
4.4 to 的两种写法
<!--第一种: to的字符串写法-->
<router-link active-class="active" to="/home">
	主页
</router-link>

<!--第二种: to的对象写法-->
<router-link active-class="active" :to="{path:'/home'}">
	Home
</router-link>
笔记
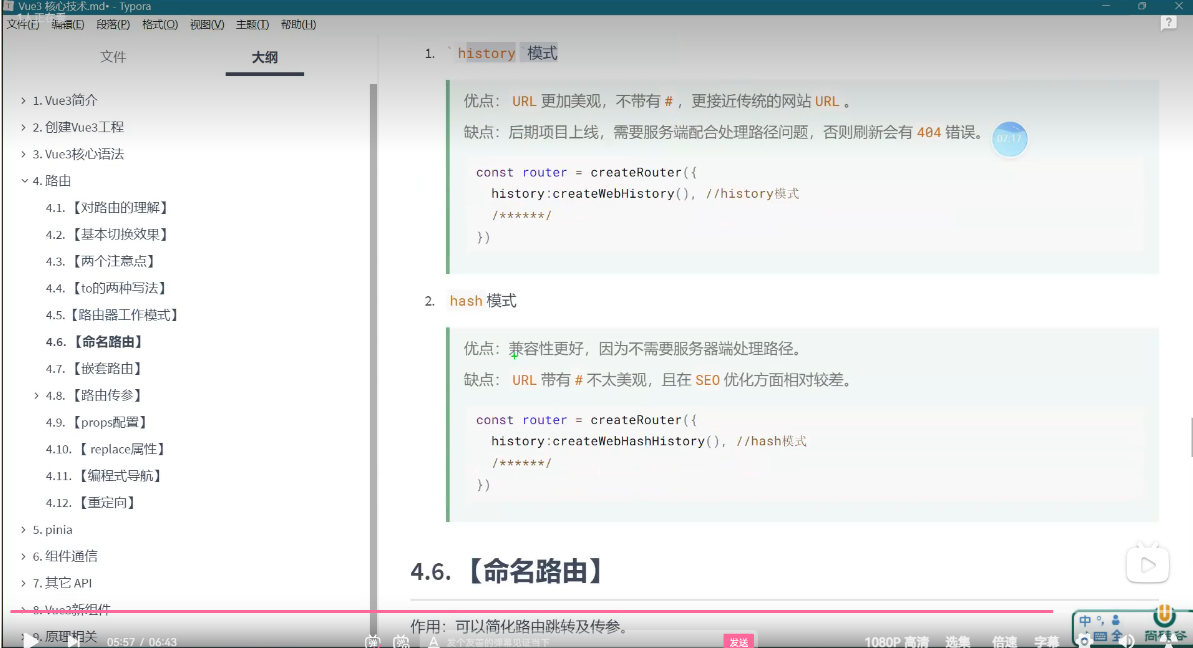
033_路由-路由器工作模式
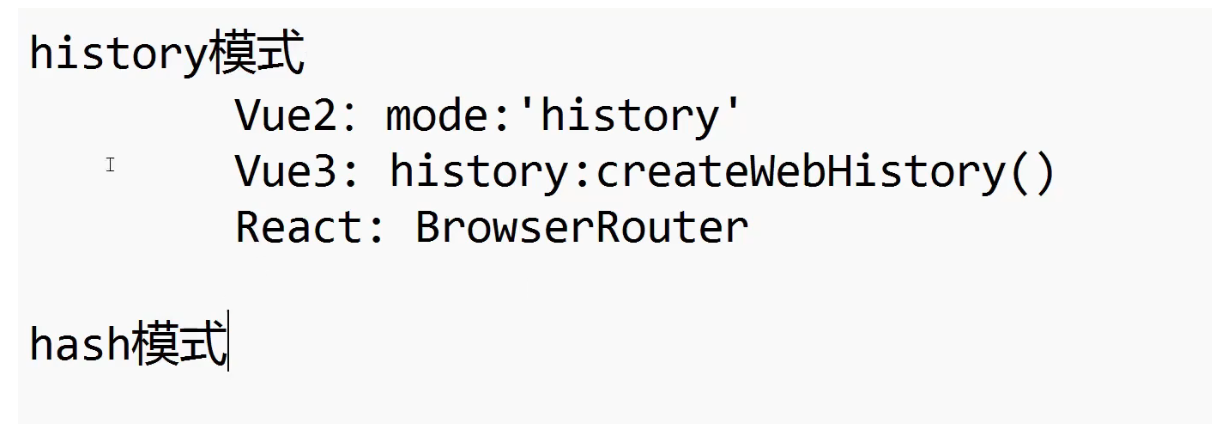
4.5 路由器工作模式
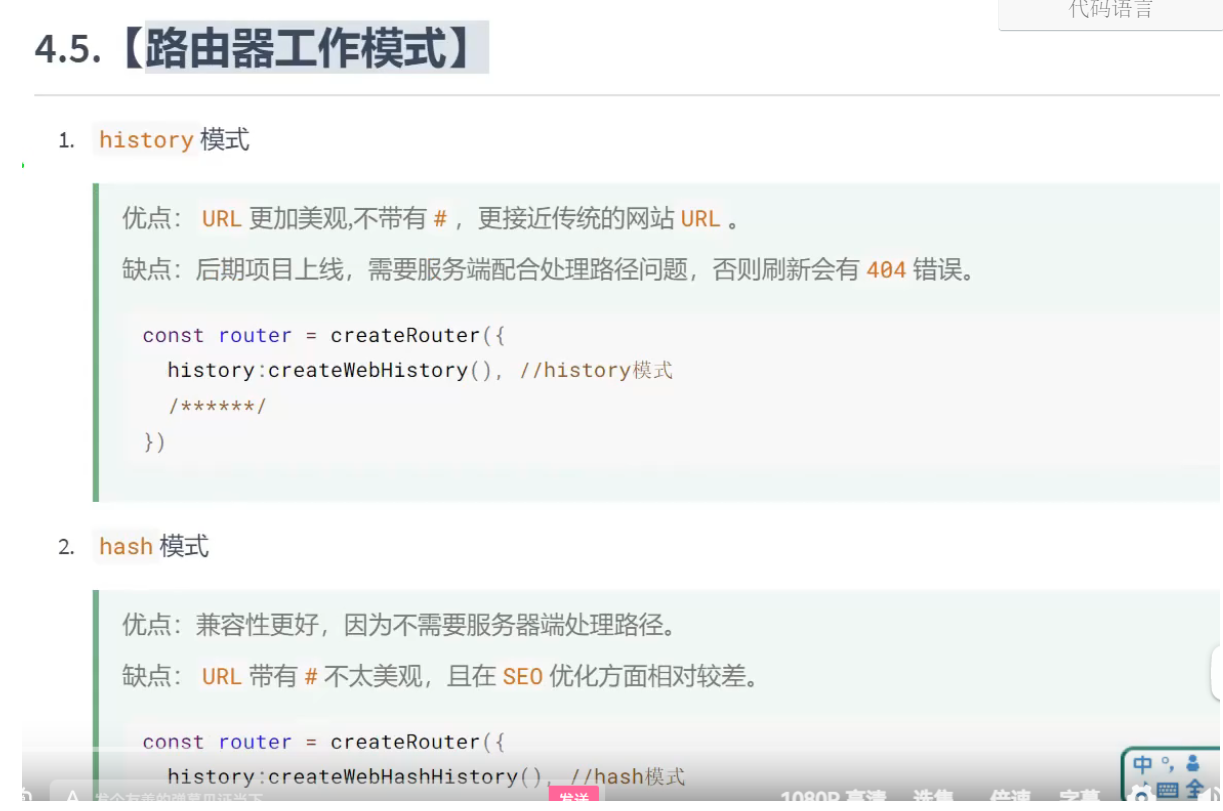
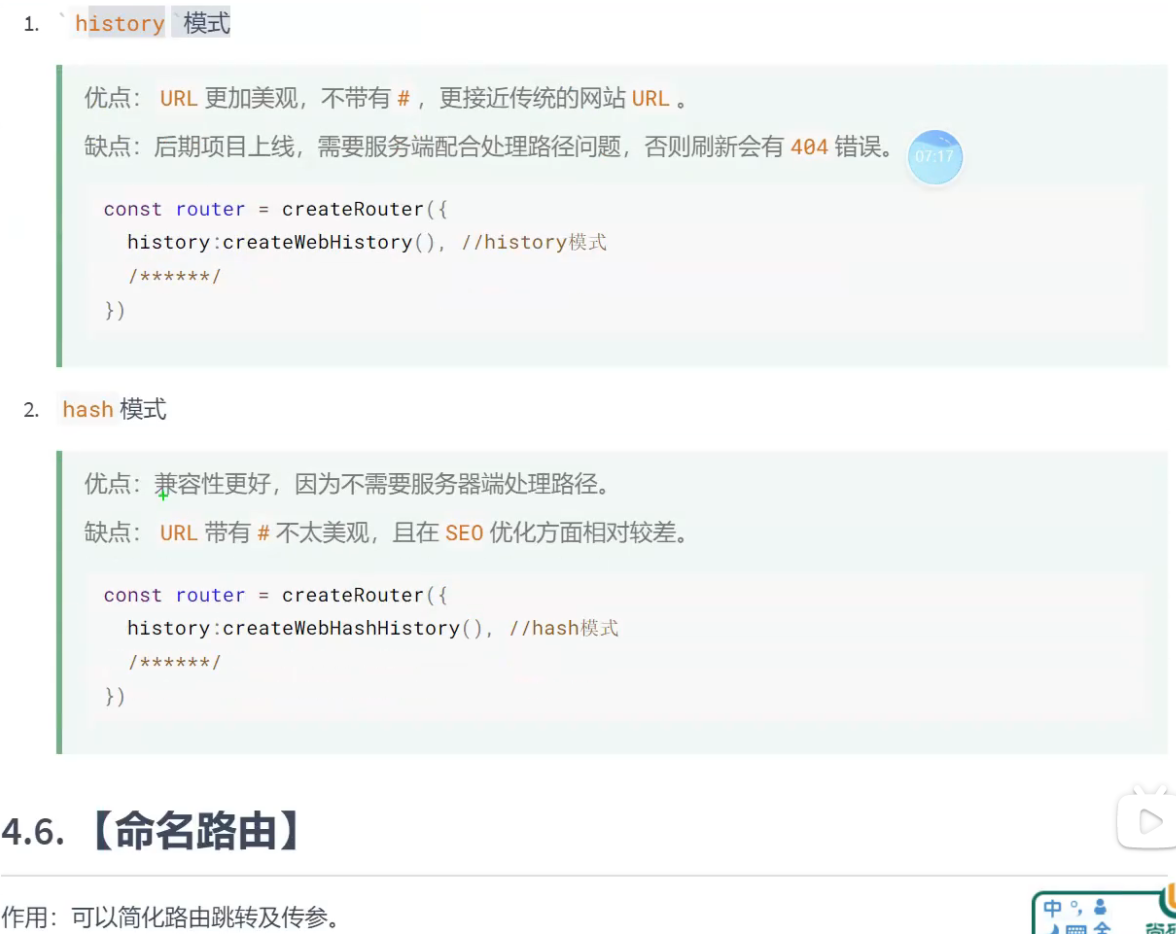
1, history模式	前台项目一般用history模式  网站主要是针对用户的项目比如哔哩哔哩
优点:URL更加美观不带有#,更接近传统网站URL.
缺点: 后期项目上线,需要服务端配合处理器处理路径问题,否则刷新会有404错误
const router = createRouter({
	history:createWebHistory(),	// history模式
	routes: [
		{path: '/home',component: Home},
		...
	]
})

2, hash模式 后台项目一般用hash模式 网站项目主要是针对内部人员的项目 酒店住宿管理平台
优点: 兼容性更好,因为不需要服务器端处理路径。
缺点: URL带#不太美观,且在SEO优化方面相对较差.
const router = createRouter({
	history: createWebHashRouter(),	// hash模式
	routes: [
		{path: '/home',component: Home},
		...
	]
})
笔记
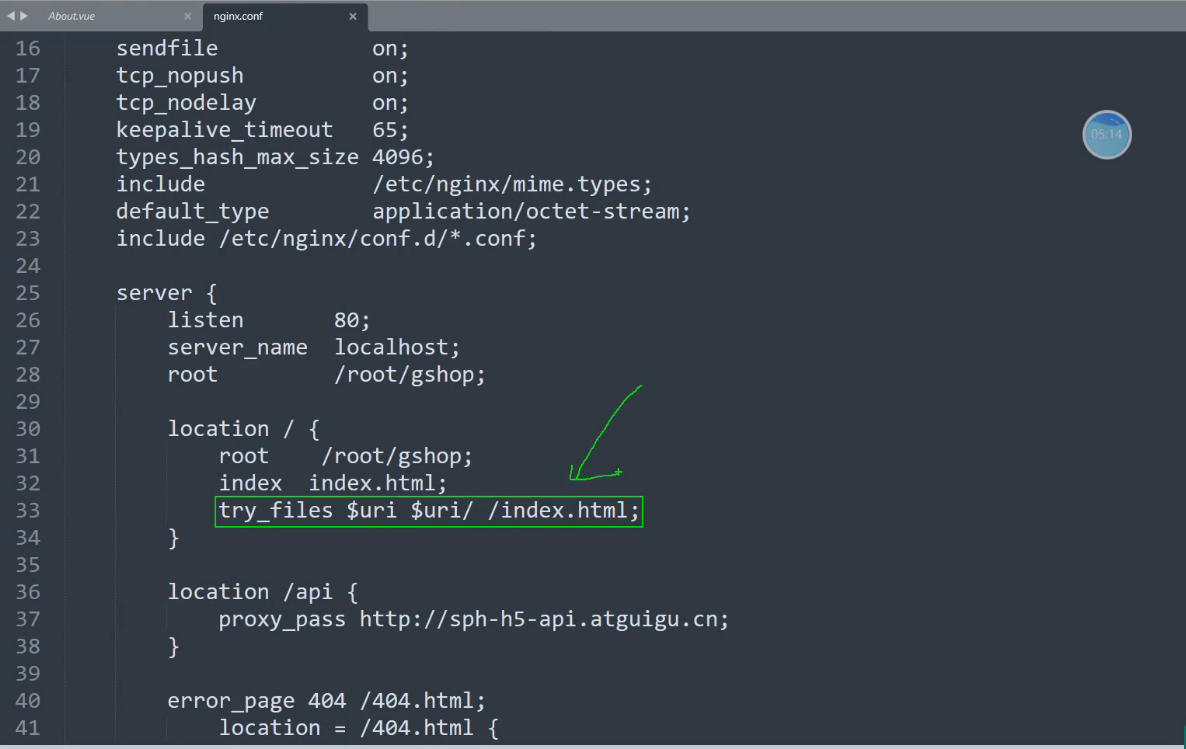
配置文件 nginx.conf
user root;
worker_processes auto;
error_log /var/log/nginx/error.log;
pid /run/nginx.pid;
include /usr/share/nginx/modules/*.conf;

events {
	worker_connections 1024;
}

http {
	log_format main '$remote_addr - $remote_user [$time_local] "$request"'
					'$status $body_bytes_sent "$http_referer"'
					'"$http_user_agent" "$http_x_forwarded_for"';
	access_log /var/log/nginx/access.log main;
	sendfile	on;
	tcp_nopush	on;
	tcp_nodelay	on;
	keepalive_timeout	65;
	types_hash_max_size	4096;
	include		/etc/nginx/mime.types;
	default_type	application/octet-stream;
	include		/etc/nginx/conf.d/*.conf;

    server {
        listen	80;
        server_name	localhost;
        root		/root/gshop;
    }
    location / {
        root	/root/gshop;
        index	index.html;
        try_files	$uri $uri/ /index.html;
    }
    location /api {
        proxy_pass http://sph-h5-api.atguigu.cn;
    }
    error_page 404 /404.html;
        location = /404.html {
    }
    error_page 500 502 503 504 /50x.html;
        location = /50x.html {
    }
}
就是靠绿色框里面的配置
_路由-to的两种写法和路由器工作模式 实现代码如下
1, src/router/index.ts
// 创建一个路由器,并暴露出去

// 第一步: 引入vue-router模块的createRouter方法
import {createRouter,createWebHistory,createWebHashHistory} from 'vue-router'

// 第三步:引入一个一个可能要呈现的组件,也就是页面组件
import Home from '@/pages/Home.vue'
import News from '@/pages/News.vue'
import About from '@/pages/About.vue'


// 第二步: 创建路由器
const router = createRouter({
    // history:createWebHistory(), // 路由器的工作模式
    history:createWebHashHistory(), // 路由器的工作模式
    routes:[    // 一个一个路由规则 路由规则数组
        {
			path: "/",
			redirect: "/home", // 重定向
		},
        {path:'/home',component:Home},
        {path:'/news',component:News},
        {path:'/about',component:About},
    ]
})

// 第四步: 把创建的路由器暴露出去
export default router;


2, src/App.vue
<template>
  <div class="app">
    <!-- 标题 -->
    <Header></Header>
    <!-- <h2 class="title">路由测试</h2> -->
    <!-- 导航区 -->
    <div class="navigate">
      <!--第一种: to的字符串写法-->
      <!-- <RouterLink to="/home" active-class="active">首页</RouterLink>
      <RouterLink to="/news" active-class="active">新闻</RouterLink>
      <RouterLink to="/about" active-class="active">关于</RouterLink> -->
      <!--第二种: to的对象写法-->
      <RouterLink :to="{path:'/home'}" active-class="active">首页</RouterLink>
      <RouterLink :to="{path:'/news'}" active-class="active">新闻</RouterLink>
      <RouterLink :to="{path:'/about'}" active-class="active">关于</RouterLink>
    </div>
    <!-- 展示区 -->
    <div class="main-content">
      <!-- 占位符,此处将来要展示不同的组件内容 -->
      <RouterView></RouterView>
      <!-- 此处以后可能要展示各种组件内容,到底展示哪个组件,取决于路由的匹配结果 -->
    </div>
  </div>
</template>

<script setup lang="ts" name="App">
import { RouterView,RouterLink } from 'vue-router';
import Header from '@/components/Header.vue';
</script>

<style scoped>
	/*App*/
  /* .title {
    text-align: center;
    word-spacing: 5px;
    margin: 30px 0;
    height: 70px;
    line-height: 70px;
    background-image: linear-gradient(45deg, gray, white);
    border-radius: 10px;
    box-shadow: 0 0 2px;
    font-size: 30px;
  } */
  .navigate {
    display: flex;
    justify-content: space-around;
    margin: 0 100px;
  }

  .navigate a {
    display: block;
    text-align: center;
    width: 90px;
    height: 40px;
    line-height: 40px;
    border-radius: 10px;
    background-color: gray;
    text-decoration: none;
    color: white;
    font-size: 18px;
    letter-spacing: 5px;
  }

  .navigate a.active {
    background-color: #64967E;
    color: #ffc268;
    font-weight: 900;
    text-shadow: 0 0 1px black;
    font-family: 微软雅黑;
  }

  .main-content {
    margin: 0 auto;
    margin-top: 30px;
    border-radius: 10px;
    width: 90%;
    height: 400px;
    border: 1px solid;
  }
</style>
034_路由-to的两种写法
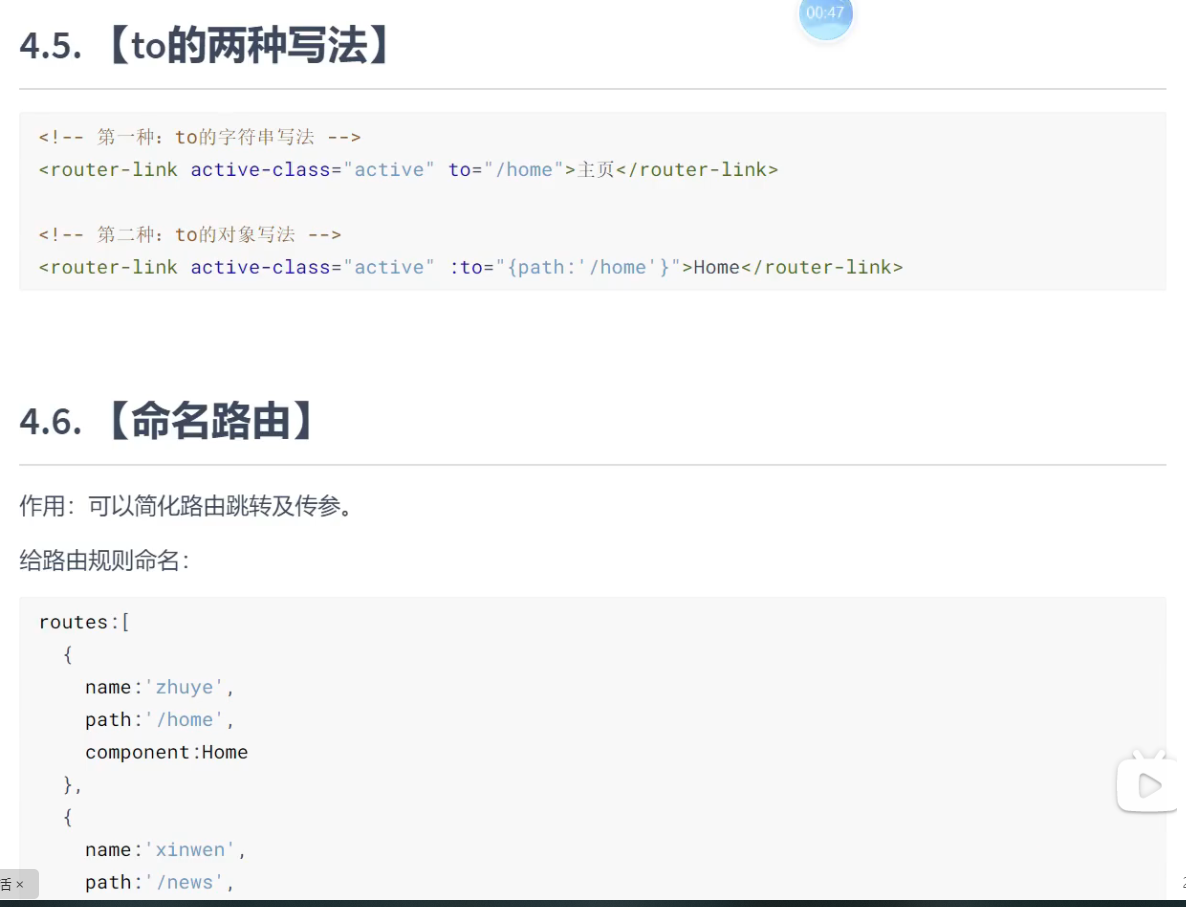
4.5 to的两种写法
<!--第一种: to的字符串写法-->
<router-link active-class="active" to="/home">
	主页
</router-link>

<!--第二种: to的对象写法 里面又分两种path跳转和名字跳转-->
1,to的对象写法中的 path 跳转
<router-link active-class="active" :to="{path:'/home'}">
	Home
</router-link>

2,to的对象写法中的 path的名字 跳转
<RouterLink :to="{name:'home'}" active-class="active">
	首页
</RouterLink>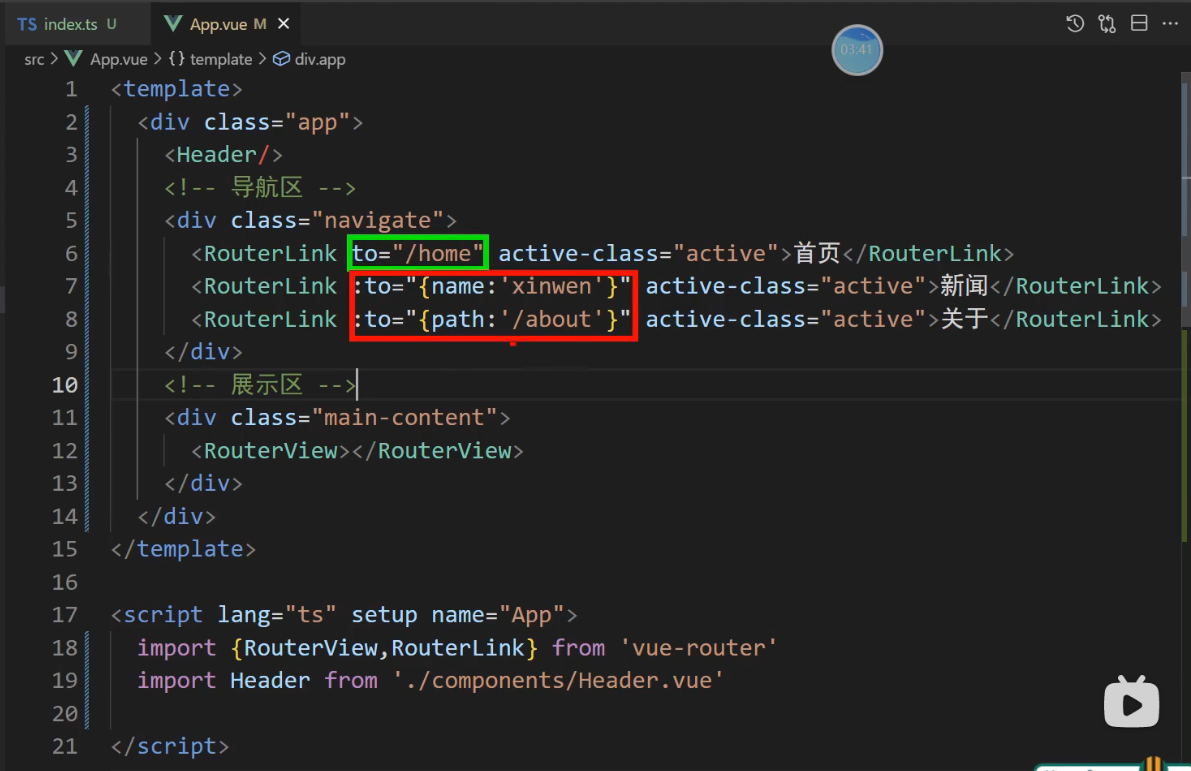
笔记
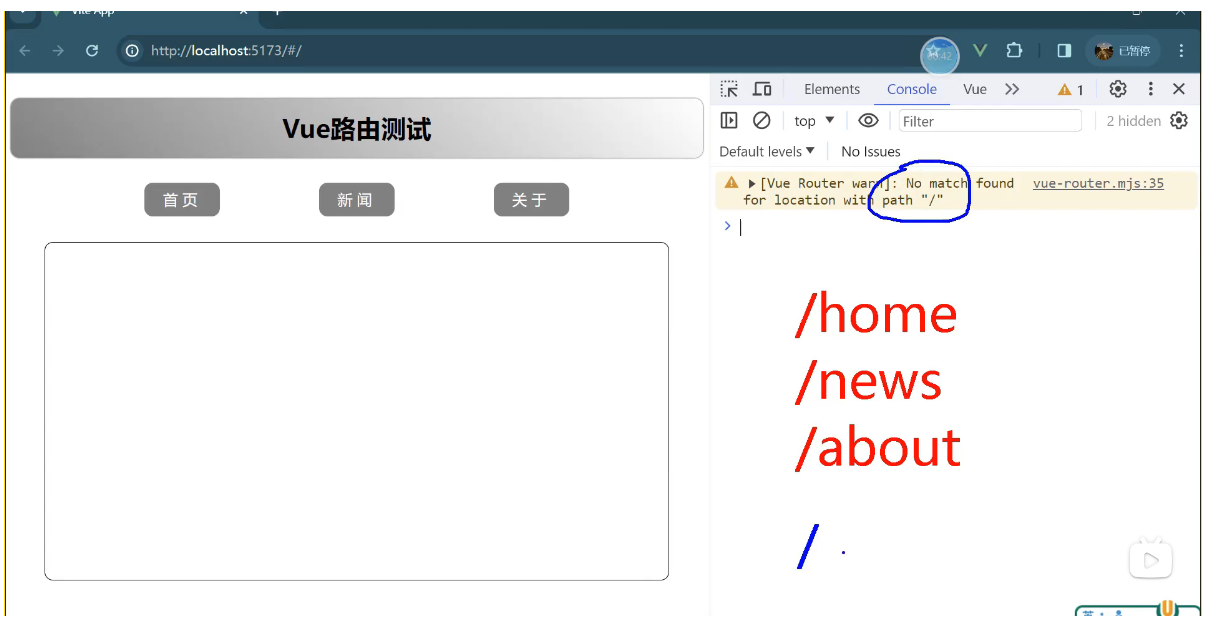
如何解决这个警告 使用重定向就可以解决了
routes:[    // 一个一个路由规则 路由规则数组
    {
        path: "/",
        redirect: "/home" // 重定向
    },
    {
        name:'home',
        path:'/home',
        component:Home
    },
   ]
重定向
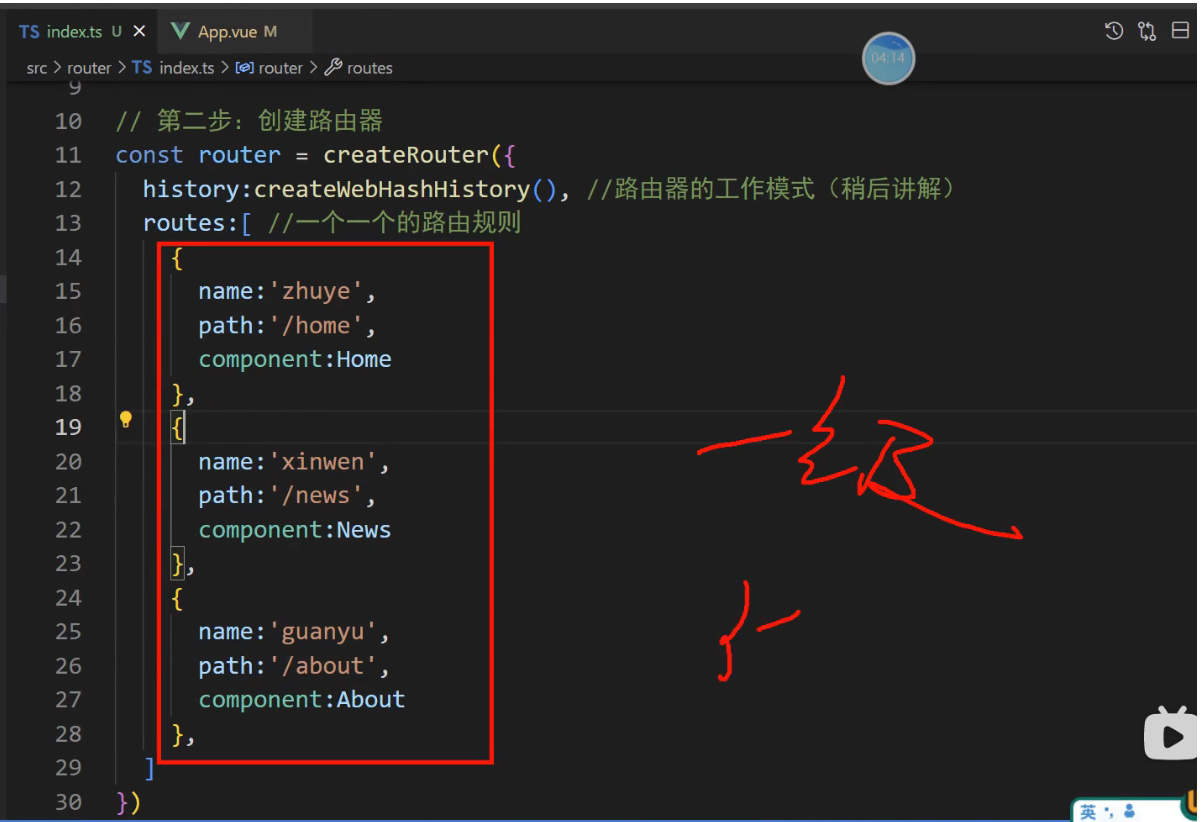
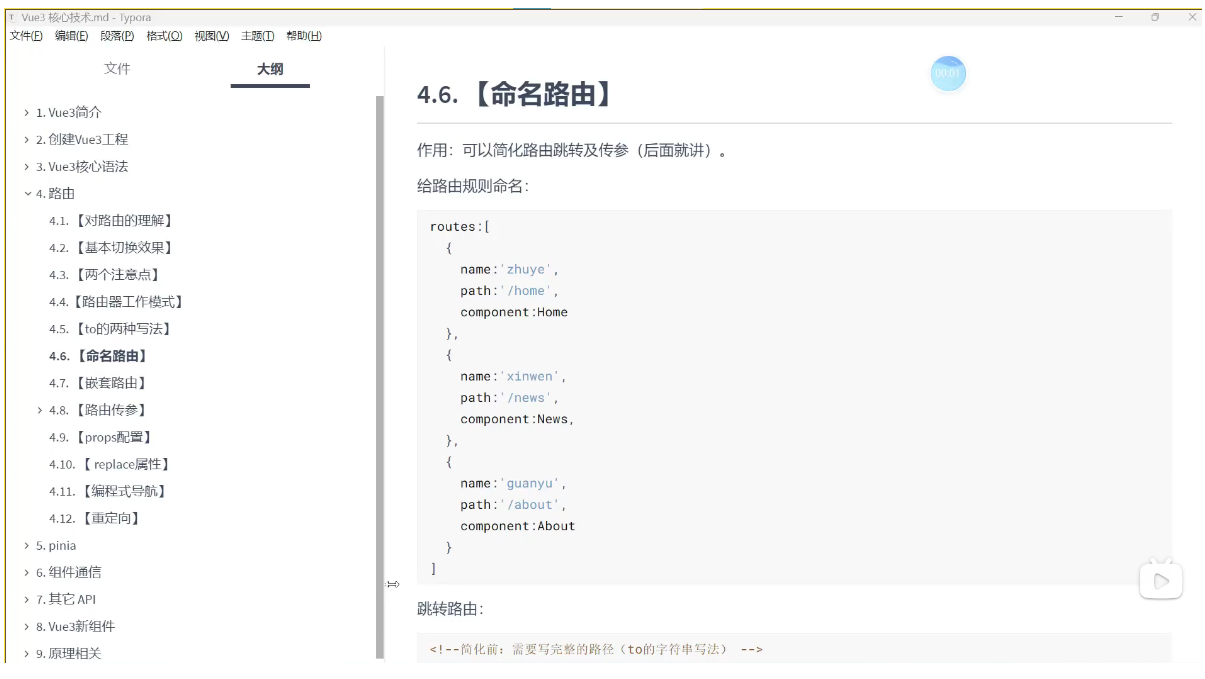
035_路由-命名路由
笔记
036_路由-嵌套路由
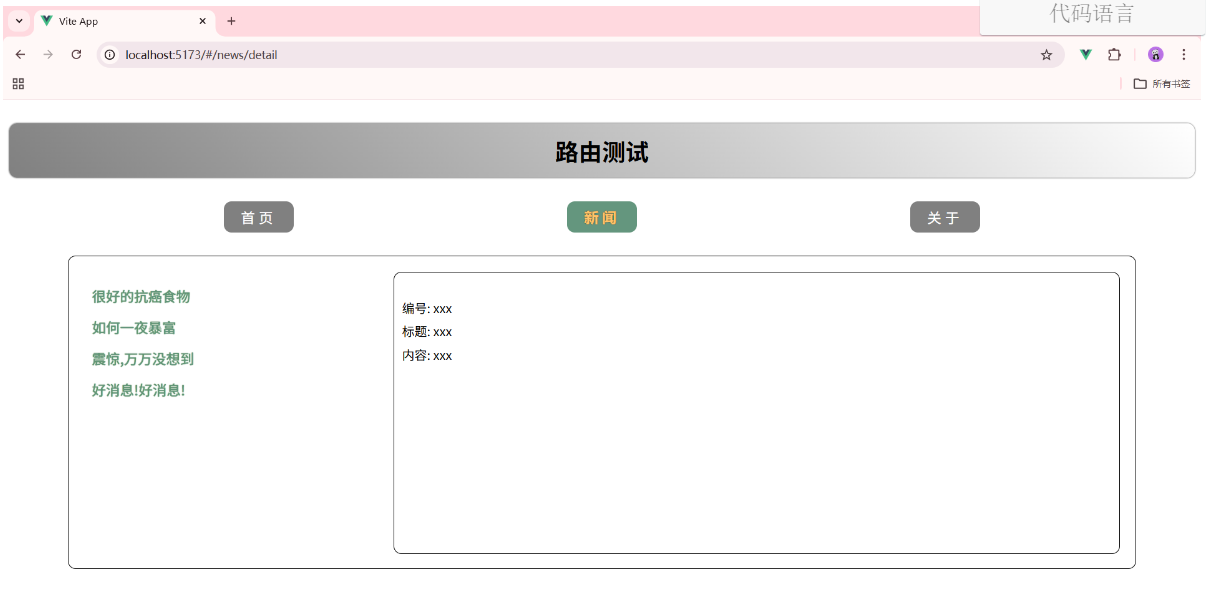
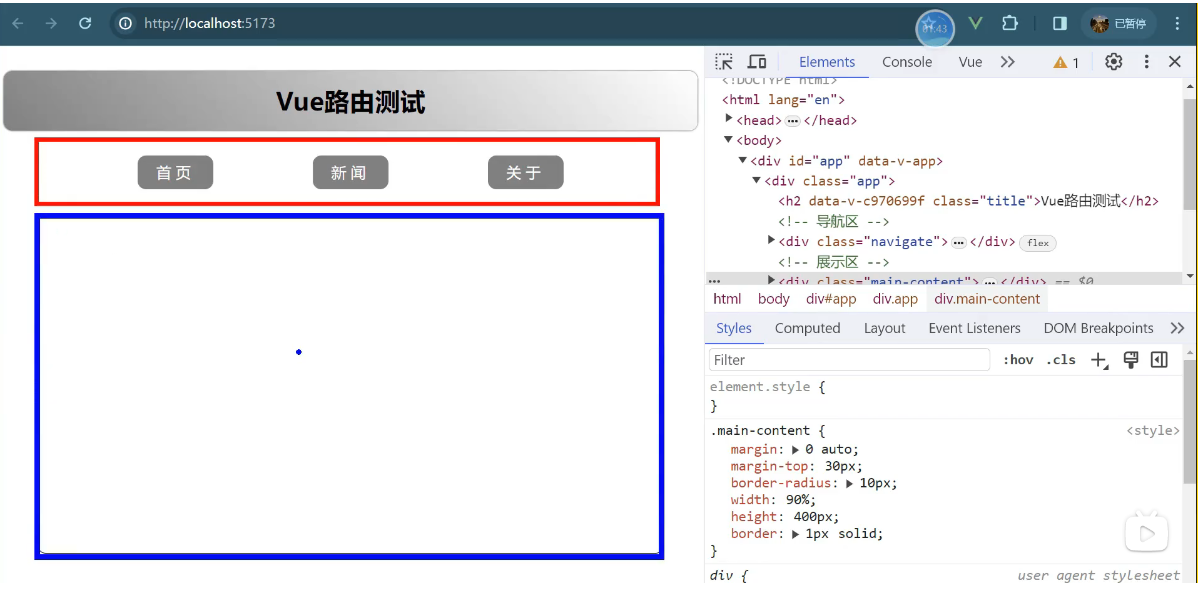
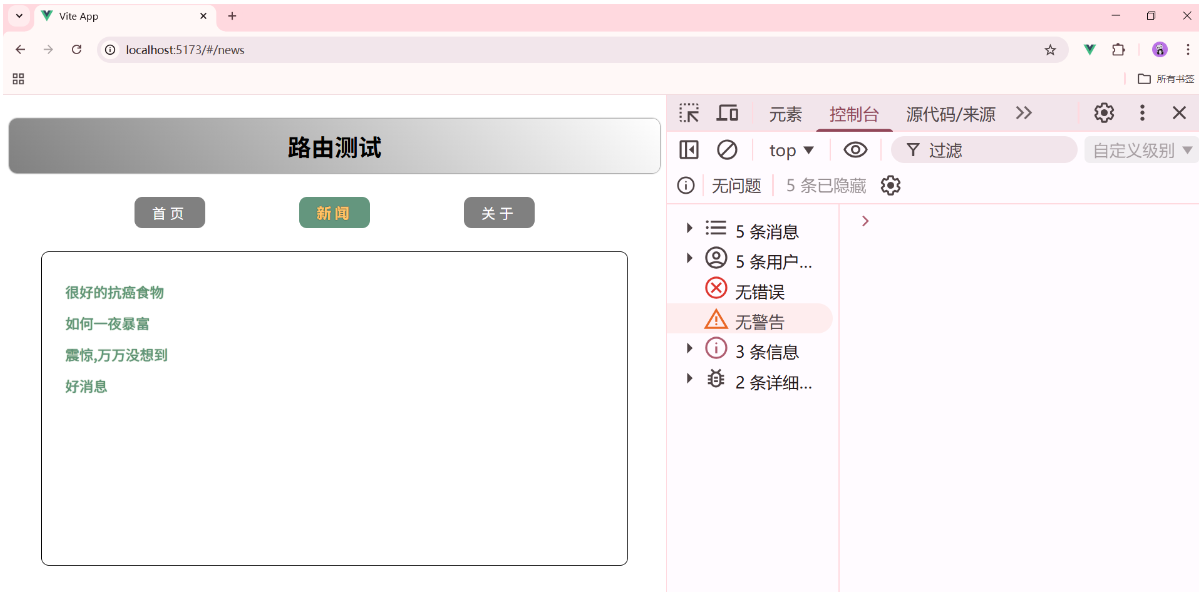
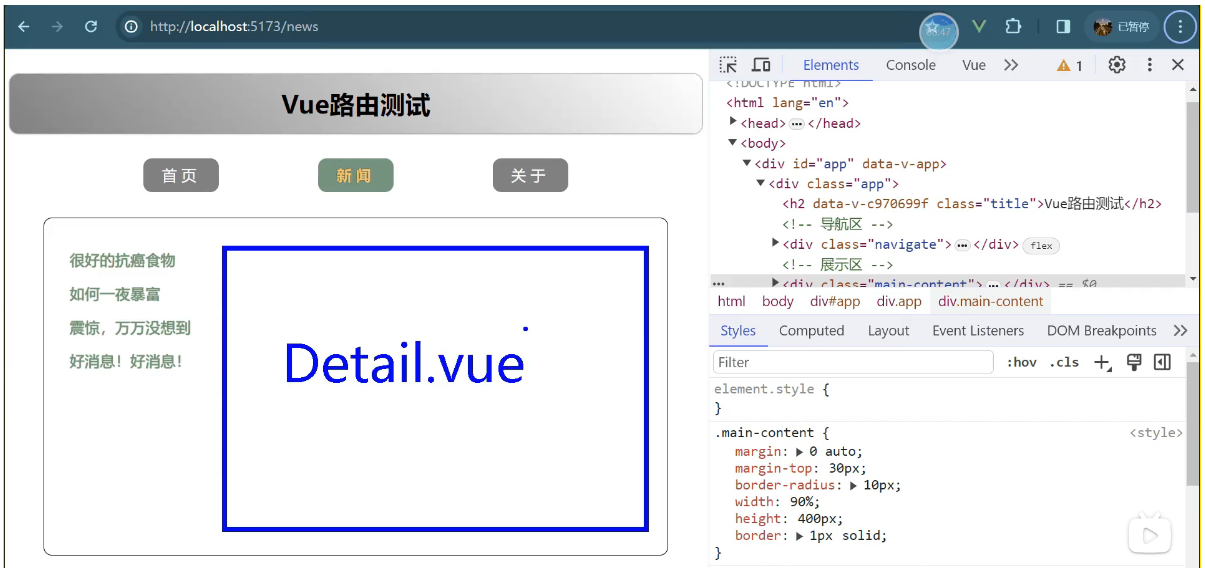
红色的导航区,蓝色的是展示区
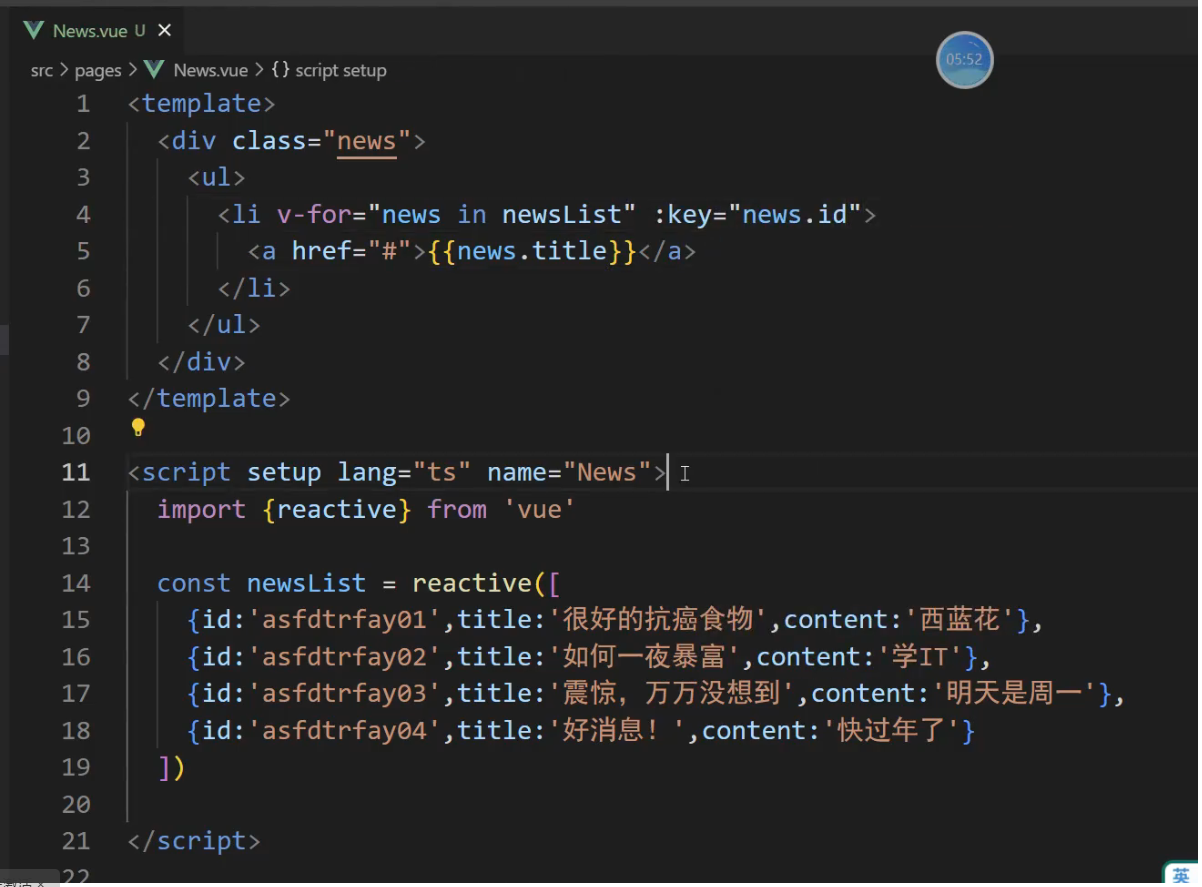
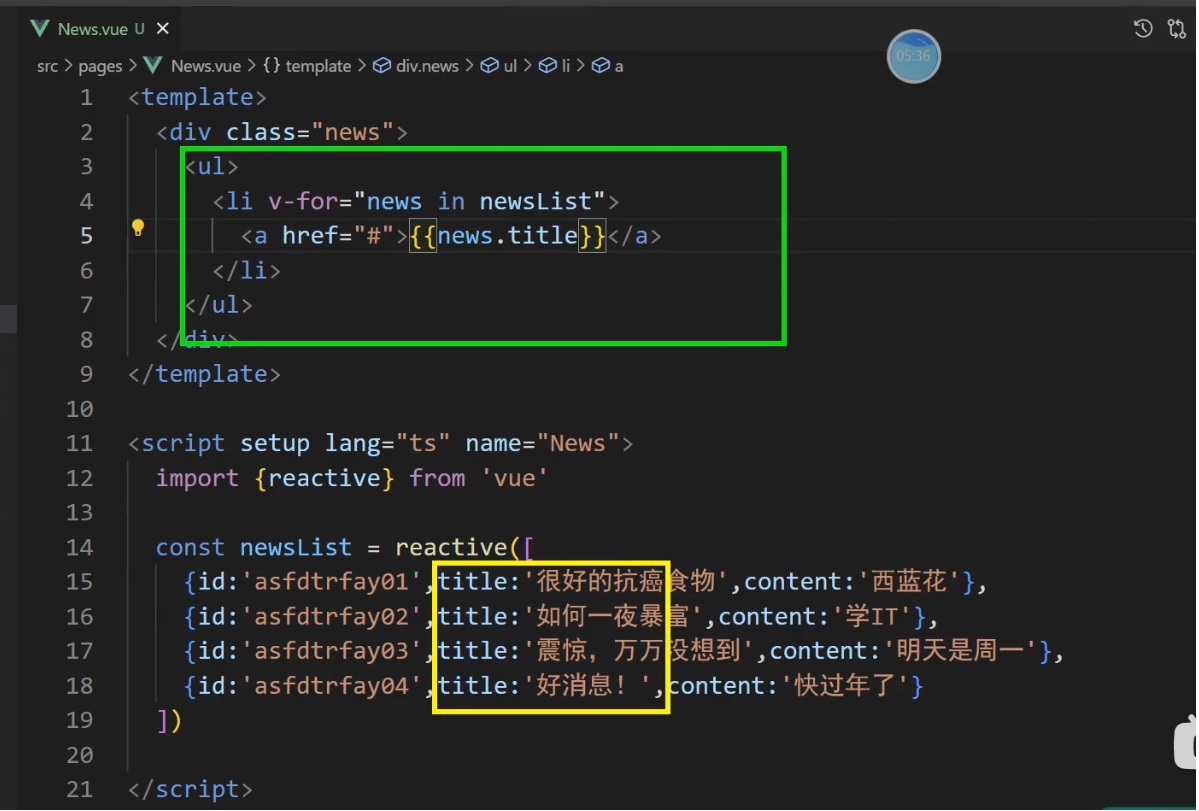
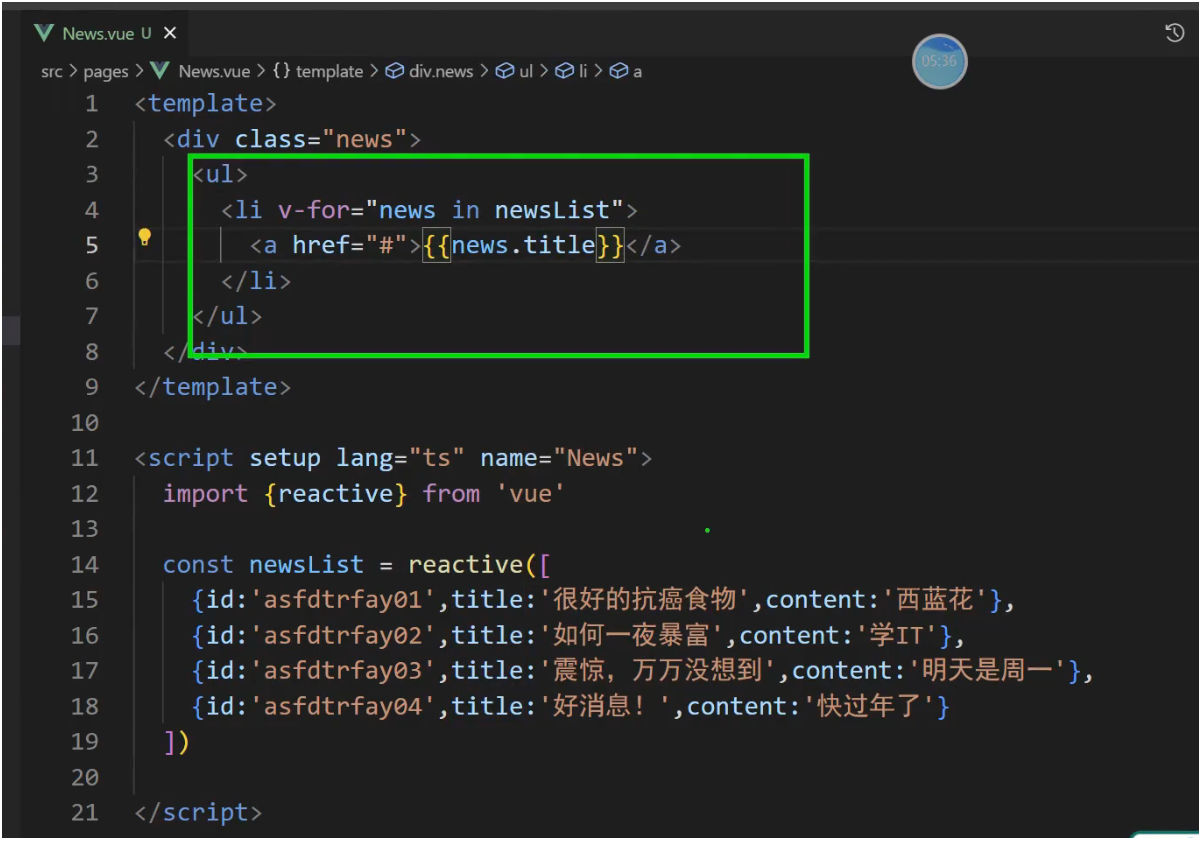
新闻页面详情展示是遍历出来的,而不是写死的
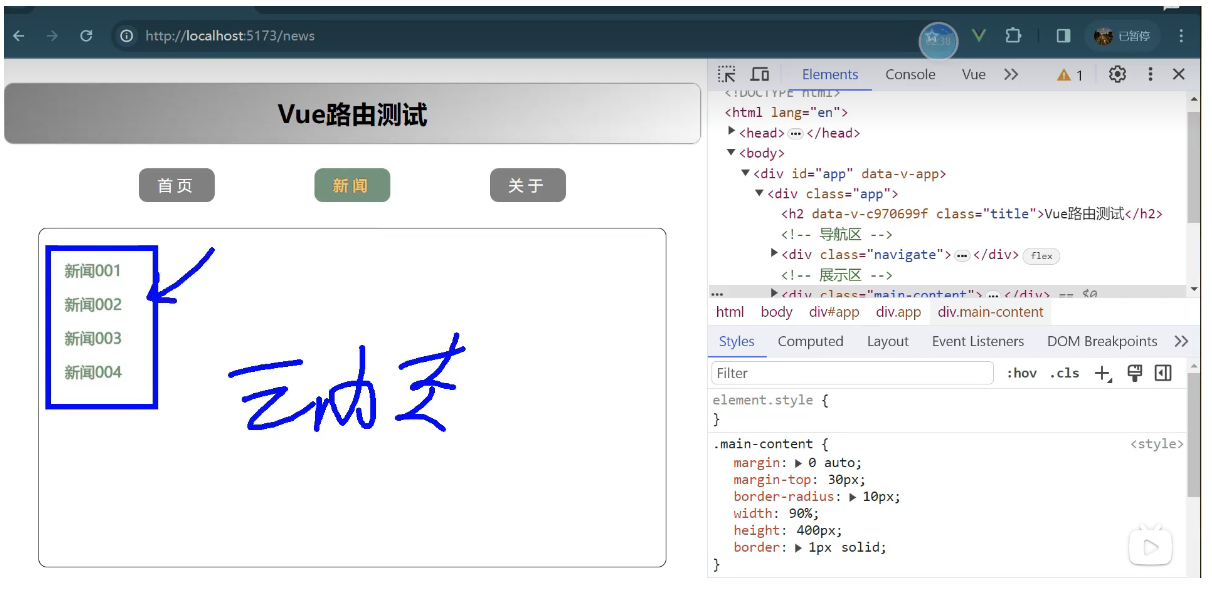
呈现新闻标题 代码-效果
点击 '新闻标题',在中间展示新闻内容
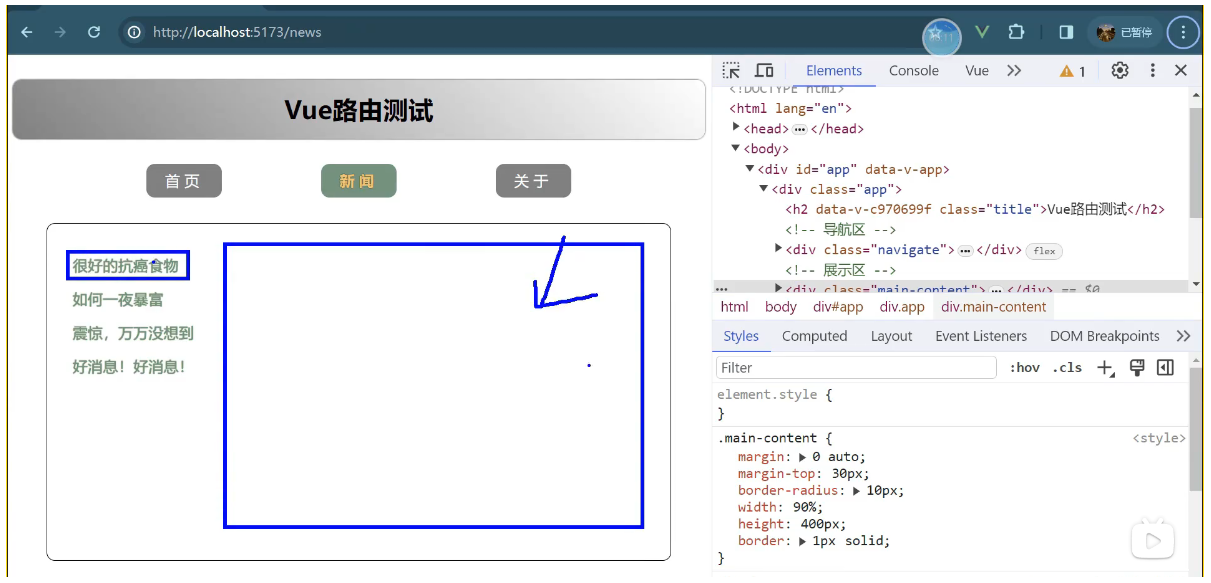
红色的是导航区,蓝色的是展示区,展示区内又有红色导航区与蓝色展示区
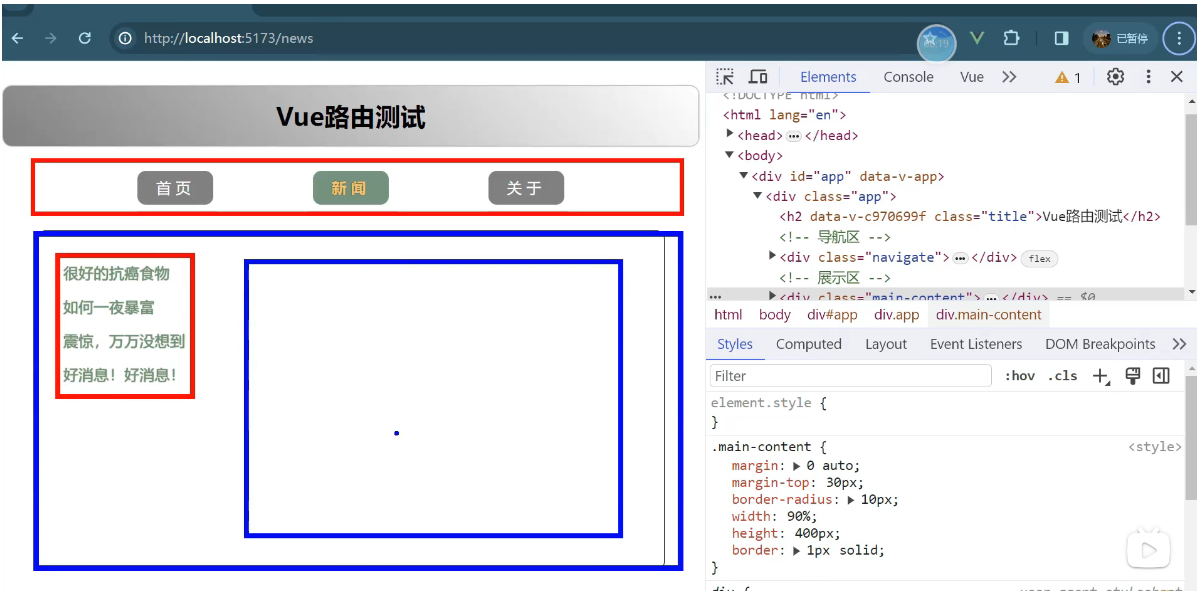

这就是嵌套关系
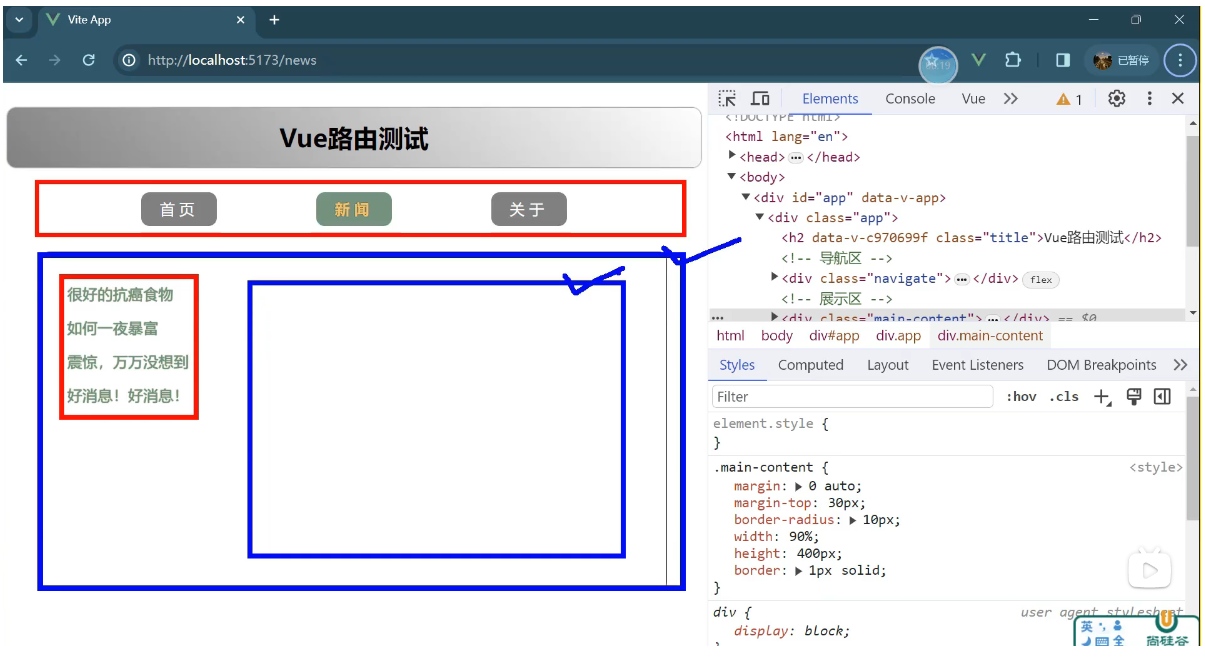
在蓝色区域要呈现一个组件,每个新闻的详情
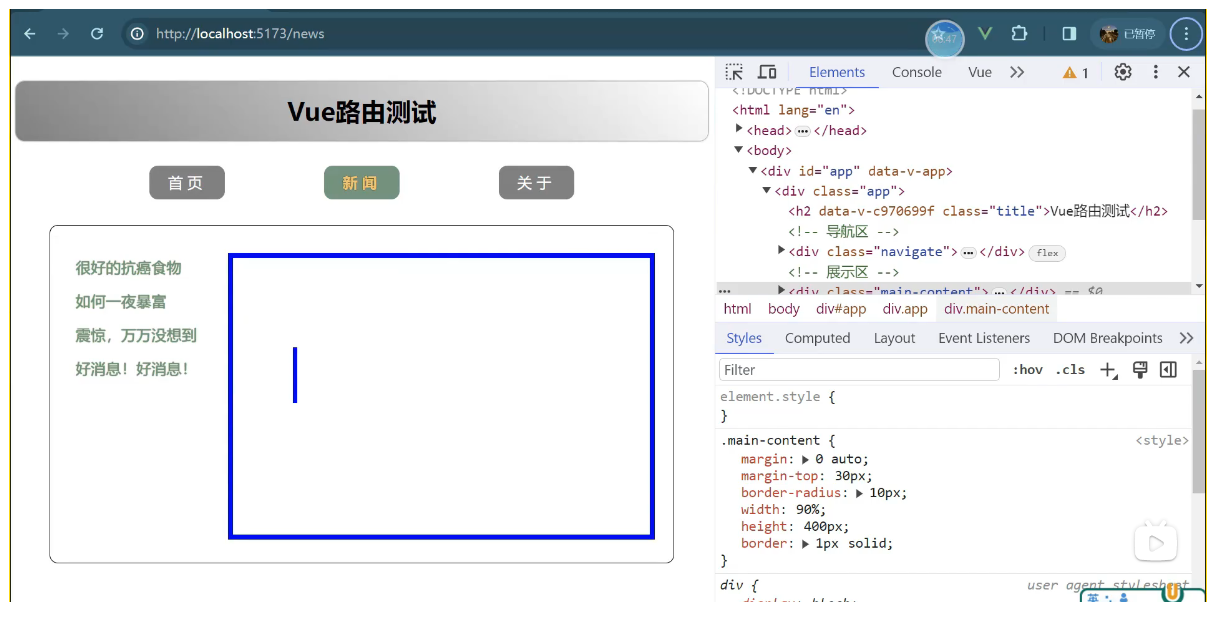
将该组件取名为 Detail.vue
src/pages/Detail.vue

<template>
	<ul class="news-list">
		<li>编号: xxx</li>
		<li>标题: xxx</li>
		<li>内容: xxx</li>
	</ul>
</template>

<script setuo lang="ts" name="About">

</script>

<style scoped>
	.news-list {
		list-style: none;
		padding-left: 20px;
	}
	.news-list>li {
		line-height: 30px;
	}
</style>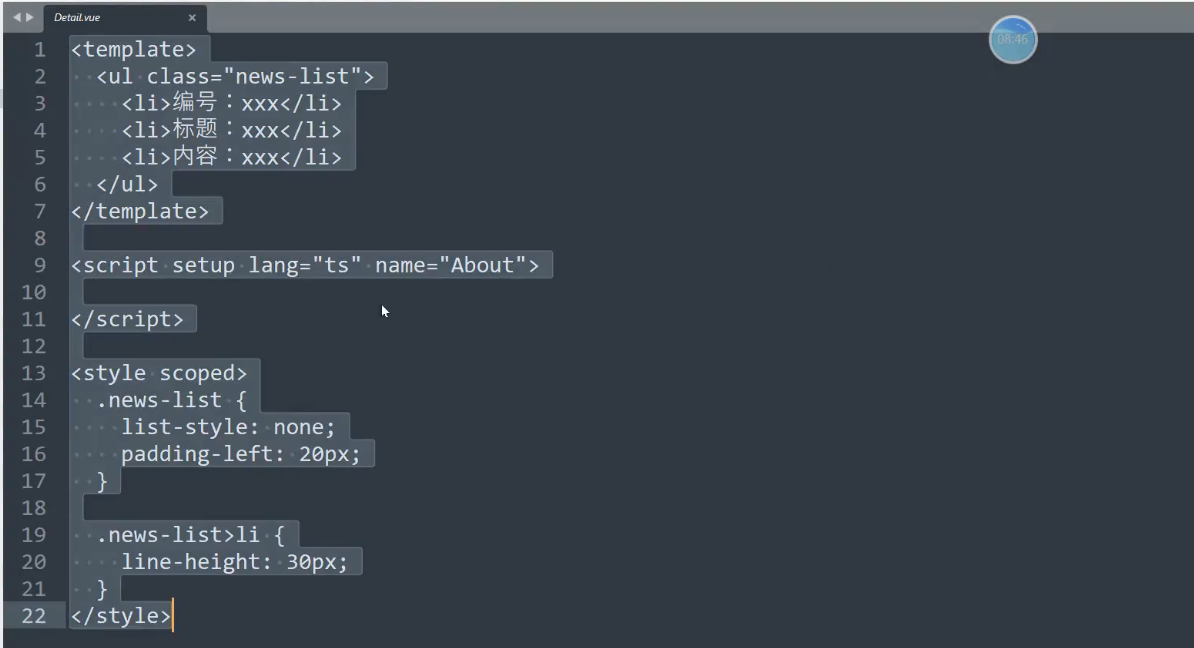
子集路由
新闻页面
_路由-嵌套路由 实现代码如下
1, src/pages/Detail.vue
<template>
<ul class="news-list">
<li>编号: xxx</li>
<li>标题: xxx</li>
<li>内容: xxx</li>
</ul>
</template>
<script setuo lang="ts" name="About">
</script>
<style scoped>
.news-list {
list-style: none;
padding-left: 20px;
}
.news-list>li {
line-height: 30px;
}
</style>
2, src/pages/News.vue
<script setup lang="ts" name="News">
/*! @file
*******************************************************
<PRE>
文件实现功能 : 新闻详情页面
作 者 : mary
版本 : 1.0
-------------------------------------------------------
备注 : -
-------------------------------------------------------
修改记录 :
日期 版本 修改人 修改内容
2025/6/18 1.0 mary 创建
</PRE>
******************************************************/
import { reactive } from 'vue'
import Detail from '@/pages/Detail.vue'
import {RouterView,RouterLink} from 'vue-router'
// defineOptions({name: ''})
//====================================================
// == 类型定义
const newsList = reactive([
{id:'zg01',title:'很好的抗癌食物',content:'西兰花'},
{id:'zg02',title:'如何一夜暴富',content:'学IT'},
{id:'zg03',title:'震惊,万万没想到',content:'明天是周一'},
{id:'zg04',title:'好消息!好消息!',content:'快过年了'},
])
//====================================================
// == 初始化
//====================================================
//== 事件处理
</script>
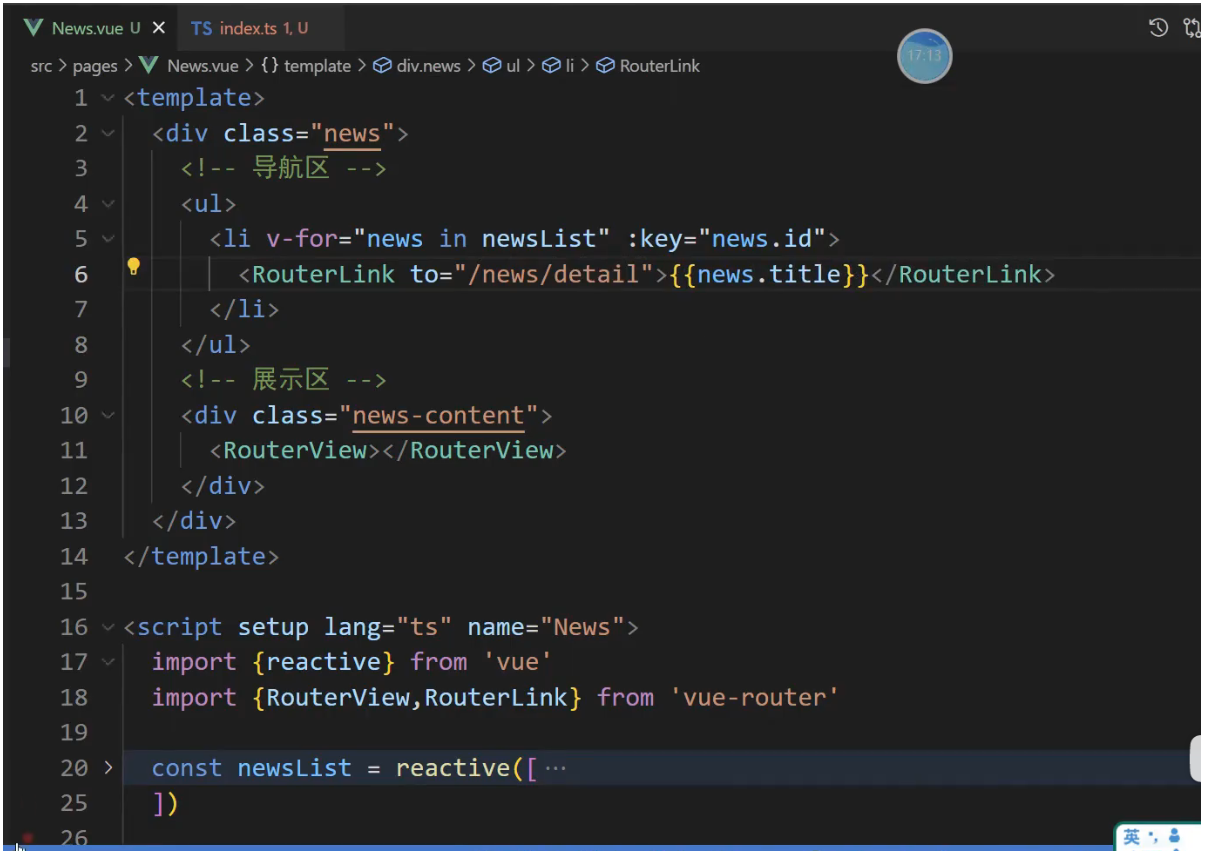
<template>
<div class="news">
<!-- 导航区 -->
<ul>
<li v-for="news in newsList" :key="news.id">
<RouterLink to="/news/detail">{{ news.title }}</RouterLink>
</li>
</ul>
<!-- 展示区 -->
<div class="news-content">
<RouterView></RouterView>
<!-- <Detail /> -->
</div>
</div>
</template>
<style scoped>
/*新闻*/
.news {
padding: 0 20px;
display: flex;
justify-content: space-between;
height: 100%;
}
.news ul {
margin-top: 30px;
list-style: none;
padding-left: 10px;
}
.news li>a {
font-size: 18px;
line-height: 40px;
text-decoration: none;
color: #64967E;
text-shadow: 0 0 1px rgb(0, 84, 0);
}
.news-content {
width: 70%;
height: 90%;
border: 1px solid;
margin-top: 20px;
border-radius: 10px;
}
</style>
3, src/router/index.ts
// 创建一个路由器,并暴露出去
// 第一步: 引入vue-router模块的createRouter方法
import {createRouter,createWebHistory,createWebHashHistory} from 'vue-router'
// 第三步:引入一个一个可能要呈现的组件,也就是页面组件
import Home from '@/pages/Home.vue'
import News from '@/pages/News.vue'
import About from '@/pages/About.vue'
import Detail from '@/pages/Detail.vue'
// 第二步: 创建路由器
const router = createRouter({
// history:createWebHistory(), // 路由器的工作模式
history:createWebHashHistory(), // 路由器的工作模式
routes:[ // 一个一个路由规则 路由规则数组
{
path: "/",
redirect: "/home" // 重定向
},
{
name:'home',
path:'/home',
component:Home
},
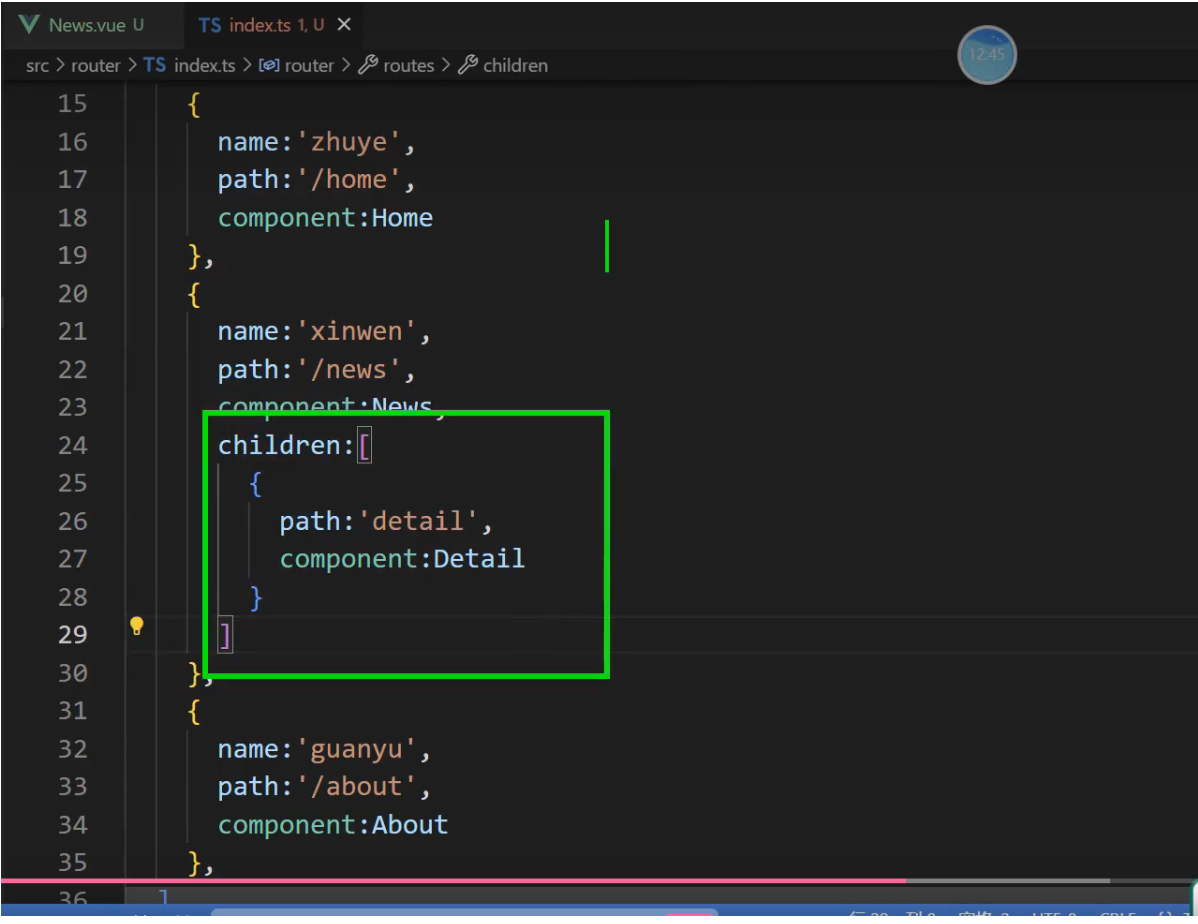
{
name:'news',
path:'/news',
component:News,
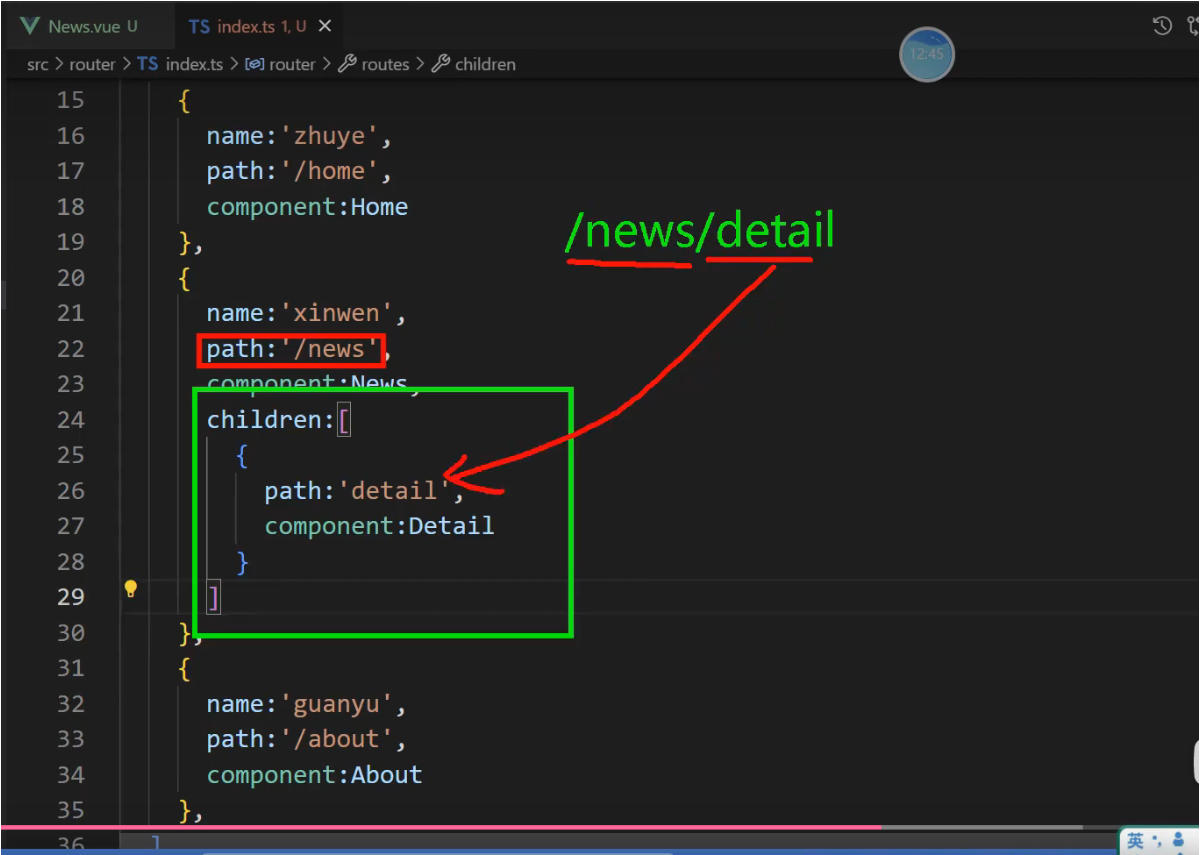
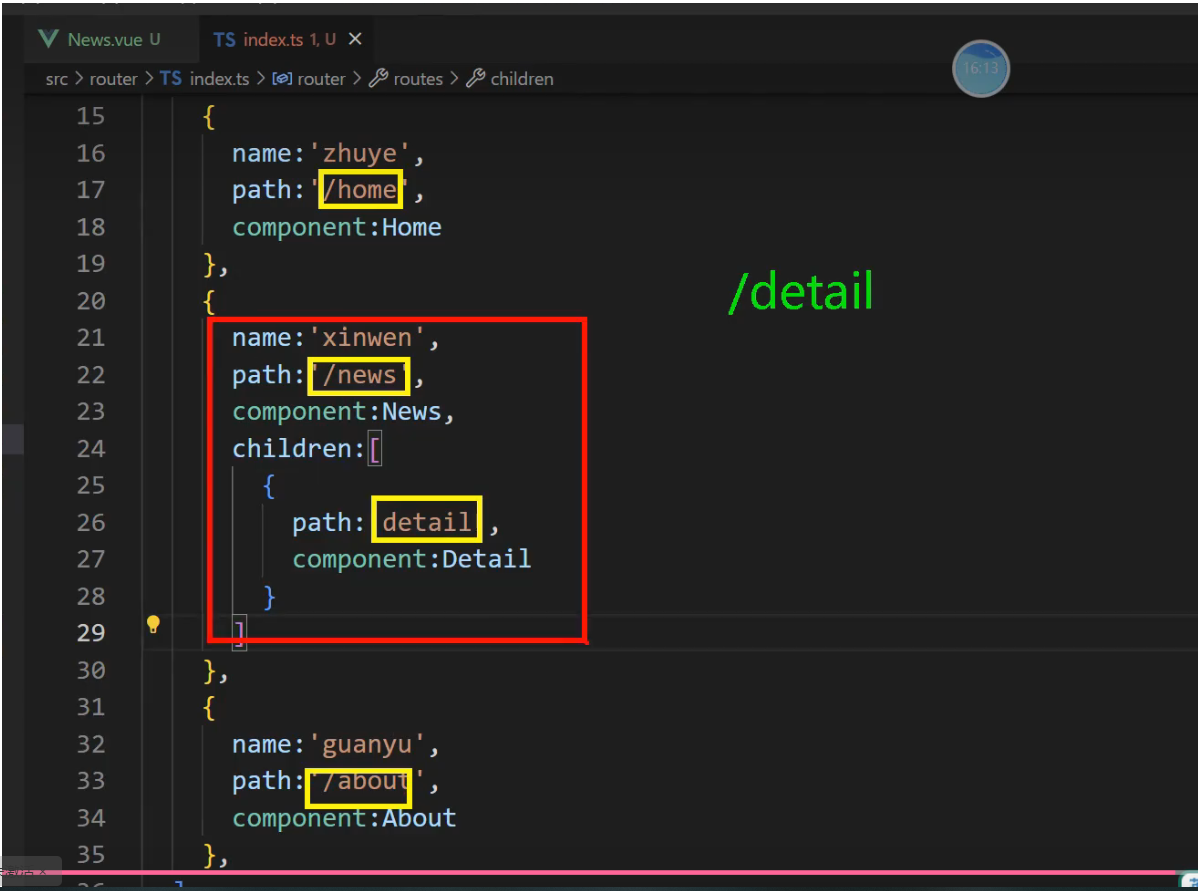
// 添加一个子集属性children,在里面写子路由规则数组
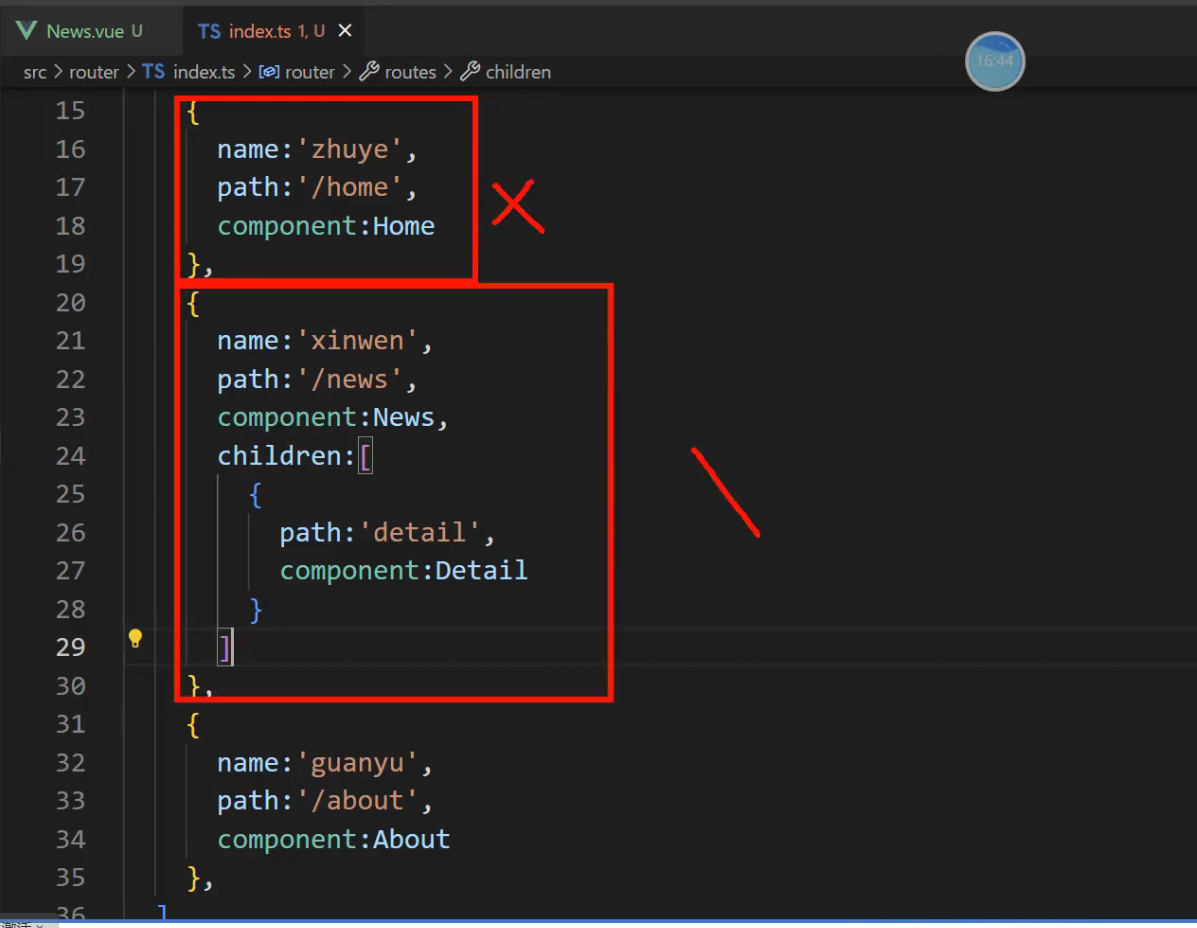
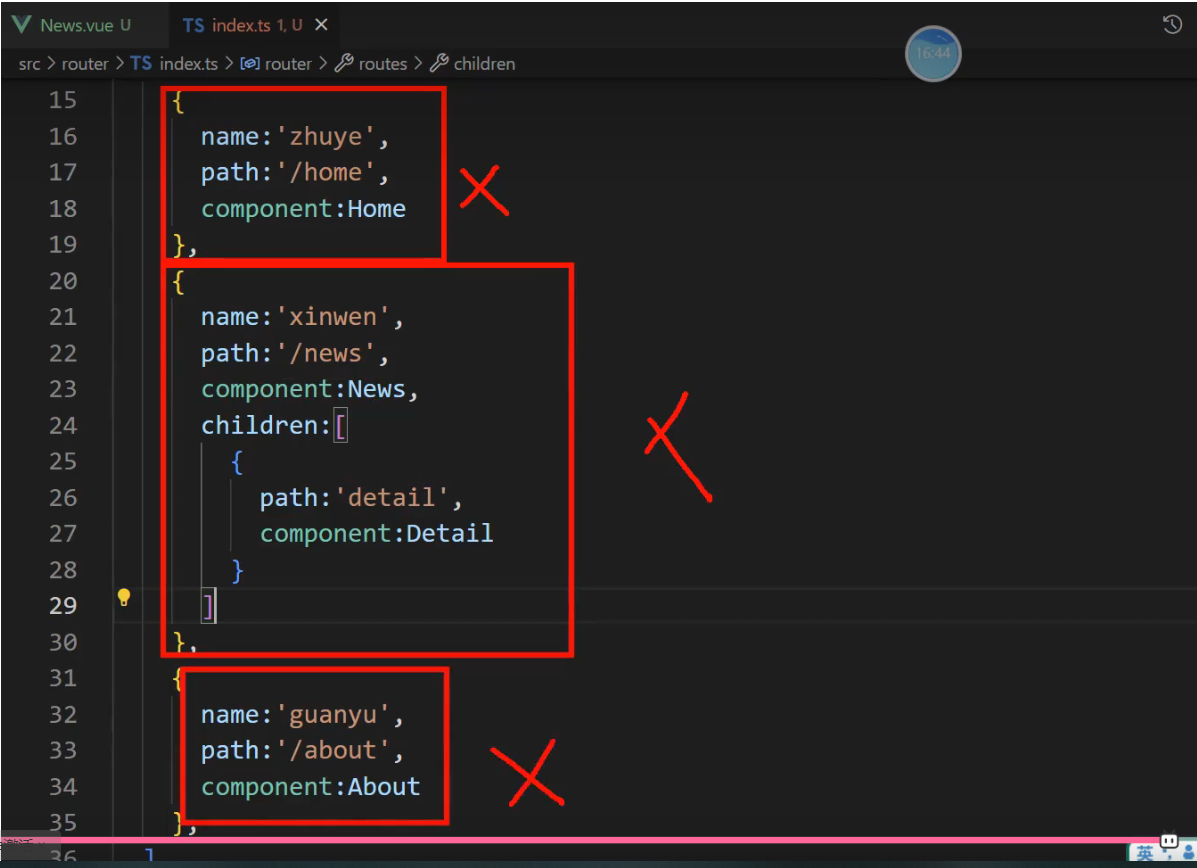
children:[ // 子路由规则数组 子集路由前部需要写'/',否则会找不到路径
{
name:'detail',
path:'detail',
component:Detail
},
]
},
{
name:'about',
path:'/about',
component:About
},
]
})
// 第四步: 把创建的路由器暴露出去
export default router;