背景
我在 浅解 JUnit 4 这个专栏陆续添加了一些文章。现有的文章初步探讨了 Test/Runner/RunnerBuilder 这些核心类的逻辑。但是 JUnit 4 的入口在哪里呢?本文会对这个问题进行探讨(由于 JUnitCore 这个类涉及的内容较多,一篇文章写不完,本文只是 上篇)。
要点
org.junit.runner.JUnitCore类有main方法,我们可以在命令行通过java -jar的方式来调用这个main方法- 调用这个
main方法时,也会有构造Runner,运行Runner这样的逻辑
一些类的全限定类名
文中提到 JUnit 4 中的类,它们的全限定类名一般都比较长,所以文中有时候会用简略的写法(例如将 org.junit.runners.Suite 写成 Suite)。我在这一小节把简略类名和全限定类名的对应关系列出来
| 简略的类名 | 全限定类名(Fully Qualified Class Name) |
|---|---|
AllDefaultPossibilitiesBuilder |
org.junit.internal.builders.AllDefaultPossibilitiesBuilder |
JUnitCore |
org.junit.runner.JUnitCore |
Request |
org.junit.runner.Request |
RunListener |
org.junit.runner.notification.RunListener |
TextListener |
org.junit.internal.TextListener |
正文
junit.org/junit4/ 是 JUnit 4 的网站。这个网站有 Frequently Asked Questions 页面。本文关心其中的 3 个问题(这 3 个问题我在下图用红框标出来了) 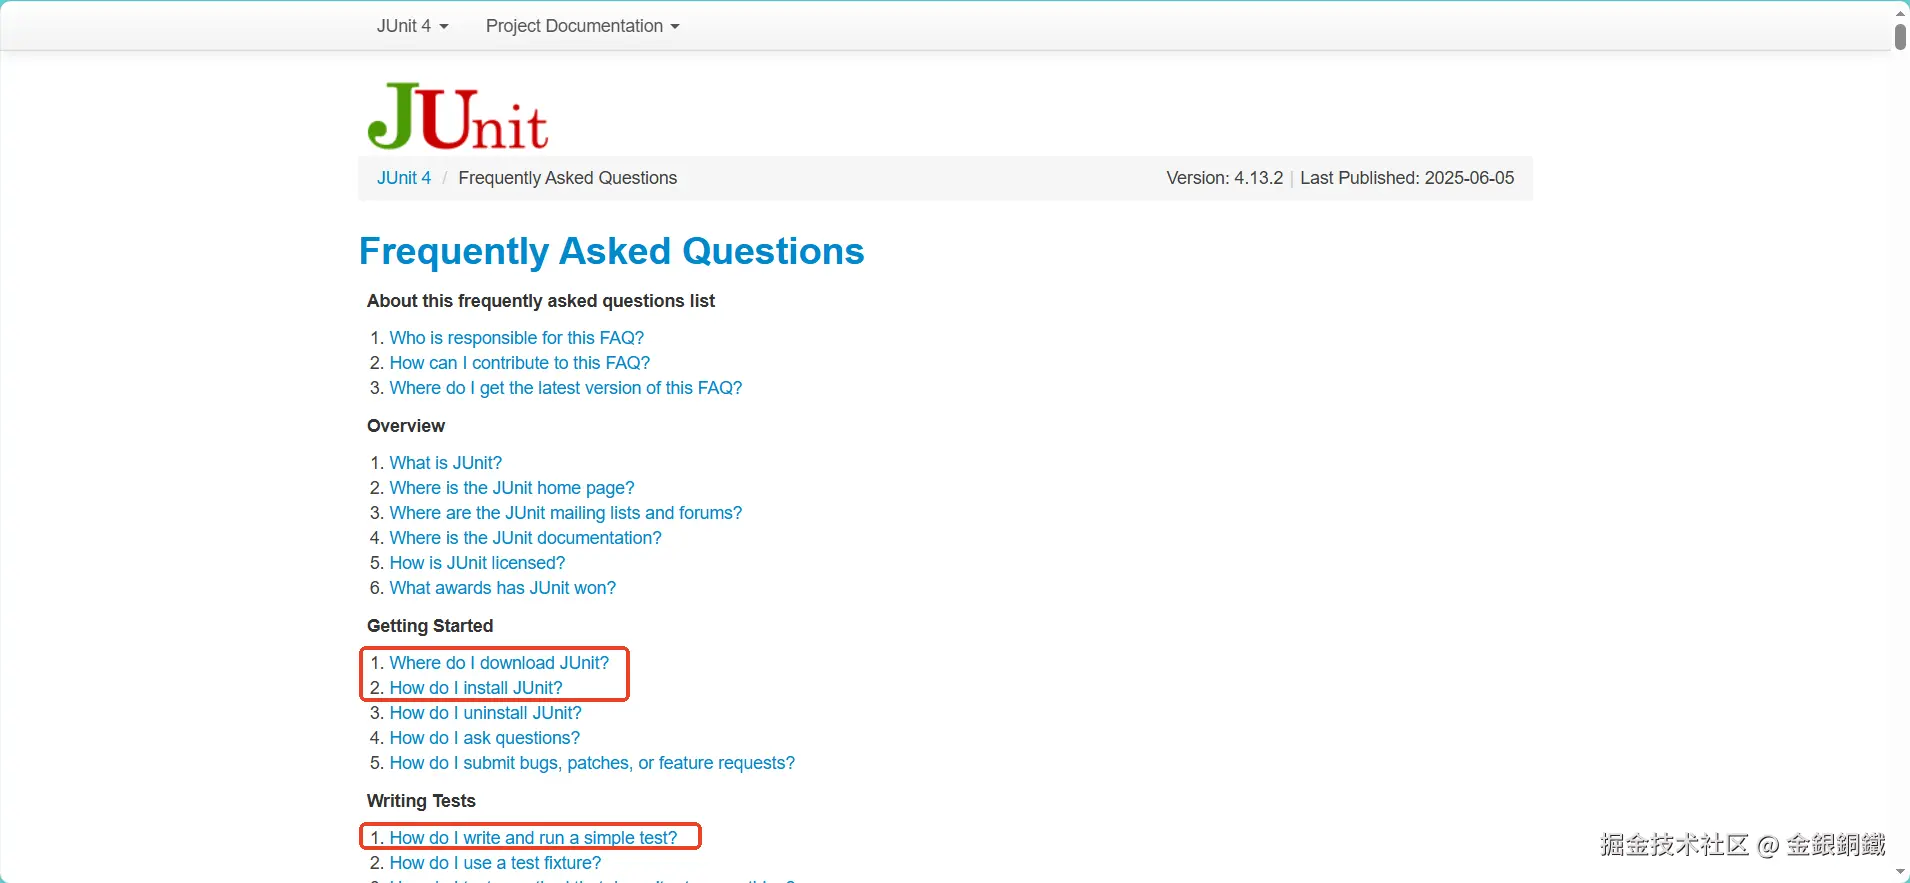
- Where do I download JUnit? (如何下载
JUnit 4?) - How do I install JUnit? (如何安装
JUnit 4?) - How do I write and run a simple test? (如何写以及运行简单的测试?)
我们逐个来看
问题 1: 如何下载 JUnit 4?
Frequently Asked Questions 页面中提供的是 SourceForge 网站的一个链接(如下图所示)

我觉得直接去 Maven Repository: junit >> junit 下载就行,例如 4.13.2 版本的链接是 Maven Repository: junit >> junit >> 4.13.2
点击下图红框位置,就可以下载 jar 包 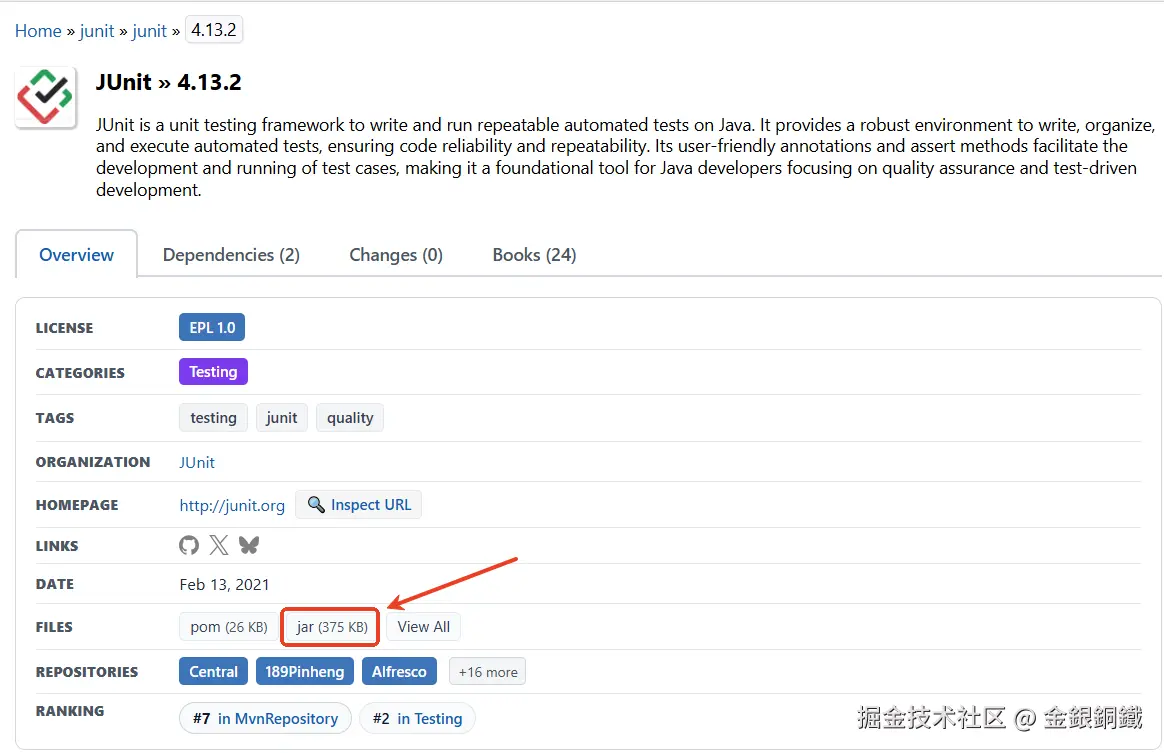
我下载之后,得到的是名为 junit-4.13.2.jar 的文件,如下图所示 👇
由于 JUnit 4 依赖了 hamcrest-core,我们前往 Maven Repository: org.hamcrest >> hamcrest-core >> 1.3 页面把 hamcrest-core 的 jar 包也下载下来(点击下图红框所示的位置就可以下载这个 jar 包)
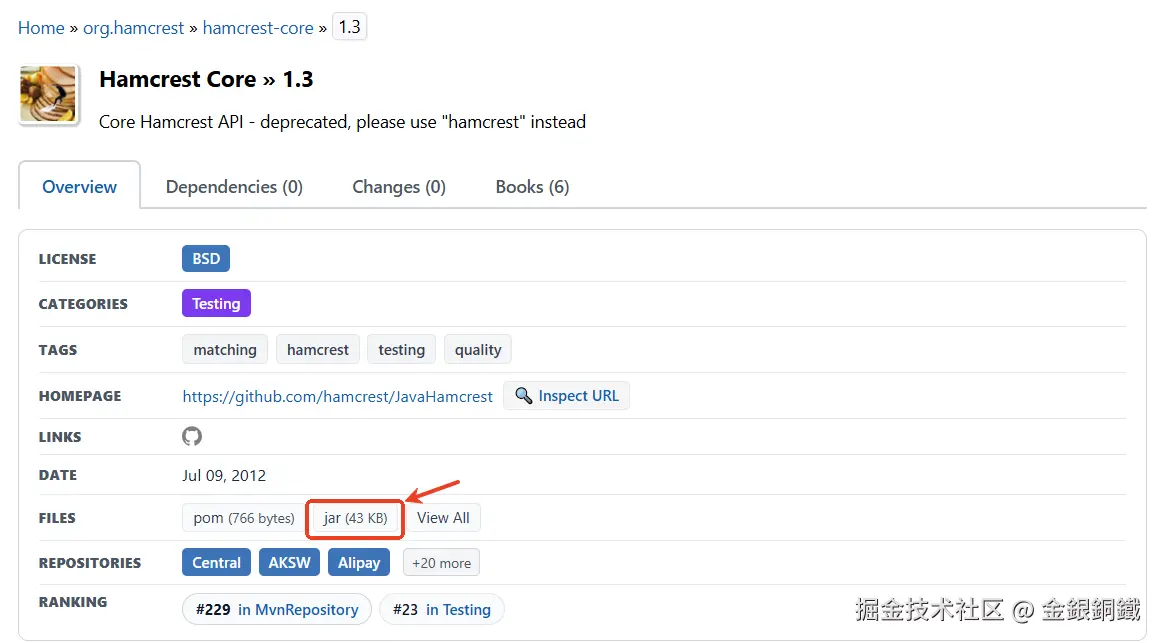
我下载之后,得到的是名为 hamcrest-core-1.3.jar 的文件,如下图所示 👇

问题 2: 如何安装 JUnit 4?
Frequently Asked Questions 页面提供的方案涉及修改 CLASSPATH (如下图所示) 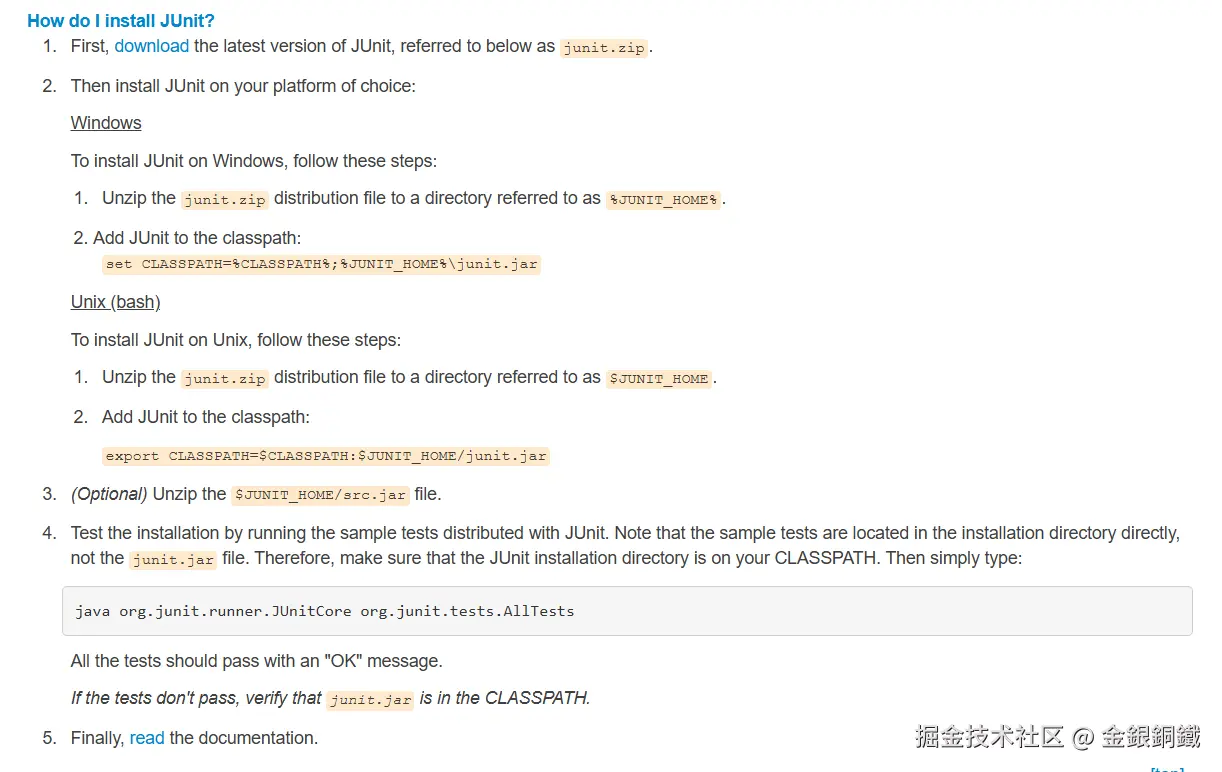
如果我们是在 maven 项目中使用 JUnit 4,那就需要手动修改 CLASSPATH。如果是在命令行做简单的测试,那么 java 命令有 -cp/-classpath 选项可以调整 classpath (即,类搜索路径)。
问题 3: 如何写以及运行简单的测试?
Frequently Asked Questions 页面提供了一个简单的例子(如下图所示)
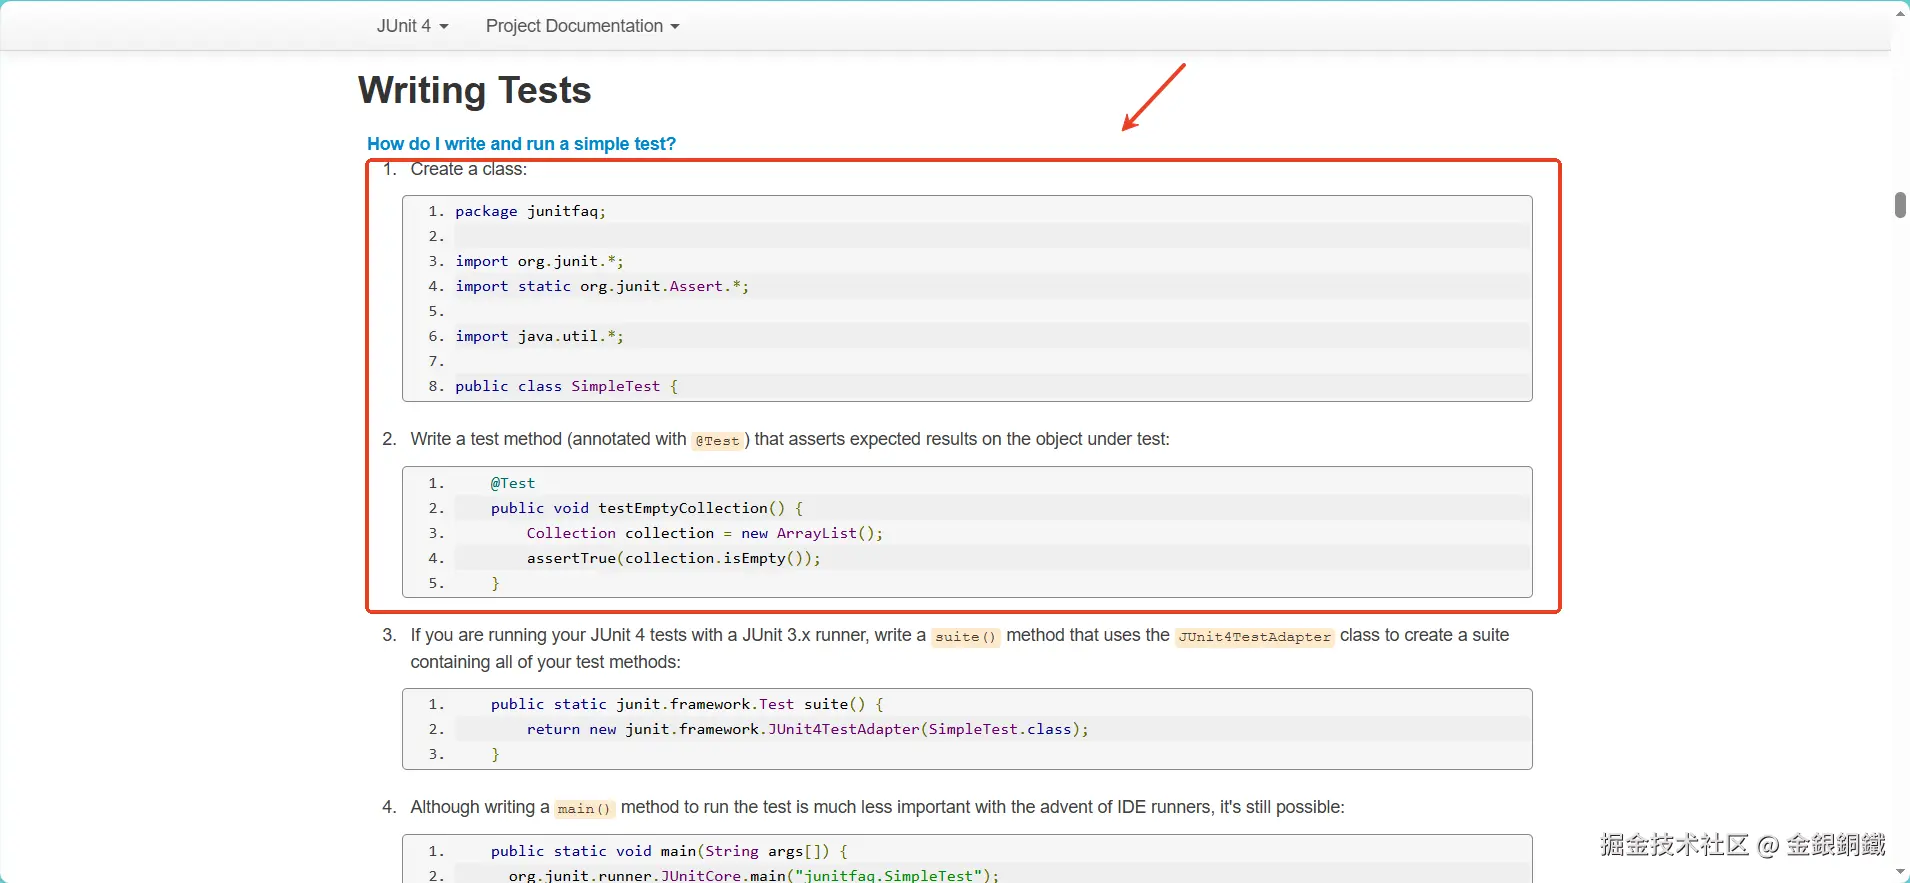
一个简单的测试
这个例子的代码可以整理为 ⬇️ (我把 package 语句删掉了)
java
import org.junit.*;
import static org.junit.Assert.*;
import java.util.*;

public class SimpleTest {
    @Test
    public void testEmptyCollection() {
        Collection collection = new ArrayList();
        assertTrue(collection.isEmpty());
    }
}
请将以上代码保存为 SimpleTest.java。用以下命令可以编译 SimpleTest.java(问题 1 提到了如何 如何下载 JUnit 4 ,请将下载好的 jar 包移动到当前目录之后再执行下方的命令)
bash
javac -cp junit-4.13.2.jar SimpleTest.java编译成功后,应该可以看到 SimpleTest.class 文件。再执行以下命令就可以运行 SimpleTest 里的单元测试了(我是在 Mac 电脑上执行的,如果您的电脑是其他系统,可能需要调整 -cp 选项里的分隔符)。
bash
java -cp .:junit-4.13.2.jar:hamcrest-core-1.3.jar org.junit.runner.JUnitCore SimpleTest运行结果如下 ⬇️
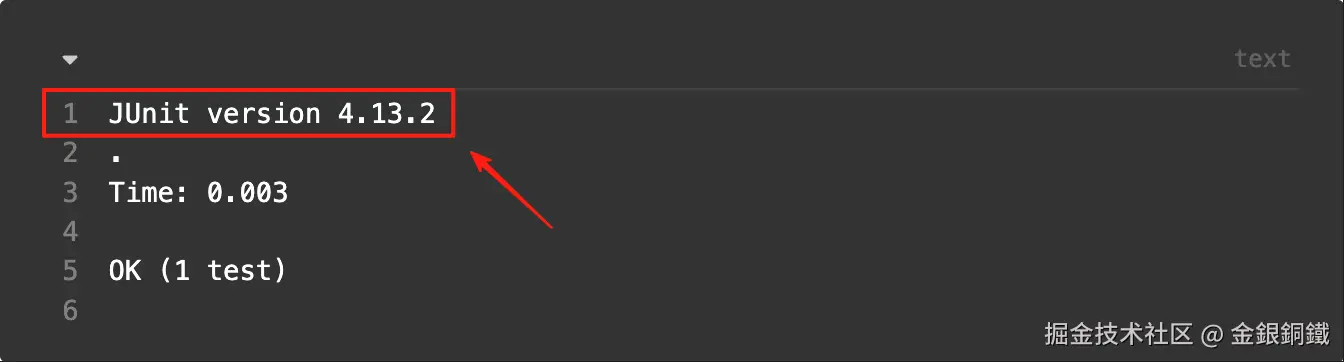
text
JUnit version 4.13.2
.
Time: 0.003

OK (1 test)
我们来看看这些内容是从哪里来的。从 java -cp .:junit-4.13.2.jar:hamcrest-core-1.3.jar org.junit.runner.JUnitCore SimpleTest 这个命令来看,我们会运行 org.junit.runner.JUnitCore 类的 main 方法,而 main 方法的参数是一个数组,这个数组中只有一个元素,即, "SimpleTest" 。我们去看看 org.junit.runner.JUnitCore 这个类 ⬇️
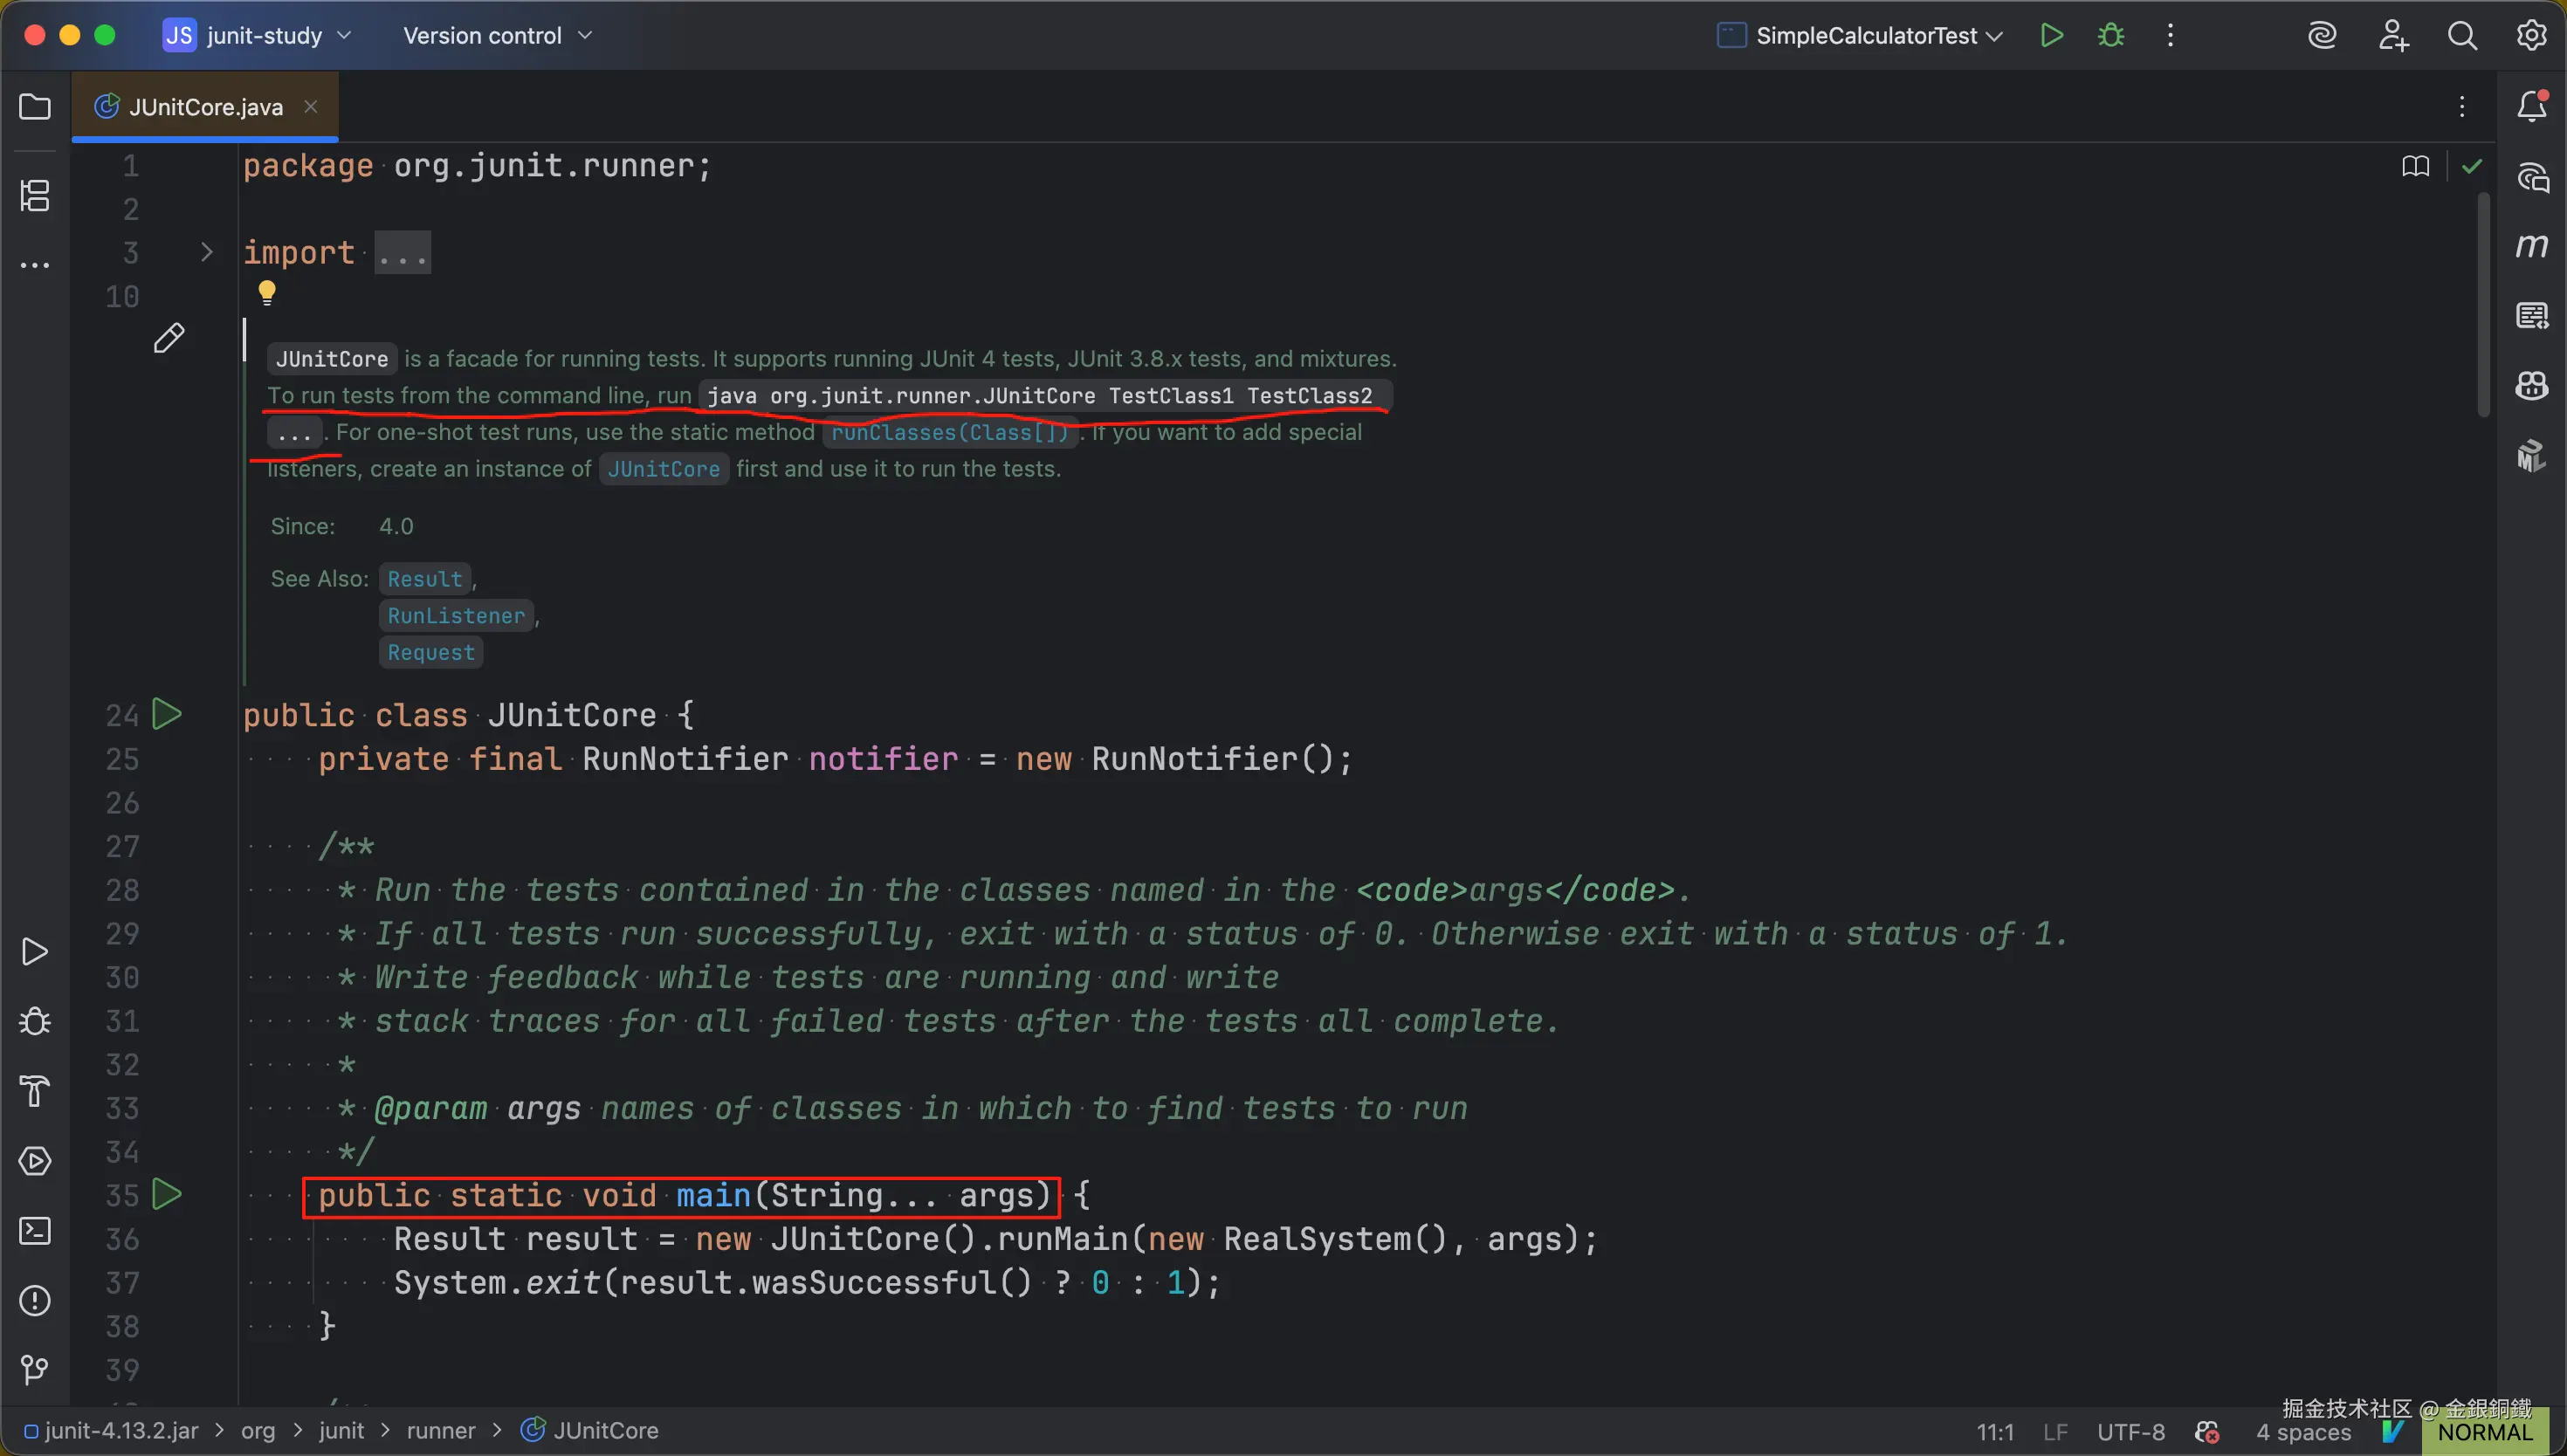
从源代码中确实能找到 main 方法(如上图红框所示)。main 方法中调用了 runMain(...) 方法 ⬇️
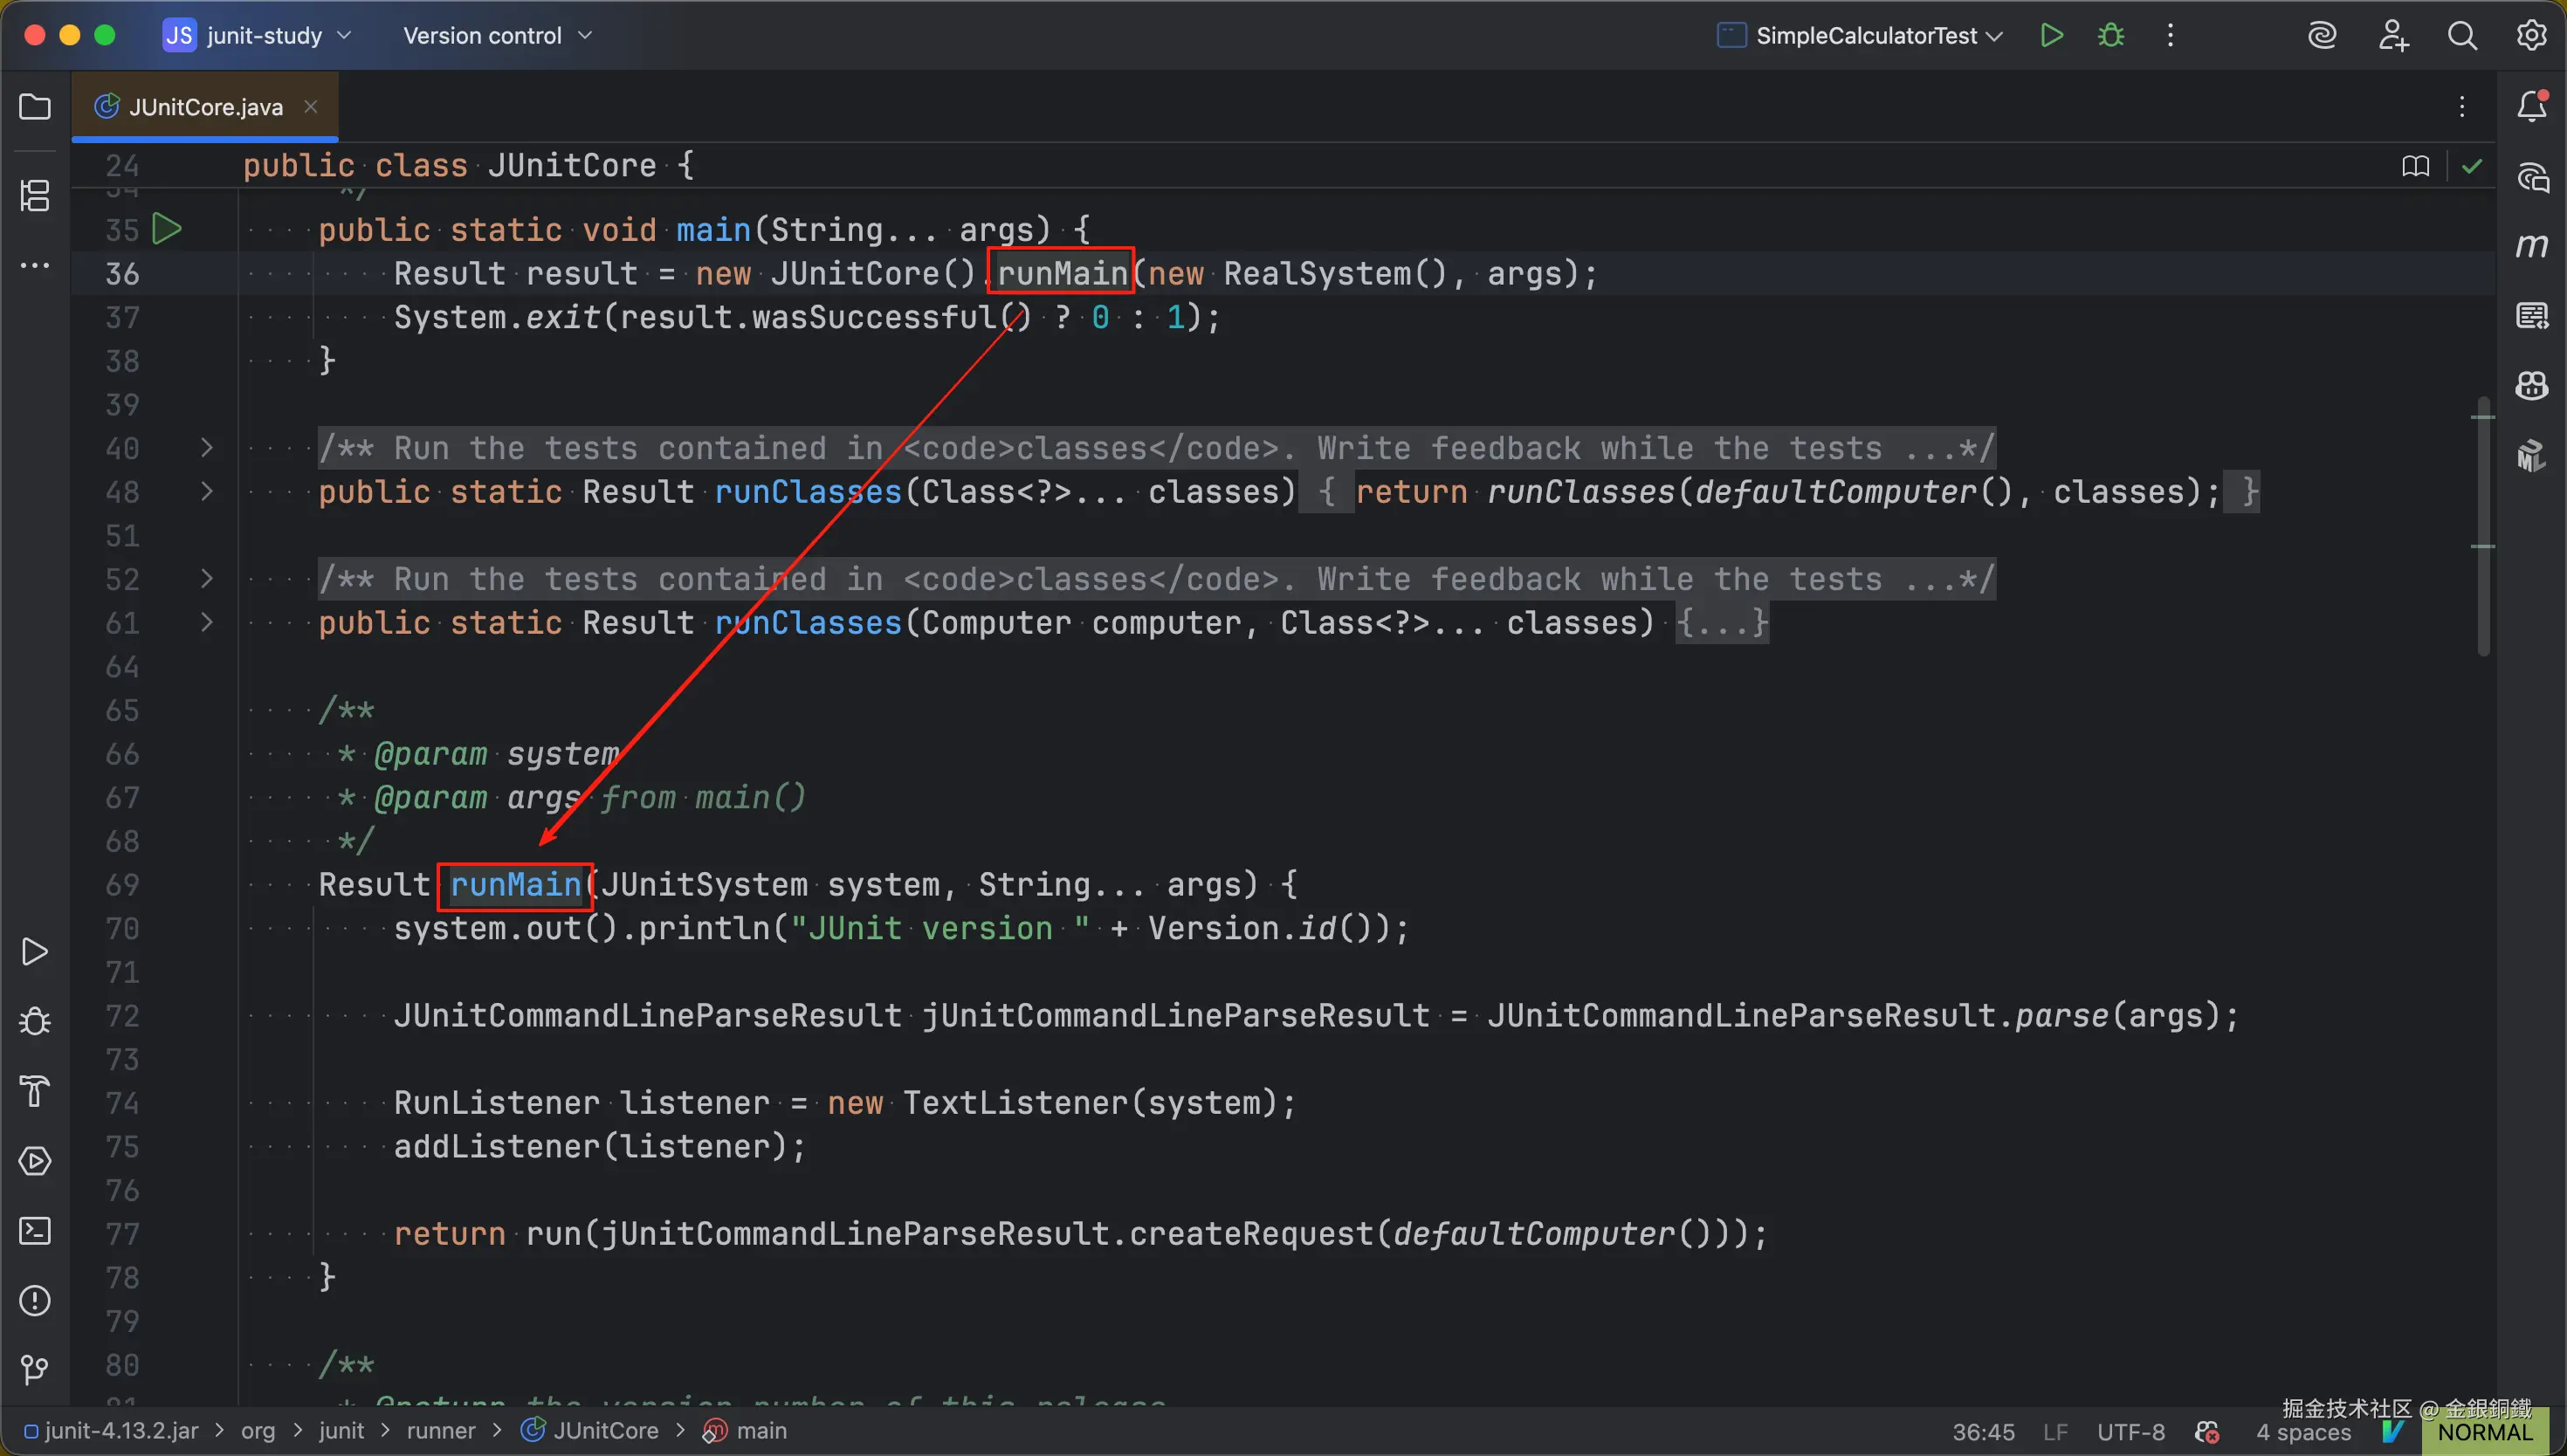
我把 runMain(...) 方法的代码复制到下方了 ⬇️
java
/**
 * @param system
 * @param args from main()
 */
Result runMain(JUnitSystem system, String... args) {
    system.out().println("JUnit version " + Version.id());

    JUnitCommandLineParseResult jUnitCommandLineParseResult = JUnitCommandLineParseResult.parse(args);

    RunListener listener = new TextListener(system);
    addListener(listener);

    return run(jUnitCommandLineParseResult.createRequest(defaultComputer()));
}
runMain(...) 方法
我觉得可以把 runMain(...) 方法的主要逻辑概括为以下几步
- 打印版本号
- 解析命令行参数
- 添加
TextListener - 构造
Runner并运行测试
我们逐个来看。
runMain(...) 方法中的第一步: 打印版本号
system.out() 其实就是 System.out。因为 runMain(...) 方法的入参中的 system 是 org.junit.internal.RealSystem 类的实例,而 RealSystem 的 out() 方法返回的就是 System.out ⬇️

至于 Version.id() 方法,它的返回值是 "4.13.2" ⬇️
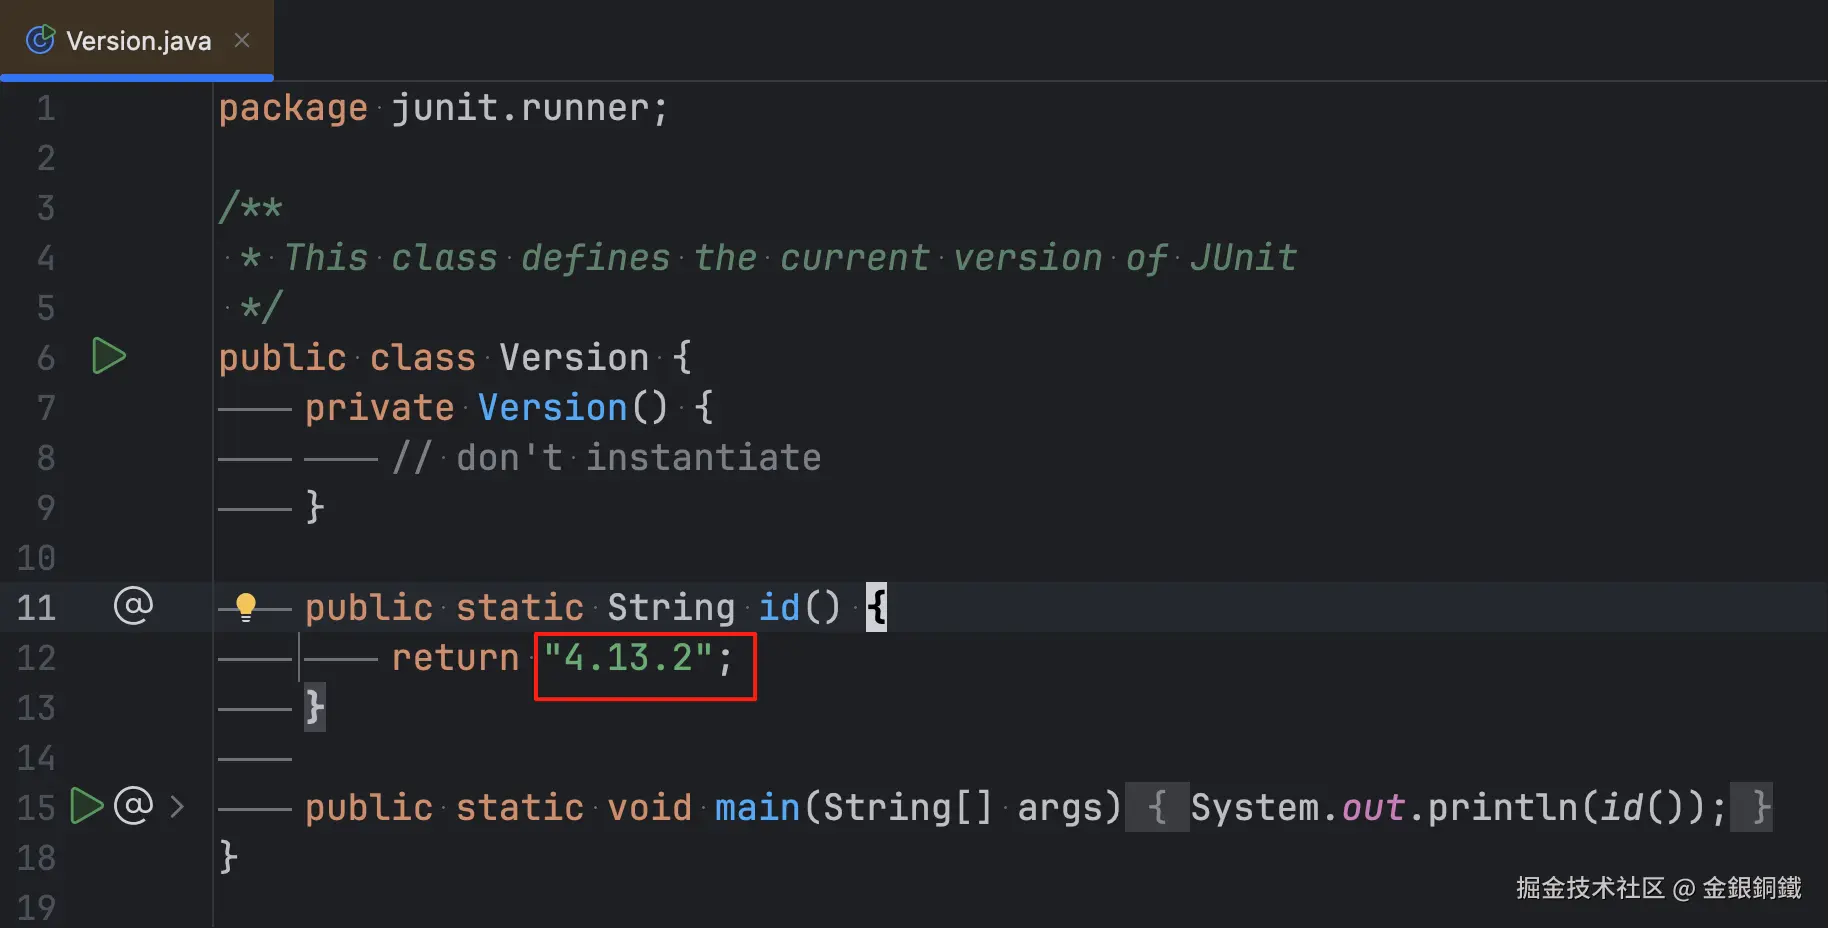
这样,运行结果中的第一行就解释清楚了 ⬇️
runMain(...) 方法中的第二步: 解析命令行参数
我们看一看 org.junit.runner.JUnitCommandLineParseResult 的 parse(String[] args) 方法 ⬇️
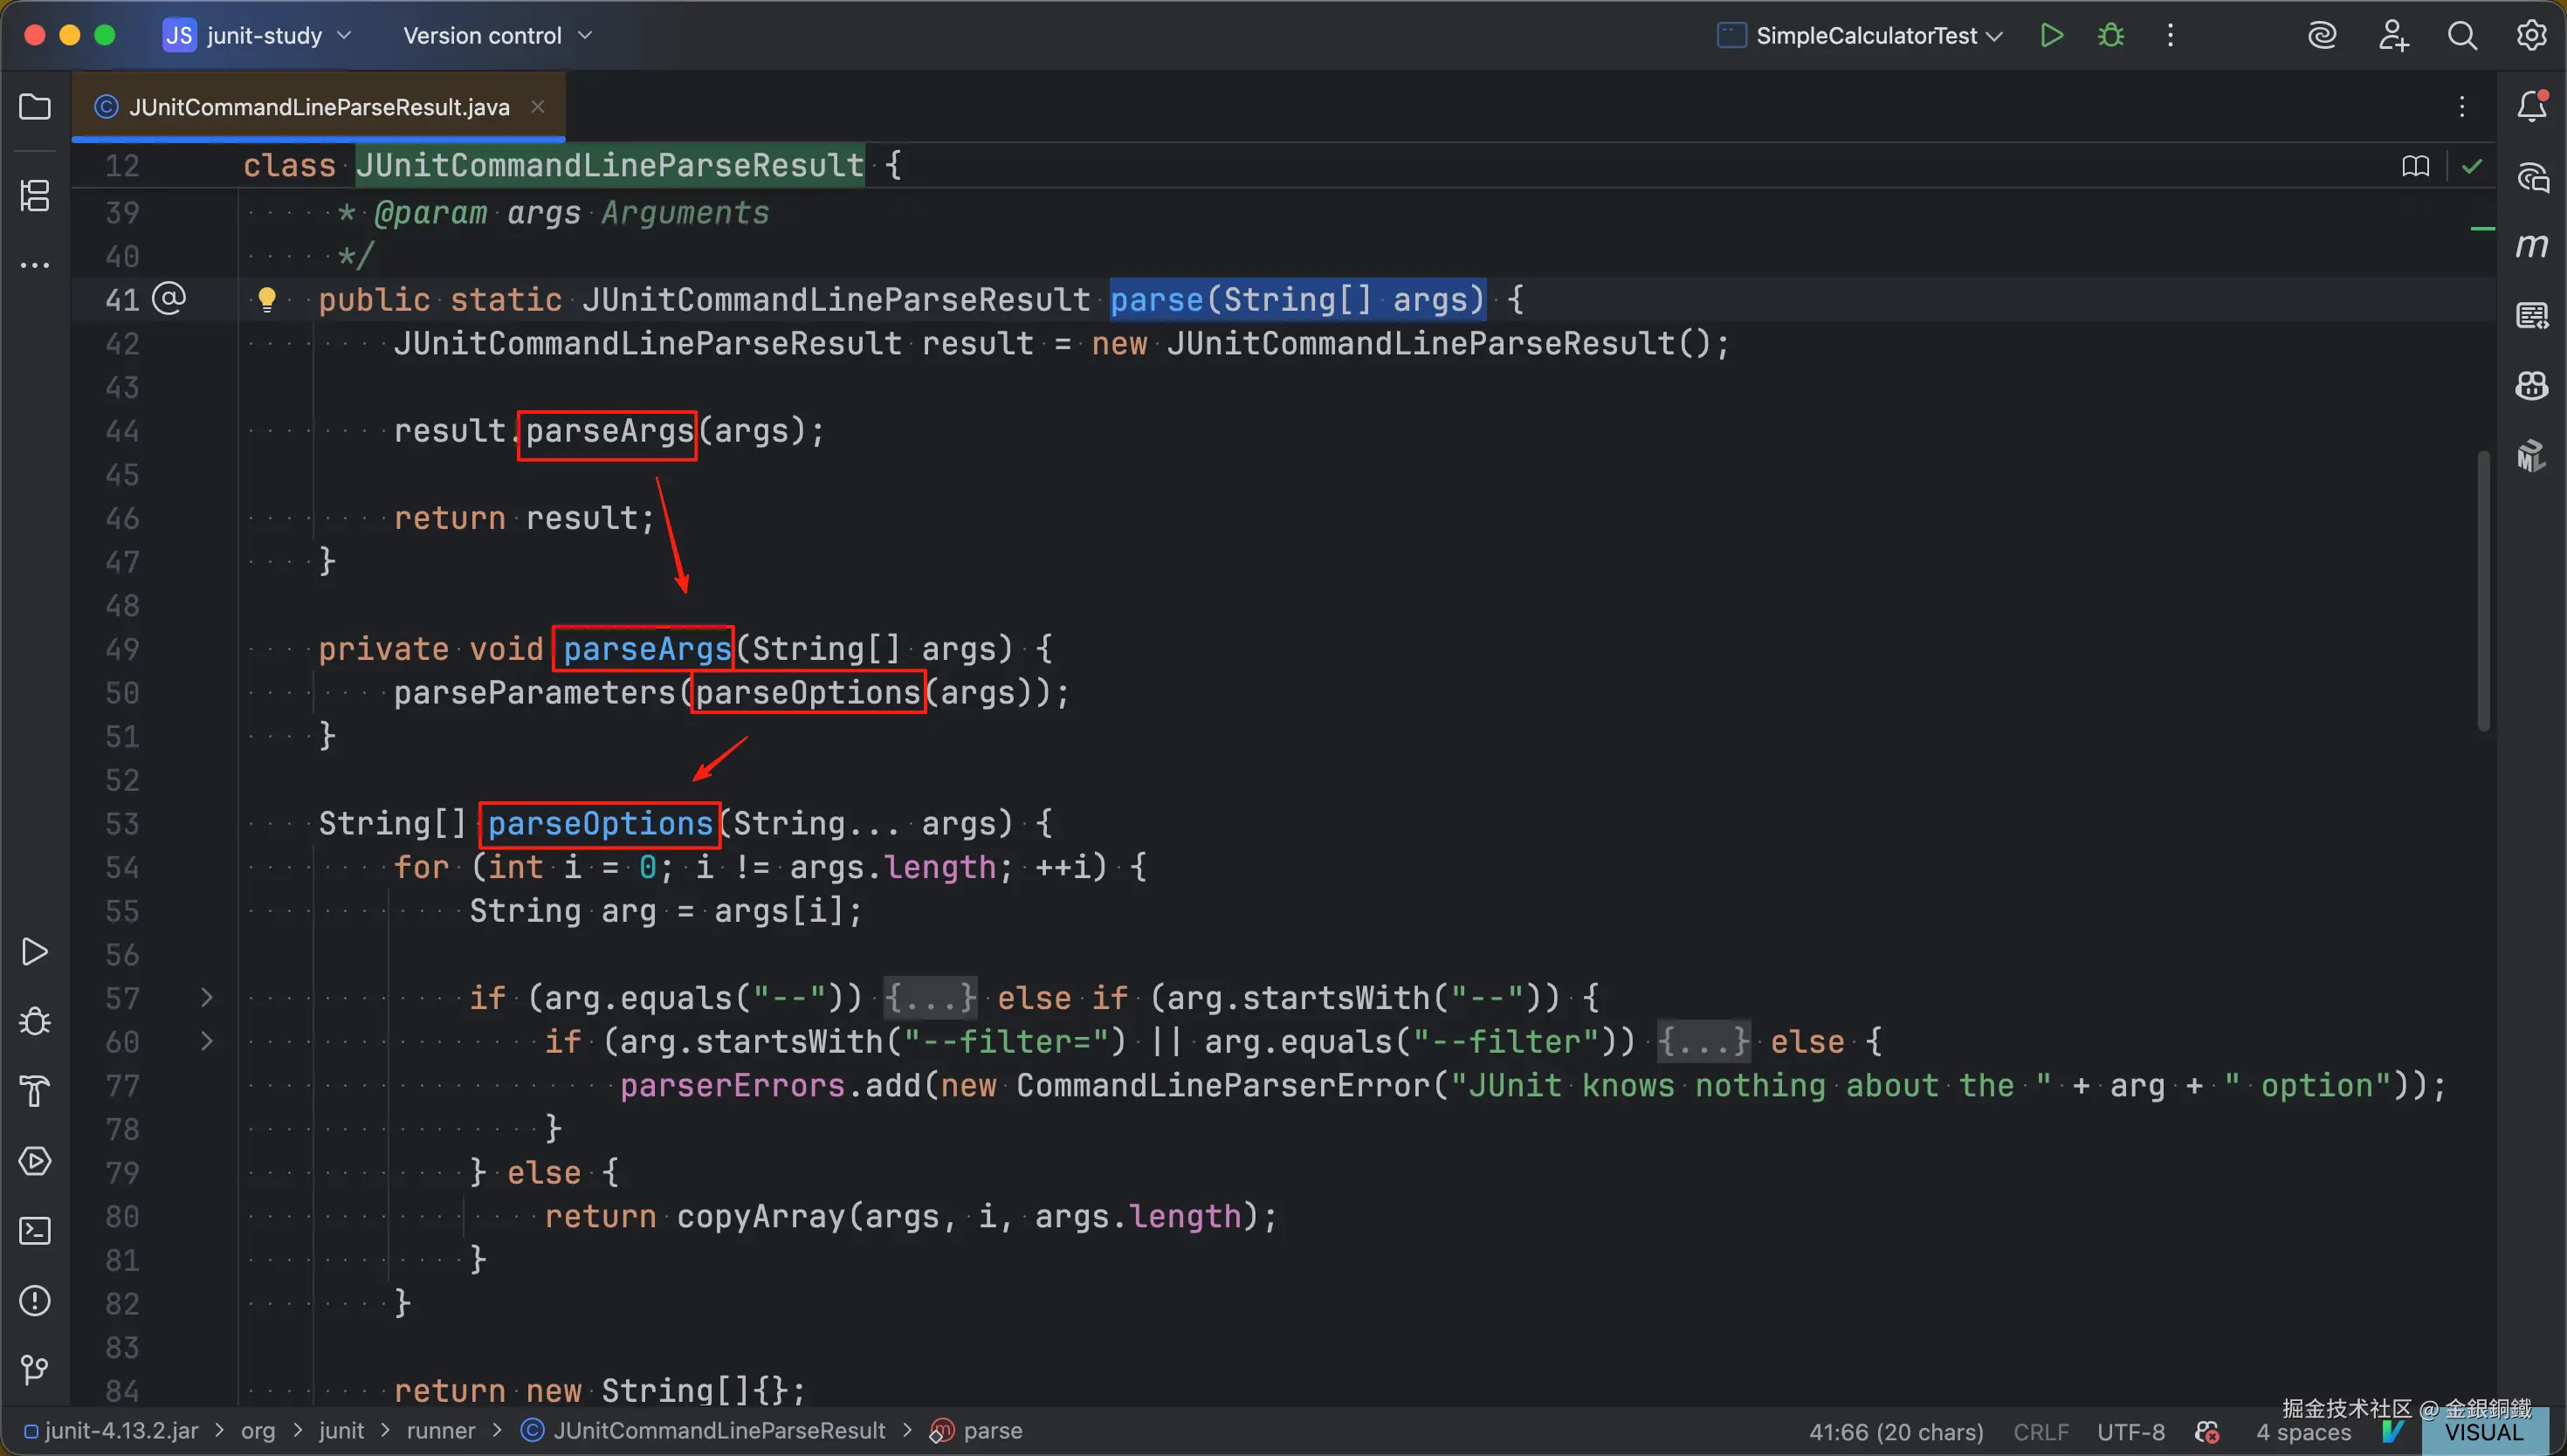
parse(String[] args)方法会调用parseArgs(String[] args)方法parseArgs(String[] args)方法会依次调用parseOptions(String... args)方法parseParameters(String[] args)方法
其中 parseOptions(String... args) 方法看起来可以处理以下三种选项。
----filter=xxx--filter
不过我没有搜索到关于这三个选项的介绍文档,加之我们的这些小例子里用不到这些选项,所以 parseOptions(String... args) 方法里的逻辑我们就不细看了(可以简单认为这个方法在处理命令行参数里的选项部分)。
至于 parseParameters(String[] args) 方法,它的代码只有几行,我复制到下方了 ⬇️
java
void parseParameters(String[] args) {
    for (String arg : args) {
        try {
            classes.add(Classes.getClass(arg));
        } catch (ClassNotFoundException e) {
            parserErrors.add(new IllegalArgumentException("Could not find class [" + arg + "]", e));
        }
    }
}
它会把命令行传过来的各个类名转化为对应的 class 对象。
以 java -cp .:junit-4.13.2.jar:hamcrest-core-1.3.jar org.junit.runner.JUnitCore SimpleTest 这个命令为例,parseParameters(String[] args) 方法会把 "SimpleTest" 转化为 SimpleTest.class
runMain(...) 方法中的第三步: 添加 TextListener
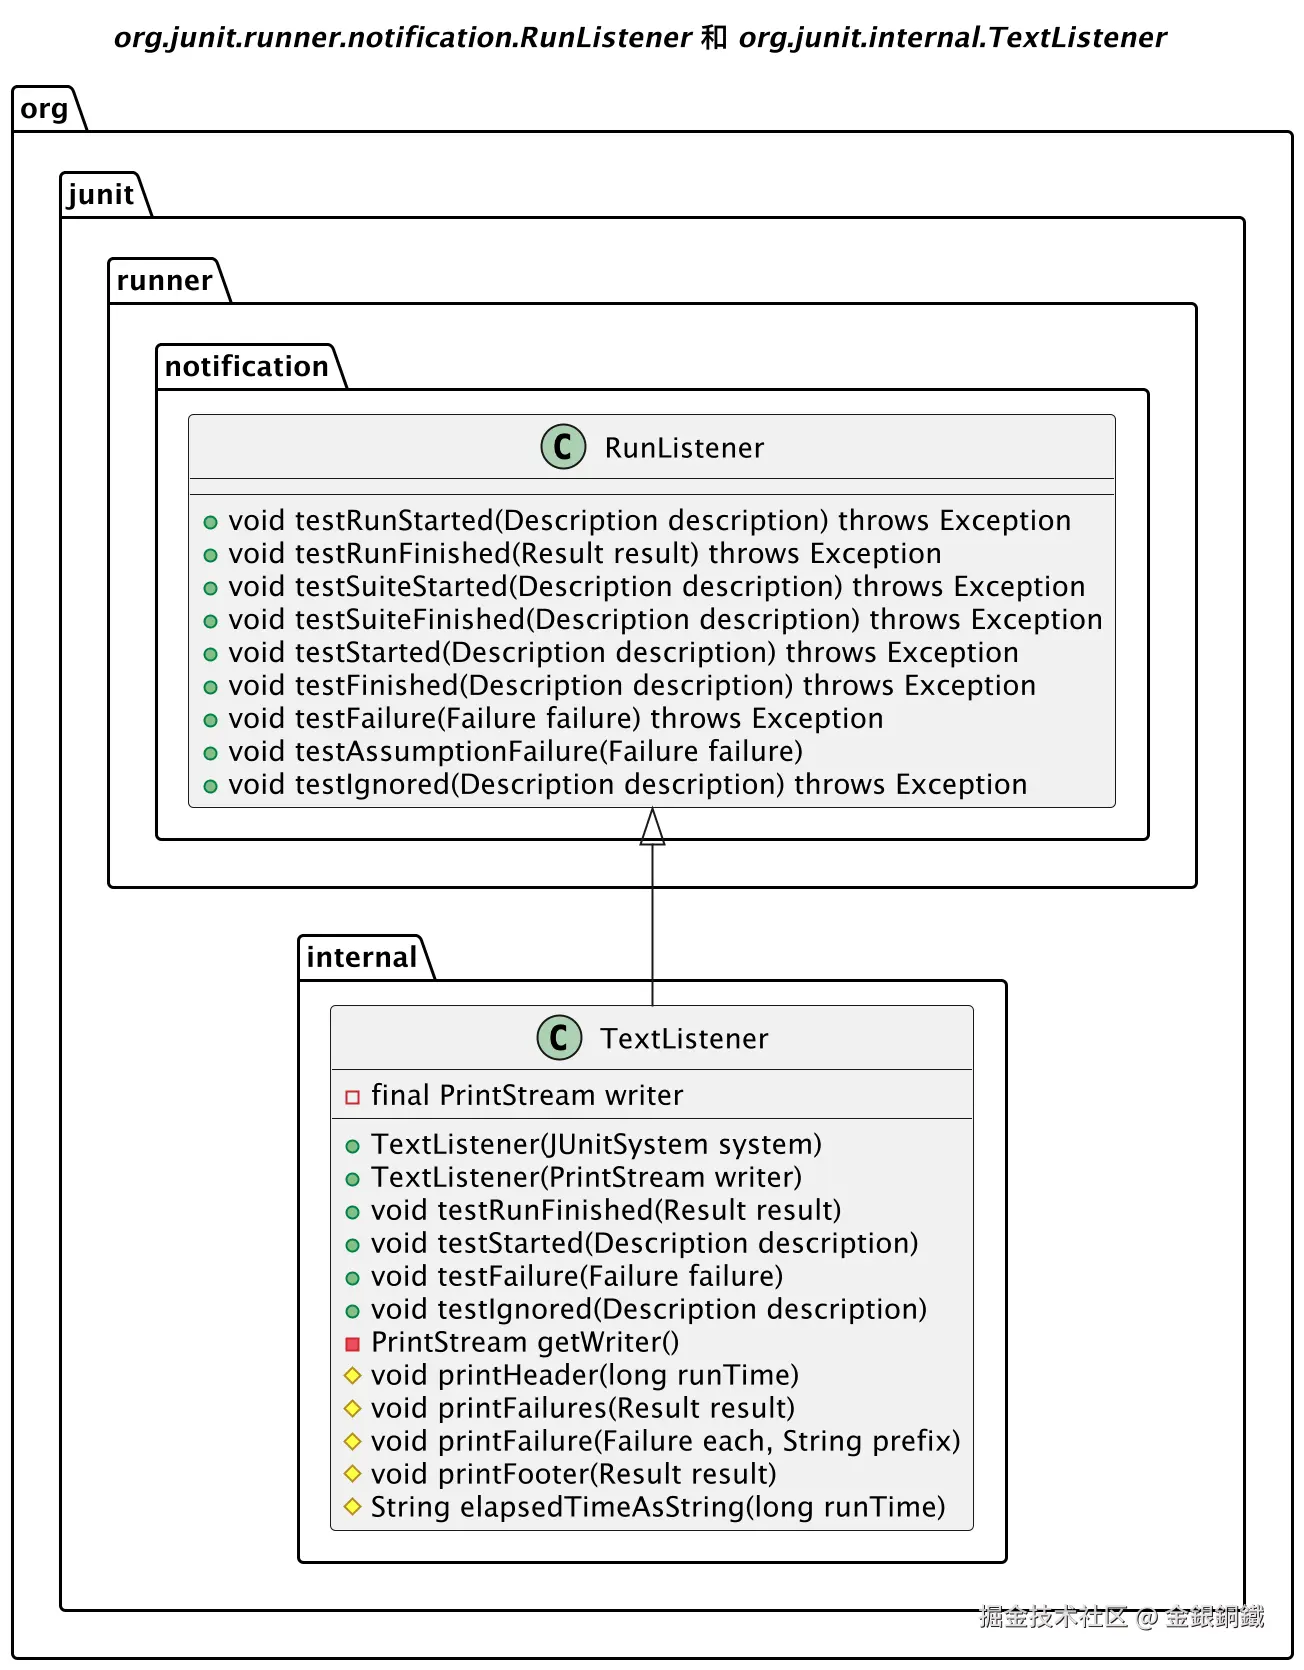
org.junit.internal.TextListener 继承了 org.junit.runner.notification.RunListener
两者的类图如下 ⬇️
在 org.junit.runner.notification.RunListener 的 javadoc 里可以看到这个类的介绍 ⬇️
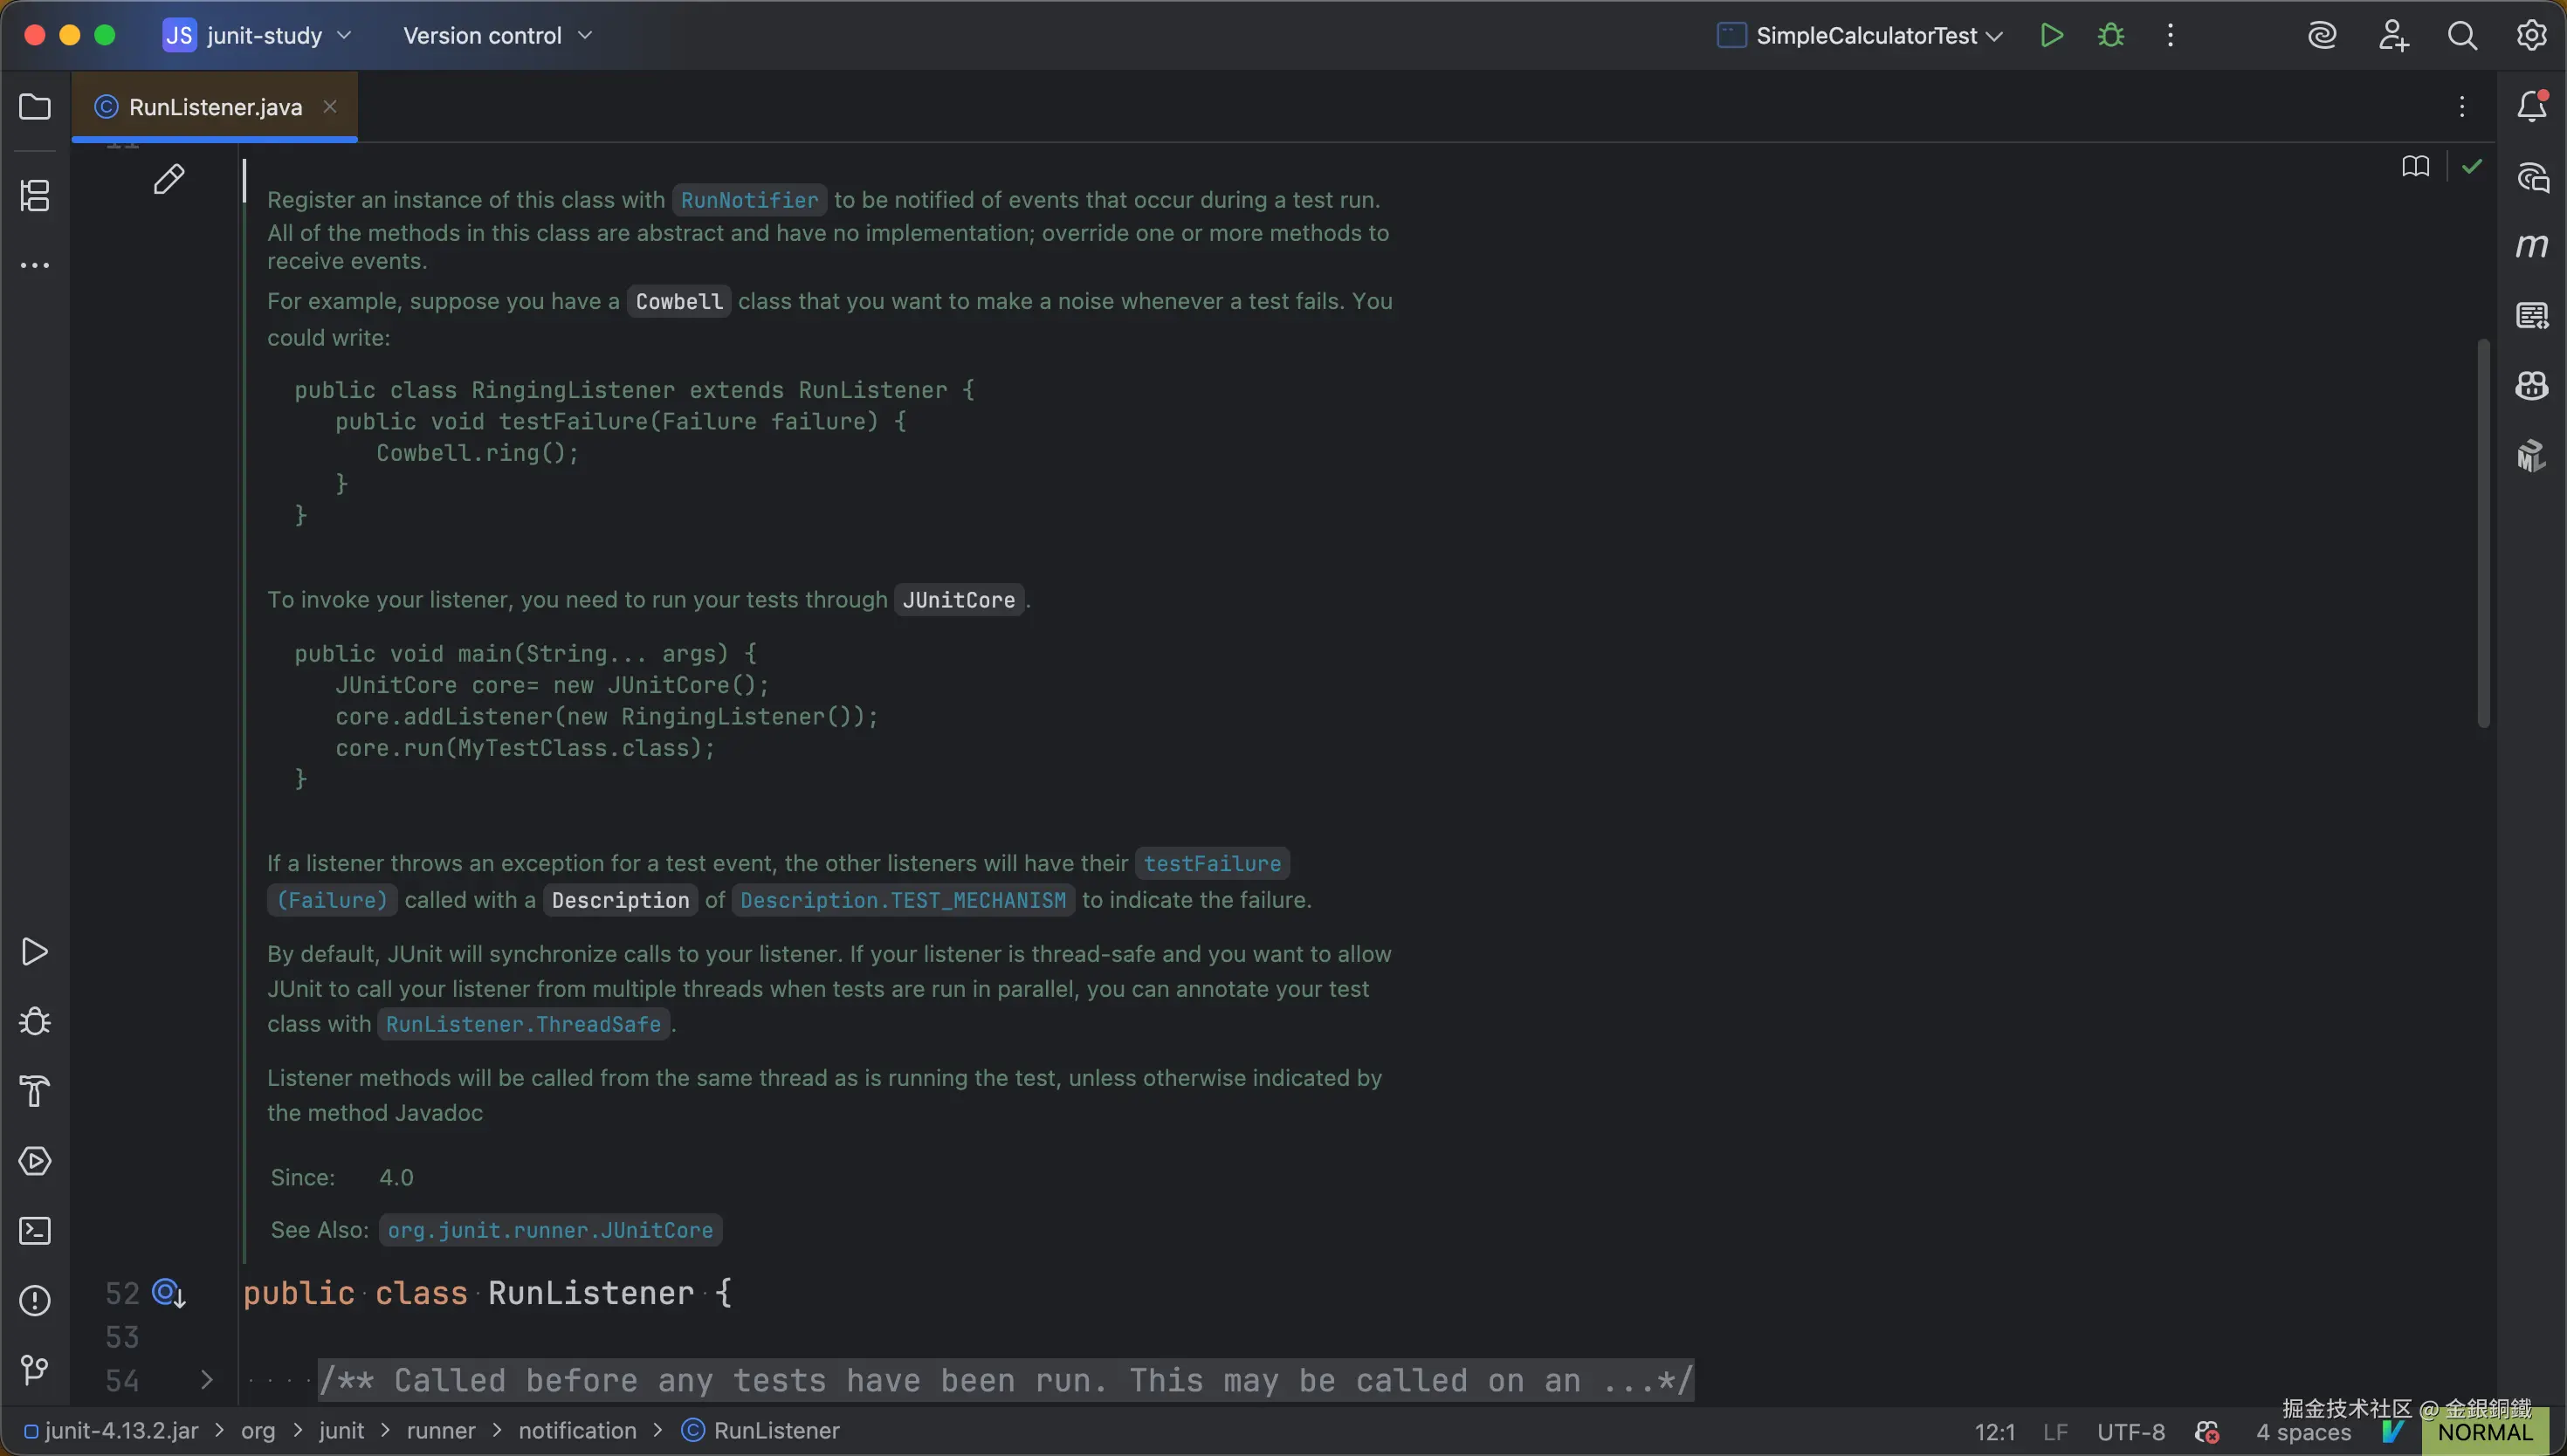
其中第一段的内容如下
Register an instance of this class with RunNotifier to be notified of events that occur during a test run. All of the methods in this class are abstract and have no implementation; override one or more methods to receive events.
我献丑来翻译一下 ⬇️
我们需要将
RunListener的实例注册到RunNotifier,以便在相关事件发生时,收到对应的通知。RunListener类中的所有方法的方法体都是空的,请override其中的若干个,以收到对应的事件。
TextListener override 了 RunListener 中的 4 个方法 ⬇️ 所以在对应的 4 种事件发生时,这 4 个方法会被调用。 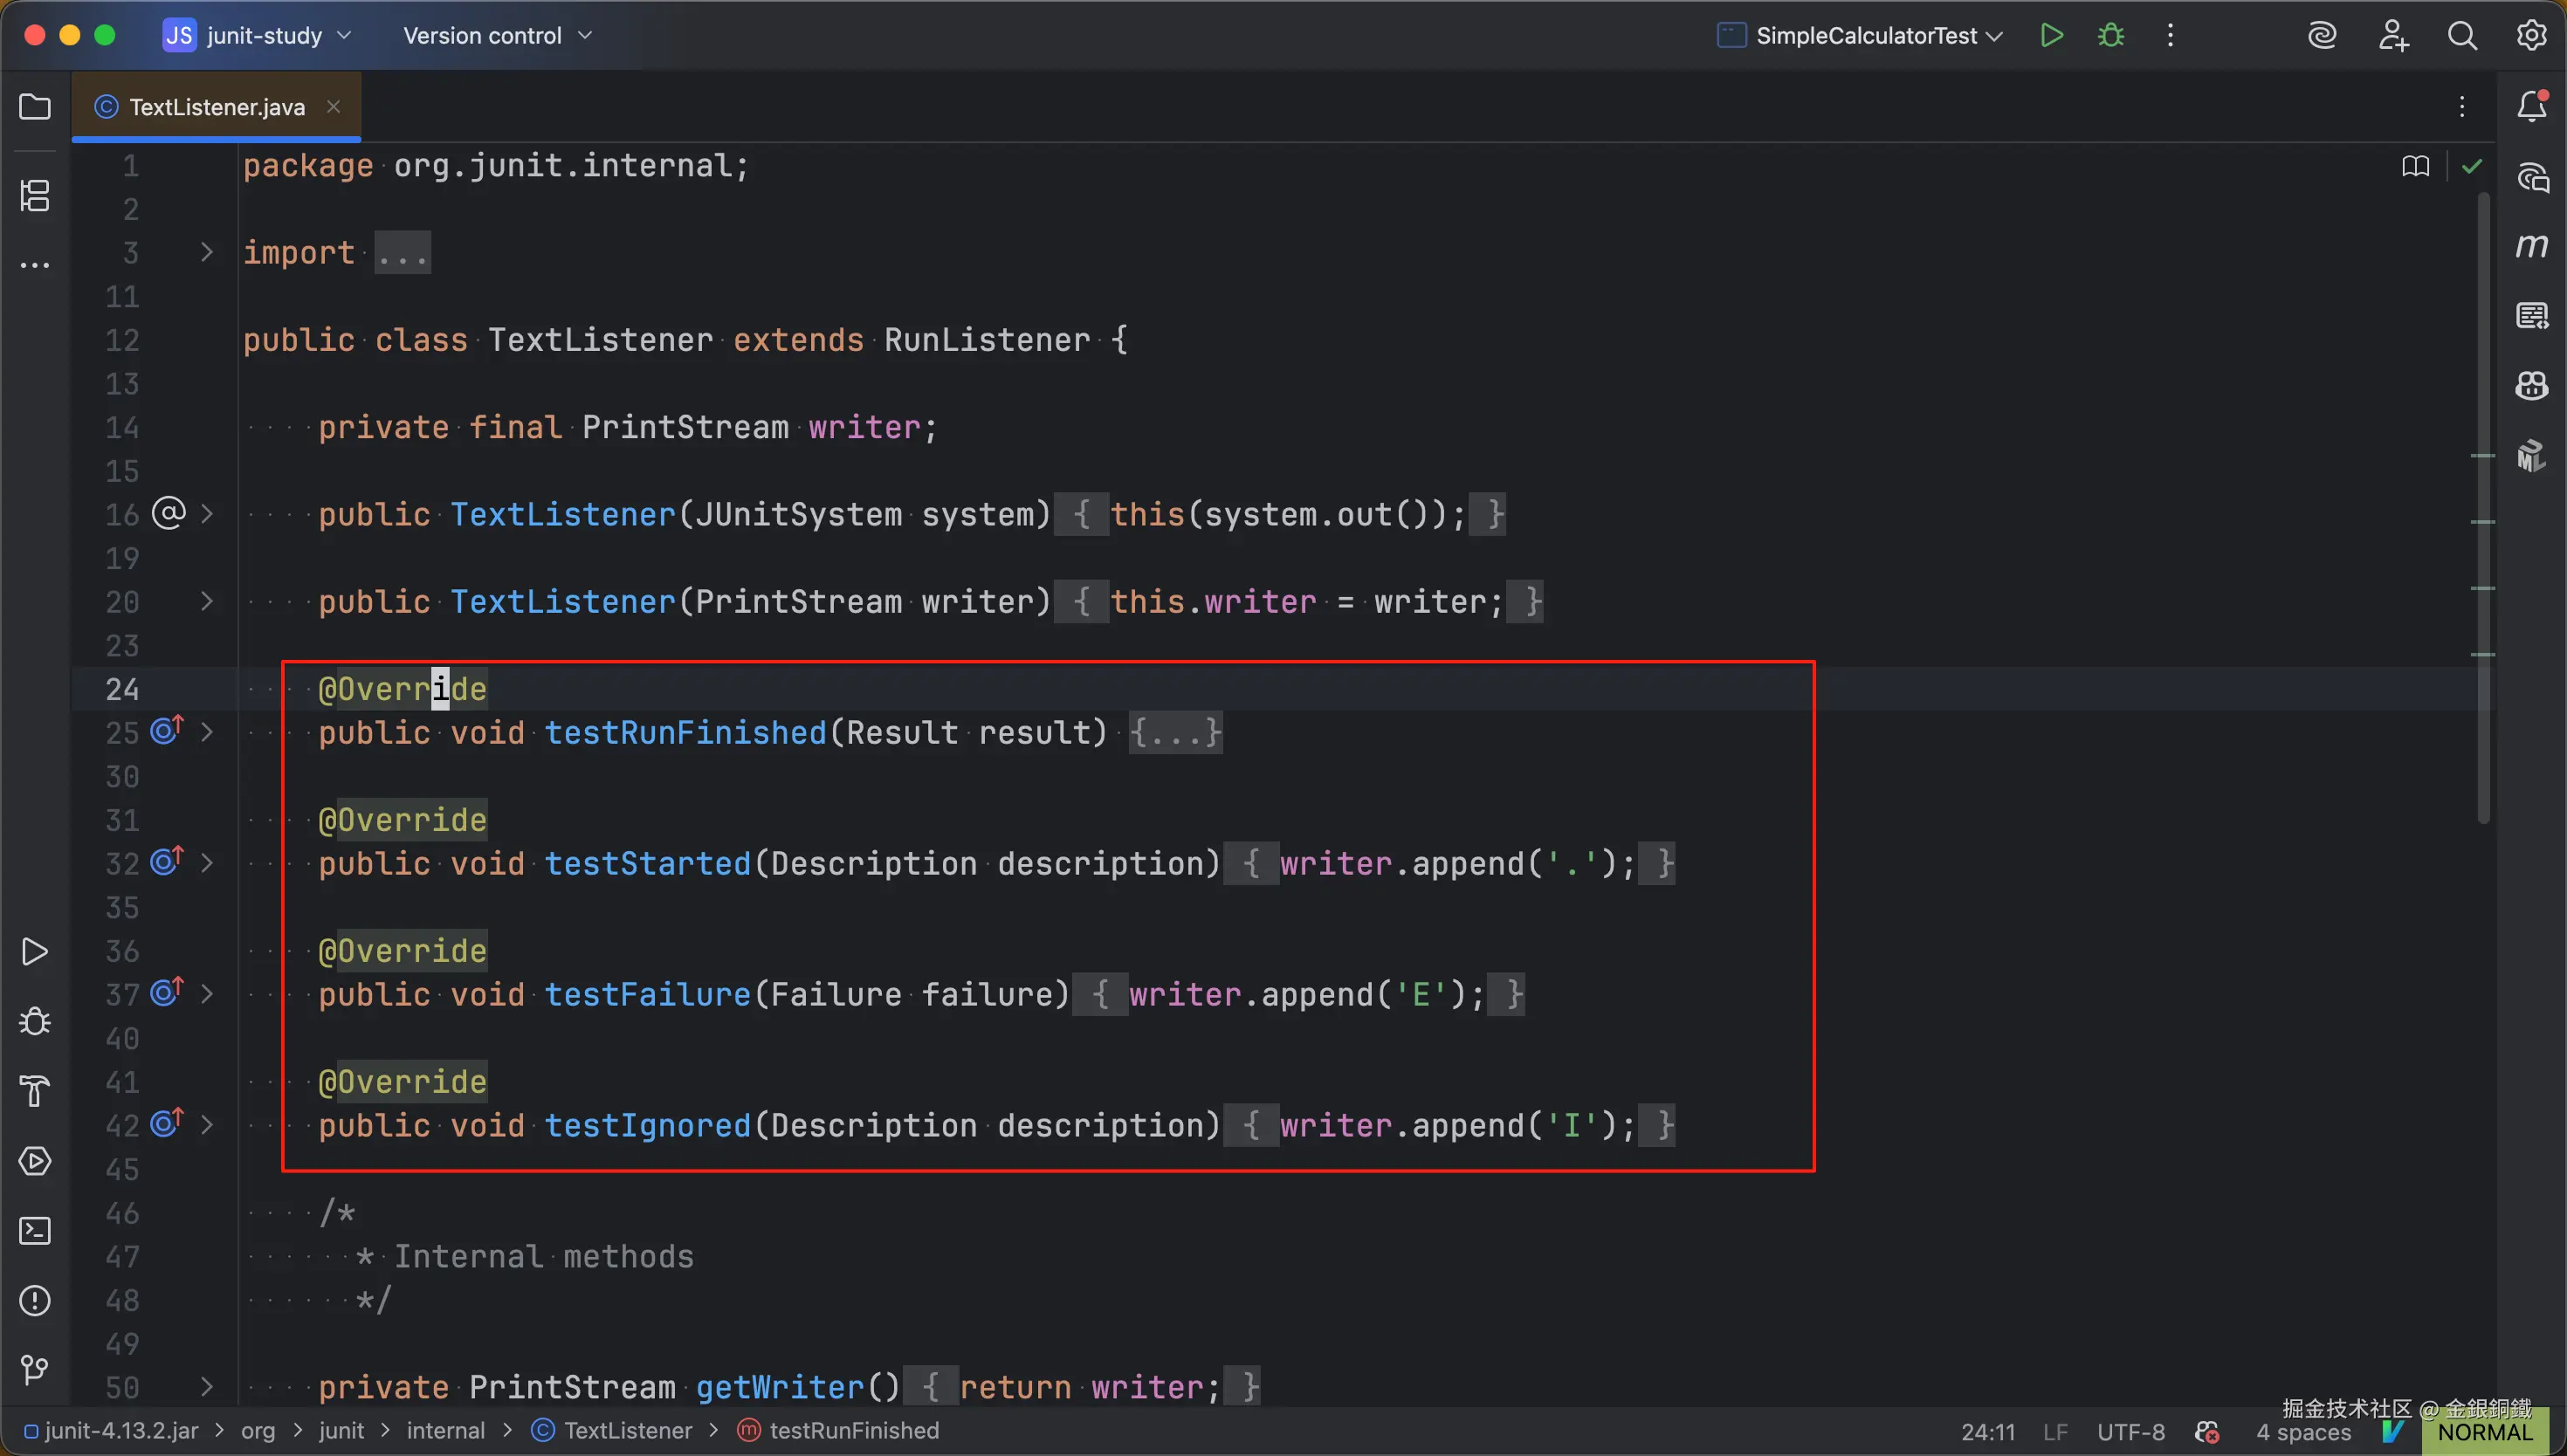
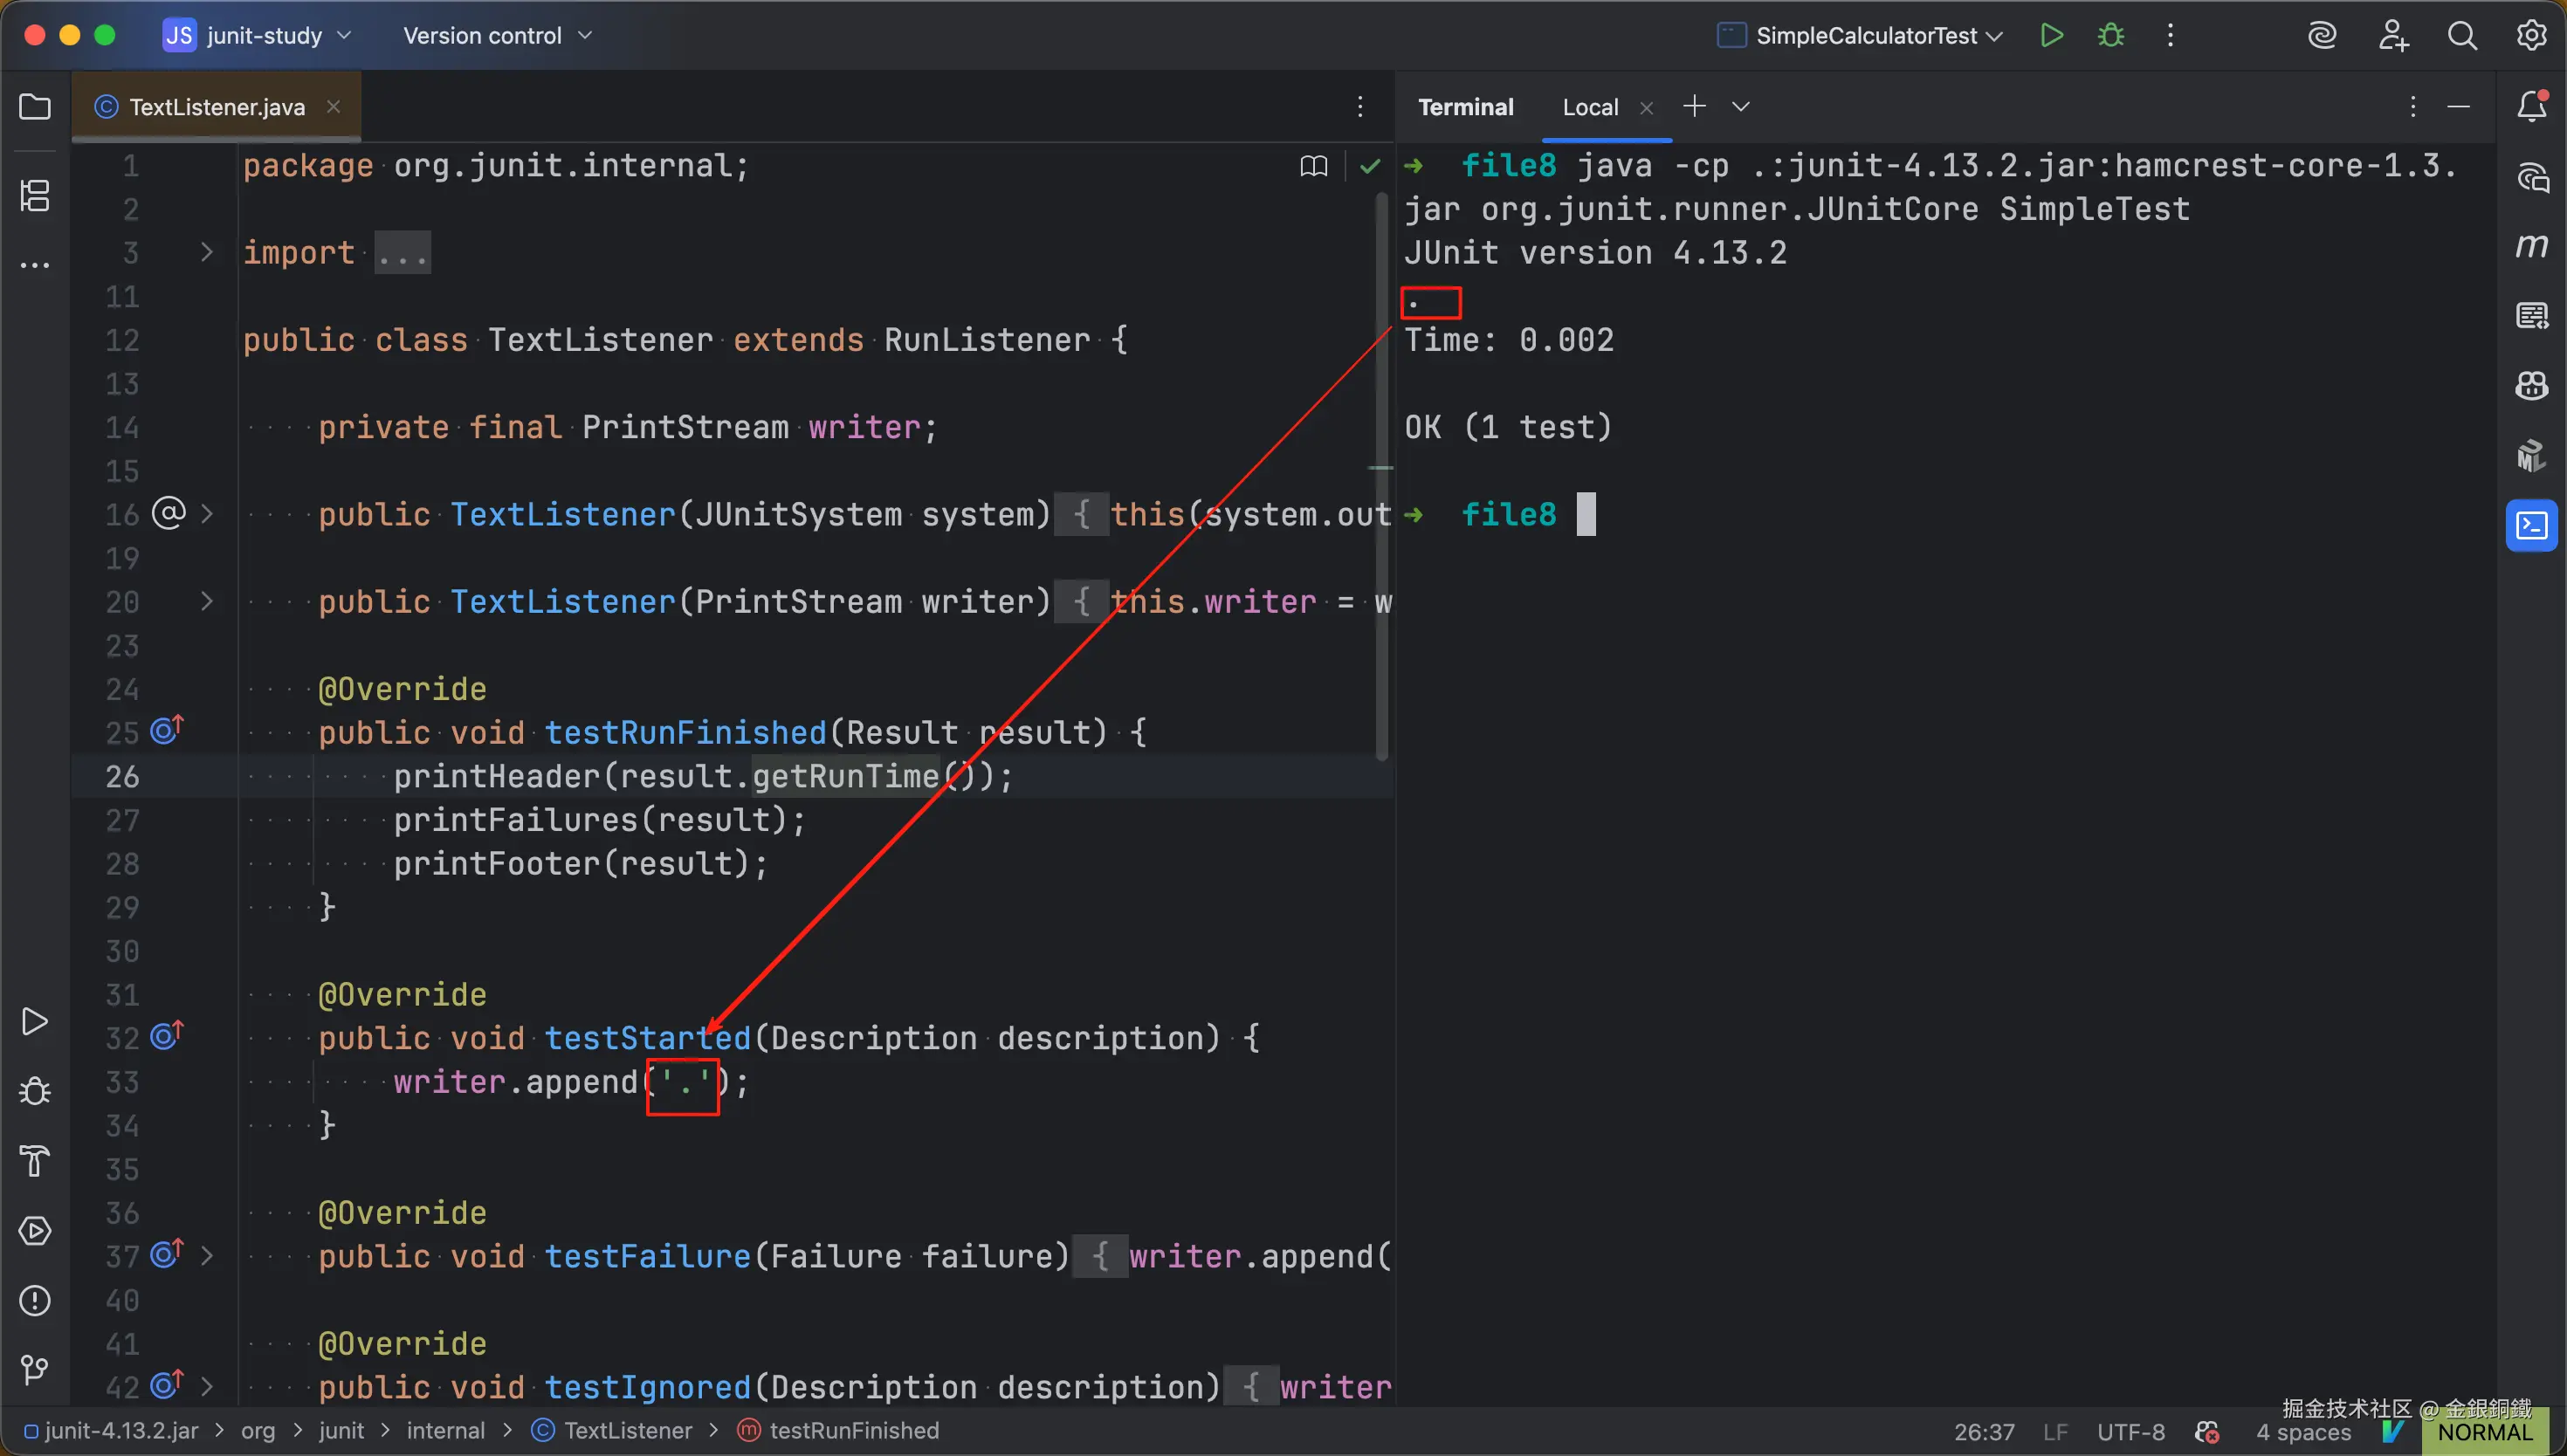
java -cp .:junit-4.13.2.jar:hamcrest-core-1.3.jar org.junit.runner.JUnitCore SimpleTest 这个命令的运行结果中的 . 就来自 testStarted(Description description) 方法(如下图所示 ⬇️)
TextListener 中的 testRunFinished(Result result) 方法包含以下三部分
- 调用
printHeader(long runTime)方法,展示运行耗时 - 调用
printFailures(Result result)方法,展示失败的单元测试的相关信息 - 调用
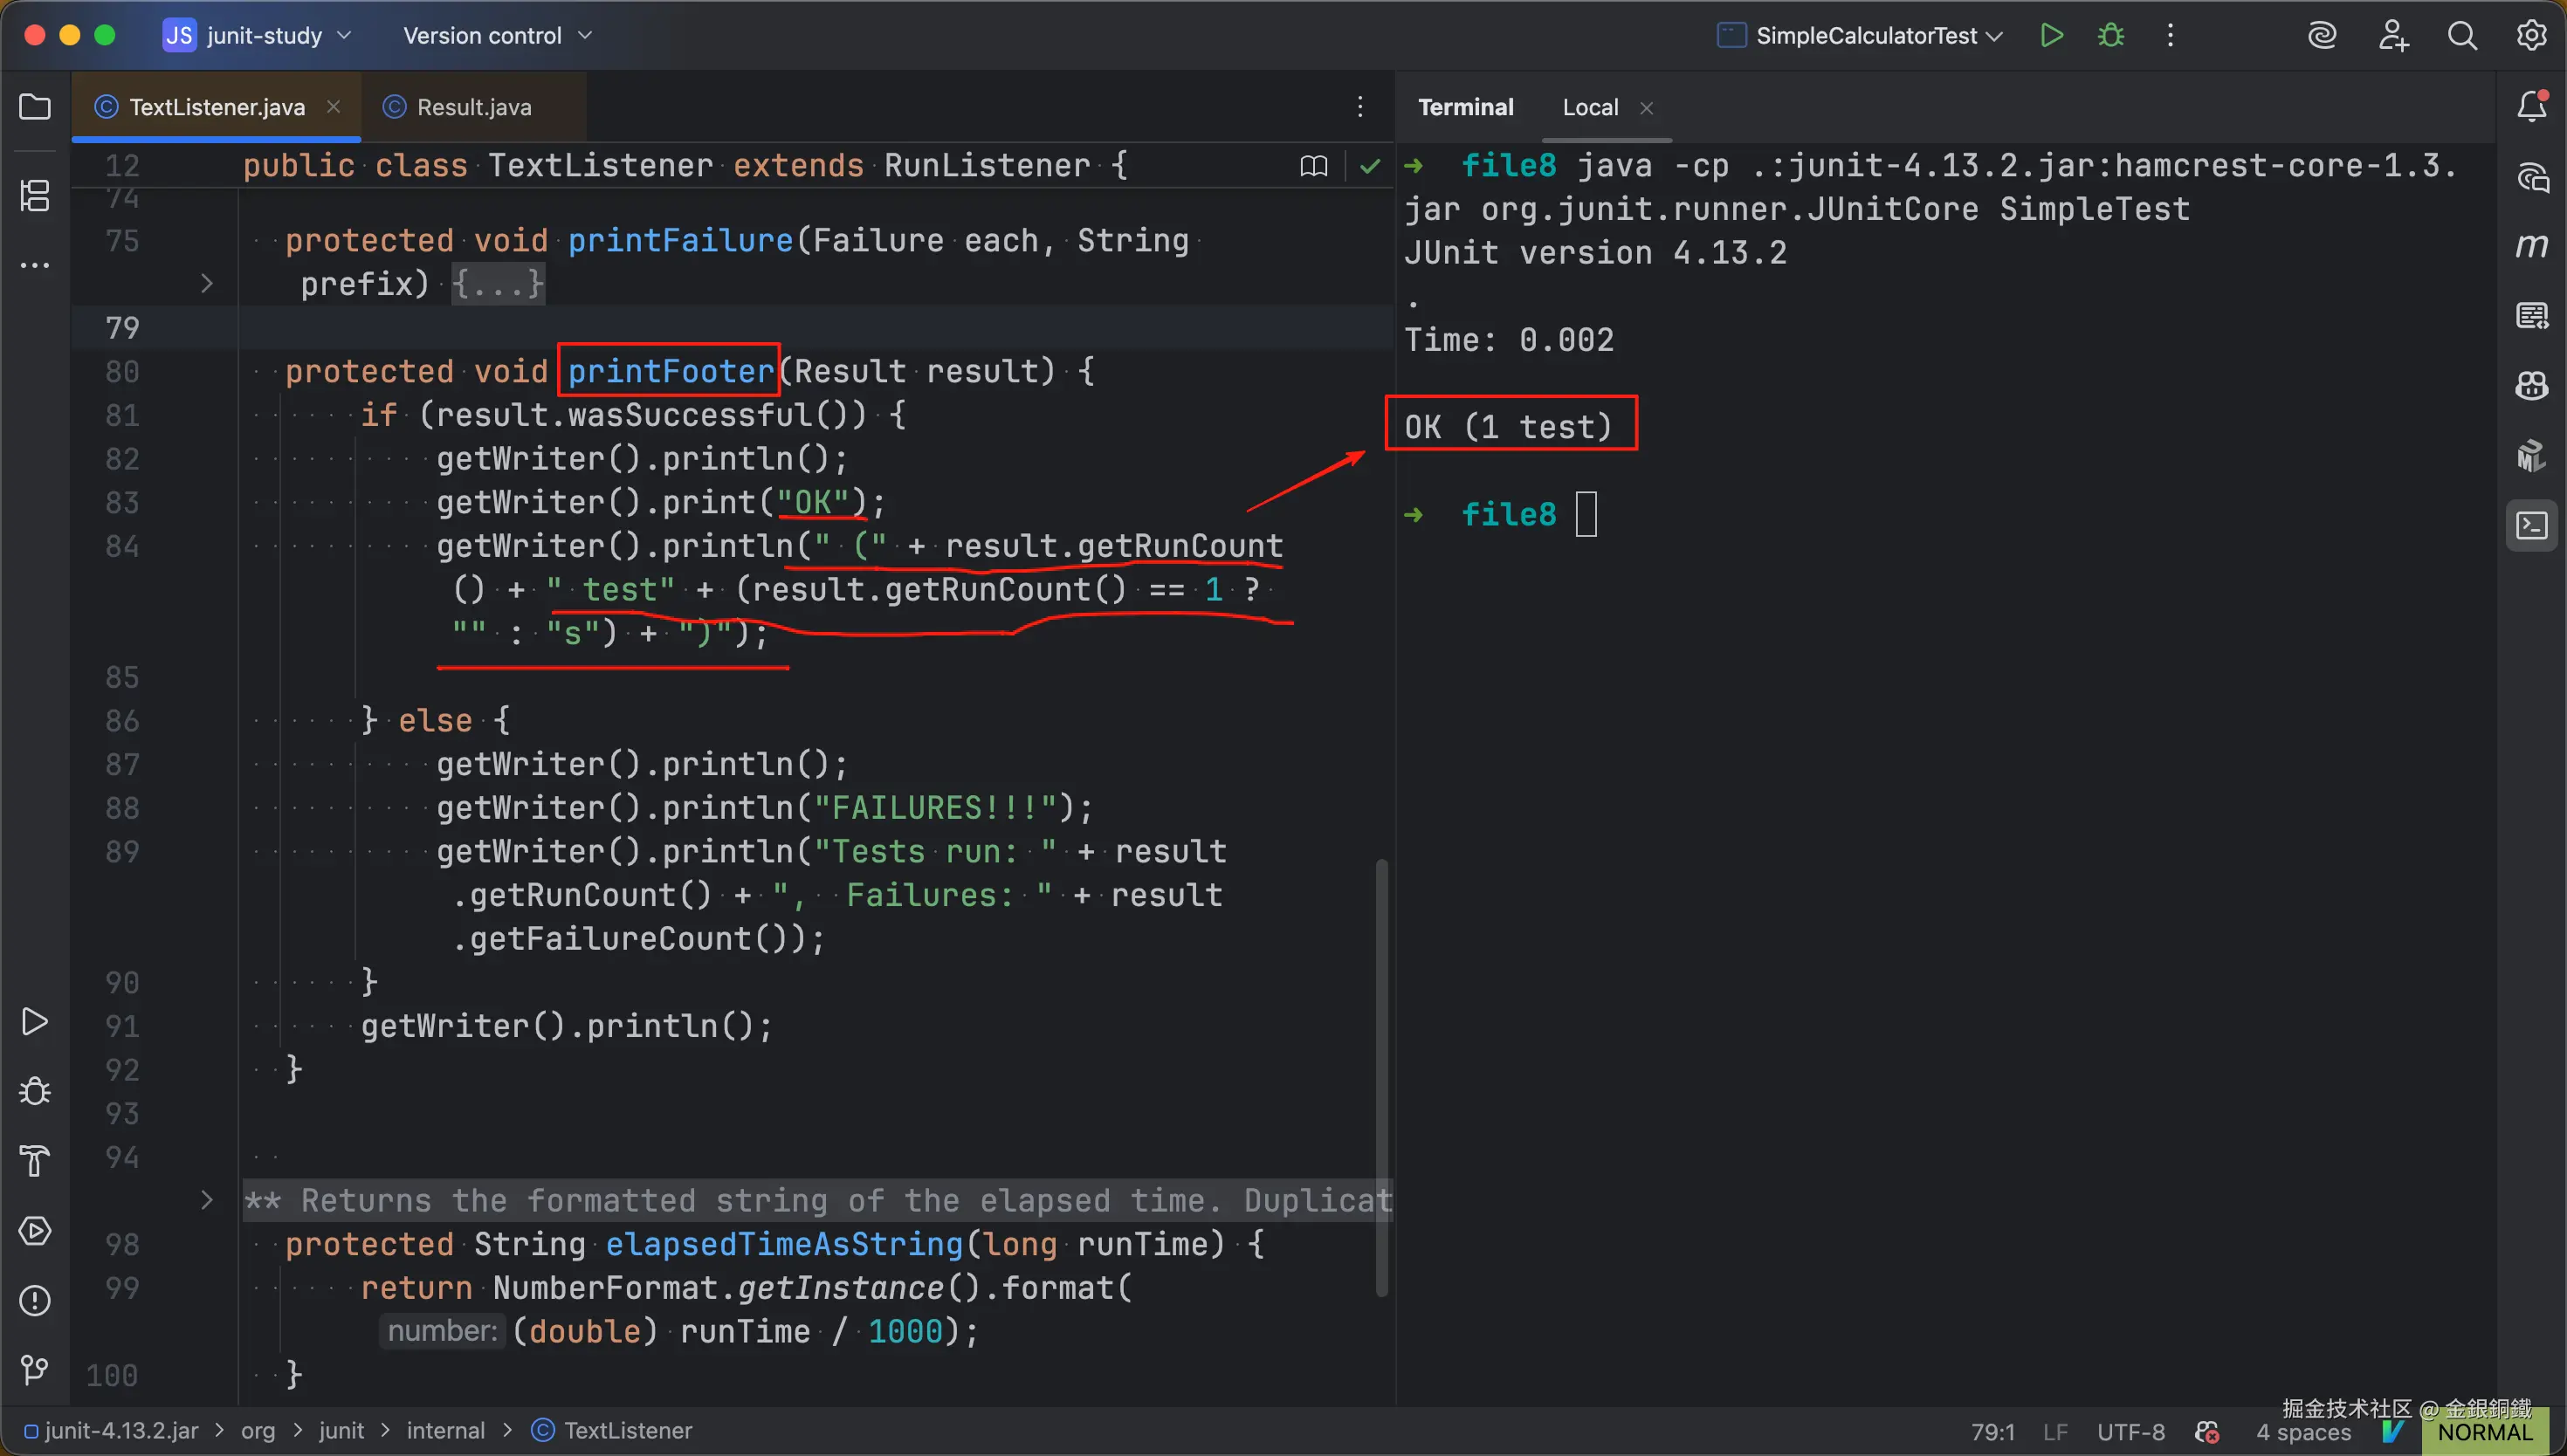
printFooter(Result result)方法,展示单元测试的计数值
printHeader(long runTime) 方法的作用如下图所示 ⬇️ 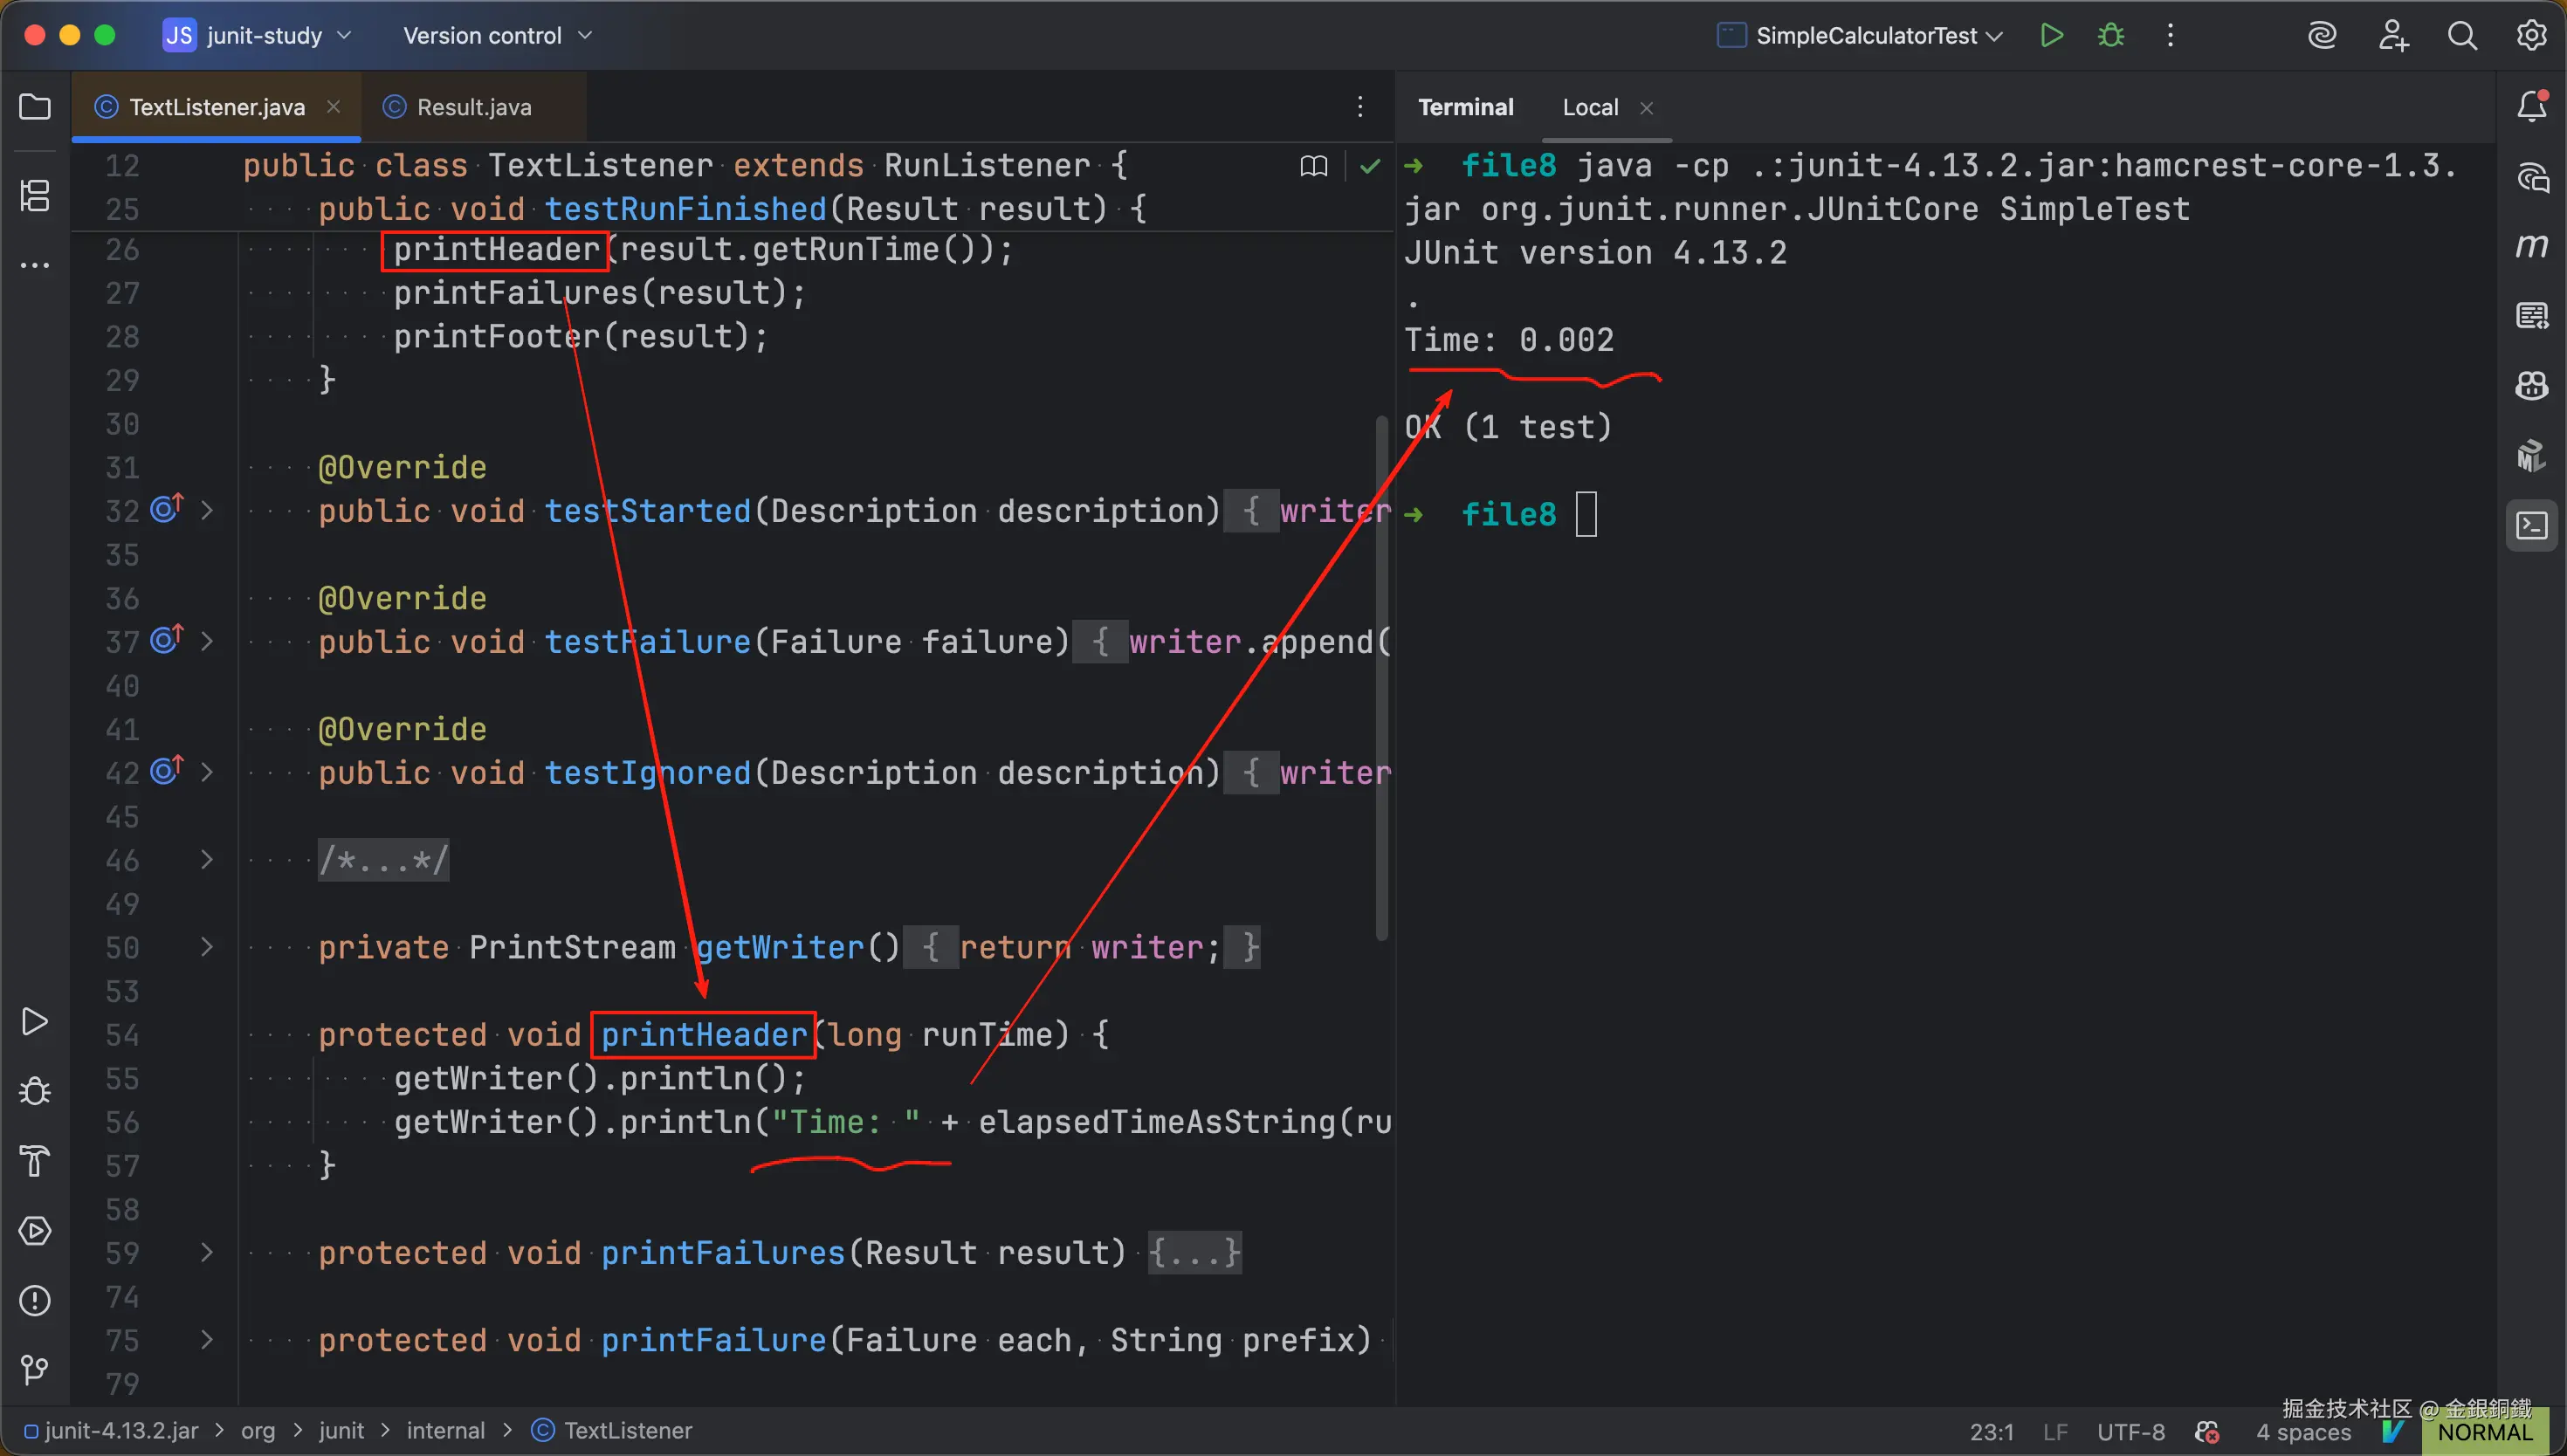
我们这个例子里没有失败的单元测试,所以就不看 printFailures(Result result) 方法了。
printFooter(Result result) 方法的作用如下图所示 ⬇️
runMain(...) 方法中的第四步: 构造 Runner 并运行测试
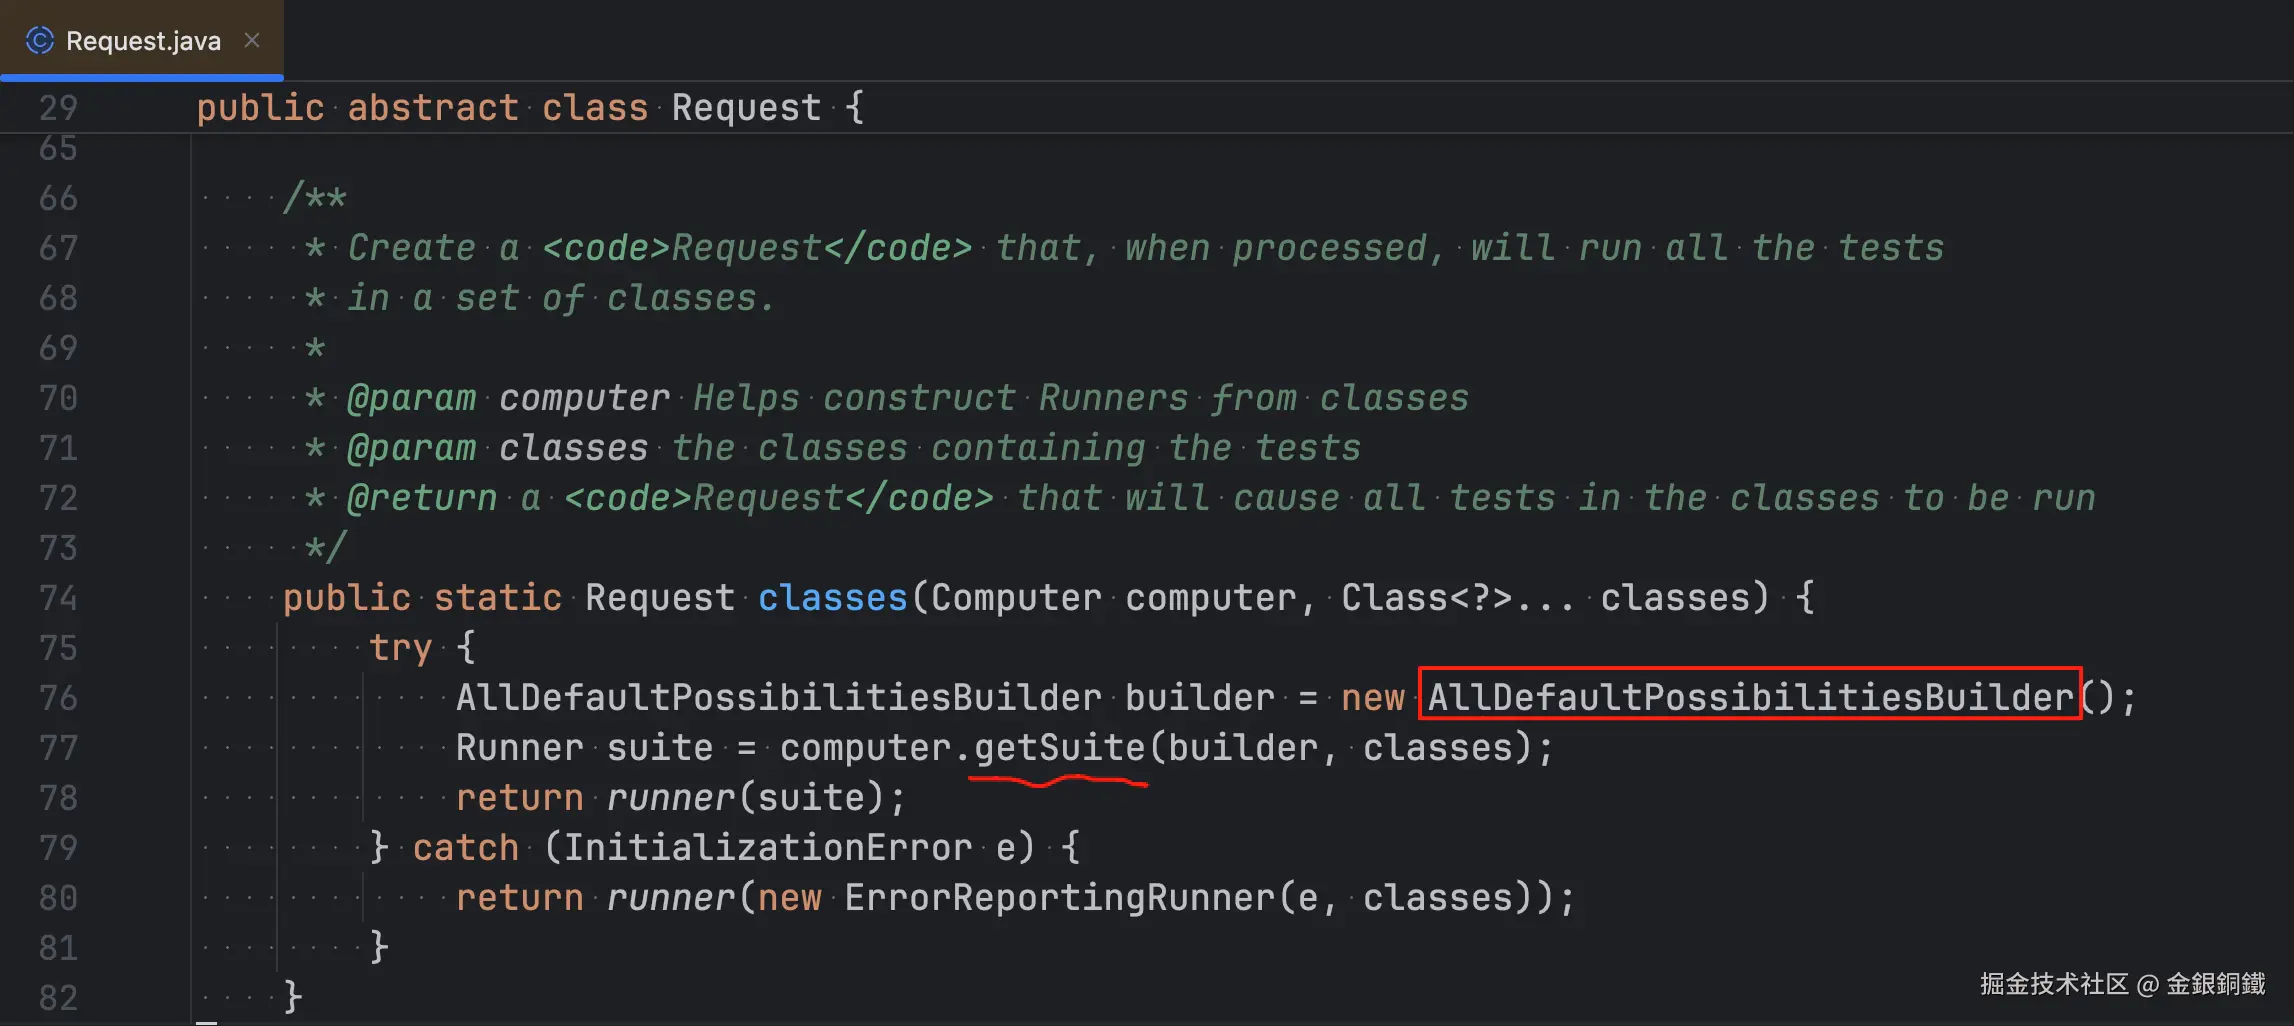
第四步的逻辑,如果展开来说,会比较多。目前我们只看构造 Runner 的部分(至于如何通过 Runner 来运行测试,后续的文章再来探讨)。构造 Runner 的核心逻辑在 org.junit.runner.Request 类的classes(org.junit.runner.Computer, java.lang.Class<?>...) 方法里。
这个方法的逻辑可以简单概括如下 ⬇️
- 用
AllDefaultPossibilitiesBuilder给各个指定的测试类构建对应的Runner(如果指定了 N 个测试类,则应当生成 N 个Runner) - 将这些
Runner作为一个Suite的children节点 - 将这个
Suite包装成org.junit.runner.Request
到这里就把 JUnitCore 中的一个入口(即,main 方法)介绍完了。下一篇我们会探讨 JUnitCore 的另一个入口。
其他
画"org.junit.runner.notification.RunListener 和 org.junit.internal.TextListener"这张图所用到的代码
我用 PlantUML 画了那张图,所用到的代码如下 ⬇️
puml
@startuml

title <i>org.junit.runner.notification.RunListener</i> 和 <i>org.junit.internal.TextListener</i>

class org.junit.runner.notification.RunListener {
    + void testRunStarted(Description description) throws Exception
    + void testRunFinished(Result result) throws Exception
    + void testSuiteStarted(Description description) throws Exception
    + void testSuiteFinished(Description description) throws Exception
    + void testStarted(Description description) throws Exception
    + void testFinished(Description description) throws Exception
    + void testFailure(Failure failure) throws Exception
    + void testAssumptionFailure(Failure failure)
    + void testIgnored(Description description) throws Exception
}

org.junit.runner.notification.RunListener <|-- org.junit.internal.TextListener

class org.junit.internal.TextListener {
    -final PrintStream writer
    +TextListener(JUnitSystem system)
    +TextListener(PrintStream writer)
    +void testRunFinished(Result result)
    +void testStarted(Description description)
    +void testFailure(Failure failure)
    +void testIgnored(Description description)
    -PrintStream getWriter()
    #void printHeader(long runTime)
    #void printFailures(Result result)
    #void printFailure(Failure each, String prefix)
    #void printFooter(Result result)
    #String elapsedTimeAsString(long runTime)
}
@enduml