文章目录
-
- 一、什么是封装?
-
- [1.1 封装的主要目的](#1.1 封装的主要目的)
- 二、Python中的封装级别
-
- [2.1 公有成员(Public)](#2.1 公有成员(Public))
- [2.2 保护成员(Protected)](#2.2 保护成员(Protected))
- [2.3 私有成员(Private)](#2.3 私有成员(Private))
- [三、名称修饰(Name Mangling)机制](#三、名称修饰(Name Mangling)机制)
- 四、属性封装:getter和setter方法
-
- [4.1 传统getter/setter方式](#4.1 传统getter/setter方式)
- [4.2 使用@property装饰器(推荐)](#4.2 使用@property装饰器(推荐))
- 五、复杂封装示例
-
- [5.1 银行账户系统](#5.1 银行账户系统)
- 六、封装的优点和最佳实践
-
- [6.1 封装的优点对比](#6.1 封装的优点对比)
- [6.2 封装最佳实践总结](#6.2 封装最佳实践总结)
- 七、封装与其他面向对象特性的关系
-
- [7.1 封装与继承](#7.1 封装与继承)
- [7.2 封装与多态](#7.2 封装与多态)
- 八、总结
-
- [8.1 封装的核心要点](#8.1 封装的核心要点)
- [8.2 Python封装的层次结构](#8.2 Python封装的层次结构)
- [8.3 何时使用封装](#8.3 何时使用封装)
一、什么是封装?
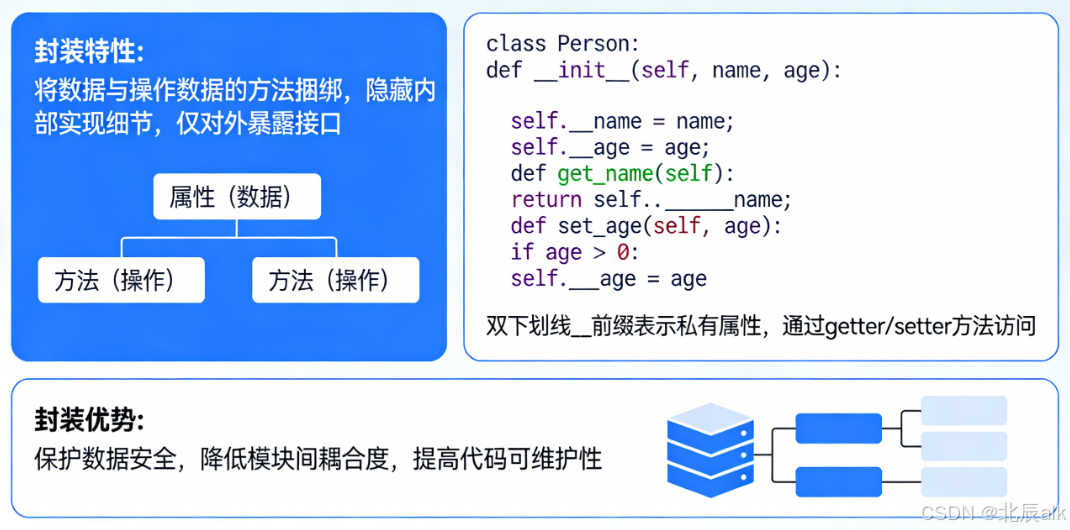
封装(Encapsulation)是面向对象编程的三大特性之一(另外两个是继承和多态)。封装是指将对象的状态信息(属性)和行为(方法)绑定在一起,并对外部隐藏内部实现细节,只暴露必要的接口供外部访问。
1.1 封装的主要目的
- 隐藏内部实现细节:外部不需要知道对象内部是如何工作的
- 保护数据完整性:防止外部直接修改对象的内部状态
- 降低复杂性:通过清晰的接口隔离内部和外部的耦合
- 提高可维护性:内部实现可以独立变化而不影响外部代码
二、Python中的封装级别
Python提供了不同级别的封装控制:
2.1 公有成员(Public)
默认情况下,Python中的所有成员都是公有的,可以直接访问。
python
class Person:
    def __init__(self, name, age):
        self.name = name  # 公有属性
        self.age = age    # 公有属性

    def introduce(self):  # 公有方法
        print(f"我叫{self.name},今年{self.age}岁")

# 使用示例
p = Person("张三", 25)
print(p.name)  # 直接访问公有属性
p.introduce()  # 直接调用公有方法
2.2 保护成员(Protected)
按照约定,以单下划线_开头的成员被视为"保护"成员,表示仅供内部使用。但这只是一种约定,实际上仍然可以从外部访问。
python
class Employee:
    def __init__(self, name, salary):
        self.name = name      # 公有属性
        self._salary = salary # 保护属性(约定私有)
        self._bonus = 0       # 保护属性

    def _calculate_bonus(self):  # 保护方法
        # 内部计算方法
        self._bonus = self._salary * 0.2
        return self._bonus

    def get_salary_info(self):   # 公有方法
        bonus = self._calculate_bonus()
        total = self._salary + bonus
        print(f"基本工资:{self._salary},奖金:{bonus},总收入:{total}")

# 使用示例
emp = Employee("李四", 10000)
print(emp.name)      # 可以访问
print(emp._salary)   # 仍然可以访问(但不建议)
emp.get_salary_info() # 推荐的访问方式
2.3 私有成员(Private)
使用双下划线__开头的成员会被Python名称修饰机制处理,使其在类外部不能直接访问。
python
class BankAccount:
    def __init__(self, account_no, balance):
        self.__account_no = account_no  # 私有属性
        self.__balance = balance        # 私有属性
        self.__transactions = []        # 私有属性

    def __validate_amount(self, amount):  # 私有方法
        return amount > 0 and isinstance(amount, (int, float))

    def deposit(self, amount):
        if self.__validate_amount(amount):
            self.__balance += amount
            self.__transactions.append(f"存款:+{amount}")
            print(f"存款成功,当前余额:{self.__balance}")
        else:
            print("存款金额无效")

    def withdraw(self, amount):
        if self.__validate_amount(amount) and self.__balance >= amount:
            self.__balance -= amount
            self.__transactions.append(f"取款:-{amount}")
            print(f"取款成功,当前余额:{self.__balance}")
        else:
            print("取款金额无效或余额不足")

    def get_balance(self):
        return self.__balance

    def get_transaction_history(self):
        return self.__transactions

# 使用示例
account = BankAccount("1234567890", 5000)
# print(account.__balance)  # 错误:AttributeError
# print(account.__account_no)  # 错误:AttributeError

account.deposit(1000)
account.withdraw(500)
print(f"当前余额:{account.get_balance()}")
print(f"交易记录:{account.get_transaction_history()}")

# 访问私有成员的技巧(不推荐)
print(account._BankAccount__balance)  # 通过名称修饰访问
三、名称修饰(Name Mangling)机制
Python通过名称修饰来实现私有成员的特性:
python
class NameManglingDemo:
    def __init__(self):
        self.public = "公有属性"
        self._protected = "保护属性"
        self.__private = "私有属性"

    def __private_method(self):
        return "私有方法"

# 查看名称修饰效果
demo = NameManglingDemo()
print(dir(demo))  # 查看所有属性和方法
# 输出中会包含:'_NameManglingDemo__private' 和 '_NameManglingDemo__private_method'
名称修饰流程图:
定义类属性__x
Python编译器处理
名称修饰为_ClassName__x
内部访问直接使用__x
外部访问需要使用_ClassName__x
类的内部代码
使用__x访问
自动转换为_ClassName__x
外部代码
直接访问__x
AttributeError
访问_ClassName__x
可以访问
四、属性封装:getter和setter方法
4.1 传统getter/setter方式
python
class Student:
    def __init__(self, name, score):
        self.__name = name
        self.__score = score

    # getter方法
    def get_name(self):
        return self.__name

    def get_score(self):
        return self.__score

    # setter方法
    def set_score(self, score):
        if 0 <= score <= 100:
            self.__score = score
        else:
            raise ValueError("分数必须在0-100之间")

    def set_name(self, name):
        if name and isinstance(name, str):
            self.__name = name
        else:
            raise ValueError("姓名不能为空且必须是字符串")

# 使用示例
stu = Student("小明", 85)
print(stu.get_name())
print(stu.get_score())

stu.set_score(95)
print(stu.get_score())

# stu.set_score(150)  # 触发异常
4.2 使用@property装饰器(推荐)
python
class Student:
    def __init__(self, name, score):
        self.__name = name
        self.__score = score
        self.__grades = []  # 成绩列表

    @property
    def name(self):
        """获取姓名"""
        return self.__name

    @name.setter
    def name(self, value):
        """设置姓名"""
        if not isinstance(value, str):
            raise TypeError("姓名必须是字符串")
        if len(value) < 2:
            raise ValueError("姓名长度不能小于2")
        self.__name = value

    @property
    def score(self):
        """获取分数"""
        return self.__score

    @score.setter
    def score(self, value):
        """设置分数"""
        if not isinstance(value, (int, float)):
            raise TypeError("分数必须是数字")
        if not 0 <= value <= 100:
            raise ValueError("分数必须在0-100之间")
        self.__score = value

    @property
    def grade_level(self):
        """根据分数返回等级(只读属性,没有setter)"""
        if self.__score >= 90:
            return 'A'
        elif self.__score >= 80:
            return 'B'
        elif self.__score >= 70:
            return 'C'
        elif self.__score >= 60:
            return 'D'
        else:
            return 'F'

# 使用示例
stu = Student("小红", 88)

# 像访问属性一样使用getter
print(stu.name)    # 小红
print(stu.score)   # 88

# 像设置属性一样使用setter
stu.score = 95
print(stu.score)   # 95

# 访问只读属性
print(stu.grade_level)  # A

# stu.grade_level = 'B'  # 错误:不能设置只读属性
五、复杂封装示例
5.1 银行账户系统
python
import datetime
import hashlib
import json

class BankAccountSystem:
    """银行账户系统 - 完整封装示例"""

    def __init__(self, owner, initial_balance=0, password=None):
        self.__owner = owner
        self.__account_number = self.__generate_account_number()
        self.__balance = initial_balance
        self.__password_hash = self.__hash_password(password) if password else None
        self.__transactions = []
        self.__frozen = False
        self.__daily_withdrawal_limit = 20000  # 每日取款限额
        self.__today_withdrawal = 0
        self.__last_transaction_date = datetime.date.today()

        # 记录初始交易
        if initial_balance > 0:
            self.__add_transaction("开户存款", initial_balance)

    def __generate_account_number(self):
        """生成账号(私有方法)"""
        import random
        return 'ACCT' + str(random.randint(10000000, 99999999))

    def __hash_password(self, password):
        """密码哈希(私有方法)"""
        return hashlib.sha256(password.encode()).hexdigest()

    def __verify_password(self, password):
        """验证密码(私有方法)"""
        if not self.__password_hash:
            return True  # 没有设置密码
        return self.__password_hash == hashlib.sha256(password.encode()).hexdigest()

    def __reset_daily_withdrawal(self):
        """重置每日取款限额(私有方法)"""
        today = datetime.date.today()
        if today > self.__last_transaction_date:
            self.__today_withdrawal = 0
            self.__last_transaction_date = today

    def __add_transaction(self, trans_type, amount, balance_after=None):
        """添加交易记录(私有方法)"""
        if balance_after is None:
            balance_after = self.__balance

        transaction = {
            '时间': datetime.datetime.now().strftime('%Y-%m-%d %H:%M:%S'),
            '类型': trans_type,
            '金额': amount,
            '余额': balance_after
        }
        self.__transactions.append(transaction)

    # 只读属性
    @property
    def owner(self):
        """账户持有人(只读)"""
        return self.__owner

    @property
    def account_number(self):
        """账号(只读)"""
        return self.__account_number

    @property
    def frozen(self):
        """账户冻结状态(只读)"""
        return self.__frozen

    @property
    def balance(self):
        """账户余额(只读)"""
        return self.__balance

    # 业务方法
    def deposit(self, amount, password=None):
        """存款"""
        # 验证密码
        if not self.__verify_password(password):
            return False, "密码错误"

        # 检查账户状态
        if self.__frozen:
            return False, "账户已冻结"

        # 验证金额
        if amount <= 0:
            return False, "存款金额必须大于0"
        if amount > 100000:  # 单笔存款限额
            return False, "单笔存款不能超过10万元"

        # 执行存款
        self.__balance += amount
        self.__add_transaction("存款", amount)
        return True, f"存款成功,当前余额:{self.__balance}"

    def withdraw(self, amount, password=None):
        """取款"""
        # 验证密码
        if not self.__verify_password(password):
            return False, "密码错误"

        # 检查账户状态
        if self.__frozen:
            return False, "账户已冻结"

        # 重置每日限额
        self.__reset_daily_withdrawal()

        # 验证金额
        if amount <= 0:
            return False, "取款金额必须大于0"
        if amount > self.__balance:
            return False, "余额不足"
        if amount > self.__daily_withdrawal_limit:
            return False, f"超过每日取款限额({self.__daily_withdrawal_limit}元)"

        # 检查每日累计取款
        if self.__today_withdrawal + amount > self.__daily_withdrawal_limit:
            return False, "今日累计取款已达限额"

        # 执行取款
        self.__balance -= amount
        self.__today_withdrawal += amount
        self.__add_transaction("取款", amount)
        return True, f"取款成功,当前余额:{self.__balance}"

    def transfer(self, target_account, amount, password=None):
        """转账"""
        # 验证密码
        if not self.__verify_password(password):
            return False, "密码错误"

        # 检查账户状态
        if self.__frozen:
            return False, "账户已冻结"

        # 验证目标账户
        if not isinstance(target_account, BankAccountSystem):
            return False, "目标账户无效"
        if target_account.account_number == self.__account_number:
            return False, "不能给自己转账"

        # 验证金额
        if amount <= 0:
            return False, "转账金额必须大于0"
        if amount > self.__balance:
            return False, "余额不足"

        # 执行转账(先从本账户扣款)
        self.__balance -= amount
        self.__add_transaction(f"转账给{target_account.owner}", amount)

        # 目标账户收款(这里假设有deposit方法)
        target_account.__balance += amount
        target_account.__add_transaction(f"收到来自{self.__owner}的转账", amount)

        return True, f"转账成功,当前余额:{self.__balance}"

    def freeze_account(self, password=None):
        """冻结账户(管理员功能)"""
        if password == "admin_password":  # 简化的管理员验证
            self.__frozen = True
            self.__add_transaction("账户冻结", 0)
            return True, "账户已冻结"
        return False, "权限不足"

    def unfreeze_account(self, password=None):
        """解冻账户(管理员功能)"""
        if password == "admin_password":
            self.__frozen = False
            self.__add_transaction("账户解冻", 0)
            return True, "账户已解冻"
        return False, "权限不足"

    def get_transaction_history(self, limit=None, password=None):
        """获取交易历史"""
        if not self.__verify_password(password):
            return None, "密码错误"

        if limit:
            return self.__transactions[-limit:]
        return self.__transactions

    def get_account_info(self, password=None):
        """获取账户信息"""
        if not self.__verify_password(password):
            return None, "密码错误"

        return {
            '持有人': self.__owner,
            '账号': self.__account_number,
            '余额': self.__balance,
            '状态': '冻结' if self.__frozen else '正常',
            '今日已取款': self.__today_withdrawal,
            '每日限额': self.__daily_withdrawal_limit
        }

# 使用示例
if __name__ == "__main__":
    # 创建账户
    acc1 = BankAccountSystem("张三", 10000, "zhang123")
    acc2 = BankAccountSystem("李四", 5000, "li456")

    # 存款
    success, msg = acc1.deposit(5000, "zhang123")
    print(msg)

    # 取款
    success, msg = acc1.withdraw(2000, "zhang123")
    print(msg)

    # 转账
    success, msg = acc1.transfer(acc2, 3000, "zhang123")
    print(msg)

    # 查看交易记录
    history, error = acc1.get_transaction_history(password="zhang123")
    if history:
        print("\n交易记录:")
        for trans in history:
            print(trans)

    # 查看账户信息
    info, error = acc1.get_account_info(password="zhang123")
    if info:
        print("\n账户信息:")
        for key, value in info.items():
            print(f"{key}: {value}")
六、封装的优点和最佳实践
6.1 封装的优点对比
python
# 未封装(不好的实践)
class BadBankAccount:
    def __init__(self, balance):
        self.balance = balance

# 使用
bad = BadBankAccount(1000)
bad.balance = -500  # 直接修改为负数,数据不完整
print(bad.balance)  # 输出:-500

# 封装后(好的实践)
class GoodBankAccount:
    def __init__(self, balance):
        self.__balance = 0
        self.set_balance(balance)

    def set_balance(self, value):
        if value >= 0:
            self.__balance = value
        else:
            raise ValueError("余额不能为负数")

    def get_balance(self):
        return self.__balance

# 使用
good = GoodBankAccount(1000)
# good.set_balance(-500)  # 抛出异常,数据得到保护
6.2 封装最佳实践总结
python
class EncapsulationBestPractices:
    """
    封装最佳实践示例
    """

    def __init__(self):
        # 1. 所有属性都应该私有化
        self.__private_data = []

        # 2. 使用@property提供访问控制
        self.__value = 0

        # 3. 初始化时进行数据验证
        self.__initialize_data()

    def __initialize_data(self):
        """私有初始化方法"""
        # 初始化逻辑
        pass

    @property
    def value(self):
        """只读属性"""
        return self.__value

    @value.setter
    def value(self, new_value):
        """带验证的setter"""
        if new_value < 0:
            raise ValueError("值不能为负数")
        self.__value = new_value

    def public_method(self):
        """公有方法:提供对外接口"""
        # 调用私有方法完成工作
        result = self.__private_operation()
        return result

    def __private_operation(self):
        """私有方法:内部实现细节"""
        # 复杂的内部逻辑
        return "内部操作结果"
七、封装与其他面向对象特性的关系
7.1 封装与继承
python
class BaseClass:
    def __init__(self):
        self.public = "公有"
        self._protected = "保护"
        self.__private = "私有"

    def get_private(self):
        return self.__private

class DerivedClass(BaseClass):
    def access_members(self):
        print(self.public)      # 可以访问
        print(self._protected)  # 可以访问(但不推荐)
        # print(self.__private)  # 错误:不能直接访问
        print(self.get_private())  # 通过公有方法访问

# 使用示例
d = DerivedClass()
d.access_members()
7.2 封装与多态
python
from abc import ABC, abstractmethod

class Payment(ABC):
    """支付抽象类"""

    def __init__(self, amount):
        self.__amount = amount
        self.__status = "pending"

    @property
    def amount(self):
        return self.__amount

    @property
    def status(self):
        return self.__status

    def _update_status(self, new_status):
        """保护方法:更新状态"""
        self.__status = new_status

    @abstractmethod
    def pay(self):
        """支付接口"""
        pass

    def get_receipt(self):
        """获取收据"""
        return {
            'amount': self.__amount,
            'status': self.__status,
            'payment_type': self.__class__.__name__
        }

class CreditCardPayment(Payment):
    def __init__(self, amount, card_number):
        super().__init__(amount)
        self.__card_number = card_number[-4:]  # 只保存后四位

    def pay(self):
        # 信用卡支付逻辑
        if self.amount > 0:
            self._update_status("completed")
            return f"信用卡支付成功:{self.amount}元"
        return "支付失败"

class WeChatPayment(Payment):
    def __init__(self, amount, open_id):
        super().__init__(amount)
        self.__open_id = open_id

    def pay(self):
        # 微信支付逻辑
        if self.amount > 0:
            self._update_status("completed")
            return f"微信支付成功:{self.amount}元"
        return "支付失败"

# 使用示例
payments = [
    CreditCardPayment(100, "1234567890123456"),
    WeChatPayment(200, "wx_123456")
]

for payment in payments:
    print(payment.pay())
    print(payment.get_receipt())
    print("-" * 30)
八、总结
8.1 封装的核心要点
- 数据隐藏:使用私有成员保护内部数据
- 接口暴露:提供公有方法作为访问接口
- 访问控制:通过getter/setter控制访问权限
- 数据验证:在setter中验证数据的有效性
- 内部实现:私有方法封装复杂逻辑
8.2 Python封装的层次结构
python
class EncapsulationHierarchy:
    """
    封装层次结构示例
    """

    # 类属性(所有实例共享)
    class_counter = 0

    def __init__(self):
        # 实例属性(每个实例独立)
        self.public = "公有"          # 完全公开
        self._protected = "保护"      # 约定保护
        self.__private = "私有"        # 强制私有

        # 修改类属性
        EncapsulationHierarchy.class_counter += 1

    @staticmethod
    def static_method():
        """静态方法(与类相关但不需要实例)"""
        return "静态方法"

    @classmethod
    def class_method(cls):
        """类方法(可以访问类属性)"""
        return f"类计数器:{cls.class_counter}"

    def __str__(self):
        """魔法方法:字符串表示"""
        return f"实例[公有:{self.public}]"

    def __len__(self):
        """魔法方法:长度"""
        return len(self.__private)

# 封装级别总结
print("封装级别(从松到严):")
print("1. 公有成员:任何地方都可以访问")
print("2. 保护成员:约定内部使用,外部仍可访问")
print("3. 私有成员:通过名称修饰强制私有")
print("4. 属性封装:通过property控制访问")
print("5. 方法封装:提供接口,隐藏实现")
8.3 何时使用封装
python
class WhenToUseEncapsulation:
    """
    封装使用场景示例
    """

    def __init__(self):
        # 1. 数据需要验证时
        self.__age = 0

        # 2. 计算属性需要缓存时
        self.___cached_result = None

        # 3. 内部状态需要保护时
        self.__status = "initial"

        # 4. 实现细节需要隐藏时
        self.__internal_cache = {}

    @property
    def age(self):
        return self.__age

    @age.setter
    def age(self, value):
        # 场景1:数据验证
        if not isinstance(value, int):
            raise TypeError("年龄必须是整数")
        if not 0 <= value <= 150:
            raise ValueError("年龄必须在0-150之间")
        self.__age = value

        # 清除缓存(因为年龄变化了)
        self.___cached_result = None

    @property
    def category(self):
        # 场景2:计算属性
        if self.___cached_result is None:
            # 复杂的分类逻辑
            if self.__age < 18:
                self.___cached_result = "未成年"
            elif self.__age < 60:
                self.___cached_result = "成年"
            else:
                self.___cached_result = "老年"
        return self.___cached_result

    def perform_operation(self, data):
        # 场景3和4:隐藏实现细节
        result = self.__complex_calculation(data)
        self.__update_status("completed")
        return result

    def __complex_calculation(self, data):
        # 复杂的内部计算逻辑
        if data in self.__internal_cache:
            return self.__internal_cache[data]

        # 模拟复杂计算
        result = sum(data) * 2
        self.__internal_cache[data] = result
        return result

    def __update_status(self, new_status):
        # 内部状态更新
self.__status = new_status通过以上详细的讲解和示例,我们可以看到Python的封装特性提供了灵活而强大的机制来保护数据、隐藏实现细节,并提供清晰的接口。合理使用封装可以使代码更加健壮、可维护和易于扩展。记住封装的核心思想:将数据和操作数据的方法绑定在一起,并对使用者隐藏内部实现细节 。