本章重点知识预览
- Location匹配:掌握各种匹配方式的优先级和适用场景
- 用户认证:使用htpasswd实现基础HTTP认证
- 错误处理:自定义错误页面和独立错误日志
- 文件服务:配置下载服务器并优化显示效果
- 性能优化:启用压缩、状态监控和文件检测
- 调试技巧:使用echo模块输出变量值进行调试
这些功能组合使用,可以构建出功能完善、性能优越的企业级Web服务器。每项配置都可以根据实际业务需求进行调整和优化。
一、Nginx的源码编译
- Nginx 是一款高性能的HTTP和反向代理服务器,采用模块化设计,支持通过源码编译灵活定制功能。
- 编译安装 可以指定安装路径、启用或禁用模块,例如SSL、gzip、stream等。
- 环境变量 配置便于直接执行nginx命令。
- systemd管理 通过编写服务文件实现开机自启和便捷管理。
本实验演示从源码编译安装Nginx-1.28.1,并配置systemd服务,实现基本的Web服务。
1. 下载软件
bash
[root@nginx ~]# wget https://nginx.org/download/nginx-1.28.1.tar.gz这里下载的是Nginx 1.28.1稳定版,可以根据需要选择其他版本。
2. 解压
bash
[root@nginx ~]# tar zxf nginx-1.28.1.tar.gz
[root@nginx ~]# cd nginx-1.28.1/
[root@nginx nginx-1.28.1]# ls
auto     CHANGES.ru          conf       contrib          html     man        SECURITY.md
CHANGES  CODE_OF_CONDUCT.md  configure  CONTRIBUTING.md  LICENSE  README.md  src
3. 检测环境,安装依赖
在编译前需要安装依赖包并运行./configure进行环境检测和配置。
bash
# 安装编译依赖
[root@nginx ~]# dnf install gcc openssl-devel.x86_64 pcre2-devel.x86_64 zlib-devel -y

# 配置编译选项
[root@nginx nginx-1.28.1]# ./configure --prefix=/usr/local/nginx --user=nginx --group=nginx --with-http_ssl_module --with-http_v2_module --with-http_realip_module --with-http_stub_status_module --with-http_gzip_static_module --with-pcre --with-stream --with-stream_ssl_module --with-stream_realip_module
说明:
--prefix:指定安装目录--user/--group:指定运行用户和组--with-*_module:启用各种功能模块(如SSL、状态监控等)
4. 配置编译选项
bash
[root@nginx nginx-1.28.1]# make
[root@nginx nginx-1.28.1]# make install
注意:
make是编译,make install是安装到指定目录。
5. Nginx启动
设置环境变量
bash
[root@nginx sbin]# vim  ~/.bash_profile
# 在文件末尾添加:
export PATH=$PATH:/usr/local/nginx/sbin

[root@nginx sbin]# source   ~/.bash_profile
创建nginx用户并启动
bash
[root@nginx logs]# useradd  -s /sbin/nologin -M nginx
[root@nginx logs]# nginx
[root@nginx logs]# ps aux | grep nginx
root       44012  0.0  0.1  14688  2356 ?        Ss   17:01   0:00 nginx: master process nginx
nginx      44013  0.0  0.2  14888  3892 ?        S    17:01   0:00 nginx: worker process
测试访问
bash
[root@nginx logs]# echo timinglee > /usr/local/nginx/html/index.html
[root@nginx logs]# curl 172.25.254.100
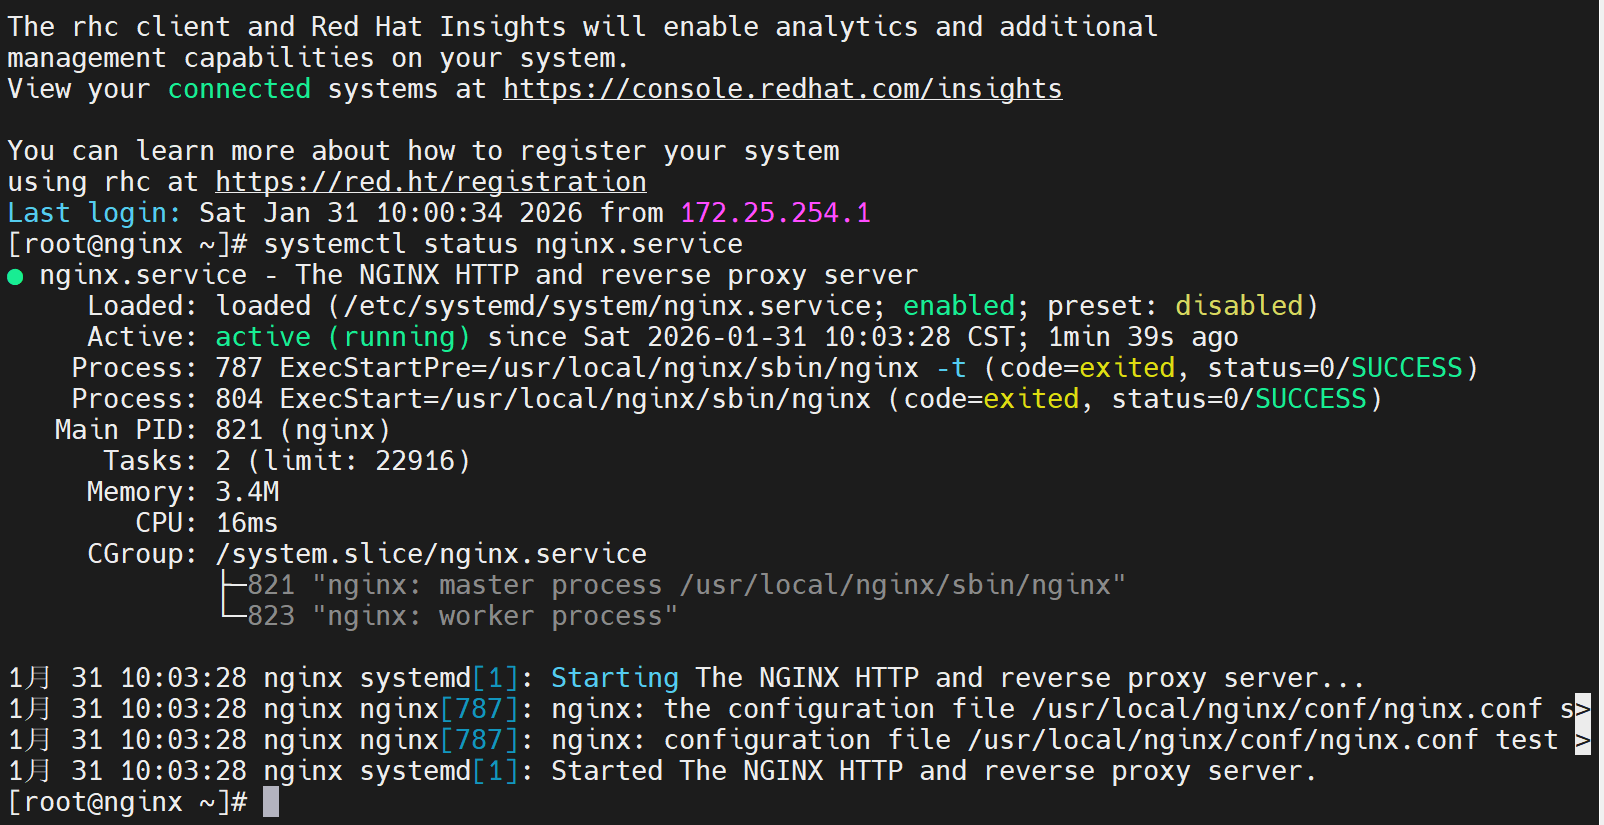
timinglee6. 编写systemd启动文件
为了方便使用systemd管理Nginx服务,我们可以创建一个service文件。
bash
[root@nginx ~]# vim /lib/systemd/system/nginx.service文件内容如下:
ini
[Unit]
Description=The NGINX HTTP and reverse proxy server
After=syslog.target network-online.target remote-fs.target nss-lookup.target
Wants=network-online.target

[Service]
Type=forking
ExecStartPre=/usr/local/nginx/sbin/nginx -t
ExecStart=/usr/local/nginx/sbin/nginx
ExecReload=/usr/local/nginx/sbin/nginx -s reload
ExecStop=/bin/kill -s QUIT $MAINPID
PrivateTmp=true

[Install]
WantedBy=multi-user.target
启用并测试服务
bash
[root@nginx ~]# systemctl daemon-reload
[root@nginx ~]# systemctl enable --now nginx.service
[root@nginx ~]# ps aux | grep nginx
此时Nginx已可通过systemctl管理,并支持开机自启。
二、Nginx的平滑升级及回滚
-
平滑升级:在不中断服务的情况下替换Nginx二进制文件,通过信号控制新旧进程共存,逐步切换。
-
USR2信号:启动新版本主进程,并与旧版本共存。
-
WINCH信号:优雅关闭旧版本的工作进程。
-
回滚:通过备份旧版本二进制,重新加载实现版本回退。
在生产环境中,我们经常需要升级Nginx版本而不中断服务,即"平滑升级"。
下面将一起开始从1.28.1升级到1.29.4,并修改版本信息隐藏版本号,之后进行版本回滚。实验中出现了误操作导致进程全部杀死,通过恢复备份重新启动。
1. 下载高版本软件
bash
[root@nginx ~]# wget https://nginx.org/download/nginx-1.29.4.tar.gz2. 编译新版本并进行平滑升级
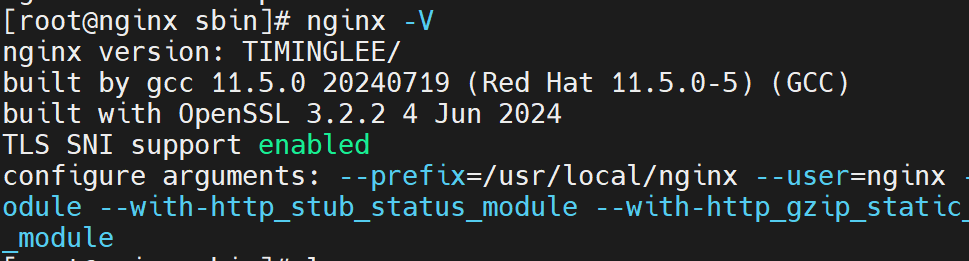
隐藏版本信息(可选)
bash
[root@nginx ~]# tar zxf nginx-1.29.4.tar.gz
[root@nginx ~]# cd nginx-1.29.4/src/core/
[root@nginx core]# vim nginx.h
# 修改以下三行:
#define nginx_version      1029004
#define NGINX_VERSION      ""
#define NGINX_VER          "TIMINGLEE/" NGINX_VERSION
编译新版本
bash
[root@nginx core]# cd ../../
[root@nginx nginx-1.29.4]# ./configure --prefix=/usr/local/nginx --user=nginx --group=nginx --with-http_ssl_module --with-http_v2_module --with-http_realip_module --with-http_stub_status_module --with-http_gzip_static_module --with-pcre --with-stream --with-stream_ssl_module --with-stream_realip_module
[root@nginx nginx-1.29.4]# make
替换二进制文件并平滑升级
bash
[root@nginx objs]# cd /usr/local/nginx/sbin/
[root@nginx sbin]# cp nginx nginx.old -p  # 备份旧版本
[root@nginx sbin]# \cp -f /root/nginx-1.29.4/objs/nginx /usr/local/nginx/sbin/nginx

# 向主进程发送USR2信号,启动新版本进程
[root@nginx sbin]# kill -USR2 <旧master进程ID>
此时会出现新旧两个master进程,旧worker会逐渐退出。
优雅关闭旧worker进程
bash
[root@nginx sbin]# kill -WINCH <旧master进程ID>3. 版本回滚
如果新版本有问题,可快速回滚到旧版本。
恢复旧版本二进制文件
bash
[root@nginx sbin]# cp nginx nginx.new -p          # 备份新版本
[root@nginx sbin]# \cp nginx.old nginx -pf        # 覆盖为旧版本
重新加载旧版本配置
bash
[root@nginx sbin]# kill -HUP <旧master进程ID>关闭新版本进程
bash
[root@nginx sbin]# kill -WINCH <新master进程ID>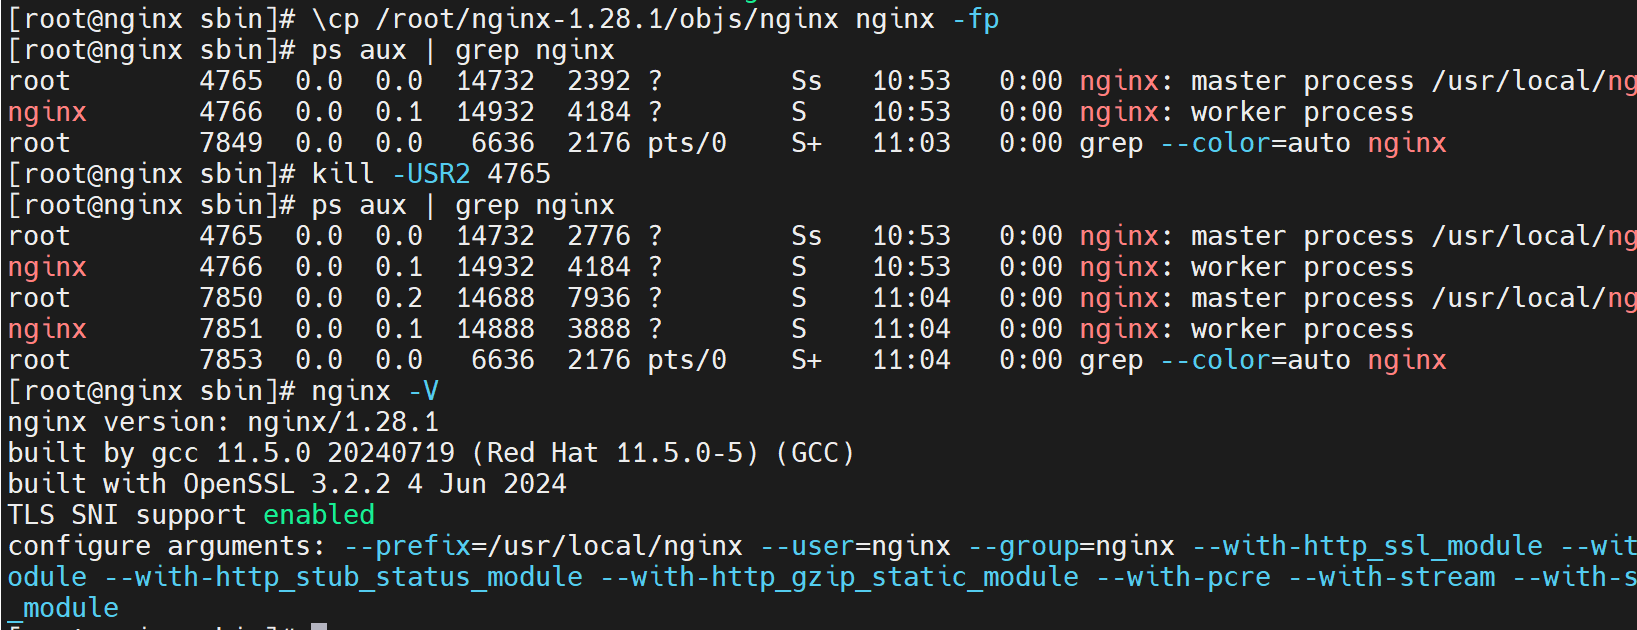
三、Nginx配置文件的管理及优化参数
user:指定worker进程运行用户。

worker_processes:worker进程数,可设为auto自动匹配CPU核心。

worker_cpu_affinity:将worker绑定到特定CPU,提升缓存命中率。

events块:配置事件处理模型(如epoll)、连接数等。

ulimit:系统文件描述符限制,需配合worker_connections调整。Nginx的性能优化主要通过调整nginx.conf中的参数实现。
调整Nginx核心参数,并通过ab压力测试验证并发能力。
1. 配置运行用户和Worker进程数
bash
[root@nginx ~]# vim /usr/local/nginx/conf/nginx.conf
nginx
user nginx;
worker_processes  2;  # 可根据CPU核心数调整,也可设为auto
测试配置并重载
bash
[root@nginx ~]# nginx -t
[root@nginx ~]# nginx -s reload
2. CPU亲和性绑定(可选)
nginx
worker_processes auto;
worker_cpu_affinity 0001 0010 0100 1000;  # 将每个worker绑定到指定CPU核心
3. 调整事件模块参数
nginx
events {
    worker_connections  10000;  # 每个worker最大连接数
    use epoll;                  # 使用epoll事件模型(Linux)
    accept_mutex on;            # 启用互斥锁
    multi_accept on;            # 一次性接受多个连接
}
4. 调整系统文件句柄限制
高并发场景下需要增加系统级别的文件打开数限制。
bash
[root@nginx ~]# vim /etc/security/limits.conf添加以下内容:
bash
*               -       nofile          100000
*               -       noproc          100000
root            -       nofile          100000
测试并发性能
bash
[root@nginx ~]# dnf install httpd-tools -y
[root@nginx ~]# ab -n 100000 -c10000 http://172.25.254.100/index.html
四、Nginx虚拟主机与location
server块:定义虚拟主机,基于listen和server_name区分。

location:根据URI匹配不同处理规则。

root与alias:root将URI附加到指定路径,alias直接映射到指定路径。
配置基于域名的虚拟主机,下面通过实验来看root与alias的区别。
1. location中的root
root指令会将location路径拼接到root指定的目录后。
配置
nginx
server {
    listen 80;
    server_name lee.timinglee.org;
    location / {
        root /webdata/nginx/timinglee.org/lee/html;
    }
    location /lee {
        root /webdata/nginx/timinglee.org/lee/html;
        # 实际访问路径:/webdata/nginx/timinglee.org/lee/html/lee
    }
}
创建测试文件
bash
[root@nginx ~]# mkdir -p /webdata/nginx/timinglee.org/lee/html/lee
[root@nginx ~]# echo lee > /webdata/nginx/timinglee.org/lee/html/lee/index.html
测试访问
bash
[root@nginx ~]# curl lee.timinglee.org/lee/2. location中的alias
alias会将location路径映射到指定目录或文件,不拼接路径。
示例配置
nginx
server {
    listen 80;
    server_name lee.timinglee.org;
    location /passwd {
        alias /etc/passwd;  # 直接映射到文件
    }
    location /passwd/ {
        alias /mnt/;        # 映射到目录
    }
}
测试效果
bash
[root@nginx ~]# curl lee.timinglee.org/passwd       # 显示/etc/passwd内容
[root@nginx ~]# curl lee.timinglee.org/passwd/      # 显示/mnt/目录下的默认文件
提示:
root会将location路径追加到root路径后alias会将location路径替换为alias路径- 如果location以
/结尾,alias也应以/结尾
五、KeepAlive长链接优化
KeepAlive可以减少TCP连接建立和关闭的开销,提升性能。
-
keepalive_timeout:设置长连接超时时间。 -
keepalive_requests:单个长连接允许的最大请求数。
通过telnet观察长连接行为。
1. 设定长链接超时时间
nginx
http {
    keepalive_timeout 65s;  # 客户端连接保持时间
}
使用telnet测试
bash
[root@nginx ~]# telnet www.timinglee.org 80
GET / HTTP/1.1
Host: www.timinglee.org
连接会在超时后自动关闭。
2. 设定单个长链接最大请求次数
nginx
http {
    keepalive_requests 100;  # 每个连接最多处理100个请求
}
测试效果
通过连续发送请求,可以看到在达到设定次数后连接会被关闭(Connection: close)。
六、Location 匹配规则详解
精确匹配 =:优先级最高,完全匹配URI。

前缀匹配 ^~:匹配URI开头,不再检查正则。

正则匹配 ~(区分大小写)和 ~*(不区分)。

通用前缀:无符号,匹配开头。

匹配顺序:精确 > 前缀(最长)> 正则(按配置顺序)> 通用前缀。
下面将通过不同location返回不同字符串,测试匹配优先级。
1. Location后什么都不带(前缀匹配)
bash
[root@nginx conf.d]# vim vhosts.conf
server {
    listen 80;
    server_name lee.timinglee.org;
    location /null {
        return 200 "/null-1";
    }
}
说明:这是最基础的前缀匹配,只要URI以
/null开头就会匹配。
测试结果:
bash
[root@nginx conf.d]# curl lee.timinglee.org/null/    # 成功匹配
/null-1
[root@nginx conf.d]# curl lee.timinglee.org/NULL/    # 区分大小写,不匹配
404 Not Found
[root@nginx conf.d]# curl lee.timinglee.org/test/null # 不是以/null开头,不匹配
404 Not Found
2. location 后用"="(精确匹配)
bash
server {
    listen 80;
    server_name lee.timinglee.org;
    location /null {
        return 200 "null-1";
    }
    location = /null {                # 精确匹配
        return 200 "null-2";
    }
    location ~ /null {                # 正则匹配
        return 200 "null-3";
    }
}
测试结果:
bash
[root@nginx conf.d]# curl lee.timinglee.org/null
null-2
注意:精确匹配优先级最高,一旦匹配就不再检查其他location。
3. location 后用"^~"(优先前缀匹配)
bash
server {
    listen 80;
    server_name lee.timinglee.org;
    location /null {
        return 200 "null-1";
    }
    location = /null {
        return 200 "null-2";
    }
    location ~ /null {
        return 200 "null-3";
    }
    location ^~ /lee {                # 优先前缀匹配
        return 200 "lee";
    }
}
测试结果:
bash
[root@nginx conf.d]# curl lee.timinglee.org/lee        # 匹配
lee
[root@nginx conf.d]# curl lee.timinglee.org/lee/test   # 匹配
lee
[root@nginx conf.d]# curl lee.timinglee.org/test/lee   # 不匹配(不是以/lee开头)
404 Not Found
4. location 后用"~"(正则匹配,区分大小写)
bash
server {
    listen 80;
    server_name lee.timinglee.org;
    location ~ /timing/ {            # 正则匹配,区分大小写
        return 200 "timing";
    }
}
测试结果:
bash
[root@nginx conf.d]# curl lee.timinglee.org/timing/    # 匹配
timing
[root@nginx conf.d]# curl lee.timinglee.org/Timing/    # 不匹配(区分大小写)
404 Not Found
5. location 后用"~*"(正则匹配,不区分大小写)
bash
server {
    listen 80;
    server_name lee.timinglee.org;
    location ~* /timinglee {         # 正则匹配,不区分大小写
        return 200 "timinglee";
    }
}
测试结果:
bash
[root@nginx conf.d]# curl lee.timinglee.org/timinglee   # 匹配
timinglee
[root@nginx conf.d]# curl lee.timinglee.org/Timinglee   # 匹配(不区分大小写)
timinglee
6. location 后用""(转义字符用于匹配文件扩展名)
bash
server {
    listen 80;
    server_name lee.timinglee.org;
    location ~* \.(img|php|jsp)$ {   # 匹配特定文件扩展名
        return 200 "app";
    }
}
测试结果:
bash
[root@nginx conf.d]# curl lee.timinglee.org/test.php    # 匹配
app
[root@nginx conf.d]# curl lee.timinglee.org/test.jsp    # 匹配
app
Location匹配优先级总结
1. =       精确匹配(最高优先级)
2. ^~      优先前缀匹配
3. ~       正则匹配(区分大小写)
4. ~*      正则匹配(不区分大小写)
5. 普通前缀匹配(无修饰符)
七、用户访问的用户认证
-
auth_basic:启用HTTP基本认证。 -
auth_basic_user_file:存放用户名密码的文件,使用htpasswd生成。
为/admin目录添加访问认证。
配置HTTP基本认证
bash
# 1. 创建认证用户文件
[root@nginx ~]# htpasswd -cmb /usr/local/nginx/conf/.htpasswd admin lee

# 2. 配置Nginx
[root@nginx ~]# vim /usr/local/nginx/conf/conf.d/vhosts.conf
server {
    listen 80;
    server_name lee.timinglee.org;
    location /admin {
        root /usr/local/nginx/html;
        auth_basic "login passwd";                    # 认证提示信息
        auth_basic_user_file "/usr/local/nginx/conf/.htpasswd";  # 认证文件
    }
}

# 3. 重启服务
[root@nginx ~]# systemctl restart nginx.service
测试认证
bash
# 未提供认证信息
[root@nginx ~]# curl lee.timinglee.org/admin/
401 Authorization Required

# 提供认证信息
[root@nginx ~]# curl -uadmin:lee http://lee.timinglee.org/admin/
admin
八、自定义错误页面
1. 创建错误页面内容
bash
[root@nginx ~]# mkdir /usr/local/nginx/errorpage
[root@nginx ~]# echo "抱歉,你要访问的页面辞职了" > /usr/local/nginx/errorpage/errormessages
2. 配置Nginx
bash
[root@nginx ~]# vim /usr/local/nginx/conf/conf.d/vhosts.conf
server {
    listen 80;
    server_name lee.timinglee.org;
    error_page 404 405 503 502 /error;  # 将错误重定向到/error
    location /lee {
        root /usr/local/nginx/html;
    }
    location /error {
        alias /usr/local/nginx/errorpage/errormessages;
    }
}
3. 测试效果
访问不存在的页面时会显示自定义错误信息。
九、自定义错误日志
1. 创建专用日志目录
bash
[root@nginx ~]# mkdir -p /usr/local/nginx/logs/timinglee.org/2. 配置独立错误日志
bash
[root@nginx ~]# vim /usr/local/nginx/conf/conf.d/vhosts.conf
server {
    listen 80;
    server_name lee.timinglee.org;
    error_log logs/timinglee.org/lee.error error;  # 独立错误日志
    # ... 其他配置
}
3. 测试日志记录
bash
# 触发404错误
[root@nginx ~]# curl lee.timinglee.org/lee/

# 查看错误日志
[root@nginx ~]# cat /usr/local/nginx/logs/timinglee.org/lee.error
2026/02/01 11:26:29 [error] 2213#0: *1 "/usr/local/nginx/html/lee/index.html" is not found...
十、Nginx中建立下载服务器
-
autoindex:开启目录列表。 -
limit_rate:限制下载速度。 -
autoindex_exact_size / autoindex_localtime:调整文件大小和时间显示格式。 -
autoindex_format:设置目录列表格式(html|xml|json|jsonp)。
1. 准备下载文件
bash
[root@nginx ~]# mkdir -p /usr/local/nginx/download
[root@nginx ~]# cp /etc/passwd /usr/local/nginx/download/
[root@nginx ~]# dd if=/dev/zero of=/usr/local/nginx/download/bigfile bs=1M count=100
2. 基础下载配置
bash
[root@nginx ~]# vim /usr/local/nginx/conf/conf.d/vhosts.conf
server {
listen 80;
server_name lee.timinglee.org;
error_page 404 405 503 502 /error;
error_log logs/timinglee.org/lee.error error;
location /lee {
root /usr/local/nginx/html;
}
location /error {
alias /usr/local/nginx/errorpage/errormessage;
}
location /download {
root /usr/local/nginx;
}
}
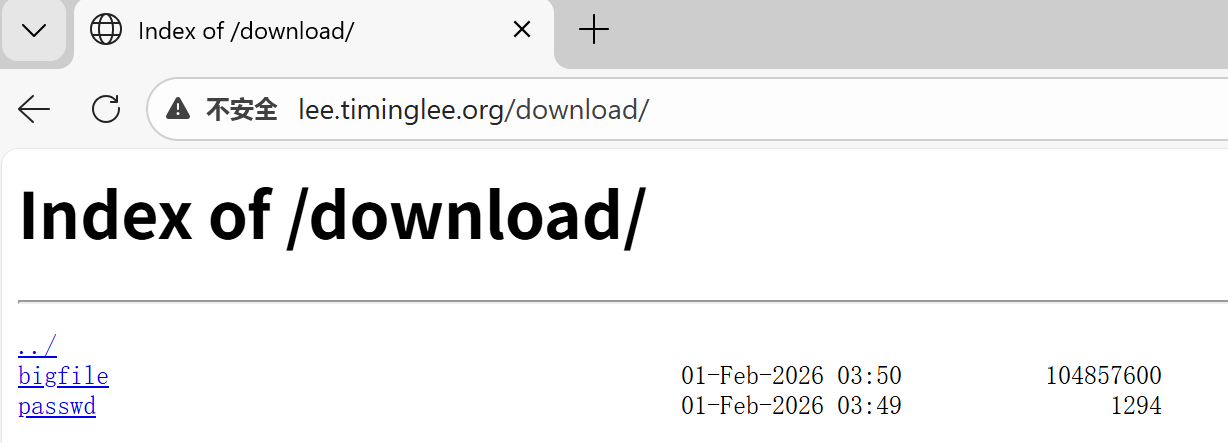
[root@nginx ~]# nginx -s reload在浏览器中访问
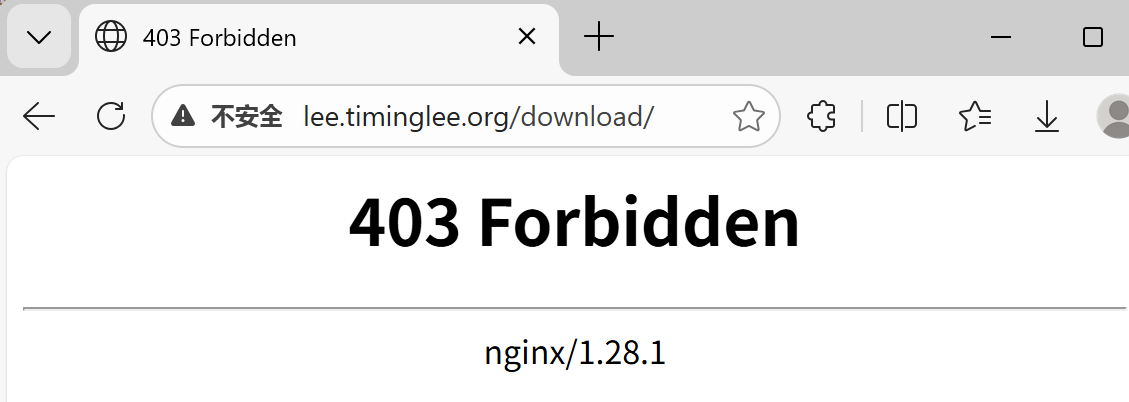
3. 启用目录列表功能
bash
[root@nginx ~]# vim /usr/local/nginx/conf/conf.d/vhosts.conf
server {
    listen 80;
    server_name lee.timinglee.org;
    error_page 404 405 503 502 /error;
    error_log logs/timinglee.org/lee.error error;
    location /lee {
        root /usr/local/nginx/html;
    }

    location /error {
        alias /usr/local/nginx/errorpage/errormessage;
    }


    location /download {
        root /usr/local/nginx;
        autoindex on;
    }
}
[root@Nginx ~]# nginx -s reload
访问效果:浏览器中显示文件列表。
4. 下载限速
bash
[root@nginx ~]# vim /usr/local/nginx/conf/conf.d/vhosts.conf
location /download {
root /usr/local/nginx;
autoindex on;
limit_rate 1024k; # 限制下载速度为1MB/s
}
[root@nginx ~]# nginx -s reload
#测试
[root@nginx ~]# wget http://lee.timinglee.org/download/bigfile
--2026-02-01 11:39:09-- http://lee.timinglee.org/download/bigfile
正在解析主机 lee.timinglee.org (lee.timinglee.org)... 172.25.254.100
正在连接 lee.timinglee.org (lee.timinglee.org)|172.25.254.100|:80... 已连接。
已发出 HTTP 请求,正在等待回应... 200 OK
长度:104857600 (100M) [application/octet-stream]
正在保存至: "bigfile"
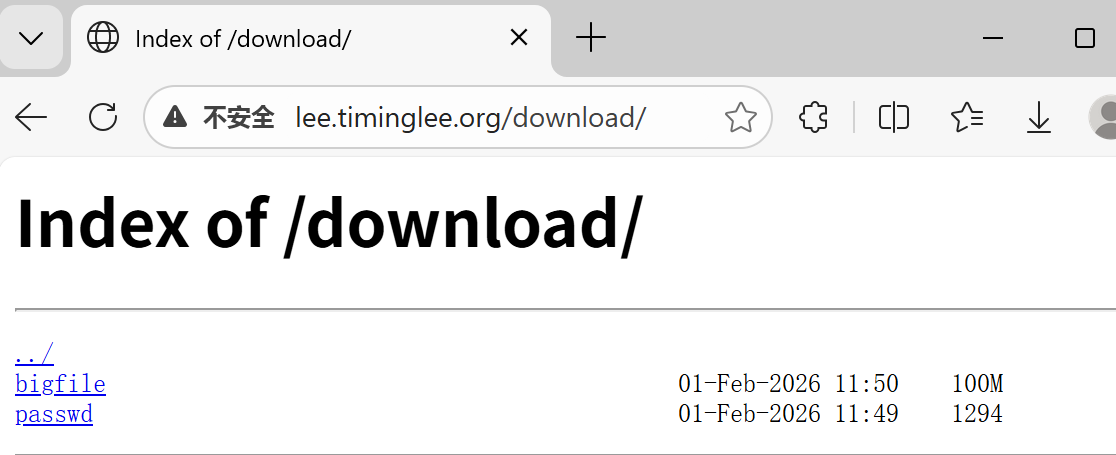
bigfile 12%[===> ] 12.00M 1.00MB/s 剩余 88s5. 优化显示效果
nginx
[root@nginx ~]# vim /usr/local/nginx/conf/conf.d/vhosts.conf
location /download {
    root /usr/local/nginx;
    autoindex on;
    limit_rate 1024k;
    autoindex_exact_size off;    # 显示友好文件大小(如100M)
    autoindex_localtime on;      # 显示本地时间
    autoindex_format html;       # 可选:html | xml | json | jsonp
}
十一、Nginx的文件检测(try_files指令)
- try_files:按顺序检查文件是否存在,若都不存在则执行最后一个参数(通常为fallback URI)。
1. 准备默认页面
bash
[root@nginx ~]# echo "default" > /usr/local/nginx/errorpage/default.html2. 配置try_files
bash
[root@nginx ~]# vim /usr/local/nginx/conf/conf.d/vhosts.conf
server {
    listen 80;
    server_name lee.timinglee.org;
    root /usr/local/nginx/errorpage;  # 设置根目录
    try_files $uri $uri.html $uri/index.html /default.html;
}
3. 测试文件查找顺序
访问 http://lee.timinglee.org/abc/ 时,Nginx会按顺序查找:
/usr/local/nginx/errorpage/abc/usr/local/nginx/errorpage/abc.html/usr/local/nginx/errorpage/abc/index.html- 如果都不存在,返回
/usr/local/nginx/errorpage/default.html
测试结果:
bash
[root@nginx ~]# curl lee.timinglee.org/abc/
default
[root@nginx ~]# curl -v lee.timinglee.org/abc/
*   Trying 172.25.254.100:80...
* Connected to lee.timinglee.org (172.25.254.100) port 80 (#0)
> GET /abc/ HTTP/1.1
> Host: lee.timinglee.org
> User-Agent: curl/7.76.1
> Accept: */*
>
* Mark bundle as not supporting multiuse
< HTTP/1.1 200 OK
< Server: nginx/1.28.1
< Date: Sun, 01 Feb 2026 06:32:02 GMT
< Content-Type: text/html
< Content-Length: 8
< Last-Modified: Sun, 01 Feb 2026 06:28:33 GMT
< Connection: keep-alive
< Keep-Alive: timeout=60
< ETag: "697ef291-8"
< Accept-Ranges: bytes
<
default
* Connection #0 to host lee.timinglee.org left intact
十二、Nginx的状态页(stub_status)
-
stub_status:提供Nginx基本的运行状态信息,如活跃连接数、请求数等。
-
结合认证和访问控制。
1. 配置状态页
bash
[root@nginx ~]# vim /usr/local/nginx/conf/conf.d/vhosts.conf
server {
    listen 80;
    server_name lee.timinglee.org;
    location /nginx_status {
        stub_status;                            # 启用状态页
        auth_basic "auth login";                # 添加认证
        auth_basic_user_file /usr/local/nginx/conf/.htpasswd;
        allow 172.25.254.0/24;                  # 限制IP访问
        deny all;
    }
}
2. 访问状态页
状态页显示信息说明:
Active connections: 1          # 当前活跃连接数
server accepts handled requests
  1       1       1           # 分别表示:接受的连接数、处理的连接数、处理的请求数
Reading: 0 Writing: 1 Waiting: 0  # 读/写/等待的连接数
十三、Nginx的压缩功能
-
gzip:启用压缩,减少传输数据量。 -
gzip_comp_level:压缩级别。 -
gzip_min_length:最小压缩文件大小。 -
gzip_types:指定MIME类型进行压缩。 -
gzip_vary:添加Vary: Accept-Encoding头。 -
gzip_static:优先使用预压缩的.gz文件。
1. 配置全局压缩参数
bash
[root@nginx ~]# vim /usr/local/nginx/conf/nginx.conf
http {
    gzip on;                            # 启用压缩
    gzip_comp_level 4;                  # 压缩级别(1-9)
    gzip_disable "MSIE [1-6]\.";        # 对旧版IE禁用压缩
    gzip_min_length 1024k;              # 最小压缩文件大小
    gzip_types text/plain application/javascript application/x-javascript
             text/css application/xml text/javascript
             application/x-httpd-php image/gif image/png;  # 压缩类型
    gzip_vary on;                       # 添加Vary头
    gzip_static on;                     # 启用预压缩文件支持
}
2. 测试压缩效果
bash
# 大文件(会被压缩)
[root@nginx ~]# curl --head --compressed lee.timinglee.org/bigfile.txt
HTTP/1.1 200 OK
Content-Encoding: gzip    # 显示已压缩

# 小文件(未达到压缩阈值)
[root@nginx ~]# curl --head --compressed lee.timinglee.org/index.html
# 无Content-Encoding头,表示未压缩
十四、Nginx 变量
-
内建变量:如
$remote_addr,$args,$document_root等。 -
自定义变量:使用
set指令。 -
第三方模块:
echo模块用于输出变量值。
1. 安装echo模块(增强调试功能)
bash
# 停止Nginx服务
[root@nginx ~]# systemctl stop nginx.service

# 重新编译Nginx,添加echo模块
[root@nginx ~]# cd nginx-1.28.1/
[root@nginx nginx-1.28.1]# make clean
[root@nginx nginx-1.28.1]# ./configure --prefix=/usr/local/nginx --add-module=/root/echo-nginx-module-0.64
[root@nginx nginx-1.28.1]# make
[root@nginx nginx-1.28.1]# cp objs/nginx /usr/local/nginx/sbin/ -p

# 启动服务
[root@nginx nginx-1.28.1]# systemctl start nginx.service
2. 常用内置变量示例
nginx
server {
    listen 80;
    server_name lee.timinglee.org;
    root /usr/local/nginx/timinglee.org/lee/html;
    location /vars {
        default_type text/html;
        echo "客户端IP: $remote_addr";
        echo "查询参数: $args";
        echo "请求方法: $request_method";
        echo "请求URI: $request_uri";
        echo "主机名: $host";
        echo "用户代理: $http_user_agent";
    }
}
3. 测试变量输出
bash
[root@nginx ~]# curl -b "key1=hello,key2=timinglee" -A "haha" -ulee:lee \
  "http://lee.timinglee.org/vars?key=lee&id=11"

# 输出示例:
客户端IP: 172.25.254.100
查询参数: key=lee&id=11
请求方法: GET
请求URI: /vars?key=lee&id=11
主机名: lee.timinglee.org
用户代理: haha
十五、网页从写
1.网页重写中的指令
bash
#if
[root@nginx ~]# vim /usr/local/nginx/conf/conf.d/vhosts.conf
server {
    listen 80;
    server_name lee.timinglee.org;
    root /webdir/timinglee.org/lee/html;
    location /vars {
        echo $remote_user;
        echo $request_method;
        echo $request_filename;
        echo $request_uri;
        echo $scheme;
    }

    location / {
        if ( $http_user_agent ~* firefox ) {
            return 200 "test if messages";
        }
    }
}

[root@nginx ~]# nginx -t
nginx: the configuration file /usr/local/nginx/conf/nginx.conf syntax is ok
nginx: configuration file /usr/local/nginx/conf/nginx.conf test is successful
[root@nginx ~]# nginx -s reload
[root@nginx ~]# curl lee.timinglee.org
hello lee
[root@nginx ~]# curl -A "firefox" lee.timinglee.org
this is test if messages[root@nginx ~]#
bash
#set
[root@nginx ~]# vim /usr/local/nginx/conf/conf.d/vhosts.conf
server {
    listen 80;
    server_name lee.timinglee.org;
    root /webdir/timinglee.org/lee/html;
    location /vars {
        echo $remote_user;
        echo $request_method;
        echo $request_filename;
        echo $request_uri;
        echo $scheme;
    }

    location / {
        set $testname timinglee;
        echo $testname;
    }
}

[root@nginx ~]# nginx -t
nginx: the configuration file /usr/local/nginx/conf/nginx.conf syntax is ok
nginx: configuration file /usr/local/nginx/conf/nginx.conf test is successful
[root@nginx ~]# nginx -s reload
[root@nginx ~]# curl lee.timinglee.org
timinglee
bash
#return
[root@nginx ~]# vim /usr/local/nginx/conf/conf.d/vhosts.conf
server {
    listen 80;
    server_name lee.timinglee.org;
    root /webdir/timinglee.org/lee/html;
    location /vars {
        echo $remote_user;
        echo $request_method;
        echo $request_filename;
        echo $request_uri;
        echo $scheme;
    }

    location / {
        return 200 "hello world";
    }
}
[root@nginx ~]# vim /usr/local/nginx/conf/conf.d/vhosts.conf
[root@nginx ~]# nginx -t
nginx: the configuration file /usr/local/nginx/conf/nginx.conf syntax is ok
nginx: configuration file /usr/local/nginx/conf/nginx.conf test is successful
[root@nginx ~]# nginx -s reload
[root@nginx ~]# curl lee.timinglee.org
hello world
bash
#break
[root@nginx ~]# vim /usr/local/nginx/conf/conf.d/vhosts.conf
server {
    listen 80;
    server_name lee.timinglee.org;
    root /webdir/timinglee.org/lee/html;
    location /vars {
        echo $remote_user;
        echo $request_method;
        echo $request_filename;
        echo $request_uri;
        echo $scheme;
    }

    location / {
        set $test1 lee1;
        set $test2 lee2;
        if ($http_user_agent = firefox){
            break;
        }
        set $test3 lee3;
        echo $test1 $test2 $test3;
    }
}

[root@nginx ~]# nginx -t
[root@nginx ~]# nginx -s reload
[root@nginx ~]# curl lee.timinglee.org
lee1 lee2 lee3
[root@nginx ~]# curl -A "firefox"  lee.timinglee.org
lee1 lee2
2 flag
bash
#redirect;
[root@nginx ~]# vim /usr/local/nginx/conf/conf.d/vhosts.conf

server {
    listen 80;
    server_name lee.timinglee.org;
    root /webdir/timinglee.org/lee/html;
    location /vars {
        echo $remote_user;
        echo $request_method;
        echo $request_filename;
        echo $request_uri;
        echo $scheme;
    }

    location / {
        rewrite / http://www.baidu.com redirect;
    }
}
[root@nginx ~]# nginx -s reload

[root@nginx ~]# curl -I lee.timinglee.org
HTTP/1.1 302 Moved Temporarily			#定向方式返回值
Server: nginx/1.28.1
Date: Tue, 03 Feb 2026 02:43:47 GMT
Content-Type: text/html
Content-Length: 145
Connection: keep-alive
Keep-Alive: timeout=100
Location: http://www.baidu.com			#定向效果
bash
#permanent
[root@nginx ~]# vim /usr/local/nginx/conf/conf.d/vhosts.conf

server {
    listen 80;
    server_name lee.timinglee.org;
    root /webdir/timinglee.org/lee/html;
    location /vars {
        echo $remote_user;
        echo $request_method;
        echo $request_filename;
        echo $request_uri;
        echo $scheme;
    }

    location / {
        rewrite / http://www.baidu.com permanent;
    }
}
[root@nginx ~]# nginx -s reload


[root@nginx ~]# curl  -I lee.timinglee.org
HTTP/1.1 301 Moved Permanently
Server: nginx/1.28.1
Date: Tue, 03 Feb 2026 02:45:38 GMT
Content-Type: text/html
Content-Length: 169
Connection: keep-alive
Keep-Alive: timeout=100
Location: http://www.baidu.com
bash
#break 和 last
[root@nginx ~]# mkdir -p /webdir/timinglee.org/lee/html/{break,last,test1,test2}
[root@nginx ~]# echo break > /webdir/timinglee.org/lee/html/break/index.html
[root@nginx ~]# echo last > /webdir/timinglee.org/lee/html/last/index.html
[root@nginx ~]# echo test1 > /webdir/timinglee.org/lee/html/test1/index.html
[root@nginx ~]# echo test2 > /webdir/timinglee.org/lee/html/test2/index.html

#break
[root@nginx ~]# vim /usr/local/nginx/conf/conf.d/vhosts.conf
server {
    listen 80;
    server_name lee.timinglee.org;
    root /webdir/timinglee.org/lee/html;
    location /vars {
        echo $remote_user;
        echo $request_method;
        echo $request_filename;
        echo $request_uri;
        echo $scheme;
    }

    location /break {
        rewrite /break/(.*) /test1/$1 break;
        rewrite /test1 /test2;
    }
    location /test1 {
        return 200 "test1 end page";
    }
    location /test2 {
        return 200 "TEST2 END PAGE";
    }

}

[root@nginx ~]# nginx -s reload
[root@nginx ~]# curl  -L lee.timinglee.org/break/index.html
test1


#last
[root@nginx ~]# vim /usr/local/nginx/conf/conf.d/vhosts.conf
server {
    listen 80;
    server_name lee.timinglee.org;
    root /webdir/timinglee.org/lee/html;
    location /vars {
        echo $remote_user;
        echo $request_method;
        echo $request_filename;
        echo $request_uri;
        echo $scheme;
    }

    location /break {
        rewrite /break/(.*) /test1/$1 last;
        rewrite /test1 /test2;
    }
    location /test1 {
        return 200 "test1 end page";
    }
    location /test2 {
        return 200 "TEST2 END PAGE";
    }

}

[root@nginx ~]# nginx -s reload
[root@nginx ~]# curl  -L lee.timinglee.org/break/index.html
test1 end page
十六、Nginx利用网页重写实现全站加密
1.制作key
bash
[root@nginx ~]# mkdir  -p /usr/local/nginx/certs/
[root@nginx ~]# openssl req -newkey rsa:2048 -nodes  -sha256  -keyout  /usr/local/nginx/certs/timinglee.org.key -x509 -days 365 -out /usr/local/nginx/certs/timinglee.org.crt
........+....+++++++++++++++++++++++++++++++++++++++*.+.....+.......+......+...+.....+.+.....+...+.+......+...+.....+++++++++++++++++++++++++++++++++++++++*.....+...........+.........+..........+...+........+.+...+..+.+............+..+...+................+..+....+......+..............+.+..............+...+.+..+.......+..+..........+...+...+.....+.............+..+.......+...........+.+...+...+..............+.........++++++
..+......+......+.+..+.+.......................................+...+...+..+.............+..+++++++++++++++++++++++++++++++++++++++*..+++++++++++++++++++++++++++++++++++++++*..........+..+...+....+...+...+..............+......+....+........+.......+..+......+.......+........+....+.......................+.+.........+......+.....+......+..........+..............+.+...+..++++++
-----
You are about to be asked to enter information that will be incorporated
into your certificate request.
What you are about to enter is what is called a Distinguished Name or a DN.
There are quite a few fields but you can leave some blank
For some fields there will be a default value,
If you enter '.', the field will be left blank.
-----
Country Name (2 letter code) [XX]:CN
State or Province Name (full name) []:Shanxi
Locality Name (eg, city) [Default City]:Xi'an
Organization Name (eg, company) [Default Company Ltd]:Linux
Organizational Unit Name (eg, section) []:timinglee
Common Name (eg, your name or your server's hostname) []:lee.timinglee
Email Address []:admin@163.com
2.编辑加密配置文件
bash
[root@nginx ~]# vim /usr/local/nginx/conf/conf.d/vhosts.conf
server {
    listen 80;
    listen 443 ssl;
    ssl_certificate /usr/local/nginx/certs/timinglee.org.crt;
    ssl_certificate_key /usr/local/nginx/certs/timinglee.org.key;
    ssl_session_cache shared:sslcache:20m;
    ssl_session_timeout 10m;
    server_name lee.timinglee.org;
    root /webdir/timinglee.org/lee/html;
    location / {
        if ($scheme = http ){
            rewrite /(.*) https://$host/$1 redirect;
        }
    }

}

[root@nginx ~]# nginx -t
nginx: the configuration file /usr/local/nginx/conf/nginx.conf syntax is ok
nginx: configuration file /usr/local/nginx/conf/nginx.conf test is successful
[root@nginx ~]# systemctl restart nginx.service
[root@nginx ~]# curl  -I  http://lee.timinglee.org/test1/
HTTP/1.1 302 Moved Temporarily
Server: nginx/1.28.1
Date: Tue, 03 Feb 2026 03:42:18 GMT
Content-Type: text/html
Content-Length: 145
Connection: keep-alive
Location: https://lee.timinglee.org/test1/
十七、Nginx反向代理
1.实验环境
bash
#172.25.254.10 RS1	172.25.254.20 RS2


[root@RS2 ~]# dnf install httpd -y
[root@RS2 ~]# systemctl enable --now httpd
[root@RS2 ~]# echo 172.25.254.20 > /var/www/html/index.html


#测试 在Nginx主机中
[root@nginx ~]# curl  172.25.254.10
172.25.254.10
[root@nginx ~]# curl  172.25.254.20
172.25.254.20
2.简单的代理方法
bash
[root@RS2 ~]# mkdir  /var/www/html/web
[root@RS2 ~]# echo 172.25.254.20 web > /var/www/html/web/index.html


[root@nginx ~]# vim /usr/local/nginx/conf/conf.d/vhosts.conf
server {
    listen 80;
    server_name lee.timinglee.org;
    location / {
        proxy_pass http://172.25.254.10:80;
    }

    location /web {
        proxy_pass http://172.25.254.20:80;
    }

}


[root@nginx ~]# nginx -s reload

#测试
[root@nginx ~]# curl  172.25.254.20/web/
172.25.254.20 web
[root@nginx ~]# curl  172.25.254.10
172.25.254.10
3.proxy_hide_header filed
bash
[Administrator.DESKTOP-VJ307M3] ➤ curl -v lee.timinglee.org
*   Trying 172.25.254.100:80...
* TCP_NODELAY set
* Connected to lee.timinglee.org (172.25.254.100) port 80 (#0)
> GET / HTTP/1.1
> Host: lee.timinglee.org
> User-Agent: curl/7.65.0
> Accept: */*
>
* Mark bundle as not supporting multiuse
< HTTP/1.1 200 OK
< Server: nginx/1.28.1
< Date: Tue, 03 Feb 2026 06:31:03 GMT
< Content-Type: text/html; charset=UTF-8
< Content-Length: 14
< Connection: keep-alive
< Keep-Alive: timeout=100
< Last-Modified: Tue, 03 Feb 2026 06:20:50 GMT
< ETag: "e-649e570e8a49f"					#可以看到ETAG信息
< Accept-Ranges: bytes
<
172.25.254.10
* Connection #0 to host lee.timinglee.org left intact

[root@nginx ~]# vim /usr/local/nginx/conf/conf.d/vhosts.conf
server {
    listen 80;
    server_name lee.timinglee.org;
    location / {
        proxy_pass http://172.25.254.10:80;
        proxy_hide_header ETag;
    }

    location /web {
        proxy_pass http://172.25.254.20:80;
    }

}
[root@nginx ~]# nginx -s reload

#测试
[Administrator.DESKTOP-VJ307M3] ➤ curl -v lee.timinglee.org
*   Trying 172.25.254.100:80...
* TCP_NODELAY set
* Connected to lee.timinglee.org (172.25.254.100) port 80 (#0)
> GET / HTTP/1.1
> Host: lee.timinglee.org
> User-Agent: curl/7.65.0
> Accept: */*
>
* Mark bundle as not supporting multiuse
< HTTP/1.1 200 OK
< Server: nginx/1.28.1
< Date: Tue, 03 Feb 2026 06:33:11 GMT
< Content-Type: text/html; charset=UTF-8
< Content-Length: 14
< Connection: keep-alive
< Keep-Alive: timeout=100
< Last-Modified: Tue, 03 Feb 2026 06:20:50 GMT
< Accept-Ranges: bytes
<
172.25.254.10
4.proxy_pass_header
bash
[Administrator.DESKTOP-VJ307M3] ➤ curl -v lee.timinglee.org
*   Trying 172.25.254.100:80...
* TCP_NODELAY set
* Connected to lee.timinglee.org (172.25.254.100) port 80 (#0)
> GET / HTTP/1.1
> Host: lee.timinglee.org
> User-Agent: curl/7.65.0
> Accept: */*
>
* Mark bundle as not supporting multiuse
< HTTP/1.1 200 OK
< Server: nginx/1.28.1						#默认访问不透传server信息
< Date: Tue, 03 Feb 2026 06:35:35 GMT
< Content-Type: text/html; charset=UTF-8
< Content-Length: 14
< Connection: keep-alive
< Keep-Alive: timeout=100
< Last-Modified: Tue, 03 Feb 2026 06:20:50 GMT
< Accept-Ranges: bytes
<
172.25.254.10
* Connection #0 to host lee.timinglee.org left intact

[root@nginx ~]# vim /usr/local/nginx/conf/conf.d/vhosts.conf
server {
    listen 80;
    server_name lee.timinglee.org;
    location / {
        proxy_pass http://172.25.254.10:80;
        proxy_pass_header Server;
    }

    location /web {
        proxy_pass http://172.25.254.20:80;
    }

}

[root@nginx ~]# nginx -s reload
Administrator.DESKTOP-VJ307M3] ➤ curl -v lee.timinglee.org
*   Trying 172.25.254.100:80...
* TCP_NODELAY set
* Connected to lee.timinglee.org (172.25.254.100) port 80 (#0)
> GET / HTTP/1.1
> Host: lee.timinglee.org
> User-Agent: curl/7.65.0
> Accept: */*
>
* Mark bundle as not supporting multiuse
< HTTP/1.1 200 OK
< Date: Tue, 03 Feb 2026 06:37:25 GMT
< Content-Type: text/html; charset=UTF-8
< Content-Length: 14
< Connection: keep-alive
< Keep-Alive: timeout=100
< Server: Apache/2.4.62 (Red Hat Enterprise Linux)			#透传结果
< Last-Modified: Tue, 03 Feb 2026 06:20:50 GMT
< Accept-Ranges: bytes
<
172.25.254.10
* Connection #0 to host lee.timinglee.org left intact
4.透传信息
bash
[root@RS1 ~]# vim /etc/httpd/conf/httpd.conf
    LogFormat "%h %l %u %t \"%r\" %>s %b \"%{Referer}i\" \"%{User-Agent}i\" \"%{X-Forwarded-For}i\"" combined


[root@RS1 ~]# systemctl restart httpd

[root@nginx ~]# vim /usr/local/nginx/conf/conf.d/vhosts.conf
server {
    listen 80;
    server_name lee.timinglee.org;
    location / {
        proxy_pass http://172.25.254.10:80;
        proxy_set_header X-Forwarded-For $remote_addr;

    }

    location /web {
        proxy_pass http://172.25.254.20:80;
    }

[root@nginx ~]# nginx -s reload

[Administrator.DESKTOP-VJ307M3] ➤ curl  lee.timinglee.org
172.25.254.10


[root@RS1 ~]# cat /etc/httpd/logs/access_log
172.25.254.100 - - [03/Feb/2026:14:47:37 +0800] "GET / HTTP/1.0" 200 14 "-" "curl/7.65.0" "172.25.254.1"
十八、利用反向代理实现动静分离
1.试验机环境
bash
#在10中
[root@RS1 ~]# dnf install php -y
[root@RS1 ~]# systemctl restart httpd
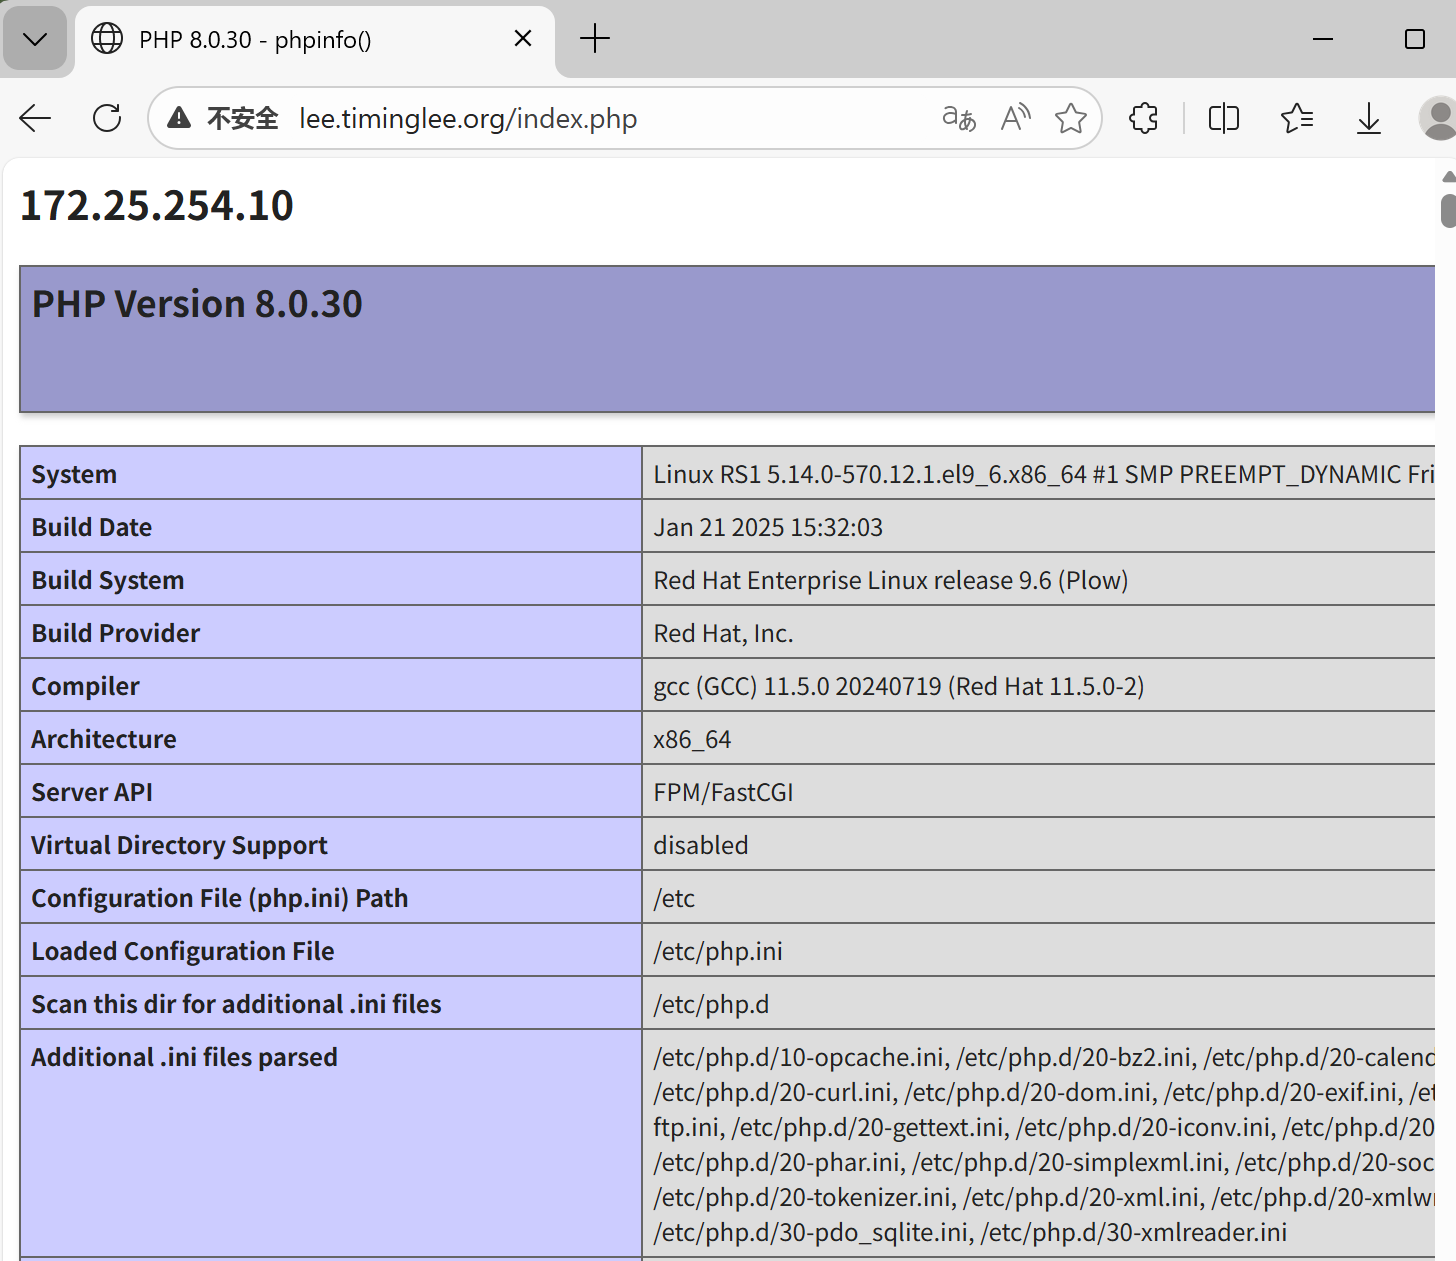
[root@RS1 ~]# vim /var/www/html/index.php
<?php
echo "<h2>172.25.254.10</h2>";
phpinfo();
?>2.动静分离的实现
bash
[root@nginx ~]# vim /usr/local/nginx/conf/conf.d/vhosts.conf
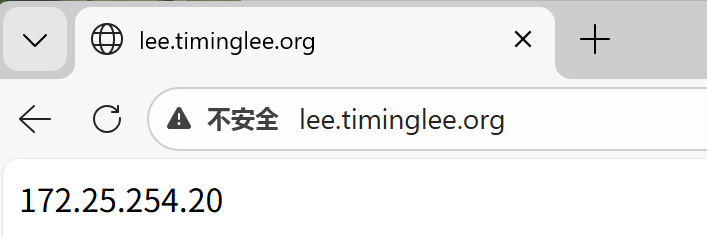
server {
listen 80;
server_name lee.timinglee.org;
location / {
proxy_pass http://172.25.254.20:80;
}
location ~* \.(php|js)$ {
proxy_pass http://172.25.254.10:80;
}
}
[root@Nginx ~]# nginx -s reload测试:
十九、缓存加速
1.当未启用缓存时进行压测
bash
[Administrator.DESKTOP-VJ307M3] ➤ ab -n 10000 -c 50 lee.timinglee.org/index.php
This is ApacheBench, Version 2.3 <$Revision: 1807734 $>
Copyright 1996 Adam Twiss, Zeus Technology Ltd, http://www.zeustech.net/
Licensed to The Apache Software Foundation, http://www.apache.org/

Benchmarking lee.timinglee.org (be patient)
Completed 1000 requests
Completed 2000 requests
Completed 3000 requests
Completed 4000 requests
Completed 5000 requests
Completed 6000 requests
Completed 7000 requests
Completed 8000 requests
Completed 9000 requests
Completed 10000 requests
Finished 10000 requests


Server Software:        nginx/1.28.1
Server Hostname:        lee.timinglee.org
Server Port:            80

Document Path:          /index.php
Document Length:        72921 bytes

Concurrency Level:      50
Time taken for tests:   13.678 seconds
Complete requests:      10000
Failed requests:        9963				#失败的
   (Connect: 0, Receive: 0, Length: 9963, Exceptions: 0)
Total transferred:      731097819 bytes
HTML transferred:       729237819 bytes
Requests per second:    731.10 [#/sec] (mean)
Time per request:       68.390 [ms] (mean)
Time per request:       1.368 [ms] (mean, across all concurrent requests)
Transfer rate:          52197.72 [Kbytes/sec] received

Connection Times (ms)
              min  mean[+/-sd] median   max
Connect:        0    7   4.0      6      26
Processing:     4   61 168.8     44    3405
Waiting:        2   38 129.9     26    3316
Total:          5   68 168.7     51    3405

Percentage of the requests served within a certain time (ms)
  50%     51
  66%     61
  75%     68
  80%     71
  90%     83
  95%     92
  98%    105
  99%    506
 100%   3405 (longest request)
2.设定缓存加速
bash
[root@Nginx ~]# vim /usr/local/nginx/conf/nginx.conf
proxy_cache_path /usr/local/nginx/proxy_cache levels=1:2:2 keys_zone=proxycache:20m inactive=120s max_size=1g;

server {
    listen 80;
    server_name lee.timinglee.org;
    location / {
        proxy_pass http://172.25.254.20:80;

    }

    location ~* \.(php|js)$ {
        proxy_pass http://172.25.254.10:80;
        proxy_cache proxycache;
        proxy_cache_key $request_uri;
        proxy_cache_valid 200 302 301 10m;
        proxy_cache_valid any 1m;
    }

}


[root@Nginx ~]# systemctl restart nginx.service
[root@Nginx ~]# tree  /usr/local/nginx/proxy_cache/
/usr/local/nginx/proxy_cache/

0 directories, 0 files

#测试
[Administrator.DESKTOP-VJ307M3] ➤ ab -n 10000 -c 50 lee.timinglee.org/index.php
This is ApacheBench, Version 2.3 <$Revision: 1807734 $>
Copyright 1996 Adam Twiss, Zeus Technology Ltd, http://www.zeustech.net/
Licensed to The Apache Software Foundation, http://www.apache.org/

Benchmarking lee.timinglee.org (be patient)
Completed 1000 requests
Completed 2000 requests
Completed 3000 requests
Completed 4000 requests
Completed 5000 requests
Completed 6000 requests
Completed 7000 requests
Completed 8000 requests
Completed 9000 requests
Completed 10000 requests
Finished 10000 requests


Server Software:        nginx/1.28.1
Server Hostname:        lee.timinglee.org
Server Port:            80

Document Path:          /index.php
Document Length:        72925 bytes

Concurrency Level:      50
Time taken for tests:   4.365 seconds
Complete requests:      10000
Failed requests:        0
Total transferred:      731110000 bytes
HTML transferred:       729250000 bytes
Requests per second:    2290.76 [#/sec] (mean)
Time per request:       21.827 [ms] (mean)
Time per request:       0.437 [ms] (mean, across all concurrent requests)
Transfer rate:          163554.31 [Kbytes/sec] received

Connection Times (ms)
              min  mean[+/-sd] median   max
Connect:        0    4   1.8      4      11
Processing:     4   18  31.3     15     734
Waiting:        1    9  30.7      5     726
Total:          6   22  31.2     20     734

Percentage of the requests served within a certain time (ms)
  50%     20
  66%     21
  75%     21
  80%     22
  90%     27
  95%     32
  98%     41
  99%     46
 100%    734 (longest request)


[root@Nginx ~]# tree  /usr/local/nginx/proxy_cache/
/usr/local/nginx/proxy_cache/
└── 1
    └── af
        └── 15
            └── e251273eb74a8ee3f661a7af00915af1

3 directories, 1 file
二十、反向代理负载均衡
1.实验环境
bash
172.25.254.100  #Nginx 代理服务器
172.25.254.10  #后端web A,Apache部署
172.25.254.20  #后端web B,Apache部署
2.实现负载均衡
bash
[root@nginx ~]# mkdir  /usr/local/nginx/conf/upstream/
[root@nginx ~]# vim /usr/local/nginx/conf/nginx.conf
events {
    worker_connections  10000;
    use epoll;
    accept_mutex on;
    multi_accept on;
}

http {
    include       mime.types;
    default_type  application/octet-stream;
	include "/usr/local/nginx/conf/upstream/*.conf";		#子配置目录


[root@nginx ~]# vim /usr/local/nginx/conf/upstream/loadbalance.conf
upstream webserver {
    server 172.25.254.10:80 weight=1 fail_timeout=15s max_fails=3;
    server 172.25.254.20:80 weight=1 fail_timeout=15s max_fails=3;
    server 172.25.254.100:8888 backup;

}
server {
    listen 80;
    server_name www.timinglee.org;

    location ~ / {
        proxy_pass http://webserver;
    }
}


[root@nginx ~]# mkdir  /webdir/timinglee.org/error/html -p
[root@nginx ~]# echo error > /webdir/timinglee.org/error/html/index.html

[root@nginx ~]# vim /usr/local/nginx/conf/conf.d/vhosts.conf
server {
    listen 80;
    server_name lee.timinglee.org;
    location / {
        proxy_pass http://172.25.254.20:80;

    }
    location ~* \.(php|js)$ {
        proxy_pass http://172.25.254.10:80;
    }

}
server {
    listen 8888;
    root /webdir/timinglee.org/error/html;
}
测试

bash
#测试error是否正常访问,模拟10和20主机故障
[root@RS1 ~]# systemctl stop httpd
[root@RS1 ~]# systemctl stop httpd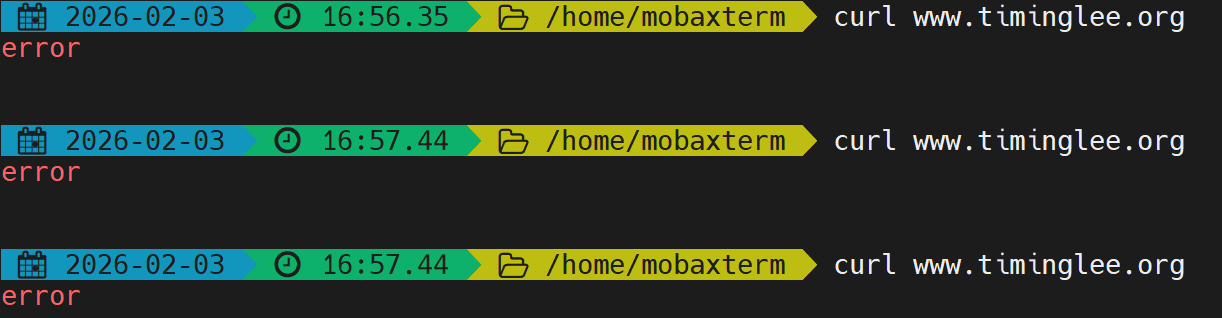
二十一、Nginx负载均衡算法
bash
[root@Nginx ~]# vim /usr/local/nginx/conf/upstream/loadbalance.conf
upstream webserver {
#ip_hash; #基于源地址哈希
#hash $request_uri consistent; #基于uri路径的哈希
#least_conn; #最小链接数
hash $cookie_lee; #cookie值哈希
server 172.25.254.10:80 weight=1 fail_timeout=15s max_fails=3;
server 172.25.254.20:80 weight=1 fail_timeout=15s max_fails=3;
#server 172.25.254.100:8888 backup;
}
server {
listen 80;
server_name www.timinglee.org;
location ~ / {
proxy_pass http://webserver;
}
}
[root@Nginx ~]# curl -b lee=20 www.timinglee.org
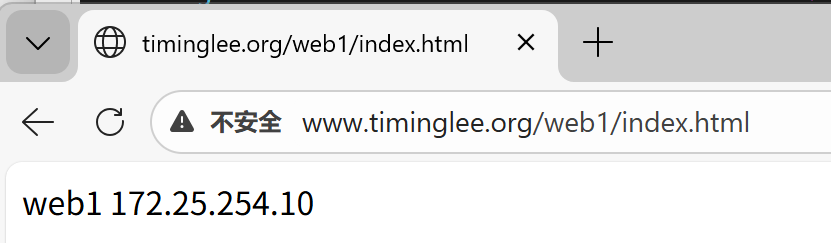
[root@Nginx ~]# curl www.timinglee.org/web1/index.html
[root@Nginx ~]# curl www.timinglee.org/效果:
bash
upstream webserver {
#ip_hash;
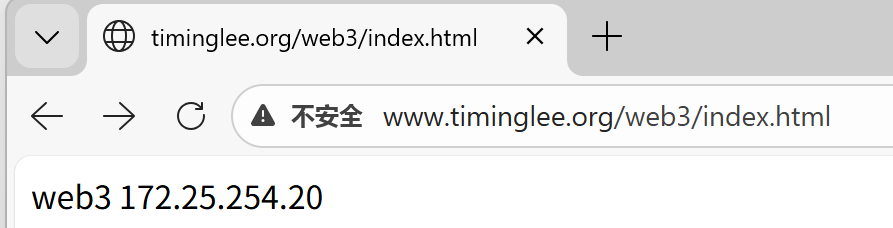
hash $request_uri consistent; # 哈希的是web1/index.hmtl部分
server 172.25.254.10:80 weight=1 fail_timeout=15s max_fails=3;
server 172.25.254.20:80 weight=1 fail_timeout=15s max_fails=3;
#server 172.25.254.100:8888 backup;
}
server {
listen 80;
server_name www.timinglee.org;
location ~ / {
proxy_pass http://webserver;
}
}
二十二、PHP的源码编译
1.下载源码包
bash
[root@nginx ~]# wget https://www.php.net/distributions/php-8.3.30.tar.gz
[root@nginx ~]# wget https://mirrors.aliyun.com/rockylinux/9.7/devel/x86_64/os/Packages/o/oniguruma-devel-6.9.6-1.el9.6.x86_64.rpm     #依赖
2.解压
bash
[root@nginx ~]# tar zxf php-8.3.30.tar.gz
[root@nginx ~]# ls
anaconda-ks.cfg                lee.png              nginx-1.29.4.tar.gz  test.c
daolian.png                    nginx-1.28.1         php-8.3.30
echo-nginx-module-0.64         nginx-1.28.1.tar.gz  php-8.3.30.tar.gz
echo-nginx-module-0.64.tar.gz  nginx-1.29.4         test
[root@nginx ~]# cd php-8.3.30
3.源码编译
bash
[root@nginx ~]# dnf install gcc systemd-devel-252-51.el9.x86_64 libxml2-devel.x86_64 sqlite-devel.x86_64  libcurl-devel.x86_64  libpng-devel.x86_64 oniguruma-devel-6.9.6-1.el9.6.x86_64.rpm -y

[root@Nginx ~]# cd php-8.3.30/
[root@Nginx php-8.3.30]# ./configure --prefix=/usr/local/php --with-config-file-path=/usr/local/php/etc --enable-fpm  --with-fpm-user=nginx --with-fpm-group=nginx --with-curl --with-iconv --with-mhash --with-zlib --with-openssl --enable-mysqlnd --with-mysqli --with-pdo-mysql --disable-debug --enable-sockets --enable-soap --enable-xml --enable-ftp --enable-gd --enable-exif --enable-mbstring --enable-bcmath --with-fpm-systemd
也可以用以下方式
# ./configure \
--prefix=/usr/local/php \		#安装路径
--with-config-file-path=/usr/local/php/etc \	#指定配置路径
--enable-fpm  \			#用cgi方式启动程序
--with-fpm-user=nginx \	#指定运行用户身份
--with-fpm-group=nginx \
--with-curl \			#打开curl浏览器支持
--with-iconv \			#启用iconv函数,转换字符编码
--with-mhash \			#mhash加密方式扩展库
--with-zlib \			#支持zlib库,用于压缩http压缩传输
--with-openssl \		#支持ssl加密
--enable-mysqlnd \		#mysql数据库
--with-mysqli \
--with-pdo-mysql \
--disable-debug \		#关闭debug功能
--enable-sockets \		#支持套接字访问
--enable-soap \			#支持soap扩展协议
--enable-xml \			#支持xml
--enable-ftp \			#支持ftp
--enable-gd \			#支持gd库
--enable-exif \			#支持图片元数据
--enable-mbstring \		#支持多字节字符串
--enable-bcmath \		#打开图片大小调整,用到zabbix监控的时候用到了这个模块
--with-fpm-systemd		#支持systemctl 管理cgi

[root@Nginx php-8.3.30]# make && make instsall
4.配置PHP
bash
[root@nginx php-8.3.30]# cd /usr/local/php/etc/
[root@nginx etc]# ll
总用量 8
-rw-r--r-- 1 root root 5376  2月  4 11:05 php-fpm.conf.default
drwxr-xr-x 2 root root   30  2月  4 11:05 php-fpm.d
[root@nginx etc]# cp -p php-fpm.conf.default php-fpm.conf
[root@nginx etc]# vim php-fpm.conf
[global]
; Pid file
; Note: the default prefix is /usr/local/php/var
; Default Value: none
pid = run/php-fpm.pid

[root@nginx etc]# cd php-fpm.d/
[root@nginx php-fpm.d]# ll
总用量 24
-rw-r--r-- 1 root root 22102  2月  4 11:05 www.conf.default
[root@nginx php-fpm.d]# cp www.conf.default www.conf
[root@nginx php-fpm.d]# vim www.conf
41 listen = 0.0.0.0:9000

[root@nginx php-fpm.d]# cp /root/php-8.3.30/php.ini-production  /usr/local/php/etc/php.ini
[root@nginx php-fpm.d]# vim /usr/local/php/etc/php.ini
989 date.timezone = Asia/Shangha

[root@nginx php-fpm.d]# cd
[root@nginx ~]# cp /root/php-8.3.30/sapi/fpm/php-fpm.service /lib/systemd/system/
[root@nginx ~]# vim /lib/systemd/system
# Mounts the /usr, /boot, and /etc directories read-only for processes invoked by this unit.
#ProtectSystem=full		#注释此参数

[root@Nginx ~]# systemctl daemon-reload
[root@Nginx ~]# systemctl enable --now php-fpm

[root@Nginx ~]# netstat -antlupe | grep php
tcp        0      0 0.0.0.0:9000            0.0.0.0:*               LISTEN      0          329917     165562/php-fpm: mas
二十三、Nginx整合PHP
bash
[root@nginx ~]# mkdir -p /webdir/timinglee.org/php/html
[root@nginx ~]# vim /webdir/timinglee.org/php/html/index.html
php.timinglee.org
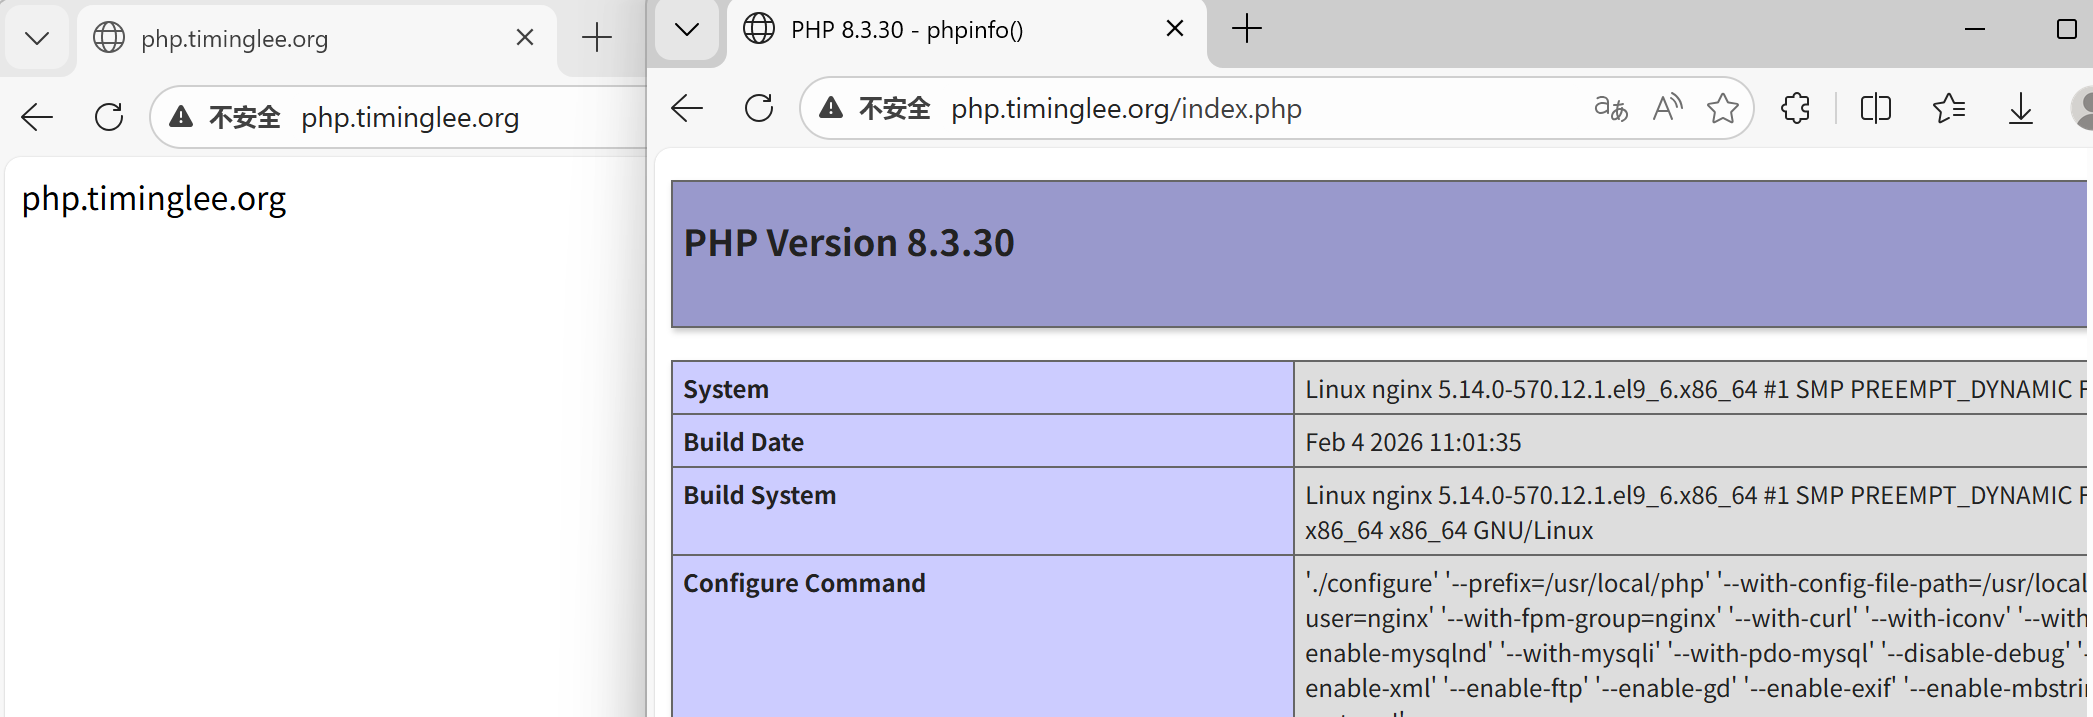
[root@nginx ~]# vim /webdir/timinglee.org/php/html/index.php
<?php
phpinfo();
?>
[root@nginx ~]# cd /usr/local/nginx/conf/conf.d/
[root@nginx conf.d]# vim php.conf
server {
listen 80;
server_name php.timinglee.org;
root /webdir/timinglee.org/php/html;
location ~ \.php$ {
fastcgi_pass 127.0.0.1:9000;
fastcgi_index index.php;
include fastcgi.conf;
}
}
[root@nginx conf.d]# nginx -s reload
#为php设定环境变量
[root@Nginx ~]# vim ~/.bash_profile
export PATH=$PATH:/usr/local/nginx/sbin:/usr/local/php/sbin:/usr/local/php/bin
[root@Nginx ~]# source ~/.bash_profile
[root@Nginx ~]# php -m
#做解析:以管理员身份运行记事本,编辑/etc/system32/driver/etc/hosts 加入php.timinglee.org
#测试
http://php.timinglee.org
http://php.timinglee.org/index.php测试效果
如果想默认访问的是动态页面,可以更改配置文件
bash
[root@nginx conf.d]# vim php.conf
server {
    listen 80;
    server_name php.timinglee.org;
    root /webdir/timinglee.org/php/html;
    index index.php index.html;
    location ~ \.php$ {
        fastcgi_pass 127.0.0.1:9000;
        fastcgi_index index.php;
        include fastcgi.conf;
    }
}
[root@nginx conf.d]# nginx -t
nginx: the configuration file /usr/local/nginx/conf/nginx.conf syntax is ok
nginx: configuration file /usr/local/nginx/conf/nginx.conf test is successful
[root@nginx conf.d]# nginx -s reload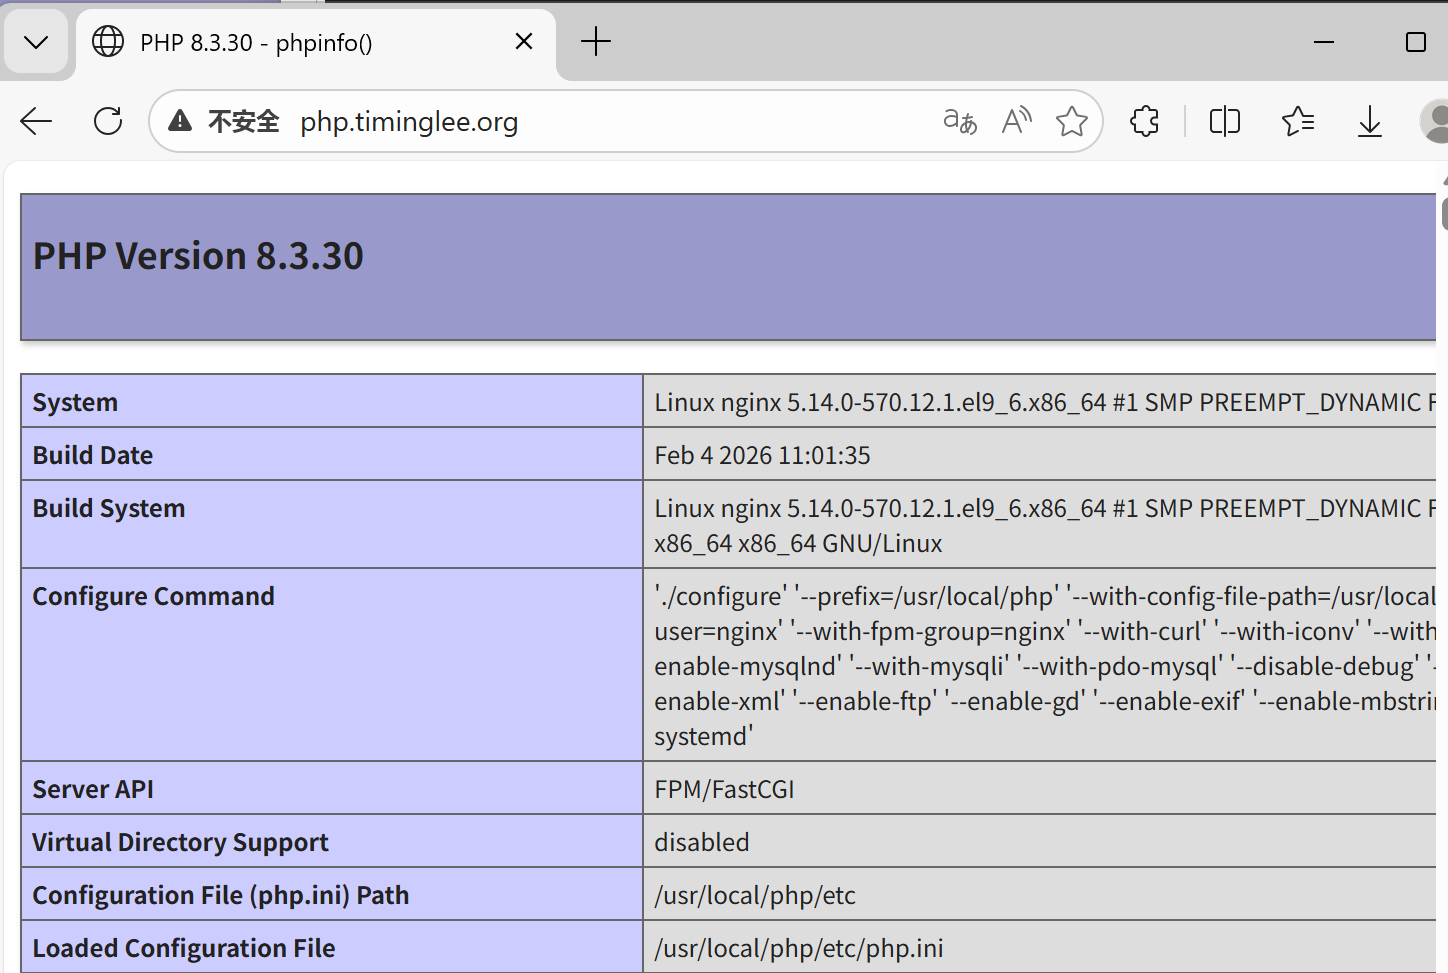
二十四、利用memcache实现php的缓存加速
1.安装memcache
bash
[root@nginx ~]# dnf install memcached.x86_64 -y2.配置memcache
bash
[root@nginx ~]# vim /etc/sysconfig/memcached
PORT="11211"
USER="memcached"
MAXCONN="1024"
CACHESIZE="64"
OPTIONS="-l 0.0.0.0,::1"

[root@nginx ~]# systemctl enable --now memcached.service

[root@nginx ~]# netstat -antlupe | grep memcache
tcp        0      0 0.0.0.0:11211           0.0.0.0:*               LISTEN      991        437305     166169/memcached
tcp6       0      0 ::1:11211               :::*                    LISTEN      991        437306     166169/memcached
3.升级php对于memcache的支持
bash
[root@nginx ~]# php -m	#查看php支持的插件

[root@nginx ~]# tar zxf memcache-8.2.tgz
[root@nginx ~]# cd memcache-8.2/
[root@nginx memcache-8.2]# dnf install autoconf -y
[root@nginx memcache-8.2]# phpize
[root@nginx memcache-8.2]# ./configure  && make && make install

[root@nginx memcache-8.2]# ls /usr/local/php/lib/php/extensions/no-debug-non-zts-20230831/
memcache.so  opcache.so

[root@nginx memcache-8.2]# vim /usr/local/php/etc/php.ini
939  extension=memcache

[root@nginx memcache-8.2]# systemctl restart php-fpm.service
[root@nginx memcache-8.2]# php -m  | grep memcache
memcache
4.测试性能
bash
[root@nginx memcache-8.2]# vim memcache.php
define('ADMIN_USERNAME','admin'); // Admin Username
define('ADMIN_PASSWORD','lee'); // Admin Password
$MEMCACHE_SERVERS[] = '172.25.254.100:11211'; // add more as an array
#$MEMCACHE_SERVERS[] = 'mymemcache-server2:11211'; // add more as an array
[root@nginx memcache-8.2]# cp -p memcache.php /webdir/timinglee.org/php/html/
[root@nginx memcache-8.2]# cp -p example.php /webdir/timinglee.org/php/html/
#测试
http://php.timinglee.org/memcache.php #数据页面,在浏览器中可以直接访问
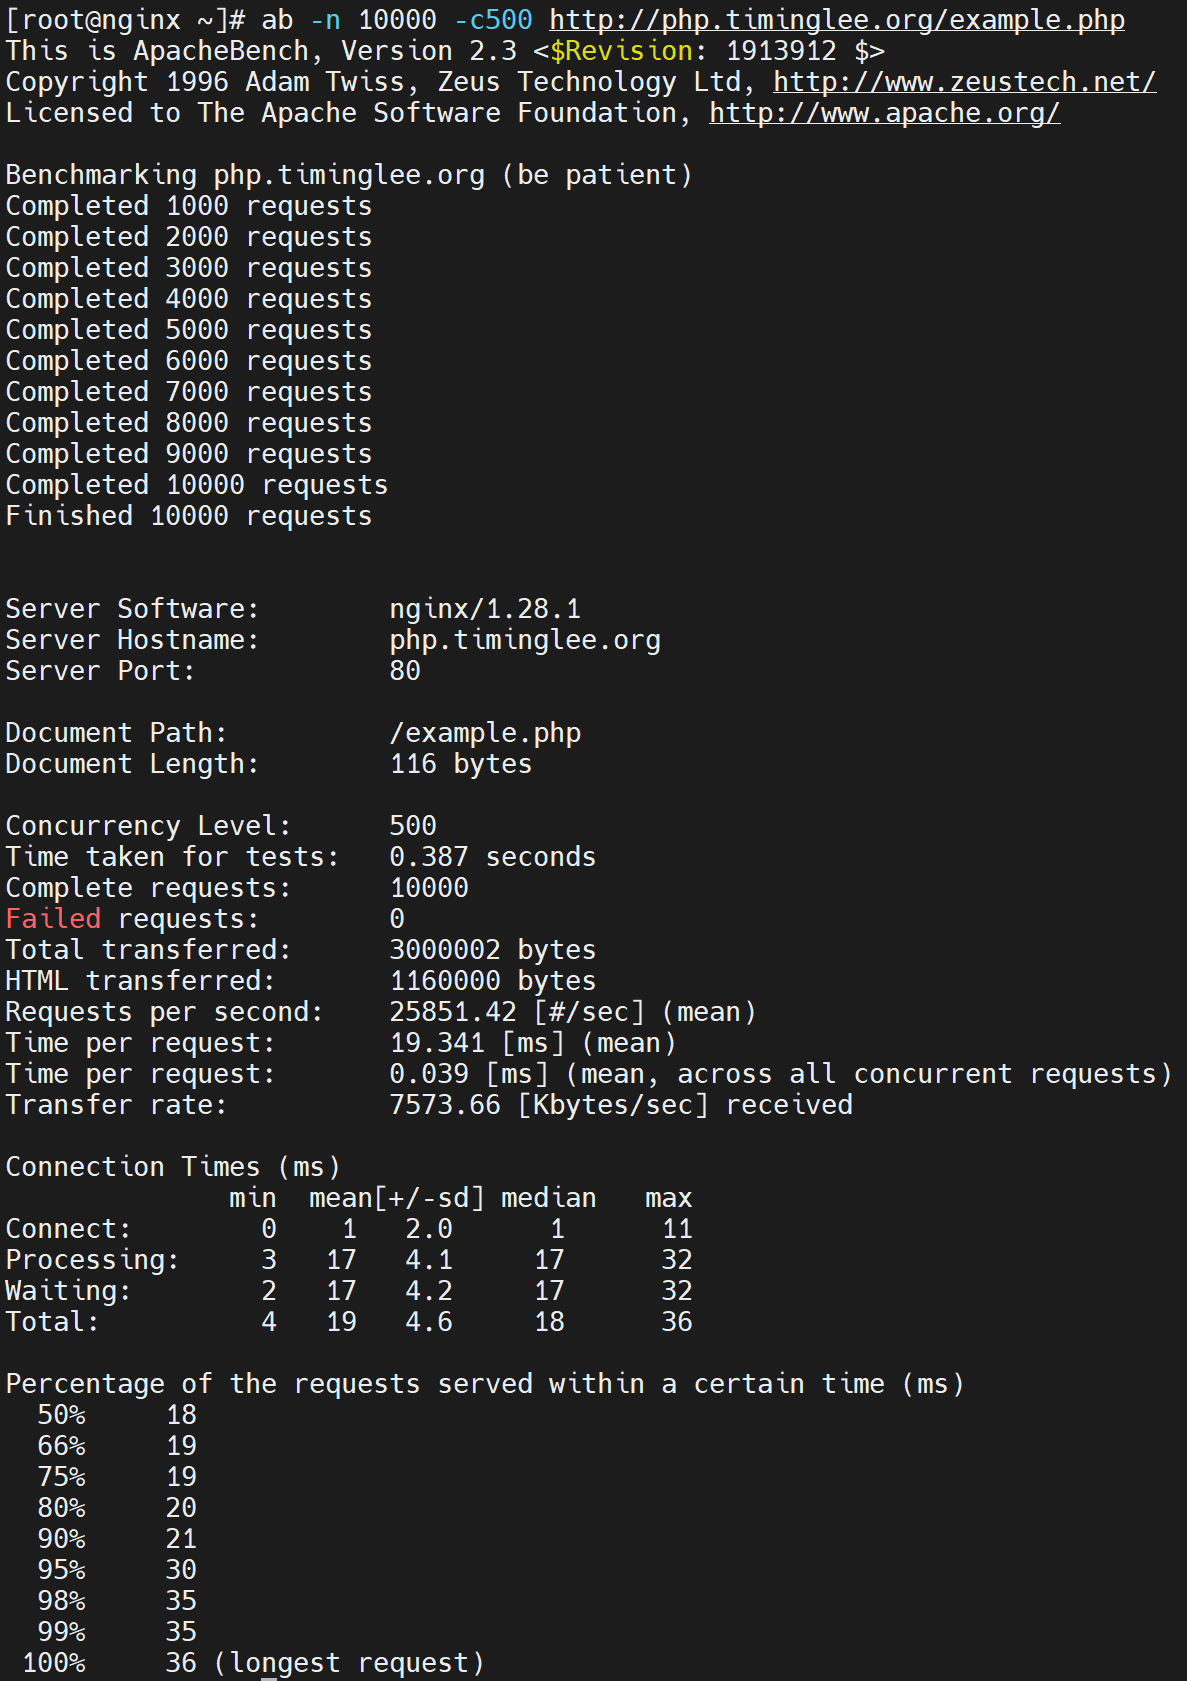
[root@nginx memcache-8.2]# ab -n 1000 -c 300 php.timinglee.org/example.php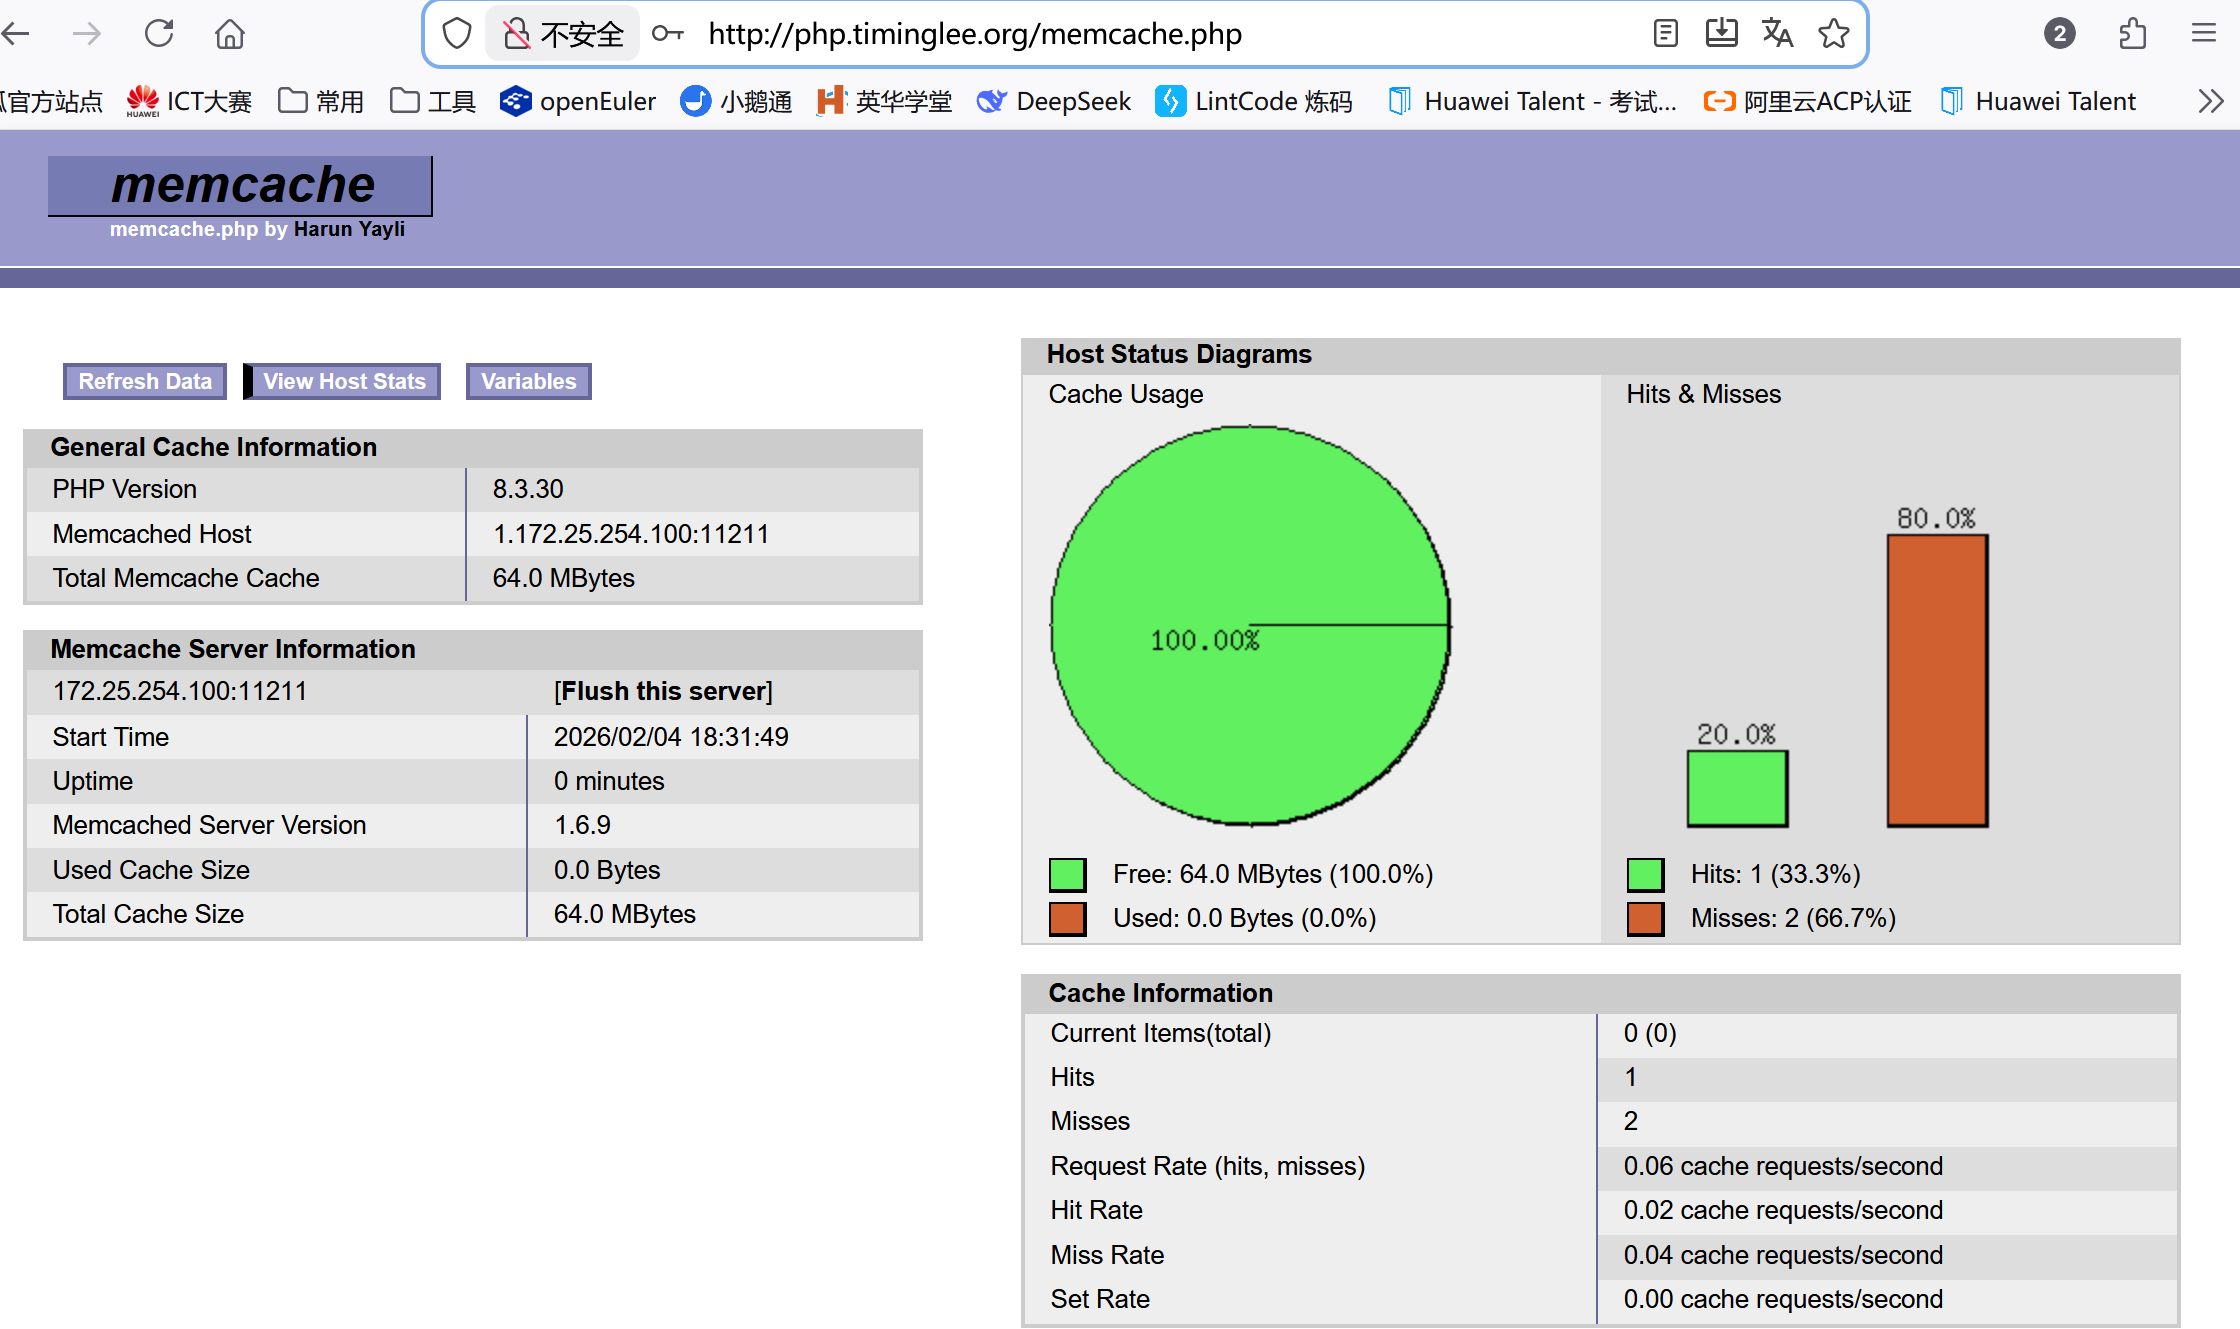
或者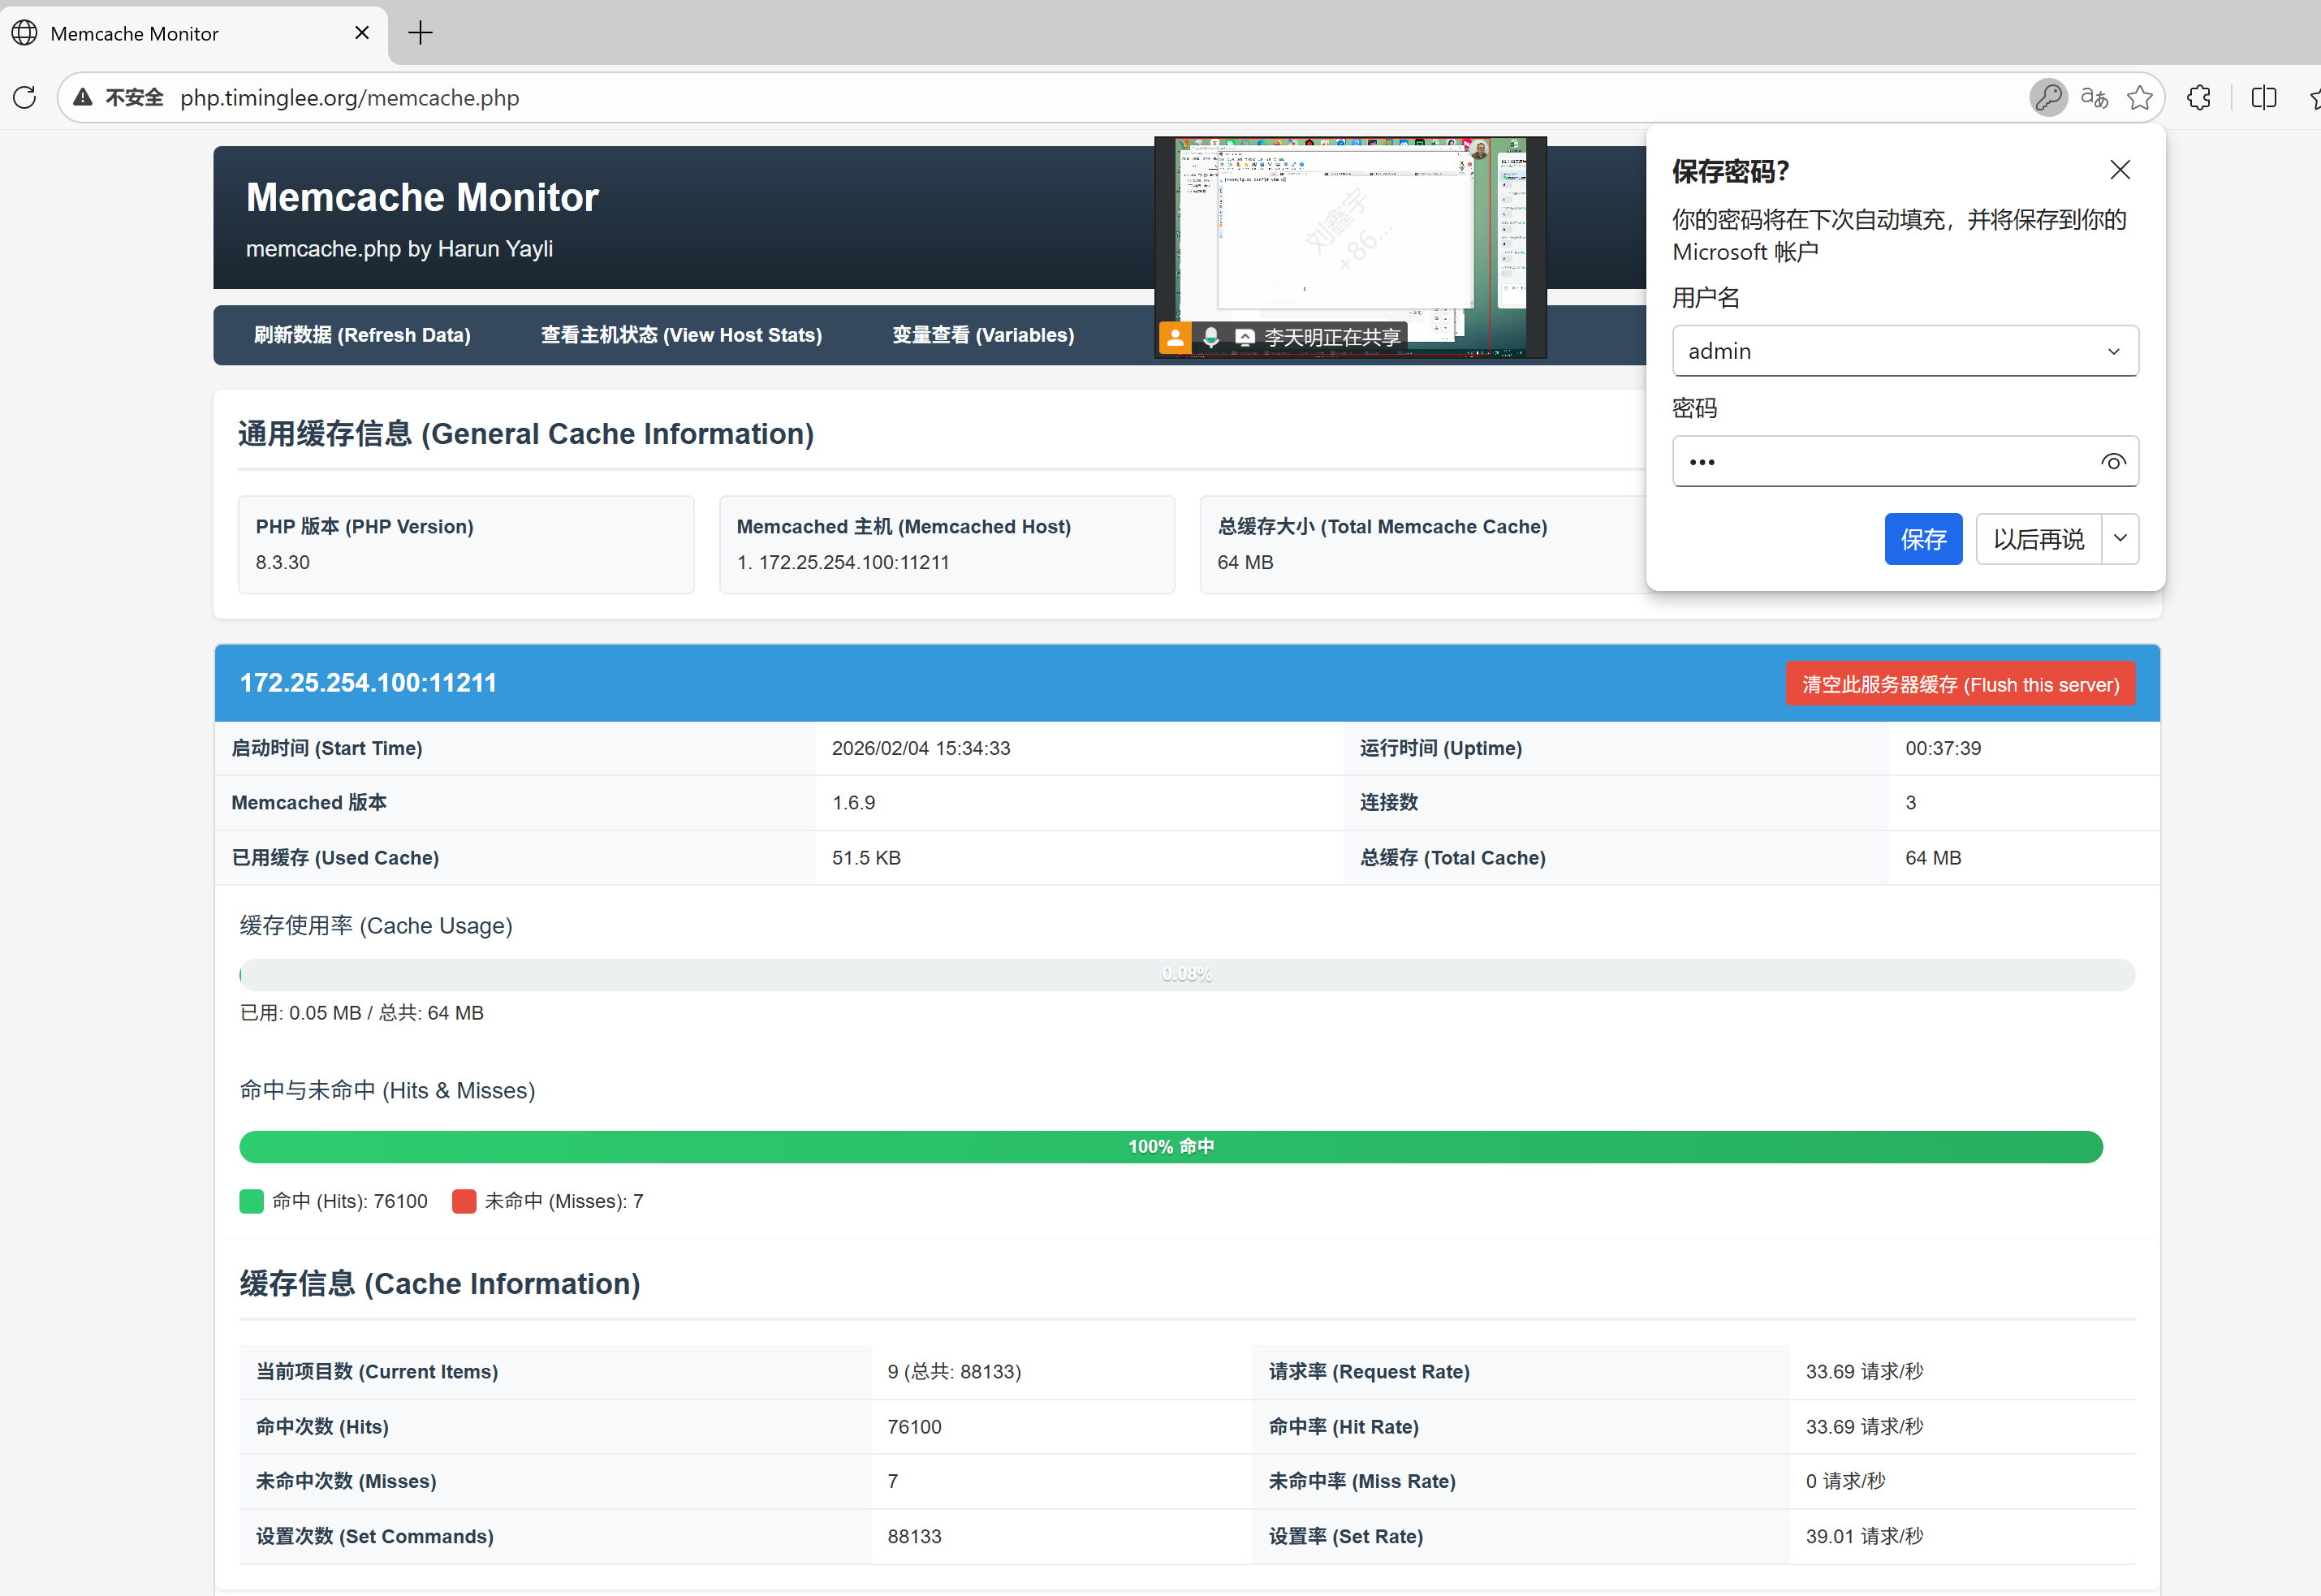
二十五、nginx+memcache实现高速缓存解
1.重新编译nginx
bash
[root@nginx ~]# systemctl stop nginx.service
[root@nginx ~]# cp /usr/local/nginx/conf/    /mnt/ -r
[root@nginx ~]# rm -fr /usr/local/nginx/

[root@nginx ~]# rm -rf nginx-1.29.4 nginx-1.28.1

[root@nginx ~]# tar zxf nginx-1.28.1.tar.gz
[root@nginx ~]# cd nginx-1.28.1/

[root@nginx ~]# tar zxf srcache-nginx-module-0.33.tar.gz
[root@nginx ~]# tar zxf memc-nginx-module-0.20.tar.gz

[root@nginx ~]# cd nginx-1.28.1/
[root@nginx nginx-1.28.1]# ./configure  --prefix=/usr/local/nginx --user=nginx --group=nginx --with-http_ssl_module --with-http_v2_module --with-http_realip_module --with-http_stub_status_module --with-http_gzip_static_module --with-pcre --with-stream --with-stream_ssl_module --with-stream_realip_module --add-module=/root/echo-nginx-module-0.64  --add-module=/root/memc-nginx-module-0.20 --add-module=/root/srcache-nginx-module-0.33
[root@nginx nginx-1.28.1]# make && make install

[root@nginx ~]# cd /usr/local/nginx/conf
[root@nginx conf]# rm -fr nginx.conf
[root@nginx conf]# cp /mnt/conf/nginx.conf /mnt/conf/conf.d/ . -r
[root@nginx conf]# systemctl start nginx.service
2.整合memcache
bash
[root@nginx conf]# vim /usr/local/nginx/conf/conf.d/php.conf
upstream memcache {
   server 127.0.0.1:11211;
   keepalive 512;
}
server {
    listen 80;
    server_name php.timinglee.org;
    root /webdir/timinglee.org/php/html;
    index index.php index.html;

    location /memc {
        internal;
        memc_connect_timeout 100ms;
        memc_send_timeout 100ms;
        memc_read_timeout 100ms;
        set $memc_key $query_string;
        set $memc_exptime 300;
        memc_pass memcache;
    }
    location ~ \.php$ {
        set $key $uri$args;
        srcache_fetch GET /memc $key;
        srcache_store PUT /memc $key;
        fastcgi_pass 127.0.0.1:9000;
        fastcgi_index index.php;
        include fastcgi.conf;
  }
}

[root@nginx conf]# nginx  -s reload
测试
二十六、Nginx的四层负载均衡代理
1.实验环境(Mysql)
bash
[root@RS1 ~]# dnf install mariadb-server -y
[root@RS2 ~]#  dnf install mariadb-server -y

[root@RS1 ~]# vim /etc/my.cnf.d/mariadb-server.cnf
server-id=10

[root@RS2 ~]# vim /etc/my.cnf.d/mariadb-server.cnf
server-id=20
[root@RS1 ~]# systemctl enable --now mariadb
[root@RS2 ~]# systemctl enable --now mariadb

[root@RS1 ~]# mysql
Welcome to the MariaDB monitor.  Commands end with ; or \g.
Your MariaDB connection id is 3
Server version: 10.5.27-MariaDB MariaDB Server

Copyright (c) 2000, 2018, Oracle, MariaDB Corporation Ab and others.

Type 'help;' or '\h' for help. Type '\c' to clear the current input statement.

MariaDB [(none)]> CREATE USER lee@'%' IDENTIFIED BY 'lee';
Query OK, 0 rows affected (0.001 sec)

MariaDB [(none)]> GRANT ALL ON *.* TO lee@'%';
Query OK, 0 rows affected (0.001 sec)

MariaDB [(none)]>

[root@RS2 ~]# mysql
Welcome to the MariaDB monitor.  Commands end with ; or \g.
Your MariaDB connection id is 3
Server version: 10.5.27-MariaDB MariaDB Server

Copyright (c) 2000, 2018, Oracle, MariaDB Corporation Ab and others.

Type 'help;' or '\h' for help. Type '\c' to clear the current input statement.

MariaDB [(none)]>  CREATE USER lee@'%' IDENTIFIED BY 'lee';
Query OK, 0 rows affected (0.001 sec)

MariaDB [(none)]> GRANT ALL ON *.* TO lee@'%';
Query OK, 0 rows affected (0.001 sec)
2.实验环境(dns)
bash
[root@RS1 ~]# dnf install bind -y
[root@RS2 ~]# dnf install bind -y
[root@RS1 ~]# vim /etc/named.conf
[root@RS2 ~]# vim /etc/named.conf
options {
// listen-on port 53 { 127.0.0.1; };
// listen-on-v6 port 53 { ::1; };
directory "/var/named";
dump-file "/var/named/data/cache_dump.db";
statistics-file "/var/named/data/named_stats.txt";
memstatistics-file "/var/named/data/named_mem_stats.txt";
secroots-file "/var/named/data/named.secroots";
recursing-file "/var/named/data/named.recursing";
// allow-query { localhost; };
dnssec-validation no;
[root@RS1 ~]# vim /etc/named.rfc1912.zones
[root@RS2 ~]# vim /etc/named.rfc1912.zones
zone "timinglee.org" IN {
type master;
file "timinglee.org.zone";
allow-update { none; };
};
[root@RS1 ~]# cd /var/named/
[root@RS2 ~]# cd /var/named/
[root@RS1 named]# cp -p named.localhost timinglee.org.zone
[root@RS2 named]# cp -p named.localhost timinglee.org.zone
[root@RS1 named]# vim timinglee.org.zone
$TTL 1D
@ IN SOA dns.timingle.org. rname.invalid. (
0 ; serial
1D ; refresh
1H ; retry
1W ; expire
3H ) ; minimum
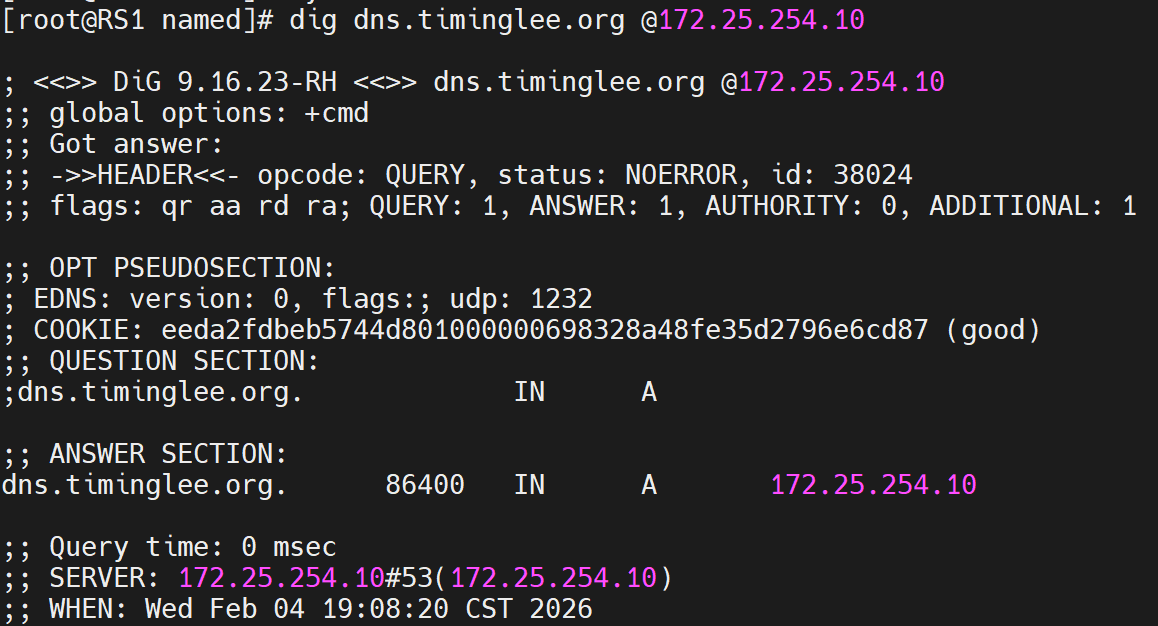
NS dns.timinglee.org.
dns A 172.25.254.10
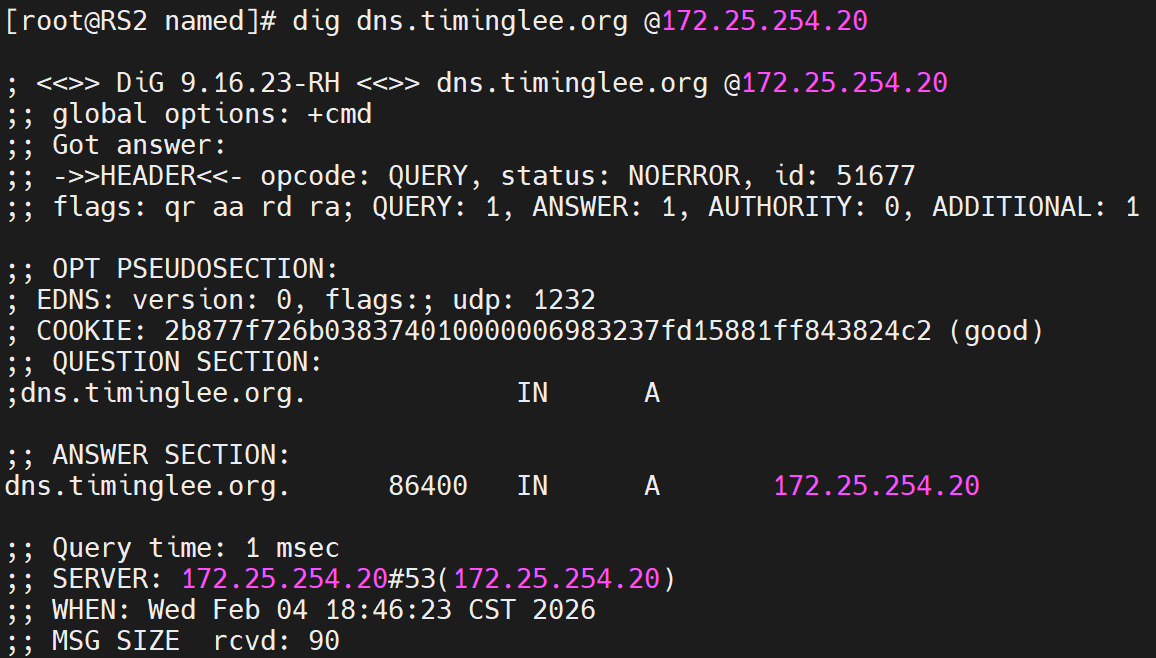
[root@RS2 named]# vim timinglee.org.zone
$TTL 1D
@ IN SOA dns.timingle.org. rname.invalid. (
0 ; serial
1D ; refresh
1H ; retry
1W ; expire
3H ) ; minimum
NS dns.timinglee.org.
dns A 172.25.254.20
[root@RS2 named]# systemctl enable --now named测试
3.tcp四层负载
bash
[root@nginx conf]# mkdir /usr/local/nginx/conf/tcp -p
[root@nginx conf]# mkdir /usr/local/nginx/conf/udp -p
[root@nginx conf]# vim /usr/local/nginx/conf/nginx.conf
include "/usr/local/nginx/conf/tcp/*.conf";
include "/usr/local/nginx/conf/udp/*.conf";
[root@nginx conf]# vim /usr/local/nginx/conf/tcp/mariadb.conf
stream {
upstream mysql_server {
server 172.25.254.10:3306 max_fails=3 fail_timeout=30s;
server 172.25.254.20:3306 max_fails=3 fail_timeout=30s;
}
server {
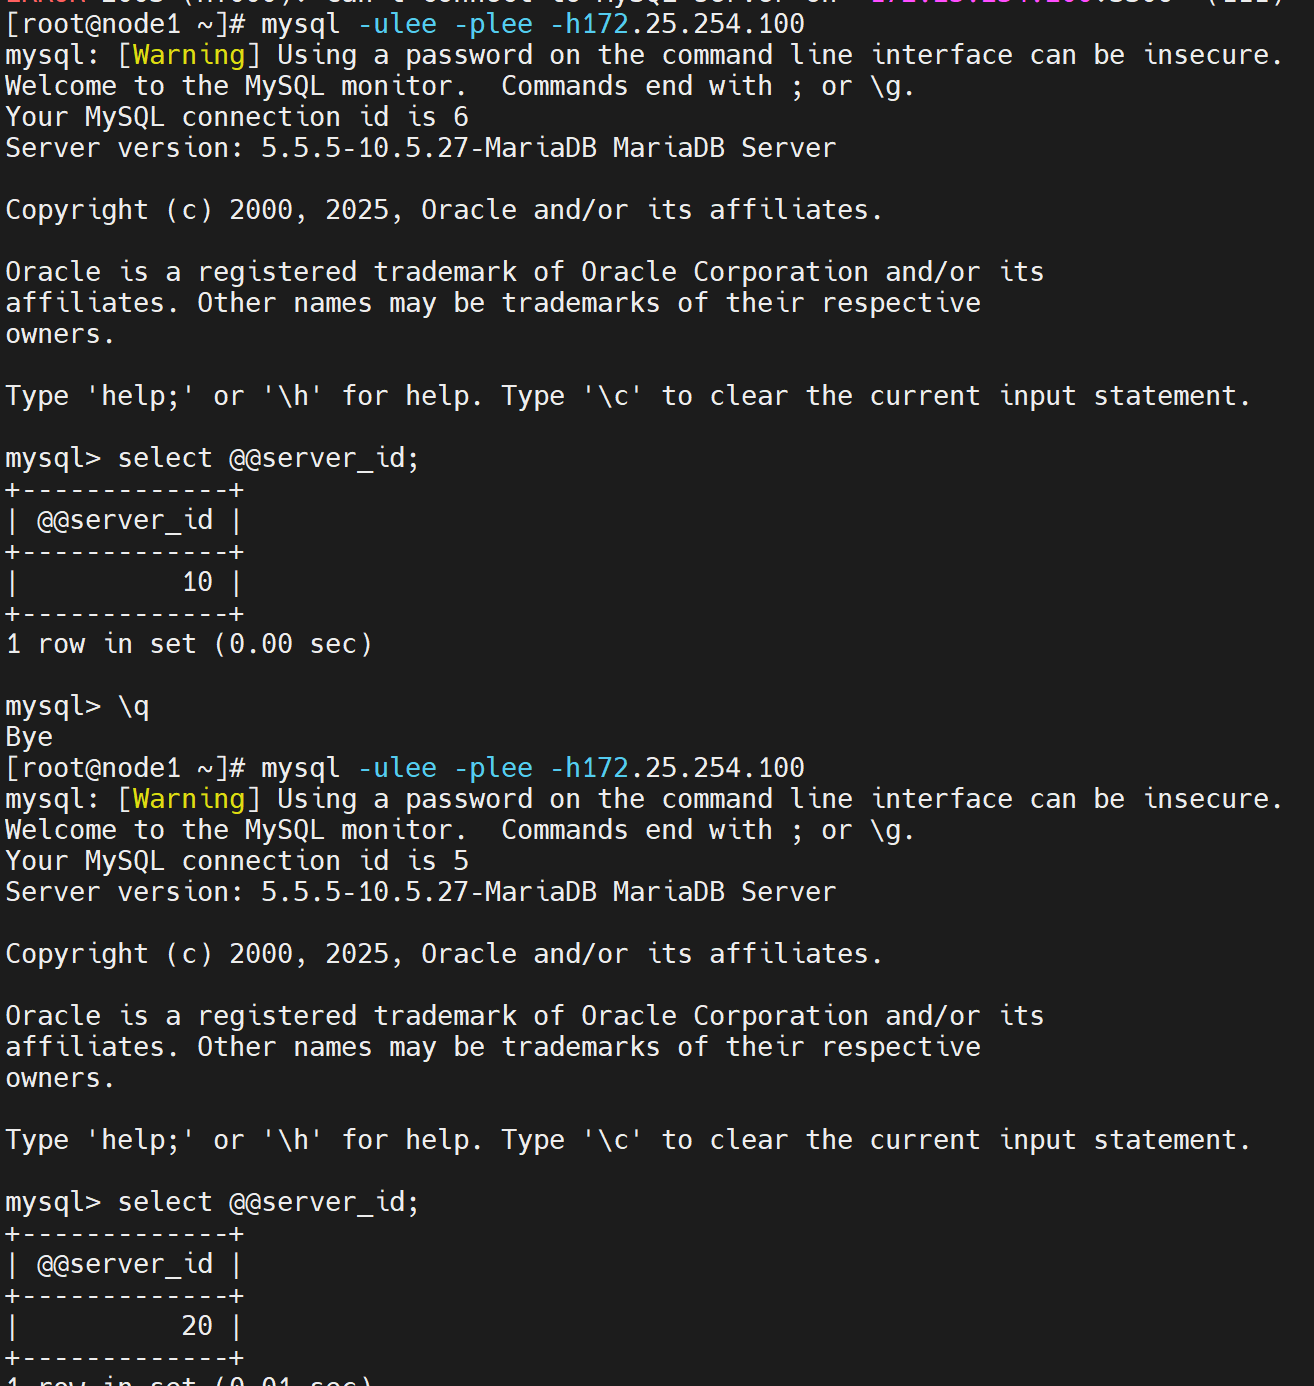
listen 172.25.254.100:3306;
proxy_pass mysql_server;
proxy_connect_timeout 30s;
proxy_timeout 300s;
}
}
[root@nginx conf]# nginx -s reload测试,这里使用另外一台主机进行测试,也可以用nginx主机进行测试
4.udp四层负载
bash
[root@nginx conf]# vim /usr/local/nginx/conf/nginx.conf
include "/usr/local/nginx/conf/tcp/*.conf";
[root@nginx ~]# vim /usr/local/nginx/conf/udp/dns.conf
stream {
  upstream mysql_server {
    server 172.25.254.10:3306  max_fails=3 fail_timeout=30s;
    server 172.25.254.20:3306  max_fails=3 fail_timeout=30s;
  }

  upstream dns_server{
    server 172.25.254.10:53 max_fails=3 fail_timeout=30s;
    server 172.25.254.20:53 max_fails=3 fail_timeout=30s;
  }

  server {
    listen 172.25.254.100:3306;
    proxy_pass mysql_server;
    proxy_connect_timeout 30s;
    proxy_timeout 300s;
  }

  server {
        listen 172.25.254.100:53 udp;
        proxy_pass dns_server;
        proxy_timeout 1s;
        proxy_responses 1;
        error_log logs/dns.log;
    }
}
[root@nginx ~]# nginx  -s reload
测试

二十七、编译安装 openresty
bash
[root@webserver ~]# cd /usr/local/src/
[root@webserver src]# wget https://openresty.org/download/openresty-1.27.1.2.tar.gz
--2026-02-06 10:21:17--  https://openresty.org/download/openresty-1.27.1.2.tar.gz
正在解析主机 openresty.org (openresty.org)... 47.91.165.147
正在连接 openresty.org (openresty.org)|47.91.165.147|:443... 已连接。
已发出 HTTP 请求,正在等待回应... 200 OK
长度:6070612 (5.8M) [application/x-gzip]
正在保存至: "openresty-1.27.1.2.tar.gz"

openresty-1.27.1.2.tar.gz  100%[======================================>]   5.79M  4.73MB/s  用时 1.2s

2026-02-06 10:21:19 (4.73 MB/s) - 已保存 "openresty-1.27.1.2.tar.gz" [6070612/6070612])

[root@webserver src]# tar zxf openresty-1.27.1.2.tar.gz
[root@webserver src]# cd openresty-1.27.1.2/
[root@webserver openresty-1.27.1.2]# ./configure --prefix=/apps/openresty --user=nginx --group=nginx --with-http_ssl_module --with-http_v2_module --with-http_stub_status_module --with-http_gzip_static_module --with-pcre --with-stream --with-stream_ssl_module --with-stream_realip_module

[root@webserver openresty-1.27.1.2]#gmake && gmake install

[root@webserver openresty-1.27.1.2]# vim ~/.bash_profile
export PATH=$PATH:/usr/local/openresty/bin

[root@webserver openresty-1.27.1.2]# source  ~/.bash_profile
[root@webserver openresty-1.27.1.2]# ln -s /apps/openresty/bin/* /usr/bin/

[root@webserver openresty-1.27.1.2]# openresty -v
nginx version: openresty/1.27.1.2

[root@webserver openresty-1.27.1.2]# openresty
[root@webserver openresty-1.27.1.2]# ps -ef | grep nginx
root       52539       1  0 10:24 ?        00:00:00 nginx: master process openresty
nginx      52540   52539  0 10:25 ?        00:00:00 nginx: worker process
root       52542    1667  0 10:25 pts/0    00:00:00 grep --color=auto nginx


[root@webserver html]# pwd
/apps/openresty/nginx/html
[root@webserver html]# echo hello test > /apps/openresty/nginx/html/index.html
[root@webserver html]# curl localhost
hello test