一、HAProxy 是什么?为什么要学它?
HAProxy = 高性能、开源的负载均衡 + 反向代理软件
1. HAProxy 是什么?
主要用来:
- 把用户请求均匀分给多台服务器
- 做流量入口、网关、高可用
- 支持 HTTP/HTTPS/TCP 等,性能极强、很稳定
简单理解:你有 10 台 Web 服务器,用户不知道也不用管连哪台,全都先连 HAProxy,它帮你自动分发。
2. 为什么要学它?
- 几乎所有公司都在用
Nginx、HAProxy 是后端 / 运维 /架构标配,面试必问。
- 专门扛高并发、扛流量
比 Nginx 更擅长长连接、TCP 代理、四层 / 七层负载均衡,很多网关、API 入口、微服务网关都用它。
- 学完直接提升岗位竞争力
会HAProxy = 你能搞定:
- 服务高可用
- 流量分发
- 故障自动剔除
- 网关层架构
- 云原生 / 容器 / K8s 必备基础
Kubernetes 里的 Service、Ingress 底层思想,跟 HAProxy 负载均衡完全同源,学会 HAProxy 很容易看懂 K8s 网络。
二、HAProxy 核心概念
1. 四层负载均衡(TCP)
只看 IP + 端口,转发快,适合 MySQL、Redis、RPC 等。
2. 七层负载均衡(HTTP/HTTPS)
能看 URL、域名、Cookie,做路由、会话保持、健康检查。
3. 前端 frontend
接收用户请求的入口(监听端口)。
4. 后端 backend
真正提供服务的服务器集群。
5. 健康检查
自动把挂掉的服务器踢出去,恢复后再加回来。
- 负载均衡算法
-
roundrobin:轮询(默认) -
leastconn:最少连接(适合长连接) -
source:按客户端 IP 哈希(会话保持)
- HAProxy 和 Nginx 区别?
-
Nginx:偏 Web 服务器、静态资源、缓存。
-
HAProxy:专业负载均衡,四层 / TCP 更强,长连接、高并发更稳。
- 四层和七层区别?
-
四层:快、通用(TCP)。
-
七层:智能、能识别 HTTP,但稍耗性能。
- 怎么保证高可用?
- 两台 HAProxy + Keepalived 做虚拟 IP(VIP)。
三、环境与核心配置
1. HAProxy 的安装及配置参数详解
1.1 基础安装
bash
#在调度器(双网卡主机中)
[root@haproxy ~]# dnf install haproxy.x86_64 -y     # 安装Haproxy
[root@haproxy ~]# systemctl enable --now haproxy    # 开机自启并立即启动服务
Created symlink /etc/systemd/system/multi-user.target.wants/haproxy.service → /usr/lib/systemd/system/haproxy.service.
1.2 基础负载均衡实现
方式 1:前后端分离(frontend + backend)
配置逻辑:
-
frontend webcluster:定义前端监听规则,绑定 80 端口、指定 HTTP 模式,匹配请求后转发到webserver-80后端集群。 -
backend webserver-80:定义后端服务器池,包含两台 Web 节点(192.168.0.10/20:80),并配置健康检查参数:-
check:启用健康检查; -
inter 3s:每 3 秒检查一次; -
fall 3:连续 3 次检查失败则标记为不可用; -
rise 5:连续 5 次检查成功则恢复可用。
-
bash
#前后端分开设定
[root@haproxy ~]# vim /etc/haproxy/haproxy.cfg

frontend webcluster
    bind            *:80
    mode            http
    use_backend     webserver-80

backend webserver-80
    server web1 192.168.0.10:80 check inter 3s fall 3 rise 5
    server web2 192.168.0.20:80 check inter 3s fall 3 rise 5

[root@haproxy ~]# systemctl restart haproxy.service #重启haproxy服务验证效果:通过curl 172.25.254.100测试,请求会轮询分发到 web1 和 web2,返回不同节点的标识信息。
方式 2:listen 整合式配置
配置逻辑:将前端监听和后端服务器池合并到listen块中,简化配置(适合小型集群)。
bash
#用listen方式书写负载均衡
[root@haproxy ~]# vim /etc/haproxy/haproxy.cfg
listen webcluster
    bind        *:80
    mode        http
    server haha 192.168.0.10:80 check inter 3s fall 3 rise 5
    server hehe 192.168.0.20:80 check inter 3s fall 3 rise 5

[root@haproxy ~]# systemctl restart haproxy.service
验证效果:与前后端分离方式一致,轮询分发请求。

1.3 日志配置
实现 Haproxy 日志的远程转发,便于集中监控和审计:
步骤 1:日志接收端配置(192.168.0.10)
修改/etc/rsyslog.conf,启用 UDP 514 端口接收日志:
bash
#在192.168.0.10 开启接受日志的端口
[root@webserver1 ~]# vim /etc/rsyslog.conf
 32 module(load="imudp") # needs to be done just once
 33 input(type="imudp" port="514")
重启 rsyslog 服务,验证端口监听(netstat -antlupe | grep rsyslog)。
bash
[root@webserver1 ~]# systemctl restart rsyslog.service

#测试接受日志端口是否开启
[root@webserver1 ~]# netstat -antlupe | grep rsyslog
udp        0      0 0.0.0.0:514             0.0.0.0:*                           0          74140      30965/rsyslogd
udp6       0      0 :::514                  :::*                                0          74141      30965/rsyslogd
步骤 2:Haproxy 端配置
在haproxy.cfg中添加日志转发规则:log 192.168.0.10 local2(local2为日志设施级别)。
bash
[root@haproxy haproxy]# vim haproxy.cfg

log         192.168.0.10 local2

[root@haproxy haproxy]# systemctl restart haproxy.service    #重启 Haproxy
重启 Haproxy 后,通过curl触发请求,在日志接收端查看/var/log/messages,可看到 Haproxy 的访问日志(包含客户端 IP、请求时间、后端节点、响应状态等)。
bash
#验证
─
[2026-01-23 15:13.54]  ~
[Administrator.DESKTOP-VJ307M3] ➤ curl 172.25.254.100
webserver1 - 192.168.0.10
                                                                                                    ✔
─────────────────────────────────────────────────────────────────────────────────────────────────────
[2026-01-23 15:19.05]  ~
[Administrator.DESKTOP-VJ307M3] ➤ curl 172.25.254.100
webserver2 - 192.168.0.20
[root@webserver1 ~]# cat /var/log/messages

Jan 23 15:19:06 192.168.0.100 haproxy[31310]: 172.25.254.1:9514 [23/Jan/2026:15:19:06.320] webcluster webcluster/haha 0/0/0/1/1 200 273 - - ---- 1/1/0/0/0 0/0 "GET / HTTP/1.1"
Jan 23 15:19:10 192.168.0.100 haproxy[31310]: 172.25.254.1:9519 [23/Jan/2026:15:19:10.095] webcluster webcluster/hehe 0/0/0/0/0 200 273 - - ---- 1/1/0/0/0 0/0 "GET / HTTP/1.1"
1.4 多进程配置
优化 Haproxy 的 CPU 利用率,通过多进程提升并发处理能力:
1. 基础多进程
配置nbproc 2:启动 2 个 Haproxy 进程;
bash
#默认haproxy是单进程
[root@haproxy ~]# pstree -p | grep haproxy
           |-haproxy(31439)---haproxy(31441)-+-{haproxy}(31442)
[root@haproxy ~]# vim /etc/haproxy/haproxy.cfg
nbproc 2验证:pstree -p | grep haproxy可看到多进程结构。
bash
#验证
[root@haproxy ~]# pstree -p | grep haproxy
           |-haproxy(31549)-+-haproxy(31551)
           |                `-haproxy(31552)
2. 进程 CPU 绑定
配置cpu-map 1 0/cpu-map 2 1:将进程 1 绑定到 CPU0,进程 2 绑定到 CPU1,避免进程抢占 CPU 资源。
bash
#多进程cpu绑定
[root@haproxy ~]# vim /etc/haproxy/haproxy.cfg
    nbproc      2
    cpu-map     1 0
    cpu-map     2 1
[root@haproxy ~]# systemctl restart haproxy.service
3. 进程独立套接字
为不同进程配置独立的 stats 套接字(用于进程管理)
bash
[root@haproxy ~]# vim /etc/haproxy/haproxy.cfg
    #stats socket /var/lib/haproxy/stats
    stats socket /var/lib/haproxy/haproxy1  mode 600 level admin process 1
    stats socket /var/lib/haproxy/haporxy2  mode 660 level admin process 1

[root@haproxy ~]# systemctl restart haproxy.service验证:ll /var/lib/haproxy/可看到创建的套接字文件。
bash
#效果
[root@haproxy ~]# ll /var/lib/haproxy/
总用量 0
srw-rw---- 1 root root 0  1月 23 15:41 haporxy2
srw------- 1 root root 0  1月 23 15:41 haproxy1
1.5 多线程配置
注意 :多线程与多进程不能同时启用,适用于单进程下提升并发:
1. 前置检查
查看默认线程数:cat /proc/[进程ID]/status | grep Threads,默认单线程。
bash
#查看当前haproxy的进程信息
[root@haproxy ~]# pstree -p | grep haproxy
           |-haproxy(31742)-+-haproxy(31744)
           |                `-haproxy(31745)

 #查看haproxy子进程的线程信息
[root@haproxy ~]# cat /proc/31744/status  | grep Threads
Threads:        1
2. 启用多线程
-
注释多进程相关配置,添加
nbthread 2:单进程下启动 2 个线程。 -
恢复默认 stats 套接字:
stats socket /var/lib/haproxy/stats。
bash
#启用多线程
[root@haproxy ~]# vim /etc/haproxy/haproxy.cfg

	#nbproc     2
    #cpu-map    1 0
    #cpu-map    2 1
    nbthread    2
    # turn on stats unix socket
    stats socket /var/lib/haproxy/stats
    #stats socket /var/lib/haproxy/haproxy1  mode 600 level admin process 1
    #stats socket /var/lib/haproxy/haporxy2  mode 660 level admin process 1

[root@haproxy ~]# systemctl restart haproxy.service
3. 验证效果
-
pstree -p | grep haproxy可看到进程下的线程子进程; -
cat /proc/[进程ID]/status | grep Threads显示线程数为 2。
bash
#效果
[root@haproxy ~]# pstree -p | grep haproxy
           |-haproxy(31858)---haproxy(31860)---{haproxy}(31861)

[root@haproxy ~]# cat /proc/31860/status  | grep Threads
Threads:        2
nbproc:进程数,利用多 CPU 核心;
nbthread:线程数,单进程内提升并发;
cpu-map:进程 CPU 绑定,优化资源调度;
stats socket:进程管理套接字,用于调试 / 监控;
check/inter/fall/rise:健康检查核心参数,保障集群可用性。
2. HAPORXY 实验环境设定
这一部分是关于HAProxy 实验环境搭建的操作指引,详细记录了实验中各节点的网络配置、服务部署及基础连通性验证步骤,整体围绕构建一个包含 HAProxy 代理节点和两台 Web 服务器节点的实验环境展开

-
HAProxy 主机(代理节点)
-
webserver1(后端 Web 服务节点 1)
-
webserver2(后端 Web 服务节点 2)
2.1 HAProxy 主机配置
该节点是实验的核心代理节点,重点完成双网卡网络配置 和内核路由转发开启(为后续代理 / 转发做基础)。
- 网卡 eth0 / eth1 配置
bash
[root@haproxy ~]# vmset.sh eth0 172.25.254.100 haproxy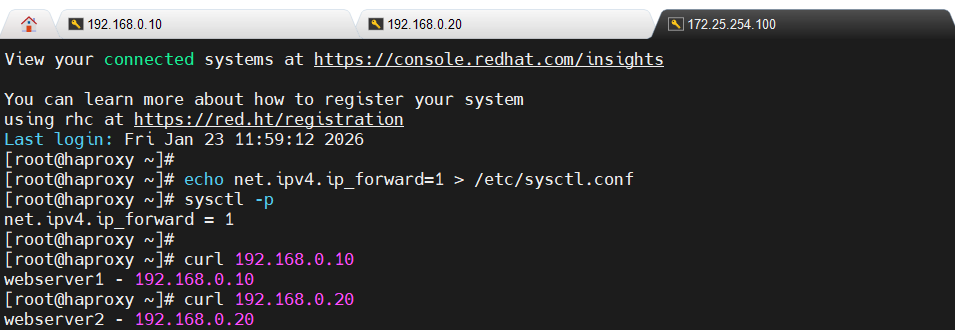
[root@haproxy ~]# vmset.sh eth1 192.168.0.100 haproxy norouter- 内核路由转发
-
开启 Linux 内核的 IPv4 转发功能(核心配置);
-
作用:让 HAProxy 节点具备路由 / 转发能力,能将外部请求转发给后端 Web 服务器,同时将响应回传给客户端。
bash
#配置内核路由功能
[root@haproxy ~]# echo net.ipv4.ip_forward=1 > /etc/sysctl.conf
[root@haproxy ~]# sysctl -p
net.ipv4.ip_forward = 1
2.2 webserver1 节点配置
该节点是后端 Web 服务节点,核心是配置网络 + 部署 HTTP 服务。
- 网络配置
bash
[root@webserver1 ~]# vmset.sh eth0 192.168.0.10 webserver1 noroute- HTTP 服务部署
bash
# 通过 DNF 包管理器安装 Apache HTTP 服务(httpd);
[root@webserver1 ~]# dnf install httpd -y
# 自定义 Web 页面内容(用于区分不同 Web 节点);
root@webserver1 ~]# echo webserver1 - 192.168.0.10 > /var/www/html/index.html
# 设置 httpd 开机自启,并立即启动服务
[root@webserver1 ~]# systemctl enable --now httpd
Created symlink /etc/systemd/system/multi-user.target.wants/httpd.service → /usr/lib/systemd/system/httpd.service.
2.3 webserver2 节点配置
和 webserver1 配置逻辑完全一致,仅 IP 和标识信息不同,是冗余的后端 Web 节点(用于后续 HAProxy 负载均衡测试)。
- 网络配置
bash
[root@webserver2 ~]# vmset.sh eth0 192.168.0.20 webserver2 noroute- HTTP 服务部署
bash
[root@webserver2 ~]# dnf install httpd -y
[root@webserver2 ~]#  echo webserver2 - 192.168.0.20 > /var/www/html/index.html
[root@webserver2 ~]# systemctl enable --now httpd
Created symlink /etc/systemd/system/multi-user.target.wants/httpd.service → /usr/lib/systemd/system/httpd.service.
2.4 环境验证步骤
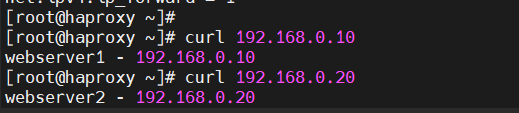
在 HAProxy 主机上通过curl命令验证与后端 Web 节点的连通性
四、负载均衡与代理能力
1. HAProxy 四层负载均衡
1.1 什么是 HAProxy 四层负载均衡?
首先要明确 "四层" 指的是TCP/IP 协议栈的传输层(第四层),对应的核心协议是 TCP/UDP。HAProxy 四层负载均衡,简单说就是:HAProxy 只关注网络请求的 "IP 地址 + 端口号",不解析请求的内容(比如 HTTP 报文、SQL 语句),纯粹把 TCP/UDP 数据包转发到后端服务器 。
可以做个形象比喻:
-
四层负载 = 快递分拣员:只看包裹上的 "收件地址(IP)+ 门牌号(端口)",直接把包裹送到对应仓库,不管包裹里装的是文件还是零食;
-
对比七层负载(HTTP):相当于快递员不仅看地址,还会打开包裹看内容,再决定送到哪个货架。
1.2 工作原理:数据包是怎么转发的?
-
监听端口:HAProxy 在指定端口(比如 6663)监听客户端的 TCP/UDP 连接请求;
-
建立连接:客户端先和 HAProxy 建立 TCP 连接(三次握手);
-
选择后端节点:HAProxy 根据预设的负载均衡算法(如轮询),从后端服务器池中选一个节点;
-
转发数据包:HAProxy 和选中的后端节点建立 TCP 连接,把客户端的数据包原封不动转发过去,同时把后端节点的响应数据包回传给客户端;
-
维持连接:整个过程中,HAProxy 相当于 "中间人",只做数据包的转发,不修改、不解析内容。
核心特点:速度快、通用性强(因为只处理传输层,不做应用层解析,性能损耗极低)。
1.3 基于 HAProxy 实现 MariaDB 数据库的四层负载均衡
HAProxy 是一款高性能的 TCP/HTTP 反向代理服务器,支持四层(TCP)和七层(HTTP)负载均衡。这部分聚焦四层负载均衡(基于 TCP 协议),针对 MariaDB 数据库集群实现请求分发,并验证故障自动切换能力。
1.3.1 模块 1:环境设定(MariaDB 数据库部署)
- 数据库安装与配置
-
server_id=10:数据库实例的唯一标识(另一台数据库服务器需设为20),用于区分集群中的不同节点。 -
其他项(datadir/socket/log-error 等):定义数据库数据目录、套接字文件、日志路径等基础参数。
bash
# 安装mariadb服务端和客户端
[root@webserver1+2 ~]# dnf install mariadb-server mariadb  -y
# 编辑数据库配置文件
[root@webserver1+1 ~]# vim /etc/my.cnf.d/mariadb-server.cnf
[mysqld]
server_id=10			#设定数据库所在主机的id标识,在20上设定id为20
datadir=/var/lib/mysql
socket=/var/lib/mysql/mysql.sock
log-error=/var/log/mariadb/mariadb.log
pid-file=/run/mariadb/mariadb.pid- 远程登录用户授权
为了让 HAProxy 和客户端能远程访问数据库,创建并授权通用用户:
bash
# 创建用户lee,允许所有主机(%)访问,密码为lee
MariaDB [(none)]> CREATE USER 'lee'@'%' identified by 'lee';
# 授予该用户所有库、所有表的全部权限
MariaDB [(none)]> GRANT ALL ON *.* TO 'lee'@'%';- 连通性测试
目的:验证数据库节点可被远程访问,为后续 HAProxy 转发做基础。
bash
[root@webserver2 ~]# mysql -ulee -plee -h 192.168.0.20 #测试10时修改ip即可1.3.2 模块 2:四层负载均衡核心配置
- HAProxy 配置文件修改
bash
[root@haproxy ~]# vim /etc/haproxy/haproxy.cfg
listen mariadbcluster
    bind        *:6663
    mode        tcp
    balance     roundrobin
    server haha 192.168.0.10:3306  check inter 3s fall 3 rise 5 weight 1
server hehe 192.168.0.20:3306 check inter 3s fall 3 rise 5 weight 1关键参数解释:
mode tcp:四层负载核心,HAProxy 仅转发 TCP 数据包,不解析应用层(如 SQL);balance roundrobin:轮询算法,请求会依次分发到 192.168.0.10 和 20;check inter 3s:每 3 秒检测后端服务器健康状态;fall 3:连续 3 次检测失败,标记服务器不可用;rise 5:连续 5 次检测成功,恢复服务器为可用状态;weight 1:权重(默认 1,数值越高被分配请求越多)。
- 重启 HAProxy 并验证端口
输出中0.0.0.0:6663 LISTEN表示配置生效,HAProxy 已监听 6663 端口。
bash
[root@haproxy ~]# systemctl restart haproxy.service

#检测端口
[root@haproxy ~]# netstat -antlupe  | grep haproxy
tcp        0      0 0.0.0.0:6663            0.0.0.0:*               LISTEN      0          44430      2136/haproxy
tcp        0      0 0.0.0.0:80              0.0.0.0:*               LISTEN      0          44429      2136/haproxy
tcp 0 0 0.0.0.0:4321 0.0.0.0:* LISTEN 0 44431 2136/haproxy- 负载均衡效果测试
客户端远程连接 HAProxy 的 6663 端口(而非直接连数据库 3306)
bash
#测试:
[Administrator.DESKTOP-VJ307M3] ➤ mysql -ulee -plee -h172.25.254.100 -P 6663
Welcome to the MariaDB monitor.  Commands end with ; or \g.
Your MariaDB connection id is 7
Server version: 10.5.27-MariaDB MariaDB Server

Copyright (c) 2000, 2017, Oracle, MariaDB Corporation Ab and others.

Type 'help;' or '\h' for help. Type '\c' to clear the current input statement.

MariaDB [(none)]> SELECT @@server_id;
+-------------+
| @@server_id |
+-------------+
|          20 |
+-------------+
1 row in set (0.00 sec)

[Administrator.DESKTOP-VJ307M3] ➤ mysql -ulee -plee -h172.25.254.100 -P 6663
Welcome to the MariaDB monitor.  Commands end with ; or \g.
Your MariaDB connection id is 8
Server version: 10.5.27-MariaDB MariaDB Server

Copyright (c) 2000, 2017, Oracle, MariaDB Corporation Ab and others.

Type 'help;' or '\h' for help. Type '\c' to clear the current input statement.

MariaDB [(none)]> SELECT @@server_id;
+-------------+
| @@server_id |
+-------------+
|          10 |
+-------------+
1 row in set (0.00 sec)测试结果:
-
第一次查询返回
server_id=20(连接到 192.168.0.20); -
第二次查询返回
server_id=10(连接到 192.168.0.10);结论:轮询算法生效,请求被依次分发到两个数据库节点。
1.3.3 模块 3:backup 参数(备份节点)验证
- 配置修改(添加 backup 参数)
backup 参数作用:
-
标记该节点为 "备份节点",仅当所有非备份节点(haha)不可用时,才会转发请求到备份节点(hehe);
-
正常情况下,所有请求都会分发到非备份节点(192.168.0.10)。
bash
[root@haproxy ~]# vim /etc/haproxy/haproxy.cfg
listen mariadbcluster
    bind        *:6663
    mode        tcp
    balance     roundrobin
    server haha 192.168.0.10:3306  check inter 3s fall 3 rise 5 weight 1
    server hehe 192.168.0.20:3306  check inter 3s fall 3 rise 5 weight 1 backup

[root@haproxy ~]# systemctl restart haproxy.service- 正常场景测试
多次连接 HAProxy 的 6663 端口,执行SELECT @@server_id;,结果均为10(仅访问主节点 192.168.0.10),验证备份节点未被使用。
bash
#测试
[Administrator.DESKTOP-VJ307M3] ➤ mysql -ulee -plee -h172.25.254.100 -P 6663
Welcome to the MariaDB monitor.  Commands end with ; or \g.
Your MariaDB connection id is 4
Server version: 10.5.27-MariaDB MariaDB Server

Copyright (c) 2000, 2017, Oracle, MariaDB Corporation Ab and others.

Type 'help;' or '\h' for help. Type '\c' to clear the current input statement.

MariaDB [(none)]> SELECT @@server_id;
+-------------+
| @@server_id |
+-------------+
|          10 |
+-------------+
1 row in set (0.00 sec)

MariaDB [(none)]> quit
Bye

[Administrator.DESKTOP-VJ307M3] ➤ mysql -ulee -plee -h172.25.254.100 -P 6663
Welcome to the MariaDB monitor.  Commands end with ; or \g.
Your MariaDB connection id is 4
Server version: 10.5.27-MariaDB MariaDB Server

Copyright (c) 2000, 2017, Oracle, MariaDB Corporation Ab and others.

Type 'help;' or '\h' for help. Type '\c' to clear the current input statement.

MariaDB [(none)]> SELECT @@server_id;
+-------------+
| @@server_id |
+-------------+
|          10 |
+-------------+
1 row in set (0.00 sec)- 故障转移测试
步骤 1:关闭主节点数据库
bash
#关闭10的mariadb并等待1分钟
[root@webserver1 ~]# systemctl stop mariadb
步骤 2:立即测试连接(短暂失败)
bash
[Administrator.DESKTOP-VJ307M3] ➤ mysql -ulee -plee -h172.25.254.100 -P 6663
ERROR 2013 (HY000): Lost connection to MySQL server at 'reading initial communication packet', system error: 1 "Operation not permitted" #标识haproxy 没有完成故障转换,需要等待原因:HAProxy 的健康检查需要时间(inter 3s,fall 3 → 约 9 秒),尚未检测到主节点故障,仍尝试转发到 10 节点,因此报错。
步骤 3:等待后重试(故障切换成功)
等待健康检查周期后再次连接,执行SELECT @@server_id;,结果为20(请求转发到备份节点 192.168.0.20),验证故障转移生效。
bash
[Administrator.DESKTOP-VJ307M3] ➤ mysql -ulee -plee -h172.25.254.100 -P 6663
Welcome to the MariaDB monitor.  Commands end with ; or \g.
Your MariaDB connection id is 11
Server version: 10.5.27-MariaDB MariaDB Server

Copyright (c) 2000, 2017, Oracle, MariaDB Corporation Ab and others.

Type 'help;' or '\h' for help. Type '\c' to clear the current input statement.

MariaDB [(none)]> SELECT @@server_id;
+-------------+
| @@server_id |
+-------------+
|          20 |
+-------------+
1 row in set (0.00 sec)- 故障恢复测试
在192.168.0.10节点重启mariadb
bash
#还原故障主机等待片刻
[root@webserver1 ~]# systemctl start mariadb
等待健康检查完成后,再次连接 HAProxy,server_id恢复为10,验证主节点恢复后请求重新切回。
bash
[Administrator.DESKTOP-VJ307M3] ➤ mysql -ulee -plee -h172.25.254.100 -P 6663
Welcome to the MariaDB monitor.  Commands end with ; or \g.
Your MariaDB connection id is 4
Server version: 10.5.27-MariaDB MariaDB Server

Copyright (c) 2000, 2017, Oracle, MariaDB Corporation Ab and others.

Type 'help;' or '\h' for help. Type '\c' to clear the current input statement.

MariaDB [(none)]> SELECT @@server_id;
+-------------+
| @@server_id |
+-------------+
|          10 |
+-------------+
1 row in set (0.00 sec)
1.3.4 核心总结
-
四层负载核心:HAProxy 通过 TCP 层转发,适配数据库等基于 TCP 的服务,不感知应用层内容;
-
轮询算法:默认均匀分发请求,适合节点性能相近的集群;
-
backup 参数:实现 "主备模式",提升服务可用性;
-
健康检查 :
check inter/fall/rise参数控制故障检测和恢复的灵敏度,需根据业务调整(如缩短 inter 加快检测,但增加开销); -
端口设计:HAProxy 监听 6663 端口,避免与数据库默认 3306 端口冲突,同时实现 "统一入口"(客户端只需连 HAProxy,无需感知后端节点)。
2. HAProxy 七层代理
2.1 什么是 HAProxy 七层代理?
"七层" 指的是TCP/IP 协议栈的应用层(第七层),最典型的就是 HTTP/HTTPS 协议。
HAProxy 七层代理,简单说就是:HAProxy 不仅会识别请求的 IP + 端口,还会深度解析应用层的内容(比如 HTTP 请求头、URL、Cookie、域名),再根据这些内容做更智能的转发 / 处理 。
继续用快递的比喻:
-
七层代理 = 智能分拣员:不仅看收件地址(IP + 端口),还会打开包裹看详情(比如是 "电商订单" 还是 "物流单据"),再精准送到对应货架;
-
对比四层负载:只看地址,不管包裹内容,纯转发。
2.2 工作原理
比四层多了 "解析 + 决策" 环节
-
建立连接:客户端和 HAProxy 建立 TCP 连接(三次握手);
-
接收并解析请求 :HAProxy 接收客户端的 HTTP 请求,解析其中的域名(Host)、URL 路径、Cookie、请求头(User-Agent/Referer) 等内容;
-
智能路由决策:根据预设规则(比如 "/api/" 路径转发到 API 服务器,"/static/" 转发到静态资源服务器),选择对应的后端服务器池;
-
转发请求 + 处理响应:把解析后的请求转发给选中的后端节点,还能修改请求 / 响应头(比如添加 X-Forwarded-For 记录真实 IP),再把后端响应回传给客户端;
-
维持连接:可复用连接(比如长连接),提升整体性能。
核心特点:更智能、更灵活,但性能略低于四层(因为多了解析步骤)。
2.3 HAProxy 七层代理的核心特点(对比四层)
| 特性 | 七层代理(HTTP/HTTPS) | 四层负载(TCP/UDP) |
|---|---|---|
| 解析深度 | 解析 HTTP 请求头、URL、Cookie 等 | 仅解析 IP + 端口 |
| 转发规则 | 可按域名、URL、Cookie 等转发 | 仅按 IP + 端口 / 算法转发 |
| 功能扩展 | 支持 URL 重写、请求头修改、会话保持、HTTPS 终止 | 无(纯转发) |
| 性能 | 稍低(解析开销) | 极高(纯转发) |
| 适用场景 | Web 服务(HTTP/HTTPS) | 数据库、Redis、SSH 等 TCP 服务 |
3. HAProxy 调度算法实验
3.1静态算法(权重固定,不支持热更新)
1. static-rr(静态轮询)
配置 :指定balance static-rr,为后端服务器设置权重(如 haha 权重 2、hehe 权重 1)。
bash
[root@haproxy ~]# vim /etc/haproxy/haproxy.cfg
listen webcluster
    bind        *:80
    balance     static-rr
    server haha 192.168.0.10:80 check inter 3s fall 3 rise 5 weight 2
    server hehe 192.168.0.20:80 check inter 3s fall 3 rise 5 weight 1

[root@haproxy ~]# systemctl restart haproxy.service测试结果:请求按权重比例分配,haha(192.168.0.10)接收请求数约为 hehe(192.168.0.20)的 2 倍。
bash
#测试
[Administrator.DESKTOP-VJ307M3] ➤ for i in {1..10}; do curl 172.25.254.100; done
webserver1 - 192.168.0.10
webserver1 - 192.168.0.10
webserver2 - 192.168.0.20
webserver1 - 192.168.0.10
webserver1 - 192.168.0.10
webserver2 - 192.168.0.20
webserver1 - 192.168.0.10
webserver1 - 192.168.0.10
webserver2 - 192.168.0.20
webserver1 - 192.168.0.10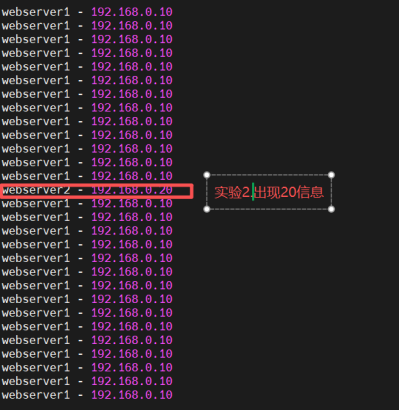
检测是否支持热更新
bash
[root@haproxy ~]# echo "get  weight webcluster/haha" | socat  stdio /var/lib/haproxy/stats
2 (initial 2)

[root@haproxy ~]# echo "set  weight  webcluster/haha 1  " | socat stdio /var/lib/haproxy/stats
Backend is using a static LB algorithm and only accepts weights '0%' and '100%'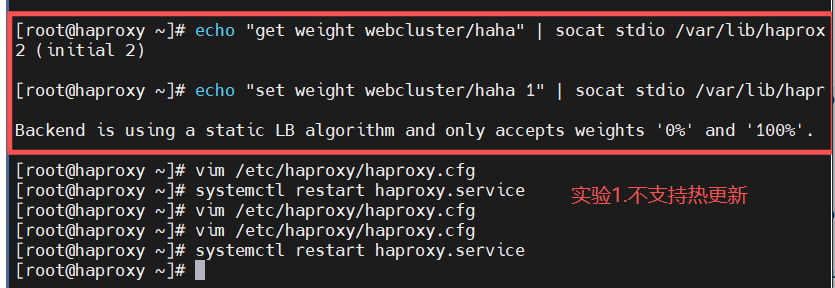
特性:不支持热更新权重(仅允许设置 0%/100%),权重修改需重启服务。
2. first(优先分配)
配置 :指定balance first,可设置maxconn(最大连接数)。
bash
[root@haproxy ~]# vim /etc/haproxy/haproxy.cfg
listen webcluster
    bind        *:80
    balance     first
    server haha 192.168.0.10:80 maxconn 1 check inter 3s fall 3 rise 5 weight 2
    server hehe 192.168.0.20:80 check inter 3s fall 3 rise 5 weight 1

[root@haproxy ~]# systemctl restart haproxy.service
#测试:在一个shell中执行持续访问
bash
[Administrator.DESKTOP-VJ307M3] ➤ while true; do curl 172.25.254.100; done
webserver2 - 192.168.0.20
webserver2 - 192.168.0.20
webserver2 - 192.168.0.20
webserver2 - 192.168.0.20
webserver2 - 192.168.0.20
webserver2 - 192.168.0.20
webserver2 - 192.168.0.20
webserver2 - 192.168.0.20
webserver2 - 192.168.0.20
webserver2 - 192.168.0.20
webserver2 - 192.168.0.20
webserver2 - 192.168.0.20
webserver2 - 192.168.0.20
webserver2 - 192.168.0.20
webserver2 - 192.168.0.20
webserver2 - 192.168.0.20
webserver2 - 192.168.0.20
.... .....
#在其他设立了中建立持续访问并观察
bash
Administrator.DESKTOP-VJ307M3] ➤  while true; do curl 172.25.254.100; done
webserver2 - 192.168.0.20
webserver2 - 192.168.0.20
webserver2 - 192.168.0.20
webserver2 - 192.168.0.20
webserver2 - 192.168.0.20
webserver2 - 192.168.0.20
webserver2 - 192.168.0.20
webserver2 - 192.168.0.20
webserver2 - 192.168.0.20
webserver2 - 192.168.0.20
webserver2 - 192.168.0.20
webserver2 - 192.168.0.20
webserver2 - 192.168.0.20
webserver2 - 192.168.0.20
webserver2 - 192.168.0.20
webserver2 - 192.168.0.20
webserver2 - 192.168.0.20
webserver1 - 192.168.0.10						#此处出现10信息
webserver2 - 192.168.0.20
3.2 动态算法(权重支持热更新,实时调整)
1. roundrobin(动态轮询)
配置 :指定balance roundrobin,支持权重配置。
bash
[root@haproxy ~]# vim /etc/haproxy/haproxy.cfg
listen webcluster
    bind        *:80
    balance     roundrobin
    server haha 192.168.0.10:80 check inter 3s fall 3 rise 5 weight 2
    server hehe 192.168.0.20:80 check inter 3s fall 3 rise 5 weight 1

[root@haproxy ~]# systemctl restart haproxy.service
bash
#测试
[Administrator.DESKTOP-VJ307M3] ➤ for i in {1..10}; do curl 172.25.254.100; done
webserver1 - 192.168.0.10
webserver1 - 192.168.0.10
webserver2 - 192.168.0.20
webserver1 - 192.168.0.10
webserver1 - 192.168.0.10
webserver2 - 192.168.0.20
webserver1 - 192.168.0.10
webserver1 - 192.168.0.10
webserver2 - 192.168.0.20
webserver1 - 192.168.0.10
动态权重更新
bash
[root@haproxy ~]# echo "get  weight webcluster/haha" | socat  stdio /var/lib/haproxy/stats
2 (initial 2)

[root@haproxy ~]# echo "set  weight  webcluster/haha 1  " | socat stdio /var/lib/haproxy/stats
[root@haproxy ~]# echo "get  weight webcluster/haha" | socat  stdio /var/lib/haproxy/stats
1 (initial 2)测试结果:默认按权重比例分配请求(haha:hehe=2:1);热更新权重后(haha 权重改为 1),请求按 1:1 比例分配。
#效果
bash
[Administrator.DESKTOP-VJ307M3] ➤ for i in {1..10}; do curl 172.25.254.100; done
webserver2 - 192.168.0.20
webserver1 - 192.168.0.10
webserver2 - 192.168.0.20
webserver1 - 192.168.0.10
webserver2 - 192.168.0.20
webserver1 - 192.168.0.10
webserver2 - 192.168.0.20
webserver1 - 192.168.0.10
webserver2 - 192.168.0.20
webserver1 - 192.168.0.10
特性 :支持通过socat命令实时修改权重,无需重启服务。
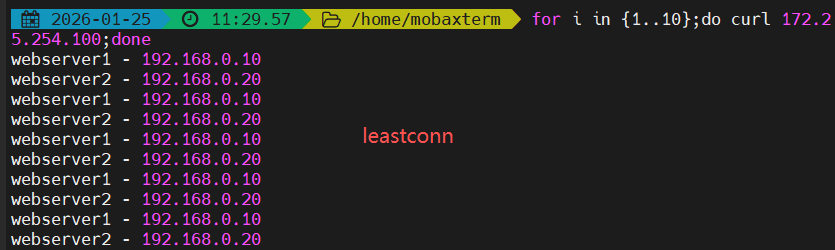
2. leastconn(最少连接数)
配置 :指定balance leastconn,基于后端服务器当前连接数分配请求。
bash
[root@haproxy ~]# vim /etc/haproxy/haproxy.cfg
listen webcluster
    bind        *:80
    balance     leastconn
    server haha 192.168.0.10:80 check inter 3s fall 3 rise 5 weight 2
    server hehe 192.168.0.20:80 check inter 3s fall 3 rise 5 weight 1

[root@haproxy ~]# systemctl restart haproxy.service
bash
[Administrator.DESKTOP-VJ307M3] ➤ for i in {1..10}; do curl 172.25.254.100; done
webserver1 - 192.168.0.10
webserver2 - 192.168.0.20
webserver1 - 192.168.0.10
webserver2 - 192.168.0.20
webserver1 - 192.168.0.10
webserver2 - 192.168.0.20
webserver1 - 192.168.0.10
webserver2 - 192.168.0.20
webserver1 - 192.168.0.10
webserver2 - 192.168.0.20测试结果:请求在两台服务器间均匀分配(haha 与 hehe 交替接收请求),优先转发至连接数最少的服务器。
3.3 混合算法(基于哈希 / 特征值分配,保证会话粘性)
1. source(基于客户端 IP)
配置 :默认balance source为静态哈希;增加hash-type consistent为动态一致性哈希。
#默认静态算法
bash
[root@haproxy ~]# vim /etc/haproxy/haproxy.cfg
listen webcluster
    bind        *:80
    balance     source
    server haha 192.168.0.10:80 check inter 3s fall 3 rise 5 weight 2
    server hehe 192.168.0.20:80 check inter 3s fall 3 rise 5 weight 1

[root@haproxy ~]# systemctl restart haproxy.service测试结果:同一客户端 IP 的所有请求始终转发至同一台服务器,保证会话粘性。
bash
#测试:
[Administrator.DESKTOP-VJ307M3] ➤ for i in {1..10}; do curl 172.25.254.100; done
webserver2 - 192.168.0.20
webserver2 - 192.168.0.20
webserver2 - 192.168.0.20
webserver2 - 192.168.0.20
webserver2 - 192.168.0.20
webserver2 - 192.168.0.20
webserver2 - 192.168.0.20
webserver2 - 192.168.0.20
#source动态算法
bash
[root@haproxy ~]# vim /etc/haproxy/haproxy.cfg
listen webcluster
    bind        *:80
    balance     source
    hash-type 	consistent
    server haha 192.168.0.10:80 check inter 3s fall 3 rise 5 weight 2
    server hehe 192.168.0.20:80 check inter 3s fall 3 rise 5 weight 1

[root@haproxy ~]# systemctl restart haproxy.service
bash
#测试:
[Administrator.DESKTOP-VJ307M3] ➤ for i in {1..10}; do curl 172.25.254.100; done
webserver2 - 192.168.0.20
webserver2 - 192.168.0.20
webserver2 - 192.168.0.20
webserver2 - 192.168.0.20
webserver2 - 192.168.0.20
webserver2 - 192.168.0.20
webserver2 - 192.168.0.20
webserver2 - 192.168.0.20
2. uri(基于请求 URI)
bash
#主备实验环境
[root@webserver1 ~]# echo RS1 - 192.168.0.10 > /var/www/html/index1.html
[root@webserver1 ~]# echo RS1 - 192.168.0.10 > /var/www/html/index2.html
[root@webserver2 ~]# echo RS2 - 192.168.0.20 > /var/www/html/index1.html
[root@webserver2 ~]# echo RS2 - 192.168.0.20 > /var/www/html/index2.html
配置 :指定balance uri + hash-type consistent。
bash
#设定uri算法
[root@haproxy ~]# vim /etc/haproxy/haproxy.cfg
listen webcluster
    bind        *:80
    balance     uri
    hash-type 	consistent
    server haha 192.168.0.10:80 check inter 3s fall 3 rise 5 weight 2
    server hehe 192.168.0.20:80 check inter 3s fall 3 rise 5 weight 1

[root@haproxy ~]# systemctl restart haproxy.service测试结果:相同 URI(如 /index.html、/index2.html)的请求固定转发至同一台服务器(/index.html→haha,/index2.html→hehe)。
bash
#测试:
[Administrator.DESKTOP-VJ307M3] ➤ for i in {1..10}; do curl 172.25.254.100/index.html; done
webserver1 - 192.168.0.10
webserver1 - 192.168.0.10
webserver1 - 192.168.0.10
webserver1 - 192.168.0.10
webserver1 - 192.168.0.10
webserver1 - 192.168.0.10
webserver1 - 192.168.0.10
webserver1 - 192.168.0.10
webserver1 - 192.168.0.10
webserver1 - 192.168.0.10
                                                                                                    ✔
─────────────────────────────────────────────────────────────────────────────────────────────────────
[2026-01-25 14:51.59]  ~
[Administrator.DESKTOP-VJ307M3] ➤ for i in {1..10}; do curl 172.25.254.100/index2.html; done
RS2 - 172.168.0.20
RS2 - 172.168.0.20
RS2 - 172.168.0.20
RS2 - 172.168.0.20
RS2 - 172.168.0.20
RS2 - 172.168.0.20
RS2 - 172.168.0.20
RS2 - 172.168.0.20
RS2 - 172.168.0.20
RS2 - 172.168.0.20
3. url_param(基于 URL 参数)
bash
#主备实验环境
[root@webserver1 ~]# echo RS1 - 192.168.0.10 > /var/www/html/index1.html
[root@webserver1 ~]# echo RS1 - 192.168.0.10 > /var/www/html/index2.html
[root@webserver2 ~]# echo RS2 - 192.168.0.20 > /var/www/html/index1.html
[root@webserver2 ~]# echo RS2 - 192.168.0.20 > /var/www/html/index2.html
配置 :指定balance url_param [参数名] + hash-type consistent(如参数 name)。
bash
#设定url_param算法
[root@haproxy ~]# vim /etc/haproxy/haproxy.cfg
listen webcluster
    bind        *:80
    balance     url_param name
    hash-type 	consistent
    server haha 192.168.0.10:80 check inter 3s fall 3 rise 5 weight 2
    server hehe 192.168.0.20:80 check inter 3s fall 3 rise 5 weight 1

[root@haproxy ~]# systemctl restart haproxy.service测试结果:相同 URL 参数值(如 name=lee→hehe,name=redhat→haha)的请求固定转发至同一台服务器。
bash
#测试:
[Administrator.DESKTOP-VJ307M3] ➤ for i in {1..10}; do curl 172.25.254.100/index.html?name=lee; done
webserver2 - 192.168.0.20
webserver2 - 192.168.0.20
webserver2 - 192.168.0.20
webserver2 - 192.168.0.20
webserver2 - 192.168.0.20
webserver2 - 192.168.0.20
webserver2 - 192.168.0.20
webserver2 - 192.168.0.20
webserver2 - 192.168.0.20
webserver2 - 192.168.0.20

[Administrator.DESKTOP-VJ307M3] ➤ for i in {1..10}; do curl 172.25.254.100/index.html?name=redhat; done
webserver1 - 192.168.0.10
webserver1 - 192.168.0.10
webserver1 - 192.168.0.10
webserver1 - 192.168.0.10
webserver1 - 192.168.0.10
webserver1 - 192.168.0.10
webserver1 - 192.168.0.10
webserver1 - 192.168.0.10
webserver1 - 192.168.0.10
webserver1 - 192.168.0.10
4. hdr(基于 HTTP 请求头)
配置 :指定balance hdr(User-Agent) + hash-type consistent(基于 User-Agent 头)。
bash
[root@haproxy ~]# vim /etc/haproxy/haproxy.cfg
listen webcluster
    bind        *:80
    balance     hdr(User-Agent)
    hash-type 	consistent
    server haha 192.168.0.10:80 check inter 3s fall 3 rise 5 weight 2
    server hehe 192.168.0.20:80 check inter 3s fall 3 rise 5 weight 1

[root@haproxy ~]# systemctl restart haproxy.service测试结果:相同 User-Agent 值(如 lee→hehe,timing→haha)的请求固定转发至同一台服务器。
bash
#测试:
[Administrator.DESKTOP-VJ307M3] ➤ curl -A "lee" 172.25.254.100
webserver2 - 192.168.0.20
                                                                                                    ✔
─────────────────────────────────────────────────────────────────────────────────────────────────────
[2026-01-25 15:00.53]  ~
[Administrator.DESKTOP-VJ307M3] ➤ curl -A "lee" 172.25.254.100
webserver2 - 192.168.0.20
                                                                                                    ✔
─────────────────────────────────────────────────────────────────────────────────────────────────────
[2026-01-25 15:00.54]  ~
[Administrator.DESKTOP-VJ307M3] ➤ curl -A "timinglee" 172.25.254.100
webserver2 - 192.168.0.20
                                                                                                    ✔
─────────────────────────────────────────────────────────────────────────────────────────────────────
[2026-01-25 15:01.00]  ~
[Administrator.DESKTOP-VJ307M3] ➤ curl -A "timing" 172.25.254.100
webserver1 - 192.168.0.10
核心结论
静态算法(static-rr、first)适用于权重固定、无需动态调整的场景,配置简单但灵活性低;
动态算法(roundrobin、leastconn)适用于需实时调整权重、均衡连接数的场景,灵活性高;
混合算法(source/uri/url_param/hdr)适用于需要会话粘性的场景,通过哈希特征保证同一客户端 / 请求特征的请求转发至固定服务器。
五、安全、会话与高可用
1. HAProxy ACL 访问控制
1.1 什么是 HAProxy ACL?
HAProxy ACL 本质是一组 "匹配规则" ------ 通过定义 ACL 规则,匹配客户端请求的特征(比如域名、URL、IP、请求头、Cookie 等),再根据 "匹配结果" 执行对应的动作(比如转发到指定后端、拒绝访问、重定向等)。
简单比喻:
ACL = 机场安检的 "筛查规则":比如 "携带液体的旅客→走液体检查通道""VIP 旅客→走贵宾通道""黑名单旅客→禁止登机";
动作 = 规则匹配后的处理方式:转发、拒绝、重定向等。
ACL 是 HAProxy 七层代理的灵魂,没有 ACL,七层代理就只能做简单的轮询转发,有了 ACL 才能实现 "智能分流、安全管控"。
1.2 ACL 的核心作用
-
智能路由 :按域名、URL、请求头等分发请求(比如
www.xxx.com→Web 服务器,api.xxx.com→API 服务器); -
访问控制:黑白名单(比如禁止特定 IP 访问、只允许内网 IP 访问);
-
安全防护:拦截恶意请求(比如禁止访问 /admin 路径的非法 IP、拦截爬虫 UA);
-
流量过滤 :区分动静请求(比如
.jpg/.css→静态服务器,/api→动态服务器); -
条件触发:比如 "HTTPS 请求→允许访问,HTTP 请求→强制跳转 HTTPS"。
1.3 实验准备
1. 本地域名解析配置:
-
Windows:通过修改 hosts 文件配置域名与 IP 映射;
-
Linux:编辑
/etc/hosts,将多个域名(如www.timinglee.org、bbs.timinglee.org、www.lee.com等)指向 172.25.254.100,并通过 ping 测试解析有效性。
找到这个文件,以管理员身份运行

2. Haproxy 基础配置
编写
/etc/haproxy/haproxy.cfg,定义前端webcluster(绑定 80 端口、http 模式),以及两个后端服务器组webserver-80-web1(指向 192.168.0.10:80)、webserver-80-web2(指向 192.168.0.20:80),重启 haproxy 服务生效。
bash
[root@haproxy ~]# vim /etc/haproxy/haproxy.cfg
frontend webcluster
    bind            *:80
    mode            http
    use_backend     webserver-80-web1

backend webserver-80-web1
    server web1 192.168.0.10:80 check inter 3s fall 3 rise 5

backend webserver-80-web2
    server web2 192.168.0.20:80 check inter 3s fall 3 rise 5

[root@haproxy ~]# systemctl restart haproxy.service
1.2 核心 ACL 规则实操
1. 域名后缀匹配
acl test hdr_end(host) -i .com,匹配后转发至 web1,否则转发至 web2
bash
[root@haproxy ~]# vim /etc/haproxy/haproxy.cfg
frontend webcluster
    bind            *:80
    mode            http

    acl test hdr_end(host) -i .com			#acl列表

    use_backend  webserver-80-web1 if test	#acl列表访问匹配
    default_backend webserver-80-web2		#acl列表访问不匹配

backend webserver-80-web1
    server web1 192.168.0.10:80 check inter 3s fall 3 rise 5

backend webserver-80-web2
    server web2 192.168.0.20:80 check inter 3s fall 3 rise 5
效果说明:.com 结尾域名(如www.lee.com)访问 web1,其他(如www.lee.org)访问 web2
bash
[2026-01-26 15:50.45]  ~
[Administrator.DESKTOP-VJ307M3] ➤ curl www.lee.com
webserver1 - 192.168.0.10
                                                                                                    ✔
─────────────────────────────────────────────────────────────────────────────────────────────────────
[2026-01-26 15:50.45]  ~
[Administrator.DESKTOP-VJ307M3] ➤ curl www.lee.org
webserver2 - 192.168.0.20
2. 域名前缀匹配
acl head hdr_beg(host) -i bbs.,匹配后转发至 web1
bash
[root@haproxy ~]# vim /etc/haproxy/haproxy.cfg
frontend webcluster
    bind            *:80
    mode            http

    acl head hdr_beg(host) -i bbs.

    use_backend  webserver-80-web1 if head
    default_backend webserver-80-web2

backend webserver-80-web1
    server web1 192.168.0.10:80 check inter 3s fall 3 rise 5

backend webserver-80-web2
    server web2 192.168.0.20:80 check inter 3s fall 3 rise 5
效果说明:bbs 开头域名(如bbs.timinglee.org)优先转发至 web1
3. 请求路径匹配
acl pathdir base_dir -i /lee,匹配后转发至 web1
bash
[root@haproxy ~]# vim /etc/haproxy/haproxy.cfg
frontend webcluster
    bind            *:80
    mode            http

    acl pathdir base_dir -i /lee

    use_backend  webserver-80-web1 if pathdir
    default_backend webserver-80-web2		#acl列表访问不匹配

backend webserver-80-web1
    server web1 192.168.0.10:80 check inter 3s fall 3 rise 5

backend webserver-80-web2
    server web2 192.168.0.20:80 check inter 3s fall 3 rise 5
效果说明:访问 /lee 路径(如 172.25.254.100/lee/)转发至 web1,其他路径转发至 web2
4. 来源 IP(黑名单)
bash
acl invalid_src src 172.25.254.1,http-request deny if invalid_src拒绝 172.25.254.1 的所有请求,返回 403 Forbidden
5. 来源 IP(白名单)
bash
http-request deny if ! invalid_src仅允许 172.25.254.1 访问,其他 IP 均被拒绝
ACL 使用的关键注意事项
规则优先级:HAProxy 按 "配置顺序" 匹配 ACL,先定义的规则先生效(比如先匹配 IP 黑名单,再匹配域名分流);
大小写敏感 :默认匹配区分大小写,加
-i参数可忽略(如hdr(host) -i www.xxx.com);性能优化:ACL 规则越多,匹配耗时越长,建议将 "高频匹配的规则(如 IP 黑白名单)" 放在前面;
测试验证 :配置后用
curl测试(如curl -H "Host: bbs.timinglee.org" http://172.25.254.100),验证规则是否生效;日志辅助 :开启
option httplog,通过日志查看 ACL 匹配结果,便于排错。
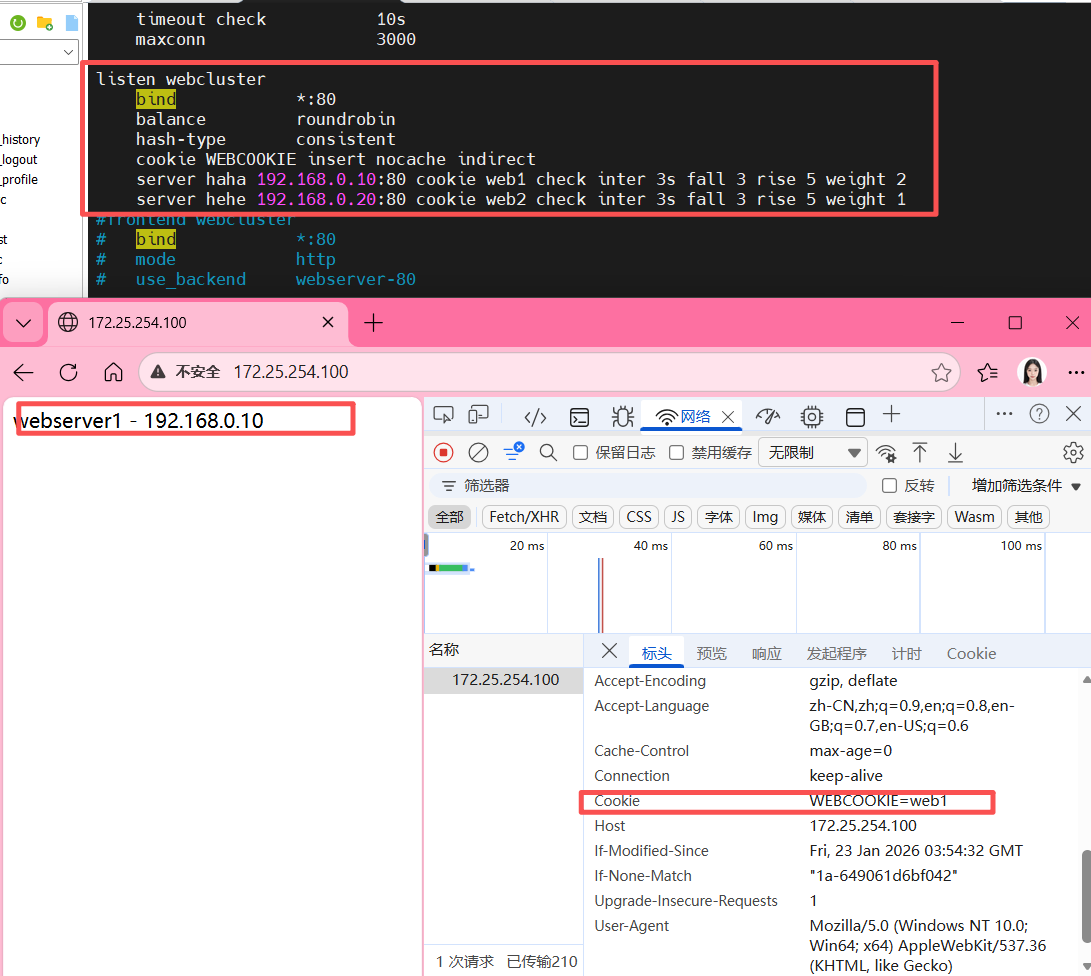
2. HAProxy 基于 Cookie 的会话保持
HAProxy 基于 Cookie 的会话保持机制,核心是通过向客户端浏览器植入 Cookie,让同一浏览器始终请求后端同一台服务器,而同一主机的不同浏览器则可路由到不同服务器,相比仅基于源 IP(source 算法)的会话保持更精细化。
2.1 核心配置
bash
[root@haproxy ~]# vim /etc/haproxy/haproxy.cfg
listen webcluster
    bind        *:80                # 监听所有网卡的80端口
    balance     roundrobin          # 基础负载均衡算法为轮询(Cookie 会覆盖此算法的默认轮询逻辑)
    hash-type   consistent          # 一致性哈希(优化后端服务器增减时的会话稳定性)
    cookie WEBCOOKIE insert nocache indirect
    # 后端服务器配置,每个服务器绑定唯一 Cookie 标识
    server haha 192.168.0.10:80 cookie web1 check inter 3s fall 3 rise 5 weight 2
    server hehe 192.168.0.20:80 cookie web2 check inter 3s fall 3 rise 5 weight 1

[root@haproxy ~]# systemctl restart haproxy.service- cookie 指令(核心)
-
WEBCOOKIE:自定义 Cookie 名称,用于标识会话绑定的后端服务器; -
insert:HAProxy 自动向客户端响应头插入该 Cookie; -
nocache:告知客户端 / 代理不要缓存该 Cookie,确保每次请求都携带最新值; -
indirect:仅当客户端请求中无该 Cookie 时,HAProxy 才插入,避免覆盖客户端已有逻辑。
- server 指令的 cookie 参数
为每个后端服务器指定唯一标识(如 web1、web2),HAProxy 会将该标识写入客户端 Cookie,后续客户端请求携带此 Cookie 时,HAProxy 会路由到对应服务器。
2.2 特性与效果
-
精细化会话保持:同一客户端主机的不同浏览器(如 Firefox、Edge)会因 Cookie 独立,被路由到不同后端服务器;
-
同一浏览器会话稳定:只要 Cookie 有效,同一浏览器的所有请求都会固定到某一台后端服务器;
-
兼容基础负载均衡:未携带 Cookie 的首次请求,仍按
roundrobin轮询分配,分配后植入 Cookie 实现后续绑定; -
可配置健康检查:
check inter 3s fall 3 rise 5定义了服务器健康检查规则(每 3 秒检查,连续 3 次失败标记为不可用,连续 5 次成功恢复),结合weight可调整服务器权重。
2.3 生效流程
-
客户端首次请求(无 Cookie):HAProxy 按轮询算法分配后端服务器,同时在响应头插入包含服务器标识的 Cookie;
-
客户端后续请求:携带该 Cookie 访问,HAProxy 解析 Cookie 中的服务器标识,直接路由到对应后端服务器;
-
服务器故障时:HAProxy 会根据健康检查结果,将请求重新分配到可用服务器,并更新客户端 Cookie。
3. HAProxy 全站加密
HAProxy 全站加密核心是将 HTTP 流量强制重定向至 HTTPS,并通过 SSL/TLS 证书实现 HTTPS 加密传输,整体分为「证书制作」和「配置全站加密」两大步骤。
3.1 制作 SSL/TLS 证书
- 创建证书存放目录
bash
[root@haproxy ~]# mkdir /etc/haproxy/certs/- 生成 RSA 私钥和自签名证书(有效期 365 天)
bash
[root@haproxy ~]# openssl req -newkey rsa:2048 -nodes -sha256  -keyout /etc/haproxy/certs/timinglee.org.key -x509 -days 365 -out /etc/haproxy/certs/timinglee.org.crt

You are about to be asked to enter information that will be incorporated
into your certificate request.
What you are about to enter is what is called a Distinguished Name or a DN.
There are quite a few fields but you can leave some blank
For some fields there will be a default value,
If you enter '.', the field will be left blank.
-----
Country Name (2 letter code) [XX]:CN
State or Province Name (full name) []:Shaanxi
Locality Name (eg, city) [Default City]:Xi'an
Organization Name (eg, company) [Default Company Ltd]:timinglee
Organizational Unit Name (eg, section) []:linux
Common Name (eg, your name or your server's hostname) []:www.timinglee.org
Email Address []:admin@timinglee.org
执行后需填写证书信息(Distinguished Name),关键字段说明:
-
Country Name:国家代码(如 CN) -
Common Name:服务器域名 / 主机名(如 www.timinglee.org,需与访问域名一致)
- 合并私钥和证书为 PEM 格式
bash
[root@haproxy ~]# cat /etc/haproxy/certs/timinglee.org.{key,crt} > /etc/haproxy/certs/timinglee.pem3.2 配置 HAProxy 实现全站加密
修改 HAProxy 主配置文件 /etc/haproxy/haproxy.cfg,通过「HTTP 重定向」+「HTTPS 监听」实现全站加密:
- 配置 HTTP 前端(80 端口):强制将所有 HTTP 请求重定向至 HTTPS:
bash
frontend webcluster-http
    bind        *:80
redirect scheme https if ! { ssl_fc } # 非 HTTPS 请求重定向到 HTTPS- 配置 HTTPS 监听(443 端口):加载证书并转发流量至后端服务器:
bash
listen webcluster-https
    bind        *:443 ssl  crt /etc/haproxy/certs/timinglee.pem  # 绑定 443 端口并加载 PEM 证书
    mode        http  # HTTP 模式(可解析 HTTP 头)
    balance     roundrobin  # 负载均衡算法(轮询)
    # 后端服务器配置(健康检查 + 权重)
    server haha 192.168.0.10:80  check inter 3s fall 3 rise 5 weight 1
server hehe 192.168.0.20:80 check inter 3s fall 3 rise 5 weight 1- 重启 HAProxy 使配置生效:
bash
[root@haproxy ~]# systemctl restart haproxy.service3.3 验证效果
通过 curl 测试 HTTP 重定向和 HTTPS 访问
bash
curl -v -k -L http://172.25.254.100关键验证点:
-
HTTP 请求返回
302 Found,location字段指向https://172.25.254.100/(重定向生效); -
HTTPS 连接成功建立,SSL 协议为 TLSv1.2,证书信息与生成时一致;
-
最终返回后端服务器的响应内容(如
webserver2 - 192.168.0.20),说明流量转发正常。
核心要点总结
「强制重定向」:通过
redirect scheme https确保所有 HTTP 流量自动转为 HTTPS,实现 "全站加密";「证书加载」:HAProxy 需将私钥和证书合并为 PEM 格式,绑定 443 端口并启用
ssl选项;「兼容性」:支持 TLSv1.2 及以上协议,可配置 cipher 套件增强安全性;
「负载均衡」:HTTPS 解密后仍可基于 HTTP 层做负载均衡和健康检查,不影响后端服务器的 HTTP 服务部署。
4. IP 透传
HAProxy 的 IP 透传主要分为七层(HTTP)IP 透传和四层(TCP)IP 透传两种场景,核心目的是让后端真实服务器(RS)能获取到客户端的真实 IP,而非 HAProxy 的 IP 地址。
4.1 七层(HTTP)IP 透传
基于 HTTP 协议层实现,依赖X-Forwarded-For请求头传递客户端真实 IP,适用于 HTTP/HTTPS 业务场景。
- 核心配置(HAProxy 侧)
修改 HAProxy 主配置文件/etc/haproxy/haproxy.cfg,在defaults段开启透传功能:
bash
defaults
    mode                    http  # 明确为七层HTTP模式
    option forwardfor       except 127.0.0.0/8  # 开启IP透传,排除本地回环地址
# 其他基础配置(日志、超时、连接数等)保持默认或按需调整- 后端服务器(RS)配置
bash
[root@webserver2 ~]#  vim /etc/httpd/conf/httpd.conf
201 LogFormat "%h %l %u %t \"%r\" %>s %b \"%{X-Forwarded-For}i\" \"%{Referer}i\" \"%{User-Agent}i \"" combined-
%{X-Forwarded-For}i:表示提取 HTTP 请求头中X-Forwarded-For的值(即客户端真实 IP); -
未配置前,Apache 日志中仅显示 HAProxy 的 IP(如 192.168.0.100);配置后可看到客户端真实 IP(如 172.25.254.1)。
- 效果验证
客户端多次访问 HAProxy 地址后,后端 Apache 日志会记录客户端真实 IP:
bash
[root@webserver2 ~]# cat /etc/httpd/logs/access_log
192.168.0.100 - - [26/Jan/2026:10:10:29 +0800] "GET / HTTP/1.1" 200 26 "172.25.254.1" "-" "curl/7.65.0"
192.168.0.100 - - [26/Jan/2026:10:10:30 +0800] "GET / HTTP/1.1" 200 26 "172.25.254.1" "-" "curl/7.65.0"
192.168.0.100 - - [26/Jan/2026:10:10:30 +0800] "GET / HTTP/1.1" 200 26 "172.25.254.1" "-" "curl/7.65.0"
4.2 四层(TCP)IP 透传
基于 TCP 协议层实现,依赖Proxy Protocol(代理协议)传递客户端真实 IP,适用于非 HTTP 类 TCP 业务(如 MySQL、Redis、Nginx 四层模式等)。
- 前置环境准备
先将后端 RS 的 Apache 替换为 Nginx
bash
# 停止Apache,安装并启动Nginx
systemctl disable --now httpd
dnf install nginx -y
echo "RS1 - 192.168.0.10" > /usr/share/nginx/html/index.html  # 后端1
echo "RS2 - 192.168.0.20" > /usr/share/nginx/html/index.html  # 后端2
systemctl enable --now nginx- 后端 Nginx 开启 Proxy Protocol
修改 Nginx 配置文件/etc/nginx/nginx.conf,让监听端口启用 Proxy Protocol:
bash
[root@webserver1 ~]# vim /etc/nginx/nginx.conf
server {
    listen       80 proxy_protocol;  # 开启四层Proxy Protocol
    listen       [::]:80;
    server_name  _;
    root         /usr/share/nginx/html;
    # 其他基础配置(错误页、默认配置等)
}
# 重启Nginx
[root@webserver2 ~]# systemctl restart nginx
仅开启此配置后,直接访问会报 502 错误(因 HAProxy 尚未适配四层透传),需继续配置 HAProxy。
- HAProxy 四层透传配置
修改 HAProxy 配置文件,切换为 TCP 模式并启用send-proxy:
bash
#设定haproxy访问4层
[root@haproxy ~]# vim /etc/haproxy/haproxy.cfg
listen webcluster
    bind        *:80
    mode        tcp				#切换为四层TCP模式
    balance     roundrobin
    # 给后端服务器添加send-proxy参数,传递Proxy Protocol信息
    server haha 192.168.0.10:80 send-proxy check inter 3s fall 3 rise 5 weight 1
    server hehe 192.168.0.20:80 send-proxy check inter 3s fall 3 rise 5 weight 1

# 重启HAProxy生效
[root@haproxy ~]# systemctl restart haproxy.service-
mode tcp:HAProxy 工作在四层 TCP 模式; -
send-proxy:HAProxy 向后端 Nginx 发送 Proxy Protocol 协议包,包含客户端真实 IP。
- 后端 Nginx 采集真实 IP
修改 Nginx 日志格式,提取$proxy_protocol_addr(Proxy Protocol 传递的客户端 IP):
bash
#设置4层ip透传
[root@webserver1&2 ~]# vim /etc/nginx/nginx.conf

    log_format  main  '$remote_addr - $remote_user [$time_local] "$request" '
                      '"$proxy_protocol_addr"'			#采集四层透传的客户端真实IP
                      '$status $body_bytes_sent "$http_referer" '
                      '"$http_user_agent" "$http_x_forwarded_for"';

# 重启Nginx
[root@webserver1&2 ~]# systemctl restart nginx.service- 效果验证
客户端访问 HAProxy 地址后,后端 Nginx 日志可看到客户端真实 IP:
bash
[root@webserver1 ~]# cat /var/log/nginx/access.log
192.168.0.100 - - [26/Jan/2026:10:52:40 +0800] "GET / HTTP/1.1" "172.25.254.1"200 19 "-" "curl/7.65.0" "-"
192.168.0.100 - - [26/Jan/2026:10:53:49 +0800] "GET / HTTP/1.1"  "172.25.254.1"200 19 "-" "curl/7.65.0" "-"
192.168.0.100 - - [26/Jan/2026:10:53:50 +0800] "GET / HTTP/1.1"  "172.25.254.1"200 19 "-" "curl/7.65.0" "-"
192.168.0.100 - - [26/Jan/2026:10:53:50 +0800] "GET / HTTP/1.1"  "172.25.254.1"200 19 "-" "curl/7.65.0" "-"
4.3 核心区别总结
| 维度 | 七层 IP 透传(HTTP) | 四层 IP 透传(TCP) |
|---|---|---|
| 依赖协议 | HTTP 协议(X-Forwarded-For头) |
Proxy Protocol(TCP 层协议) |
| HAProxy 模式 | mode http |
mode tcp |
| 核心配置 | option forwardfor |
后端服务器配置send-proxy |
| 后端采集字段 | X-Forwarded-For请求头 |
$proxy_protocol_addr(Proxy Protocol 地址) |
| 适用场景 | HTTP/HTTPS 业务 | 所有 TCP 层业务(如 Nginx、MySQL、Redis) |
关键注意事项
七层透传仅适用于 HTTP/HTTPS,四层透传是通用的 TCP 层方案,适用范围更广;
后端服务器必须适配对应的透传方式(如 Apache/Nginx 配置日志采集字段、开启 Proxy Protocol),否则无法获取真实 IP;
send-proxy和proxy_protocol需成对配置(HAProxy 侧 send-proxy + 后端侧 proxy_protocol),否则会出现 502 等错误。
六、 运维与扩展
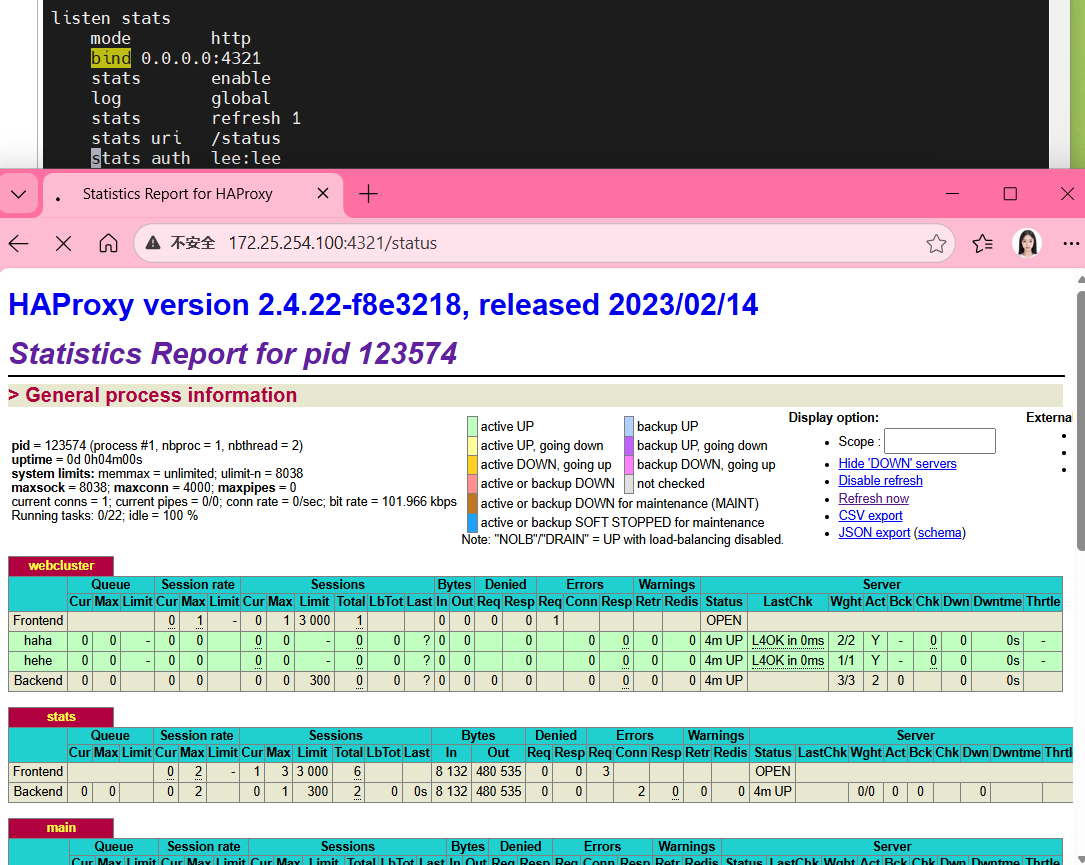
1. HAProxy 状态页监控
HAProxy 状态页(stats page)是用于监控 HAProxy 运行状态的重要功能,可直观查看后端节点健康状态、流量转发、连接数等核心指标。
1.1 基础配置步骤
- 编辑 HAProxy 主配置文件
配置文件路径为 /etc/haproxy/haproxy.cfg,通过 listen 块定义状态页监听规则:
bash
[root@haproxy ~]# vim /etc/haproxy/haproxy.cfg
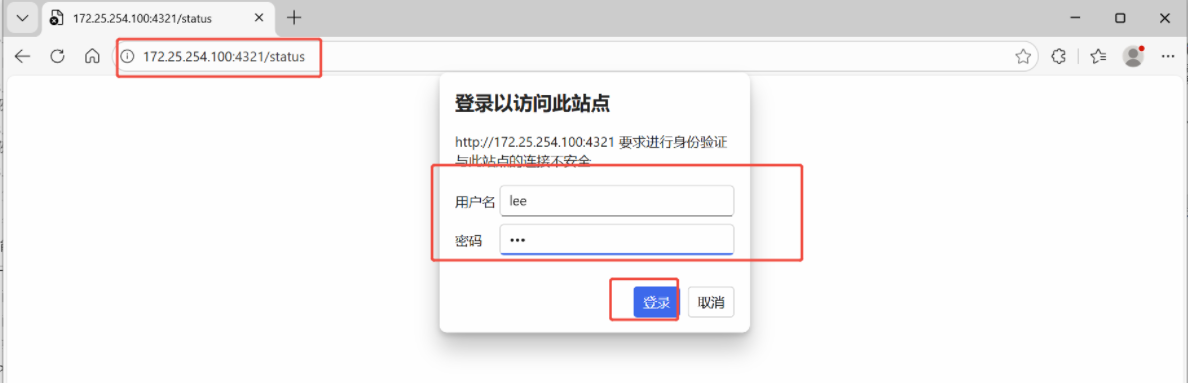
listen stats # 定义stats监听块名称
mode http # 状态页基于HTTP协议
bind 0.0.0.0:4321 # 监听所有网卡的4321端口(可自定义端口)
stats enable # 启用状态页功能
log global # 继承全局日志配置
stats uri /status # 访问状态页的URI路径(示例:http://IP:4321/status)
stats auth lee:lee # 状态页访问认证(账号:lee,密码:lee)- 重启 HAProxy 服务使配置生效
bash
systemctl restart haproxy.service- 登陆测试
1.2 功能扩展:开启自动刷新
默认状态页需手动刷新,可配置自动刷新间隔(单位:秒),实时监控节点状态:
- 修改配置文件,新增
stats refresh项:
bash
[root@haproxy ~]# vim /etc/haproxy/haproxy.cfg
listen stats
    mode        http
    bind 0.0.0.0:4321
    stats       enable
    log         global
    stats       refresh   1  # 配置1秒自动刷新(可自定义间隔)
    stats uri   /status
stats auth lee:lee- 重启服务
bash
systemctl restart haproxy.service- 状态监控场景
-
实时查看后端节点在线 / 离线状态;
-
模拟设备下线时,状态页会自动刷新并展示节点异常状态(结合自动刷新配置)。
核心作用
可视化监控 HAProxy 运行状态、后端服务器健康度;
快速定位节点故障,辅助运维排障;
支持自定义刷新频率,满足实时监控需求。
2. Socat 热更新工具
Socat 本身是一款多功能的网络工具,而结合 HAProxy 场景的 "Socat 热更新工具",核心是利用 Socat 与 HAProxy 的 stats socket 交互,实现 HAProxy 配置 / 节点权重的热更新(即不停止 HAProxy 服务的前提下完成配置调整),避免服务中断。
2.1 核心应用场景
基于文档中的实操,其核心作用是对 HAProxy 后端节点进行权重调整(热更新),无需重启 HAProxy 服务,保证业务连续性。
2.2 基础使用前提
- 安装 Socat
bash
[root@haproxy ~]# dnf install socat -y
[root@haproxy ~]# socat -h #验证安装成功- HAProxy 配置准备
HAProxy 需开启 stats socket(统计套接字),并赋予足够权限(否则无法修改配置):
- 编辑 HAProxy 配置文件
/etc/haproxy/haproxy.cfg,添加 / 修改 stats socket 配置
bash
#对socket进行授权
[root@haproxy ~]# vim /etc/haproxy/haproxy.cfg
stats socket /var/lib/haproxy/stats mode 600 level admin- 清理旧的 stats 文件并重启 HAProxy 使配置生效:
bash
[root@haproxy ~]# rm -rf /var/lib/haproxy/*
[root@haproxy ~]# systemctl restart haproxy.service
生效后会生成权限为 srw------- 的 /var/lib/haproxy/stats 套接字文件,作为 Socat 与 HAProxy 交互的通道。
2.3 核心操作(与 HAProxy 交互)
通过 Socat 向 HAProxy 的 stats socket 发送指令,实现 "查看信息" 和 "修改配置" 两类核心操作:
- 查看 HAProxy 后端节点信息
- 查看所有后端服务器状态(包含节点 ID、地址、权重、运行状态等):
bash
#执行权重更改
[root@haproxy ~]# echo "show servers state" | socat stdio /var/lib/haproxy/stats- 查看指定后端节点的权重:
bash
[root@haproxy ~]# echo "get  weight webcluster/hehe" | socat  stdio /var/lib/haproxy/stats
1 (initial 1)- 热更新(修改)HAProxy 节点权重
直接修改权重(无权限时会报错):
bash
# 格式:echo "set weight 后端集群名/节点名 新权重" | socat stdio /var/lib/haproxy/stats
[root@haproxy ~]# echo "set weight webcluster/hehe 4 " | socat stdio /var/lib/haproxy/stats-
若提示
Permission denied:需检查 HAProxy 的 stats socket 配置是否包含level admin(管理员权限),并重启 HAProxy。 -
修改后可再次执行
get weight指令验证权重是否生效。
2.4 效果验证
修改节点权重后,可通过多次访问 HAProxy 前端地址,验证流量分发比例是否符合权重配置:
bash
#测试
[Administrator.DESKTOP-VJ307M3] ➤ for i in {1..10}; do curl 172.25.254.100; done
webserver2 - 192.168.0.20
webserver2 - 192.168.0.20
webserver1 - 192.168.0.10
webserver2 - 192.168.0.20
webserver2 - 192.168.0.20
webserver2 - 192.168.0.20
webserver2 - 192.168.0.20
webserver1 - 192.168.0.10
webserver2 - 192.168.0.20
webserver2 - 192.168.0.20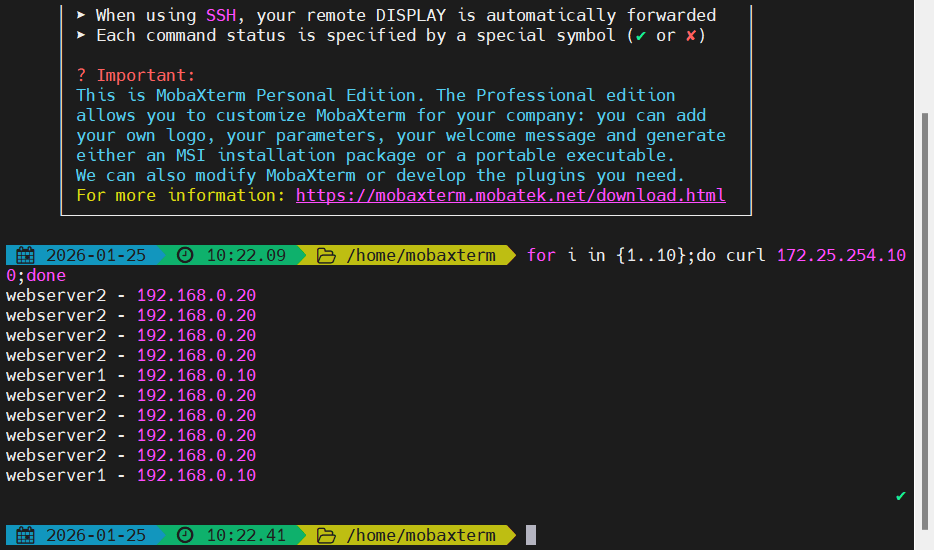
核心价值
无停机更新:调整 HAProxy 后端节点权重时,无需重启 HAProxy 服务,避免业务中断;
灵活调优:可根据服务器负载、业务需求动态调整节点权重,优化流量分发;
轻量交互:借助 Socat 工具实现与 HAProxy 套接字的简单交互,操作成本低。
3. 自定义 HAProxy 错误界面
HAProxy 提供了多种自定义错误界面的方式,核心用于后端服务不可用时,替换默认的错误提示,提升用户体验或实现特定的故障引导逻辑,主要包含sorryserver(备用服务器) 、自定义错误页面文件 、重定向到指定网站 三种场景。
3.1 基础方案:sorryserver(备用服务器)
当正常业务后端服务器全部宕机时,将请求定向到预先配置的备用服务器(sorryserver),是故障时的 "兜底访问节点",而非直接返回错误页面。
【配置步骤】
- 部署备用服务器(可复用 HAProxy 主机):安装 Web 服务(如 Apache),修改监听端口(示例为 8080),并配置自定义提示内容;
bash
#在新主机中安装apache(可以用haproxy主机代替)
[root@haproxy ~]# dnf install httpd -y
[root@haproxy ~]# vim /etc/httpd/conf/httpd.conf
47 Listen 8080
[root@haproxy ~]# systemctl enable --now httpd
Created symlink /etc/systemd/system/multi-user.target.wants/httpd.service → /usr/lib/systemd/system/httpd.service.

[root@haproxy ~]# echo "李哥在,没意外" > /var/www/html/index.html- 修改 HAProxy 配置文件(
/etc/haproxy/haproxy.cfg),在后端集群中添加backup标识的备用服务器:
bash
[root@haproxy ~]# vim /etc/haproxy/haproxy.cfg
listen webcluster
    bind        *:80
    mode        http
    balance     roundrobin
    server haha 192.168.0.10:80  check inter 3s fall 3 rise 5 weight 1
    server hehe 192.168.0.20:80  check inter 3s fall 3 rise 5 weight 1
server wuwu 192.168.0.100:8080 backup #sorryserver- 重启 HAProxy 生效,当所有业务服务器宕机时,请求会被转发到备用服务器。
bash
[root@haproxy ~]# systemctl restart haproxy.service- 测试
bash
[Administrator.DESKTOP-VJ307M3] ➤ curl 172.25.254.100
webserver1 - 192.168.0.10

[Administrator.DESKTOP-VJ307M3] ➤ curl 172.25.254.100
webserver2 - 192.168.0.20

#关闭两台正常的业务主机
[root@webserver1+2 ~]# systemctl stop httpd

[Administrator.DESKTOP-VJ307M3] ➤ curl 172.25.254.100
李哥在,没意外
3.2 核心方案:自定义错误页面文件
当包括备用服务器在内的所有后端服务都宕机时,HAProxy 会返回默认错误页面(如 503),可通过自定义错误页面文件替换默认内容。
【配置步骤】
- 创建错误页面存放目录,并编写自定义错误页面文件(需遵循 HTTP 格式):
bash
[root@haproxy ~]# mkdir /errorpage/html/ -p
[root@haproxy ~]# vim /errorpage/html/503.http
HTTP/1.0 503 Service Unavailable
Cache-Control: no-cache
Connection: close
Content-Type: text/html;charset=UTF-8

<html><body><h1>什么动物生气最安静</h1>
大猩猩!!
</body></html>- 修改 HAProxy 的
defaults段,添加errorfile指令关联错误码与自定义文件:
bash
[root@haproxy ~]# vim /etc/haproxy/haproxy.cfg
defaults
    mode                    http
    # 其他默认配置(日志、超时、连接数等)
errorfile 503 /errorpage/html/503.http # 503错误关联自定义文件- 重启 HAProxy,当触发 503 错误时,会返回自定义的页面内容。
bash
[root@haproxy ~]# systemctl restart haproxy.service- 测试
bash
[Administrator.DESKTOP-VJ307M3] ➤ curl 172.25.254.100
<html><body><h1>什么动物生气最安静</h1>
大猩猩!!
</body></html>
3.3 扩展方案:重定向错误到指定网站
除了返回本地自定义页面,还可将错误请求直接重定向到外部指定网站(如百度)。
【配置步骤】
- 修改 HAProxy 的
defaults段,将errorfile替换为errorloc,指定重定向的 URL:
bash
[root@haproxy ~]# vim /etc/haproxy/haproxy.cfgdefaults
    mode                    http
    # 其他默认配置
errorloc 503 http://www.baidu.com # 503错误重定向到百度- 重启 HAProxy,当触发 503 错误时,浏览器会直接跳转到配置的外部网站。
bash
[root@haproxy ~]# systemctl restart haproxy.service核心说明
优先级:
sorryserver> 自定义错误页面 / 重定向,仅当备用服务器也不可用时,才会触发自定义错误页面或重定向;错误码:HAProxy 支持为不同错误码(如 403、500、503 等)配置不同的自定义逻辑;
格式要求:自定义错误页面文件(
.http)必须包含完整的 HTTP 响应头(如HTTP/1.0 503 Service Unavailable),否则会导致 HAProxy 解析失败。