文章目录
第一个前后端分离项目
前端
虚拟学生数据
骨架
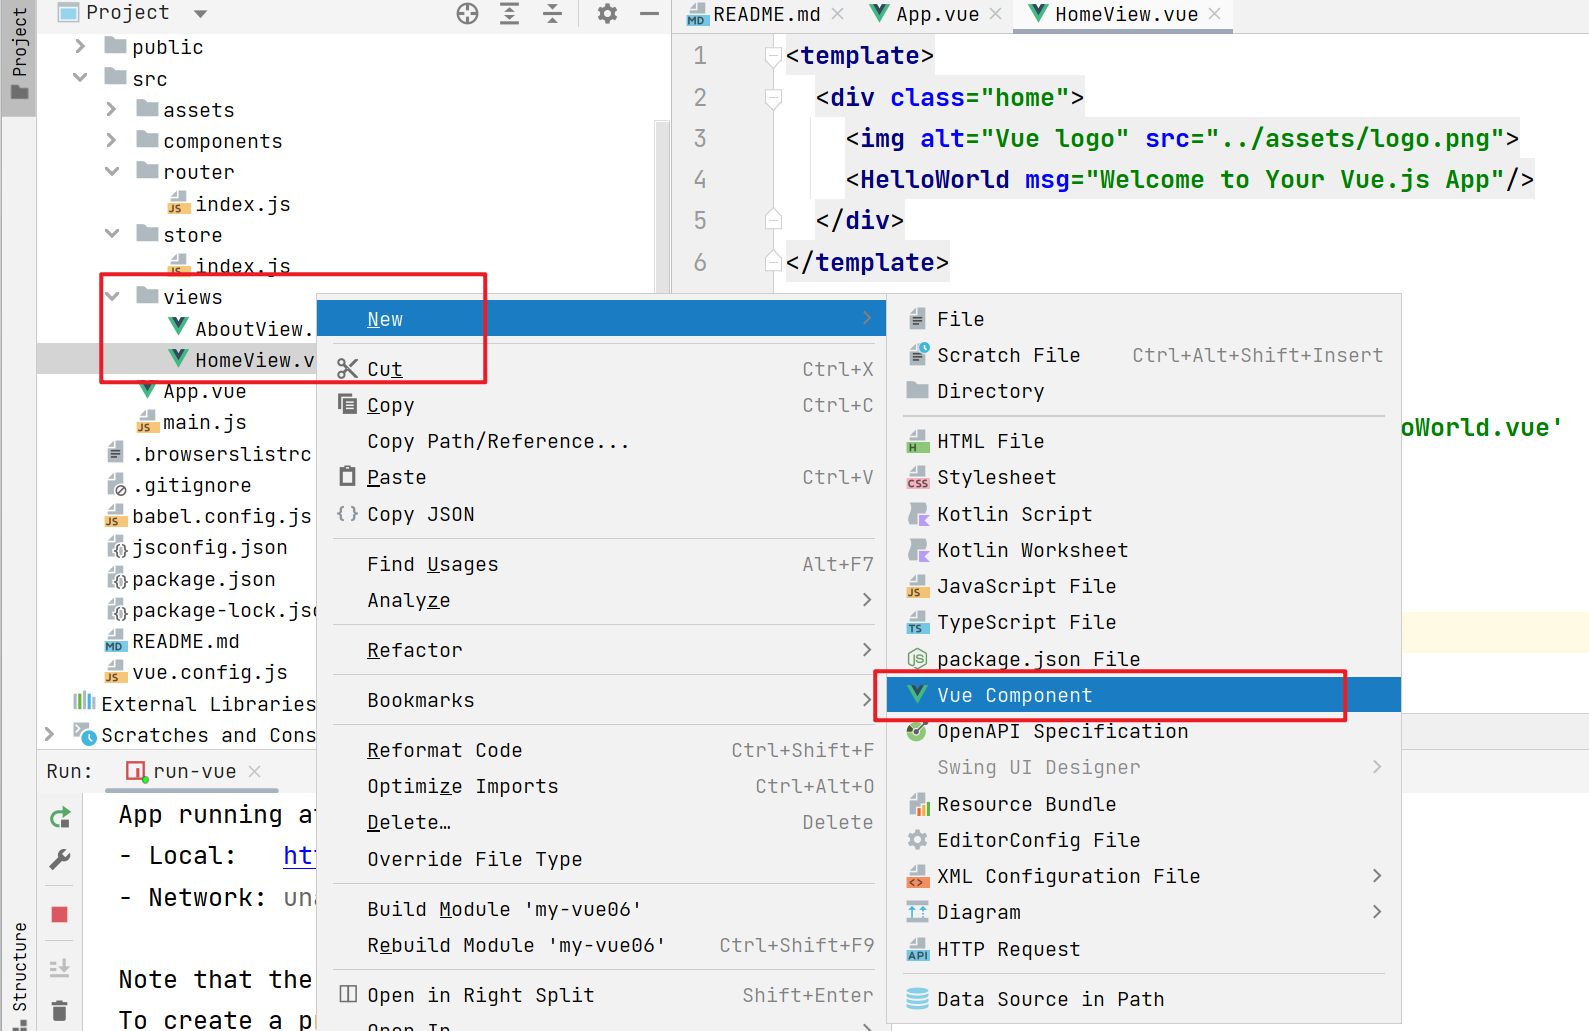
- 自行创建 vue 程序 并导入 idea中

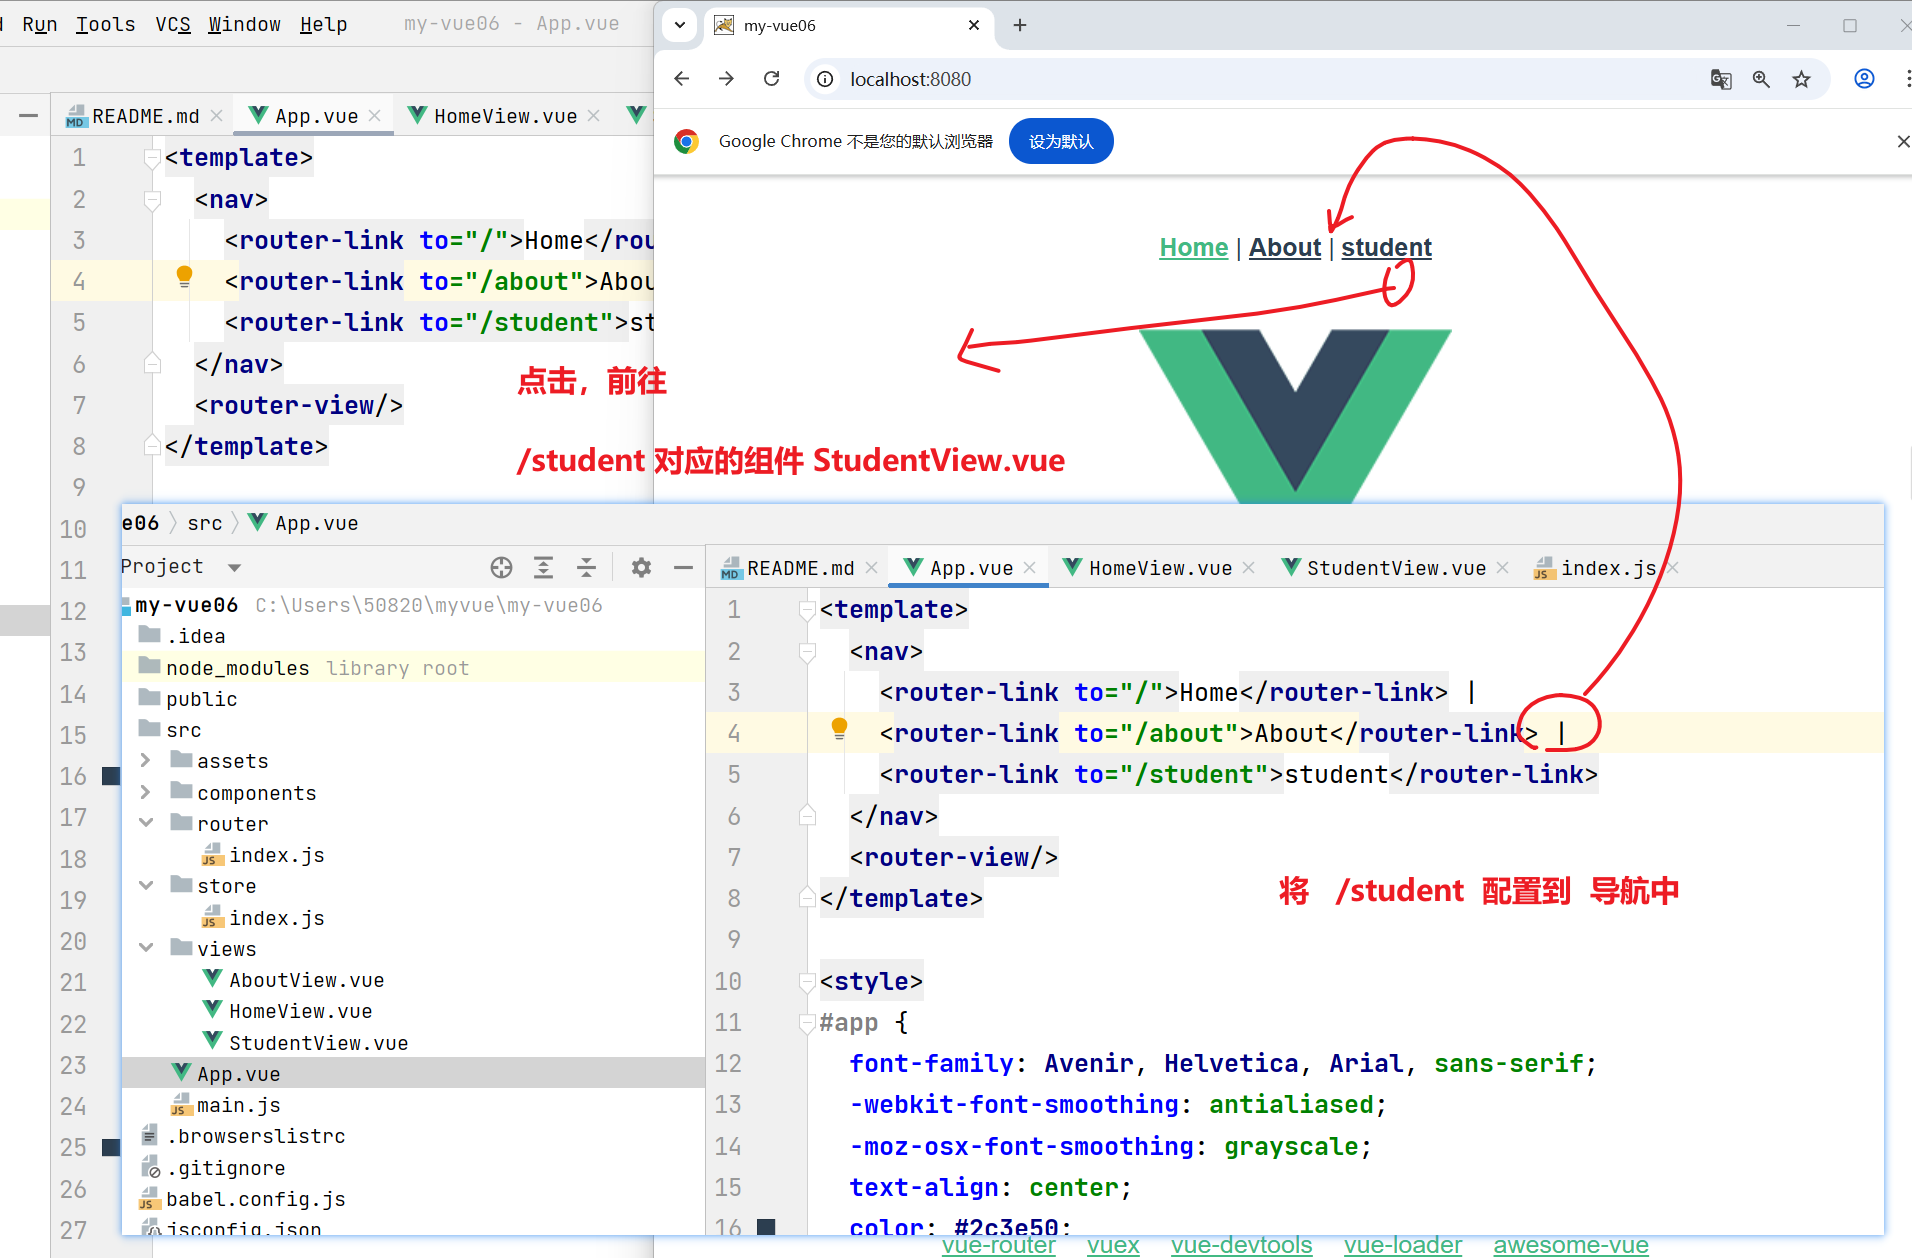
配置路由
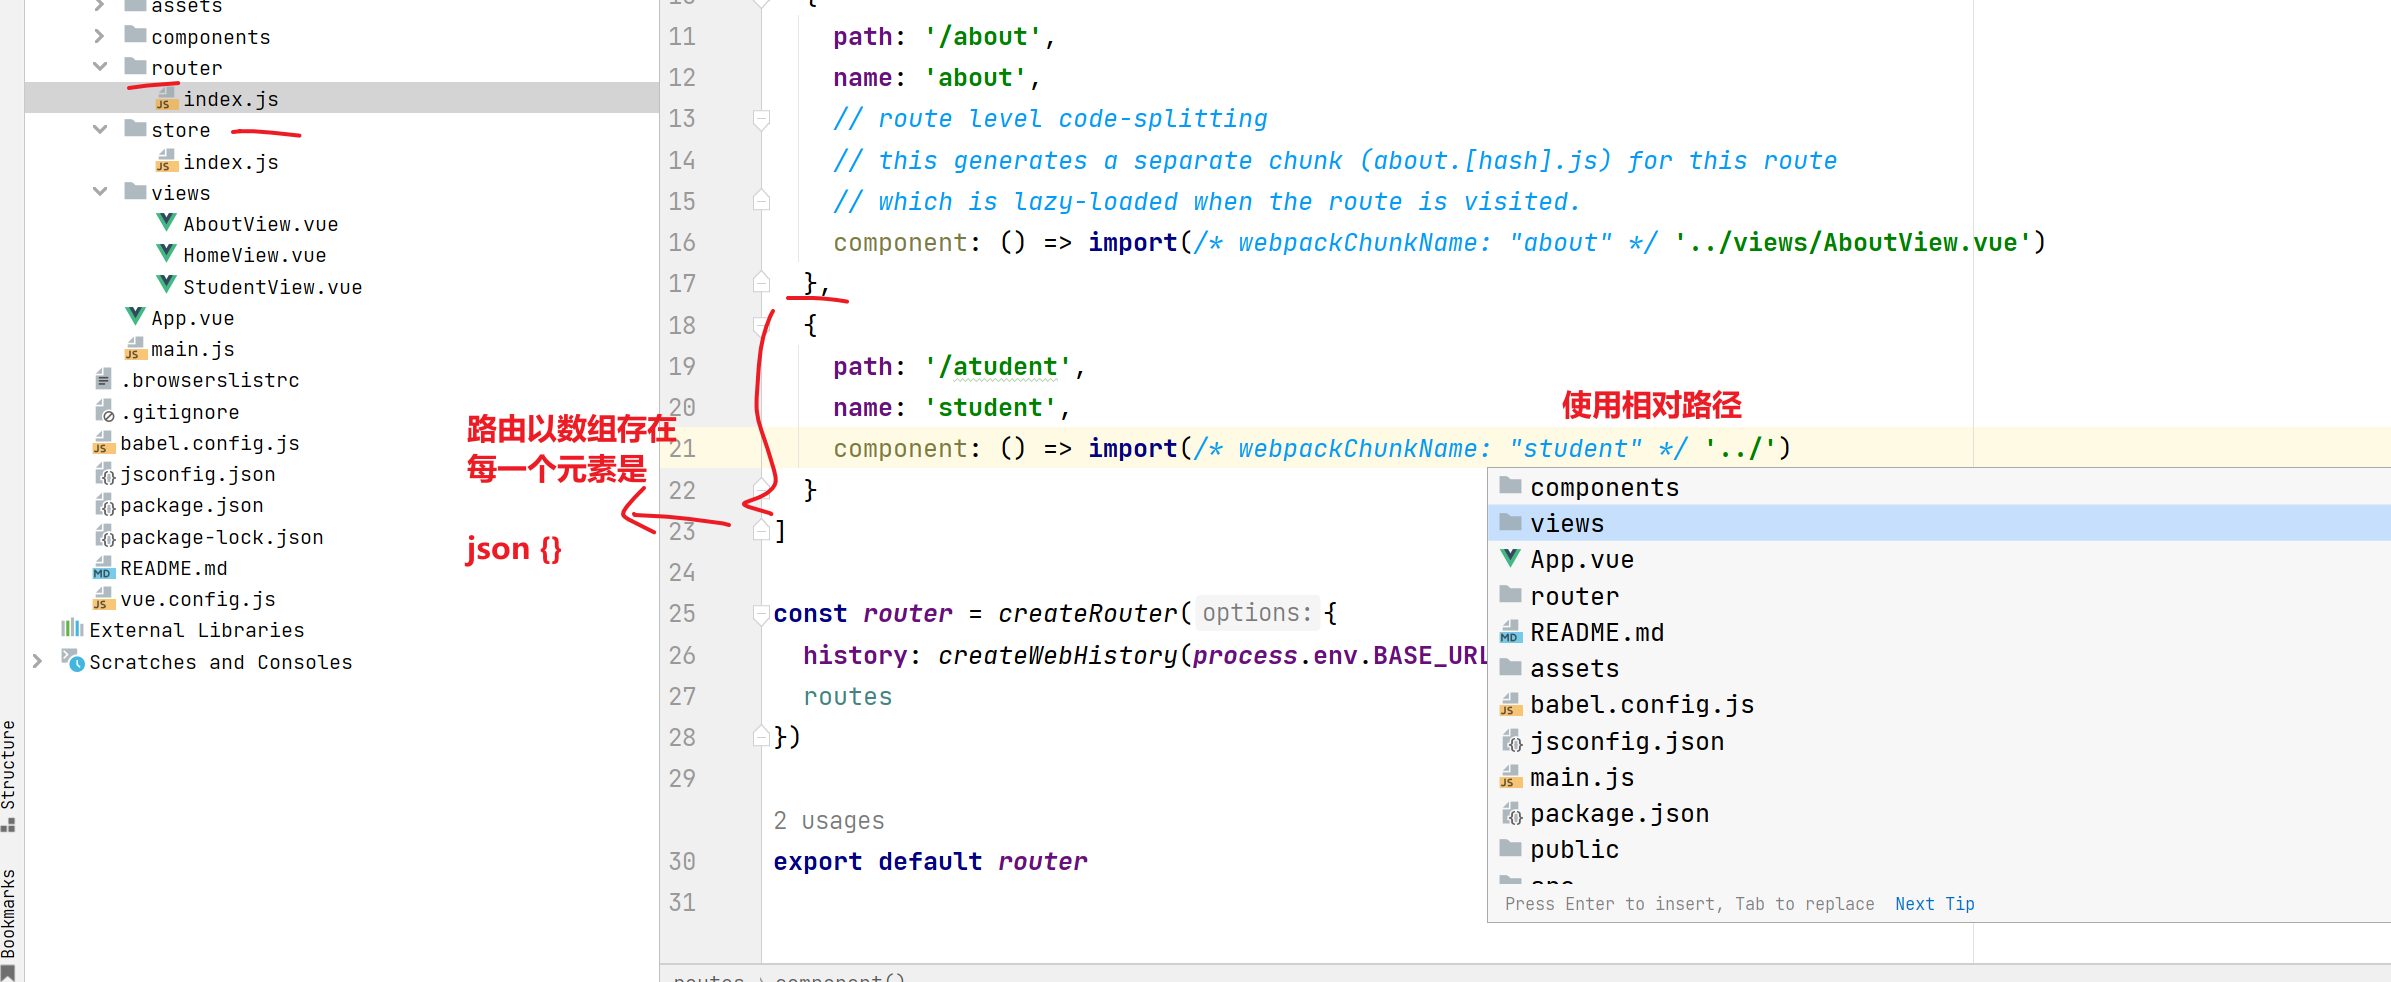
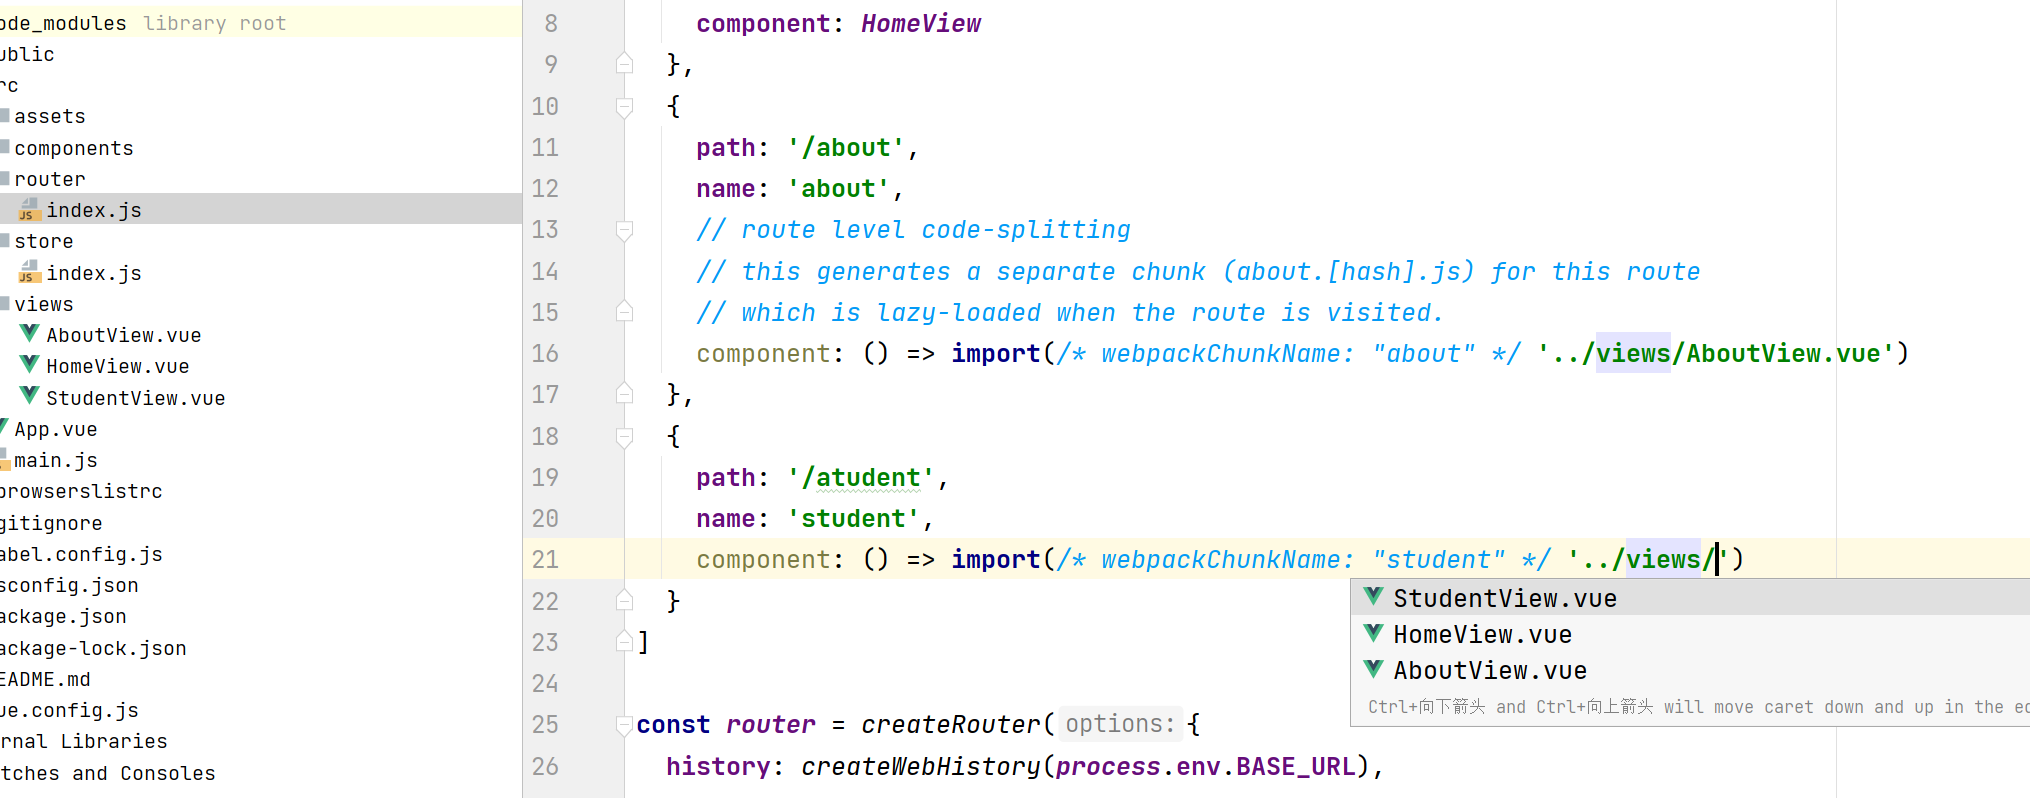
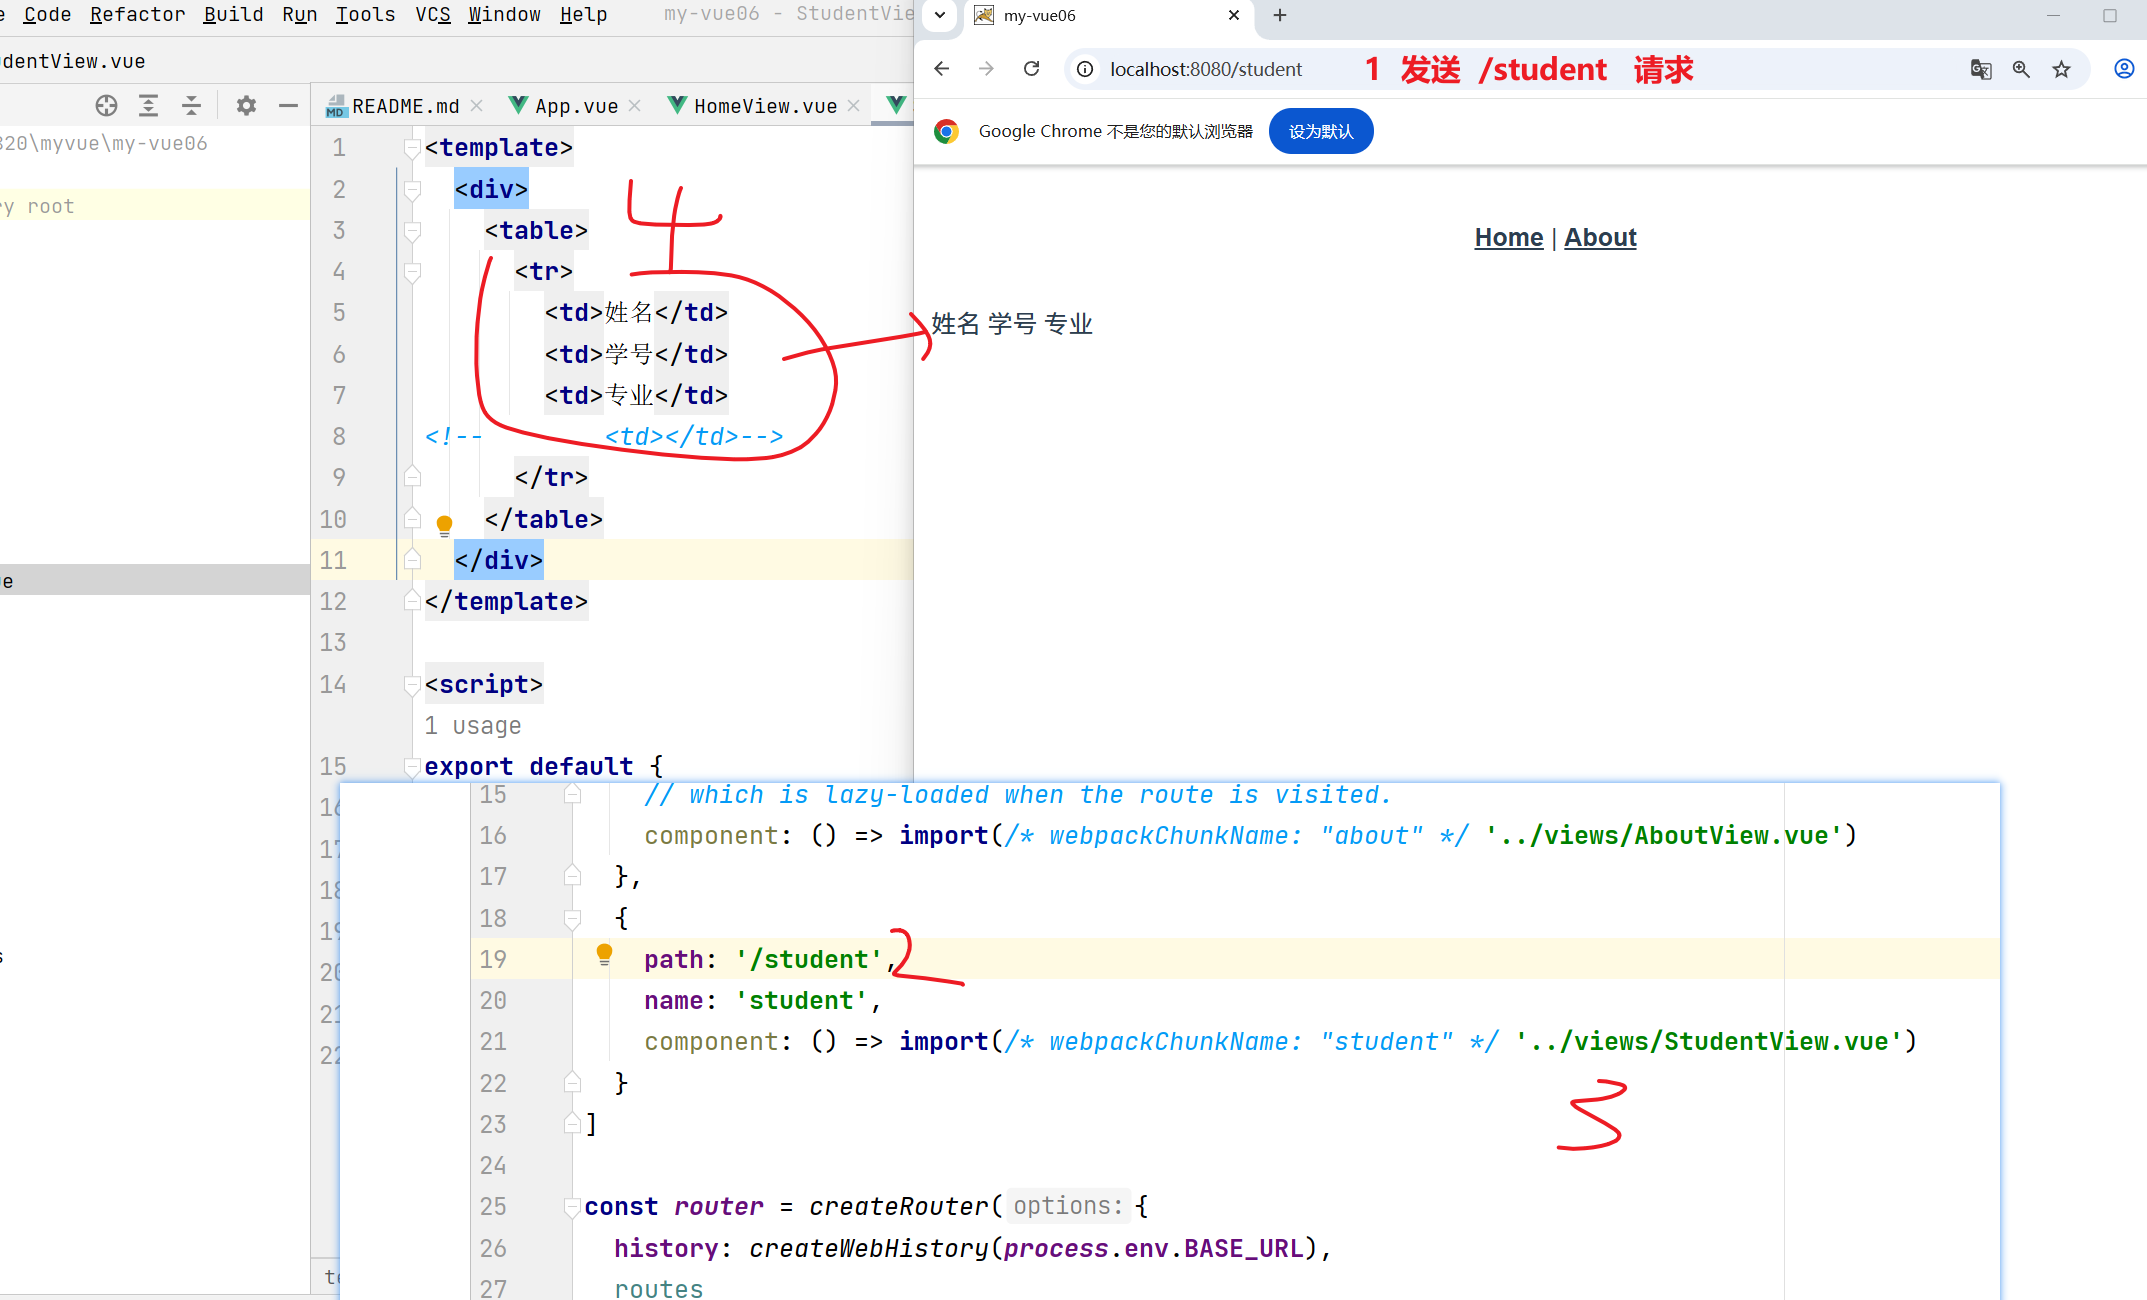
配置到导航体中
虚拟学生数据

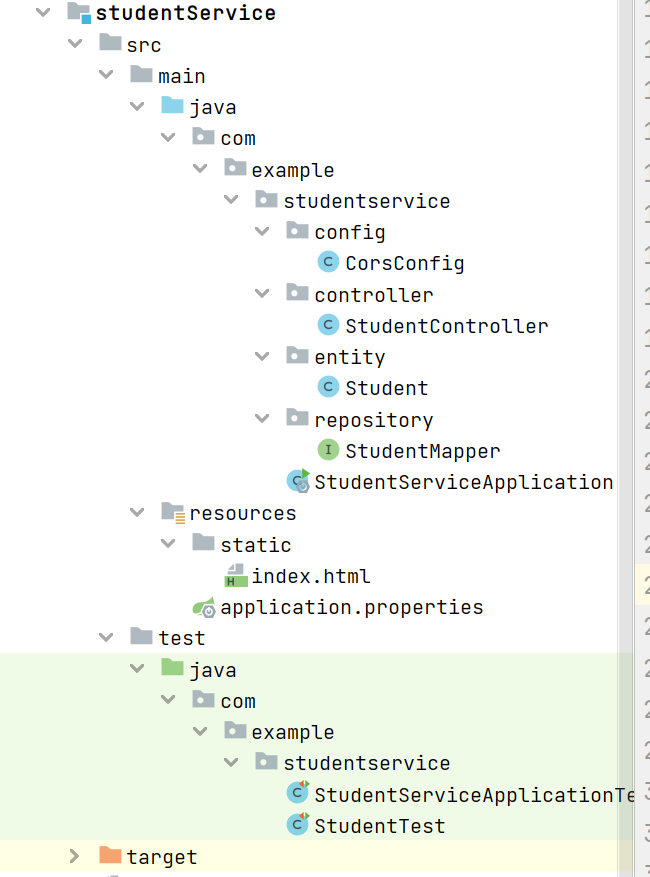
后端
spring boot + vue
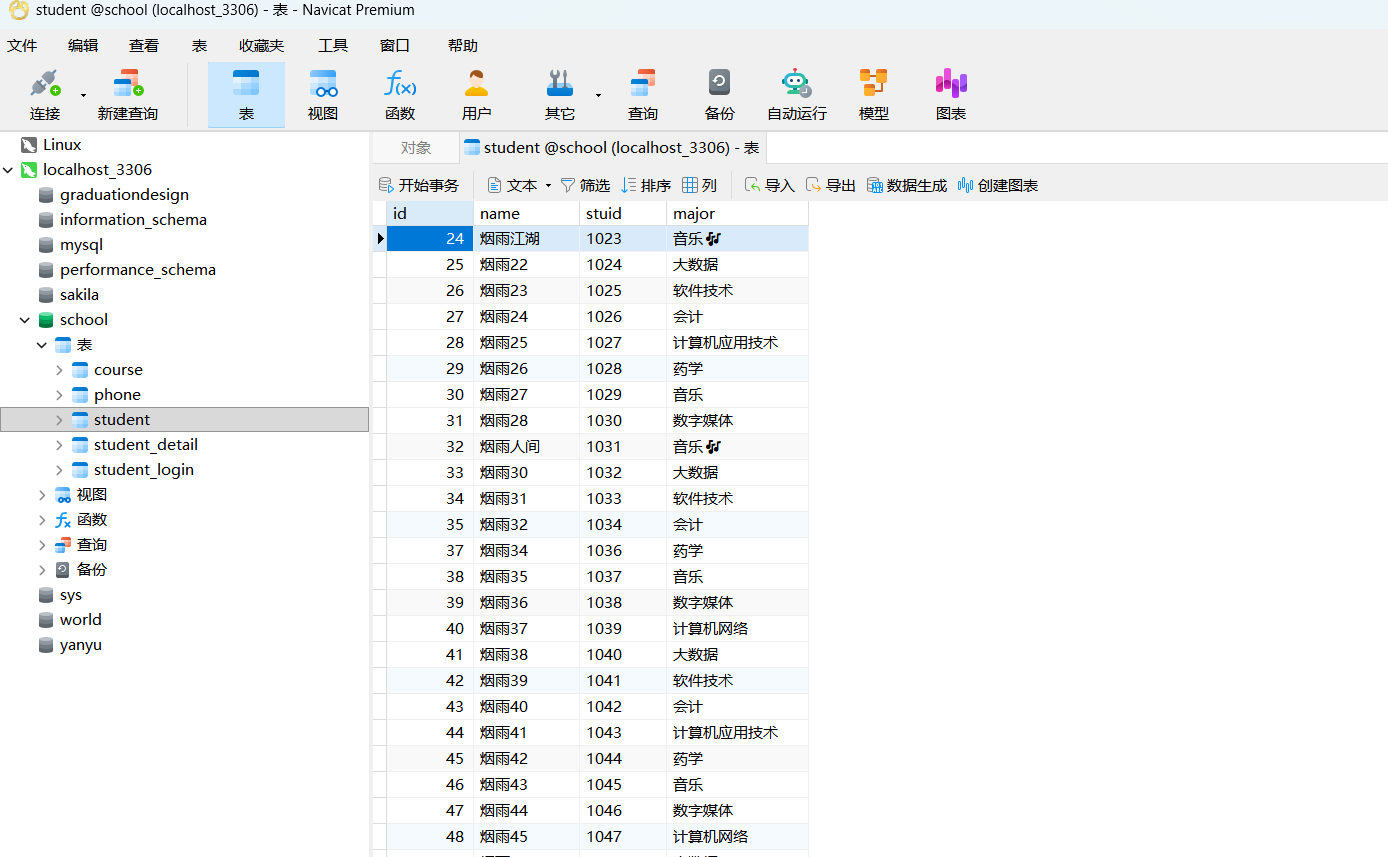
- 建库建表
直接使用之前的表

spring boot 实现查表业务返回list 集合

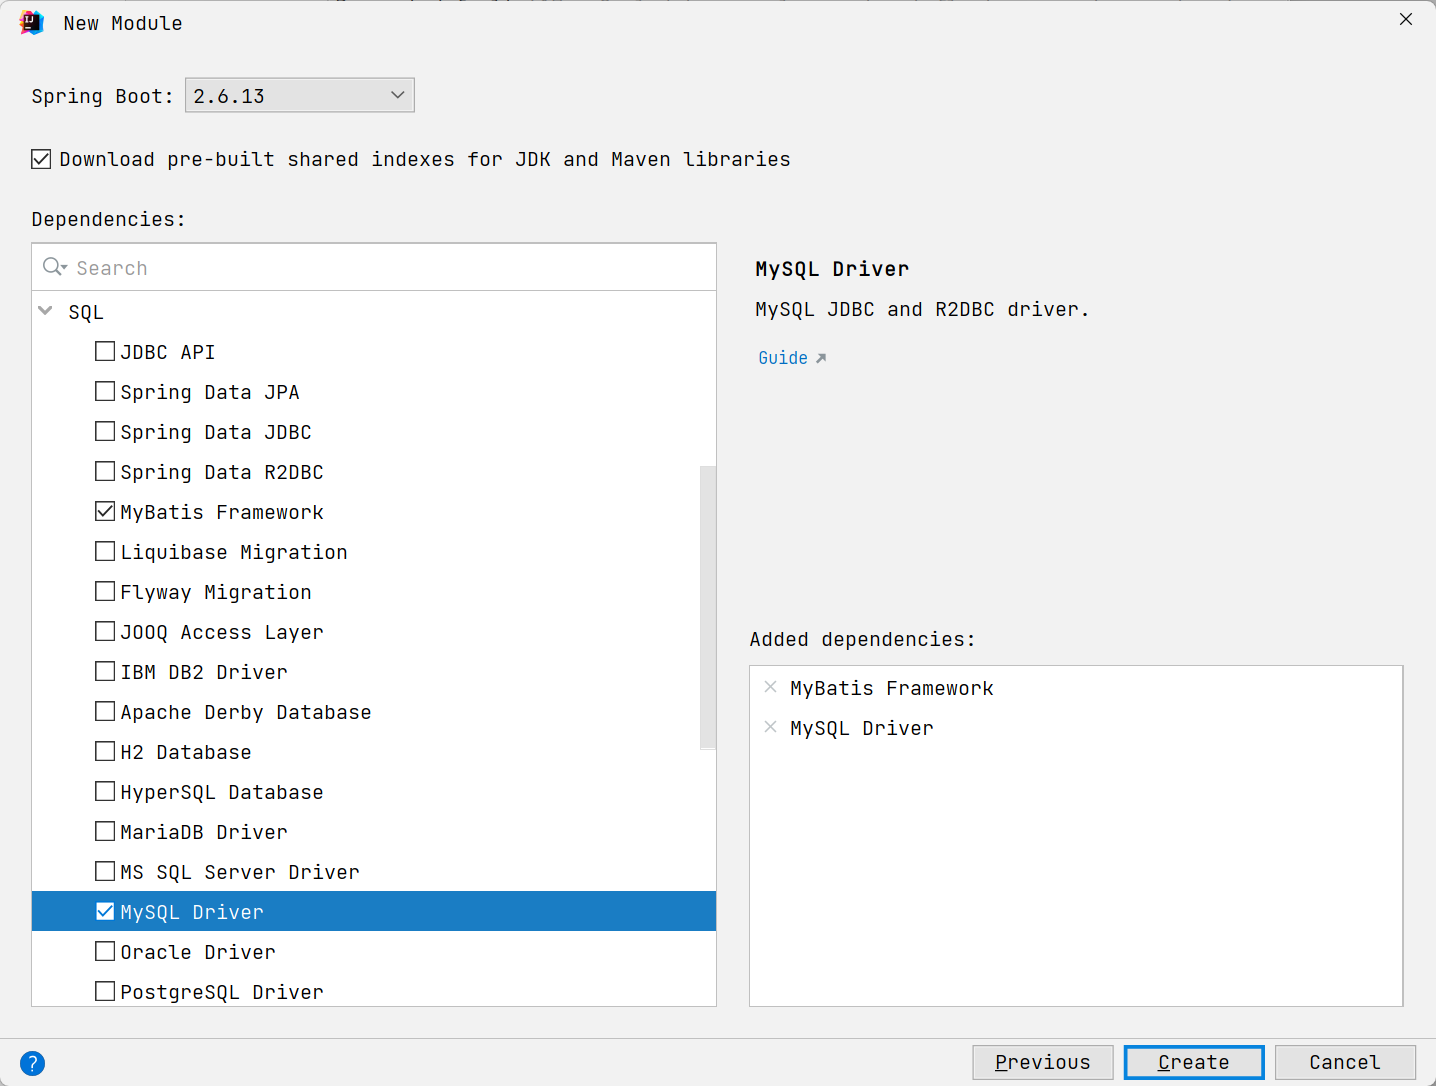
中间件
在基于Spring Boot和Vue的前后端分离项目中,Axios是两者之间沟通的桥梁。你可以把它想象成一个负责送信和回信的信使,专门在前端和后端之间传递数据。
下面我从核心作用 和具体用法两个方面,帮你全面理解它。
🎯 Axios在项目中的核心作用
在前后端分离的架构中,Axios扮演着至关重要的角色,主要体现在以下几个方面:
| 作用 | 解释 | 类比 |
|---|---|---|
| HTTP通信 | Axios是基于Promise的HTTP客户端,负责在Vue前端发起Ajax请求(如GET、POST),与Spring Boot后端的RESTful API进行数据交互-2-5-7。 | 前端要数据或提交表单时,Axios负责把请求送到后端。 |
| 异步数据获取与更新 | 在Vue组件中,通常在生命周期钩子(如created)里用Axios获取数据,然后更新视图,实现页面的局部刷新,无需重载整个页面-1-5-9。 |
用户打开页面时,Axios默默取回数据,页面自动渲染;用户提交表单时,Axios把数据送出去,再根据结果更新页面提示。 |
| 统一管理接口 | 可以通过创建Axios实例、设置请求/响应拦截器 等方式,集中管理所有API请求,统一处理诸如添加认证Token、全局错误提示、格式化响应数据等逻辑-3-9。 | 为信使(Axios)制定统一的送信规则,比如所有信件都要贴上一张统一的标签(Token),如果收到坏消息(错误状态码)就统一拉响警报。 |
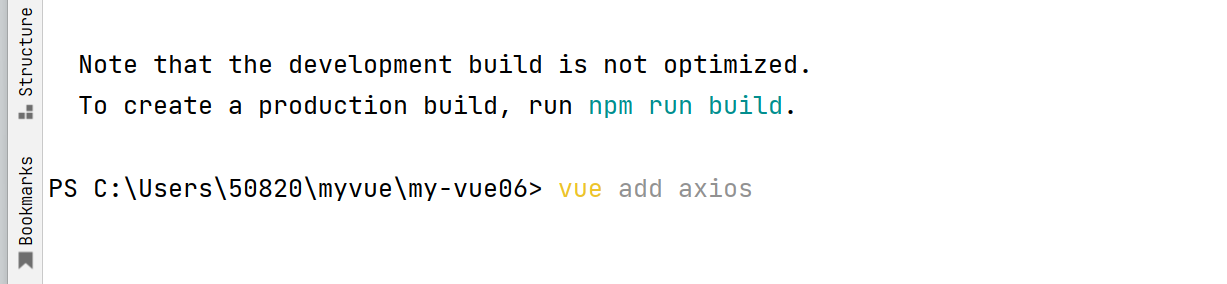
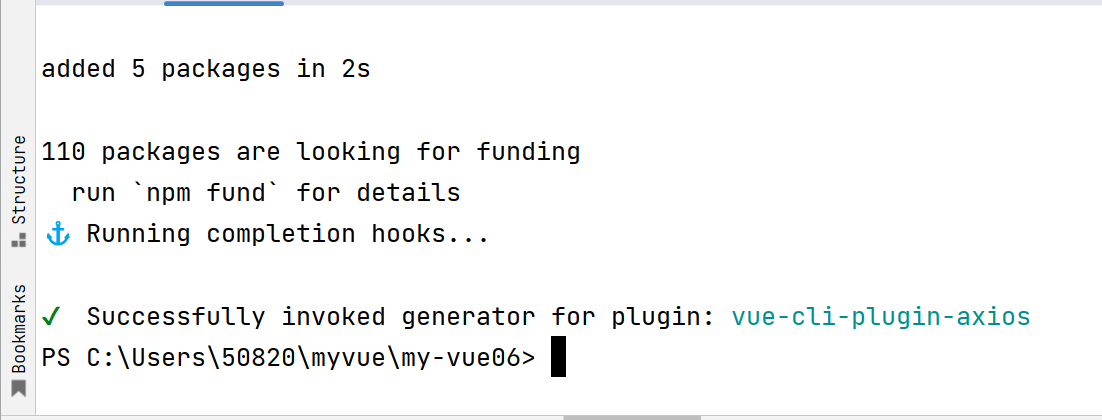
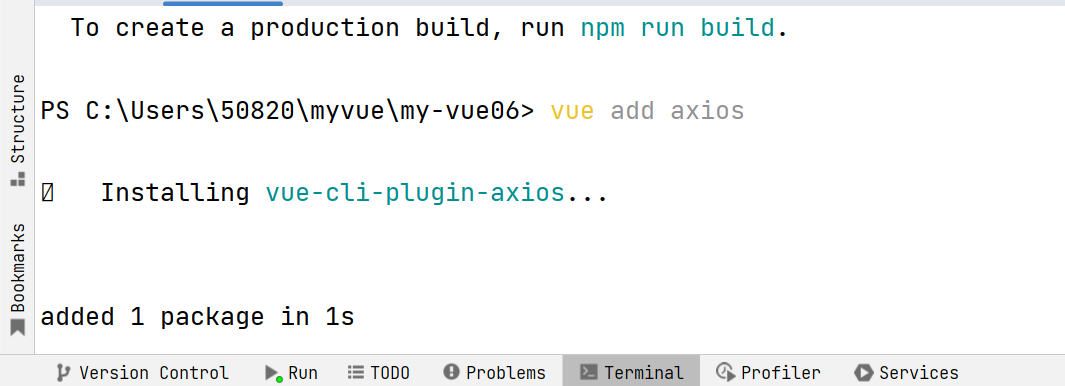
安装
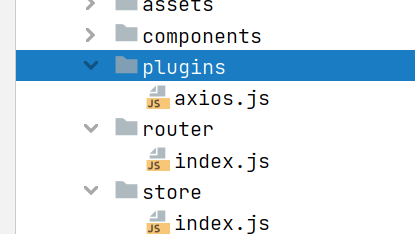
Axios引用错误
使用报错:
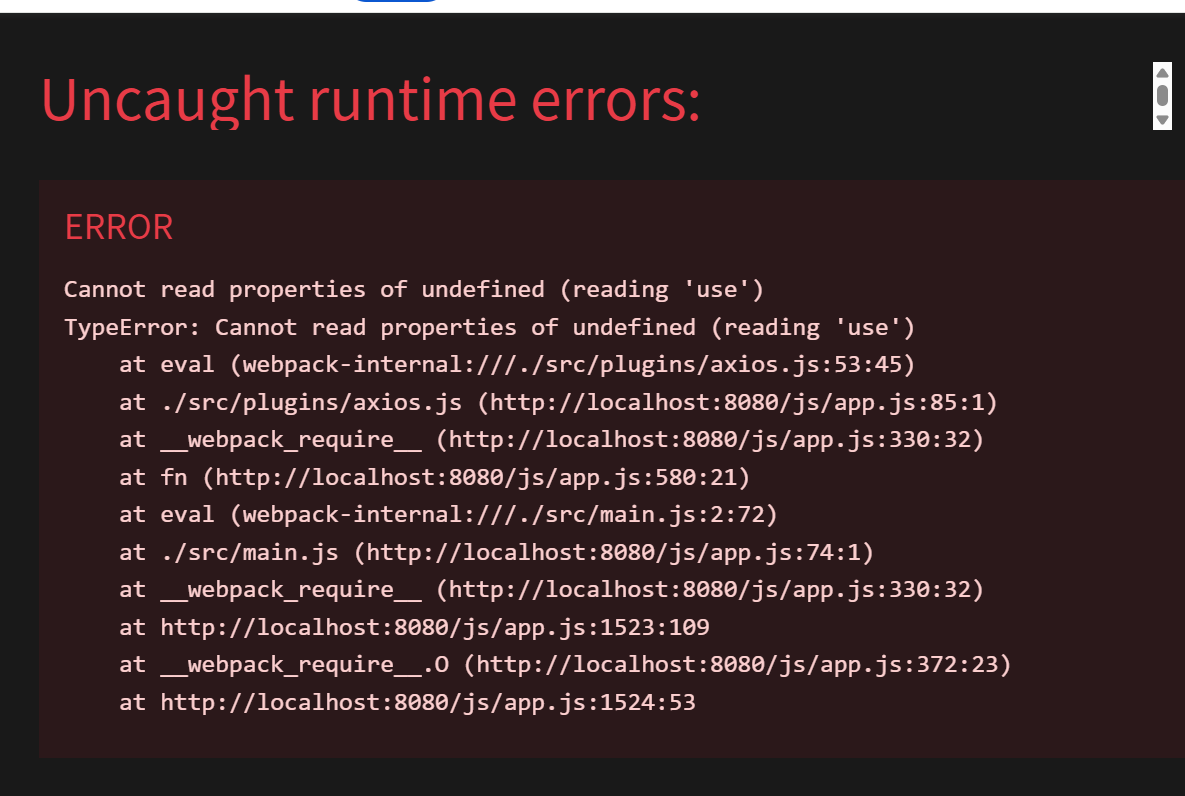
这个错误是因为在 src/plugins/axios.js 文件中尝试使用 Vue.use() 来安装 Axios,但这是 Vue 2 的写法 ,而你的项目是 Vue 3,Vue 3 不再使用 Vue.use() 来注册 Axios。
错误原因分析
错误信息 Cannot read properties of undefined (reading 'use') 表明代码中有一个 Vue.use() 调用,但 Vue 这个变量是 undefined。这是因为:
-
你的项目是 Vue 3(之前你选择了 3.x)
-
src/plugins/axios.js文件中使用了 Vue 2 的写法,类似于:javascript
复制下载
javascriptimport Vue from 'vue' import axios from 'axios' Vue.use({ // 这行报错,Vue 3 中没有 Vue.use() install: function(Vue) { Vue.prototype.$axios = axios } })
解决方案
方案一:修改 axios.js 文件(推荐)
打开 src/plugins/axios.js 文件,将其内容修改为 Vue 3 的写法:
javascript
复制下载
javascript
// src/plugins/axios.js
import axios from 'axios'
// 配置 axios 默认值
axios.defaults.baseURL = 'http://localhost:8080' // 改为你的后端地址
axios.defaults.timeout = 10000
// 添加请求拦截器(可选)
axios.interceptors.request.use(
config => {
// 从 localStorage 获取 token 并添加到请求头
const token = localStorage.getItem('token')
if (token) {
config.headers.Authorization = `Bearer ${token}`
}
return config
},
error => {
return Promise.reject(error)
}
)
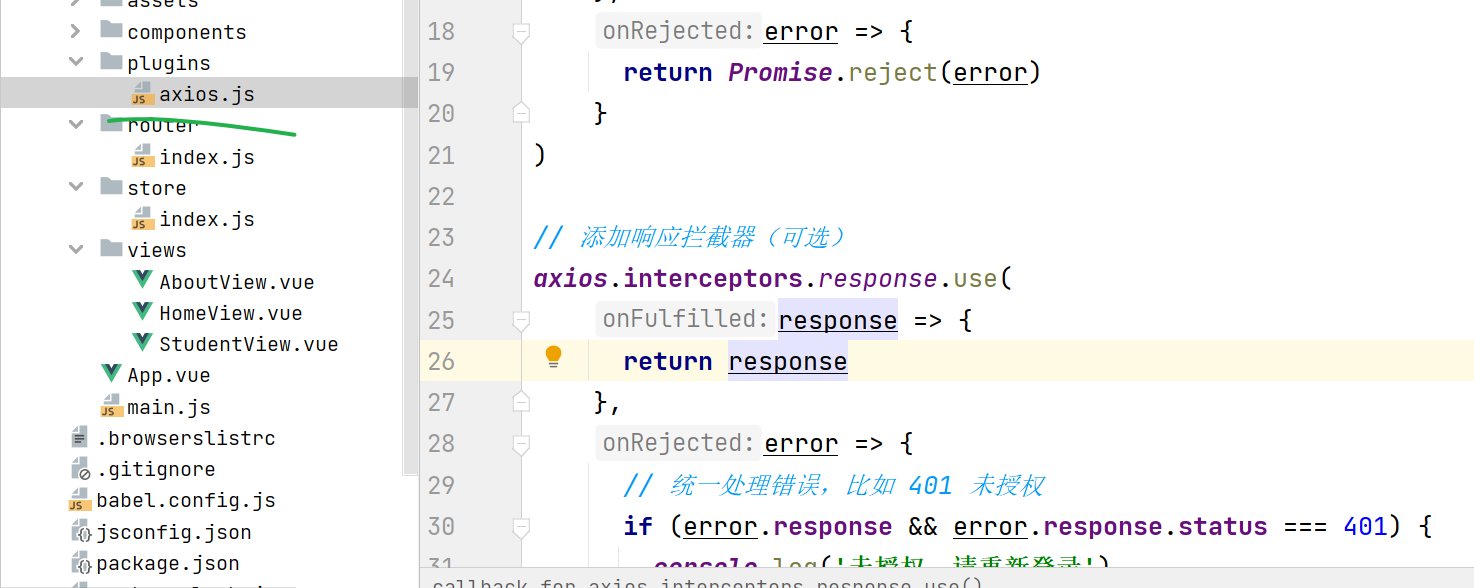
// 添加响应拦截器(可选)
axios.interceptors.response.use(
response => {
return response
},
error => {
// 统一处理错误,比如 401 未授权
if (error.response && error.response.status === 401) {
console.log('未授权,请重新登录')
// 可以在这里跳转到登录页
}
return Promise.reject(error)
}
)
export default axios方案二:在 main.js 中正确挂载 Axios
打开 src/main.js 文件,修改为 Vue 3 的正确挂载方式:
javascript
复制下载
javascript
// src/main.js
import { createApp } from 'vue'
import App from './App.vue'
import router from './router'
import store from './store'
import axios from './plugins/axios'  // 引入刚才配置好的 axios

const app = createApp(App)

// Vue 3 中挂载全局属性的正确方式
app.config.globalProperties.$axios = axios

app.use(store)
app.use(router)
app.mount('#app')
修改完成后,在任意组件中测试是否正常:
vue
复制下载
javascript
<template>
  <div>
    <h1>测试 Axios</h1>
    <button @click="testAxios">点击测试</button>
  </div>
</template>

<script>
export default {
  methods: {
    testAxios() {
      // 通过 this.$axios 访问
      this.$axios.get('https://jsonplaceholder.typicode.com/posts/1')
        .then(res => {
          console.log('请求成功:', res.data)
          alert('请求成功,请查看控制台')
        })
        .catch(err => {
          console.error('请求失败:', err)
          alert('请求失败: ' + err.message)
        })
    }
  }
}
</script>
总结
| 问题 | 原因 | 解决方案 |
|---|---|---|
Cannot read properties of undefined (reading 'use') |
在 Vue 3 项目中使用了 Vue 2 的 Vue.use() 语法 |
修改 axios 配置文件,使用 Vue 3 的 app.config.globalProperties 挂载 |
按照上面的任一方案修改后,重启项目应该就能正常工作了。如果你不确定具体是哪个文件导致的错误,可以先尝试方案三,这是最简单直接的解决方法。
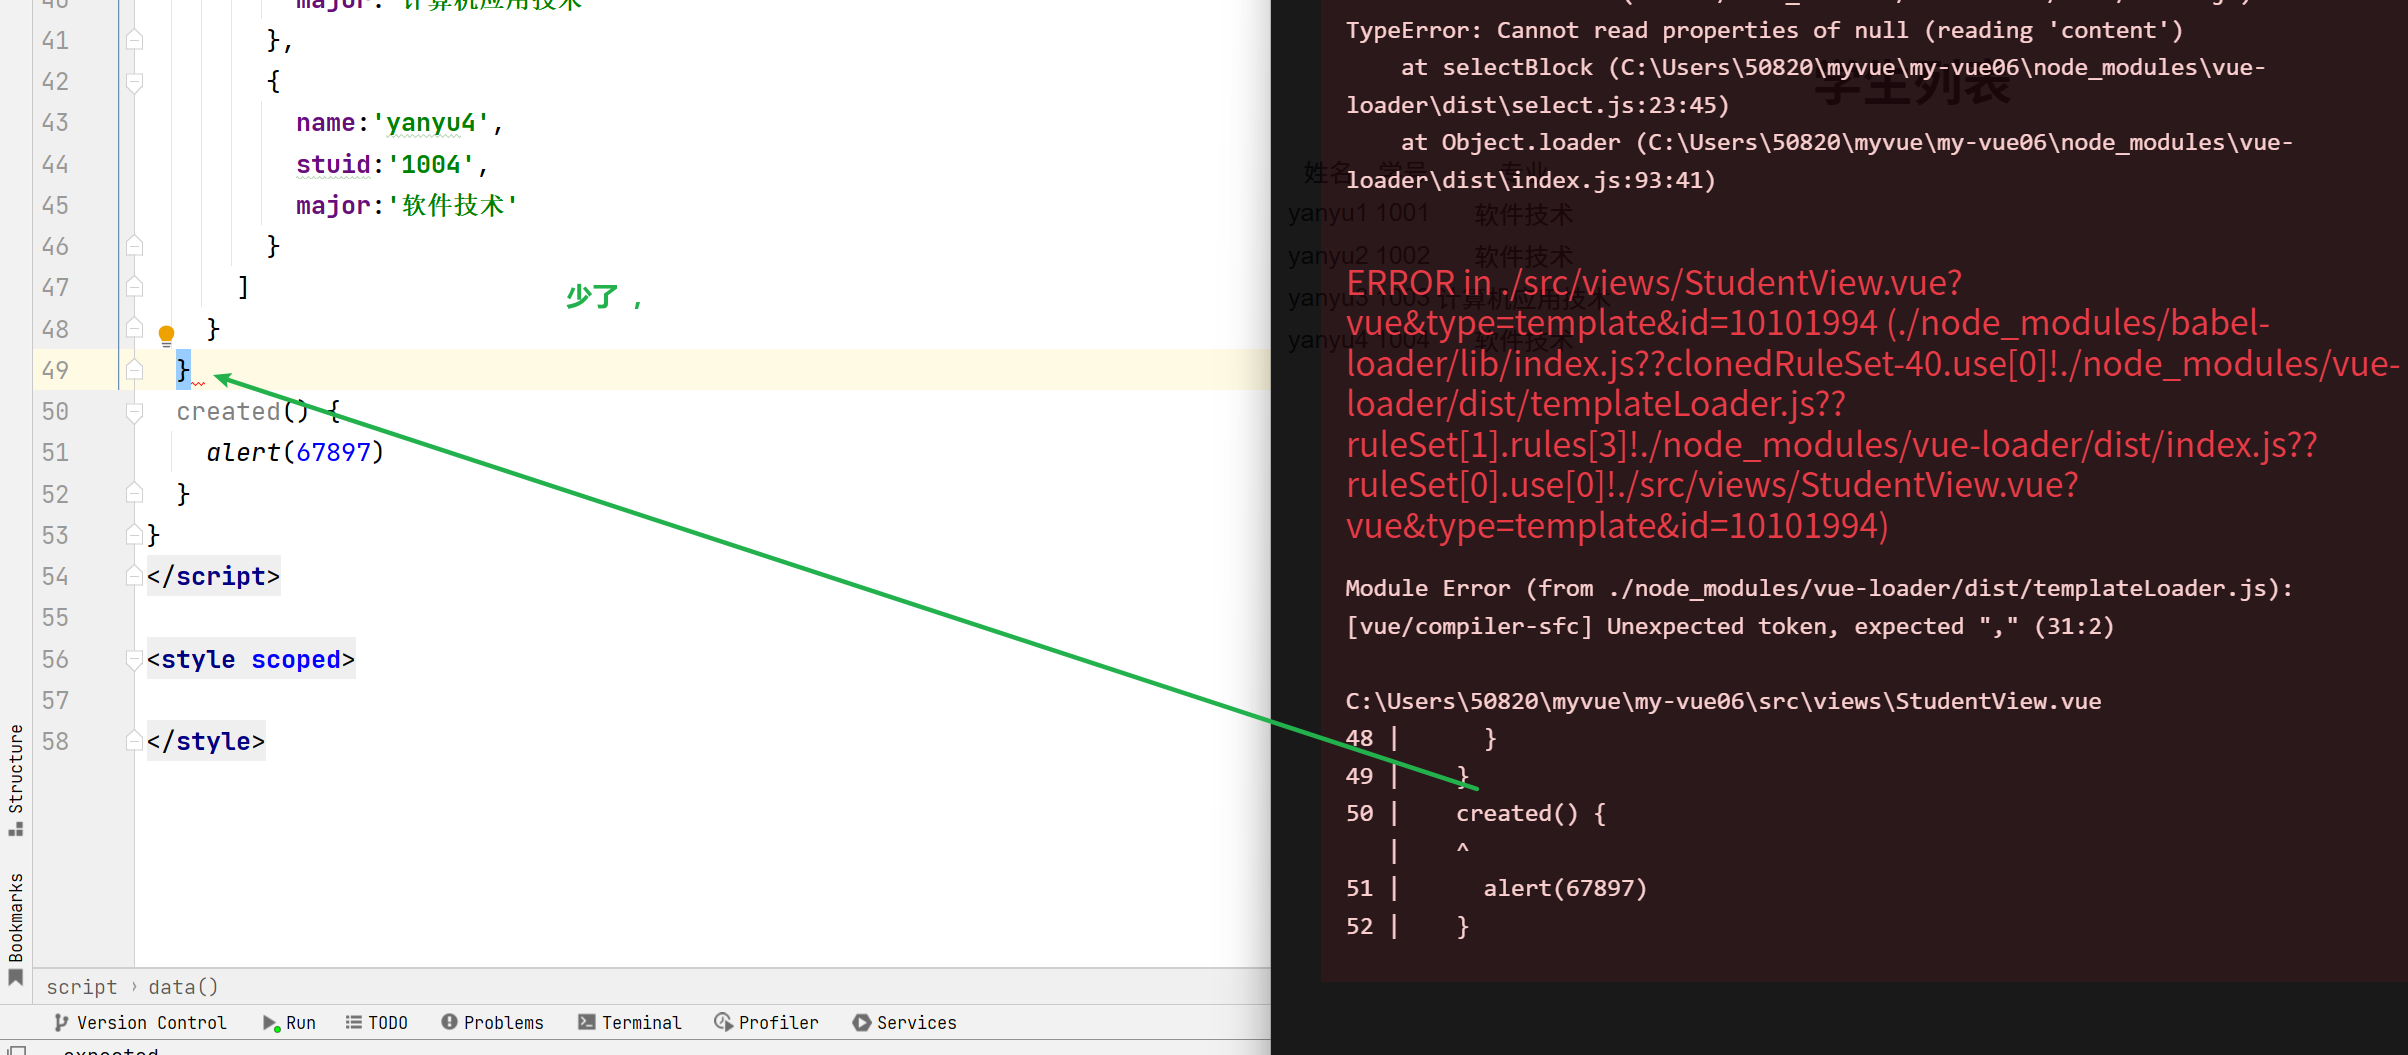
,错误(根据区域找)
承接spring boot数据
接受后端的集合数据
未导入 axios 报错
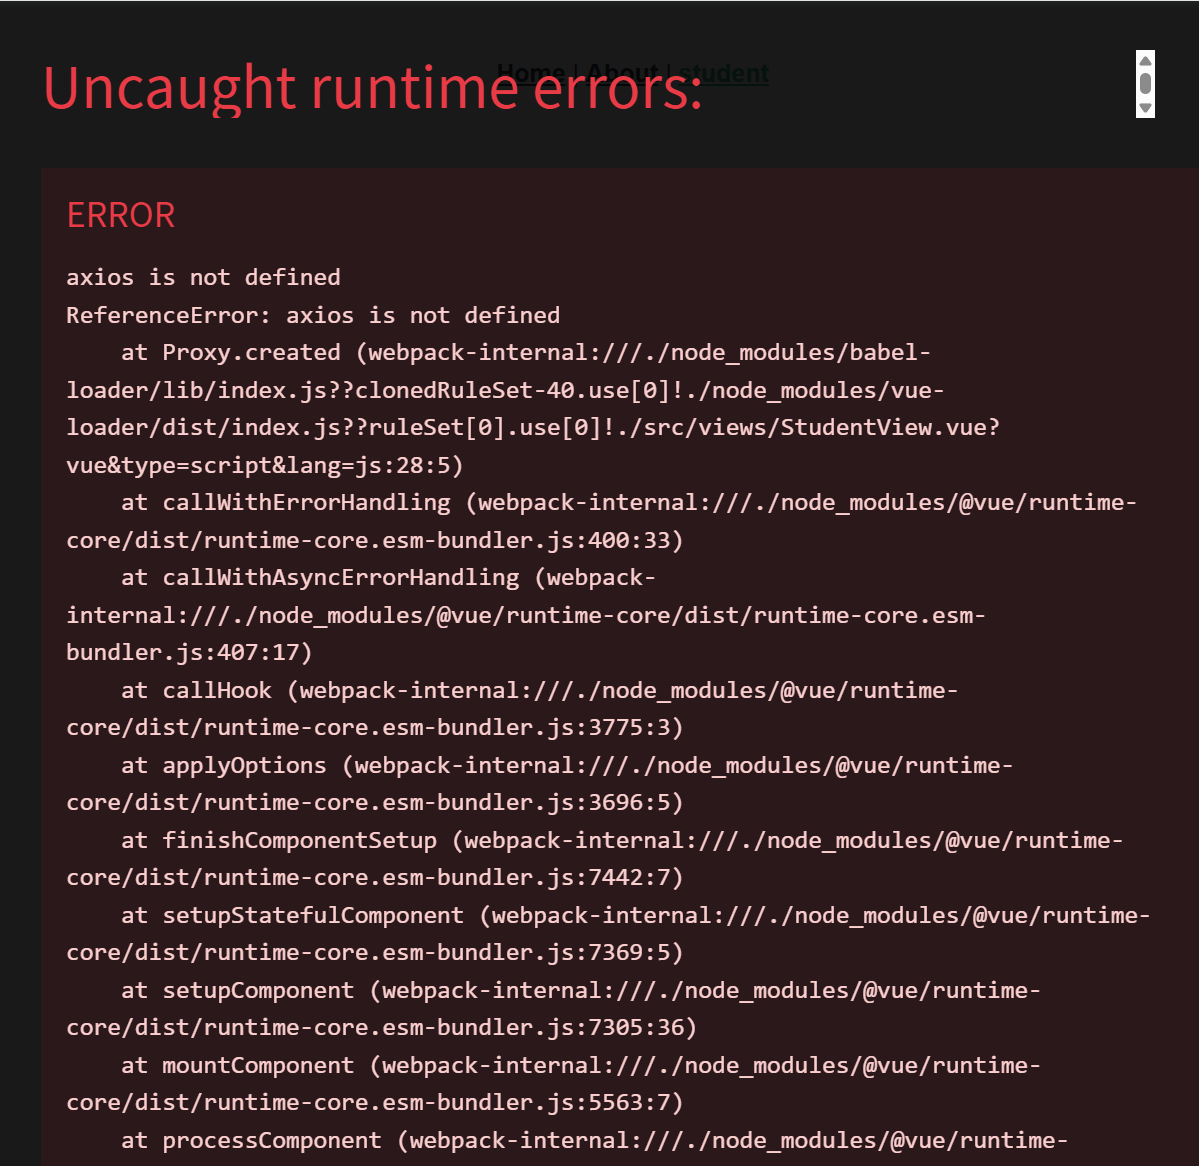
解决

javascript
<template>
<div>
<h1>{{studentTitle}}</h1>
<table>
<tr>
<td>姓名</td>
<td>学号</td>
<td>专业</td>
</tr>
<!-- v-for 类似于 foreach 去遍历数组 -->
<tr v-for="item in studentInfo">
<td>{{item.name}}</td>
<td>{{item.stuid}}</td>
<td>{{item.major}}</td>
<!-- <td></td>-->
</tr>
</table>
</div>
</template>
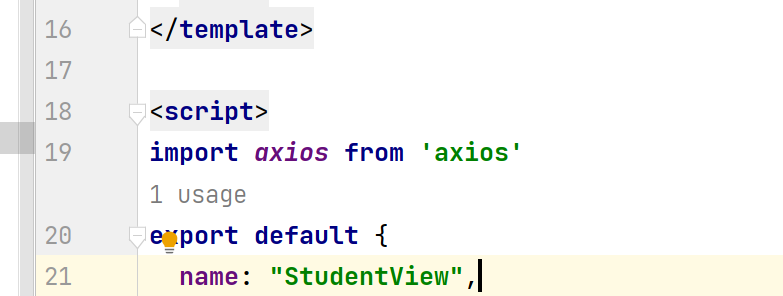
<script>
// 导入对应的插件 axios
import axios from 'axios'
export default {
name: "StudentView",
data(){
return{
studentTitle:'学生列表',
studentInfo:[
{
name:'yanyu1',
stuid:'1001',
major:'软件技术'
},
{
name:'yanyu2',
stuid:'1002',
major:'软件技术'
},
{
name:'yanyu3',
stuid:'1003',
major:'计算机应用技术'
},
{
name:'yanyu4',
stuid:'1004',
major:'软件技术'
}
]
}
},
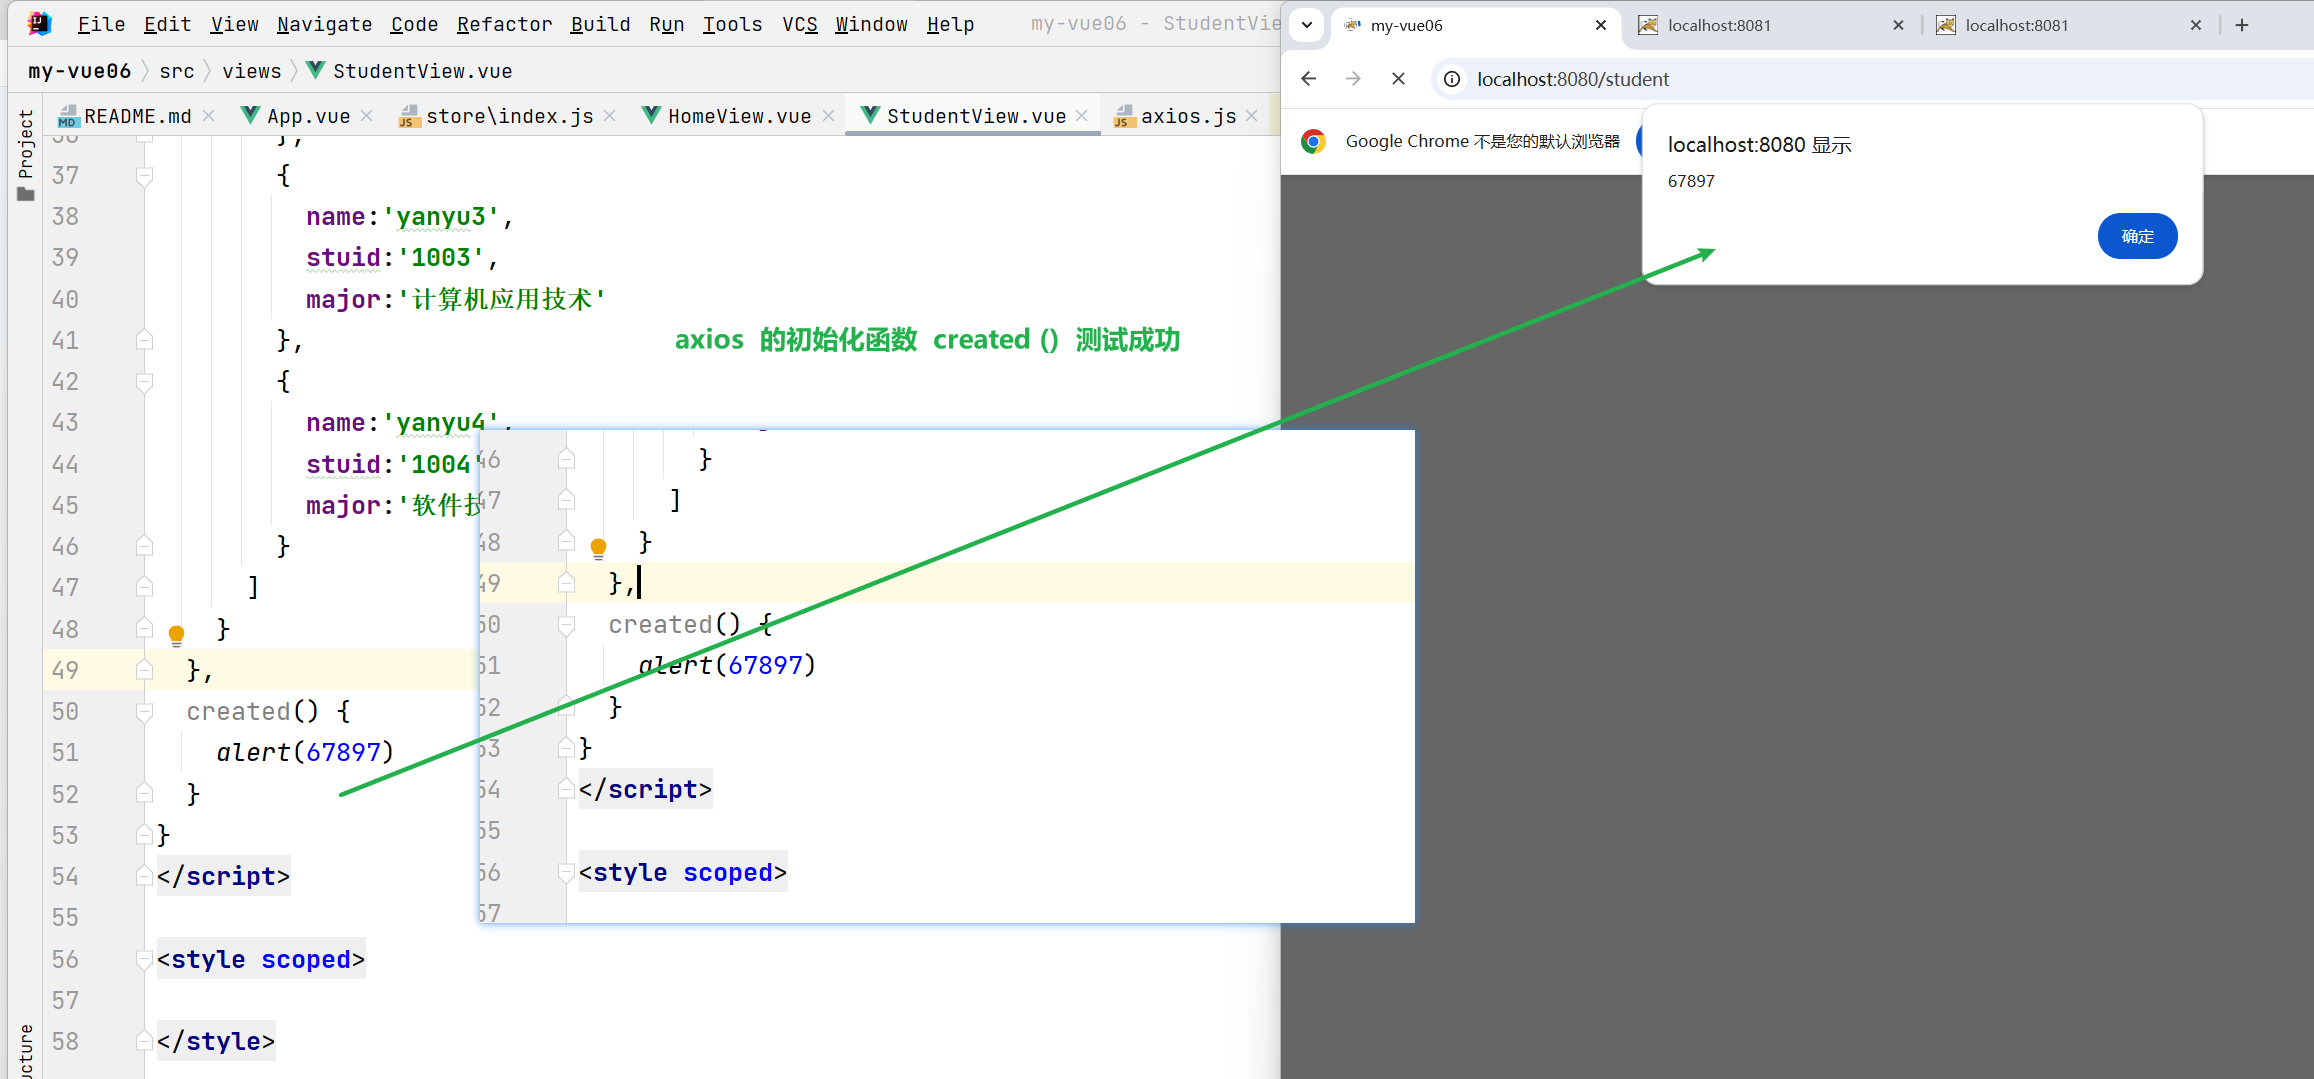
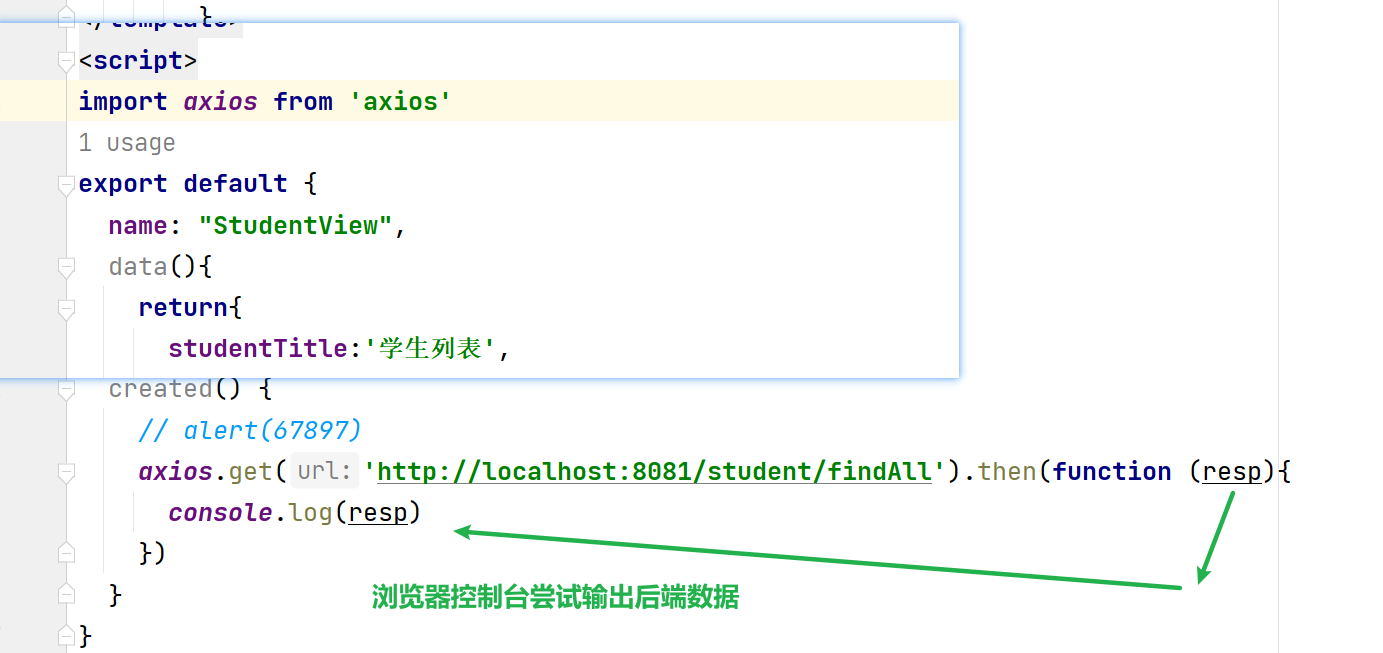
created() {
// alert(67897)
// 后端的链接
axios.get('http://localhost:8081/student/findAll').then(function (resp){
// resp 后端数据
console.log(resp)
})
}
}
</script>
<style scoped>
</style>跨域问题
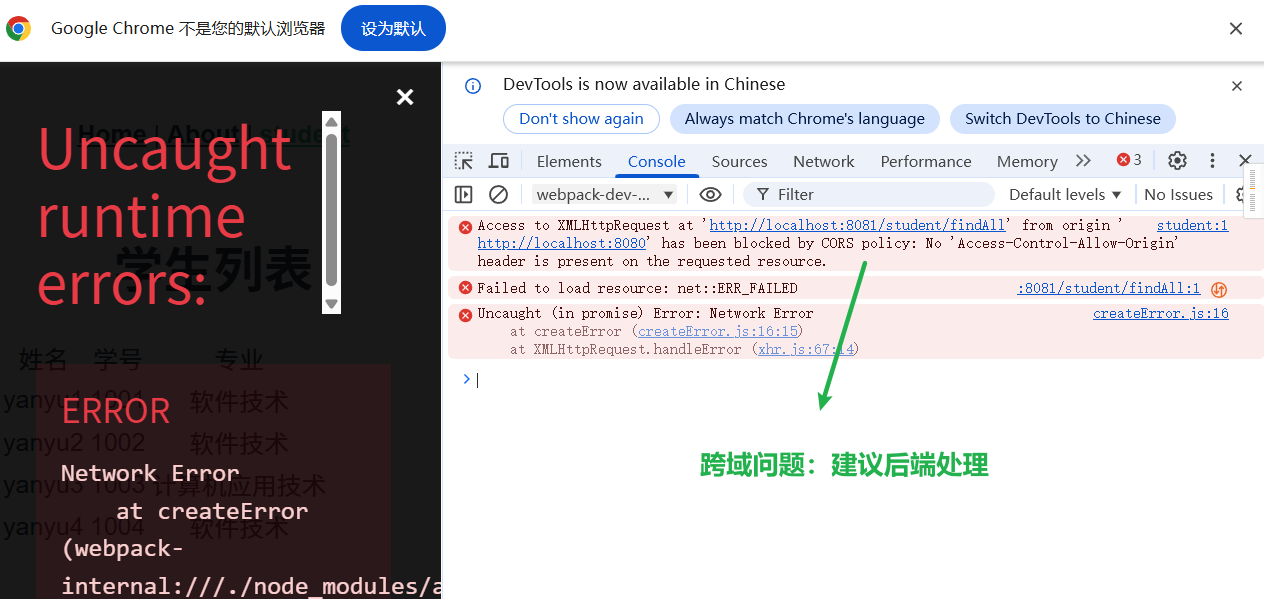
在后端处理
检查后端跨域配置(这是关键) 🔐
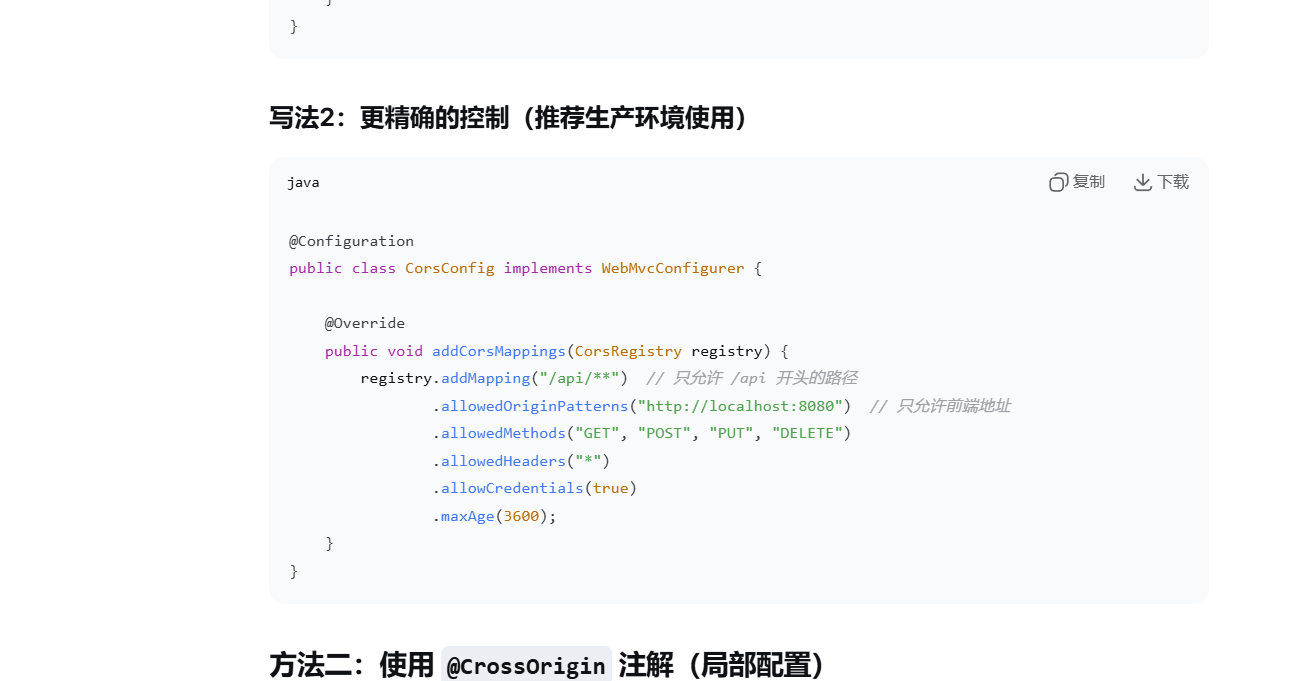
如果你确认后端已启动且地址正确,那问题很可能出在跨域配置上。打开 Spring Boot 项目,创建一个配置类:
java
复制下载
java
package com.example.demo.config;  // 改成你自己的包名

import org.springframework.context.annotation.Configuration;
import org.springframework.web.servlet.config.annotation.CorsRegistry;
import org.springframework.web.servlet.config.annotation.WebMvcConfigurer;

@Configuration
public class CorsConfig implements WebMvcConfigurer {

    @Override
    public void addCorsMappings(CorsRegistry registry) {
        registry.addMapping("/**")  // 所有接口
                .allowedOriginPatterns("*")  // 允许所有来源(开发用)
                .allowedMethods("GET", "POST", "PUT", "DELETE", "OPTIONS")  // 允许的请求方式
                .allowedHeaders("*")  // 允许的请求头
                .allowCredentials(true)  // 允许携带凭证
                .maxAge(3600);  // 预检请求缓存时间
    }
}配置后重启后端,让新配置生效。
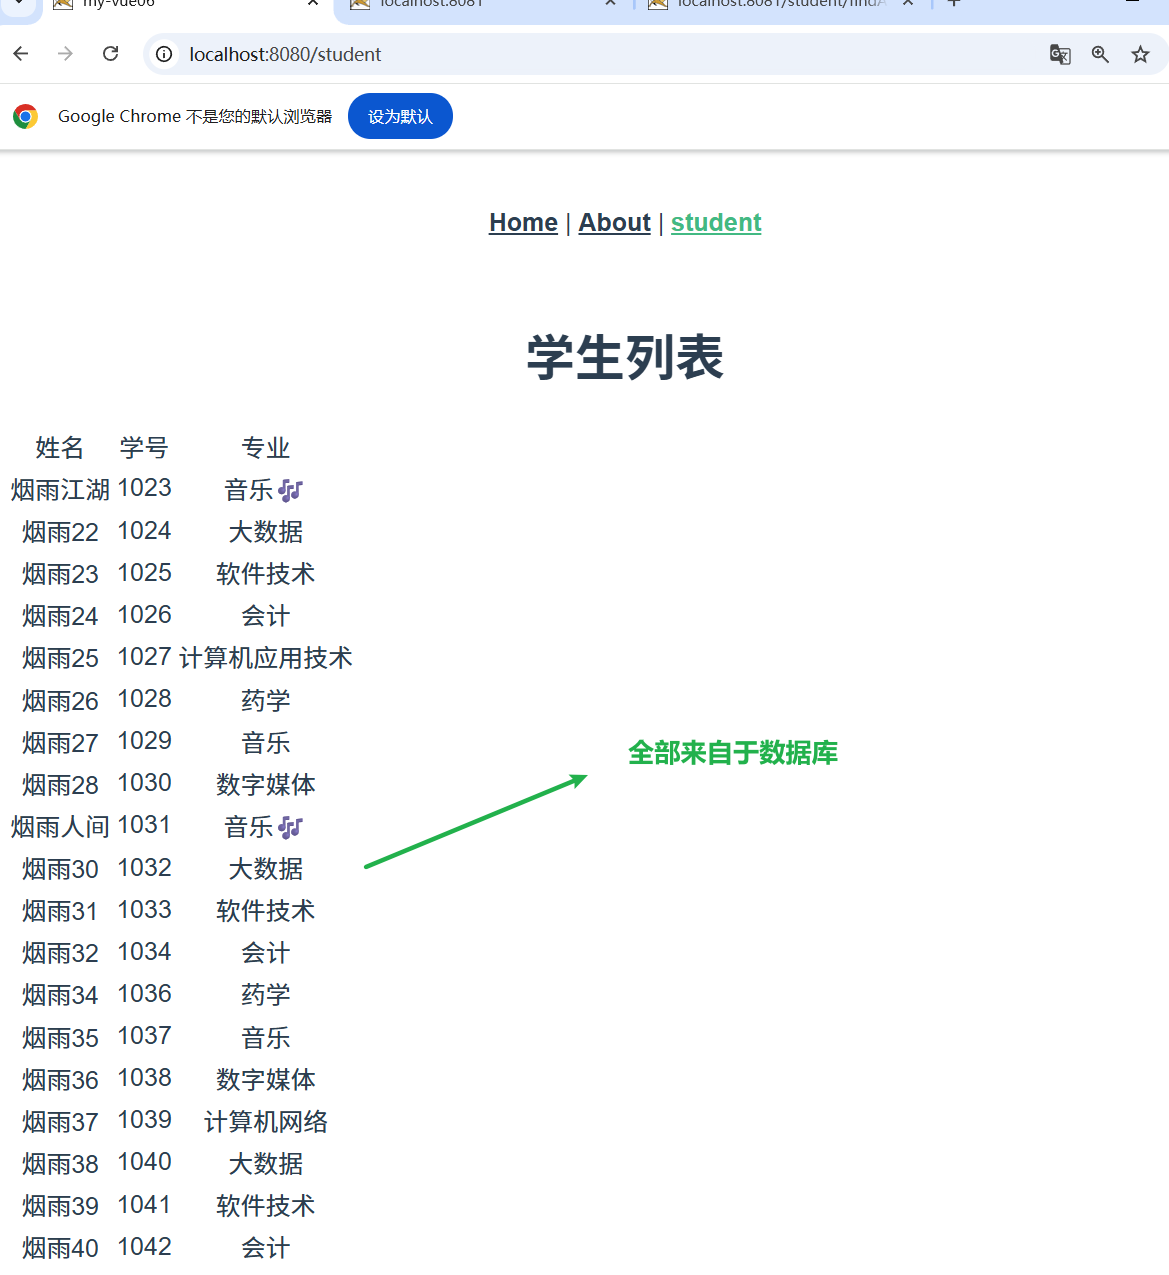
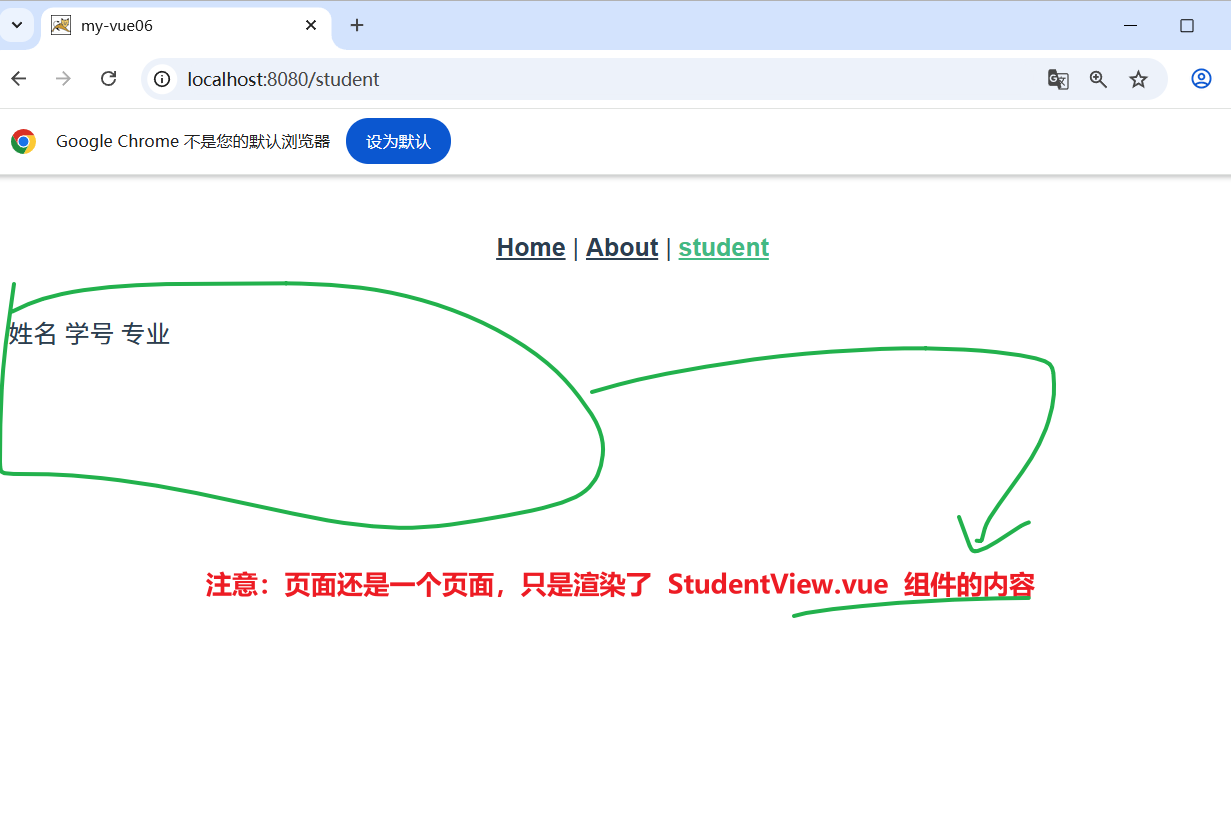
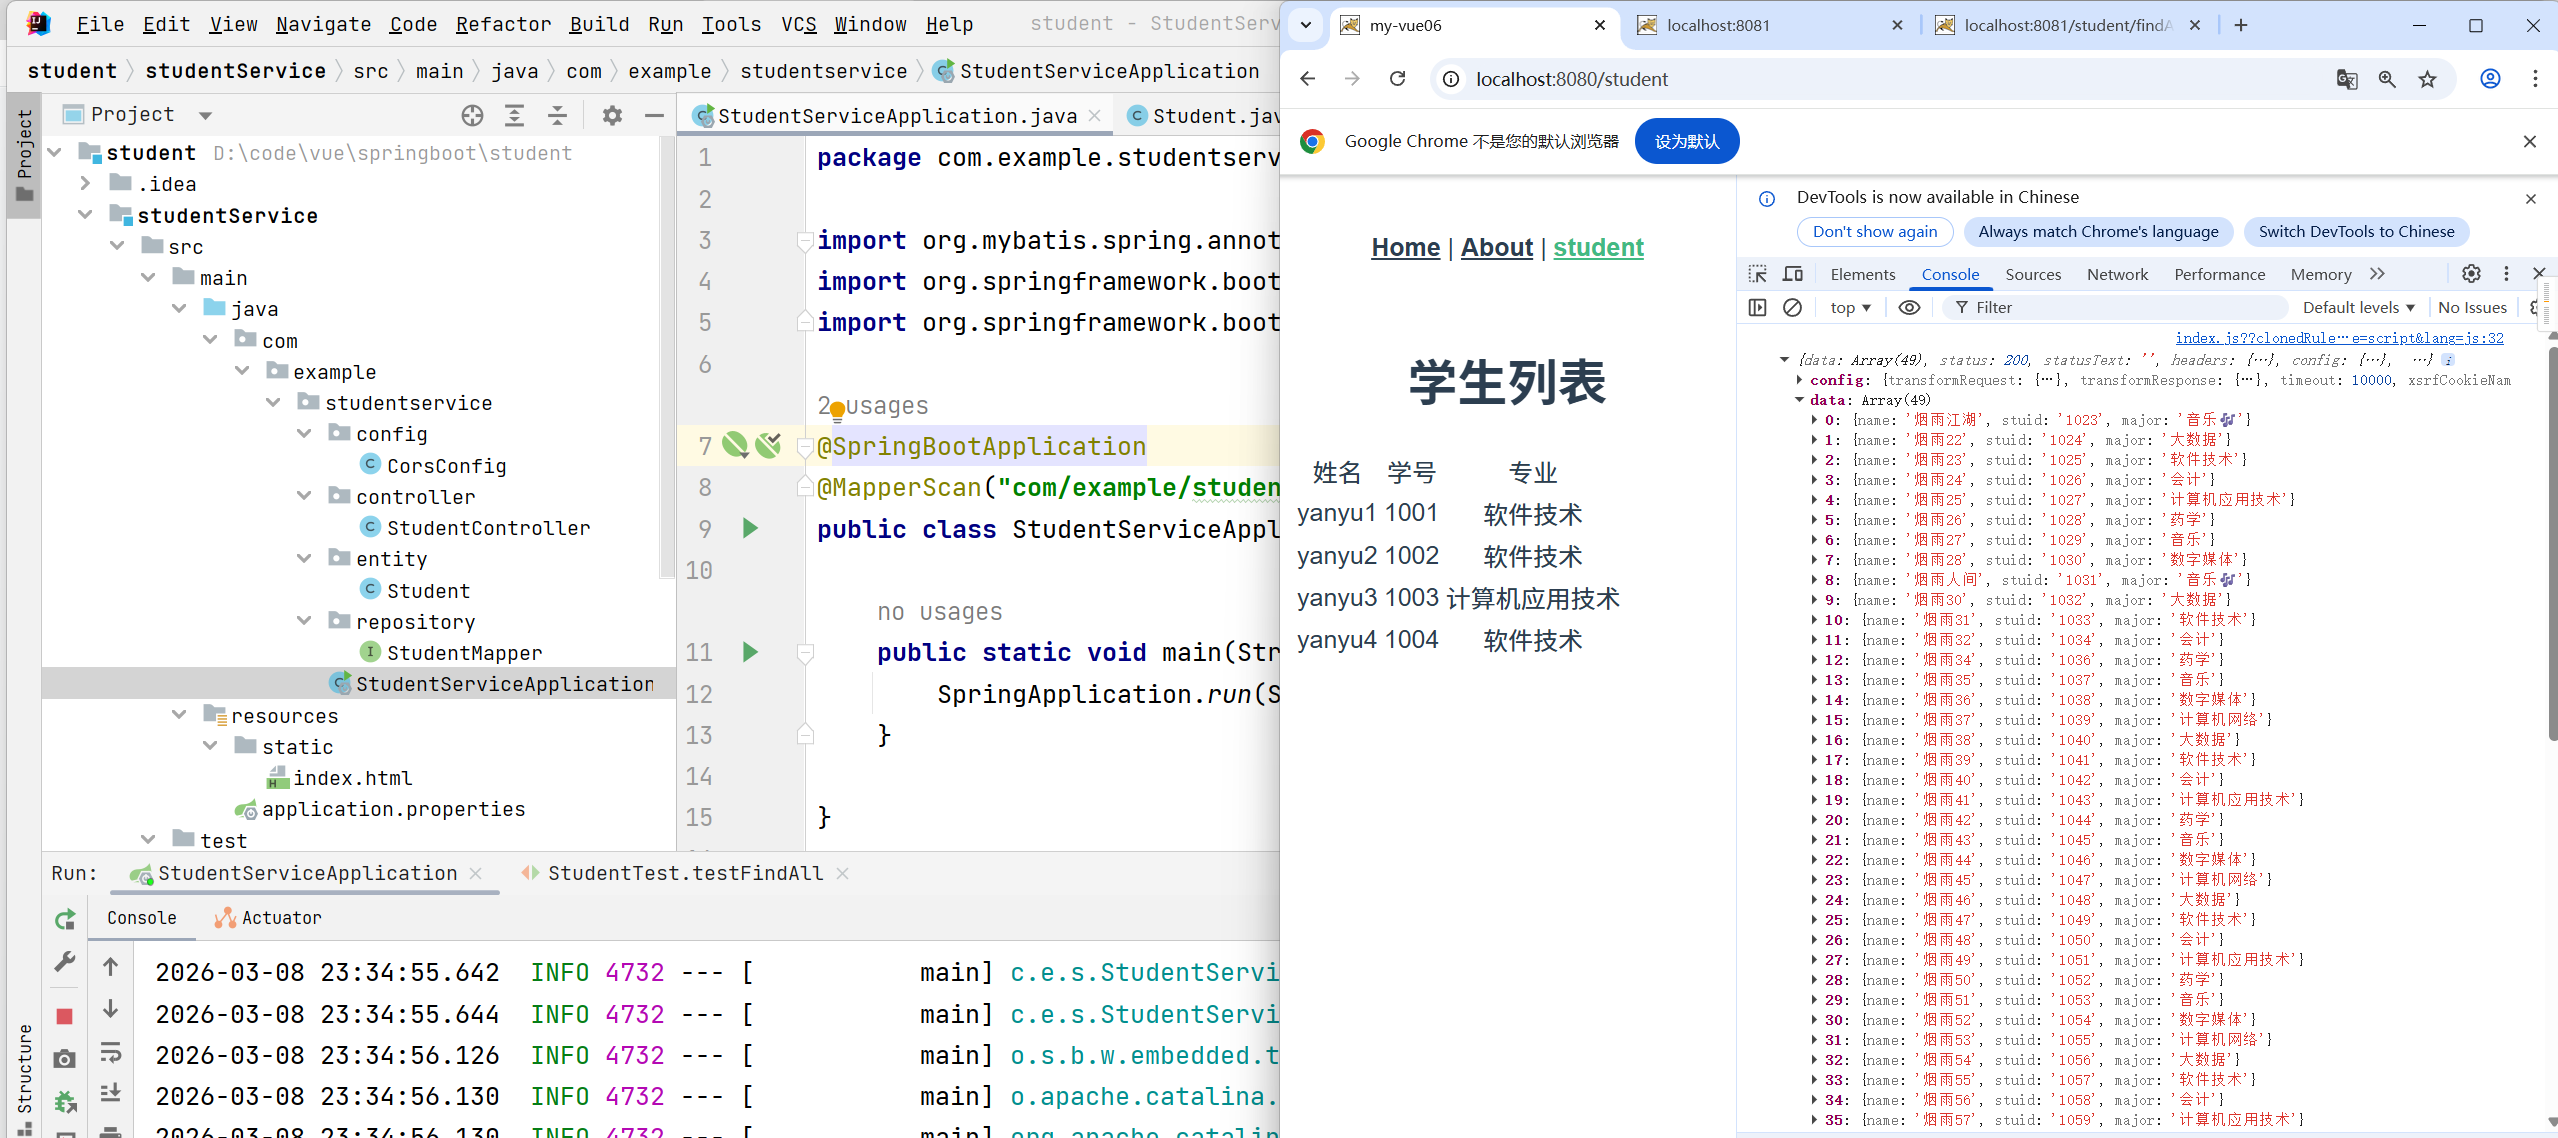
成功拿到后端数据
 模板部分 (
<template>)
html
复制下载
运行
javascript
<template>
  <div>
    <h1>{{studentTitle}}</h1>
    <table>
      <tr>
        <td>姓名</td>
        <td>学号</td>
        <td>专业</td>
      </tr>
      <!--  v-for  类似于  foreach  去遍历数组    -->
      <tr v-for="item in students">
        <td>{{item.name}}</td>
        <td>{{item.stuid}}</td>
        <td>{{item.major}}</td>
<!--        <td></td>-->
      </tr>
    </table>
  </div>
</template>| 代码 | 作用 |
|---|---|
<h1>{``{studentTitle}}</h1> |
显示标题「学生列表」,数据来自 data 中的 studentTitle |
<table> |
创建一个表格 |
第一行 <tr> |
表格的标题行,显示「姓名、学号、专业」三个列名 |
v-for="item in students" |
Vue 的列表渲染指令 ,遍历 students 数组,为每个元素生成一行 <tr> |
{``{item.name}} 等 |
显示当前遍历到的学生对象的 name、stuid、major 属性 |
注释掉的 <td> |
预留的列,目前没用 |
渲染效果:会生成一个表格,第一行是列名,下面每一行对应一个学生。
脚本部分 (<script>)
- 导入和导出
javascript
复制下载
javascript
import axios from 'axios'

export default {
  name: "StudentView",
  // ...
}
import axios from 'axios':引入 Axios,用来发 HTTP 请求(解决了你之前axios is not defined的问题)export default { name: "StudentView" }:导出组件,并命名为 "StudentView"
- data() 函数
javascript
复制下载
javascript
data(){
  return{
    studentTitle:'学生列表',
    students:[  // 初始为空数组,等待后端数据填充
      // 注释掉的是测试用的假数据
    ]
  }
}studentTitle:页面标题,硬编码为「学生列表」students:核心数据,初始为空数组。稍后会被后端返回的真实数据替换- 注释掉的部分是之前测试用的假数据,现在用后端数据代替
- created() 生命周期钩子
javascript
复制下载
javascript
created() {
  // 保存 this 引用,解决回调函数中 this 指向问题
  const _this = this

  // 发送 GET 请求到后端
  axios.get('http://localhost:8081/student/findAll').then(function (resp){
    // 把后端返回的数据赋值给 students
    _this.students = resp.data
  })
}
关键点解释:
① created() 是什么?
- Vue 组件的生命周期钩子
- 在组件实例创建完成后自动调用
- 此时组件已经初始化,但还没渲染到页面上
- 适合在这里发请求获取初始数据
② const _this = this 为什么要这样写?
javascript
复制下载
javascript
// 如果不保存 this,在回调函数里 this 就变了
created() {
  // 这里的 this 指向 Vue 组件实例 ✅

  axios.get(...).then(function (resp) {
    // 这里的 this 指向的是 undefined(严格模式)或 window ❌
    // 所以 this.students 会报错
  })
}
解决方案:
- 方法一(你用的) :在外面把
this保存到_this,回调里用_this
第一个前后端分离项目代码汇总
前端
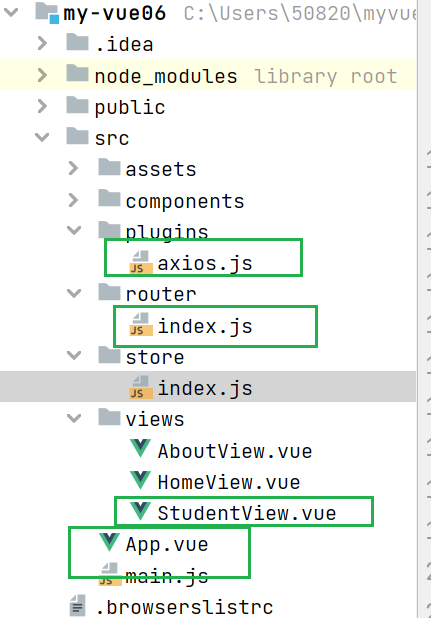
app.vue
javascript
<template>
  <nav>
    <router-link to="/">Home</router-link> |
    <router-link to="/about">About</router-link> |
    <router-link to="/student">student</router-link>
  </nav>
  <router-view/>
</template>

<style>
#app {
  font-family: Avenir, Helvetica, Arial, sans-serif;
  -webkit-font-smoothing: antialiased;
  -moz-osx-font-smoothing: grayscale;
  text-align: center;
  color: #2c3e50;
}

nav {
  padding: 30px;
}

nav a {
  font-weight: bold;
  color: #2c3e50;
}

nav a.router-link-exact-active {
  color: #42b983;
}
</style>
StudentView.vue
javascript
<template>
<div>
<h1>{{studentTitle}}</h1>
<table>
<tr>
<td>姓名</td>
<td>学号</td>
<td>专业</td>
</tr>
<!-- v-for 类似于 foreach 去遍历数组 -->
<tr v-for="item in students">
<td>{{item.name}}</td>
<td>{{item.stuid}}</td>
<td>{{item.major}}</td>
<!-- <td></td>-->
</tr>
</table>
</div>
</template>
<script>
import axios from 'axios'
export default {
name: "StudentView",
data(){
return{
studentTitle:'学生列表',
students:[
// 清空虚拟 数据,填充后端返回的数据(数据形式)
// {
// name:'yanyu1',
// stuid:'1001',
// major:'软件技术'
// },
// {
// name:'yanyu2',
// stuid:'1002',
// major:'软件技术'
// },
// {
// name:'yanyu3',
// stuid:'1003',
// major:'计算机应用技术'
// },
// {
// name:'yanyu4',
// stuid:'1004',
// major:'软件技术'
// }
]
}
},
created() {
// alert(67897)
const _this = this
// vue 的 this 对象 赋值给 _this 避免被回调函数的 this 覆盖
axios.get('http://localhost:8081/student/findAll').then(function (resp){
// console.log(resp)
_this.students = resp.data
})
}
}
</script>
<style scoped>
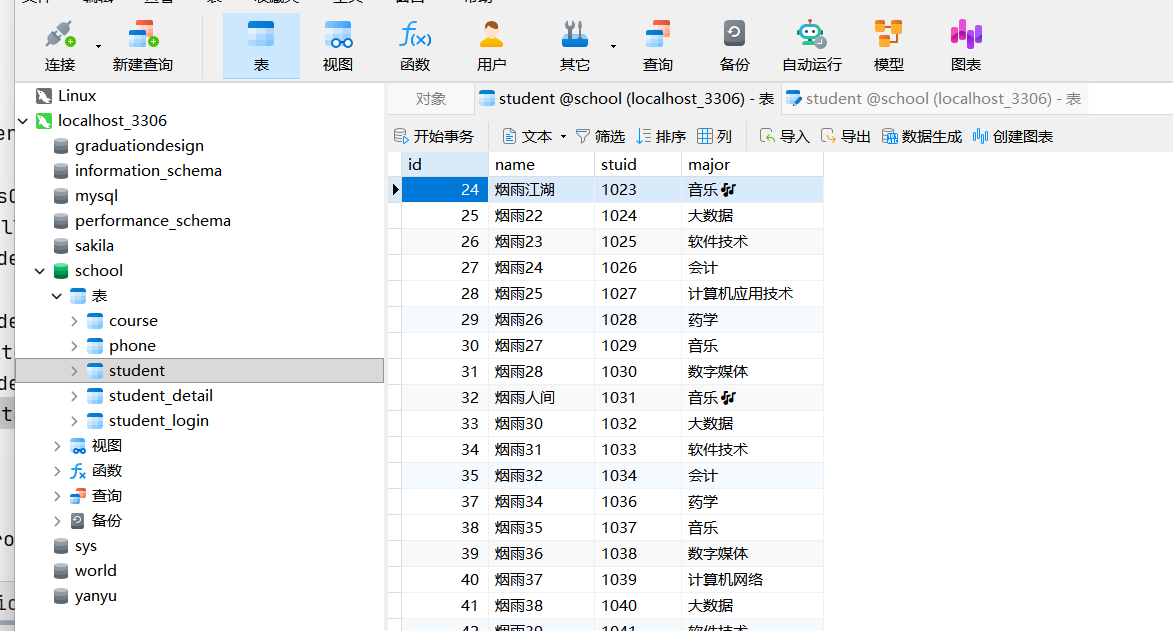
</style>数据库
后端
application.properties
sql
#下é¢è¿™äº›å†
容是为了让MyBatisæ˜ å°„
#指定Mybatisçš„Mapperæ--‡ä>>¶
mybatis.mapper-locations=classpath:mappers/*xml
#指定Mybatis的实ä½"目录
mybatis.type-aliases-package=com.example.studentservice.mybatis.entity
# åº"ç"¨æœåŠ¡ WEB 访é---®ç<<¯å£
server.port=8081
#HikariCP 是一个高性能的 Java 数据库连接池,也是 Spring Boot 的默认数据源实现。
spring.datasource.type=com.zaxxer.hikari.HikariDataSource
#配置数据库的基本属性
spring.datasource.driver-class-name=com.mysql.cj.jdbc.Driver
spring.datasource.url=jdbc:mysql://localhost:3306/school?serverTimezone=Asia/Shanghai&useUnicode=true&characterEncoding=utf8&autoReconnect=true&useSSL=false
spring.datasource.username=root
spring.datasource.password=yanyu666pom.xml
xml
<?xml version="1.0" encoding="UTF-8"?>
<project xmlns="http://maven.apache.org/POM/4.0.0" xmlns:xsi="http://www.w3.org/2001/XMLSchema-instance"
    xsi:schemaLocation="http://maven.apache.org/POM/4.0.0 https://maven.apache.org/xsd/maven-4.0.0.xsd">
    <modelVersion>4.0.0</modelVersion>
    <groupId>com.example</groupId>
    <artifactId>studentService</artifactId>
    <version>0.0.1-SNAPSHOT</version>
    <name>studentService</name>
    <description>studentService</description>
    <properties>
        <java.version>1.8</java.version>
        <project.build.sourceEncoding>UTF-8</project.build.sourceEncoding>
        <project.reporting.outputEncoding>UTF-8</project.reporting.outputEncoding>
        <spring-boot.version>2.6.13</spring-boot.version>
    </properties>
    <dependencies>
        <dependency>
            <groupId>org.springframework.boot</groupId>
            <artifactId>spring-boot-starter-web</artifactId>
        </dependency>
        <dependency>
            <groupId>org.mybatis.spring.boot</groupId>
            <artifactId>mybatis-spring-boot-starter</artifactId>
            <version>2.2.2</version>
        </dependency>

        <dependency>
            <groupId>com.mysql</groupId>
            <artifactId>mysql-connector-j</artifactId>
            <scope>runtime</scope>
        </dependency>
        <dependency>
            <groupId>org.springframework.boot</groupId>
            <artifactId>spring-boot-starter-test</artifactId>
            <scope>test</scope>
        </dependency>
    </dependencies>
    <dependencyManagement>
        <dependencies>
            <dependency>
                <groupId>org.springframework.boot</groupId>
                <artifactId>spring-boot-dependencies</artifactId>
                <version>${spring-boot.version}</version>
                <type>pom</type>
                <scope>import</scope>
            </dependency>
        </dependencies>
    </dependencyManagement>

    <build>
        <plugins>
            <plugin>
                <groupId>org.apache.maven.plugins</groupId>
                <artifactId>maven-compiler-plugin</artifactId>
                <version>3.8.1</version>
                <configuration>
                    <source>1.8</source>
                    <target>1.8</target>
                    <encoding>UTF-8</encoding>
                </configuration>
            </plugin>
            <plugin>
                <groupId>org.springframework.boot</groupId>
                <artifactId>spring-boot-maven-plugin</artifactId>
                <version>${spring-boot.version}</version>
                <configuration>
                    <mainClass>com.example.studentservice.StudentServiceApplication</mainClass>
                    <skip>true</skip>
                </configuration>
                <executions>
                    <execution>
                        <id>repackage</id>
                        <goals>
                            <goal>repackage</goal>
                        </goals>
                    </execution>
                </executions>
            </plugin>
        </plugins>
    </build>

</project>
解决跨域
CorsConfig.java
java
package com.example.studentservice.config;

import org.springframework.context.annotation.Configuration;
import org.springframework.web.servlet.config.annotation.CorsRegistry;
import org.springframework.web.servlet.config.annotation.WebMvcConfigurer;

/**
 * @Author: yanyu666_508200729@qq.com
 * @Date 2026/3/8 23:24
 * @description:  解决跨域问题
 */
@Configuration
public class CorsConfig implements WebMvcConfigurer {
    @Override
    public void addCorsMappings(CorsRegistry registry) {
        registry.addMapping("/**")  // 只允许 /**   任意 开头的路径
                .allowedOriginPatterns("*") // 只允许前端地址
                .allowedMethods("GET", "POST", "PUT", "DELETE","OPTIONS")
                .allowedHeaders("*")
                .allowCredentials(true)
                .maxAge(3600);
    }
}
控制器
StudentController.java
java
package com.example.studentservice.controller;

import com.example.studentservice.entity.Student;
import com.example.studentservice.repository.StudentMapper;
import org.springframework.beans.factory.annotation.Autowired;
import org.springframework.stereotype.Controller;
import org.springframework.web.bind.annotation.GetMapping;
import org.springframework.web.bind.annotation.RequestMapping;
import org.springframework.web.bind.annotation.RestController;

import java.util.List;

/**
 * @Author: yanyu666_508200729@qq.com
 * @Date 2026/3/8 22:23
 * @description:
 */
@RestController
@RequestMapping("/student")
public class StudentController {
    @Autowired
    private StudentMapper studentMapper;
    @GetMapping("/findAll")
    public List<Student> findAll(){
        return studentMapper.findAll();
    }

}
映射实体类
java
package com.example.studentservice.entity;

import java.util.Objects;

/**
 * @Author: yanyu666_508200729@qq.com
 * @Date 2026/3/8 22:02
 * @description:
 */
public class Student {
    String name;
    String stuid;
    String major;

    @Override
    public String toString() {
        return "Student{" +
                "name='" + name + '\'' +
                ", stuid='" + stuid + '\'' +
                ", major='" + major + '\'' +
                '}';
    }

    @Override
    public boolean equals(Object o) {
        if (this == o) return true;
        if (o == null || getClass() != o.getClass()) return false;
        Student student = (Student) o;
        return Objects.equals(name, student.name) && Objects.equals(stuid, student.stuid) && Objects.equals(major, student.major);
    }

    @Override
    public int hashCode() {
        return Objects.hash(name, stuid, major);
    }

    public String getName() {
        return name;
    }

    public void setName(String name) {
        this.name = name;
    }

    public String getStuid() {
        return stuid;
    }

    public void setStuid(String stuid) {
        this.stuid = stuid;
    }

    public String getMajor() {
        return major;
    }

    public void setMajor(String major) {
        this.major = major;
    }

    public Student() {
    }

    public Student(String name, String stuid, String major) {
        this.name = name;
        this.stuid = stuid;
        this.major = major;
    }
}
dao层
java
package com.example.studentservice.repository;

import org.apache.ibatis.annotations.Select;

import java.util.List;

/**
 * @Author: yanyu666_508200729@qq.com
 * @Date 2026/3/8 22:04
 * @description:
 */
public interface StudentMapper {
    @Select("select * from student")
    List<com.example.studentservice.entity.Student> findAll();


}
启动类
java
package com.example.studentservice;

import org.mybatis.spring.annotation.MapperScan;
import org.springframework.boot.SpringApplication;
import org.springframework.boot.autoconfigure.SpringBootApplication;

@SpringBootApplication
@MapperScan("com/example/studentservice/repository")
public class StudentServiceApplication {

    public static void main(String[] args) {
        SpringApplication.run(StudentServiceApplication.class, args);
    }

}
中间件axios
使用vue 3 语法替换旧版本
java
// src/plugins/axios.js
import axios from 'axios'

// 配置 axios 默认值
axios.defaults.baseURL = 'http://localhost:8080'  // 改为你的后端地址
axios.defaults.timeout = 10000

// 添加请求拦截器(可选)
axios.interceptors.request.use(
    config => {
      // 从 localStorage 获取 token 并添加到请求头
      const token = localStorage.getItem('token')
      if (token) {
        config.headers.Authorization = `Bearer ${token}`
      }
      return config
    },
    error => {
      return Promise.reject(error)
    }
)

// 添加响应拦截器(可选)
axios.interceptors.response.use(
    response => {
      return response
    },
    error => {
      // 统一处理错误,比如 401 未授权
      if (error.response && error.response.status === 401) {
        console.log('未授权,请重新登录')
        // 可以在这里跳转到登录页
      }
      return Promise.reject(error)
    }
)

export default axios
代替这个 axios . js
测试